Installing your Theme
↑ Back to topChecking your theme version
↑ Back to topActivate your Theme Key
↑ Back to topUpdating your theme
It is very important to ensure you have the latest version of your theme at all times. This is the best way to proactively troubleshoot issues on your site.Please reference the WooCommerce Helper Documentation to learn more.
Overview
↑ Back to topMenus
↑ Back to top- Primary Menu – This is the menu that sits to the right of your logo.
- Top Menu – This is the smaller menu area at the very top of the theme.
Setting Up the Homepage
↑ Back to top
Homepage Area (3-col)
↑ Back to topHomepage Area (full-width)
↑ Back to topTo customize the “News from the Blog” display in this section, add the “Woo – News from the Blog” widget to the “Homepage Full” widget area. Note: This widget will not work well in any other widget area other than “Homepage Full” as it is built to span across the full width of the site.
Setting Up The Slider
↑ Back to top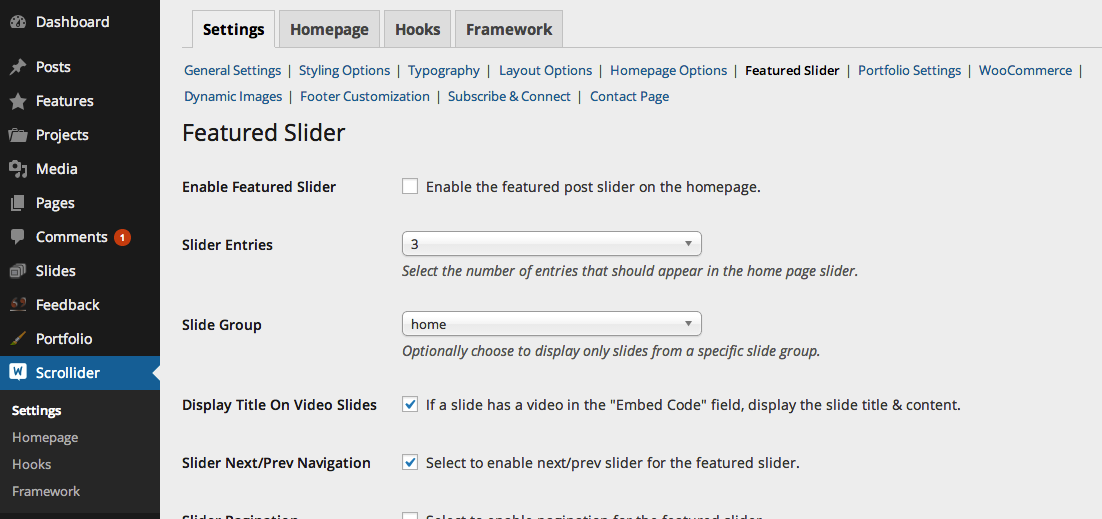 Go to Scrollider > Settings > Featured Slider
- Enable or disable the Slider.
- Choose how many slides you want to display.
- Optionally choose a slide group if you only want to display certain slides (see below).
- Choose whether to display next/previous arrows on the slider.
- Choose whether to display pagination dots at the bottom of the slider.
- Choose whether hovering over the slider will pause it.
- Select the interval (in seconds) that each slide will display for.
- Choose how long it will take (in seconds) to transition from one slide to the next.
- Choose the order that your slides will be displayed in.
Adding Slides
↑ Back to top- Type a title for the slide and complete all of the post’s body content.
- If you want an image to appear as the background to the entire slide than add a Featured Image in the provided Featured Image panel.
- If you want to use a video simply past the embed code in the proper box under the Custom Settings
- Choose Enable Content Overlay if you want to display a semi-transparent background behind the slide content when using a Featured Image. Example
- If you don’t want a transparent box behind the text, upload your image using the Custom Image Upload field instead: Example
- If you want the slide title to link to a page, you can enter the page URL in the Slide URL field.
- Optionally assign this slide to a Slide Group in the Slide Groups panel on the left (see below).
- Publish the slide.
Featured Slider Images
↑ Back to topSlide Groups
↑ Back to top- Enter a name for your Slide Group (e.g. Homepage).
- Click “Add New Slide Group.”
Features Area
↑ Back to top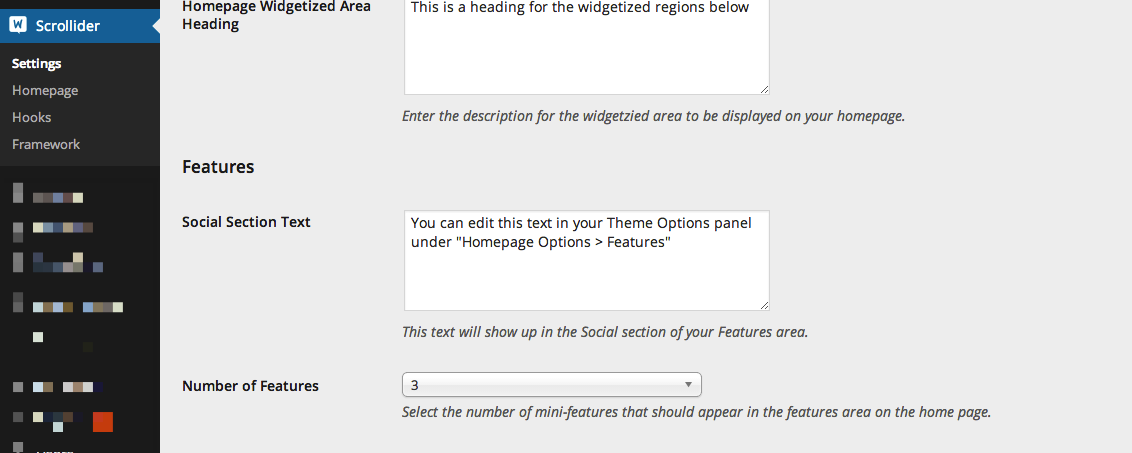 Once you’ve configured your settings you will need to create at minimum the number of features you specified in the theme settings. If you set it to show 3 Features then be sure to create at least 3 features.
To add a feature go to Features > Add New:
Once you’ve configured your settings you will need to create at minimum the number of features you specified in the theme settings. If you set it to show 3 Features then be sure to create at least 3 features.
To add a feature go to Features > Add New:
- Type a title for the feature and complete all of the post’s body content.
- If you want an icon to appear beside the feature then upload a “Features Icon” in the Scrollider Custom Settings panel.
- Add an excerpt for the feature in the “Features Excerpt” field in the Scrollider Custom Settings panel. This will be displayed in the Homepage features area.
- Optionally enter a URL if you want your feature to link to somewhere other than your feature post.
- Publish the Feature.
Features Area – Social Links
↑ Back to topSetup The Portfolio
↑ Back to top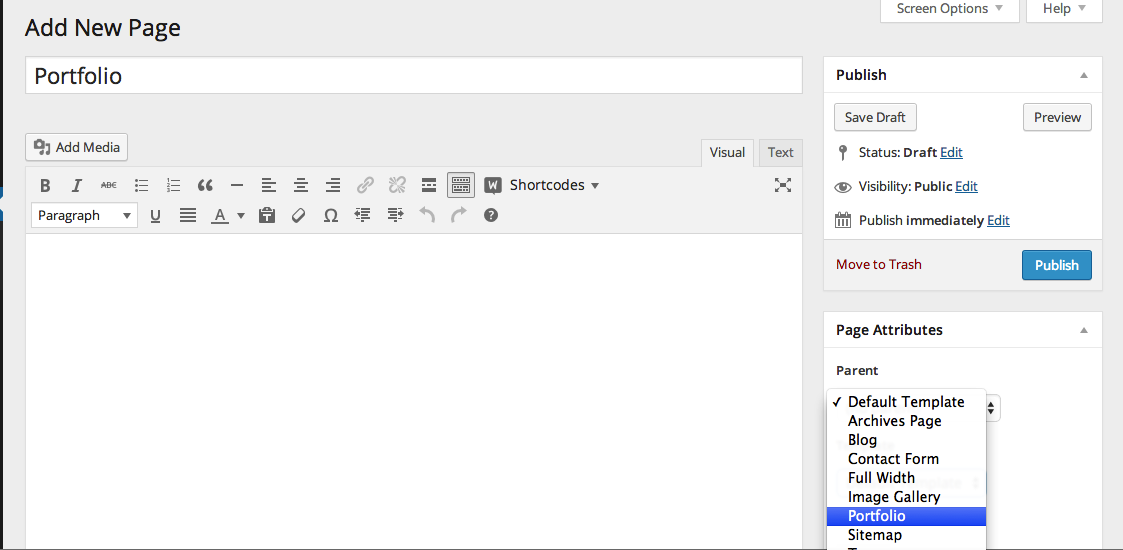 Now configure your Portfolio page settings. Go to Settings > Portfolio Settings:
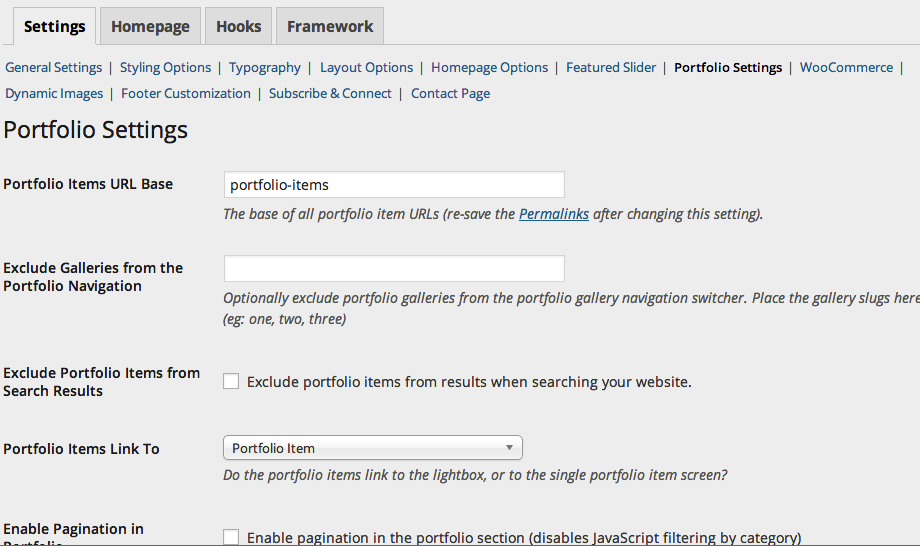
- Enter a URL Base for your Portfolio Items (we recommend ‘portfolio-items’). Note: This should not be the same as the page slug of your Portfolio page.
- Optionally choose to exclude certain Portfolio Galleries from the Portfolio page navigation.
- Optionally choose to exclude Portfolio items from your site’s search results.
- Choose whether portfolio items should open in a lightbox or link to the Portfolio item page when clicked.
- Choose whether to enable pagination in the Portfolio page (this will disable the Javascript filters at the top of the page).
Add items to the Portfolio
↑ Back to top- Type a title for the post and complete all of the post’s body content.
- If you are posting an image(s) upload them via the Featured Image panel*
- If you want to use a video simply past the embed code in the proper box under the Custom Settings
- Publish the portfolio post.
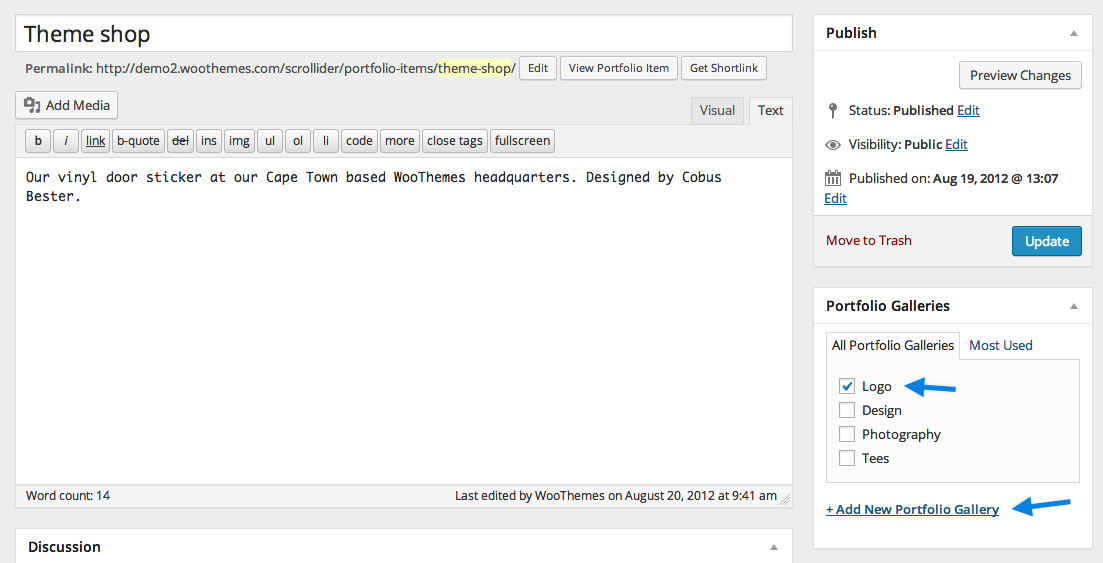
Using Portfolio Galleries
↑ Back to top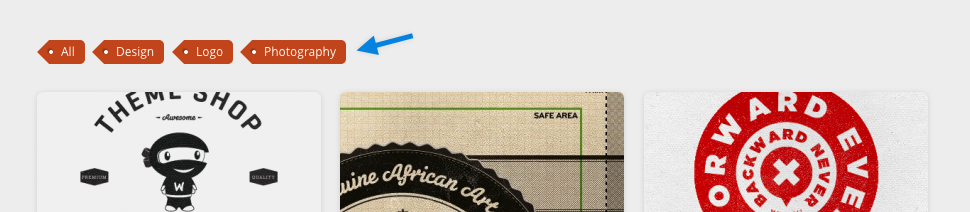 Think of Portfolio Galleries as categories for your portfolio posts. This is an easy way to organize your work into certain categories that then can be filtered on the portfolio page.
You can easily create and add portfolio posts to galleries in two ways. One way is under Portfolio > Portfolio Galleries. This is just like creating categories for your posts. You can also create new portfolio categories when editing/writing a portfolio post.
Think of Portfolio Galleries as categories for your portfolio posts. This is an easy way to organize your work into certain categories that then can be filtered on the portfolio page.
You can easily create and add portfolio posts to galleries in two ways. One way is under Portfolio > Portfolio Galleries. This is just like creating categories for your posts. You can also create new portfolio categories when editing/writing a portfolio post.

Single Posts Widget Area
↑ Back to topCustom Scrollider Widgets
↑ Back to top- Woo – Adspace
- Woo – Search
- Woo – Flickr
- Woo – Blog Author Info
- Woo – Embed/Video
- Woo – Subscribe/Connect
- Woo – News From The Blog
- Woo – Post Type Slideshow
- Woo – Related Posts
- Woo – Feedback