L’abonnement comprend
Assistance
1. Access the Tool
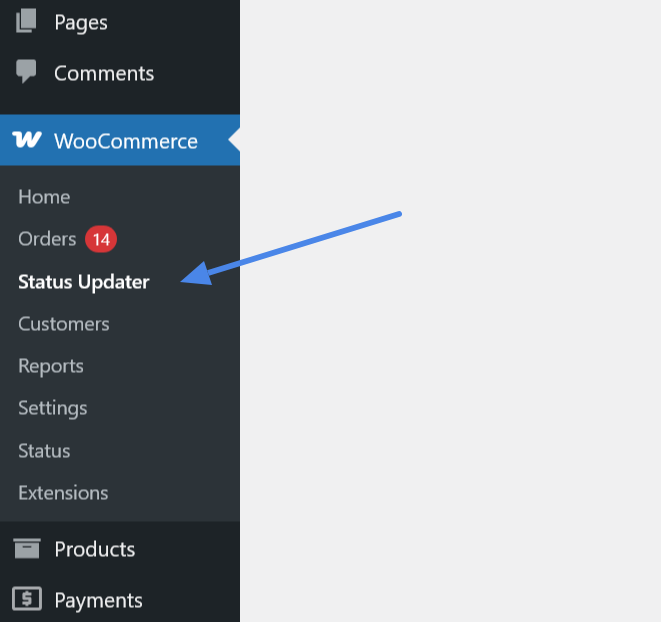
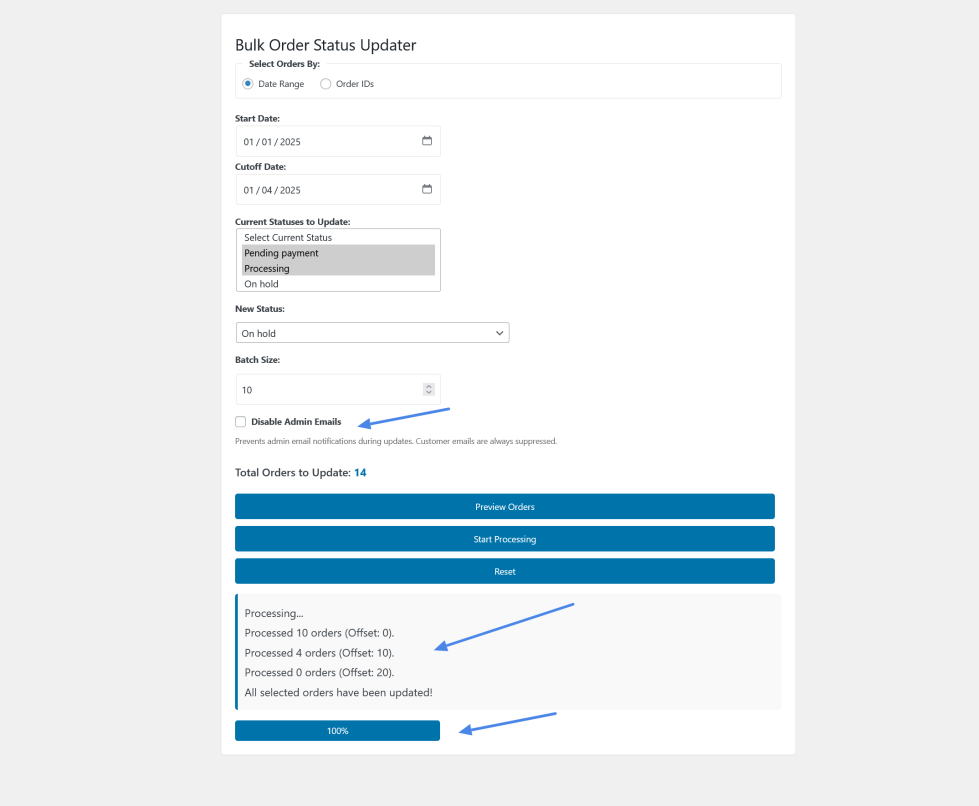
– Navigate to WooCommerce > Status Updater in your WordPress admin dashboard, or use the « Updater Page » link from the Plugins page (available to shop managers and admins).
2. Choose Selection Method
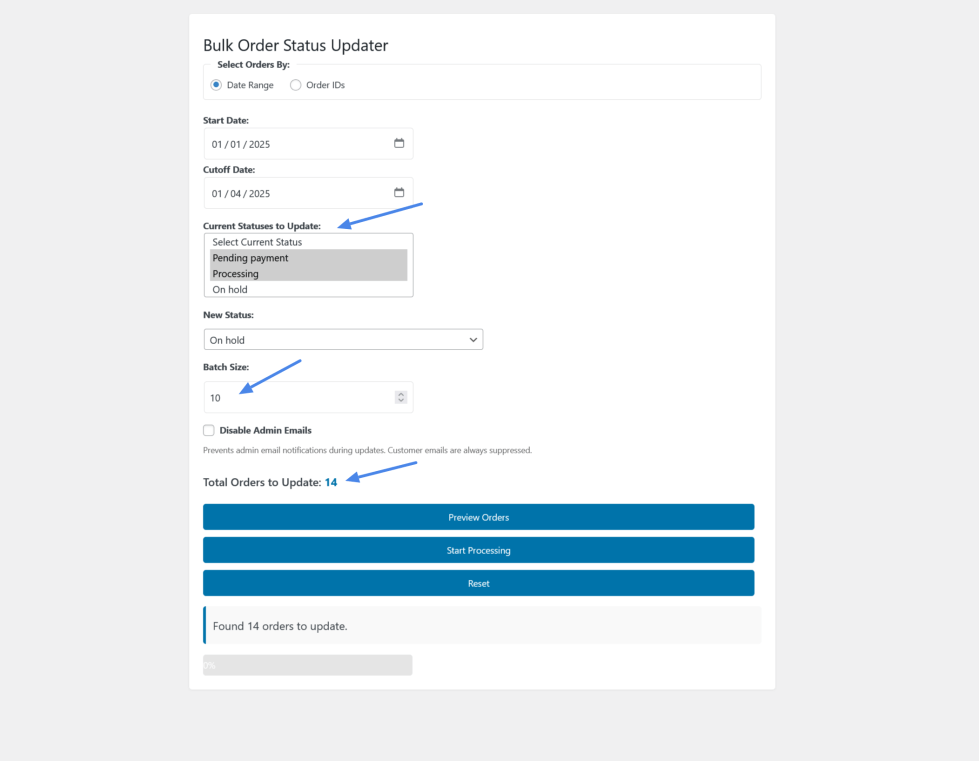
– Date Range: Select « Date Range » to update orders within a specific time period.
– Enter « Start Date » and « Cutoff Date. »
– Pick one or more « Current Statuses to Update » (e.g., « Pending, » « Processing »).
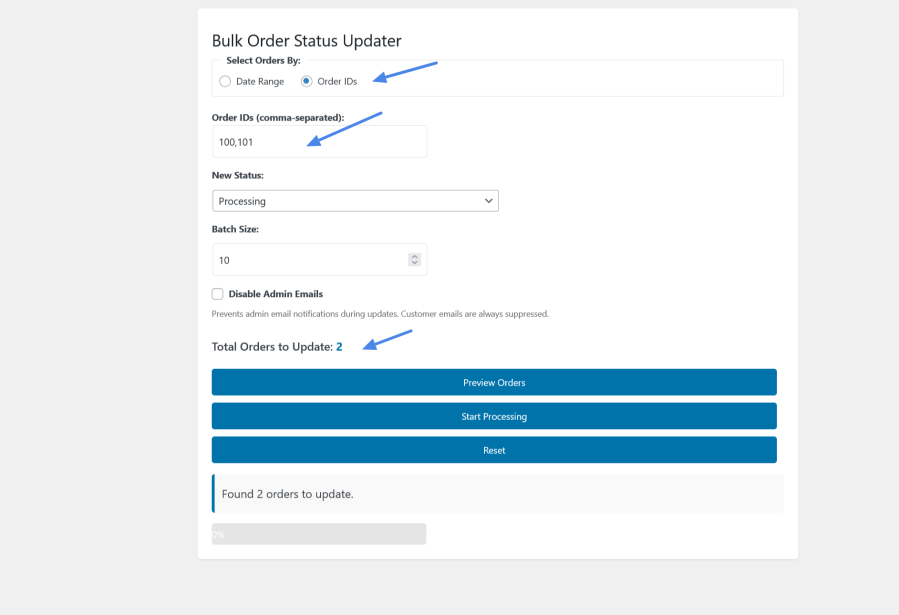
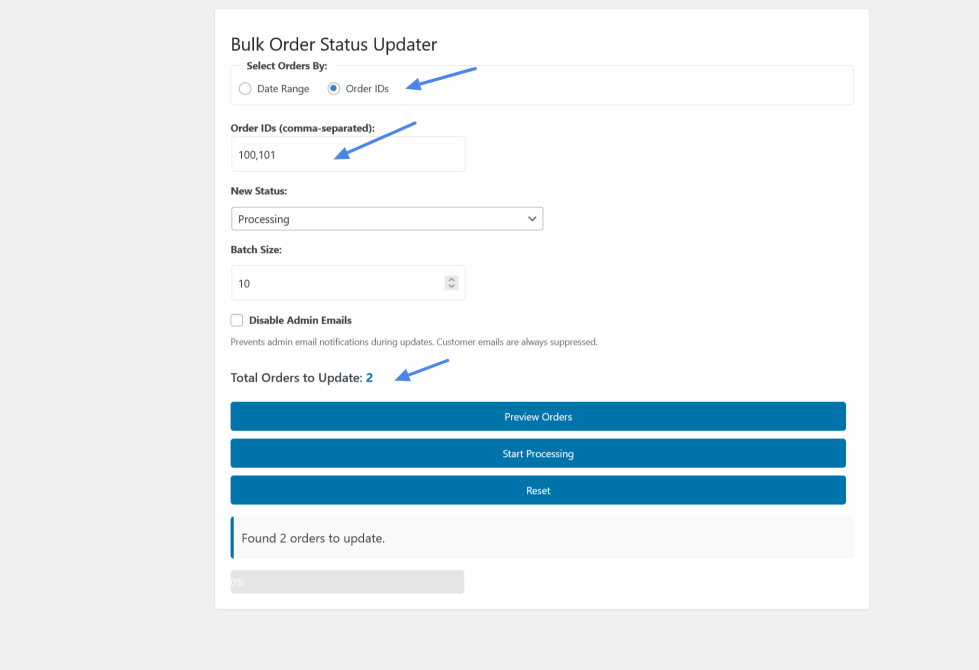
– Order IDs: Select « Order IDs » to update specific orders by their IDs.
– Enter comma-separated order IDs (e.g., « 24, 25, 26 »). No current status selection is required.
3. Set New Status
– Choose a « New Status » from the dropdown (e.g., « Completed, » « Cancelled »).
4. Configure Options
– Set « Batch Size » (default 10) to control how many orders process at once.
– Check « Disable Admin Emails » to suppress admin notifications during updates (customer emails are always suppressed).
5. Preview and Process
– Click « Preview Orders » to see the total orders that will be updated.
– If the new status matches a selected current status for a date range, you’ll see « Cannot process »—adjust statuses and try again.
– Click « Start Processing » to begin. Watch the progress bar update in real-time.
6. Reset
– After processing (or to start over), click « Reset » to clear the form. Both « Current Statuses » and « New Status » will revert to « Select » options.
Catégories
Extension information
Pays