Product comparison
Subscription includes
Support
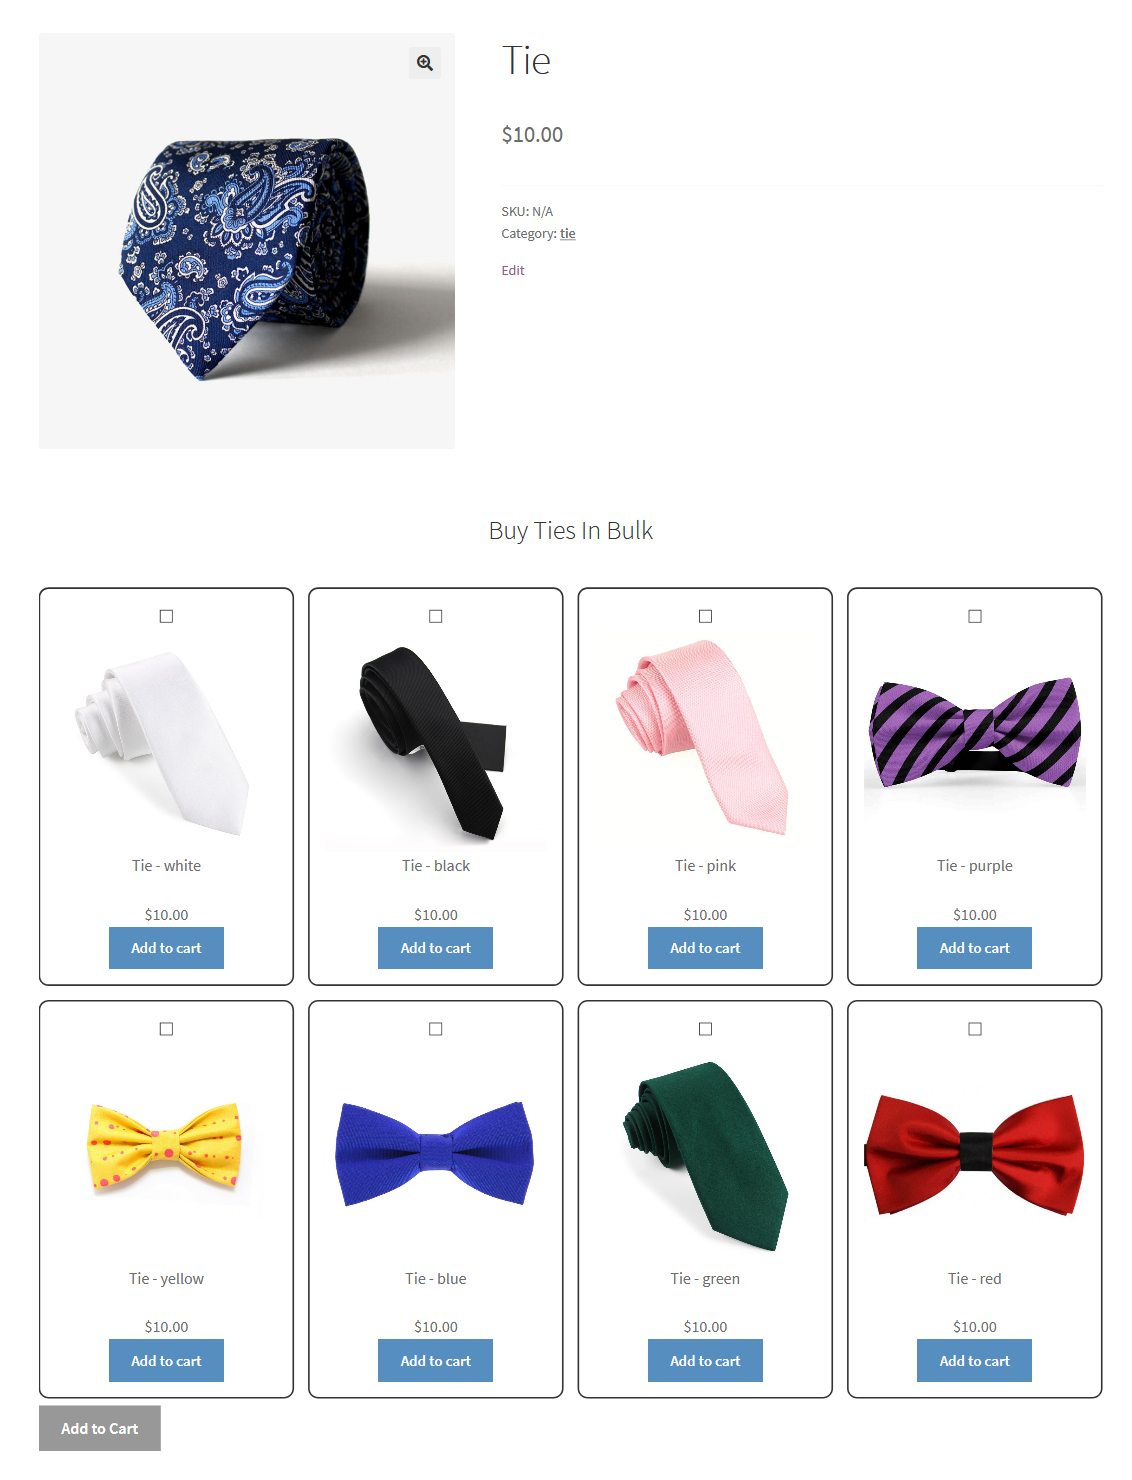
Smart Bulk Variations for WooCommerce enhances the variable products single page to display variations as single items in multiple pre-designed layouts. Shoppers can view all variations as a list, grid, table, or an attributes view. Shoppers can easily add single or bulk variations to their cart, increasing sales and reducing bounce rate.
The extension allows you to enable the variation layouts at the product level for specific variable products or enable it for all products from global settings.
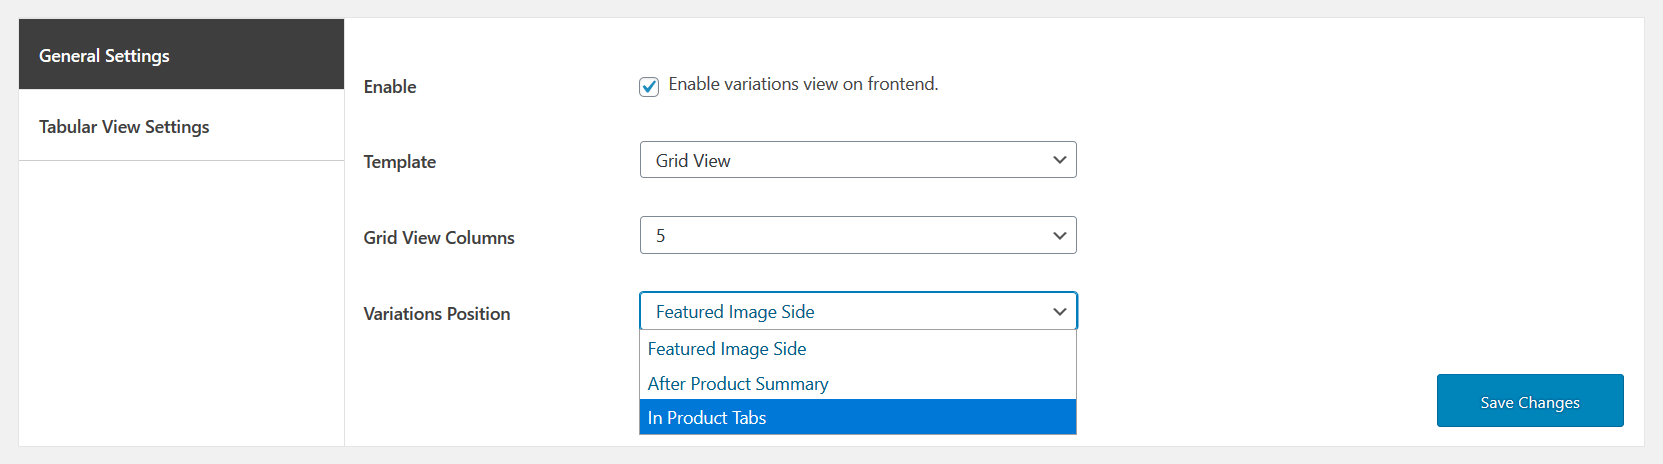
Enable/disable variations layouts for all variable products on the front end. Choose from templates including table view, attributes view, grid view, or list view. Display variations with a featured image, before product tabs, and in product tabs.
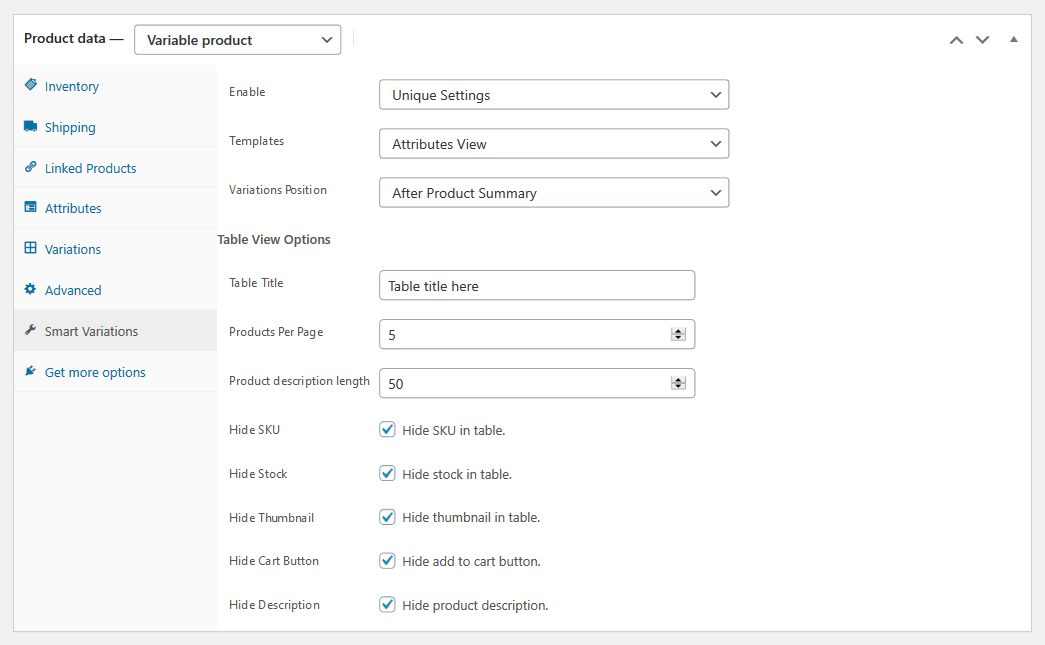
Enable/disable bulk variations layouts for variable products within the product edit screen.
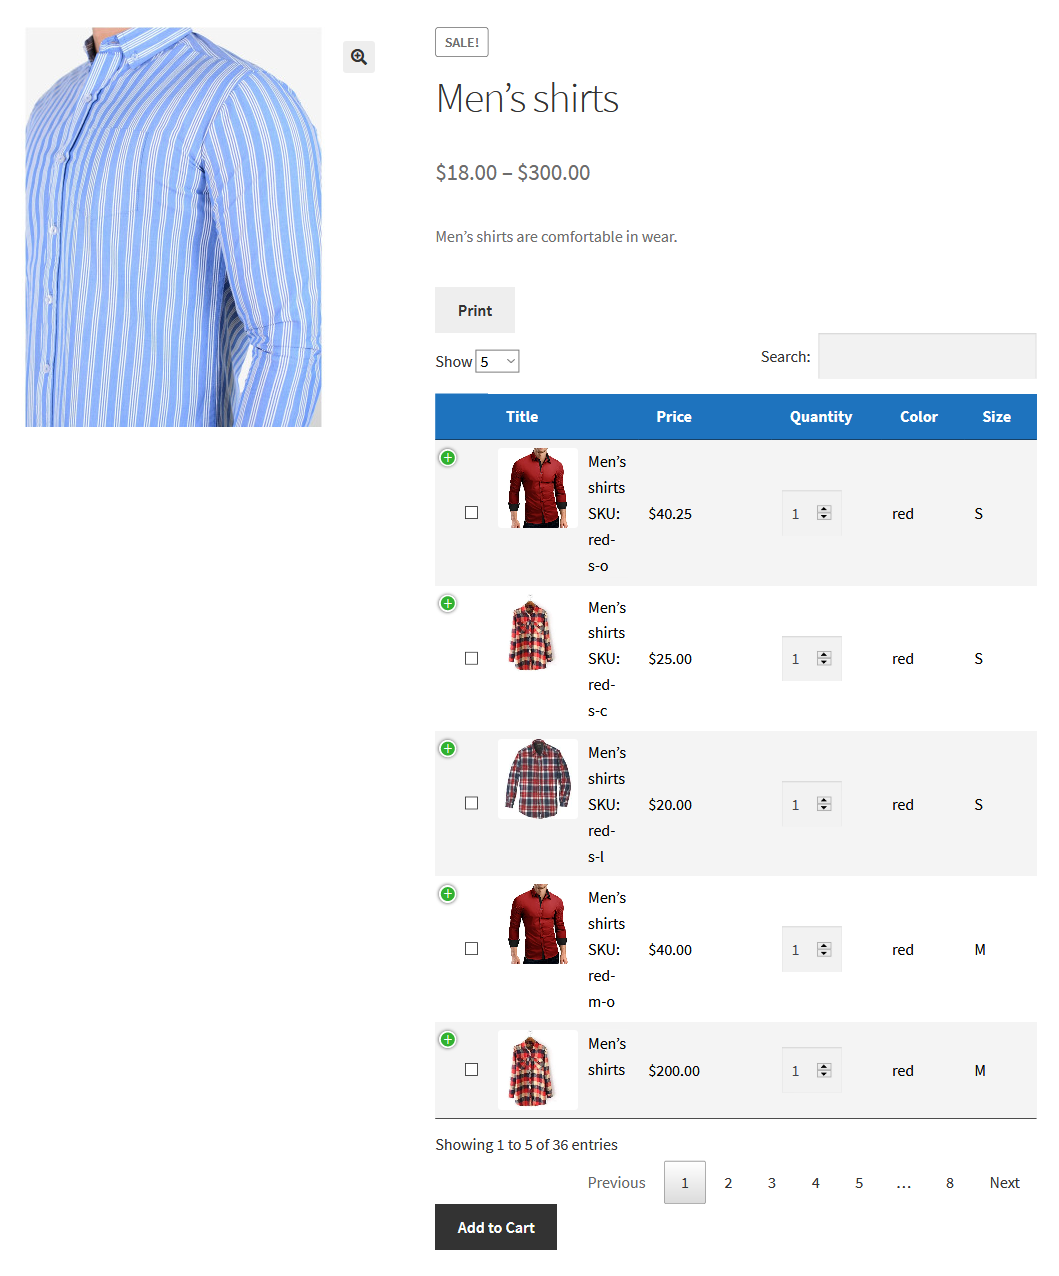
1. Table view — featured image on the side
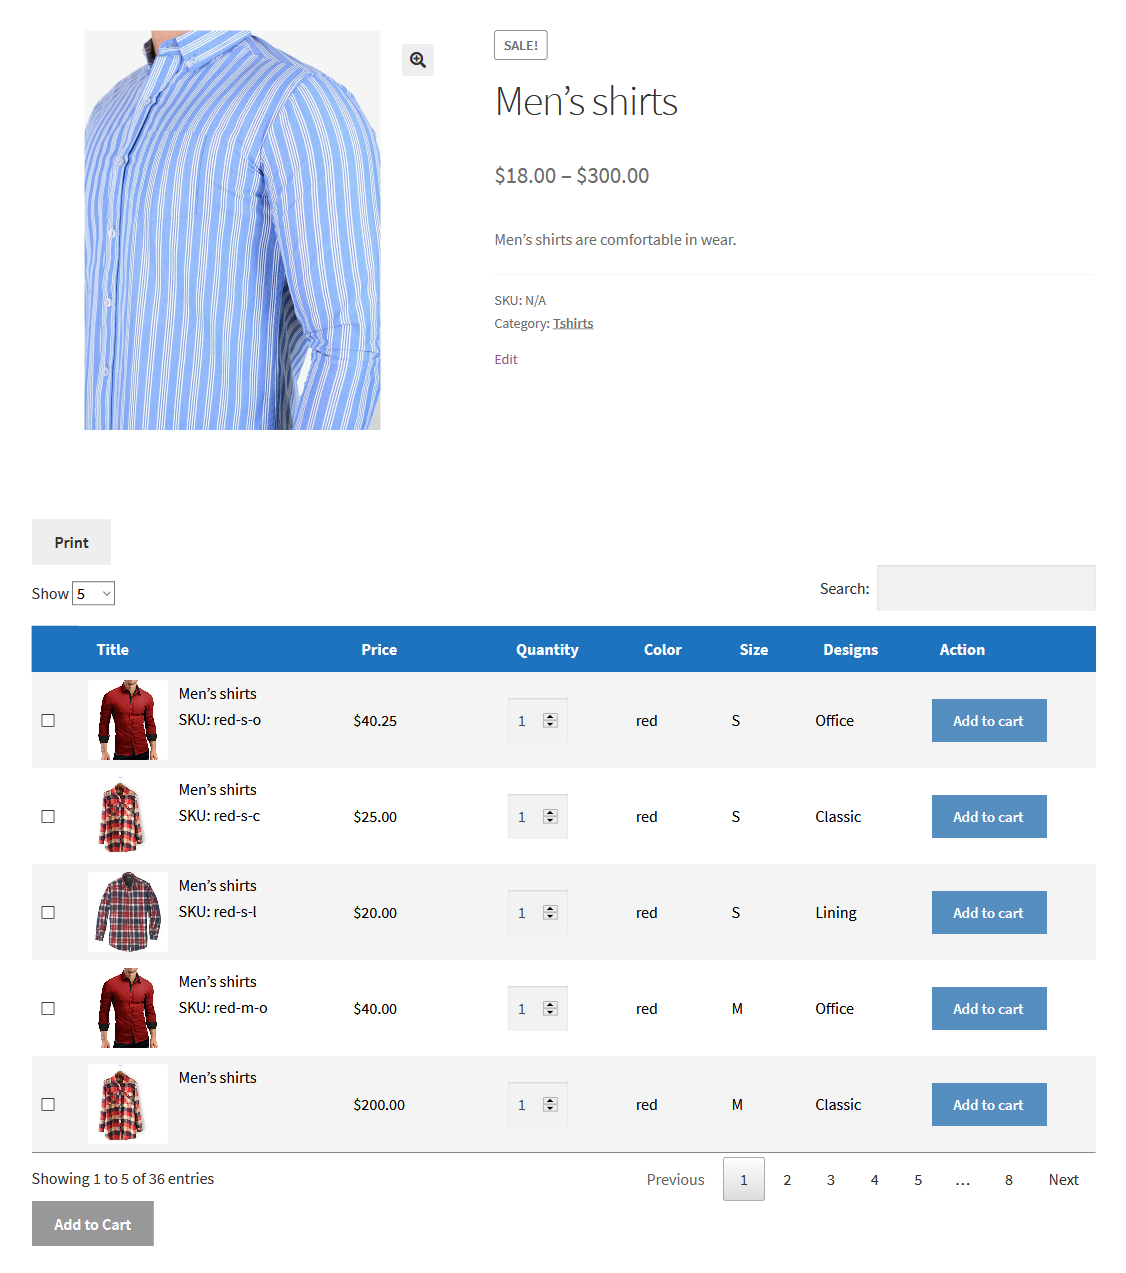
2. Table view — after product summary
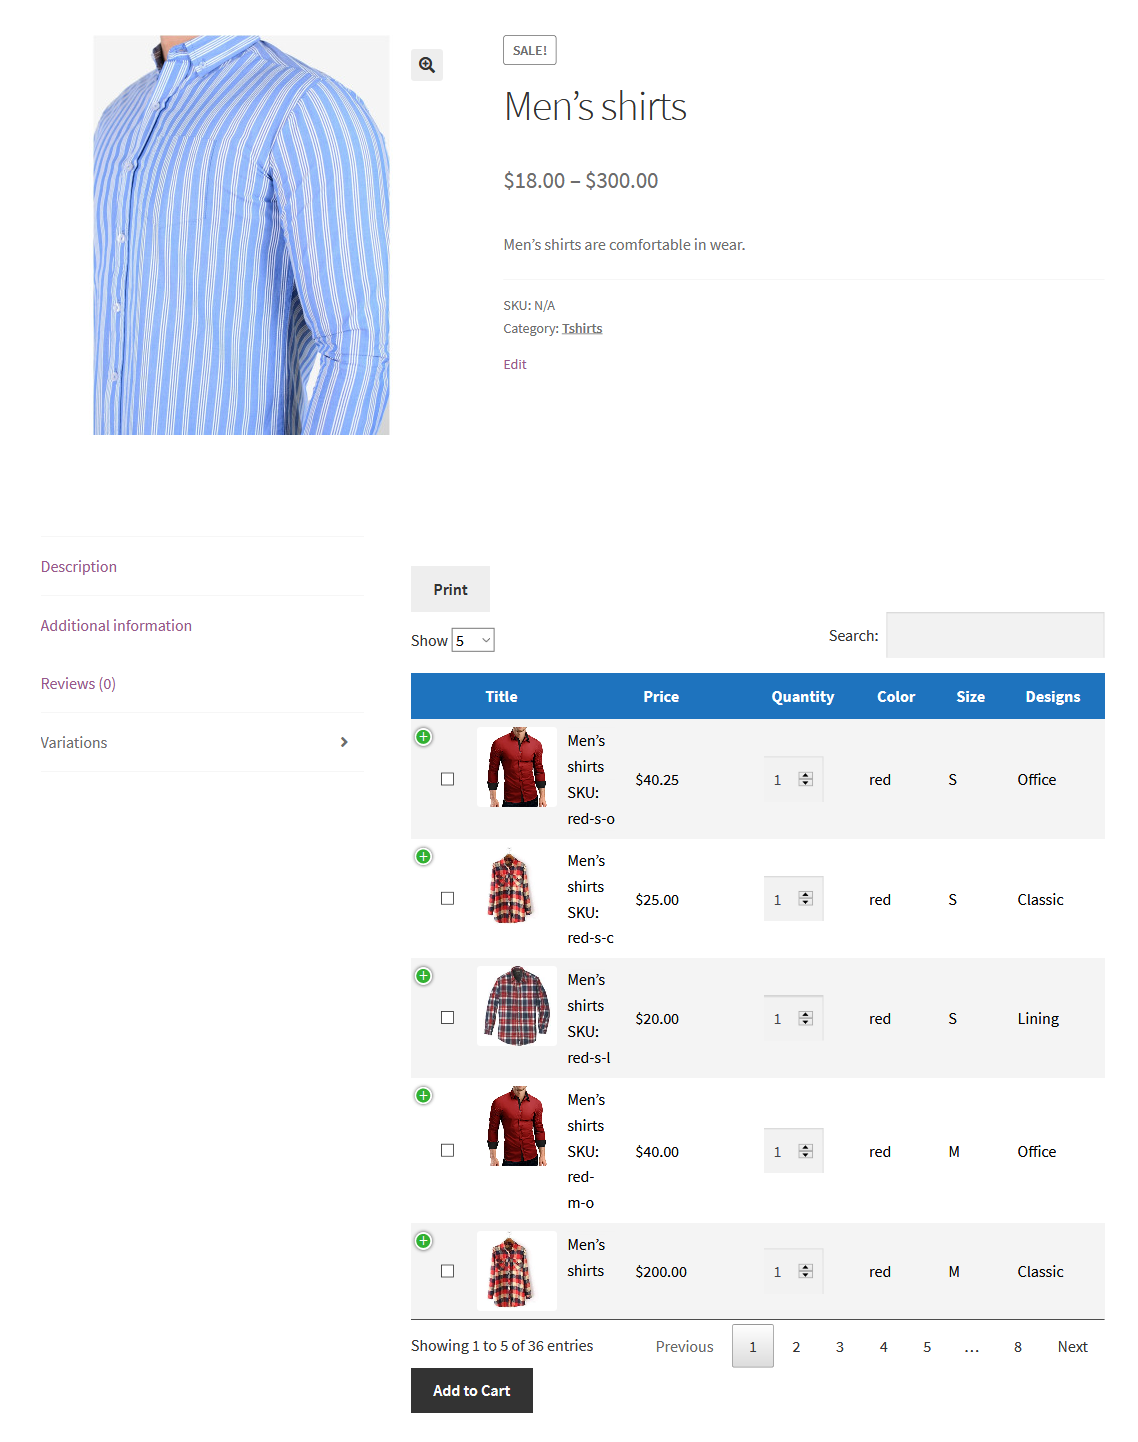
3. Table view — in product tabs
4. Attribute view — featured image appears on the side

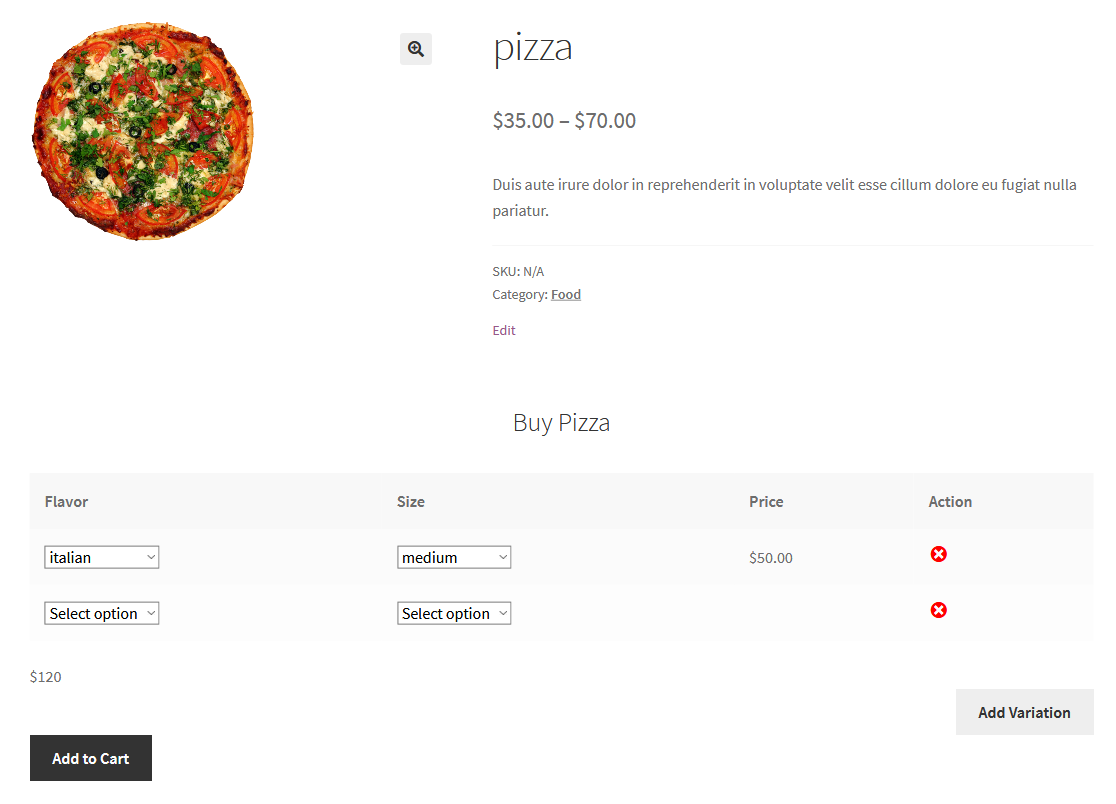
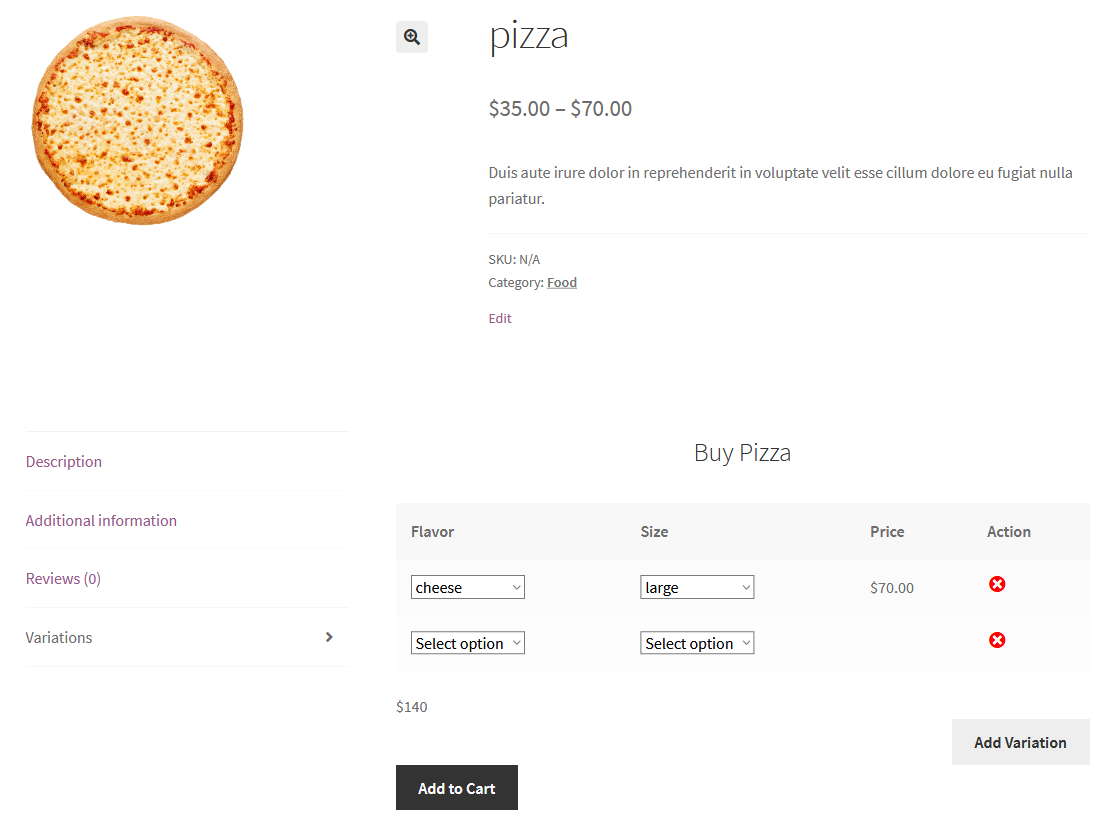
5. Attribute view — after product summary
6. Attribute view — in product tabs
7. List view — featured image appears on the side

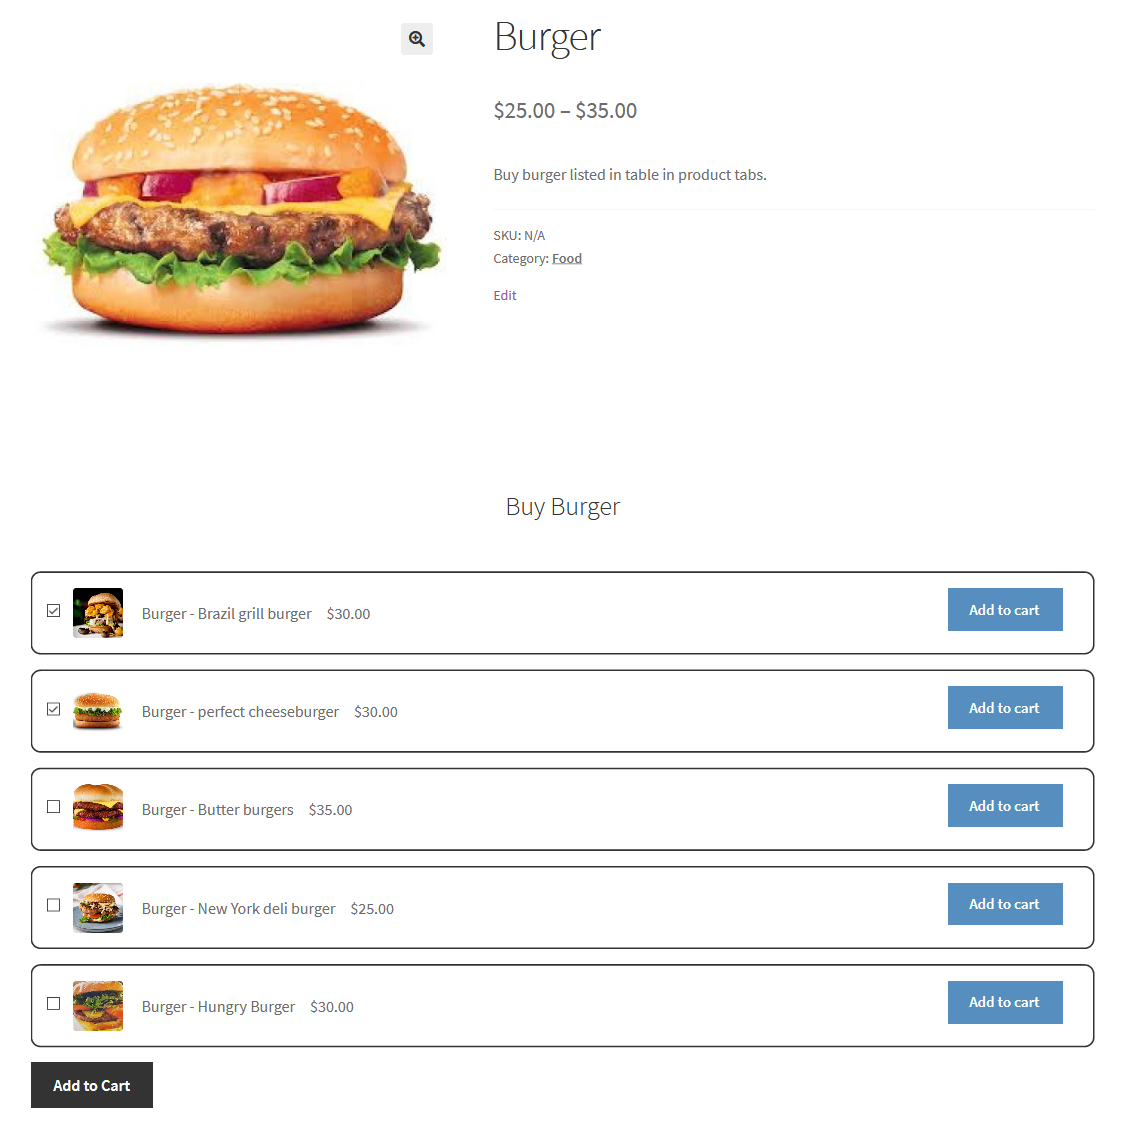
8. List view — after product summary
9. List view — in product tabs

10. Grid view — featured image appears on the side

11. Grid view — after product summary
12. Grid view — in product tabs

Extension information
Quality Checks
Countries
Languages