High-quality photos are a crucial part of every product page in your online store. They help shoppers compare items, assess features, determine whether the product fits their needs and style, and form an emotional connection with your brand.
But adding these images to your online store can also come at a price. With each large photo or media file you add to a product page, the load time increases. And your shoppers, no matter how interested they are, aren’t willing to wait around for very long.
The question store owners find themselves asking is this: How do I speed up image loading while retaining a high-resolution appearance? It might sound like a challenge, but there are actually quite a few simple ways to balance fast product photos and fantastic image quality.
First, let’s have a look at why site speed matters. Then, we’ll go over some tips for how you can decrease the load time of your product photos while preserving their quality.
Why the speed of your store matters (hint: it’s not just about SEO)
↑ Back to topThere are a few reasons why having fast-loading product photos is just as important as having attractive ones. The one that most store owners think of first involves search engines.
Google began including site speed as a ranking factor for its search results in 2010. Since then, nearly every piece of search engine optimization advice for ecommerce sites includes the tip to “speed up your store” or “reduce loading times.”
It’s true that faster sites will perform better in search rankings, all other things considered equal. And the higher up you are in search results, the more organic search traffic you’ll drive to your site. But SEO isn’t the only reason why speed is so important. Google only made speed a ranking factor in the first place in order to prioritize User Experience (UX) on the web.
Here’s what it really comes down to: shoppers don’t want to wait. They don’t want to wait for shipments, they don’t want to wait for answers, and they certainly don’t want to wait for your store to load. So if you offer a potential customer a slow, laggy product page, well, what does that say about the rest of their experience with you?

So while large image file sizes can cause slow-loading pages that potentially hurt your SEO, these slow pages can also — more importantly — irritate your shoppers. And that’s why it’s so important to strike that balance between fast and beautiful.
With that in mind, let’s move on to the methods you can use to make your image files smaller while preserving their quality.
Save images in WebP or JPEG format unless you need transparency
↑ Back to topSome formats are naturally larger than others. You can compress images all you like, but if you ultimately use file types that naturally create larger file sizes, then you won’t be able to fully optimize your images.
Generally speaking, WebP should be your first format of choice with JPEG as second best, unless you need transparency for some reason. In the event that transparency is required, you should opt for a transparent PNG.
Other formats are larger or less convenient for online compression. And while you might be tempted to use a hilarious animated GIF on your product page, you should probably reconsider. The trade-off in loading time isn’t worth the brief chuckle your shoppers might have.
Let’s take a look at the file sizes for this image of a cup of tea on a white background when saved in some of the most common image formats. No image compression was run on this file. These are just the file sizes when saving this image at 1280×853 pixels at full resolution.


As you can see, the smallest file is the WebP file with JPEG as a close second. The largest file size is the TIF file format. The GIF file is almost twice as large as the WebP file. If this was an animated GIF, it would be even larger.
Not only do images save at different file sizes at their highest quality, but they have different compression abilities as well. After running image file optimization on each of the above image files in Photoshop with settings that resulted in images of similar visual quality, these were the results:

The WebP image again saved to the smallest file size — and by a very wide margin. The JPEG also reduced its file size considerably. The PNG did not experience any file size savings and the reduction in file size of the GIF was minimal. Using LZW compression on the TIFF image saved an enormous amount of file size as well, but the resulting file is still over 2.5x larger than the uncompressed WebP file.
If you have thousands of files on your website, you can see how using compressed WebP or JPEG files would save you lots of space and keep your image load times relatively fast.
Note: AVIF is another image format that tends to have even better compression than WebP. While it does have broad support, it’s still not as well-supported as WebP. If you use Adobe Photoshop to process images, you’ll need to install a plugin to open AVIF files and save them in AVIF format.
Use image compression to create web-ready images
↑ Back to topShoppers want product photos that are large, highly detailed, and able to be zoomed in on (if you have a zoom function enabled on your store, that is). Thankfully, this is easily achievable by using image compression software.
Many of these applications have become so efficient that an untrained eye is incapable of spotting the difference between compressed and uncompressed images.

Before compressing your images, you’ll want to determine what the maximum file size is at which your images will be displayed. Mobile devices tend to use higher resolution displays with greater pixel density than desktop computers, although high-definition displays are becoming more common on desktop.
You may find that a 500px wide image displaying in a 500px-wide space doesn’t look that great and a 800px or 1000px-wide image looks better constrained to 500px on a retina desktop or smartphone display.
Play around with your image sizes to see where the best balance is for your products. Additionally, if you are offering a zoom feature for your product images, you’ll want to use larger images than if you were only using thumbnails.
Once you’ve decided what your maximum pixel dimensions should be, you can move on to converting your original high-res product photos to optimized, web-ready images.
Let’s take a look at some of the tools you can use to create fast-loading product photos for your site.
Adobe Photoshop
If you use any version of Adobe Photoshop, there are a few different ways to save your images in optimized formats. You can use the Save As feature, just don’t forget to change your file name if you are saving it in the same file format as the original file. You can also use Export As or the legacy Save for Web option (until it’s no longer supported).
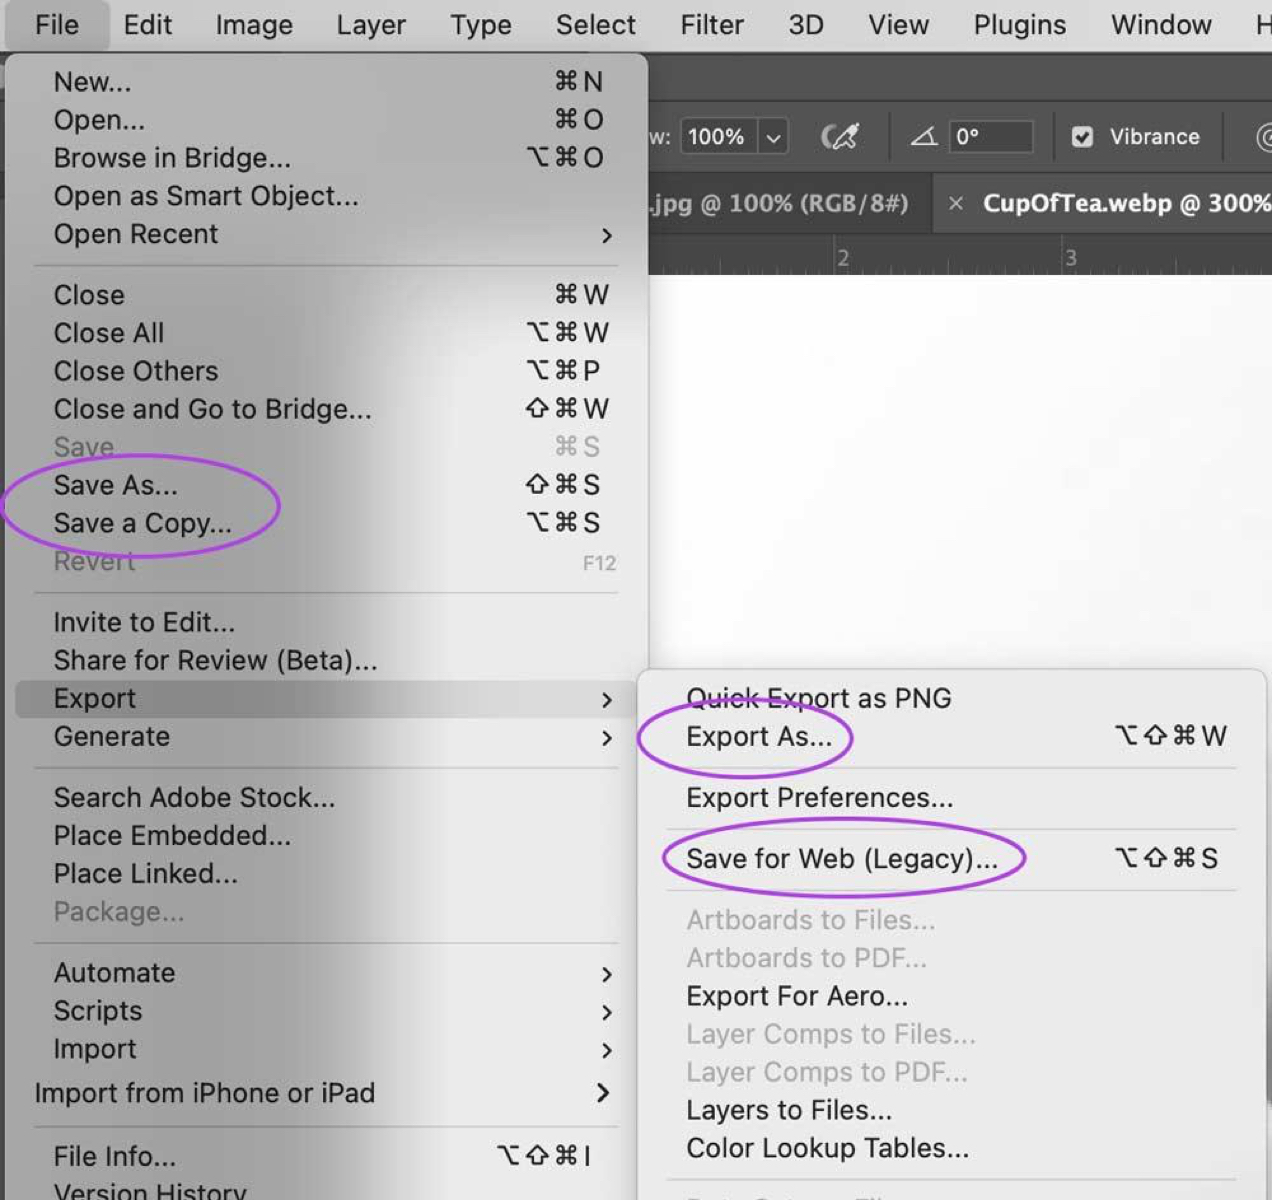
Each of these options will have steps during the save process that will allow you to adjust your image compression settings. However, each option does have some different features and capabilities.
- Only Save As will allow you to save a WebP file.
- Only Export As and Save For Web allow you to adjust the pixel dimensions of your image during the save process. If you are using Save As, you’ll need to resize your image to the dimensions you want it in Photoshop first.
- The legacy Save For Web feature is the only option that will show you an approximate loading time and resulting file size before exporting your image, allow you to adjust animation loop settings on a GIF, and offer granular options on what metadata to keep or omit from your file.
The rest of the options in all methods are the same — decide whether to keep or omit metadata, embed your color profile, and adjust image quality (lossy or lossless).
No Photoshop? No problem: try one of these free online tools
Not everyone has access to Photoshop, but that shouldn’t hold you back. There are plenty of free online tools designed to compress your photos.
Two of the best are Kraken Image Optimizer and ShortPixel. Both tools shrink your images to a surprisingly small size while still preserving quality.
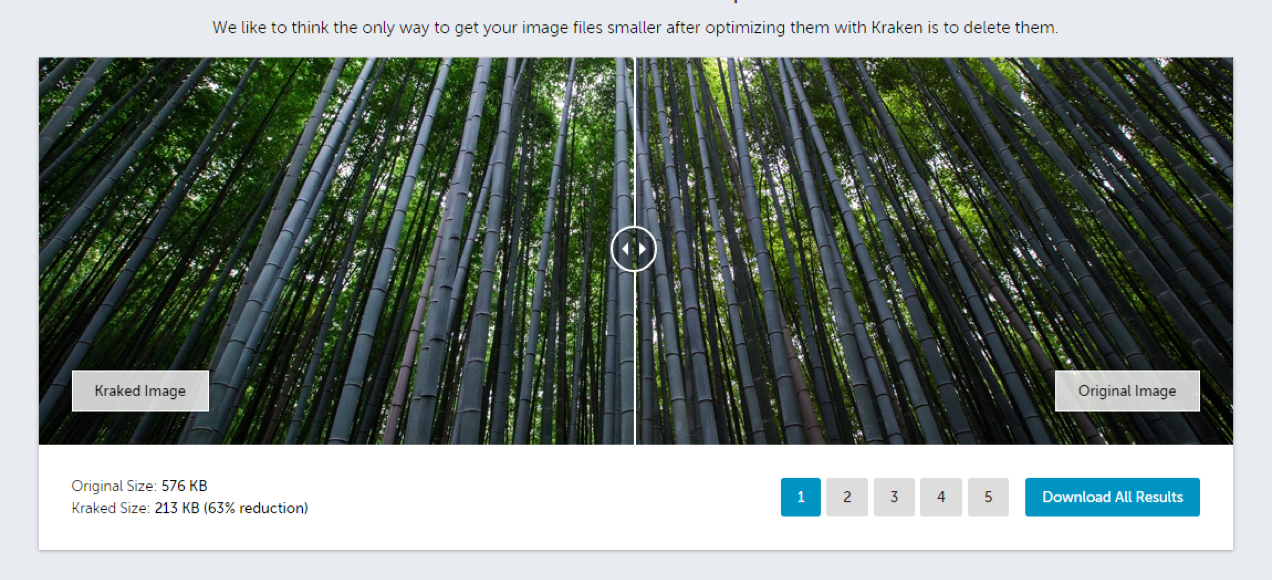
Once the tools are finished with your uploaded images, you’ll be able to save them and add them to your store.
Both of these tools’ free versions do have some limitations in terms of number of files and/or maximum file sizes that can be uploaded, so it may be a bit more tedious of a process than using Photoshop or their paid plans. But it is free and if you don’t have a large store with hundreds of products, then this might be a great fit.
Using WooCommerce? Edit the WordPress settings or try a plugin
You may or may not know that image compression is built right into WordPress. This compression shrinks your JPEGs to 82% of their original size, but that might not be enough for stores that opt for huge, highly-detailed photos or large galleries.
One option you have to control this built-in compression is to edit WordPress’s functions.php file. This will allow you to increase — or decrease, if you prefer — the amount of automatic compression that occurs prior to your images hitting the Media Library.
Want an easier route? You can always try a plugin. ShortPixel has their own, which works for just about any file type including Apple’s HEIC format so you can add images directly from your iPhone. With a free account, you get 100 credits per month.
Enable a content delivery network for your store
↑ Back to topAlthough modern Internet connections and improved hosting capabilities have sped up the time it takes for a shopper to load your store, there can still be connectivity issues. These can slow down site load times, especially if a shopper is across the globe from where your server is located.
Fortunately, there’s a way to speed things up for them (and not just for those bigger files like product photos, either). A content delivery network (CDN) displays stored content from servers physically close to visitors instead of on-demand content from a single location. This speeds up the experience for all your shoppers.
With a CDN like Jetpack, cached (that is, not current-to-the-second) copies of your store will be shown to visitors. Visitors will also receive content from the CDN server that’s closest to them. Both of these things speed up load time dramatically, especially for large photos and media files.
Along with compression, utilizing a CDN is a fantastic way to serve product photos super quickly, especially if you don’t update your store on a frequent basis. And of course, if anything requires an urgent update, you can turn the CDN off.
A few other ways you can balance fast and fantastic
↑ Back to topThe ideas offered above are the biggest, most meaningful things you can do to strike a balance between product photos that look good and load quickly. But here are a few more tips to keep in mind:
- Opt for white backgrounds. Generally speaking, the fewer colors an image contains, the smaller the file size will be. This is even more true once compression comes into play and the palette is further reduced.
- Eliminate unnecessary product shots. Do you have photos of the shoes you’re selling from ten different angles? You can probably reduce it to five and cut the loading time in half.
- Load thumbnails first and only bring up the full size on click. This way shoppers will expect to wait for the bigger photos.
- Lazy load images. Lazy loading images improves page speed by only loading images above the fold and loading other images as users scroll to where they are on the page. The Jetpack plugin not only offers CDN functionality, but also lazy loading for images. Jetpack also has other WordPress optimization tools that, while not all directly related to images, can boost performance and improve the user experience.
- Strip unnecessary metadata. Depending on the purpose of your image file, you might be storing a lot of metadata like copyright information, keywords, tags, geographic data, image descriptions, etc. In some cases, you may want to keep this information, but you can also save some file space by omitting it when you compress your images.
Amazing product images don’t have to slow down your site (or your shoppers)
↑ Back to topIt might seem like the only way to have gorgeous product photos is to settle for a sluggish store, or that the only way to get quick-loading product pages is to settle for tiny, highly-compressed photos. But we beg to differ.
With just a few optimizations to your product photos, you can find the perfect balance between fast-loading and fantastic-looking. And neither your site — nor your shoppers — will have to slow down.
Want more guidance? Learn how to optimize images for the web.
About


