With many businesses unable to operate offline, it’s more important than ever to learn how to sell online. You need a way to update loyal customers, bring in additional revenue (especially if your storefront is closed), and offer new options like virtual services or pickup scheduling. And you don’t have a lot of time — or money — to do it.
WooCommerce is a no-cost, fully-customizable Ecommerce tool for WordPress, the free website-building platform. It was designed to meet the needs of store owners regardless of technical expertise, so anyone can get a store up and running. And if you do run into any questions, there’s extensive documentation available along with a stellar support team.
If you’re able, it’s always a good idea to start by writing an online business plan. But if you just can’t wait, let’s take a look at how to start an online business in five steps.
1. Purchase a domain name and choose a host
↑ Back to topA domain name is the website address people type into their browser to find your site, like WooCommerce.com. Ideally, choose one that includes the name of your business or the products or services that you offer. The more clear and concise, the better.
You can purchase domains from any number of providers — we like GoDaddy for the straightforward search tool that helps you find the perfect name. Most .com domains start at around $11.99.
Then, choose a hosting provider for your site. A host stores the files needed to create your site and make it accessible to people around the world. There are lots to choose from, with varying prices and features — including a GoDaddy plan created specifically for WooCommerce.
GoDaddy’s E-commerce hosting plan includes everything you need to get your site online, from an SSL certificate to hassle-free software installation and daily backups. You’ll also benefit from a speedy hosting platform that’s optimized for WordPress, support, and pre-installed WooCommerce extensions for appointment bookings, subscriptions, pre-orders, and more. And to help support businesses during the COVID-19 pandemic, GoDaddy is offering it at $1 for the first three months, so you can get going without spending money that you don’t have.
Learn more about GoDaddy’s Ecommerce Hosting plan here.
2. Install WordPress and select a theme
↑ Back to topYour next step is to install WordPress. Most hosting providers offer one-click installations; check with your host for specific instructions. If you’ve chosen the GoDaddy Ecommerce plan, this will already be taken care of.
To log into your new website, head to example.com/wp-admin and use the login credentials you created during the installation process. (Just make sure to replace example.com with your own domain name!) There, you’ll see your WordPress dashboard, where you can build and manage every aspect of your online store — here’s a full breakdown of the dashboard settings and options.
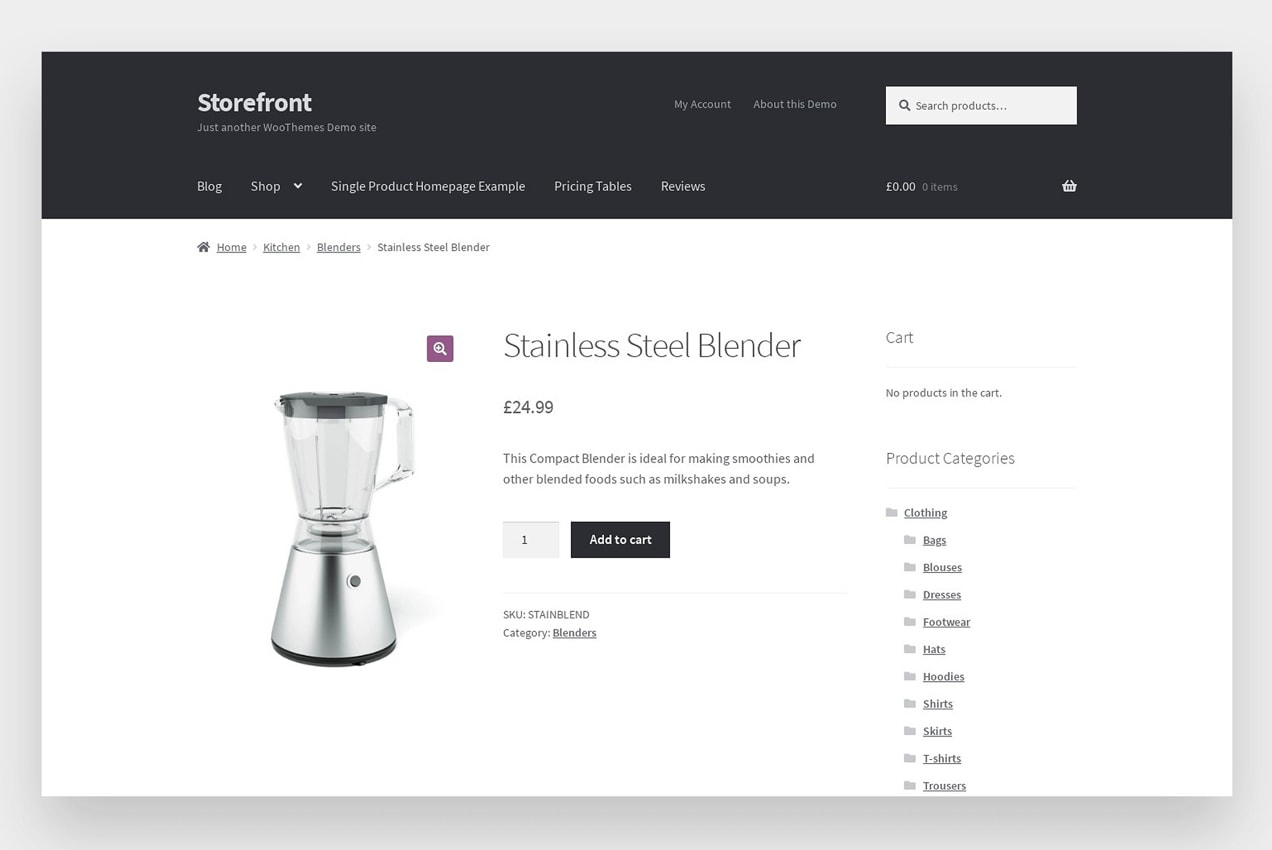
Then, select a WordPress theme — that’s the template that controls the design and layout of your site. We recommend starting with the Storefront theme: it’s clean, simple, and intuitive, and looks great on devices of any size, from desktops to mobile phones, and it’s free!

(Not loving Storefront? Browse more free, Ecommerce-ready themes here.)
3. Create basic pages
↑ Back to topWhile the exact pages you create will depend on your business and the products you sell, there are a few pages every store should have:
- Home
- About
- Contact
- Privacy Policy
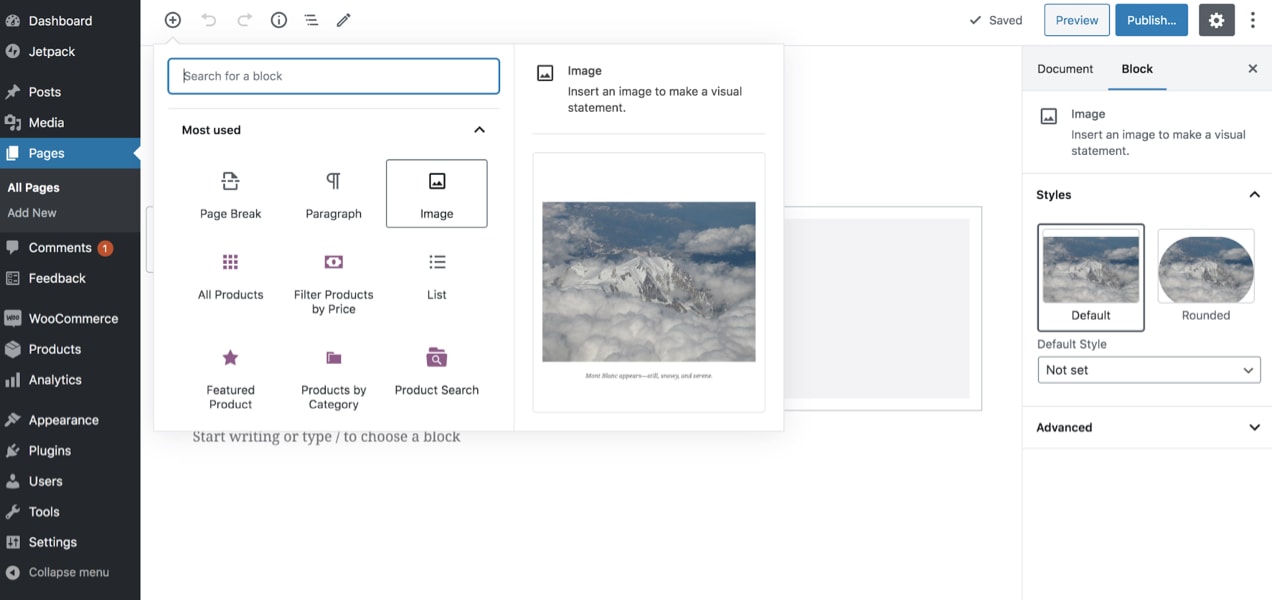
Each page is made up of blocks of content like headings, paragraphs, images, videos, and buttons. To create a new page:
- Go to Pages → Add New in your WordPress dashboard.
- Add a title at the top of the page.

- Click the plus icon in the top left to choose the type of block you want to add. Scroll through the options, or use the search bar to find something specific. Each block comes with its own settings, which you can edit in the column that appears on the right of the page.
- Once you’re done adding blocks, click the blue Publish button at the top right and your page will be live!
For more details about creating and editing pages, read our support documentation.
4. Install WooCommerce
↑ Back to topWooCommerce adds Ecommerce functionality to your WordPress site, including the ability to sell products. To install WooCommerce, go to Plugins → Add New in your WordPress dashboard. Search for “WooCommerce,” then click Install Now and Activate. Again, if you chose the GoDaddy Ecommerce hosting plan, this will already be done for you.
The Setup Wizard will walk you through each of the following steps:
- Connect to Jetpack and WooCommerce Services. These free tools provide automatic tax calculations, the ability to print shipping labels at home, security functionality, and more.
- Store details: Set the location of your store.
- Industry: Choose the industry your business operates in.
- Product types: Select the type of products you want to sell — digital, physical, or both.
- Business details: Add details about your business and get personalized recommendations for your store.
- Theme: Since you’ve already installed and set up your theme, simply select the one you’re already using.
You’ll be taken to another screen, where you can add products and set up shipping, taxes, and payments.
Shipping: Decide how much customers pay for shipping to different locations. If you enable WooCommerce Services, you can print shipping labels at home and avoid trips to the post office. Or set free shipping, and allow shoppers to pick up food or other products outside your physical location.
Taxes: Set tax rates based on your location. If you use WooCommerce Taxes, it’ll take care of everything for you automatically.
Payments: Select a payment gateway, which allows you to accept credit cards securely on your site.
That’s all it takes to get your store set up! Now it’s time to add some products.
5. Add products
↑ Back to topGo to Products → Add New in your WordPress dashboard. Start by adding the name and description of your product in the fields with the corresponding labels.
Then, scroll down to the Product Data box and expand the dropdown that says Simple Product. Choose between the following product types:
- Simple product: Covers the majority of products. These are shipped and have no options, like a toy or book.
- Grouped product: A collection of related products that can be purchased individually, like a set of glasses.
- Virtual product: A product or service that isn’t shipped, like an online consultation or curbside pickup at your restaurant.
- Downloadable product: A virtual product that customers download, like an eBook or audio file.
- External or affiliate product: A product that’s listed on your website but sold elsewhere.
- Variable product: A product with options, like a shirt that comes in multiple colors or sizes.

Here’s how to create a simple product — click on the links above for detailed tutorials on the other product types.
- Add a Regular Price and a Sale Price, if applicable.
- Click the Inventory tab and set a SKU and inventory amounts, if applicable.
- Select the Shipping tab and add the weight and dimensions.
- In the right hand column, choose a Product Category. Consider grouping products by type, size, color, age range, or other appropriate features.
- Add a Product Image, which will be the primary image. You can also add additional Product Gallery Images that customers can scroll through.
- Click the blue Publish button at the top right to add your product to your live website.
Feel free to be creative! WooCommerce is flexible enough to support virtually anything that you envision. During this time period, you might want to accept preorders that you’ll ship once your storefront or warehouse is back open. Or sell services that you typically offer in person — like workouts, counseling sessions, or cooking classes — virtually. You could offer delivery or curbside pickup for food and drinks, accept donations for charities, or ship new products that you’ve developed, like hand sanitizer or face masks.
Once you’ve added all your products, they’ll appear on the Shop page that was automatically created through the Setup Wizard. You can find this by going to Pages → All Pages and clicking on Shop.
Start selling online.
↑ Back to topAnd that’s it! You have a fully-functioning online store that will generate revenue not just during the COVID-19 pandemic, but for years to come. If you run into any hiccups along the way, make sure to read our documentation, with step-by-step instructions, or reach out via our support forums.
Want some inspiration? Check out our showcase of WooCommerce sites.
About


Selling online has become trend. Woocommerce you have listed amazing steps to sell online. I am so glad to see this post of an example of what’s possible. Thank you for sharing.
Thanks so much! We love partnering with small businesses to achieve whatever they’d like online.
Gracias por este post, me ayuda a mejorar mis procesos para ofrecer esta solución a mis clientes, agradecido.
Saludos.