Active installs
100+
Subscription includes
Support
The Banner Images for WooCommerce plugin allows you to easily add banners to WooCommerce shop pages, product categories, individual products, checkout, and thank-you pages. This tool is ideal for admins looking to enhance their online store’s appearance and promote sales, specials, and brand identity through custom banners.
With this plugin, you can spotlight key products, advertise promotions, and engage users to boost sales and increase visibility. Whether it’s on a WooCommerce product page banner or a category banner, this plugin offers versatile options to help you attract attention and reinforce your brand message.

You don’t need coding skills to use the WooCommerce banner plugin. Simply fill out the settings page, upload your WooCommerce banner images (supporting PNG, JPEG, and GIF formats), and add your text. You can also add links to redirect users and use alt text for better WooCommerce SEO.
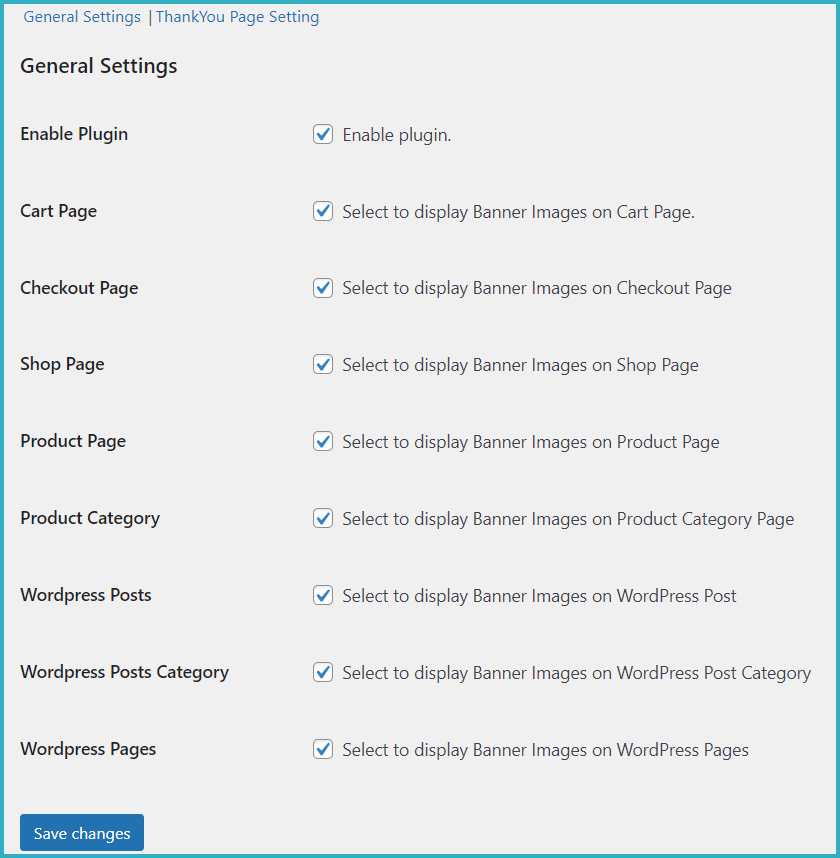
Every page, product category, and post has its own banner settings. Additionally, you can manage all banners via the WooCommerce settings tab, giving you full control over whether banners are displayed on specific pages like the WooCommerce shop page or individual product page banners. Enable or disable banners on WooCommerce product category pages or single product pages with just a few clicks.
Responsive Banner Images for WooCommerce & WordPress Websites: Create banners that are fully responsive, ensuring they look great on all devices and screen sizes.
Add Banners for WooCommerce Products and Categories: Easily add banner images to WooCommerce product pages and category pages to highlight promotions or key products.
Add Banners to Default WordPress Posts and Categories: Display custom banners on your default WordPress posts and categories to engage visitors and drive more traffic.
Supports Banner Images on Tag Pages: Add banner images to your WooCommerce tag pages to enhance user experience and visibility.
Add Banner Images for WooCommerce & WordPress Default Pages: Integrate banners seamlessly into your WooCommerce and WordPress default pages and their associated categories.
Banner Images for WooCommerce Thank You Page: Add a special banner to the WooCommerce Thank You page, enhancing post-purchase engagement.
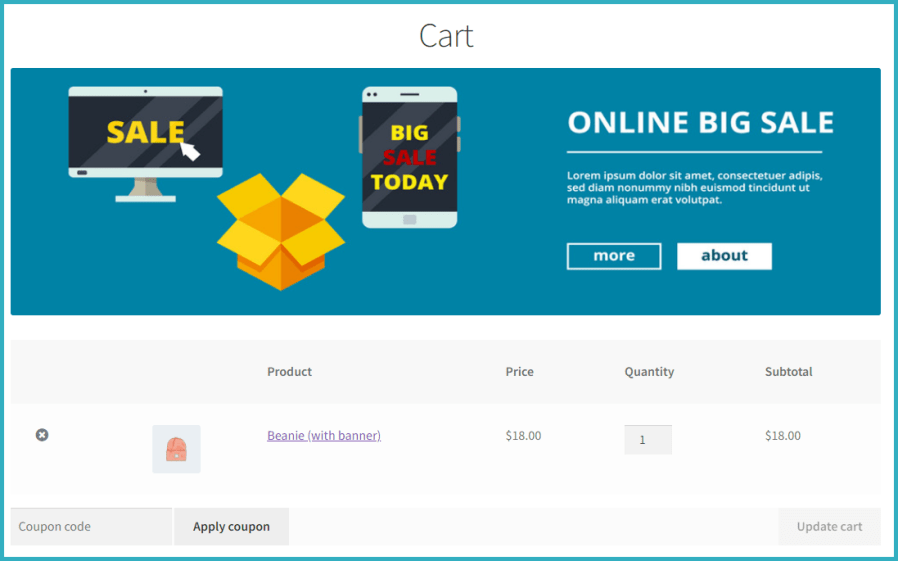
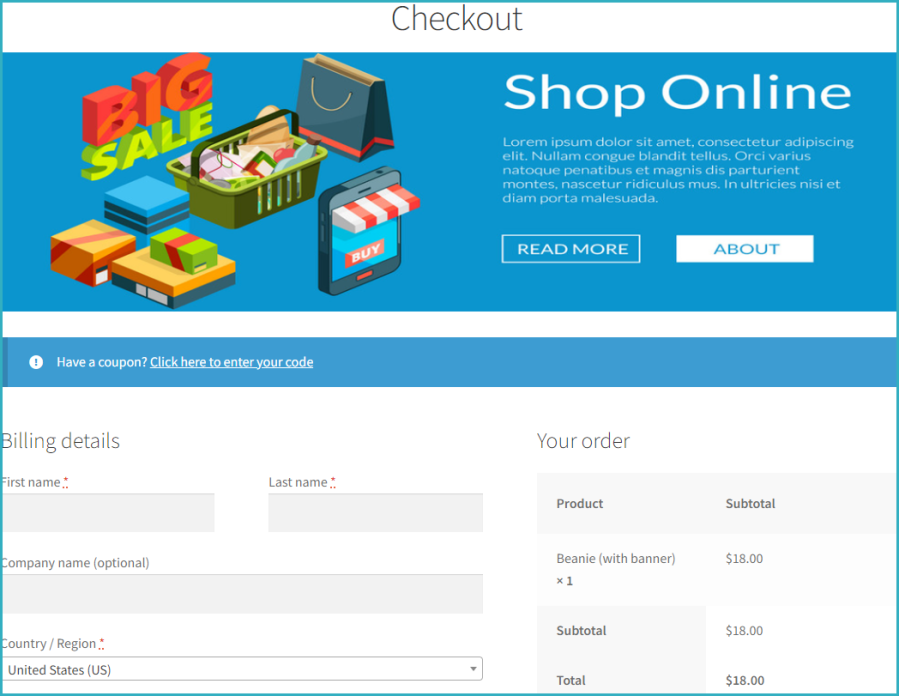
Banner Images for Cart and Checkout Pages: Customize your WooCommerce Cart page and Checkout page with banners that can showcase sales, discounts, or promotions.
Enable/Disable the Plugin: Use the setting options to easily enable or disable the plugin across your store for better management.
Enable/Disable Banner Images: Flexibly manage whether banners are displayed on different pages of your WooCommerce store or website.
Add Custom Links and Alt Text for SEO: Optimize your banners by adding custom links and alt text for better SEO and user navigation.
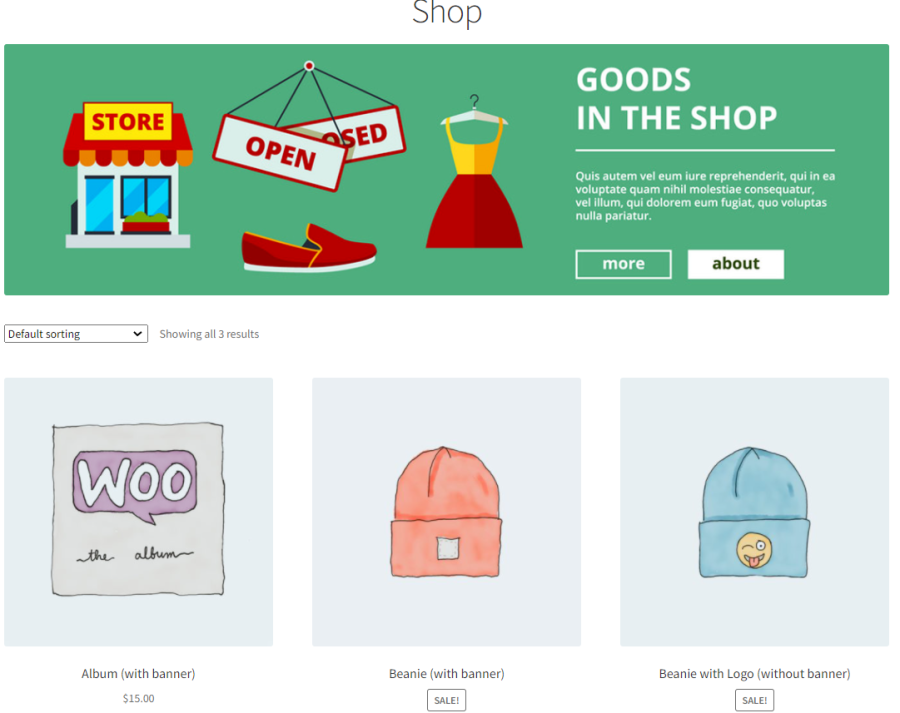
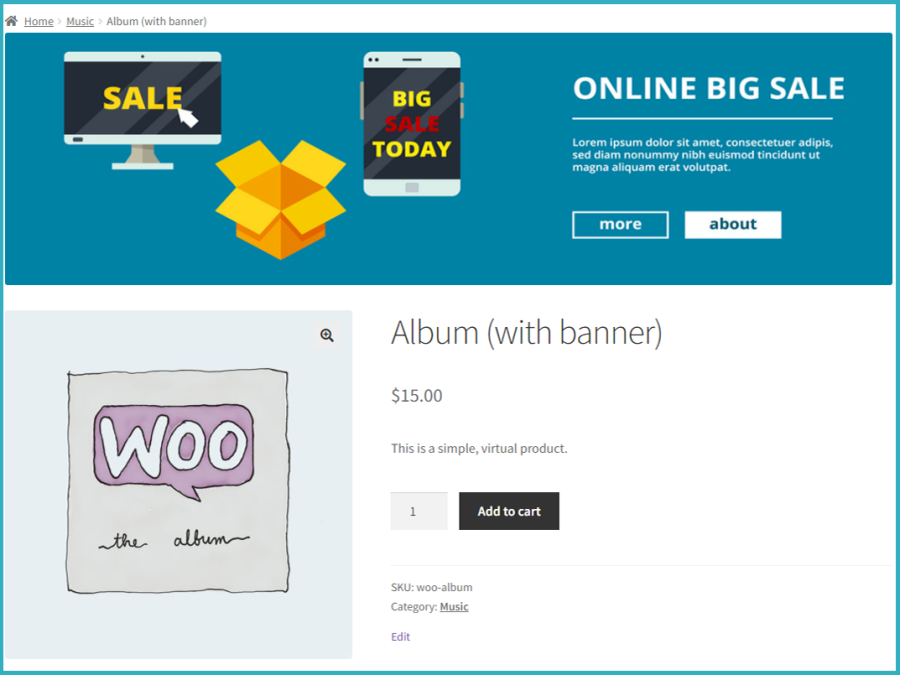
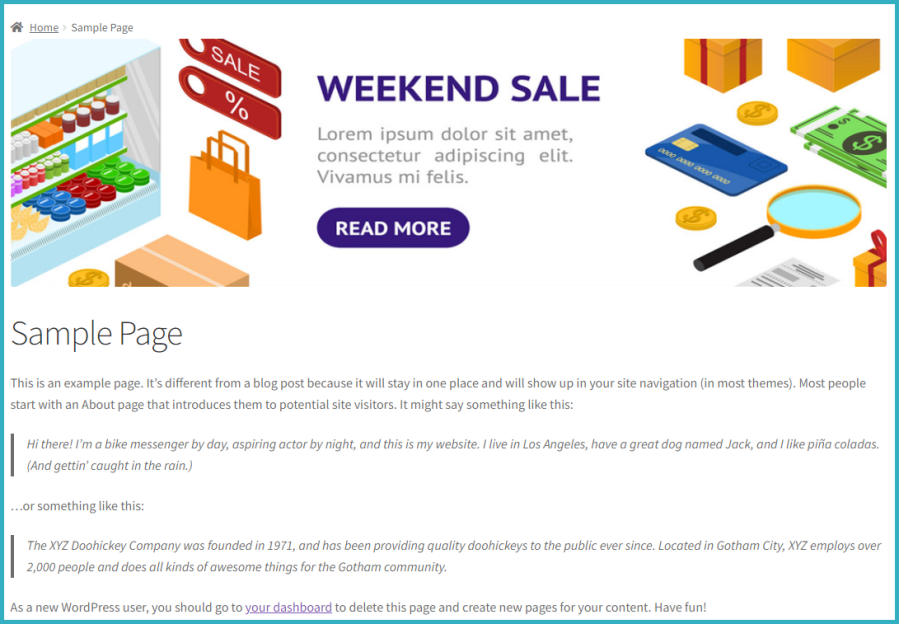
The Banner Images for WooCommerce plugin lets you easily display promotional banners on your WooCommerce shop pages. Whether you’re running a flash sale, offering a special discount, or promoting a new product, you can quickly add eye-catching banners to engage your customers. With this plugin, your promotional banners can be featured across various pages of your store, including the shop page, product pages, and more.

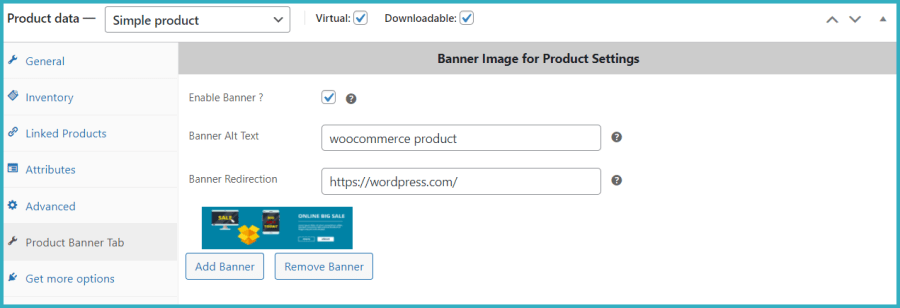
No coding is required at all! The Banner Images for WooCommerce plugin is user-friendly and doesn’t require any technical knowledge. To add banners to your product pages, simply follow these steps:
Go to Your Products in the WooCommerce admin panel.
Select Edit or Add a New Product Page.
Scroll to Product Data and click the Product Banner Tab.
Enable the checkbox to display the banner image.
Optionally, add a redirect link and alt text to optimize your banner.
This seamless setup allows you to add banners quickly without writing a single line of code!
Adding a banner to your product categories is just as easy! Follow these simple steps:
Go to WooCommerce Products in your WordPress admin panel.
Click on Product Category.
Select Edit or Add a New Category for your product.
In the category settings, you will find options to add a banner image.
You can also add alt text for SEO and a redirection link to enhance user engagement.
These settings allow you to personalize each product category with banners that help showcase sales, promotions, or highlight specific products.

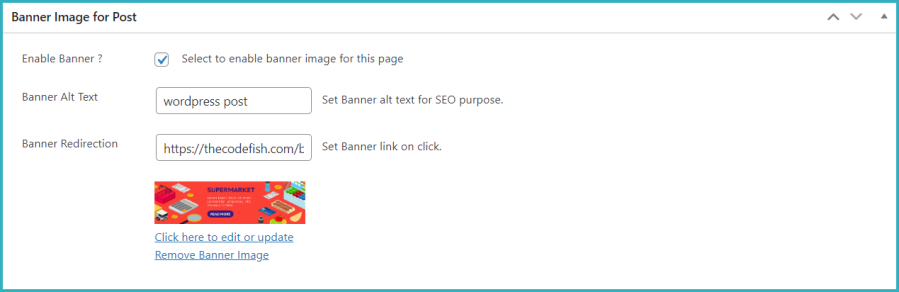
Adding banners to your WordPress posts and their categories is easy with the Banner Images for WooCommerce plugin. Follow these simple steps:
Go to Post Pages in your WordPress admin panel.
Click on Edit or Add a New Post.
In the post editor, you’ll see a meta box to upload and configure the banner image.
Select your banner image, enable its display, and fill in the SEO alt text to improve visibility.
You can also add a redirection link to drive traffic to specific pages or products.
Finally, click Publish to apply the banner to your post.
These options make it simple to enhance the visual appeal and SEO of your WordPress posts by adding engaging banners.
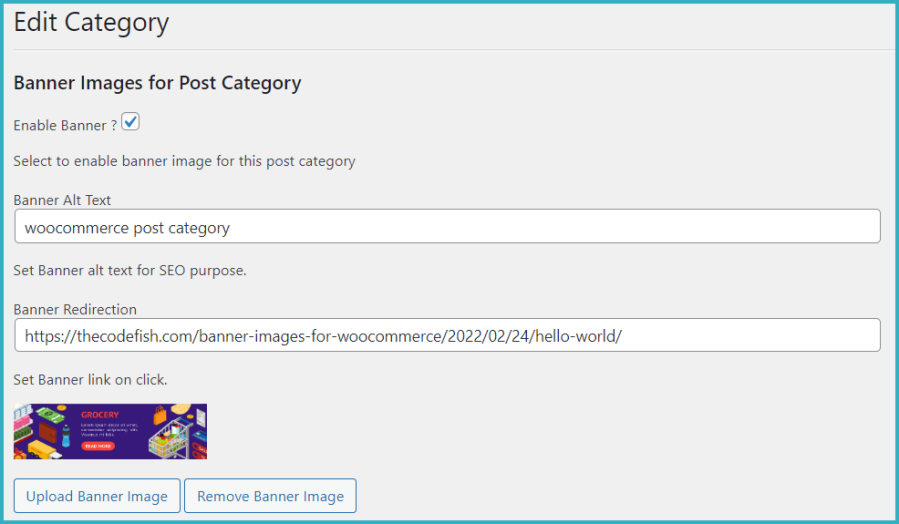
To add a banner image to a WordPress post category, follow these steps:
Go to Post Category in your WordPress admin panel.
Click on Edit or Add a New Post Category.
You’ll see the post banner image options in the meta box.
Follow the same process as adding a banner to WordPress posts: choose your banner image, enable its display, add SEO alt text, and insert a redirection link if needed.
Click Publish to apply the banner to your post category.
This process helps you enhance category pages with engaging banners, improving both user experience and SEO.
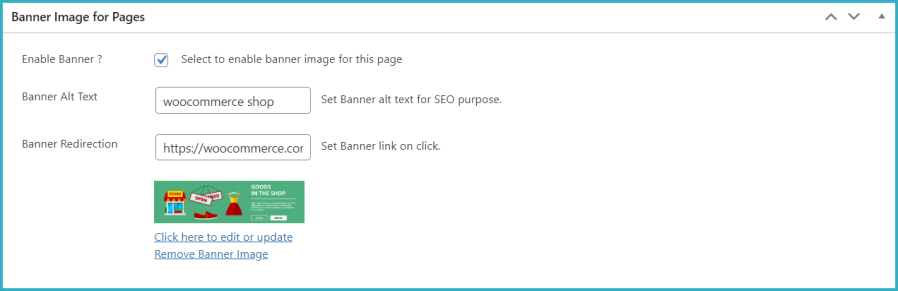
To display banner images on your default WordPress and WooCommerce pages, follow these steps:
Go to Admin > Pages or Add a New Page.
For each page (such as the Navigation page, Checkout page, Thank You page, etc.), locate the banner image meta box.
Upload your banner image, enable the banner display, add SEO alt text, and include a redirection link if necessary.
Click Publish to apply the banner to the page.
This feature allows you to customize your WooCommerce and WordPress pages with engaging banners, improving both user interaction and SEO.
To add a banner to a page section, follow these steps:
Go to the Page Section > Edit or Add a New Index Page.
In the editor, locate the banner image meta box.
Upload your banner image, enable the banner display, and optionally add SEO alt text and a redirection link.
Save or publish your page.
This allows you to seamlessly add banners to specific sections of your pages, enhancing visual appeal and boosting engagement.
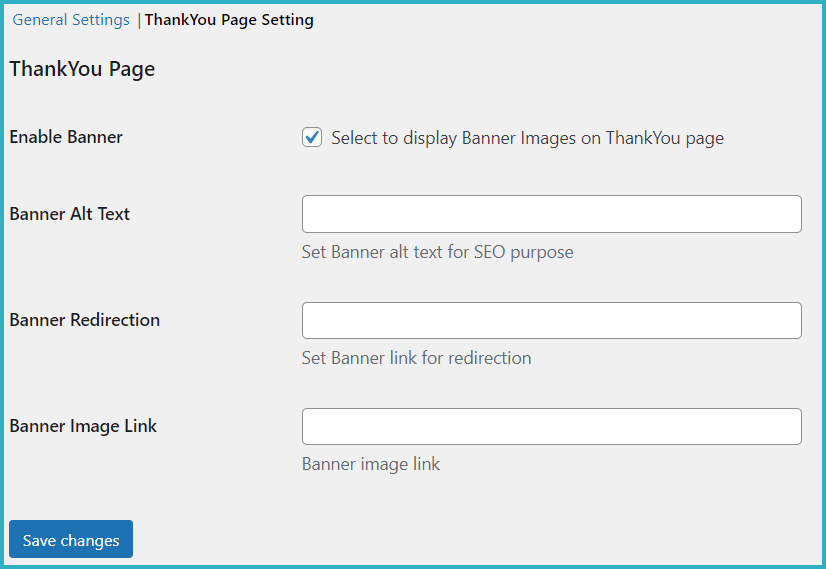
To add a banner to the WooCommerce Thank You page, follow these steps:
Go to WooCommerce Settings and navigate to the last tab titled Banner Image.
Here, you’ll have the option to upload a banner image specifically for the Thank You page.
You can also add SEO alt text and a redirect link for better user engagement and SEO benefits.
Save your settings, and the banner will be displayed after order completion.
This feature helps you leverage the post-purchase experience by promoting special offers or reinforcing your brand with custom banners.
To add banner images to your WooCommerce Cart and Checkout pages, follow these steps:
Go to your Cart or Checkout page by navigating to the list of pages in your WordPress dashboard.
You’ll find a meta box where you can upload and configure your banner images specifically for the Cart and Checkout pages.
You can also add SEO alt text and a redirect link to each banner for better user engagement and SEO optimization.
Save your settings, and the banners will be displayed on the respective pages.
This feature allows you to enhance the shopping experience by adding promotional content, offers, or important updates on your Cart and Checkout pages.
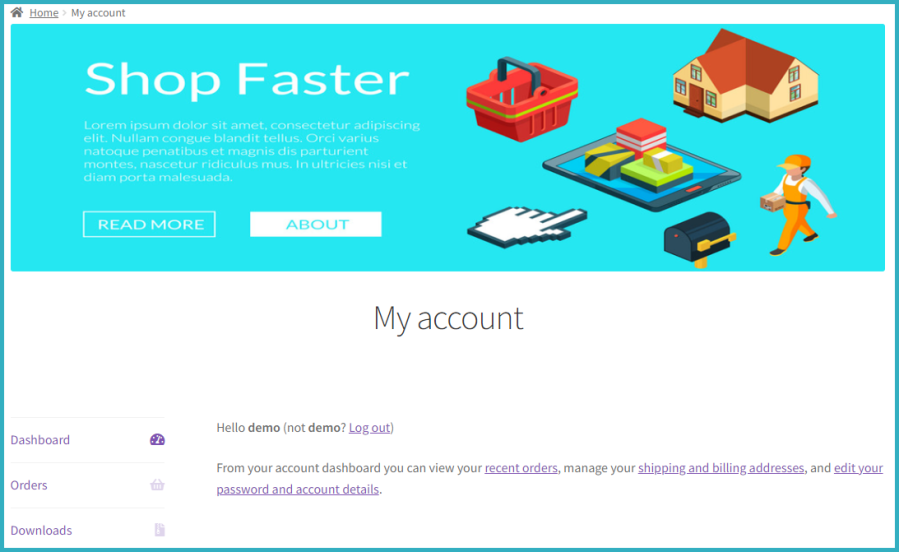
To add banner images to your WooCommerce My Account pages, follow these steps:
Go to the Pages menu in your WordPress dashboard and click on Edit for the desired page.
Upload your banner image, and be sure to add alt text for SEO purposes and a redirection link if necessary.
Save the changes to display the banner on the My Account page.
Alternatively:
Navigate to the list of pages and locate the My Info page.
Click on Edit, then upload your banner image.
Add alt text and a redirect link, and save the page.
This allows you to display customized banners on your My Account pages, enhancing user engagement and providing additional promotional content for logged-in customers.
The Banner Images for WooCommerce plugin offers a range of banner customization options to manage and control the display of banners across your site. You can enable or restrict banners on different product pages, posts, and category pages as needed.
Enable/Disable Banners: Easily toggle the banners on or off for specific pages, product categories, and posts.
Customizable Display Options: Customize the placement and appearance of banners on WooCommerce product pages, category pages, checkout pages, and thank you pages.
Redirection Links: Add custom redirect links to banner images, allowing users to click on the banners and be directed to a specific URL.
Alt Text for SEO: Add SEO-friendly alt text for each banner image to improve search engine rankings.
Responsive Settings: Ensure that banners display properly on mobile, tablet, and desktop devices.
These settings provide full control over where and how your banners appear, enhancing both the functionality and the visual appeal of your WooCommerce store.
The Banner Images for WooCommerce plugin is compatible with many popular themes and page builders, ensuring seamless integration with your WordPress site. Whether you’re using a custom theme or a well-known page builder, the plugin will work smoothly with the following:
Elementor Builder
WP Bakery Builder
Divi Builder
Storefront Theme
Enfold Theme
Avada Theme
Woodmart Theme
Divi Theme
Flatsome Theme
Porto Theme
Xstore Theme
Shopkeeper Theme
The plugin supports multi-language functionality, making it accessible to a global audience. It provides a user-friendly POT language file, allowing easy translation into multiple languages for your convenience. This makes it a great option for stores with international customers.
To add a banner to your product page, go to Products > Edit or Add a New Product. Then, under the Product Data section, select the Product Banner tab, check the box to enable the banner, and upload your image. You can also add a redirection link and alt text for SEO.
Yes! You can add banners to your WooCommerce category pages. Go to WooCommerce > Products > Product Categories, select a category, and you’ll find an option to upload and display a banner image. You can also add SEO alt text and a redirect link for the banner.
No coding is required. The plugin is user-friendly, with all settings available through the WordPress admin panel. Simply select the pages or categories where you want to display banners, upload your images, and configure alt text and redirect links.
Yes, the plugin allows you to add banners to the Checkout and Thank You pages. Simply go to WooCommerce > Settings, navigate to the Banner Image tab, and upload a banner image with the option to add alt text and a redirect link.
Yes, the plugin is compatible with popular page builders such as Elementor, WP Bakery, and Divi. It integrates smoothly with most WordPress themes and builders, allowing you to display banners on product pages, categories, posts, and more without any issues.
Categories
Extension information
Quality Checks
Countries
Languages