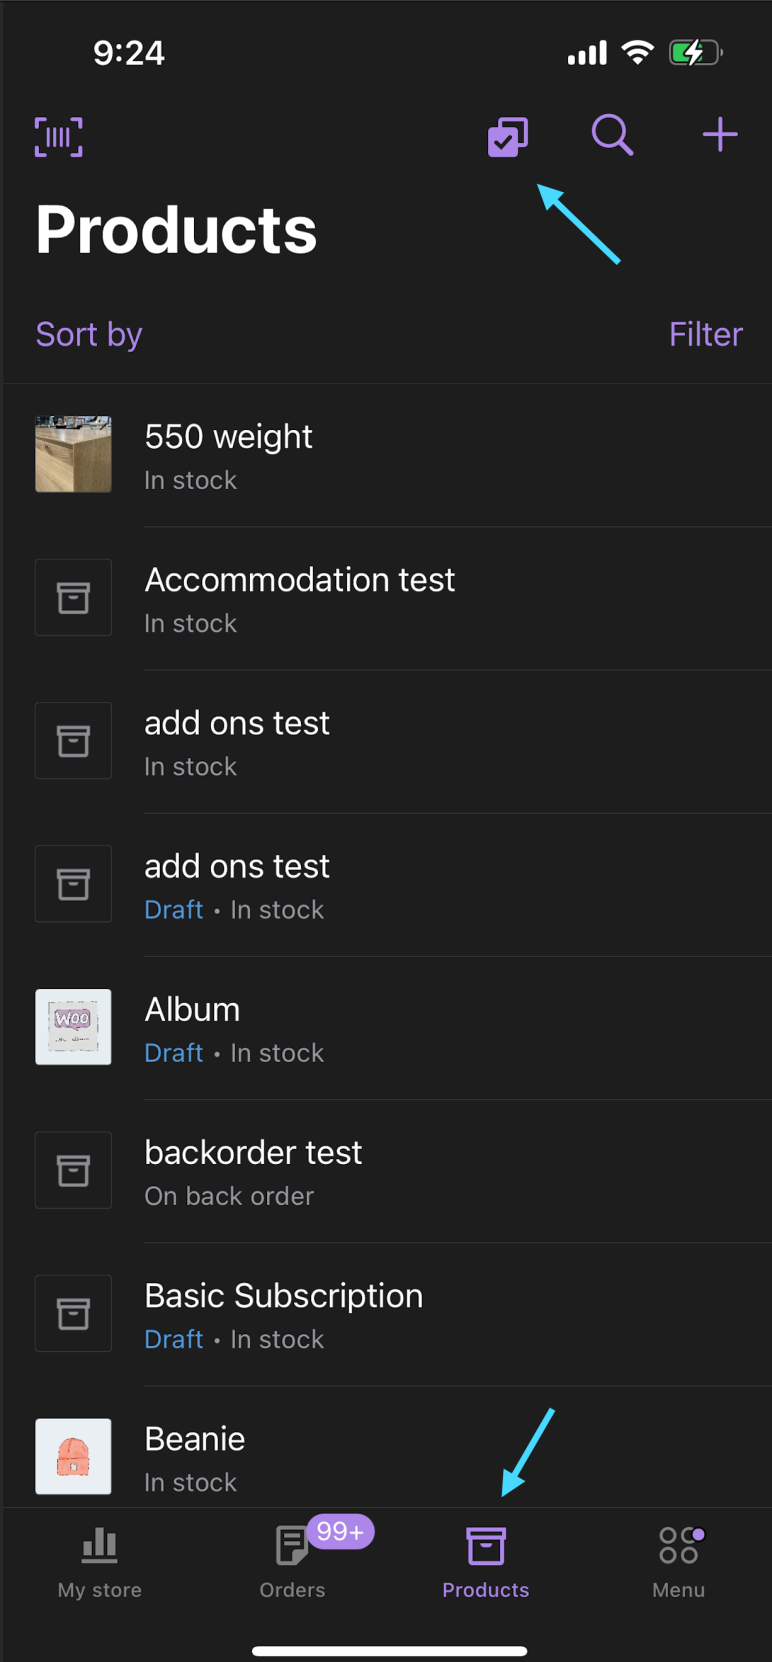
The Products tab allows you to access a list of products that can be sorted or filtered by stock status, product type, or category, search for a specific product, view and manage, and add new ones. To access this view, tap the Products icon on the navigation bar at the bottom-right.
Product Sort and Filter
Products can be sorted ascending or descending by either date or name
- Tap on Sort By below the Product name at the top-left of the view
- Tap Date: Newest to Oldest, Date: Oldest to Newest, Title: Z to A, or Title: A to Z to sort products accordingly
- Once selected, the product list reloads, showing products in the order specified
- Tap anywhere else on the screen to exit the selection without making a change
Products can be filtered by Stock Status, Product Status, Product Type, or Product Category.
- Tap on Filter below the Product name at the top-right of the view
- Select Stock Status to filter by Any, In stock, Out of stock, On Backorder
- Select Product Status to filter by Any, Published, Draft, Pending Review
- Select Product Type to filter by Any, Simple, Variable, Grouped, External/Affiliate.
- Select Product Category to filter by one of the product categories configured in your WooCommerce store
- After each filter selection, either tap Show Products to apply the filters or tap the Back arrow (top-left) to view and select more filters
- While filters are active, a filter count is shown on the Product page next to Filter, and Clear All appears as an option in the Filters view
- To reset all Product filters, tap Filters, then Clear All, followed by Show Products
Product Search
To search for specific Products:
- Tap the Search icon in the top toolbar
- Begin typing. The search will look for matching terms in Product names
- Tapping on the SKU tab will allow you to search for products using their SKU
If a product has an SKU assigned to it, you can also search by scanning its barcode. To do so, press the Barcode icon at the top-left of the toolbar. Scan the product’s barcode using your device’s camera, and the matching product will show.
View and Manage Products
View Products
To view a product in detail, tap an individual product on the Products list.
The Product detail screen provides details on:
- Product images: add or remove images
- Product name
- Product long description
- Promote with Blaze
- For Variable products: adding and managing variations
- For Variable products: adding and managing variation attributes
- For Grouped products: add/remove products in the group
- Price: regular price, sale price, sale schedule (from/to), tax status, tax class
- Product reviews
- For External/Affiliate products: Product link, product URL, button text
- Inventory: SKU, Manage stock toggle (quantity, backorders), Stock status (in stock, out of stock, or on back order), toggle to limit one per order
- Categories: assign, unassign, add category
- For Downloadable products: Downloadable files: add, remove, file URL, File Name
- Product short description
- Product Type: Physical, simple virtual, variable, grouped, external
You can update the prices across all product variations simultaneously for Variable products. You will find the option for bulk updating the prices by selecting Variations and then tapping the ellipsis menu at the top-right of the screen.
At the bottom of each Product detail view is a link to Add more details to add the following (visibility depends on product type):
- Shipping: weight, length, width, height, shipping class
- Tags: add a tag, or select from tags existing in your WooCommerce store
- Linked products: upsells, cross-sells
- Downloadable files: from the device or WordPress Media Library, enter the file URL
Add a Product
Adding a product in the app requires data similar to adding a product to your WooCommerce store. Follow the steps outlined below to add a product via the app:
- From the Product list view, tap the + icon at the top-right of the screen
- Select from Simple physical product, Simple virtual product, Variable Product, Grouped Product, or External product
- Fill in the relevant fields
- Tap Add more details to add, as required by your product, shipping weight and dimensions, categories and tags, a short description, and linked products
- Under the ellipsis menu at the top-right of the screen, there are options to Save as draft, Product Settings, or to cancel the product creation. Product Settings contain familiar WooCommerce options:
- Status
- Visibility
- Catalog Visibility
- Virtual product toggle
- Downloadable product toggle
- Enable review toggle
- Slug
- Purchase Note
- Menu Order
- Once the new product configuration is completed, click Publish at the top-right of the screen
Share or Delete a Product
A published product can be shared, and a product with any status can be deleted.
To delete a product:
- Enter the Detail view of the product
- Tap the ellipsis menu at the top-right of the screen
- Select Delete
- A Remove product prompt appears
- Tap Move to Trash to confirm or Cancel to exit
- Confirming will move the product to the trash and return you to the Product list view
- Cancelling returns you to the product detail view
To share a published product:
- Enter the detail view of the product.
- Tap the ellipsis menu at the top-right of the screen.
- Select Share.
- Choose a sharing method from those offered (variety depends on apps installed on your device).
Bulk updating products
↑ Back to topThe WooCommerce Mobile app allows you to bulk update the status and price of multiple products at once.
To bulk update products:
- Enter the Products list view, and tap the checkbox icon at the top of the screen
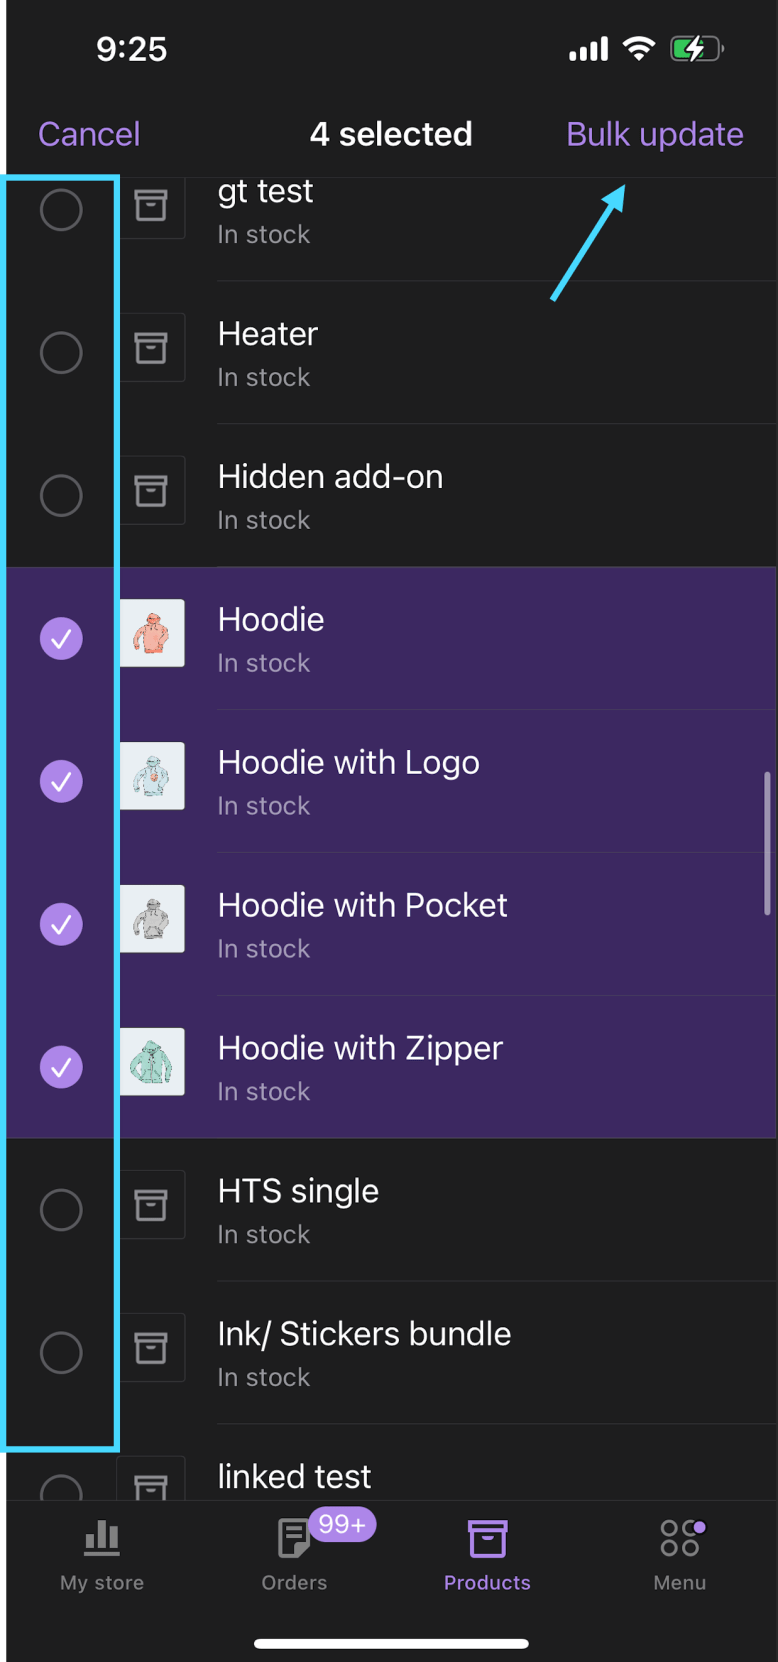
- Tap on the products you’d like to edit, then press Bulk Update on the top-right
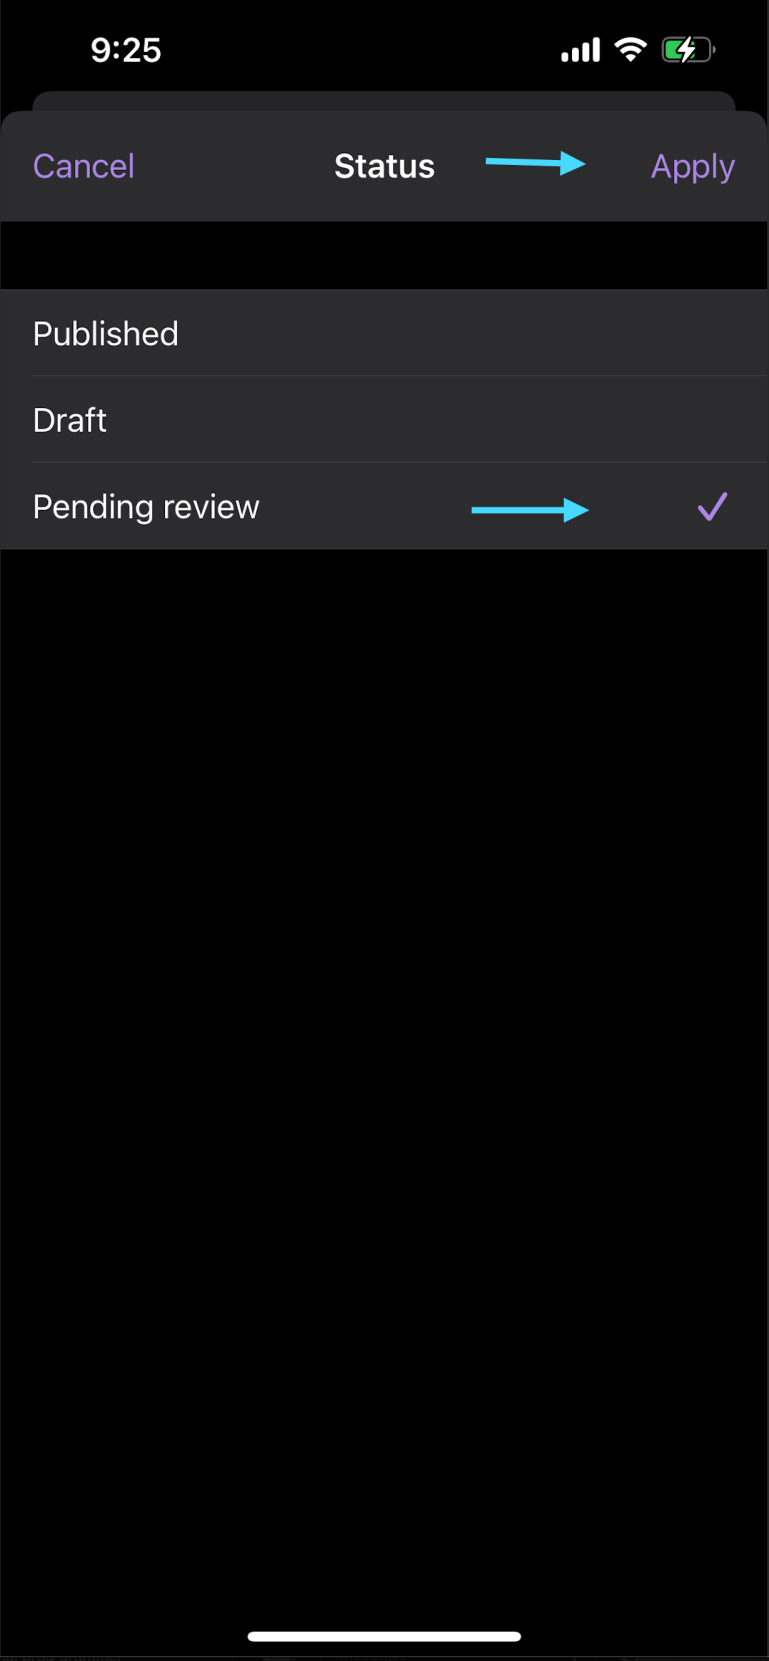
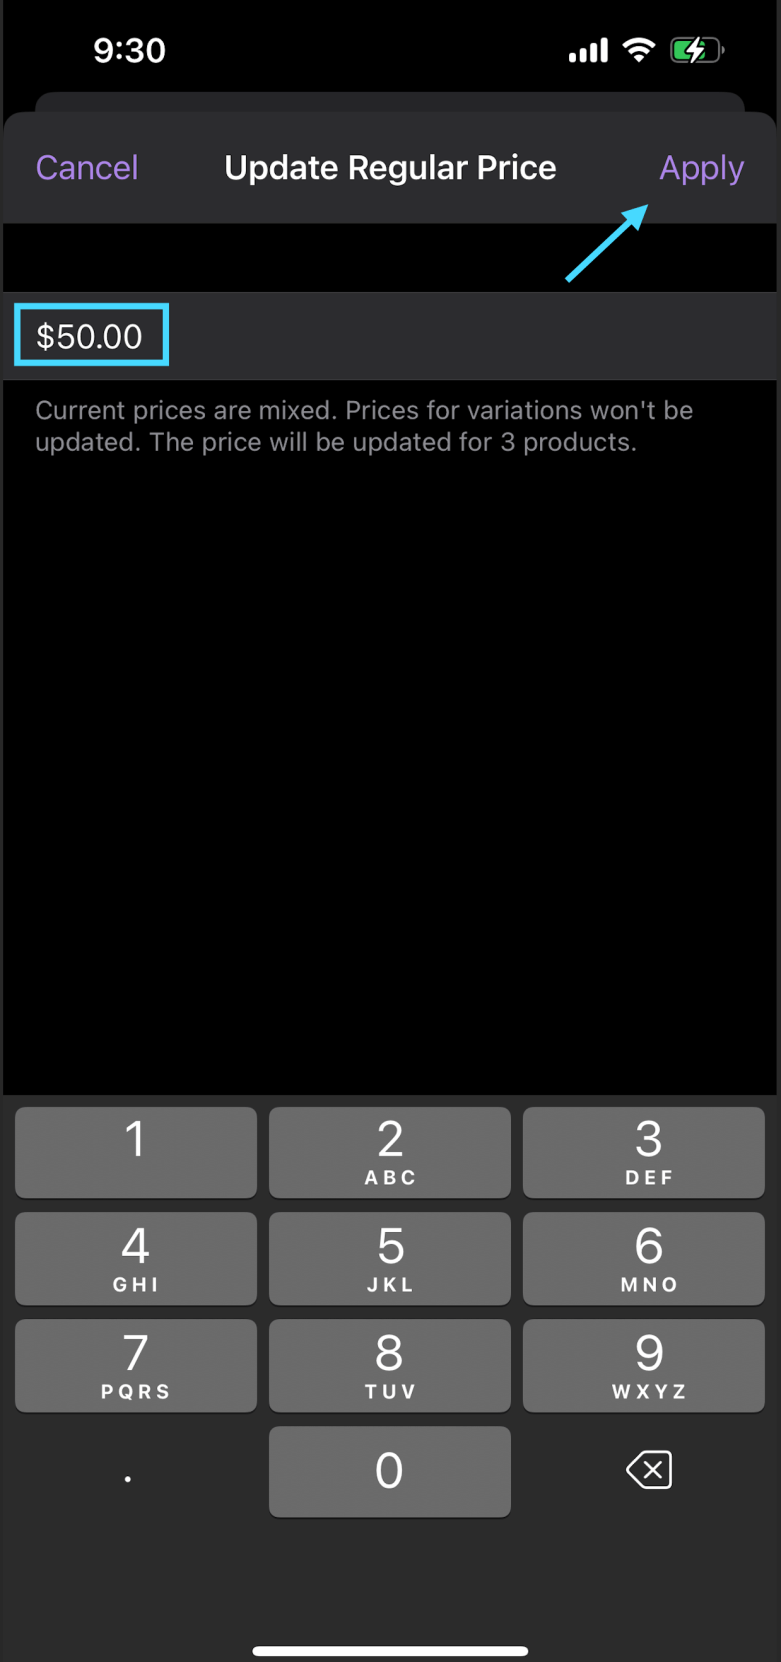
- Tap on what you’d like to update: the status of the product (to Published, Draft, or Pending review) or the product’s price
- Once changes are made, press Apply in the top-right
- You’ll see a message appear when the changes have been successfully made

Menu
↑ Back to topThe Menu tab is home to admin tasks, including switching stores, accessing your store’s WooCommerce Admin, your store view, reviews, and app settings. To access this view tap the Menu icon on the navigation bar at the bottom-right.
- The Menu view is headed by the store details the app is currently connected to. The name and URL of the store are visible at a glance. The Switch store link will allow switching to another store
- The Settings button at the top of this view leads to app Settings
- Blaze – create Blaze Campaigns to get your products seen by millions
- WooCommerce Admin – launches your WordPress Admin in an in-app browser to perform any tasks the app might not natively support. Click Done at the top-left to exit this view
- View Store – launches the customer-facing view of your store in an in-app browser. Click Done at the top-left to exist this view
- Coupons – create and manage your store’s coupons
- Reviews – manage your product reviews
- Customers– view information about any customer, including their number of orders, total spent, average order amount, and general location information
Still experiencing issues?
↑ Back to topIf you’re using the Jetpack plugin to connect the app to your site, make sure that the Jetpack connection is active and working correctly. You can verify some known issues or try reconnecting your site.
If you’re still having difficulty, contact support from within the app by going to Menu > Settings > Help & Support > Contact Support.