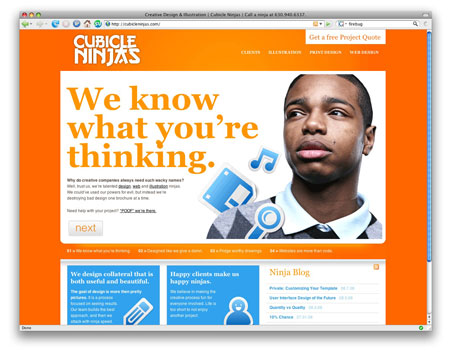
This is a guest post by Josh Farkas, King Ninja at Cubicle Ninjas. It has been modified from it’s original version to suit the newest version (v1.1) of VibrantCMS.
WooThemes are wonderful because they look beautiful out of the box. But if you’d prefer to customize them to your taste they’ve built-in the tools to make that very easy. Here are a few tips I learned first-hand when I built our new Cubicle Ninja’s website with the VibrantCMS theme.
Let’s pretend we’re launching a fun new website about an upcoming war between kittens and mankind. We’ve installed WordPress, followed the detailed directions provided by the WooThemes team to install the VibrantCMS theme, and we were ready to add in our own imagery.
Using Large Images
By default the featured post area will grow vertically to match your image, but horizontally, your image will overflow into the next featured panel. Take a look at the left side of the image above as an example.
Is there an easy way to add in image greater then 340 pixels wide without this issue?
1. Go to Manage > Pages and locate the page with the problem image.
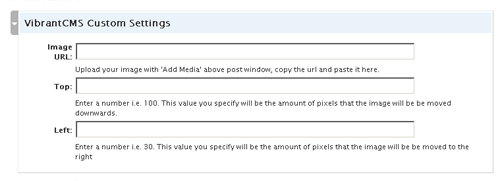
2. Find “VibrantCMS Custom Settings” where we’d originally placed our image URL. Located here are two fields, “Top” and “Left”. We will use these to adjust where our image is located.
3. Place a value you’d like to move your image into the field labeled “Left”. For example -50 moves your image 50 pixels to the left.
4. Hit save to update this featured panel.
5. View your page to see how you did. You can keep guessing and checking until your image fits perfectly.
Editing the Background
We now have our custom images snuggly in place. Would it be possible to customize our background color or image?
Absolutely. As a matter of fact, if you can customize this you’ve learned how to customize any element of your theme – the same rules apply. We’ll be using an amazing plug-in for Firefox that helps us see what we’ll need to edit. This tool is called Firebug. Click here to install your copy before we begin.
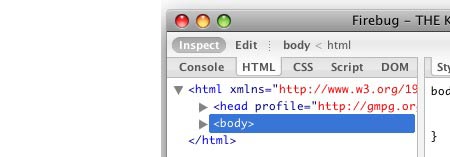
1. With Firebug, finding out what the code is behind any part of our website is as easy as clicking. Let’s open Firebug by going to Tool>Firebug>Open in New Window within Firefox.
2. At the top-left of Firebug there is an menu item called “Inspect”. Let’s click this.
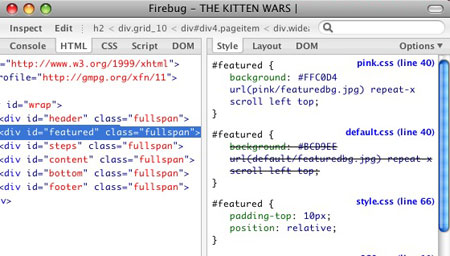
3. As we run our mouse over the page we can see a blue outline appearing. These are the hidden elements of your webpage. If we mouse-over the top of our background and click, we see the specific code that controls this area.
4. In Firebug’s top right corner it displays where this code is located. This class is located in a file called “pink.css”. All of the template variations have their own CSS file. This controls the look and feel for that specific style. Use a FTP program to find the folder where these CSS files are located.
It should look close to this:
www.yourwebsitehere.com/wp-content/themes/vibrantcms/styles/
5. Next, use a text editor to open the “pink.css” file.
6. Once inside look for an entry that matches our Firebug name, “#featured”. It should look like this:
#featured {
background: #ffc0d4 url(pink/featuredbg.jpg) repeat-x top left;
}
7. Looking at this class we can see how quickly we can modify our featured area:
“#FFC0D4” is the pink in our background, by changing this value we will modify the color
“url(pink/featuredbg.jpg)” is referencing the gradient image across the top of the featured area
“repeat-x scroll left top” tells the image to repeat horizontally and start at the top left
8. Let’s say we like our background gradient image, but we’d like there to be repeating text in this area. This would be as simple as finding the referenced image above and replacing it. (If you’re using a different style then Pink, your featured background image will be located in the folder name of that style.)
9. We can find this image at:
www.yourwebsitehere.com/wp-content/themes/vibrantcms/styles/pink/featuredbg.jpg
10. Edit and replace the old version of “featuredbg.jpg”. Your website now has a new repeating background image.
And that’s it! We’ve only begun editing our Kitten Wars website, and it looks very rough, but you can see how quickly we could change almost every aspect of the featured panel. And with your knowledge of Firebug exploring the remainder of your website should be that much easier.
About


This post is very helpful. Hope to see more.
useful. But how do I removing the padding on the right of the image?
Does this apply to the LiveWire theme? I can’t find the user manual for this theme.
Can you send me a lnk?
Alan F.
Thank you so much for this fantastic post, Josh. I LOVE what you guys have done with your cubicle ninja site, and whilst I’m a million miles away from having the necessary skills or experience to do something even half as impressive, I’m so grateful to you for you taking the time and trouble to post advice which at least gives me a starter for ten. Much kudos – thank you!
Louise
Josh, great post. And I have to give you guys lots of credit for that wonderful job on your site. The great thing is it’s not just pretty, but it also effectively communicates its message.
Congrats!
Yeah this is great… It would be cool to see something like this for all the themes, I know the lessons here can be used elsewhere but sometimes you just want to click on the theme you bought and get help. great post
Thanks so much for the kind words everyone! I hope this introduction gets people playing with new ideas about the near endless possibilities for theme customization…
And my hat is off to everyone at WooThemes for building the best themes in the WordPress community!
Rétroliens/Pings
Tendances
Prepare your business for 2026 EU tax changes
By Lynn J •
Stripe’s Agentic Commerce Suite launching with WooCommerce support from day one
By Jay Walsh •
From artisan to everywhere: How Melt Chocolates scaled with storytelling, Woo, and Klaviyo
By Vanessa Petersen •
Never miss a beat — join our mailing list
Please enter a valid email.
View our privacy policy. You can unsubscribe anytime.
There was an error subscribing; please try again later.
Thanks for subscribing!
Emails will be sent to
You're already subscribed!
Emails are sent to