This documentation applies exclusively to the PayPal Payments plugin (WooCommerce PayPal Payments). It does not apply to other WooCommerce payment gateways.
Important update for merchants:
Card-testing attacks have become increasingly common across ecommerce platforms. Native bot protection has been implemented directly within the PayPal Payments plugin, helping safeguard your checkout without adding friction for real customers.
Merchants using the PayPal Payments plugin must enable this feature immediately to protect their store from card-testing attacks and maintain compliance with card networks.
Automated card-testing (carding) bots can flood your checkout with hundreds of failed authorizations, spam confirmation emails, and wasted resources. The PayPal Payments plugin includes built-in bot protection for PayPal’s payment endpoints to reduce this risk without adding friction for legitimate customers.
CAPTCHA for PayPal Payments
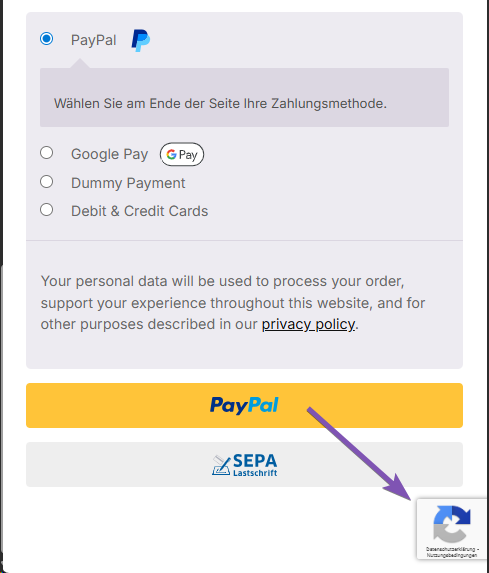
↑ Back to topThis CAPTCHA feature is built into the PayPal Payments plugin and protects PayPal-specific payment endpoints only. It protects PayPal’s payment endpoints including Advanced Card Processing, so coverage is precise, lightweight, and tailored to PayPal merchants. It works across Classic checkout, Checkout Blocks, and PayPal express buttons.
What is Google reCAPTCHA?
↑ Back to topGoogle reCAPTCHA is a security service that helps websites distinguish between real humans and automated bots.
- reCAPTCHA v3 runs invisibly in the background and assigns each visitor a risk score based on behavior.
- reCAPTCHA v2 presents a visible challenge (a checkbox or image puzzle) when more verification is needed.
The PayPal Payments plugin uses both versions together to create a simple checkout experience while blocking automated attacks on PayPal payment methods.
How it works
↑ Back to topThe PayPal Payments plugin uses a layered CAPTCHA system:
1. Google reCAPTCHA v3 (invisible check)
- Automatically evaluates visitor behavior.
- Each visitor receives a score between 0.0 and 1.0, where lower scores indicate more suspicious behavior.
- Uses a configurable score threshold to decide whether to accept the visitor as human.
- Runs silently with pre-generated tokens to ensure a smooth checkout.
Understanding the score threshold
The score threshold determines when visitors move from v3’s invisible assessment to the v2 challenge.
- Default recommended threshold: 0.5
- Scores above the threshold → treated as human, no challenge shown
- Scores below the threshold → v2 challenge appears
Merchants can raise the threshold to be more strict (more challenges) or lower it to be more permissive (fewer challenges).
2. Google reCAPTCHA v2 (visible challenge)
- Shows only when a visitor’s v3 score falls below the threshold.
- Presents a simple checkbox or challenge to confirm they’re human.
Why this matters
↑ Back to topFailure to deploy fraud-prevention controls may expose your business to automated bot attacks, card-testing fraud, and non-compliance across all major card networks.
Non-compliance can result in:
- Per-transaction fines that accumulate monthly
- Payment processing restrictions
- Merchant account termination
- Placement on industry-wide monitoring or restriction lists
- Potential loss of the ability to accept credit cards
- Bank acceptance criteria reduce legitimate traffic
Why use this instead of a general CAPTCHA plugin
↑ Back to topGeneral CAPTCHA plugins often do not protect PayPal’s payment routes where automated payment attempts occur. The PayPal Payments plugin’s CAPTCHA integration targets PayPal’s exact endpoints, minimizing false positives while guarding the most critical parts of the checkout flow for PayPal transactions.
Requirements for PayPal Payments CAPTCHA
- Google account
- Google reCAPTCHA v2 and v3 keys (Site Key and Secret Key)
- PayPal Payments plugin version 3.3.0 or newer
Setup instructions for PayPal Payments CAPTCHA
- Install or update the PayPal Payments plugin to the latest version.
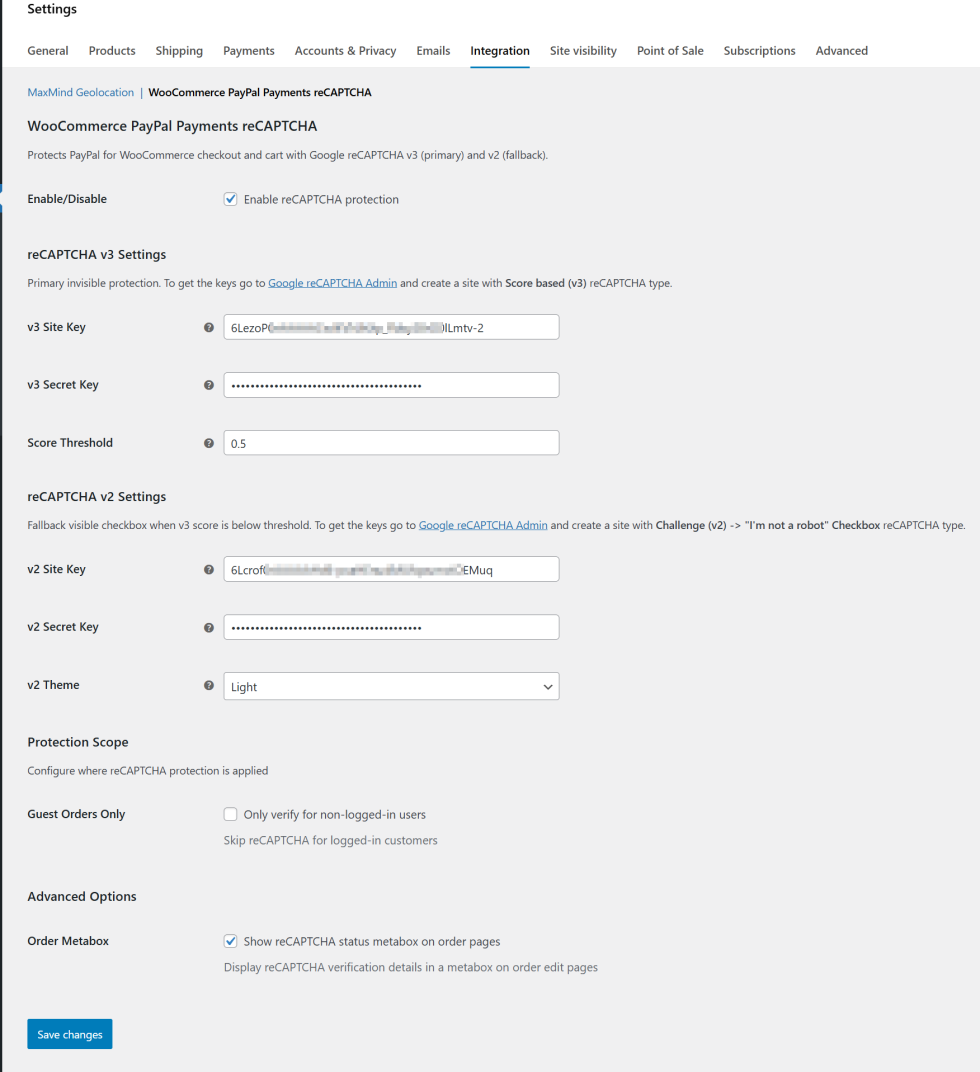
- In your WordPress dashboard, go to WooCommerce → Settings → Integration → WooCommerce PayPal Payments reCAPTCHA.
- Check the option Enable reCAPTCHA protection.
- Open the Google reCAPTCHA admin console: https://www.google.com/recaptcha/admin
- Create keys for your domain:
- Generate Site Key and Secret Key for reCAPTCHA v3.
- Paste them into the v3 Site Key and v3 Secret Key fields.
- Keep the Score Threshold at 0.5 to start. Adjust as needed based on customer behavior.
- Generate Site Key and Secret Key for reCAPTCHA v2 and paste them into the corresponding fields.
- Click Save changes.
After enabling PayPal Payments reCAPTCHA protection
Note
The reCAPTCHA protection will only be active if both v2 and v3 keys were configured.
Once enabled, reCAPTCHA v3 runs silently in the background, and the reCAPTCHA badge should appear in the bottom-right corner of your site.
The reCAPTCHA v2 challenge checkbox will only appear when the visitor’s score is below the Score Threshold configuration.
Additional configuration
↑ Back to topAdditional optional settings allow you to configure PayPal Payments reCAPTCHA protection:
| Setting | Description |
|---|---|
| Guest Orders Only | Only verify for non-logged-in users. We recommend only checking this when the user registration is protected with an alternative reCAPTCHA integration. |
| Order Metabox | Display the reCAPTCHA status metabox on order edit pages, including the v3 score and additional metadata. This information may be useful for developers. |
After correctly configuring your reCAPTCHA API v2 & v3 keys with your preferred configuration, the settings page should look similar to this:
Troubleshooting
↑ Back to top- Legitimate user challenged too often
Increase the v3 score threshold slightly and test again. - Bots still getting through
Lower the v3 score threshold incrementally and confirm via reCAPTCHA dashboard that the v2 fallback is triggering. Review hosting or WAF rate-limit options for an additional layer of protection. - No change after enabling reCAPTCHA protection
Confirm both v2 and v3 keys are configured and valid for the exact domain. Clear any server, CDN, and browser caches. - Unclear reCAPTCHA activity
Navigate to the reCAPTCHA dashboard to review v3 scoring & v2 challenge activity.
Get help
↑ Back to topHave a question or need assistance with the PayPal Payments plugin or its CAPTCHA feature? Get in touch with a Happiness Engineer via the Help Desk by selecting Get Support, Technical support, and PayPal Payments.
Creating a support request requires a WooCommerce.com account. Your request must include a link to your site and a copy of your WooCommerce System Status Report.
After submitting your request, the support team will respond as soon as possible.
Assistance can additionally be sought in the official WordPress.org community support forums. These forums are regularly monitored by our dedicated support team, who are committed to assisting users. In certain circumstances, our team may request creating a private support request to provide more personalized support.