This scenario will walk you through how to use WooCommerce and WooCommerce Bookings to set up availability for multiple people, restrict specific dates and times, require customers to confirm bookings and offer a buffer period for cancellations.
Scenario
↑ Torna in cimaJohn and Jane have a law office. Clients can choose who they want to make an appointment with and select a date and time, excluding holidays. The booking requires the law office to confirm the booking, and customers can cancel their meeting up to 7 days before the appointment. Note that because the law firm requires to approve the booking first before it’s fully booked, payment will not be taken at initial time of checkout.
Requirements:
- Their office is open from 10:00 to 13:00 and from 15:00 to 18:00 for appointments, Monday to Friday.
- Meetings are 1 hour each.
- They also are closed on public holidays, for example, 25th December and 1st January will not be available for booking.
- They want to confirm each booking and they want their clients to be able to cancel the booking a minimum of 7 days prior to the appointment.

Products Used
↑ Torna in cimaSetup and Configuration
↑ Torna in cimaIn this example, before we create the bookable product, we will first set up each attorney’s availability as Resources.
Configure the Resources
↑ Torna in cima- In the sidebar of your WordPress Admin, click on Bookings > Resources.
- Click the Add Resource button. This will take you to a Add New Resource page.
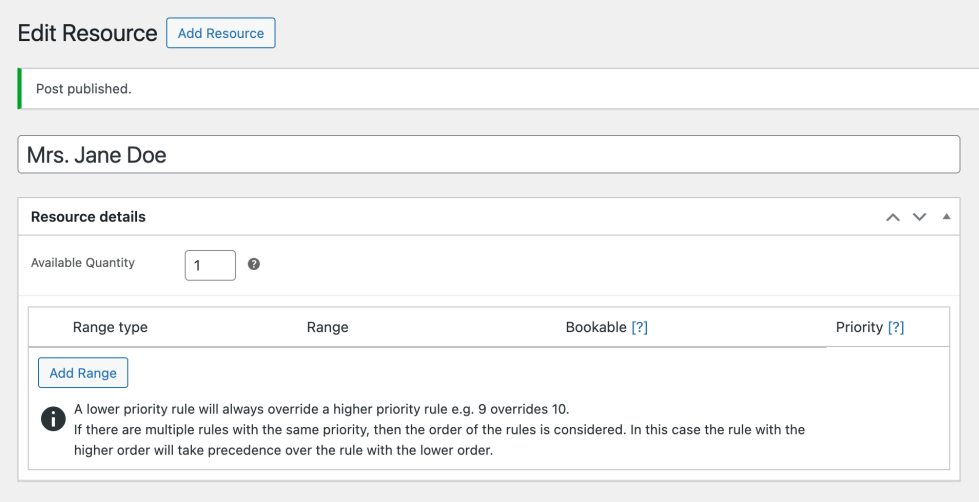
- In our example, we will name the first Resource, one of the lawyers, as Mrs. Jane Doe.
- Set the Available Quantity to
1. Since a lawyer can only be in one place at one time, be sure to set each resource with an Available Quantity of1. We do not need to specify the availability. - Save.
- Go through steps 2 – 5 to add other resources, in this use case that would be Mr. John Doe.
Configure the Store Availability
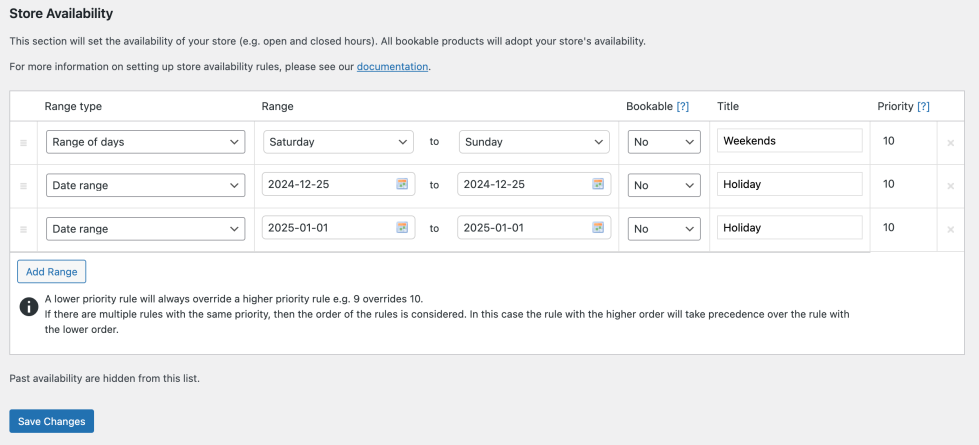
↑ Torna in cima- In the sidebar of your WordPress Admin, click on Bookings > Settings > view the Store Availability tab.
- Click Add Range button and a range rule will show up.
- Under Range Type dropdown, select the
Range of Days. - Set the Range as
Saturday to Sundayand Bookable asNo. - You can specify a title to identify the store availability, such as
Weekend. - Keep the priority as
10. - Go through steps 2-6 to add any other closure dates such as public holidays.
Create the Bookable Product
↑ Torna in cima- In the sidebar of your WordPress Admin, click on Products.
- Click on the Add New button on the top.
- Under Product data select Bookable Product.
- Select the options for Virtual and Has Resources for this use case.
Configure the General Tab
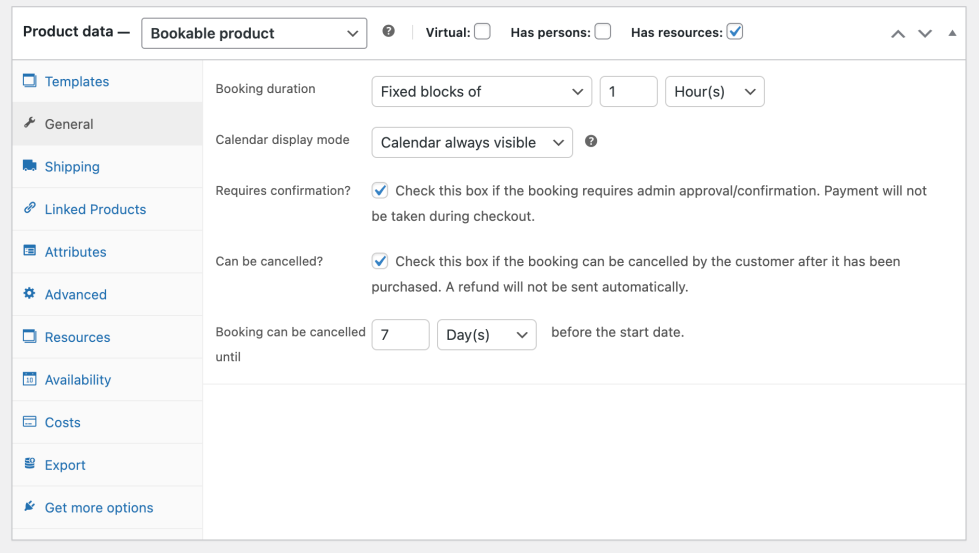
↑ Torna in cimaThese configurations set up a bookable time that is 1 hour in length, requires the store admin to approve the booking before payment is made, and allows the customer to cancel the booking 7 days before the appointment.
- Under the General Tab, set the
Booking durationto afixed blocks of 1 Hour. - Check the boxes for
Requires confirmation?andCan be cancelled?. - Set the
Booking can be cancelled untilto7 days.
Configure the Resources Tab
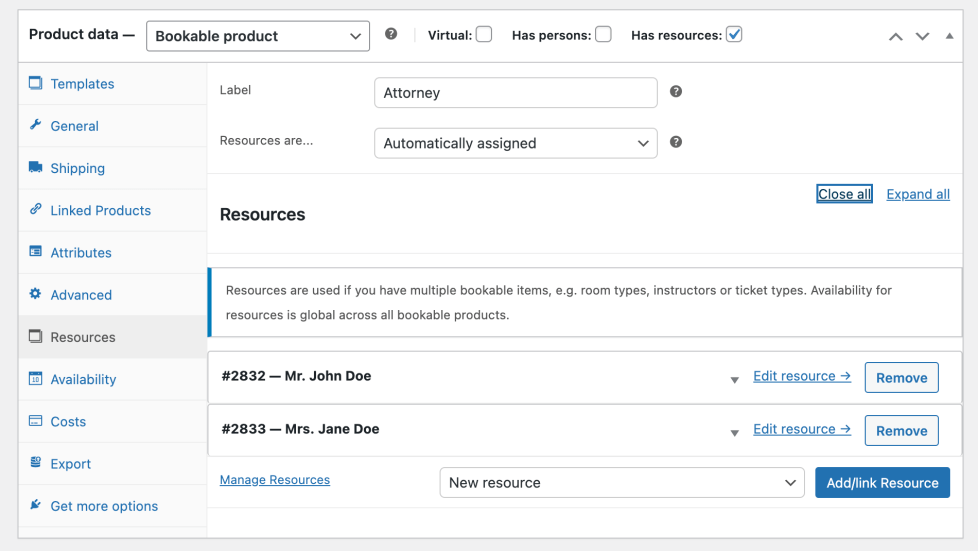
↑ Torna in cima- Select the Resources tab (note: The tab only appears if you selected Has Resources when creating the product).
- Select Add/link Resource to add a resource.
- Name your resource
Mrs. Jane Doewhen the window opens, and select OK. - Add your other resources. In this use case, we will add the resource, Mr. John Doe.
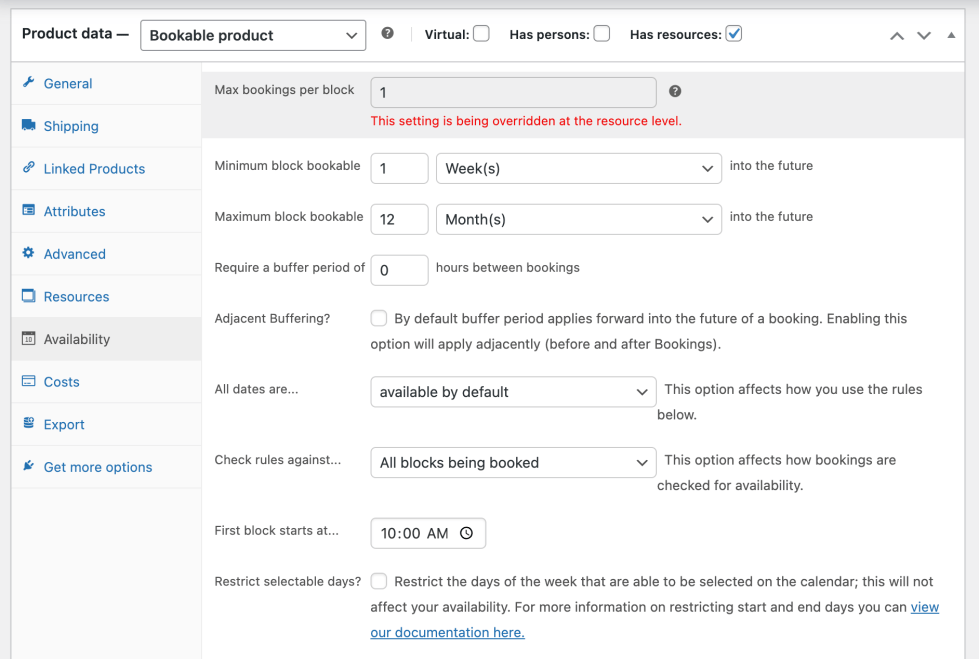
Configure the Availability Tab
↑ Torna in cima- Set the All dates are… to
available by default. Remember, we’ve already set closure date and time rules in the global store availabilities setting above. - Check rules against… set to
All blocks being booked. - Set the First block starts at… to
10 amfor this use case.
Usage
↑ Torna in cimaBelow are details on how the customer and store admin’s experience would be for a booking that requires confirmation from the store admin.
Customer Experience
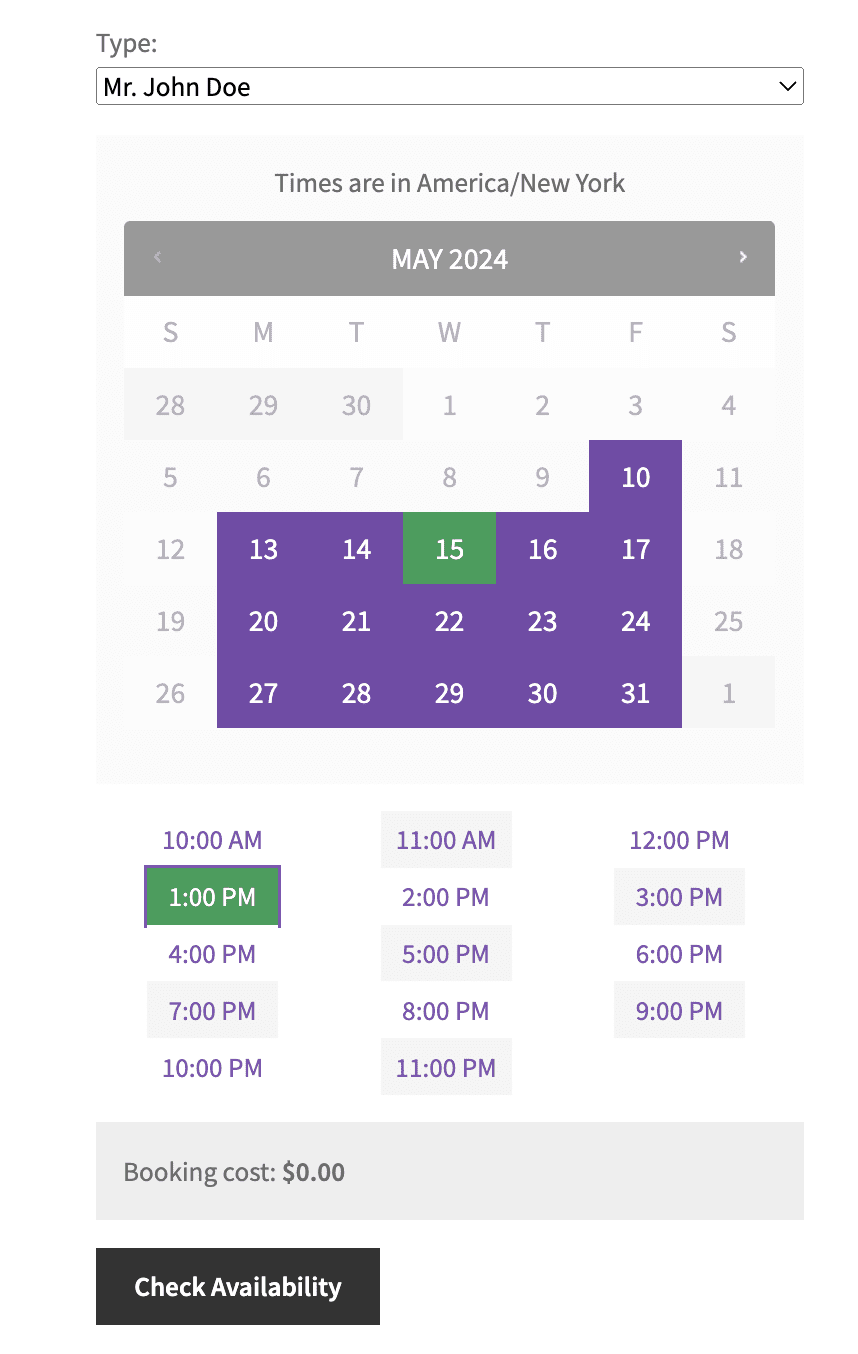
↑ Torna in cimaOn the front end, when the customer books a meeting with the lawyer, here is the customer experience going through checkout:
- The merchant will see a Check Availability button instead of an Add to Cart button (see Image 1 below).
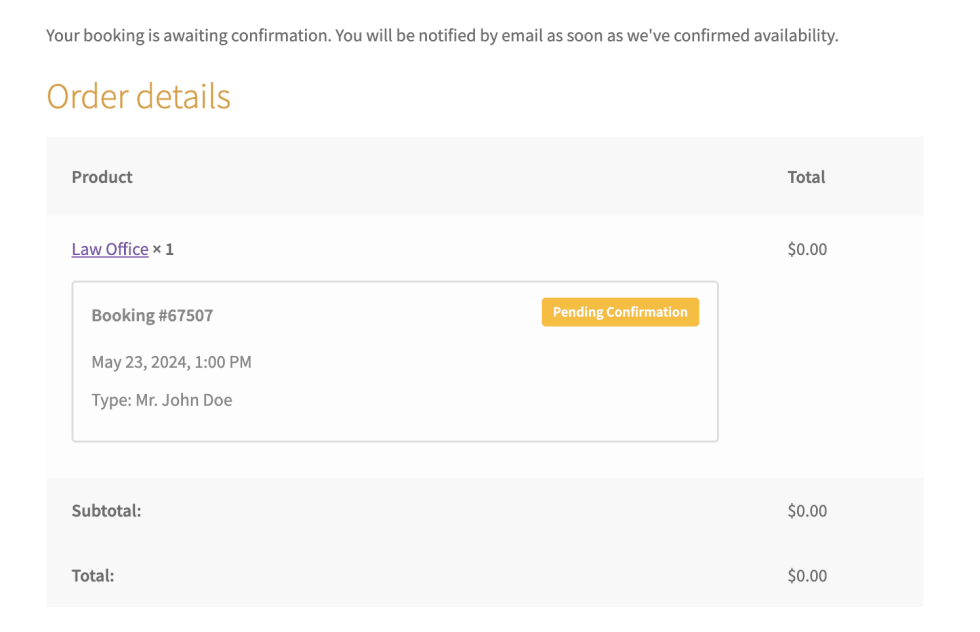
- They will not need to add credit card details at checkout and their booking will be set as Pending Confirmation.
- Upon requesting a booking at checkout, they will be directed to the Order Confirmation page where it will indicate that booking is awaiting confirmation and the customer notified by email as soon as the store admin confirms availability (see Image 2).
- Once the store admin has approved the booking, the customer will receive an email confirming the booking and provided a link to pay for the booking.
Store Admin Experience
↑ Torna in cimaOnce the customer has requested an appointment, the following steps will take place for the store admin to confirm the booking:
- The store admin will receive an email with details and a link to confirm the booking.
- In the WP Admin menu, under Bookings, the store admin will see the
pending bookings. Under the Actions column, they will need to click the check mark to approve the booking. - Once approved, the customer will receive an email to purchase the booking. Then the booking status will go from
ConfirmedtoPaid.

Questions and Support
↑ Torna in cimaSomething missing from this documentation? Do you still have questions and need assistance?
- Have a question before you buy this extension? Please fill out this pre-sales form – please include the name of this extension in your query.
- Already purchased and need some assistance? Get in touch with a Happiness Engineer via the WooCommerce.com Support page and choose this extension name from the “I need help with” dropdown