
The My Store tab provides sales and visitor data and gives insight into sales trends. It’s the default view when launching the app, but can be accessed from any other view by tapping the My Store icon next to the navigation bar at the bottom-left of the screen.
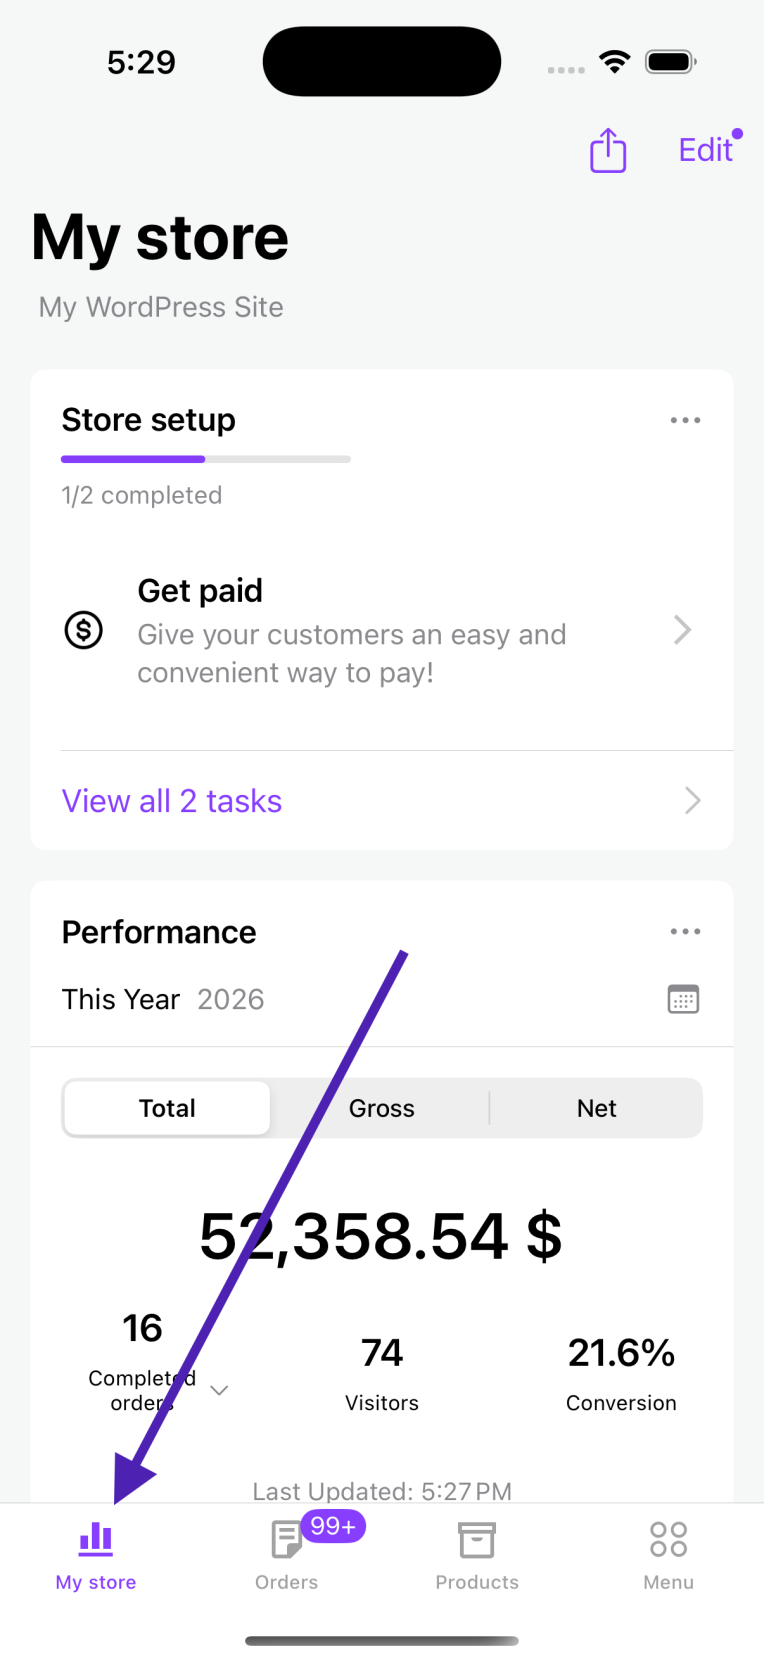
Store Stats
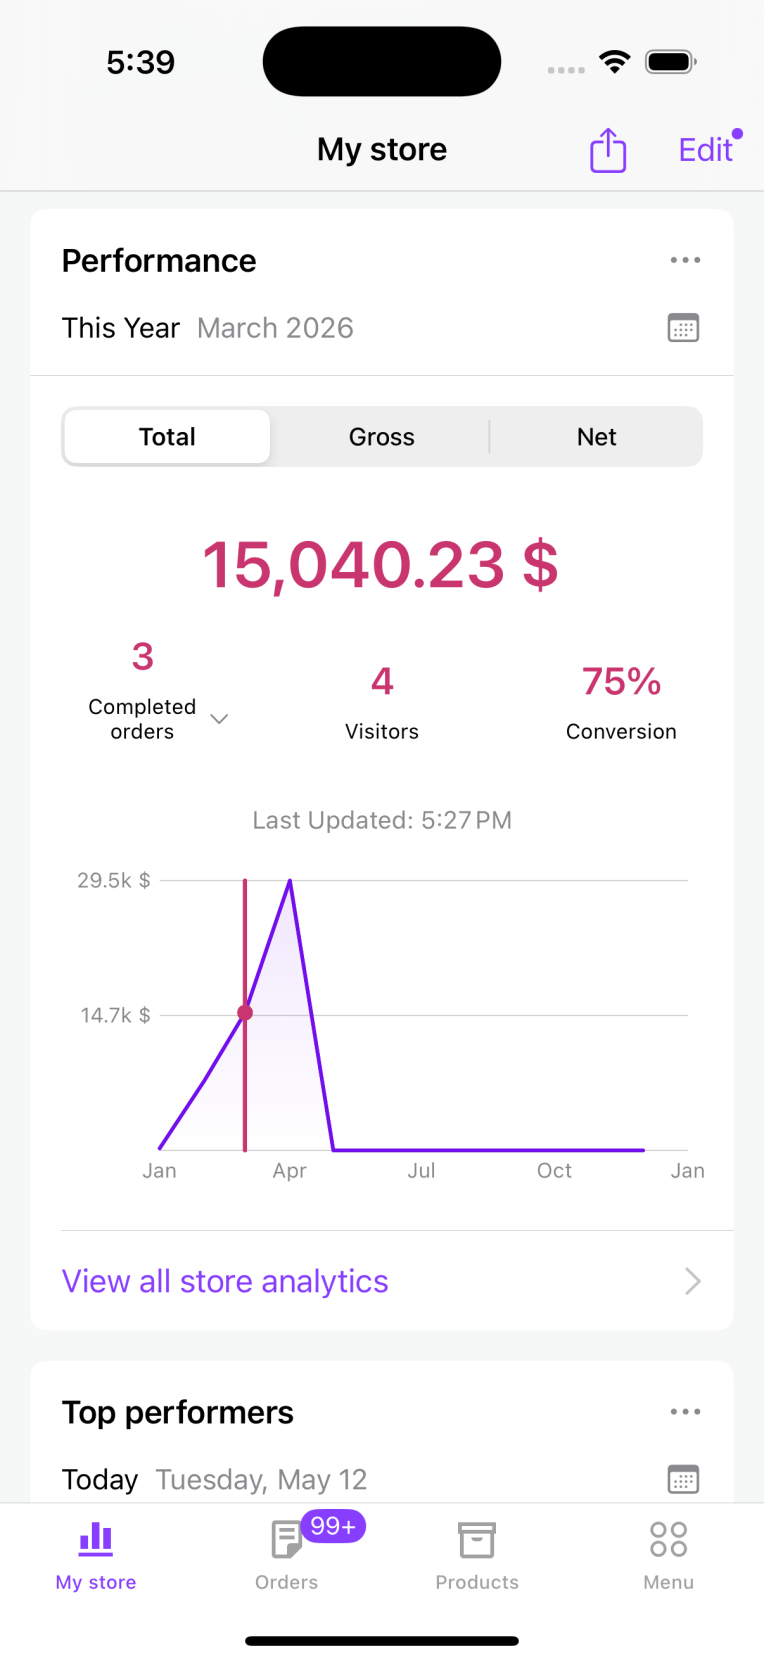
↑ Back to topThe top section of My Store displays your store’s key performance metrics for the selected period:
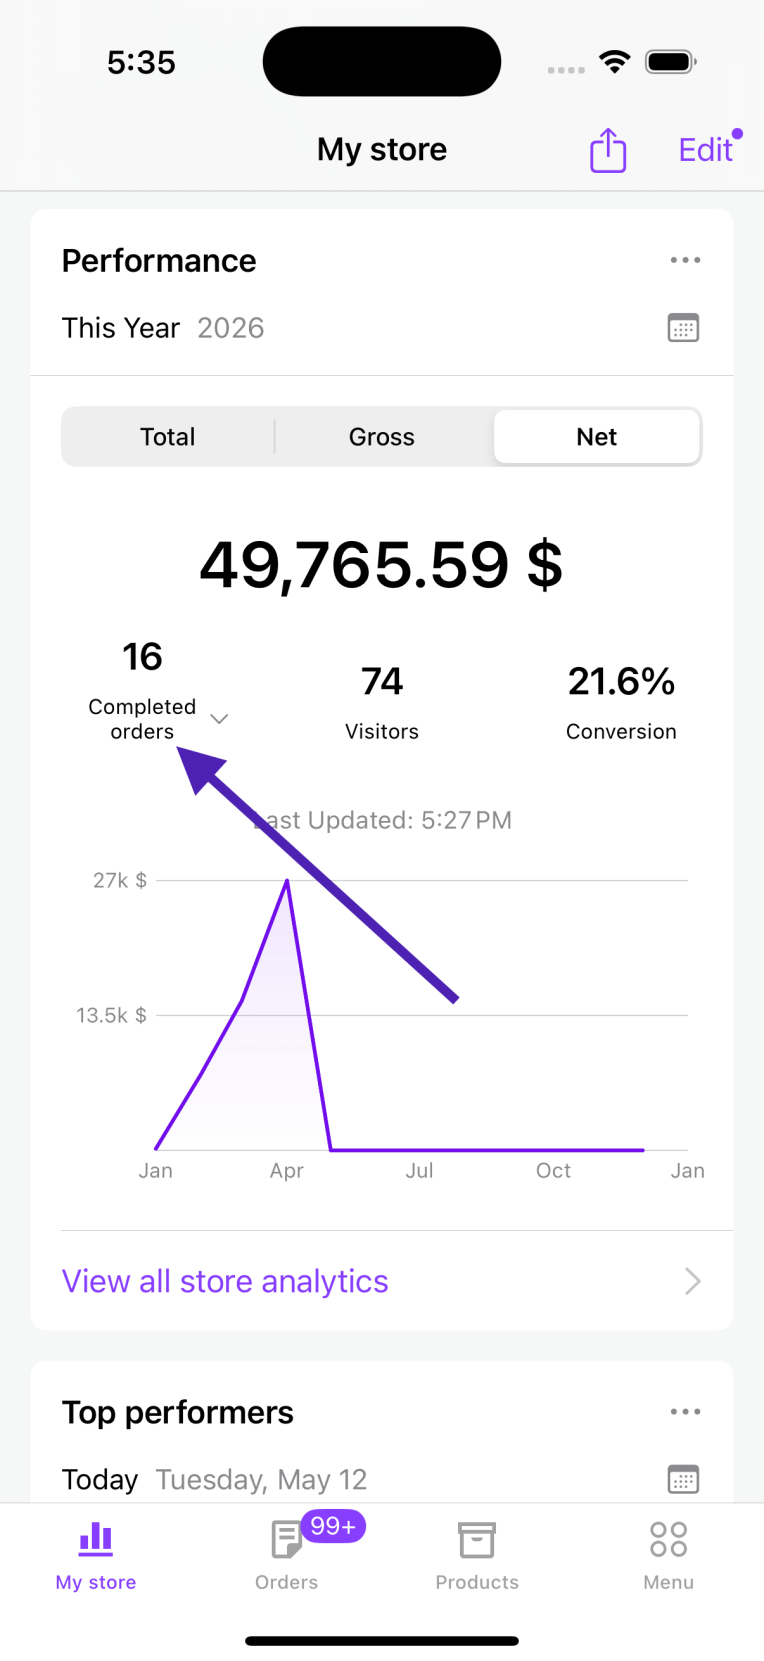
- Orders — Number of orders for the period. The label shows which order date type is active (e.g., “Paid orders”). Tap it to change which orders are included.
- Visitors — Unique visitors to your store (requires Jetpack connection).
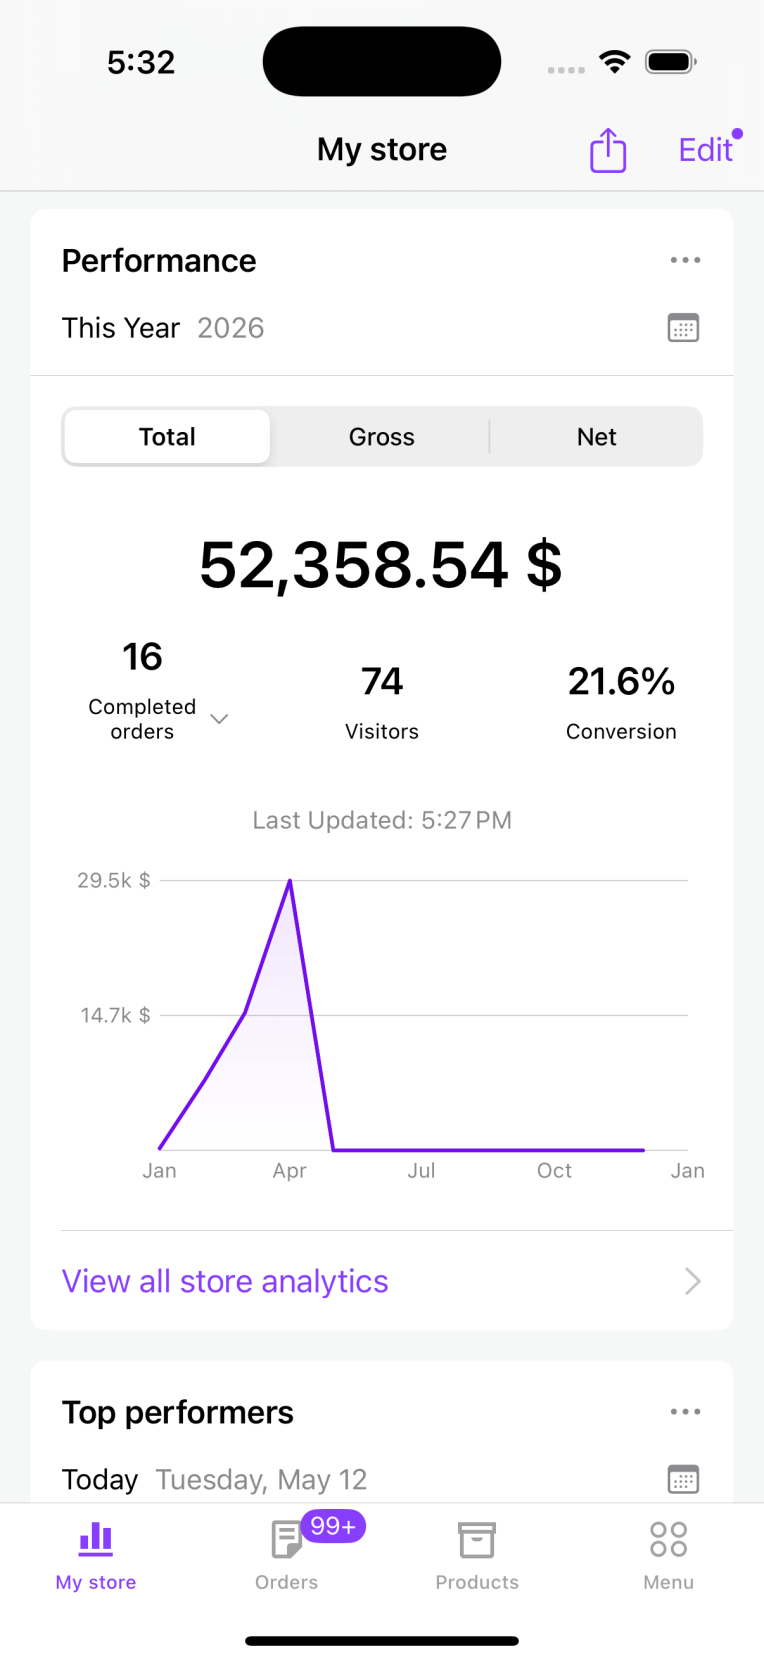
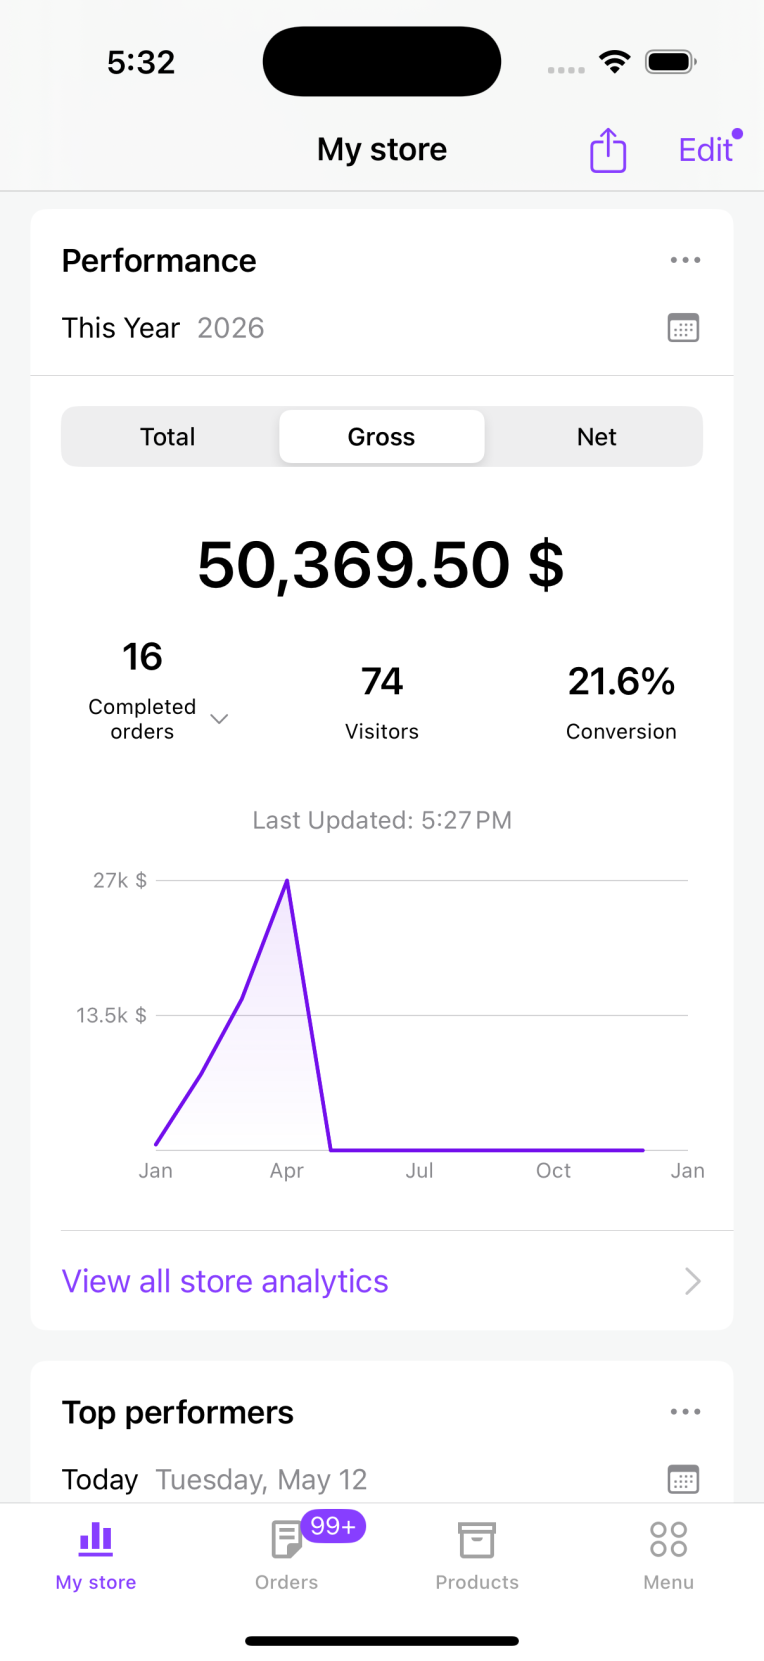
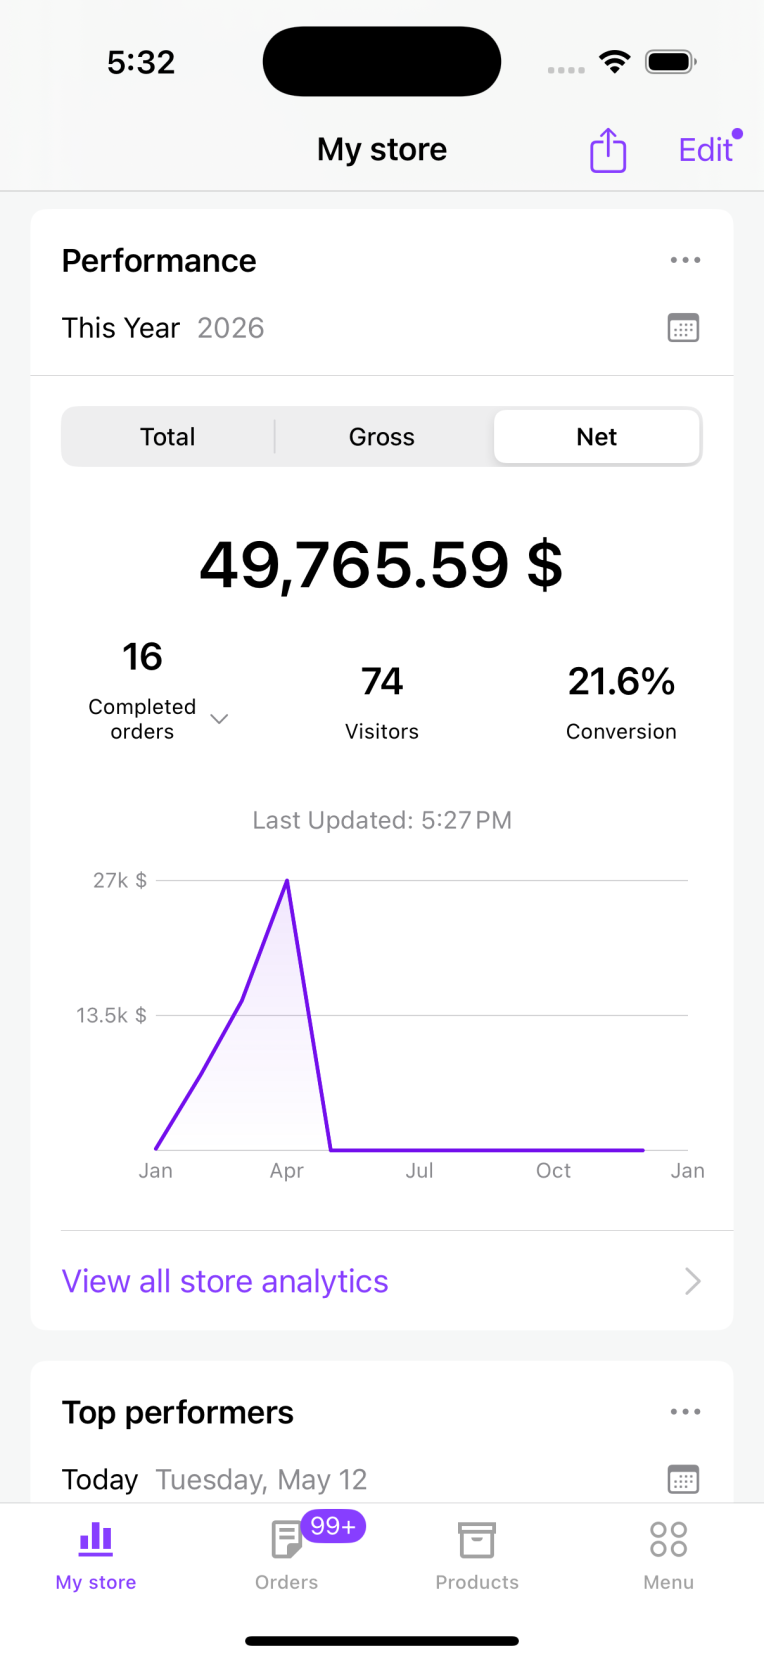
- Revenue — Your store’s revenue for the period. Use the Gross / Net / Total selector at the top of the Performance card to switch between revenue types:
- Total — Gross sales including taxes, shipping, and fees.
- Gross — Total sales before any deductions.
- Net — Gross sales minus returns and coupons. Does not include taxes, shipping, or fees.
Choosing which orders to include
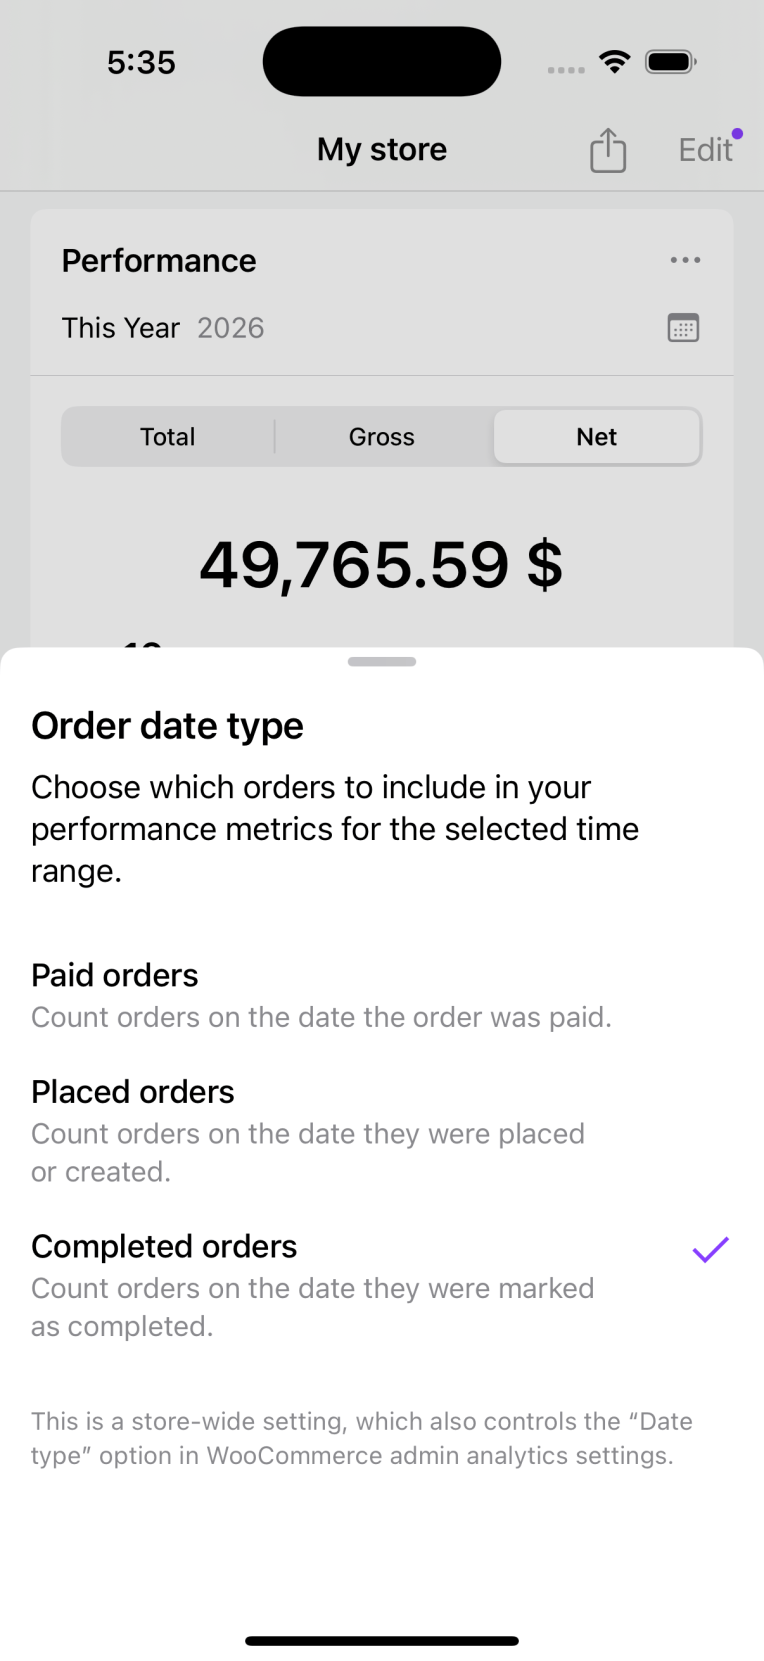
↑ Back to topTapping the order count label opens a bottom sheet where you can choose:
- Paid orders — Count orders on the date the order was paid (or marked as paid).
- Placed orders — Count orders on the date they were placed or created.
- Completed orders — Count orders on the date they were marked as completed.
Important: This setting is store-wide. Changing it in the app also changes the Date type setting in wp-admin → Analytics → Settings, and vice versa. It affects all WooCommerce analytics, not just the mobile app.
Tip for Cash on Delivery (COD) stores
If you use COD or other manual payment methods and see 0 orders or revenue, select “Placed orders.” COD orders don’t record a payment date in the “Processing” status, so they won’t appear under “Paid orders” until manually completed.
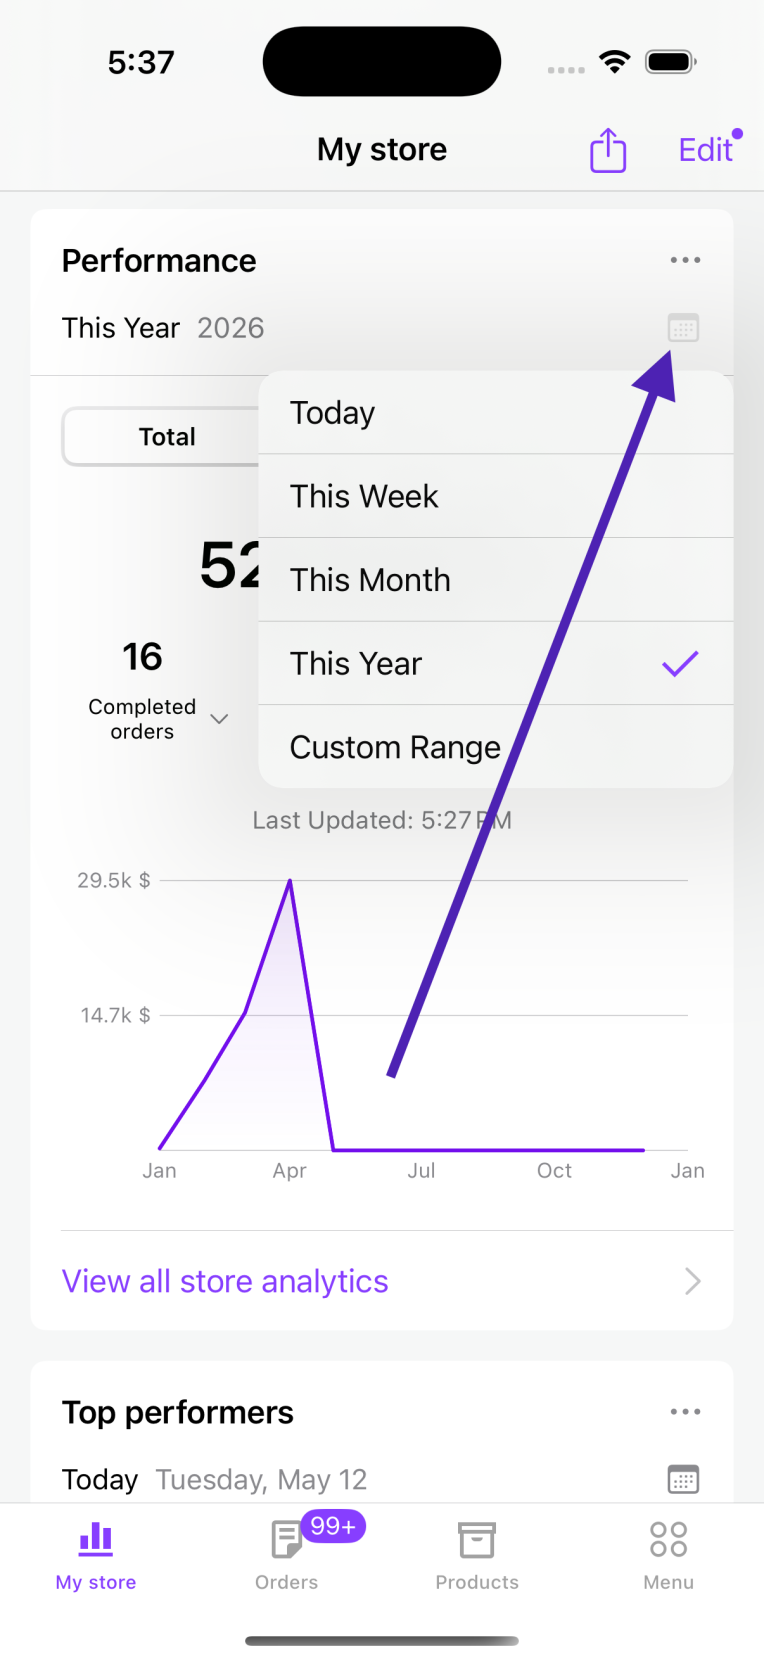
The data can be filtered for Today, This Week, This Month, This Year, or Custom Range by selecting the calendar icon on the top-right of the respective area.
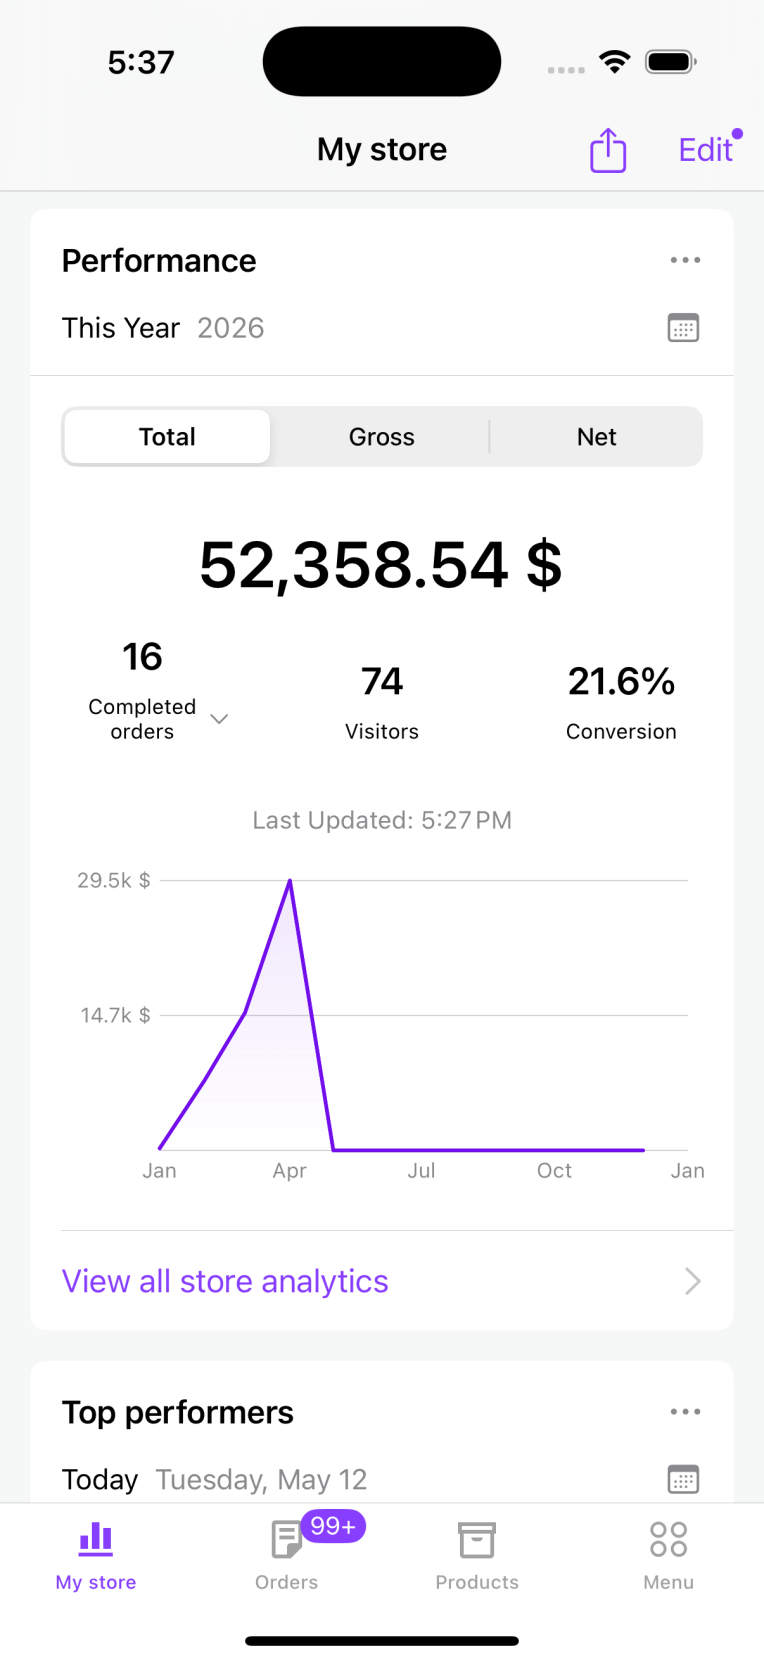
Graphs display an overview of how sales have changed over time. Tap on points in the graph to view that period’s data.
The bottom section displays top-selling products for the corresponding period.
The My Store tab updates each time you open the app or pull down the screen to refresh it manually as needed.
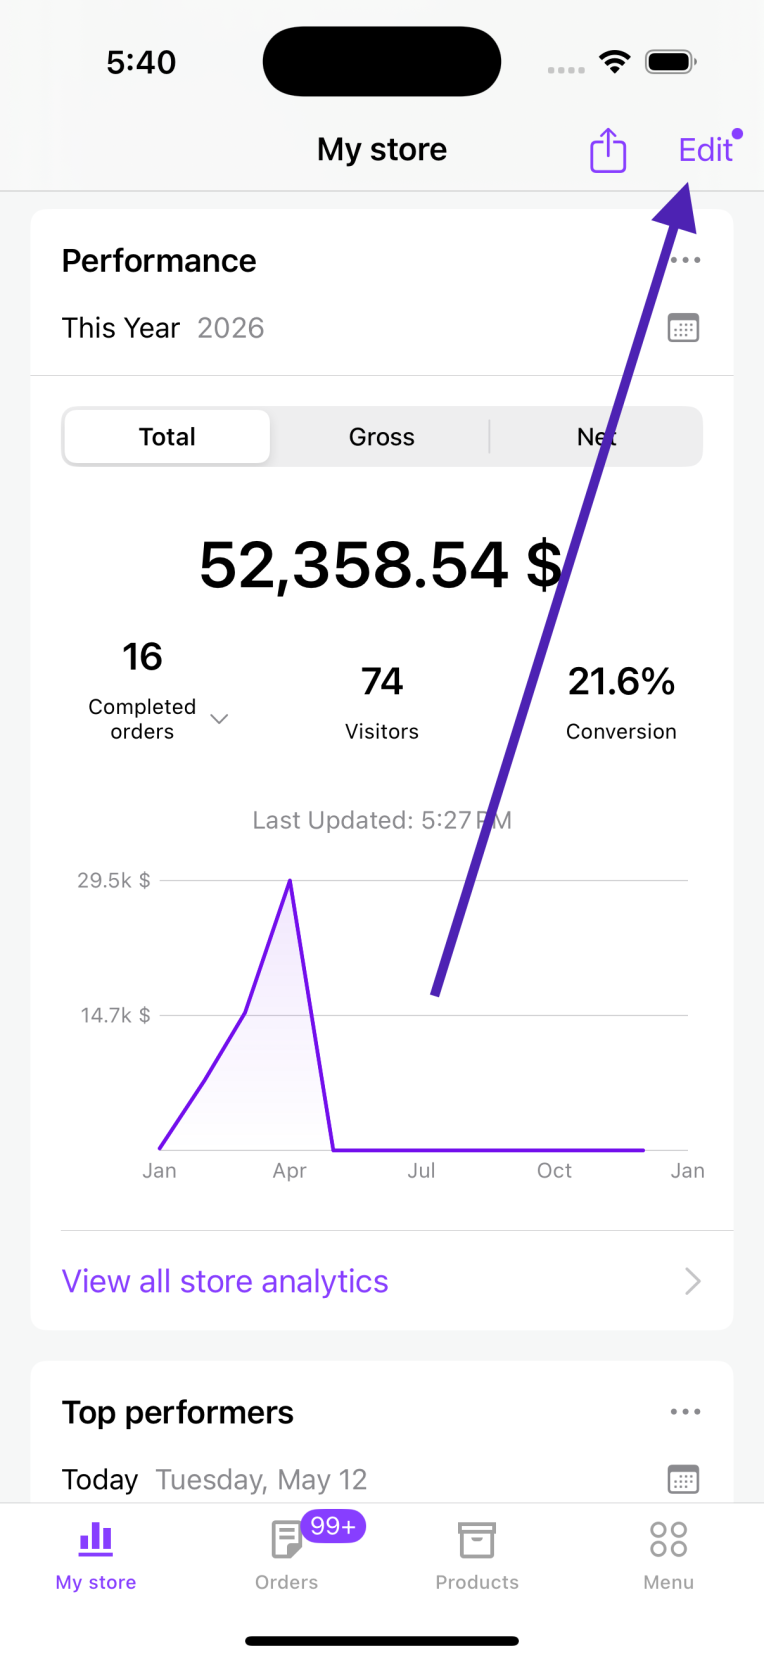
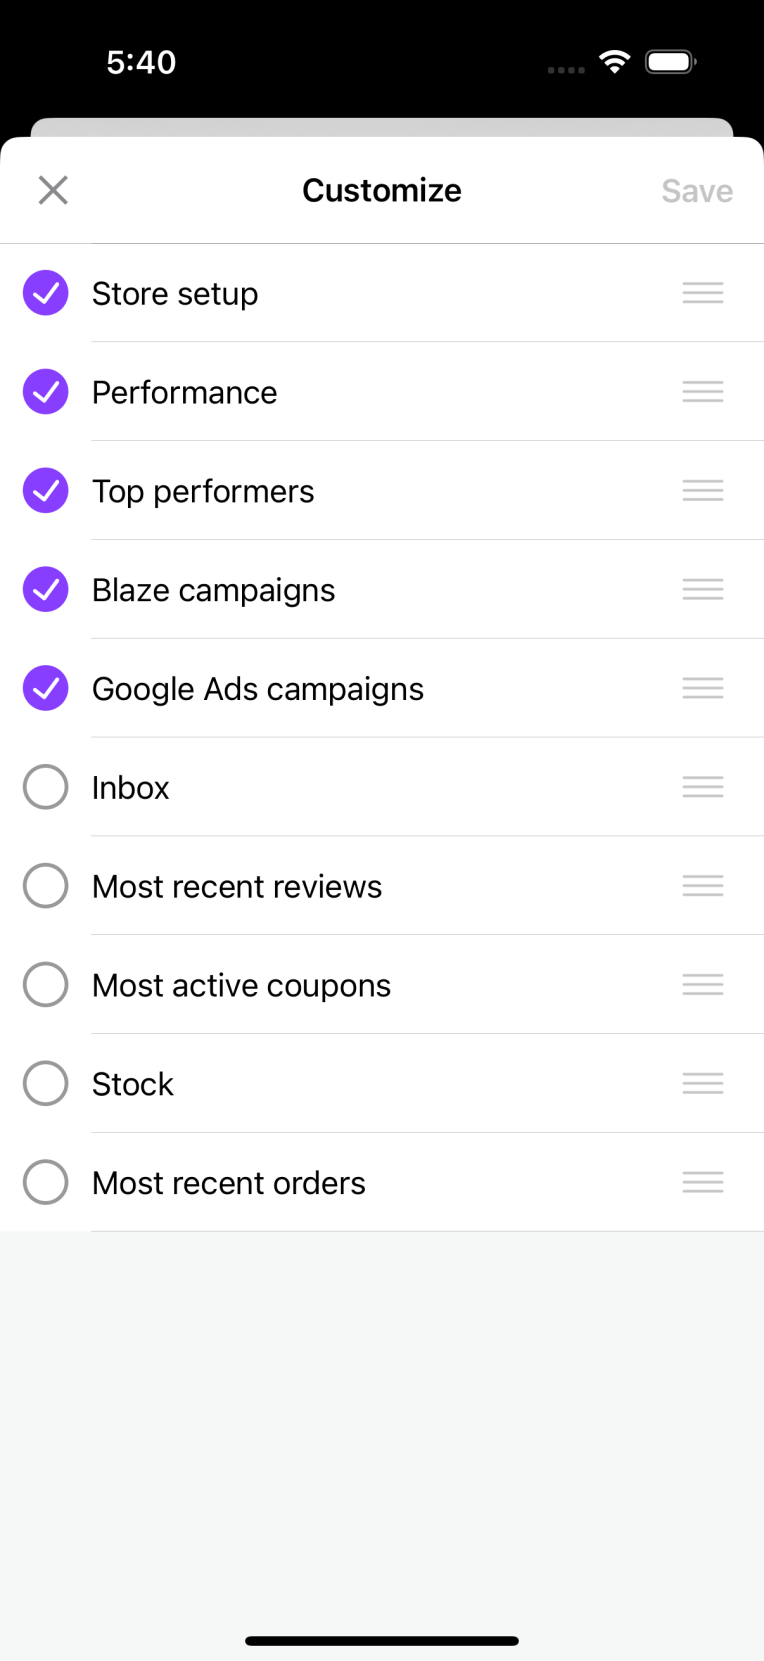
You can customize the view for the My Store tab by clicking Edit in the top right corner of the screen. You can then add or remove the cards to be displayed in the My Store tab. When you are done, remember to save the changes by clicking on the save button.
You can also share your site’s address from the My Store tab by clicking on the share icon at the top right corner of the screen. It will allow you to either directly select an app from your device to share your site address or copy it so you can manually share it.
Site Stats
↑ Back to top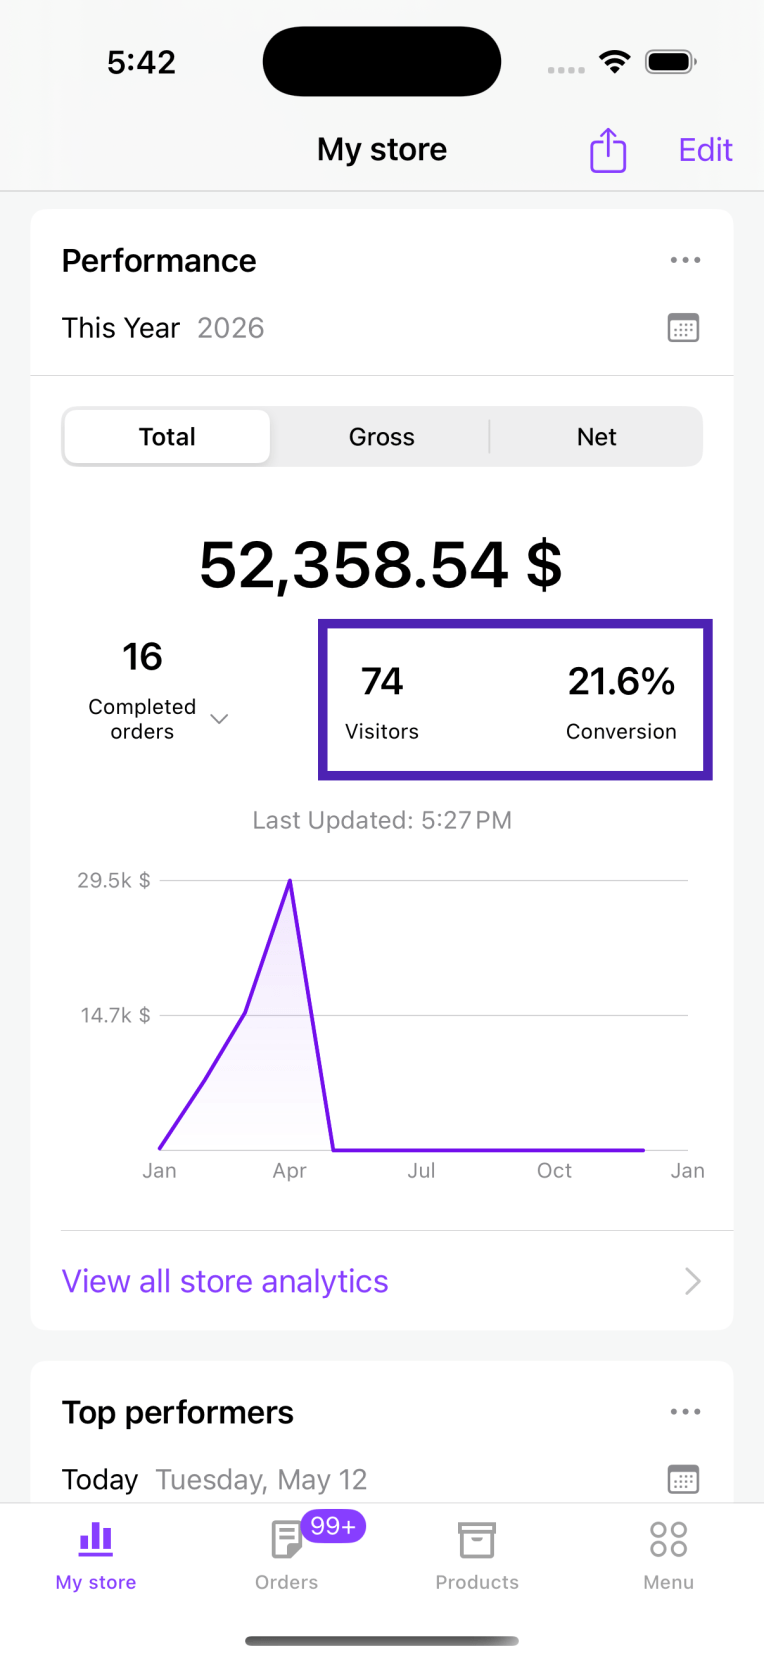
Site stats (Visitors and Conversion Rate) are available only to sites using the Jetpack plugin. In order to have access to the stats, make sure you install the Jetpack plugin and connect your site to Jetpack using your WordPress.com account.
For more details on how to do this, check the Jetpack Documentation page here.
If your site already has the Jetpack plugin installed and is connected, and you are having issues with the visitor and conversion rate stats, please take a look at the Troubleshoot Jetpack connection error messages
Troubleshooting Analytics
↑ Back to topThe Woo Mobile App displays the same analytics data as the WooCommerce Analytics dashboard in your WordPress admin. They share the same data source and the same settings. If you notice a difference between the two, or if you’re seeing unexpected results, see Troubleshooting analytics in the Woo Mobile App.
Still experiencing issues?
↑ Back to topIf you’re using the Jetpack plugin to connect the app to your site, make sure that the Jetpack connection is active and working correctly. You can verify some known issues or try reconnecting your site.
If you’re still having difficulty, you can get help from within the app by going to Menu → Settings → Help & Support → Contact Support. Starting with app version 24.9, this opens our AI Support Chat, which can help troubleshoot common issues. To reach our human support team, start a chat with the AI assistant and then tap the Contact Support 🎧 button in the top-right corner of the chat.