Shopify Data Migrator helps you move store data from Shopify into WooCommerce: products, categories, customers, orders, pages, blog articles, coupons, and product reviews with automatic SEO redirects and optional real-time sync during cutover.
Installation
↑ Back to top1. Log in to your WordPress admin dashboard.
2. Go to **Plugins → Add New → Upload Plugin**.
3. Upload the `shopify-data-migrator` ZIP (or copy the plugin folder into `/wp-content/plugins/`).
4. Click **Install Now**, then **Activate**. WooCommerce must already be installed and active.
5. Open **WooCommerce → Settings → Shopify Data Migrator**.
Configuration
↑ Back to top1. Settings
In your Shopify admin, open **Settings** (bottom-left), then open **Apps and sales channels** (or **Apps**).
2. Install custom App
1. Click **Develop apps** (or open the Shopify Dev Dashboard for your store).
2. Create an app and install it on the store.
3. Configure Admin API scopes needed for products, customers, orders, content, discounts, and webhooks (if you use Live Sync).
4. Copy the **Client ID** and **Client Secret**, or create an Admin API access token (`shpat_…`).
3. Plugin Connection settings
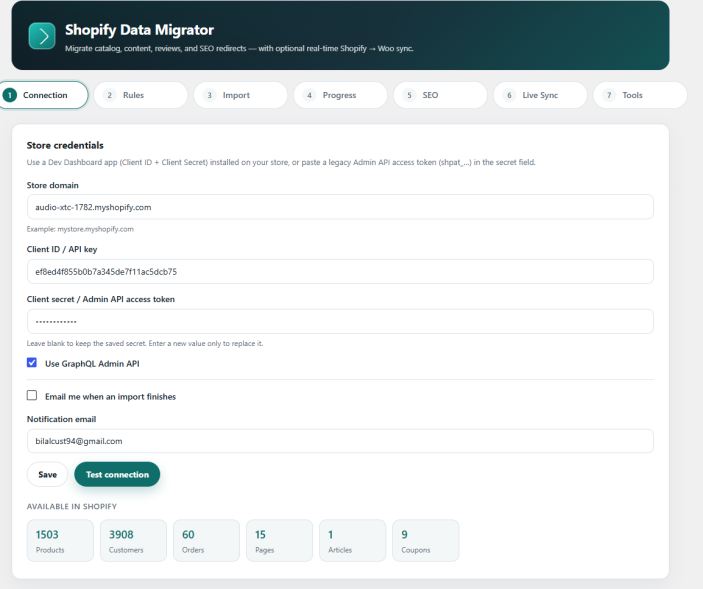
In WordPress, open **WooCommerce → Settings → Shopify Data Migrator → Connection** and enter:
**Store domain** | e.g. `mystore.myshopify.com` |
**Client ID / API key** | Client ID from your Shopify app |
**Client secret / Admin API access token** | Client Secret, or paste a `shpat_` / `shpua_` token |
**Use GraphQL Admin API** | Recommended (leave enabled) |
**Email me when an import finishes** | Optional notification
Click **Save**, then **Test connection**. On success you should see **Connected successfully** and **Available in Shopify** counts.
Import settings
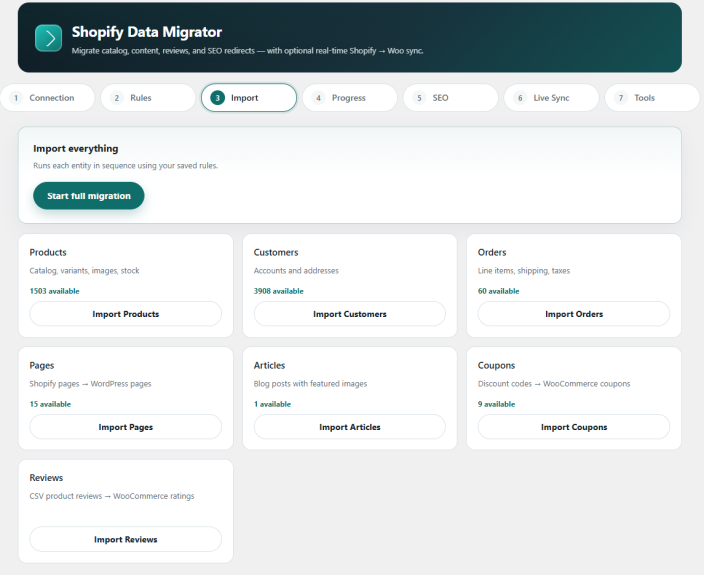
↑ Back to topOpen the **Import** step. - Click **Start full migration** to run each entity in sequence using your saved Rules. - Or use a selective button: **Import Products**, **Import Customers**, **Import Orders**, **Import Pages**, **Import Articles**, **Import Coupons**, **Import Reviews**. **Suggested order:** Products → Customers → Orders → Pages / Articles / Coupons → Reviews. Reviews are included in a full migration only if a CSV was uploaded under **Rules → Reviews**.
Product Settings
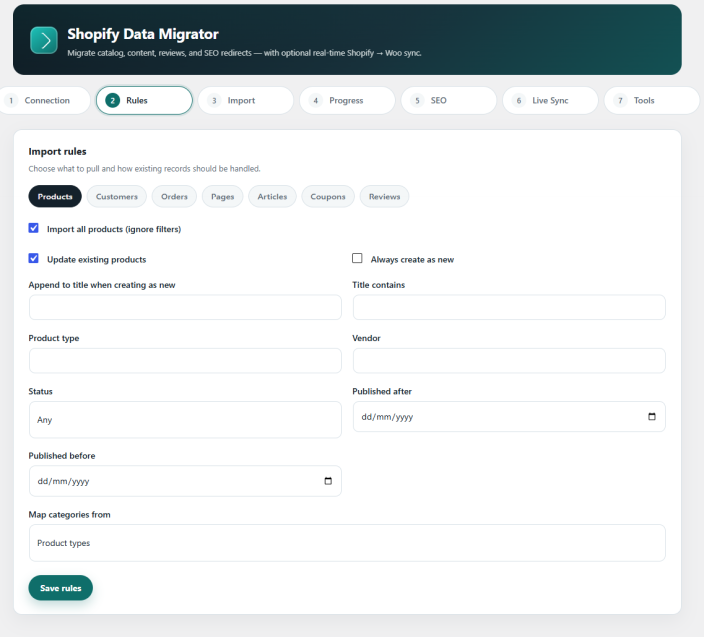
↑ Back to topOpen **Rules → Products**, configure options, then click **Save rules**.
* Import all products (ignore filters) | Import the full catalog |
*Update existing products** Update Woo products linked by Shopify ID
*Always create as new** | Always create new products |
| **Append to title when creating as new** | Optional title suffix
| Filters | Title contains, product type, vendor, status, published after/before |
| **Map categories from** | Product types, Tags, or Collections
**What is imported:** simple and variable products, images, prices, SKU, stock, tags, categories, and an SEO redirect for `/products/{handle}`.
Then open **Import → Import Products** (or run a full migration).
Customer Settings
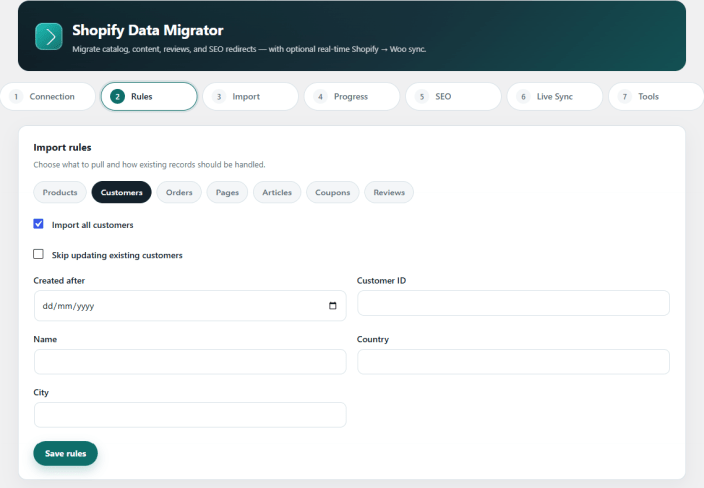
↑ Back to topOpen **Rules → Customers**, configure options, then **Save rules**.
**Import all customers** | Ignore filters |
**Skip updating existing customers** | Do not overwrite users matched by email |
| Filters | Created after, customer ID, name, country, city |
*What is imported:** WordPress users with role `customer`, billing/shipping addresses when available.
**Note:** Shopify passwords are **not** migrated. Customers must use WordPress password reset to sign in.
Then open **Import → Import Customers**
Order Settings
↑ Back to topImport products and customers first when possible (SKU and email linking work better).
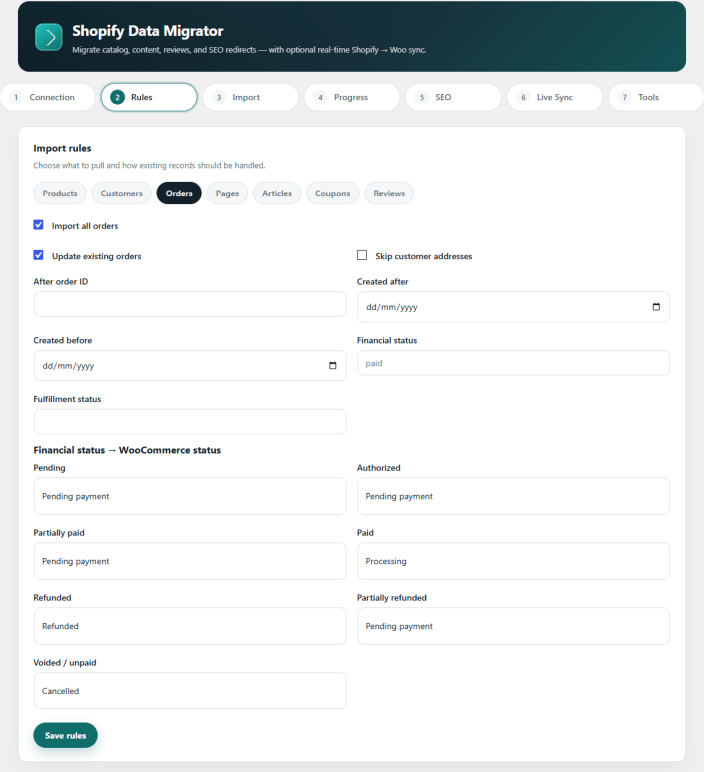
Open **Rules → Orders**, configure options, then **Save rules**.
| **Import all orders** | Ignore filters |
| **Update existing orders** | Update orders linked by Shopify ID |
| **Skip customer addresses** | Do not copy addresses onto the order |
| Filters | After order ID, created after/before, financial status, fulfillment status |
**What is imported:** WooCommerce orders with line items, shipping, taxes, and the **Shopify #** column on the orders list.
Then open **Import → Import Orders**.
Page Settings
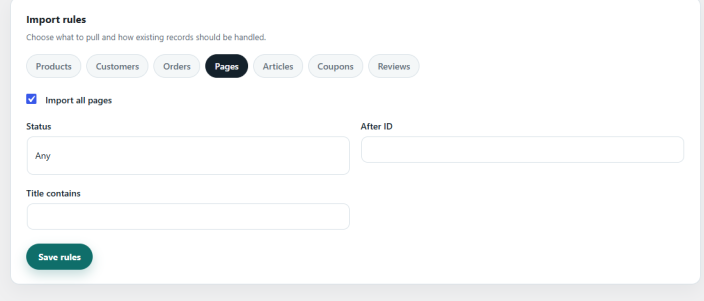
↑ Back to topOpen **Rules → Pages**, configure options, then **Save rules**.
- **Import all pages**
- Filters: status, after ID, title contains
**What is imported:** WordPress pages (title, slug, body HTML) and SEO redirects for `/pages/{handle}`.
Then open **Import → Import Pages**.
Blog Settings
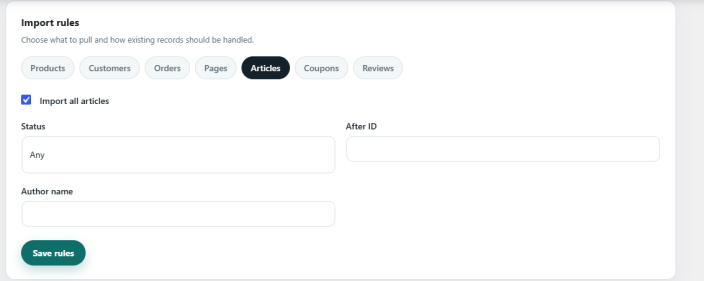
↑ Back to topOpen **Rules → Articles**, configure options, then **Save rules**.
- **Import all articles**
- Filters: status, after ID, author name
**What is imported:** WordPress posts (content, excerpt, tags, featured image) and SEO redirects for `/blogs/{blog_handle}/{handle}`.
Shopify blog structure is flattened into standard WordPress posts.
Then open **Import → Import Articles**.
Coupon Settings
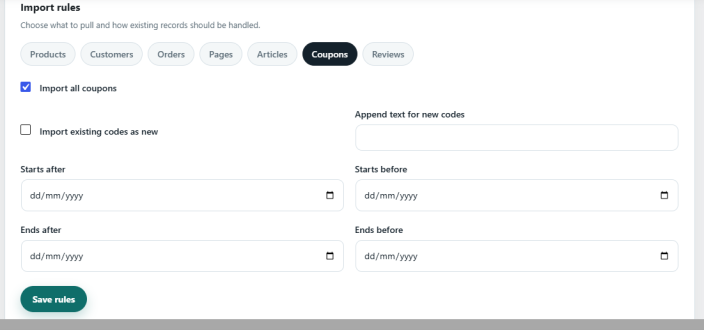
↑ Back to topOpen **Rules → Coupons**, configure options, then **Save rules**. - **Import all coupons** - **Import existing codes as new** (optional append text) - Date windows: starts/ends after/before **What is imported:** Discount codes → WooCommerce coupons (percent or fixed cart amounts, usage limits, expiry when available). Complex BXGY / free-shipping discounts may map with limited fidelity. Then open **Import → Import Coupons**.
Reviews
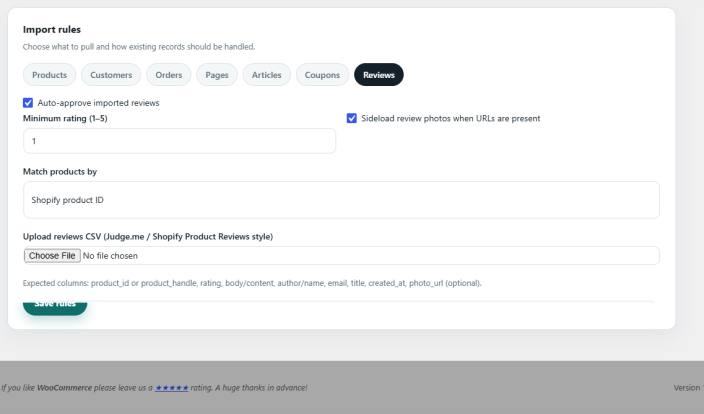
↑ Back to topReviews are imported from a **CSV file** (Judge.me / Shopify Product Reviews style), not from the Shopify Admin API. ### Upload CSV 1. Open **Rules → Reviews**. 2. Set **Auto-approve imported reviews**, **Minimum rating**, **Sideload review photos**, and **Match products by** (Shopify product ID, handle/slug, or SKU). 3. Choose your CSV and click **Upload CSV**. 4. Click **Save rules**. **Expected columns:** `product_id` or `product_handle`, `rating`, `body`/`content`, `author`/`name`, `email`, `title`, `created_at`, `photo_url` (optional).
Run review import
↑ Back to top1. Ensure products are already imported. 2. Open **Import → Import Reviews**. If no CSV is uploaded, the job fails with: *No reviews CSV uploaded. Upload a CSV under Rules → Reviews first.*
Order Status
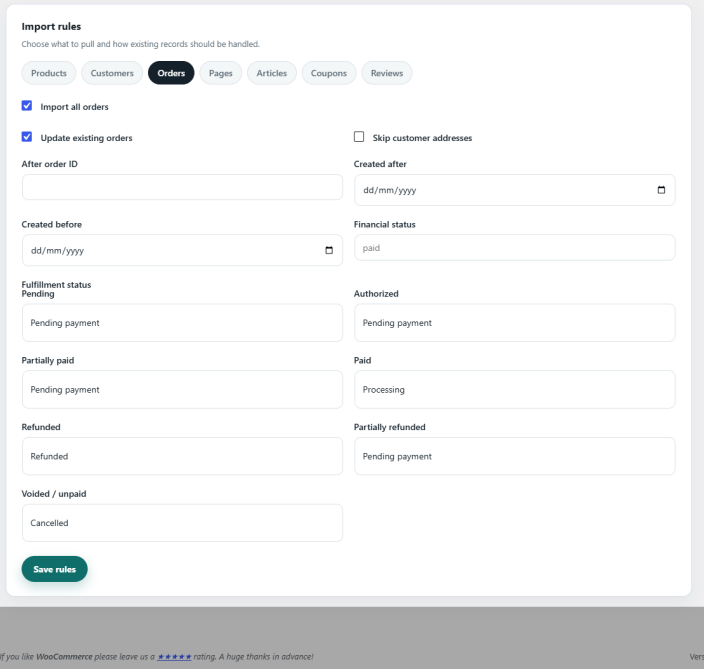
↑ Back to topUnder **Rules → Orders**, use **Financial status → WooCommerce status** to map Shopify payment states to WooCommerce order statuses: - Pending - Authorized - Partially paid - Paid - Refunded - Partially refunded - Voided / unpaid Choose the WooCommerce status for each Shopify financial status, then **Save rules** before importing orders.
Verify the migration was successful
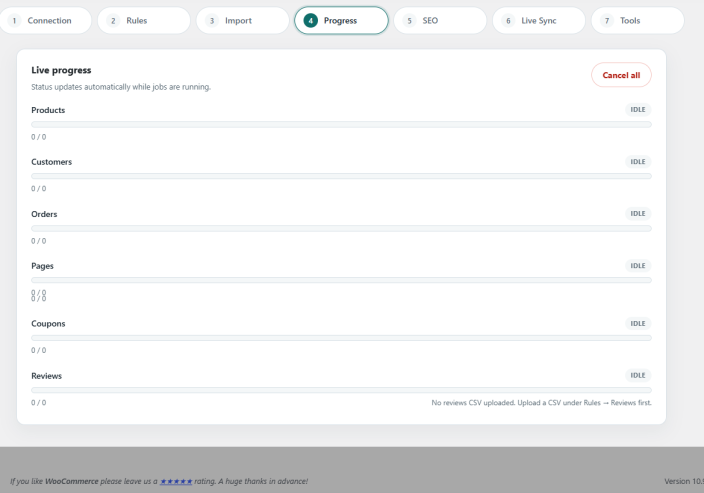
↑ Back to topOpen **Progress → Live progress**.
| Idle | Not started |
| Queued / Running | In progress |
| Done | Finished successfully |
| Failed | Stopped with an error message |
| Cancelled | Stopped by you |
Also check:
- Counts: `imported / total` and message **Import complete.**
- **Available in Shopify** counts on Connection vs imported totals
- Spot-check Products, Users, Orders (**Shopify #** column), Pages, Posts, Coupons, product reviews
- Optional finish email (Connection settings)
- **WooCommerce → Status → Logs** → source `shopify-data-migrator`
SEO redirects
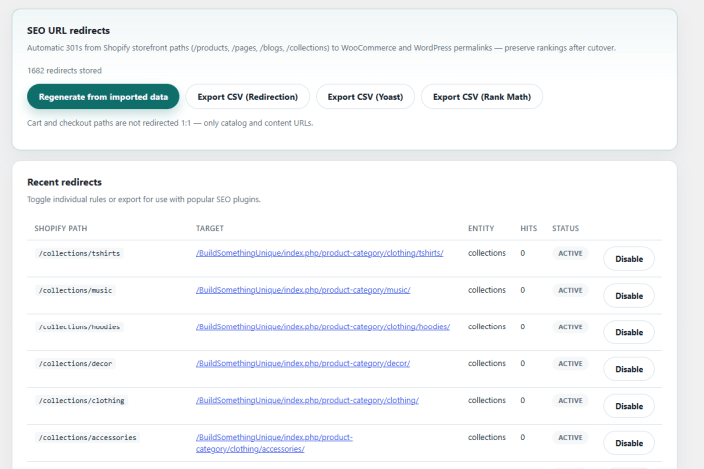
↑ Back to topOpen the **SEO** step.
During product, page, and article imports, the plugin stores **301** redirects from Shopify storefront paths to WooCommerce/WordPress permalinks:
| Shopify path | Redirects to |
|--------------|--------------|
| `/products/{handle}` | Product permalink |
| `/pages/{handle}` | Page permalink |
| `/blogs/{blog}/{handle}` | Post permalink |
| `/collections/{handle}` | Product category link |
**Cart and checkout paths are not redirected 1:1** — only catalog and content URLs.
**Manage redirects here:**
- View **Recent redirects** (path, target, entity, hits, status)
- **Disable** / **Enable** individual rules
- **Regenerate from imported data**
- Export CSV for **Redirection**, **Yoast**, or **Rank Math**
Configure webhook sync (Live Sync)
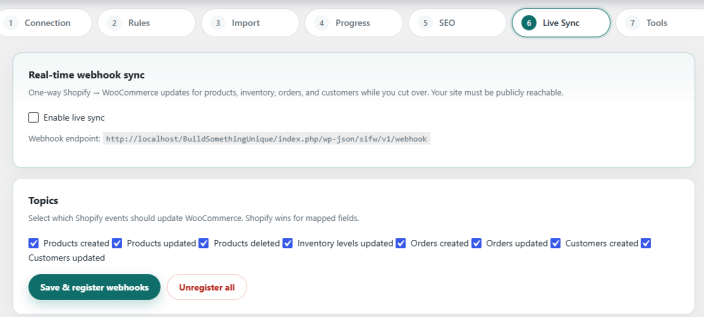
↑ Back to topOpen **Live Sync** for one-way **Shopify → WooCommerce** updates during cutover. **Requirements:** Site must be publicly reachable over HTTPS; Connection must work; app needs webhook permissions. 1. Check **Enable live sync**. 2. Select **Topics** (products create/update/delete, inventory levels, orders create/updated, customers create/update). 3. Click **Save & register webhooks**. 4. Confirm how many webhooks are registered. Webhook endpoint: `/wp-json/sifw/v1/webhook` (HMAC verified). When cutover is finished, click **Unregister all** (or disable live sync and save).