The Show Meta Data feature in the Variation List allows admins to display additional custom product metadata directly within the variation list.
This is a powerful feature for stores that need to present extra information beyond standard attributes, such as:
- Stock status
- SKU
- Custom fields (e.g., model number, expiry date, specifications)
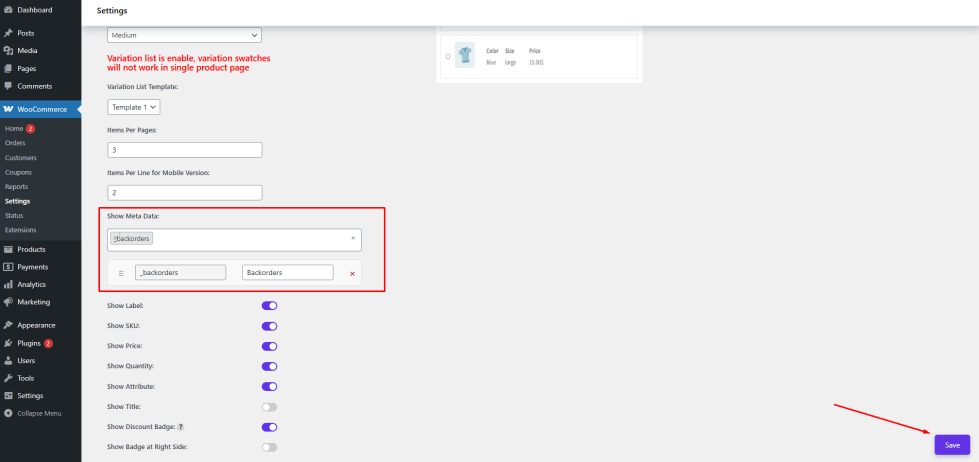
With this setting, admins can select specific WooCommerce product meta keys and display them as part of each variation row. This helps customers access important details instantly without navigating to another page.
Key Benefits
↑ Back to top- Displays additional product information directly in the variation list
- Improves customer understanding and confidence
- Supports custom WooCommerce meta fields
- Helps in presenting technical or detailed product data clearly
How to Configure
↑ Back to top- Go to WordPress Admin Panel → WooCommerce → Settings
- Click the Variation Monster tab
- Navigate to the Variation List section
- Locate the Show Meta Data option
- Select the meta keys you want to display
- Add user-friendly labels for each selected meta field
Click the Save button
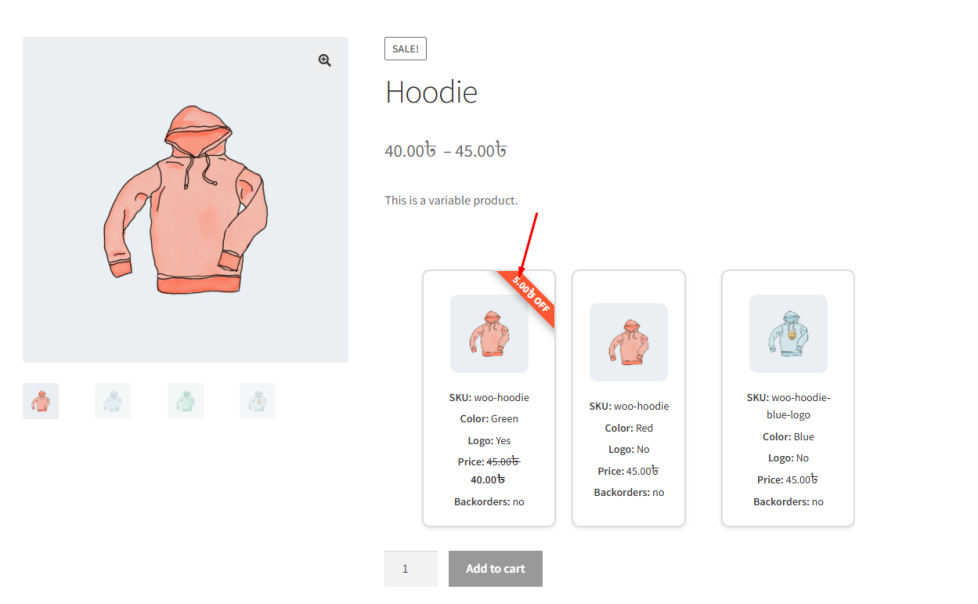
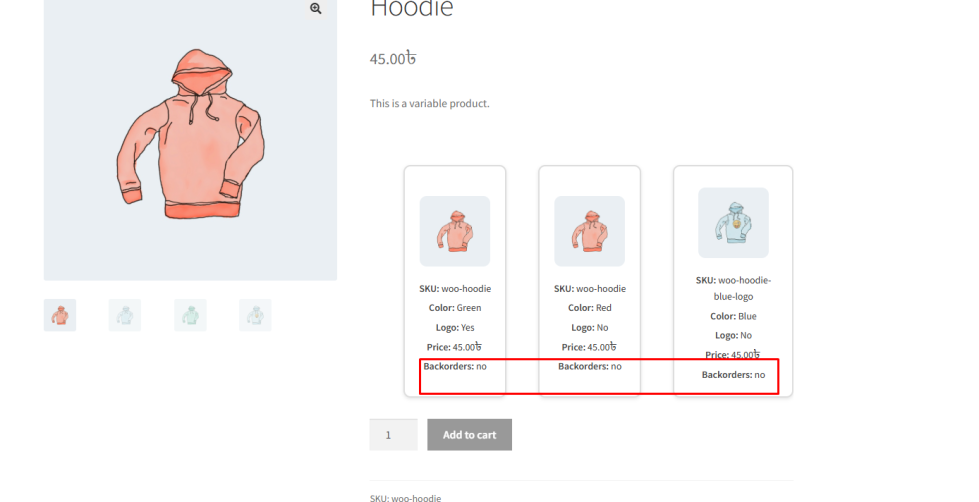
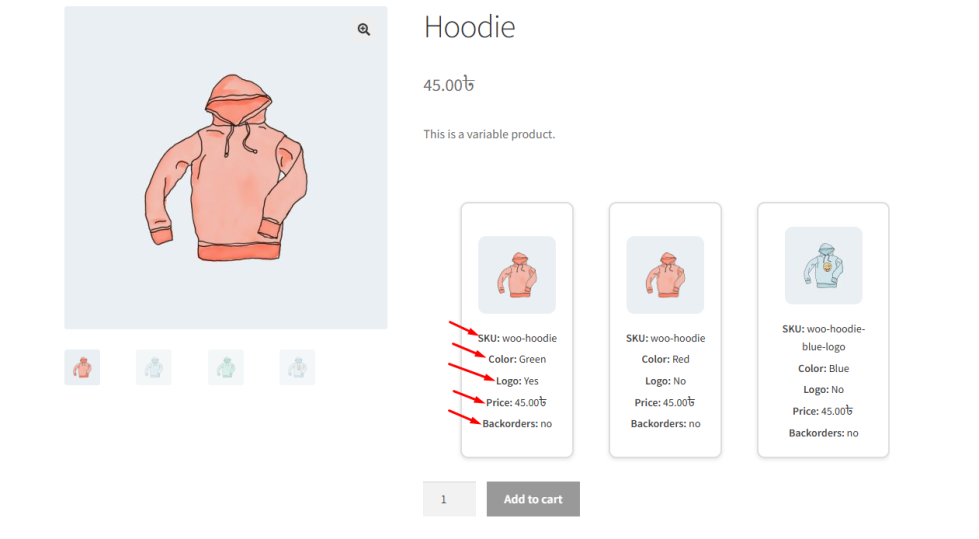
After saving the settings, the selected metadata will appear in the Variation List on the single product page, providing customers with more detailed and useful information.
Show Label
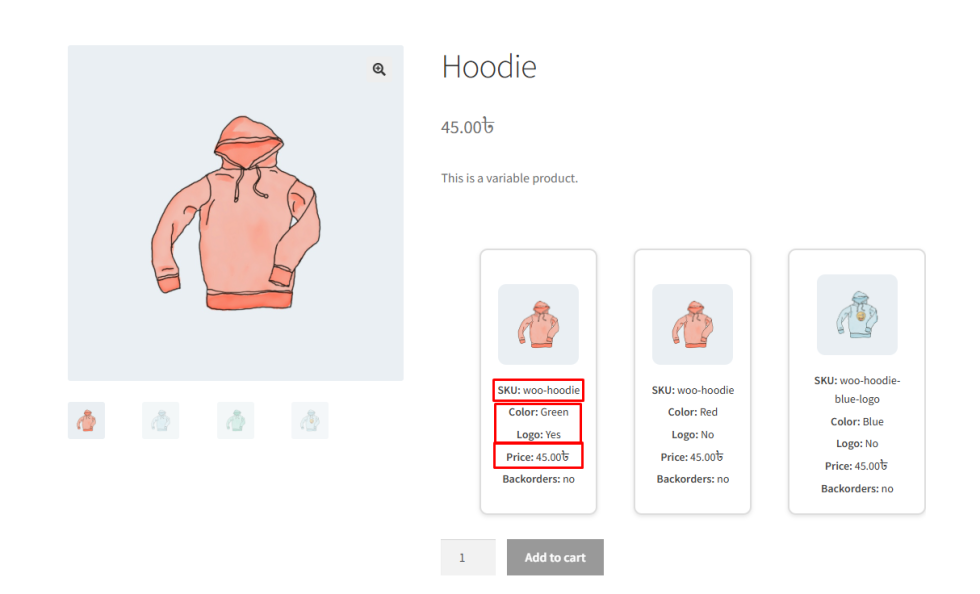
↑ Back to topThe Show Label setting allows the admin to control whether labels (field names) are displayed in the Variation List.
By default, each piece of information is shown with its label, such as:
- SKU: woo-hoodie
- Color: Green
- Logo: Yes
- Price: 45.00৳
- Backorders: No
When this option is disabled, only the values will be displayed, and the labels (e.g., SKU, Color, Price) will be hidden.
Why Use This Feature?
↑ Back to top- Enable labels for better clarity and detailed information
- Disable labels for a cleaner and more minimal design
This flexibility allows you to adjust the display based on your store’s design and user experience preferences.
How to Configure
↑ Back to top- Go to WordPress Admin Panel → WooCommerce → Settings
- Click the Variation Monster tab
- Navigate to the Variation List section
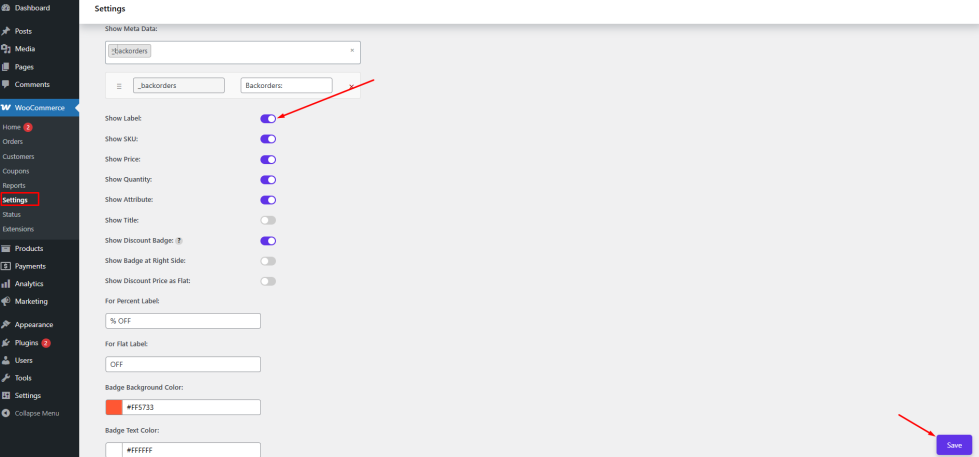
- Locate the Show Label option
- Enable or disable it based on your preference
- Click the Save button
After saving, the variation list on the single product page will display information with or without labels, depending on your selected setting.
Show SKU, Price, Quantity, Attribute & Title
↑ Back to topThis section allows the admin to control which information is displayed for each variation in the Variation List. By enabling or disabling these options, you can customize how much detail is shown to customers.
Show SKU
↑ Back to topThe Show SKU option allows the admin to display the SKU (Stock Keeping Unit) for each variation. This helps in identifying products, especially for large inventories or technical items.
Show Price
↑ Back to topThe Show Price option displays the price of each variation directly in the list. Customers can instantly see pricing without selecting a variation.
Show Quantity
↑ Back to topThe Show Quantity option enables a quantity input field for each variation. This allows customers to select the desired quantity directly from the list.
Show Attribute
↑ Back to topThe Show Attribute option displays all variation attributes (such as color, size, etc.). This makes it easier for customers to understand each variation clearly.
Show Title
↑ Back to topThe Show Title option displays the variation title or name. This can include attribute combinations or a custom variation name for better clarity.
How to Configure
↑ Back to top- Go to WordPress Admin Panel → WooCommerce → Settings
- Click the Variation Monster tab
- Navigate to the Variation List section
- Locate the options:
- Show SKU
- Show Price
- Show Quantity
- Show Attribute
- Show Title
- Enable or disable each option based on your requirements
- Click the Save button

Frontend Output
↑ Back to topAfter saving the settings, the selected options will be displayed in the Variation List on the single product page:
- If enabled, SKU, Price, Quantity field, Attributes, and Title will appear for each variation
- If disabled, those elements will be hidden from the list
This allows you to create either a detailed variation list with full information or a clean, minimal layout, depending on your store design and customer needs.
Show Badge at Right Side
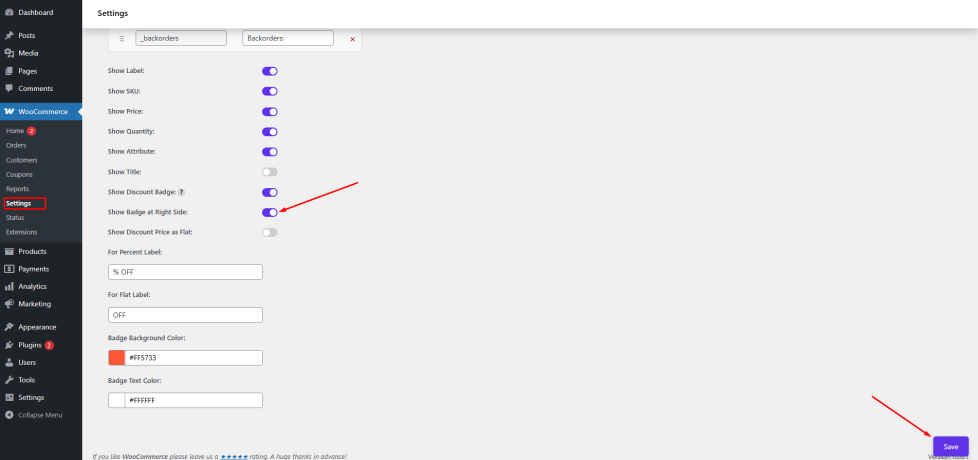
↑ Back to topThe Show Badge at Right Side option allows the admin to display a discount badge on the right side of each variation item in the Variation List.
This badge highlights discounts and makes offers more visible to customers.
How to Configure
↑ Back to top- Go to WordPress Admin Panel → WooCommerce → Settings
- Click the Variation Monster tab
- Navigate to the Variation List section
- Enable the Show Badge at Right Side option
- Click the Save button
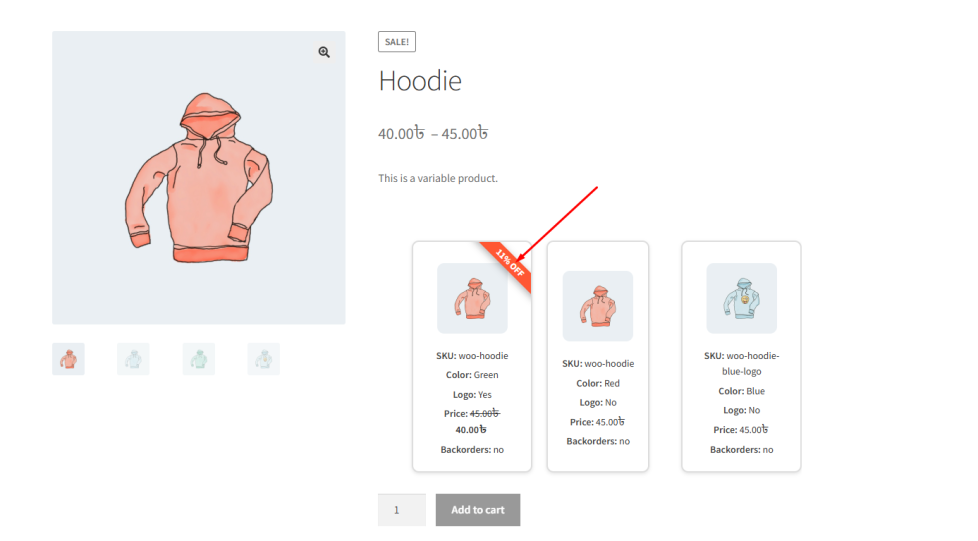
Frontend Output
↑ Back to topAfter enabling, a badge will appear on the right side of each variation row, showing discount information (percentage or flat).
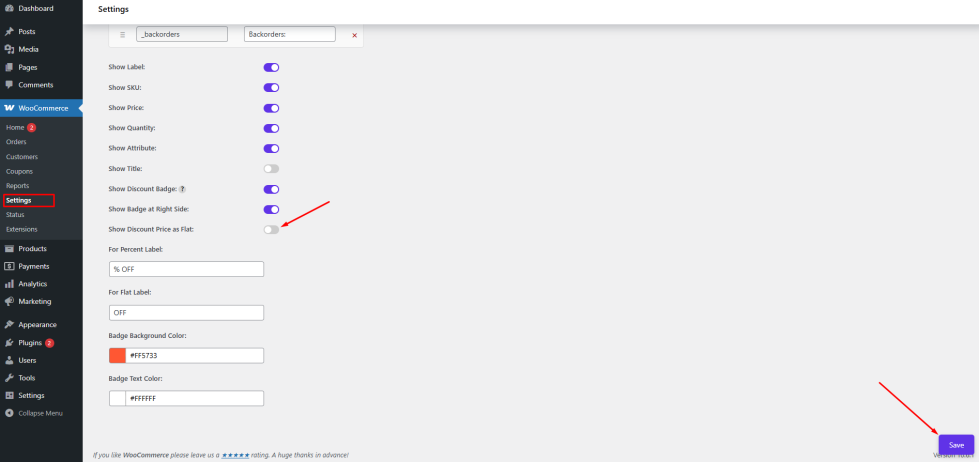
Show Discount Price as Flat
↑ Back to topThe Show Discount Price as Flat option allows the admin to display discounts as a fixed amount instead of a percentage.
For example:
- Flat: ৳50 OFF
- Instead of: 10% OFF
How to Configure
↑ Back to top- Navigate to WooCommerce → Settings → Variation Monster → Variation List
- Enable the Show Discount Price as Flat option
Click Save
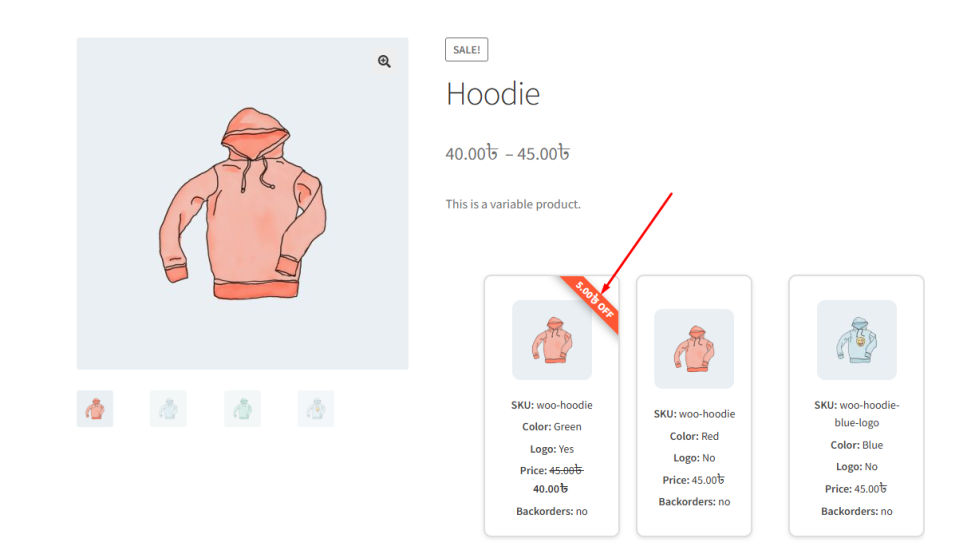
Frontend Output
↑ Back to top- If enabled: Discount shows as flat value (e.g., ৳50 OFF)
- If disabled: Discount shows as percentage (e.g., 10% OFF)
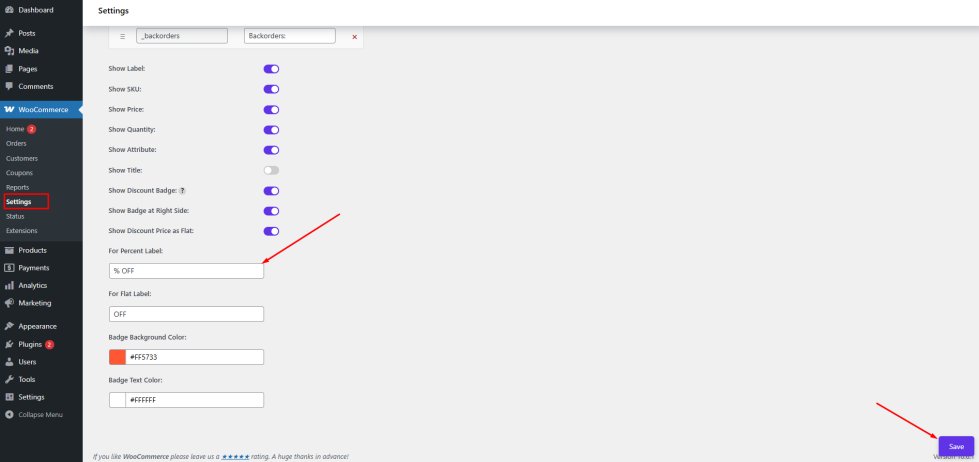
Percent Label
↑ Back to topThe Percent Label setting allows the admin to customize the text displayed for percentage discounts.
Default example:
- % OFF
You can change it to:
- % Discount
- Save %
How to Configure
↑ Back to top- Go to Variation List settings
- Locate Percent Label
- Enter your preferred label (e.g., % OFF)
- Click Save
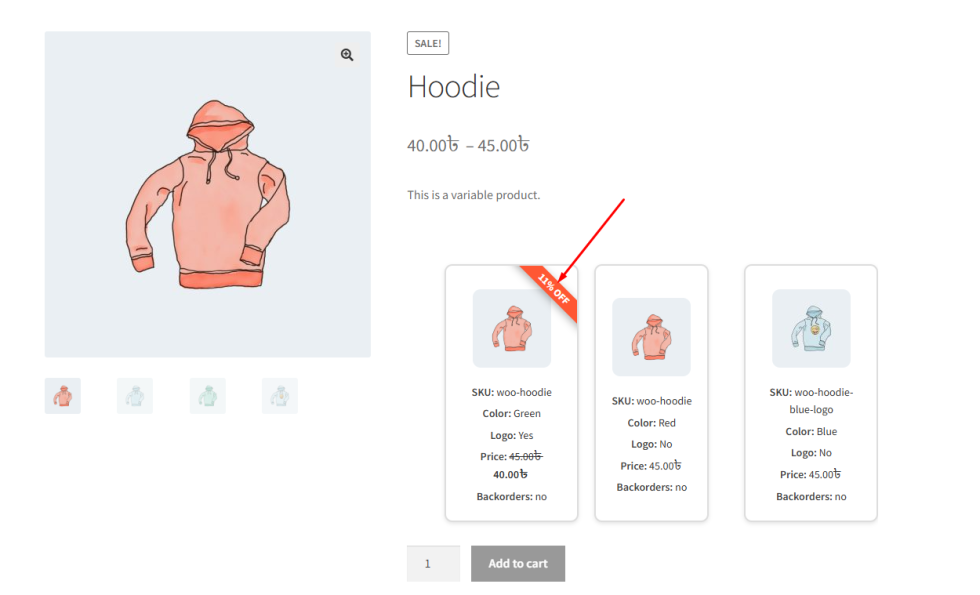
Frontend Output
↑ Back to topThe entered label will appear with percentage discounts (e.g., 20% OFF).
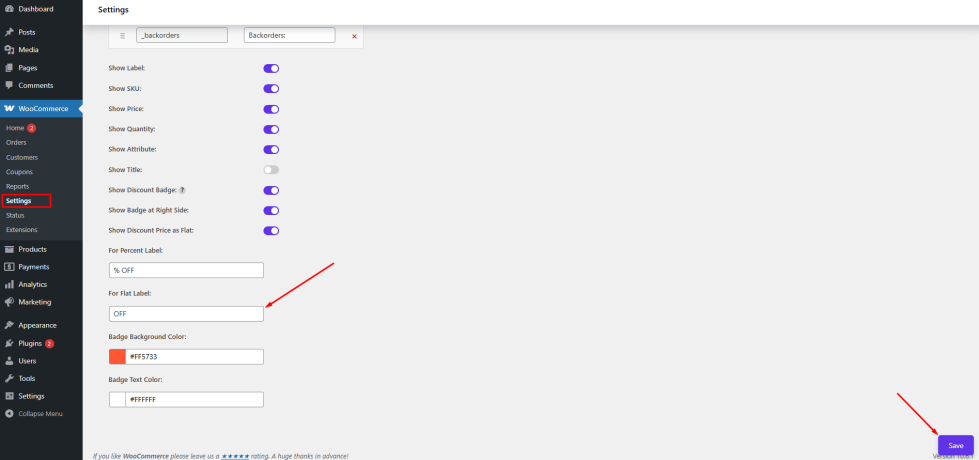
Flat Label
↑ Back to topThe Flat Label setting allows the admin to customize the text for flat discounts.
Default example:
- OFF
You can change it to:
- Discount
- Save
How to Configure
↑ Back to top- Navigate to Variation List settings
- Find Flat Label
- Enter your desired text (e.g., OFF)
- Click Save
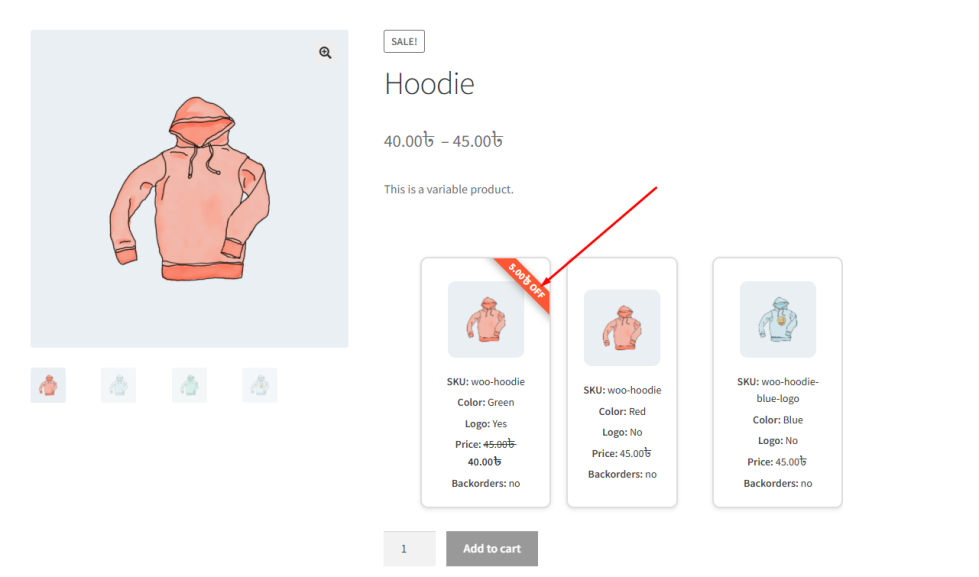
Frontend Output
↑ Back to topThe label will be displayed with flat discounts (e.g., ৳50 OFF).
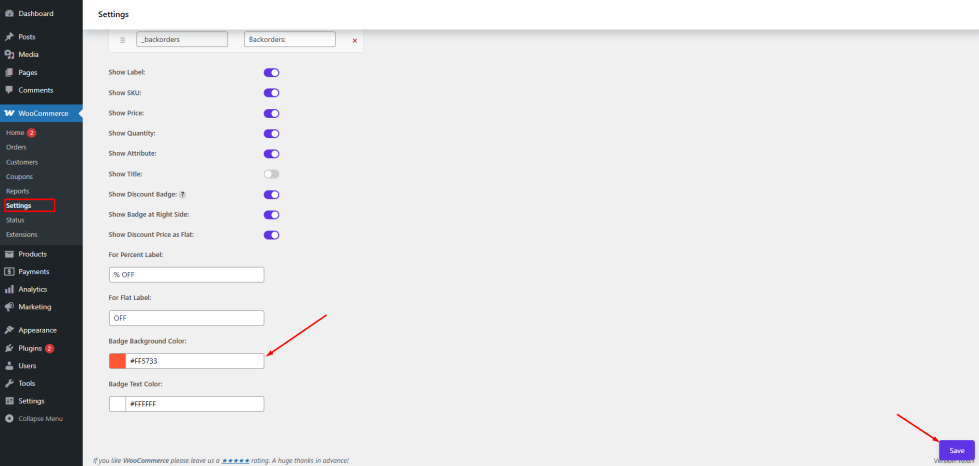
Badge Background Color
↑ Back to topThe Badge Background Color setting allows the admin to change the background color of the discount badge.
For example:
- Default: #FF5733
- Can be changed to match your brand color
How to Configure
↑ Back to top- Go to Variation List settings
- Locate Badge Background Color
- Select a color using the color picker or enter a hex code
Click Save
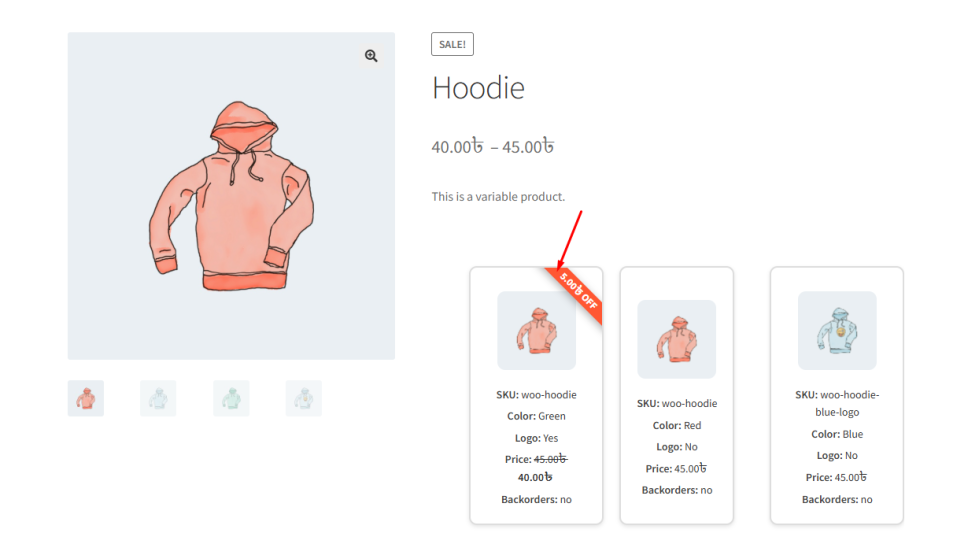
Frontend Output
↑ Back to topThe badge background will appear in the selected color on the single product page.
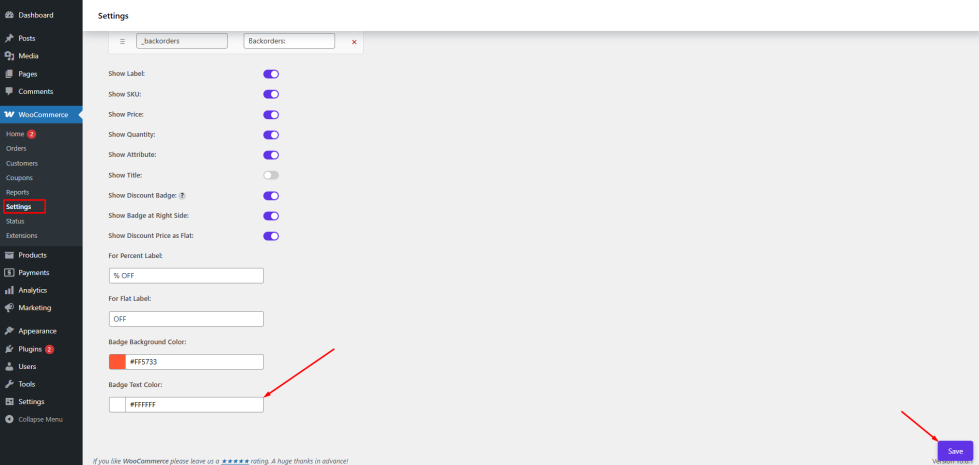
Badge Text Color
↑ Back to topThe Badge Text Color setting allows the admin to control the text color inside the discount badge.
This ensures proper contrast and readability.
How to Configure
↑ Back to top- Navigate to Variation List settings
- Find Badge Text Color
- Choose your preferred color
Click Save
Frontend Output
↑ Back to topThe badge text (e.g., 10% OFF or ৳50 OFF) will be displayed in the selected color.