NOTE
This product is no longer available on WooCommerce.com. This document has been left available for existing users, but will no longer be updated.
Getting Started
↑ Back to topWe appreciate your decision to select Sparkla for your project! The provided documentation will assist you in initiating the installation and setup process for the theme. Navigate through the sections conveniently using the right-side menu.
The steps below describe how to install the theme, import its demo content (optional), and receive updates.
Installation
↑ Back to topAutomatic:
The theme can be installed directly from your WooCommerce subscriptions dashboard, click the link below and follow the quick-guide:Automatic Installation
Manual:
If you opt for a manual installation of the theme, you may proceed by following the instructions provided below:Note: Make sure to download the theme files from your WooCommerce account before continuing: https://woocommerce.com/my-account/downloads/
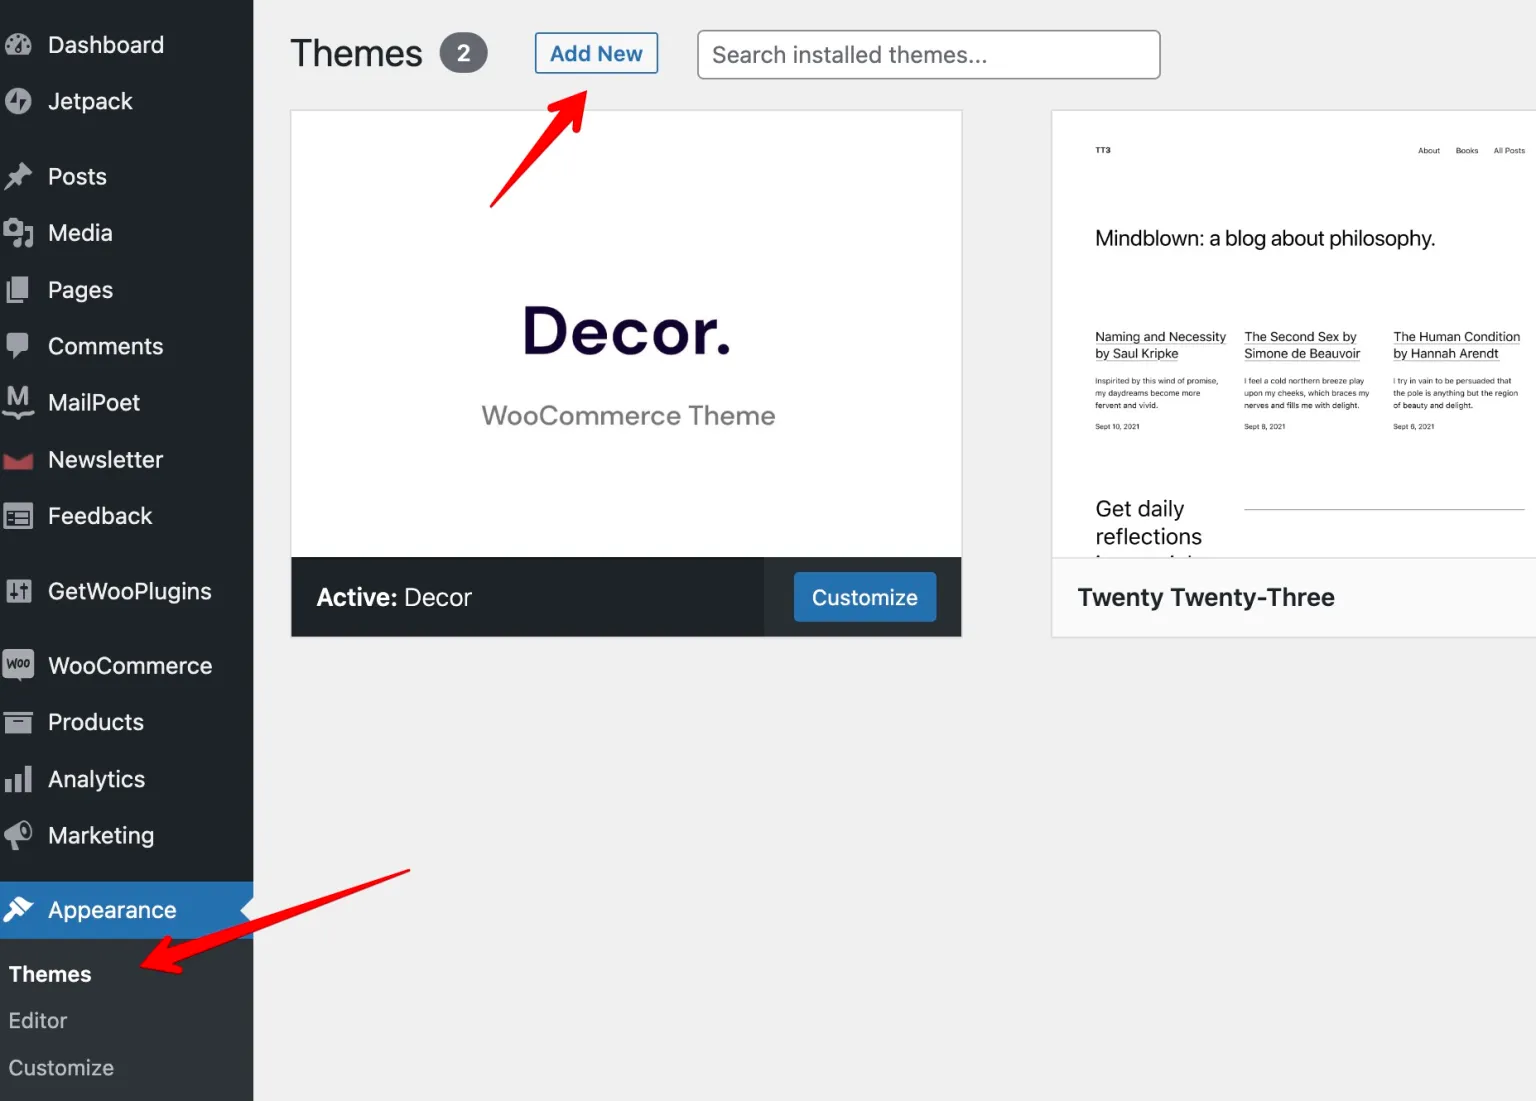
- Log-in to your WordPress admin and navigate to Appearance > Themes.
- Click the Add New button, then Upload Theme.
- Click the “Choose File” button and locate the downloaded heim.zip file on your computer.
- Select the file and click “Install Now”.
- After the installation is complete, click “Activate” to set Heim as the active theme.
Sparkla Demo Importer
↑ Back to topOnce the theme is activated you will be redirected to the theme’s setup wizard.Note: To start the theme’s setup wizard manually, navigate to Appearance > Themes >Activate in the WordPress admin.

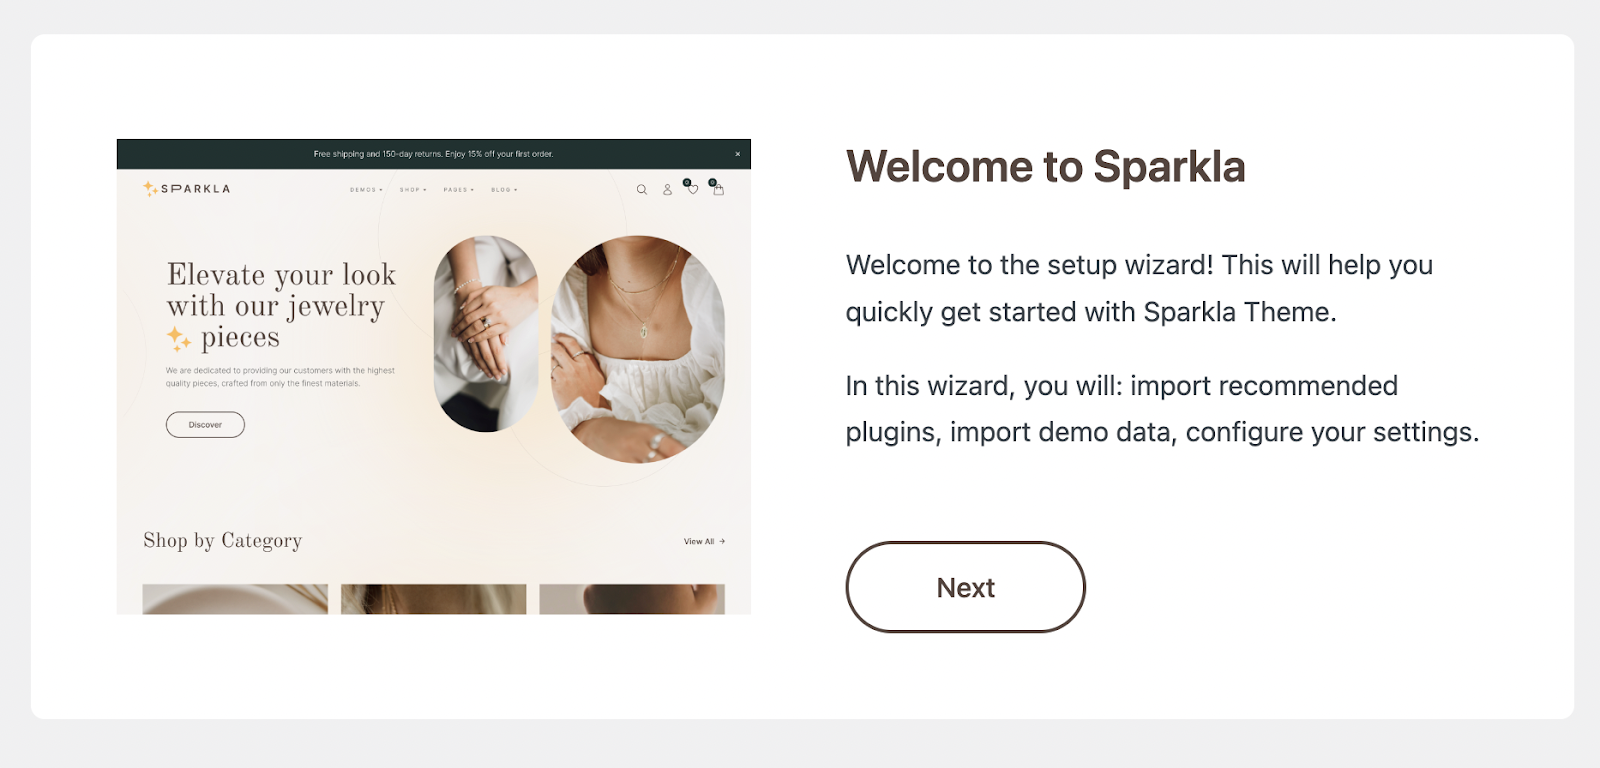
Step 1. Get Started
The initial stage involves the welcome screen. Proceed by clicking “Next” to initiate the wizard.
Step 2. Plugin Installation
The following stage involves the installation of WooCommerce plugins. Although this step is discretionary, it’s crucial for activating the e-commerce features and demo content of the theme, encompassing shop pages and additional elements.
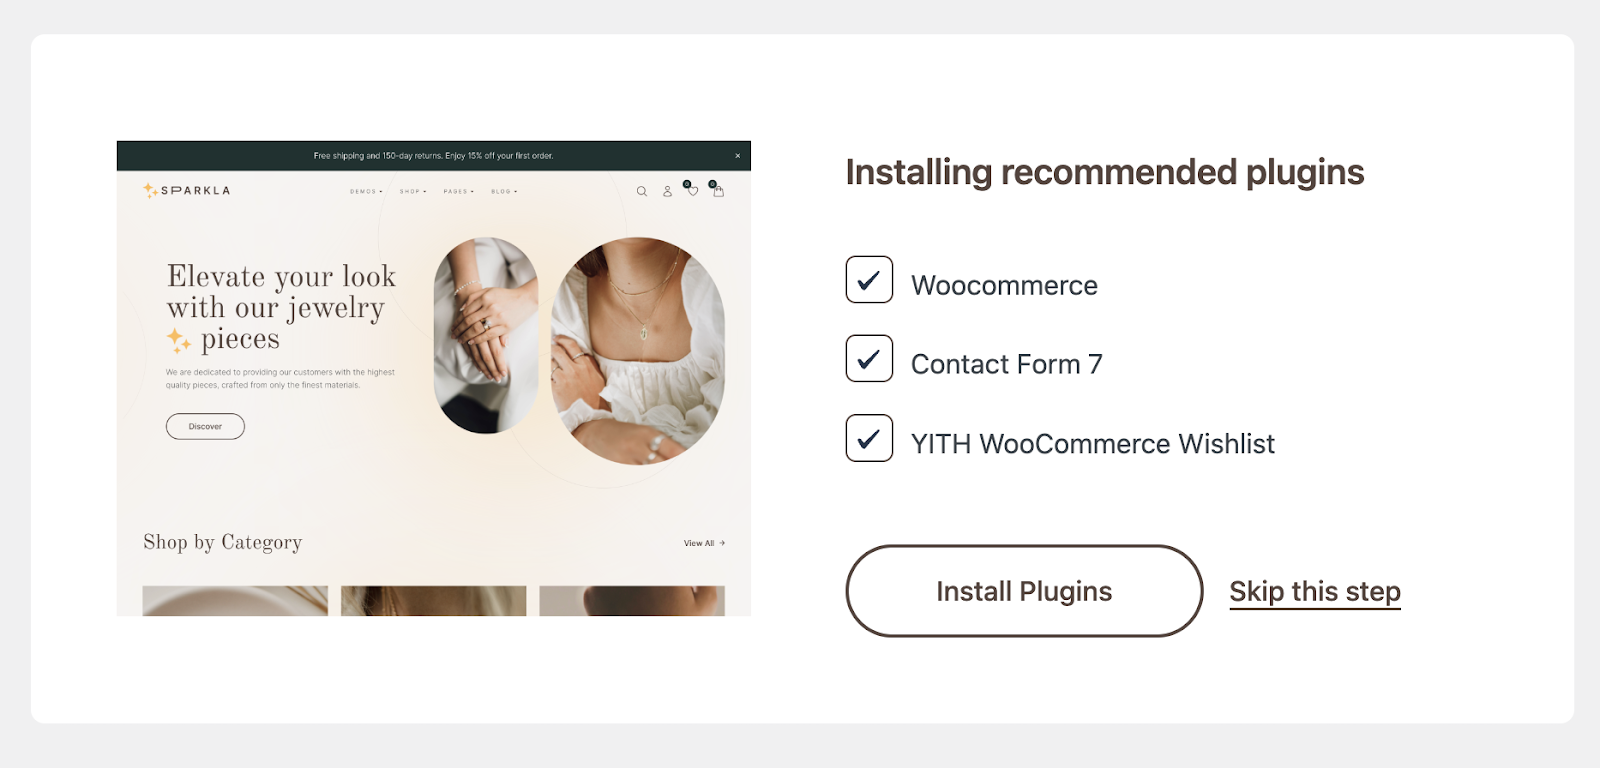
Note: Should the installation of the WooCommerce plugin encounter any issues, you can still proceed with its installation by navigating to the WordPress admin’s Plugins page:Install WooCommerce manually
Step 3. Import Demo Content
In the third phase, the theme’s demo content will be imported. This encompasses Pages, Posts, Menus, Products, Images, Categories/Tags, and diverse configurations to the theme’s settings. While this step remains optional, it can serve as an excellent initial foundation for your store.

For the importing demo content click on Dashboard>WooCommerce>Status>Tools.
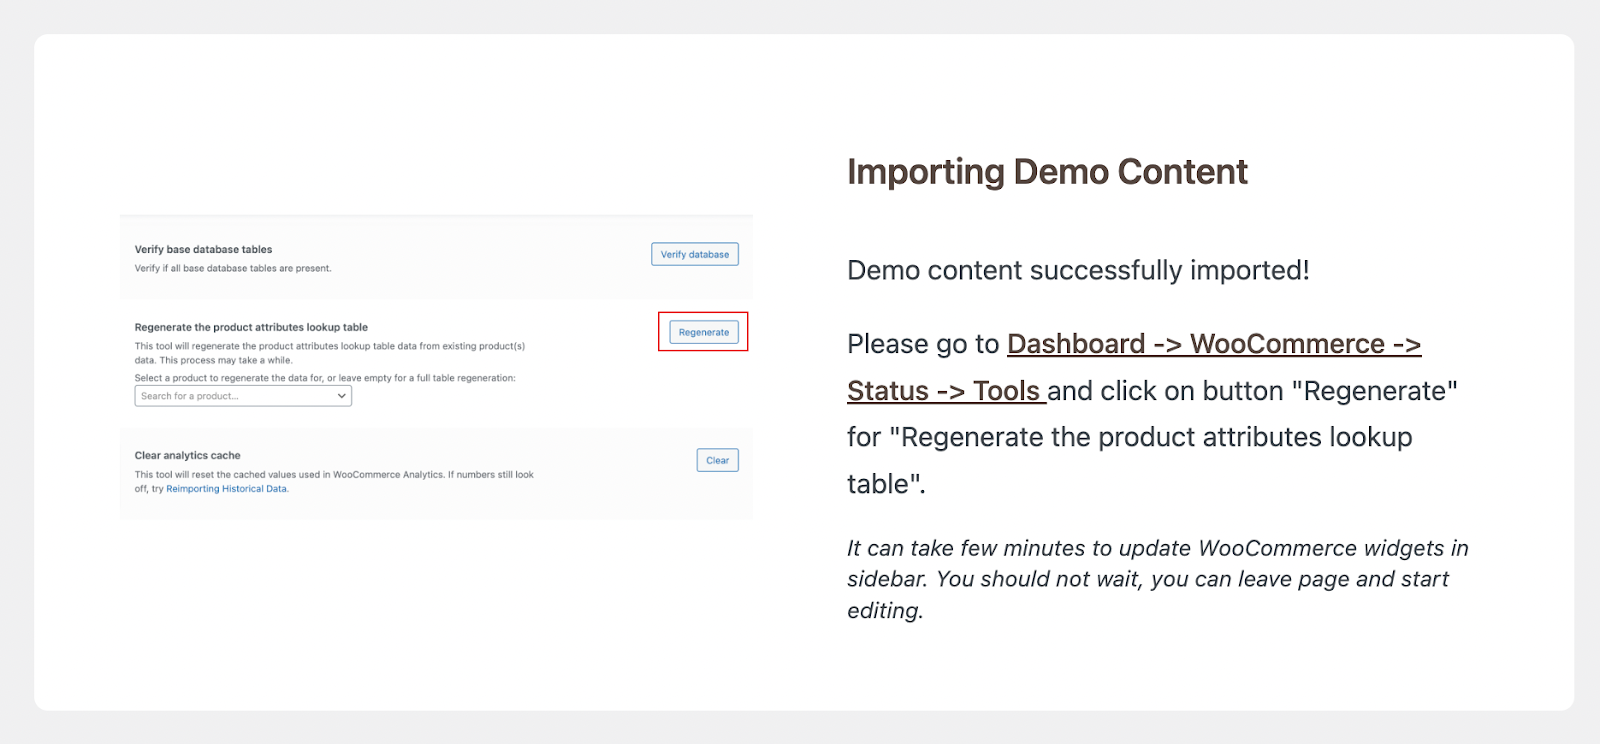
Here you’ll find Regenerate the product attributes lookup table. Click on the Regenerate button and wait till the installation will end.

After the regeneration is completed, a popup will appear on the screen with a notification that the theme has been successfully installed.
Updates
↑ Back to topTheme updates are conveniently received through the WordPress admin, and they are automated. All you need to do is connect your site to its WooCommerce account.
It’s advisable to promptly install these updates as soon as they are made available to ensure the best performance and security.
Block Editor
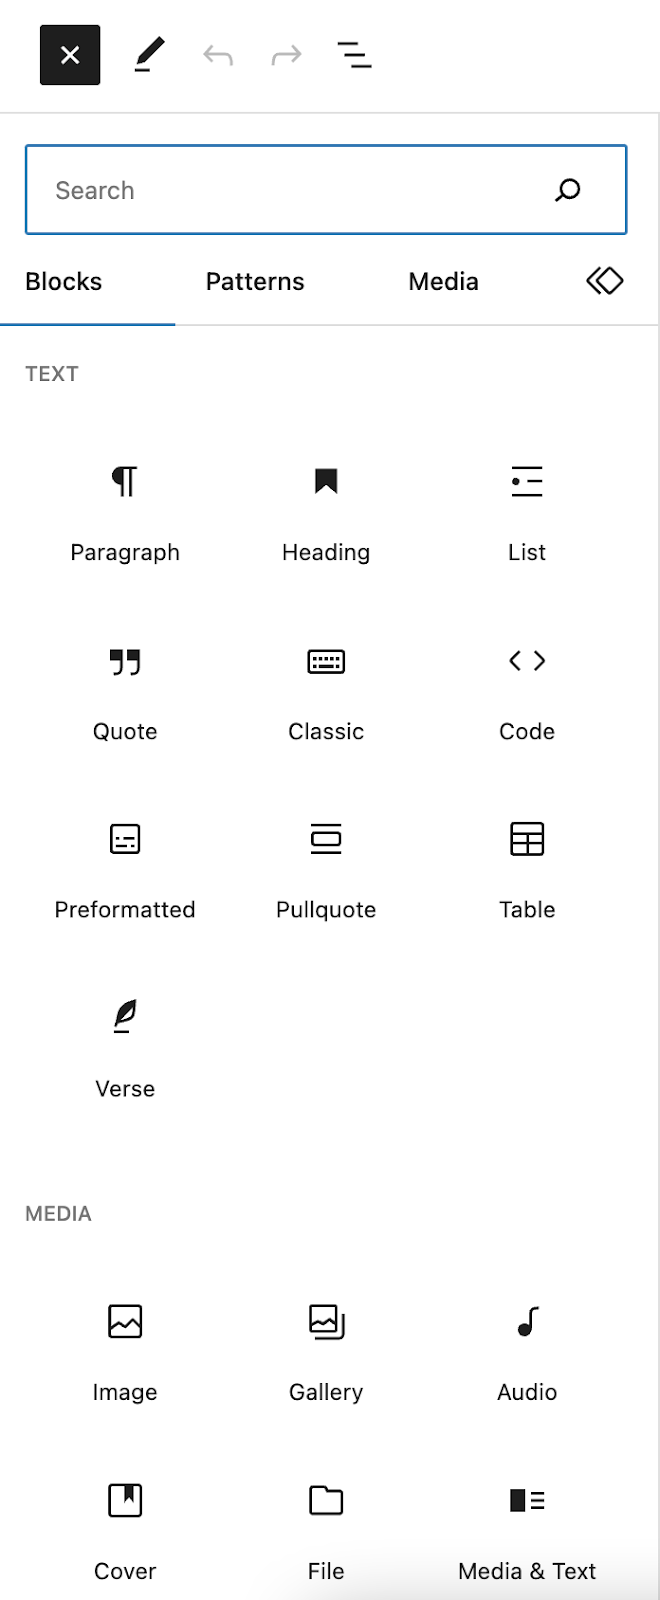
↑ Back to topThe theme has been seamlessly integrated with the native WordPress Block Editor, commonly known as Gutenberg. If you are new to WordPress or the Block Editor, the following article will provide you with a helpful starting point.WordPress.org Documentation
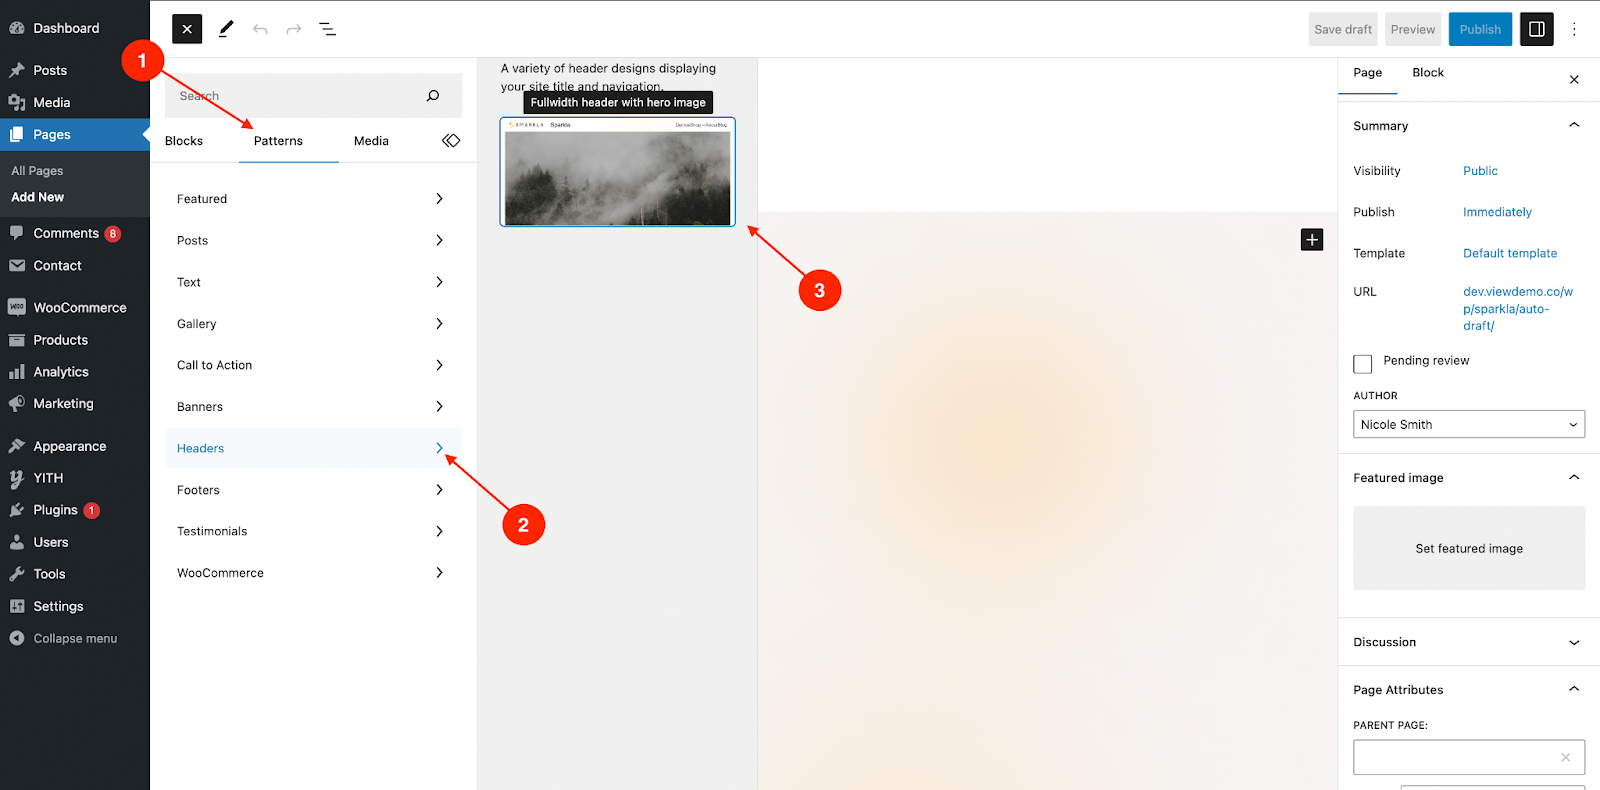
Block Patterns
↑ Back to topBlock Patterns refer to pre-defined content/layouts that can be easily incorporated into any page using the editor’s “Patterns” menu. This feature is especially handy when you wish to display specific sections of the demo content or combine different elements creatively. You can access the theme’s Block Patterns conveniently under the “Sparkla Theme” tab.

Menus & Menu Locations
↑ Back to topYou can create and assign menus to the available menu locations of the theme through Appearance > Menus in the WordPress admin. If you are not familiar with the process of creating WordPress menus, you can refer to the guide provided below for assistance.WordPress Menu User GuideThe theme has 5 available menu locations:
- Header Primary: Located in the Header (this is the main menu).
- Header Secondary: Located in the Header, before the right menu/icons.
- Mobile Primary: Located in the mobile menu.
- Mobile Secondary: Located in the mobile menu, below the “Mobile Primary” location.
- Footer: Located in the footer-bar.
Menu colors are changed from Appearance > Customize > Colors (see the documentation’s “Colors” section).
Widgets
↑ Back to topShop Filters and the Footer have designated widget areas, which can be customized and managed through Appearance > Widgets in the WordPress admin.WordPress.org Documentation
Shop Filter Widgets
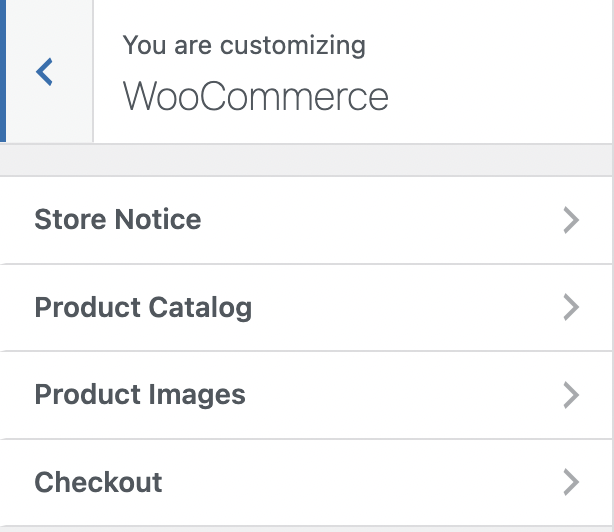
WooCommerce provides a variety of widgets that you can utilize to filter your products within the shop-catalog.Furthermore, the theme offers several options that can be customized to alter the display of the filters. These settings can be accessed through Appearance > Customize > WooCommerce
3.
Footer Widgets
The footer widget area can accommodate up to 5 widget columns, and you can adjust the layout of the footer widgets using additional settings found in Appearance > Customize > Footer.1. 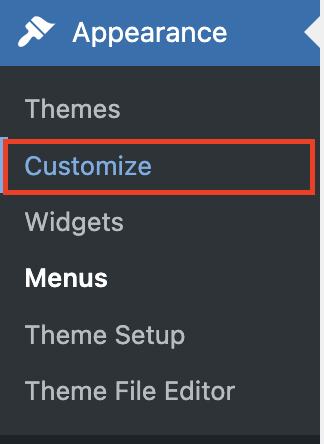

Customizer Options
↑ Back to topThe theme’s customization options have been seamlessly integrated with the WordPress Customizer, accessible through Appearance > Customize in the WordPress admin. Below is a summary of the different sections available for customization:
Logo
↑ Back to topBy default a text based logo is displayed in the header, but if you want to display an image instead you can add one via Appearance > Customize > Site Identity.The following options are also available on this page:
- Add an alternative logo for Mobile.
- Adjust the logo size for Desktop and Mobile.
- Change the Site Title and Tagline.
- Add a site icon (also known as favicon).
Fonts
↑ Back to topTo modify the font type and sizes of the theme, you can access the customization options under Appearance > Customize > Fonts.
Use Google Font:
The Google Fonts library has gained immense popularity and offers a diverse selection of fonts that can be utilized with the theme. You can explore their extensive collection on the Google Fonts website to find the perfect font style for your website.To add a new font from the Google Fonts library you can follow the steps below:
- Open the Google Fonts website.
- Find the font you want to use and copy or note its name.
- Return to your WordPress site and navigate to Appearance > Customize > Fonts > Font Types.
- Enter the font name exactly as it’s spelled on the Google Fonts website into the theme’s font-option field.
- Click Publish to save the Customizer settings.

Once you have selected and applied the Google Font for your site through the customization options, it should now be visible on your website. In case you do not see the changes immediately, you can try clearing your browser’s cache to ensure the new font is displayed correctly.
Use Standard Font:
If you prefer to use a widely supported standard font for your website, you can enter one of the following font names into the font-option field under Appearance > Customize > Fonts > Font Types:
- Arial
- Verdana
- Tahoma
- Trebuchet MS
- Times New Roman
- Georgia
- Garamond
- Courier New
- Brush Script MT
Change Font Sizes:
The majority of the theme’s font sizes are dynamically adjusted based on a single “base” setting. All elements such as headings, paragraphs, buttons, etc., are scaled to their respective sizes relative to this base setting.To customize the font sizes for the Base, Header, and Header Sub-menu, you can make the desired changes through Appearance > Customize > Fonts > Font Sizes.
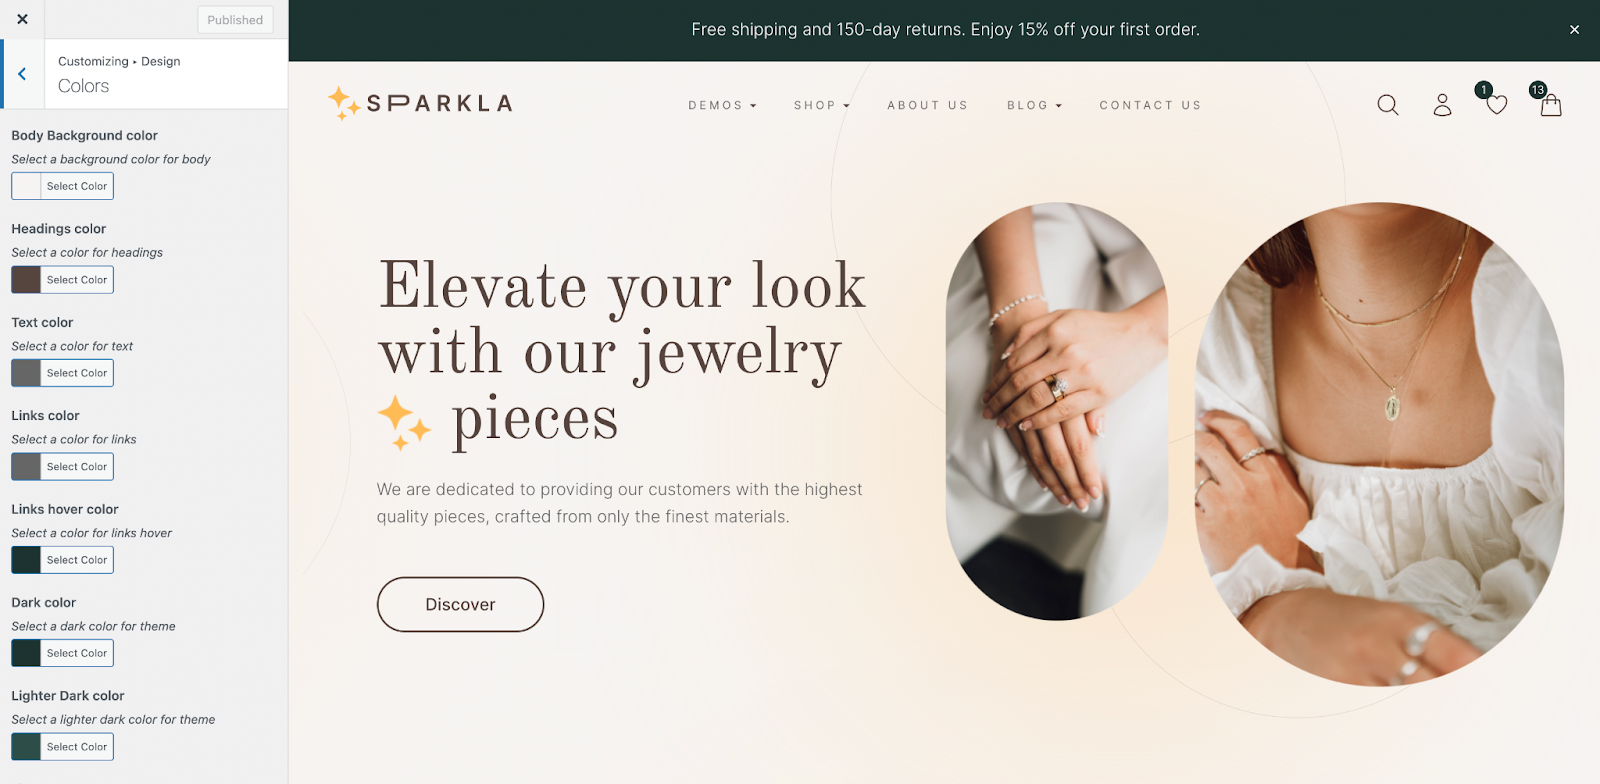
Colors
↑ Back to topThe theme offers two color modes, light and dark, which can be used independently or changed using a “switcher” menu. Alternatively, the color mode can be automatically selected based on the visitor’s browser color preference/mode.To choose the desired color mode, you can access the settings through Appearance > Customize >Design > Colors >.
Header
↑ Back to topFrom Appearance > Customize > Header, you have the ability to make the following adjustments to the theme’s header:
- Toggle the “sticky” header behavior.
- Adjust the Desktop and Mobile height.
- Toggle the various menu icons/buttons (color-switcher, search, my-account, cart).
- Add custom suggestions for the search-panel.
- Toggle the mini/side cart panel.
Top Bar
↑ Back to topThe Top Bar located above the site’s header can be customized through Appearance > Customize > WooCommerce > Store Notice.Please note that its colors can be changed independently from the general color options available on Appearance > Customize > Colors.
Mobile Menu
↑ Back to topThe mobile/side-panel menu has the flexibility to be displayed on both Desktop and Mobile devices. However, the main menu will be visible only on mobile devices by default.
You can configure the following menu options from Appearance > Customize > Mobile Menu:
- Toggle Desktop visibility.
- Toggle product-categories menu.
- Toggle color-mode switcher.
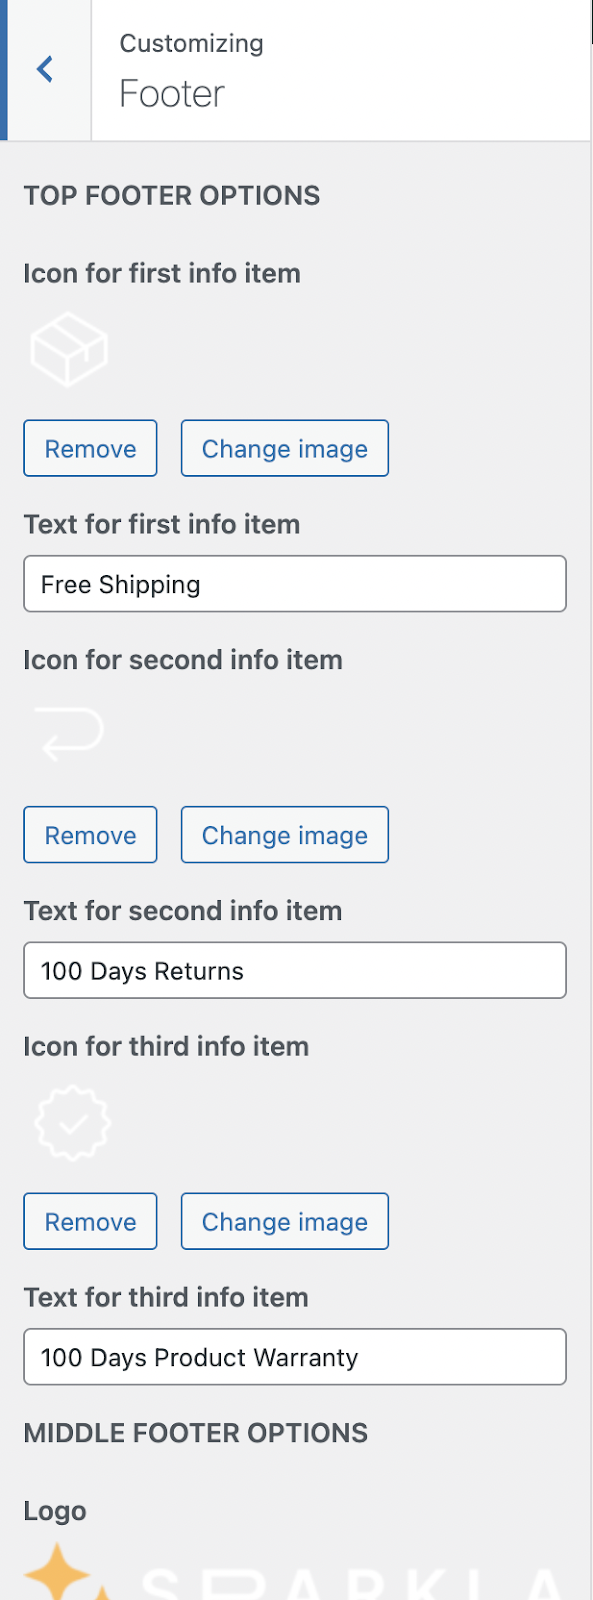
Footer
↑ Back to topThe Footer is structured into two distinct parts: the widget section and the footer bar. Widgets can be incorporated into the widget section through Appearance > Widgets (refer to the “Widgets” section in this documentation for more details), while the footer bar can be customized from Appearance > Customize > Footer.The available footer options are listed below:
- Footer text (listed HTML tags allowed).
- Adjust spacing for Desktop and Mobile.
- Change widget columns.
Note that the Footer’s colors are changed separately with the color options on Appearance > Customize > Colors.
Shop
↑ Back to topThe theme has added multiple configuration options for the WooCommerce shop-catalog, you can find the options listed below on Appearance > Customize > WooCommerce:
- Change filters layout.
- Enable toggle for individual filters.
- Toggle buttons for the slide-in filters panel.
- Toggle product “hover” image.
- Change pagination type (standard or “infinite” loading).
- Toggle “sale” labels.
- Toggle “new” labels.
Note that the WooCommerce plugin has additional options for the shop-catalog on Appearance > Customize > WooCommerce > Product Catalog.
Blog
↑ Back to topFrom Appearance > Customize > Blog, you have the ability to make the following adjustments to the theme’s blog/archive page:
- Toggle the blog heading for category pages.
- Toggle the category menu.
How To Add a New Product
↑ Back to topTo add new product go to the Products and Click on Add New:
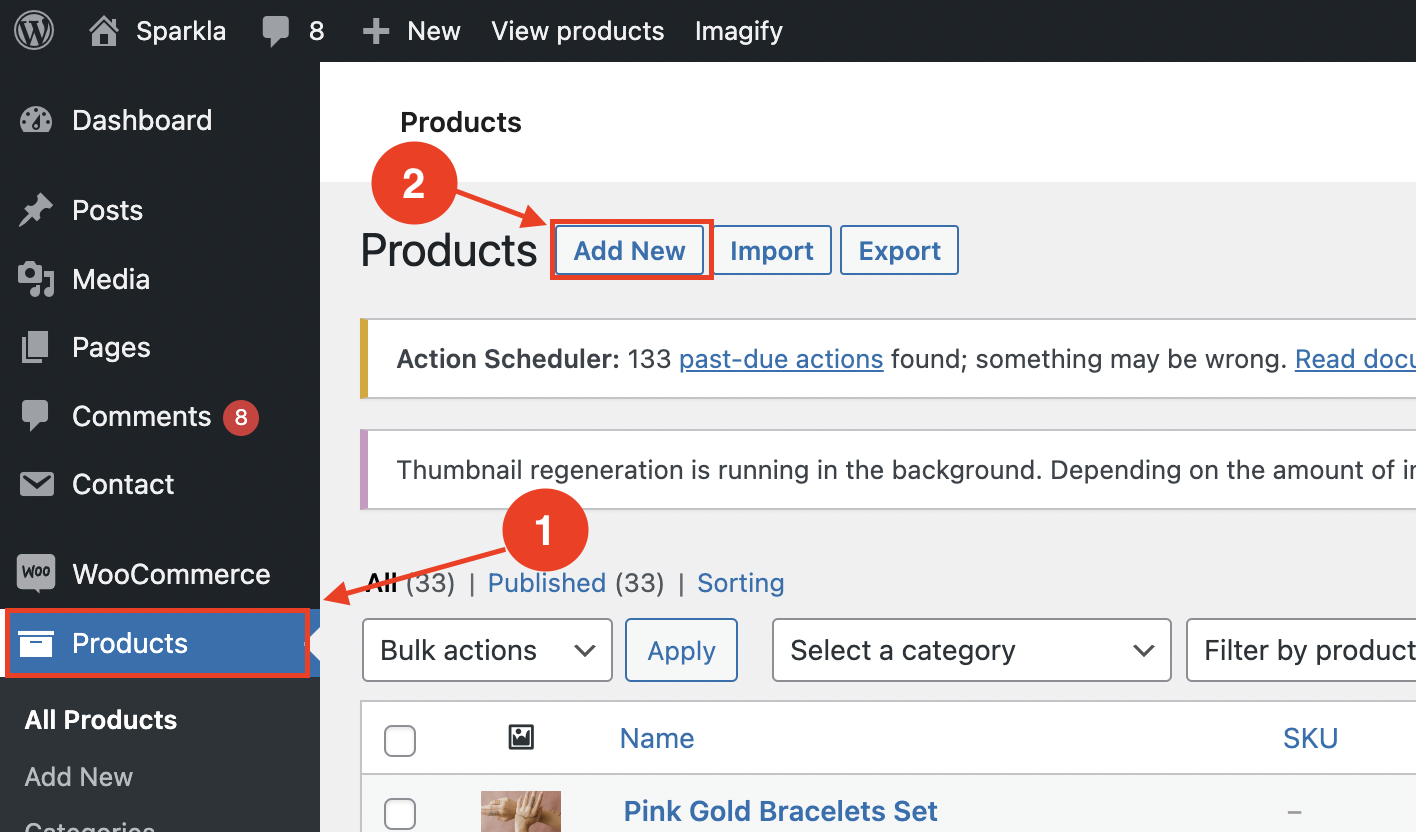
Add the following information:
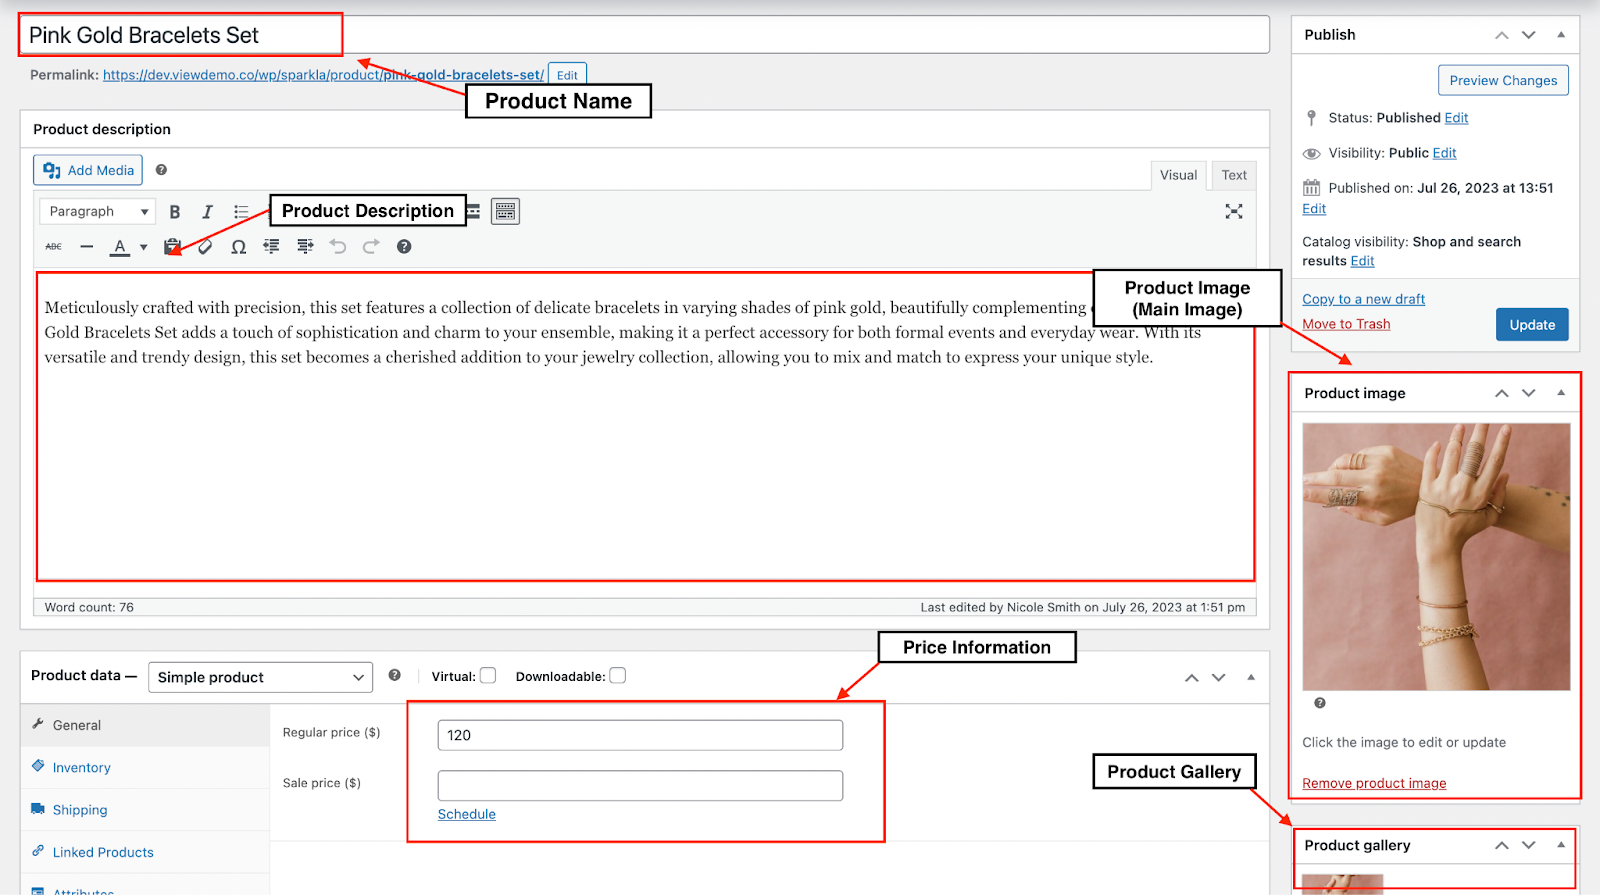
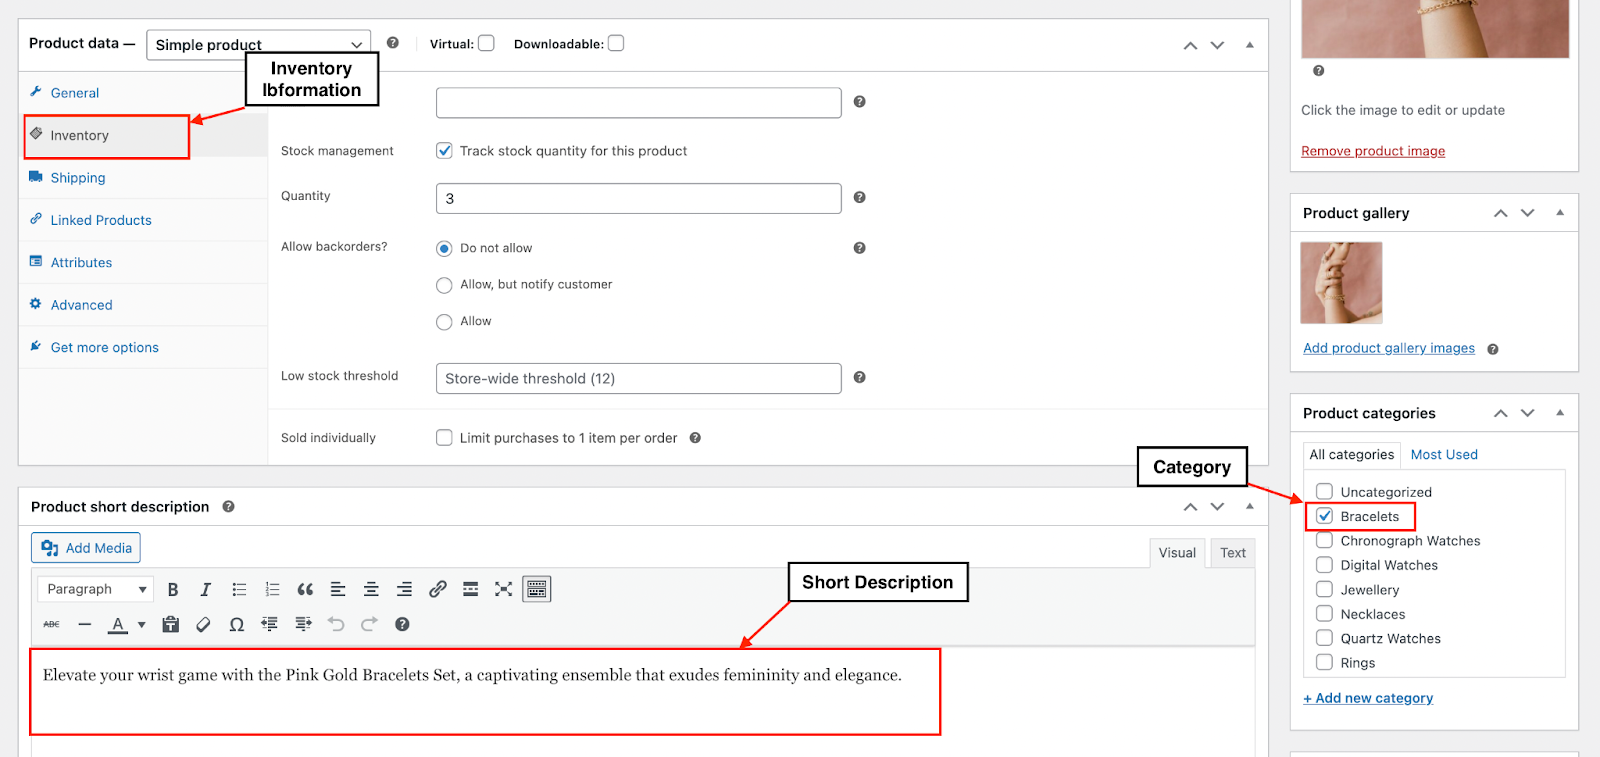
Don’t forget to click Publish.
How To Add New Blog Post
↑ Back to topTo add new Blog Post go the the Posts and click Add New:
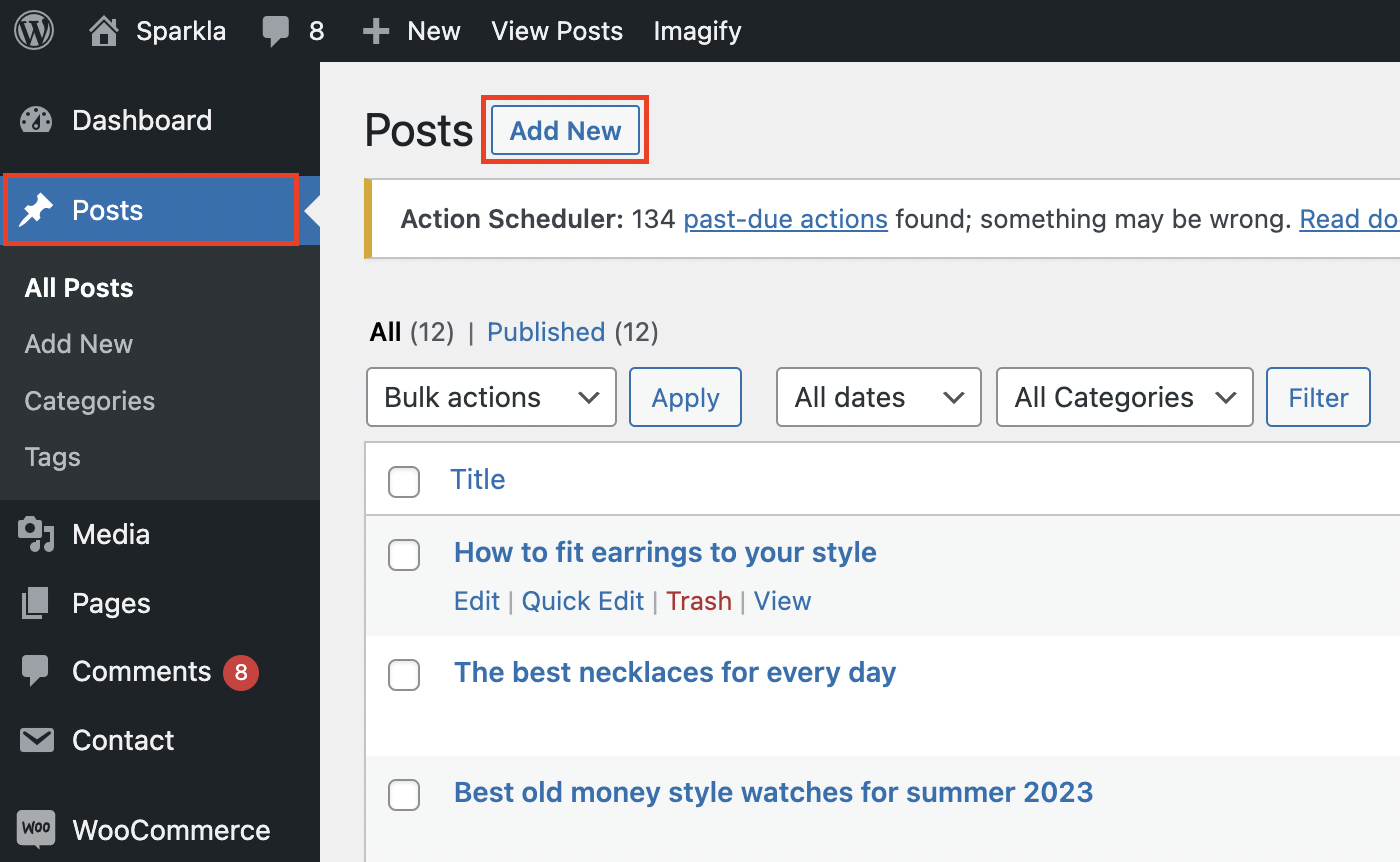
On the blog post you can add: Heading, Paragraphs, Images, Video, Lists and more.