Note: This guide should help you get started with PayPal quickly! Take a look at our complete PayPal Payments documentation where you can find helpful information about how PayPal Payments can help you get the most out of your store.
Thank you for choosing our official PayPal integration. With WooCommerce PayPal Payments, you can:
- Offer full-stack payment processing — the choice of payment methods for your customers
- Smart payment buttons — present relevant payment methods to your customers in specific markets
- Fully customizable card fields for Advanced Card Payments
- Digital wallets such as Apple Pay & Google Pay
- Use the latest PayPal features — all in one integration, including PayPal Pay Later or Fastlane
Requirements
↑ Back to topFirst, let’s make sure your site meets the requirements to ensure a smooth installation. To install WooCommerce PayPal Payments, you’ll need:
- WordPress Version 6.5 or newer (installed)
- WooCommerce Version 9.6 or newer (installed and activated)
- PHP Version 7.4 or newer
- PayPal business or personal account
Installation
↑ Back to topTo install WooCommerce PayPal Payments on your site, follow these steps:
- Go to Plugins > Add New on your WordPress site.
- In the search box, type “WooCommerce PayPal Payments” and hit Enter on your keyboard.
- One of the first results will be WooCommerce PayPal Payments by PayPal.
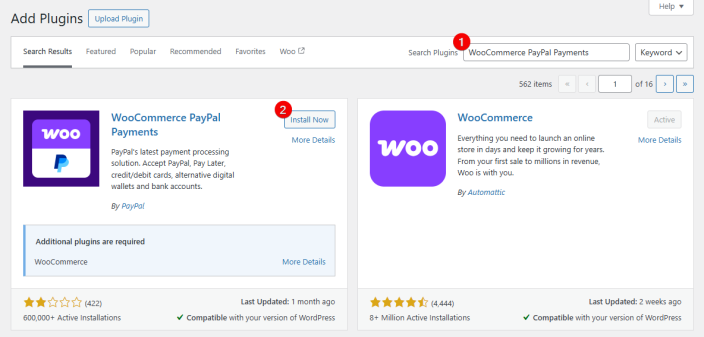
- Click the Install Now button to begin installation on your site. Once installation is complete, the Install Now button will change to Activate.
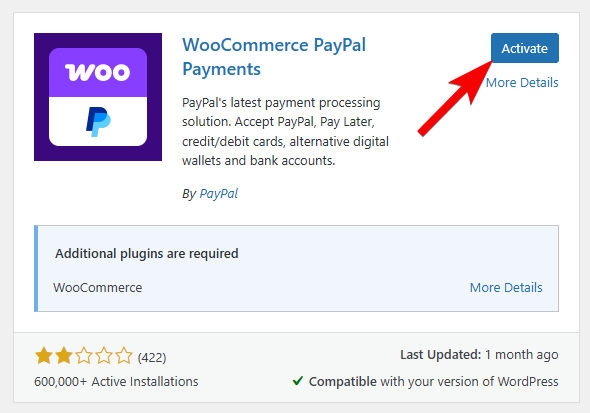
- Click the Activate button.
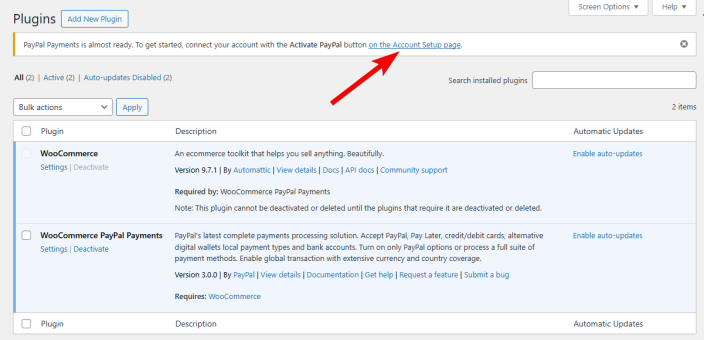
After clicking Activate, you will be taken to the plugins overview page with a notice linking to the Account Setup page to connect your PayPal account or create a new one.
Account Setup
↑ Back to topOnce you have installed and activated the PayPal Payments plugin, follow these steps to set it up and start accepting payments on your WooCommerce store.
Activating PayPal Payments
↑ Back to top- After installation, go to the PayPal Payments settings page in your WooCommerce dashboard.
- On the setup page, you’ll see a large “Activate PayPal Payments” button. Clicking this button will begin the setup process for your live PayPal account.
- Follow the prompts as explained. See the sections titled Sandbox below for guidance on how to test payments before going live.

Set up Sandbox Account for Testing
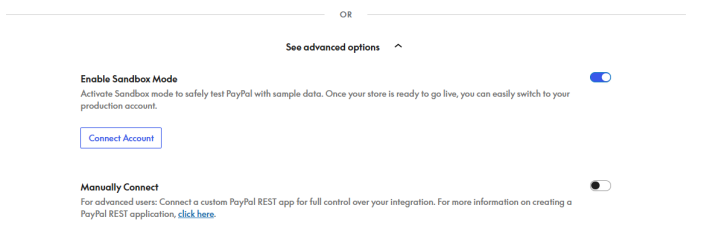
If you first want to test PayPal payments in a safe environment before going live with your store, you can click on See advanced options to either enable Sandbox Mode and connect using PayPal’s onboarding process or manually using a previously created PayPal REST application.
If you don’t have a Sandbox account yet, you can create one as described below:
Creating A PayPal Sandbox account:
- Visit https://developer.paypal.com
- Log in using your PayPal account credentials
- Navigate to Dashboard -> Developer Dashboard -> Sandbox Account -> Create Account
- Either use the existing pre-generated business account or create a new business or personal account
- For the Sandbox account you would like to use, click the email address or … and select View/Edit Account
- Note the email address and password for the account to use with the onboarding process
- While here, create a second business or personal account and note down these login details as well to use as the buyer when testing the PayPal payment process
Sandbox Connection Instructions:
- Enable Sandbox Mode:
- To test PayPal transactions using sample data, turn on Sandbox Mode. This allows you to test payments without real transactions. You can safely try out the entire payment process and switch back to live mode once you’re ready to receive real payments.
- After enabling Sandbox Mode, click Connect Account to link your PayPal Sandbox account.
- Manually Connect:
- For more control over your integration, you can use Manual Connect to set up a custom PayPal REST application. This is recommended for advanced users who need to configure their integration more precisely.
- Provide your Sandbox Client ID and Sandbox Secret Key in the respective fields.
- Once entered, click Connect Account to establish the connection.
Choose Your Account Type
↑ Back to topIf you are following the live account setup guide, it will first require you to identify as a Business or Personal seller for PayPal to offer the right services to you.

- You will be prompted to choose between Business Account and Personal Account.
- After selecting the appropriate account type, click Continue to proceed.
Recommendation
Using a PayPal Business Account unlocks advanced features like credit/debit card payment processing, fraud-prevention, invoicing, and other business-oriented payment processing tools.
Select Product Types
↑ Back to top
- Configure PayPal based on the Products You Sell: Choose the types of products you sell to help tailor the setup. You can select from:
- Virtual Products: Services, downloadable items, bookings, or deposits.
- Physical Goods: Items that require shipping.
- Subscriptions Option: If you sell subscription-based products, enable the Subscriptions option (note that this requires WooCommerce Subscriptions to be enabled).
- Proceed: Once you’ve selected your product types, click Continue.
Choose Checkout Options
↑ Back to top
- Add Expanded Checkout Features: Here, you can enable additional checkout options:
- Custom Card Fields: Style the credit card fields to match your store’s design. This feature includes advanced fraud protection, 3D Secure, and chargeback protection.
- Digital Wallets: Enable Apple Pay and Google Pay for a seamless checkout experience.
- Alternative Payment Methods: Offer additional payment options like local payment methods.
- Fastlane by PayPal: Speed up checkout by allowing guest checkout and linking customers’ email addresses to their payment details.
- Proceed: After selecting your desired options, click Continue to proceed to the final step.
Connect Your PayPal Account
↑ Back to top- Log in to PayPal: You will now be prompted to log in to your existing PayPal account or create a new one if you don’t have an account yet. PayPal will guide you through the process of creating a new account if necessary.
- Complete the Setup: Once you’ve logged into your PayPal account, click Connect to PayPal to finalize the setup and connect your PayPal account to WooCommerce.
- Finish Setup: After connecting your PayPal account, your PayPal Payments gateway will be fully set up and ready to accept payments.
Configuring PayPal Payments
↑ Back to topOverview
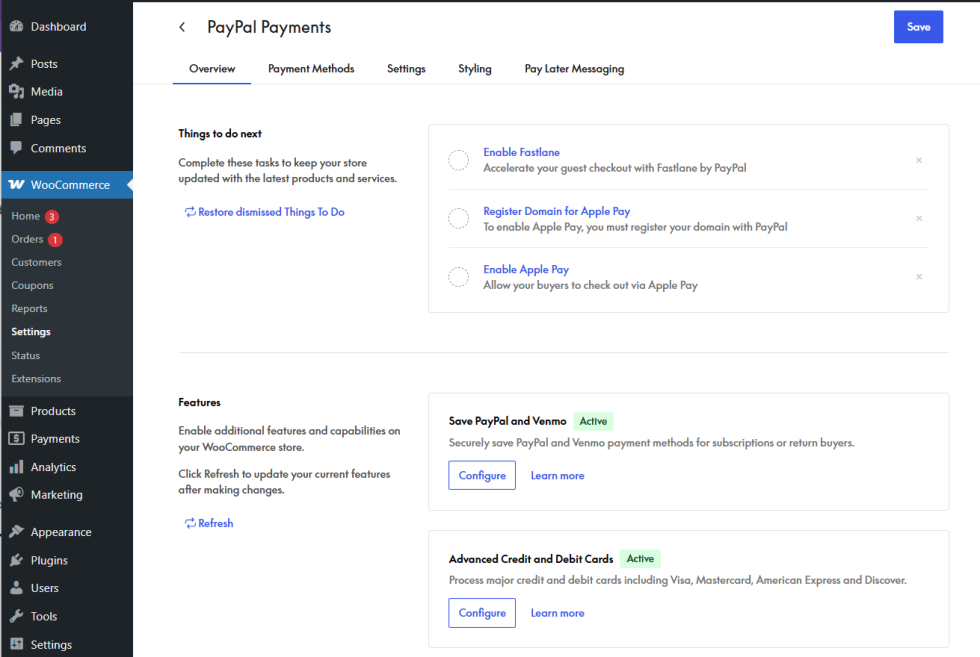
↑ Back to topAfter connecting your PayPal account, the overview page will display Things To Do Next, an overview of available features, and the Help Center.
Payment Methods
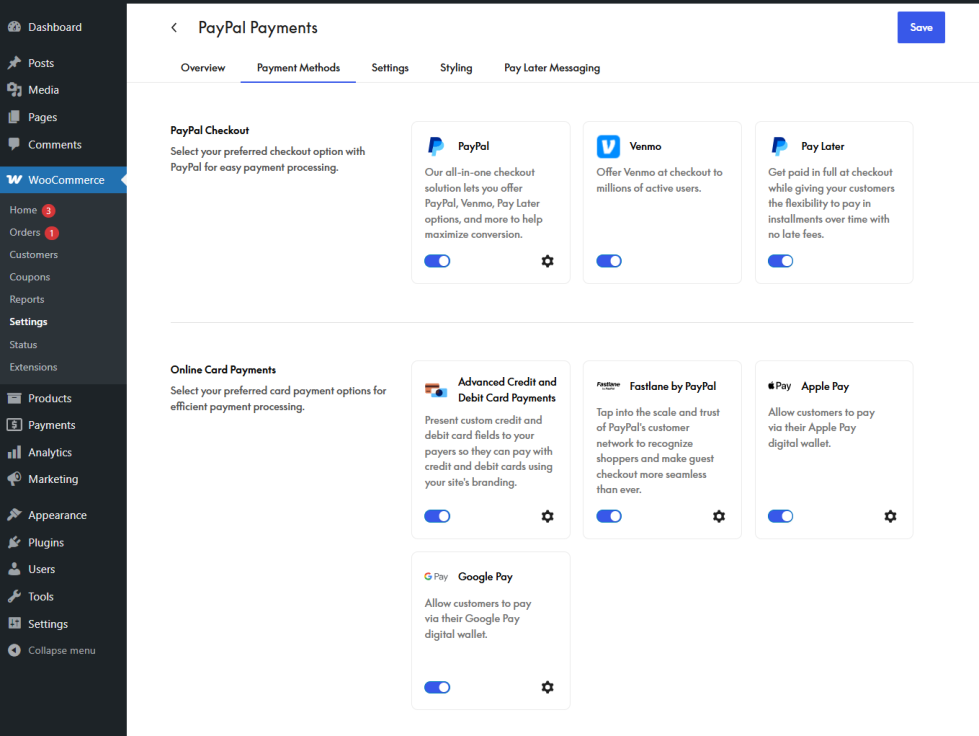
↑ Back to topChoose which payment methods PayPal should provide for your store. Configure the payment methods according to your needs.
Settings
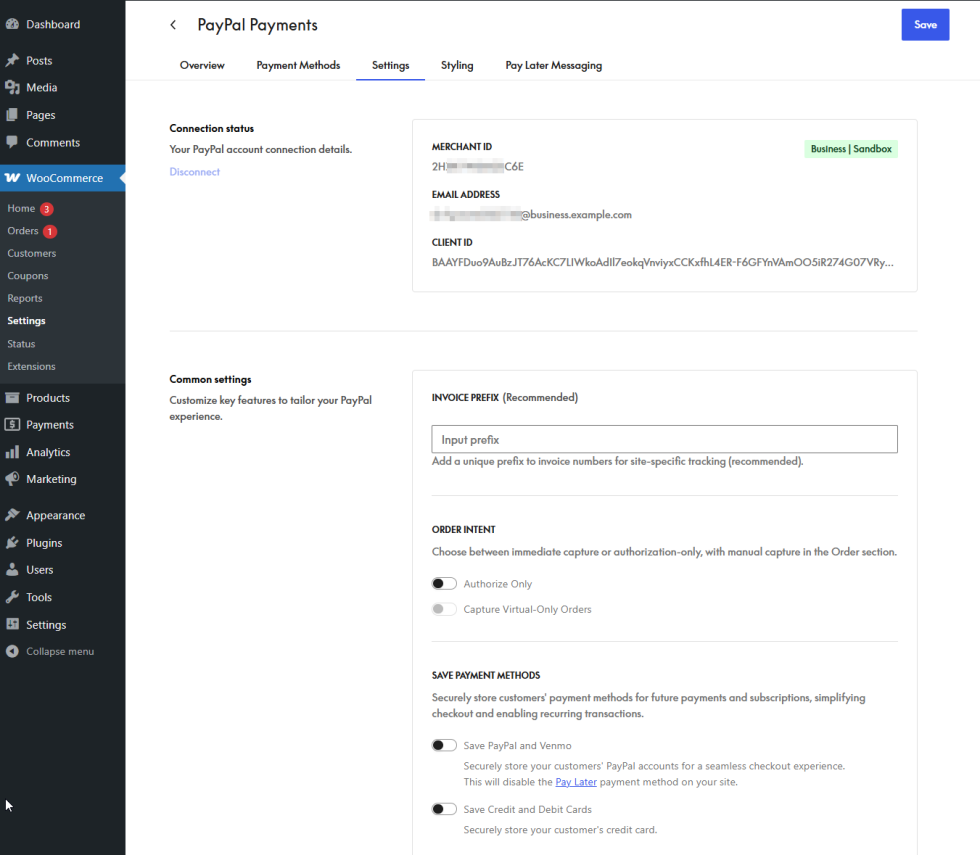
↑ Back to topThe most frequently used settings are found in the Settings tab. Resubscribe webhooks, enable advanced features, or disconnect your PayPal account from this tab.
Styling
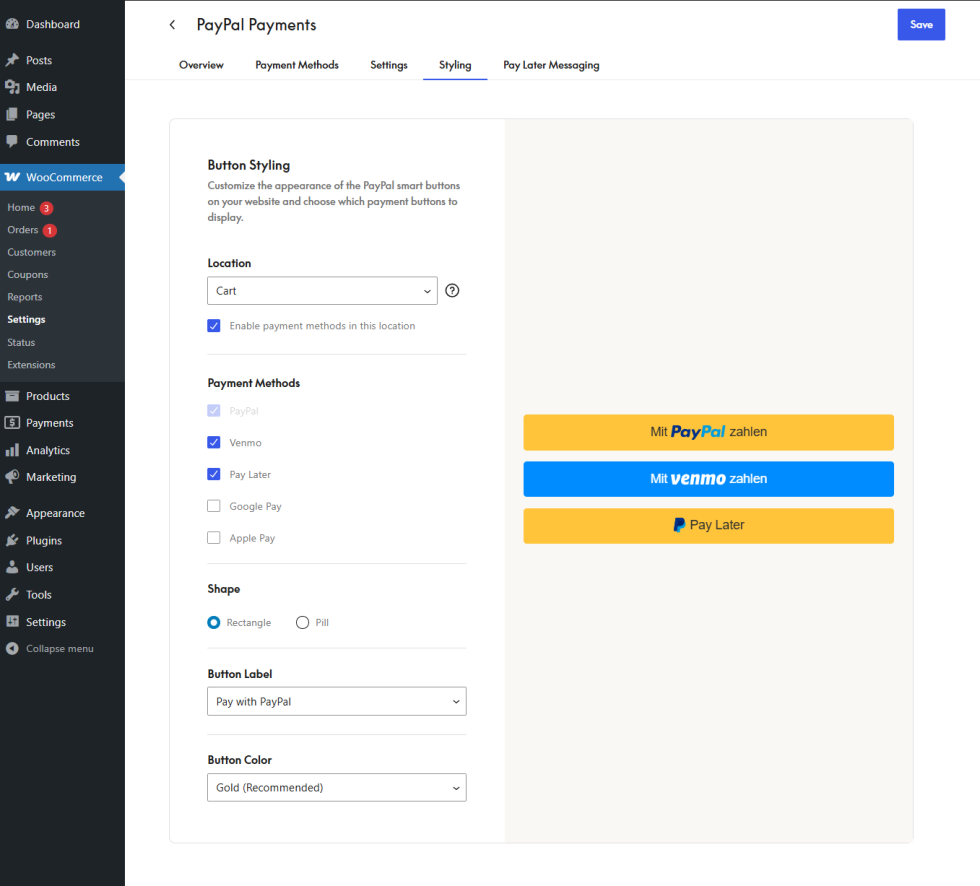
↑ Back to topThe styling tab lets you control the appearance of PayPal and other smart payment buttons.
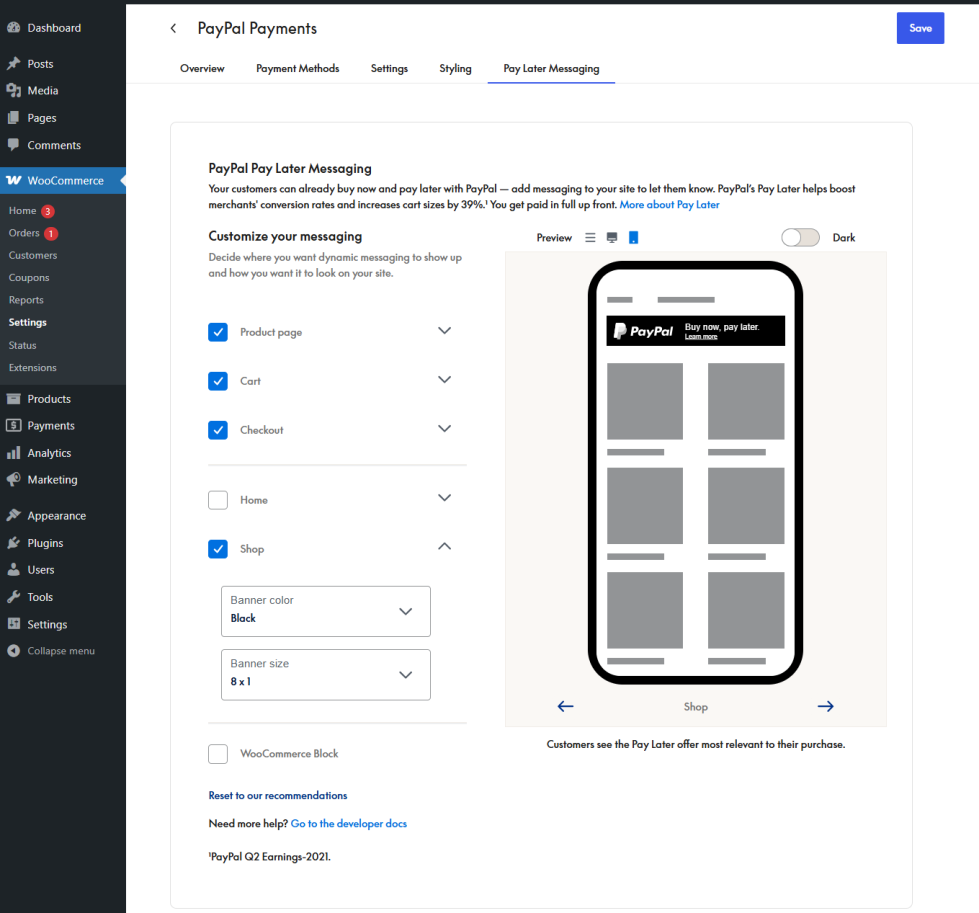
Pay Later Messaging
Add dynamic Pay Later messaging to your site, decide where you want it to show up and how it should look on your site. PayPal’s Pay Later helps boost merchants’ conversion rates and increases cart sizes by 39%.¹ You get paid in full up front. More about Pay Later
Get help
↑ Back to topIf you need assistance with the PayPal Payments extension, please contact the support team via our support request form.
To receive support for PayPal Payments, it may be necessary to add the extension to your WooCommerce account. Once the extension has been added, support can be reached from the Dashboard section, by selecting Get Support, Technical support, and PayPal Payments.
Creating a support request requires a WooCommerce.com account. Your request must include a link to your site and a copy of your WooCommerce System Status Report. After submitting your request, the support team will get back to you as soon as possible.
Additionally, assistance can be sought in the official WordPress.org community support forums. These forums are regularly monitored by our support team, who are dedicated to helping users. In certain circumstances, it may be necessary to create a private support request, to provide support with a more detailed explanation of your issue.