
Smart Buttons
↑ Back to topPayPal’s Smart Buttons provide customers with a tailored checkout experience. These buttons are designed to maximize conversion by offering PayPal, Pay Later options, and credit/debit card payments. The Smart Buttons can be easily customized to fit your site’s design and offer multiple payment options, improving the user experience.
In the PayPal Payments settings, open the Styling tab to choose where the buttons appear and how they look:
- Location: Cart, Classic Checkout, Express Checkout, Mini Cart or Product Page. Check Enable payment methods in this location to show buttons there.
- Payment Methods: PayPal is always shown. Venmo, Pay Later, Google Pay and Apple Pay can be turned on or off per location.
- Shape: Rectangle or Pill.
- Button Label: PayPal, Checkout, PayPal Buy Now or Pay with PayPal.
- Button Color: Gold (Recommended), Blue, Silver, Black or White.
- Button Layout (Vertical or Horizontal) and Show tagline below buttons: only for Classic Checkout, Mini Cart and Product Page.
The preview next to the settings shows the result. Click Save to apply it.
PayPal on Non-Checkout Pages
↑ Back to topPayPal can be integrated on non-checkout pages, including product pages and the shopping cart. This allows users to quickly initiate payments without navigating to the checkout page. By offering PayPal on non-checkout pages, customers can easily pay and complete transactions directly from anywhere on your site.
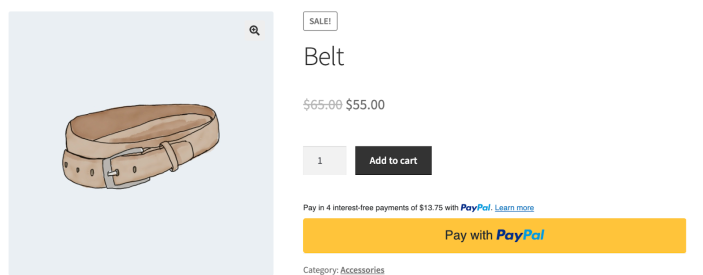
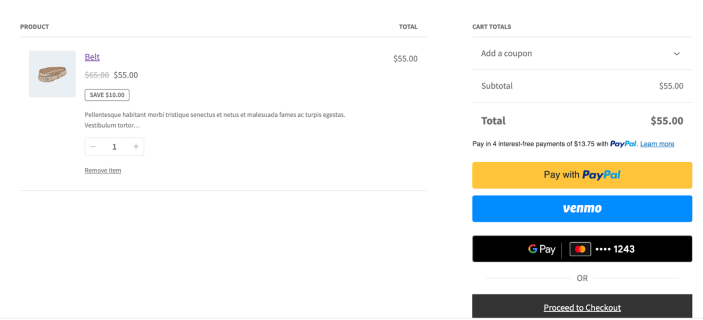
The smart buttons on product and cart pages simplify the checkout process by auto-populating the customer’s address details from their PayPal account to the WooCommerce checkout form. This feature was previously called PayPal Express.
To show the buttons on these pages, open the Styling tab, select the Product Page, Cart or Mini Cart location, and check Enable payment methods in this location. In block themes, the buttons are added automatically to the Single Product template and the Mini-Cart block.
The customer experience:
- Customer adds items to the cart
- Customer clicks the PayPal button on the cart page
- Customer logs in to PayPal and authorizes the transaction*
- PayPal sends the customer’s billing/shipping information to the WooCommerce Checkout page
- Customer confirms shipping preferences and taxes on the Checkout page
- Customer clicks “Place order” to complete the transaction with PayPal.
This process reduces the amount of data entry required by the customer, streamlining the checkout experience.
If the Pay Now Experience is turned on (see below), the customer selects a shipping method in the PayPal window and the order is placed as soon as they approve the payment. They do not return to the WooCommerce Checkout page. The steps above apply when the Pay Now Experience is turned off.
*PayPal obtains order authorization for an amount up to 150% of the subtotal to account for taxes and shipping costs, capped at $75. The original subtotal is used if no taxes or shipping costs apply, otherwise the updated total is used.
Pay Now Experience
↑ Back to topThe Pay Now Experience allows your customers to complete their purchase directly within PayPal’s payment window, bypassing the WooCommerce order review page. When enabled, this feature synchronizes your store’s shipping methods with PayPal, enabling shoppers to select their preferred shipping option directly within the PayPal interface. This streamlined checkout flow helps reduce cart abandonment by providing a faster, more seamless payment experience.
To turn it on or off, open the Settings tab and find Pay Now Experience under Common settings: “Let PayPal customers skip the Order Review page by selecting shipping options directly within PayPal.” It is turned on by default for US merchants after onboarding.
Mobile App Integration (AppSwitch)
↑ Back to topWhen customers use iOS or Android devices with the PayPal app installed, the Pay Now Experience enables AppSwitch functionality. This automatically redirects users from their mobile browser to the PayPal app to securely confirm their payment, providing an even more streamlined and trusted checkout experience on mobile devices.
The AppSwitch feature works by:
- Detecting when the PayPal app is available on the customer’s device
- Seamlessly transitioning the payment flow from the browser to the native PayPal app
- Returning customers to your store after payment confirmation in the app
This mobile-optimized experience is particularly valuable for customers who prefer using native apps for secure payments, as it leverages the trusted PayPal app interface while maintaining the convenience of the Pay Now flow.
PayPal on the Checkout Page – Express Checkout
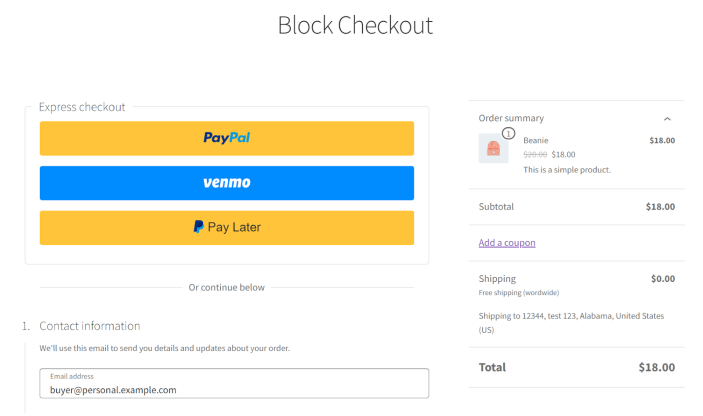
↑ Back to topOn stores that use the Checkout block, PayPal, Venmo, Pay Later, Apple Pay and Google Pay buttons can appear in the Express Checkout area at the top of the Checkout page. The customer pays with one click, and PayPal fills in their contact and address details. To show or hide these buttons, select the Express Checkout location in the Styling tab. See WooCommerce Blocks for details.
PayPal on the Checkout Page – Classic Checkout
↑ Back to topPayPal can be added to the checkout page, providing a seamless payment experience. The PayPal button will be prominently displayed, enabling users to complete transactions using their PayPal account or other payment methods directly from the checkout.
The PayPal buttons on the WooCommerce Classic Checkout page replace the “Place order” button. Customers must complete all required form fields before making a payment. When a smart button is clicked, the form fields are checked on the server before creating the PayPal order. If necessary, this form field validation can be turned off with a filter to avoid compatibility issues with third-party code. The WooCommerce form field validation occurs after the PayPal order has been created. If the WooCommerce validation fails, the customer will not be charged and no WooCommerce order will be created.
Depending on customer eligibility and plugin configuration, Alternative Payment Methods are automatically presented in the PayPal Payments Checkout gateway.
To show or hide the buttons on this page, select the Classic Checkout location in the Styling tab. Button Layout and the tagline can be set for this location.
PayPal redirect gateway on the Checkout Page
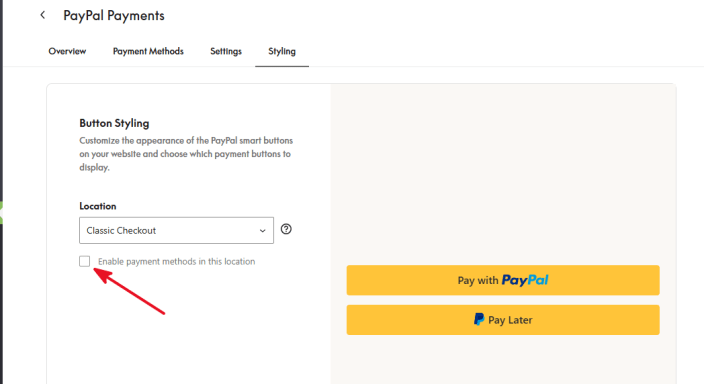
↑ Back to topTo enable a simple PayPal redirect gateway on the Checkout page, uncheck the option “Enable payment methods in this location” for the Classic Checkout location:
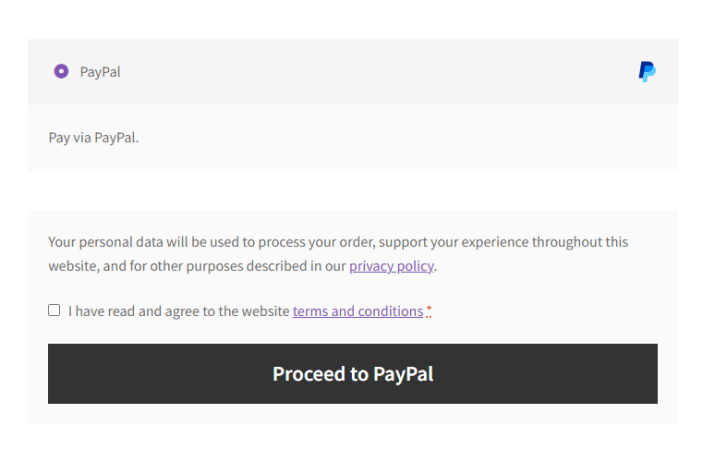
When selecting the PayPal radio button on the checkout page, no PayPal smart buttons appear. Instead, the buyer will be redirected to the PayPal website when they click “Proceed to PayPal”.
Collect the buyer’s phone number
↑ Back to topBy default, PayPal may not send the buyer’s phone number to WooCommerce during PayPal wallet or express checkout payments. This is controlled by your PayPal merchant account, not by WooCommerce PayPal Payments.
To enable phone number collection:
- Open the PayPal website preferences for your Live account or Sandbox account.
- Go to Account Settings → Website payments → Website preferences.
- Find Contact telephone number.
- Select On (optional field) or On (required field).
- Save your changes.
When PayPal returns a phone number, WooCommerce PayPal Payments adds it to the order’s billing phone field. The plugin’s Contact selection on payment setting controls the Contact Module experience, but it cannot make PayPal return a phone number unless collection is enabled in the merchant account.
Collect the buyer’s separate billing address
↑ Back to topWith express buttons, PayPal sends only the shipping address by default, so WooCommerce copies it into the billing fields. To receive a separate billing address, contact PayPal Merchant Support and ask them to enable the billing address feature for your account.