
The Mini-Cart block adds a button that shoppers can use to view their cart from the site header or another template area.
Use this guide to check the current button and drawer settings, edit the Mini-Cart drawer, and confirm the labels shoppers see.
Before you start: Use an account that can edit site templates, then open a template containing the Mini-Cart block in the Site Editor. These template-editing steps apply to block themes.
Mini-Cart Button Settings
↑ Back to topSelect the Mini-Cart block in the template to open its settings in the sidebar. The list below uses the current Site Editor labels.
- Cart Icon: Choose the cart, bag, or alternate bag icon.
- Display total price: Show the cart total beside the icon. The price is hidden when the cart is empty.
- Show Cart Item Count: Choose Always (even if empty), Only if cart has items, or Never. The editor displays a placeholder count.
- Mini-Cart in cart and checkout pages: In the Site Editor, choose Hide or Remove. This setting may affect the header layout.
- Open drawer when adding: Choose whether the drawer opens after a shopper adds a product to the cart.
- Navigate to checkout when clicking the Mini-Cart, instead of opening the drawer: Choose whether selecting the button opens the drawer or goes directly to Checkout.
- Styles: Adjust the Mini-Cart icon, product-count, and price colors. The block also supports typography and spacing controls.
Your theme styles apply unless you choose different block styles.
Cart Drawer Template Part
↑ Back to topBy default, selecting the Mini-Cart button opens a drawer where shoppers can view their selected products and continue to checkout. You can instead configure the button to send shoppers to Checkout. WooCommerce uses a template part to display the drawer contents. To change the expanded Mini-Cart, edit the Mini-Cart template part.
Accessing the Mini-Cart Template Part
↑ Back to topYou can access the Mini-Cart Drawer template part to edit it in a few different ways:
- In the Mini-Cart block settings sidebar, choose Edit Mini-Cart Drawer template in the Cart Drawer section.
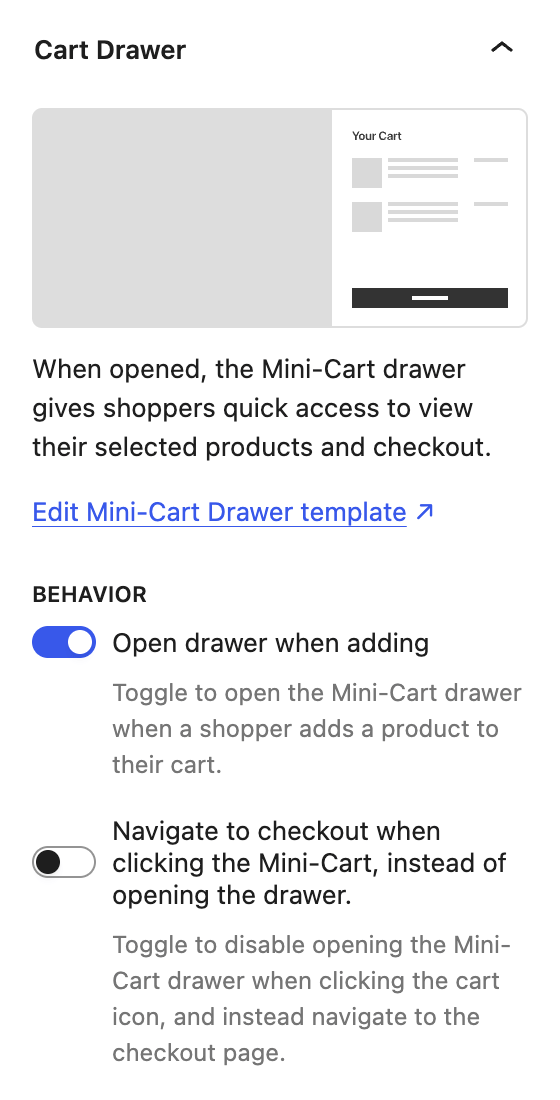
- Access the template part directly using the editor command palette:
- Open Appearance > Editor in your WordPress dashboard.
- Press Command+K on Mac or Ctrl+K on Windows.
- Search for the Mini-Cart template part and select it.
- Access the template part in the editor navigation:
- Open Appearance > Editor in your WordPress dashboard.
- Select Patterns.
- Select Mini-Cart under Template Parts, then open the template part.
Editing the Mini-Cart Template Part
↑ Back to topThe Filled and Empty Mini-Cart views are locked in place, but you can edit the text and settings of their existing blocks and add blocks to either view.
Mini-Cart States
Once you’ve accessed the template part, if you open List View you’ll see that it contains a block called “Mini-Cart Contents”, which has two states nested inside of it:
- Filled Mini-Cart view
- Empty Mini-Cart view
Select the Mini-Cart Contents block to switch between its Filled and Empty views. You can also select a block inside either view in List View to edit that view.
Adding blocks to the Mini-Cart
↑ Back to topTo add a block to a state of the Mini-Cart:
- Select the state you’d like to edit.
- Select Add block in the template.
- Search for the block of your choice and select it.
By default, the Filled view uses View cart and Go to checkout. The Empty view uses Your shopping cart is empty and Return to shop. To change a label or message, select its text in the relevant view and enter your wording. Existing custom text remains in place.
Filled and Empty View Settings
In the Filled Mini-Cart view, you can:
- Adjust the color, typography and dimensions of the heading elements.
- Control the button style and color of the “View cart” and “Go to checkout” buttons in the Mini-Cart footer.
- Select the heading or button text to edit it.
In the Empty Mini-Cart view, you can:
- Adjust the color, typography and dimensions of the paragraph element.
- Control the button style and color of the “Return to shop” button.
- Select the “Your shopping cart is empty” message or button text to edit it.
Check Your Changes
↑ Back to topSelect Save in the Site Editor and confirm the changed template parts. Preview the template with an empty cart and with at least one item in the cart. Confirm the button icon, total-price and item-count choices, and the Filled or Empty view. Open the Mini-Cart from the storefront and check that it opens the drawer or follows your selected Checkout behavior.
If a label does not change, select the matching text block inside the correct Mini-Cart view and check whether custom text is already saved. If the drawer does not open when you select the Mini-Cart button, check the setting that navigates to Checkout. If the Mini-Cart is missing on Cart or Checkout pages, review its Hide or Remove setting in the Site Editor.
Questions and support
↑ Back to topDo you still have questions and need assistance?
This documentation is about the free, core WooCommerce plugin, for which support is provided in our community forums on WordPress.org. By searching this forum, you’ll often find that your question has been asked and answered before.
If you haven’t created a WordPress.org account to use the forums, here’s how.
- If you’re looking to extend the core functionality shown here, we recommend reviewing available extensions in the WooCommerce Marketplace.
- Need ongoing advanced support or a customization built for WooCommerce? Hire a Woo Agency Partner.
- Are you a developer building your own WooCommerce integration or extension? Check our Developer Resources.
If you weren’t able to find the information you need, please use the feedback thumbs below to let us know.