Overview
↑ Back to topM2E Temu Connect for WooCommerce lets you:
- List products from your WooCommerce catalog on Temu.
- Keep inventory and prices in sync between Woo and Temu in real time.
- Import Temu orders into WooCommerce so you can fulfill them like any other store order.
M2E Temu Connect is the WooCommerce extension that powers this integration. It lives in your store’s WP Admin dashboard and uses M2E Multichannel Connect to communicate with Temu.
What this integration is built for:
- WooCommerce as your primary data source. Products, quantities, and base prices start in Woo. M2E sends that data to Temu and keeps it aligned.
- Temu Local expansion. M2E is an official Temu partner and supports Temu markets in the US, UK, and EU, with more regions available through Temu Local.
- Centralized work. You manage listings, inventory, and orders in WooCommerce while M2E runs the sync with Temu.
- Flexible settings to meet your needs. You control how much stock Temu can see and can set Temu-specific prices to keep your inventory saved for other channels.
Requirements
↑ Back to top- An active WooCommerce store
- A registered and approved Temu seller account
Once these are in place, you link WooCommerce to M2E Temu Connect, link your Temu account, and can start listing products and syncing orders under the built-in free trial.
Installation
↑ Back to topTo start using a product from WooCommerce.com, you can use the “Add to store” functionality on the order confirmation page or the My subscriptions section in your account.
- Navigate to My subscriptions.
- Find the Add to store button next to the product you’re planning to install.
- Follow the instructions on the screen, and the product will be automatically added to your store.
Alternative options and more information at:
Managing WooCommerce.com subscriptions.

Setup and connection
↑ Back to top1. Connect your Temu seller account
↑ Back to topYour WooCommerce store will act as the primary data source. To sync products and orders, connect your Temu account.
- Navigate to the extension settings in your store’s WP Admin dashboard.
- Click Connect Marketplace Account.

- Choose Temu and authorize access when prompted.
Once the connection is established, M2E displays a simple checklist to guide you through the remaining setup steps.
2. Match existing Temu listings to WooCommerce products
↑ Back to topIf you already have products live on Temu, M2E will look for matches in WooCommerce using SKU or Product ID.
If some items are still not matched:
- Open the Link Products step in the M2E Setup Guide.
- Click View Not Linked Products to open the Listings page.
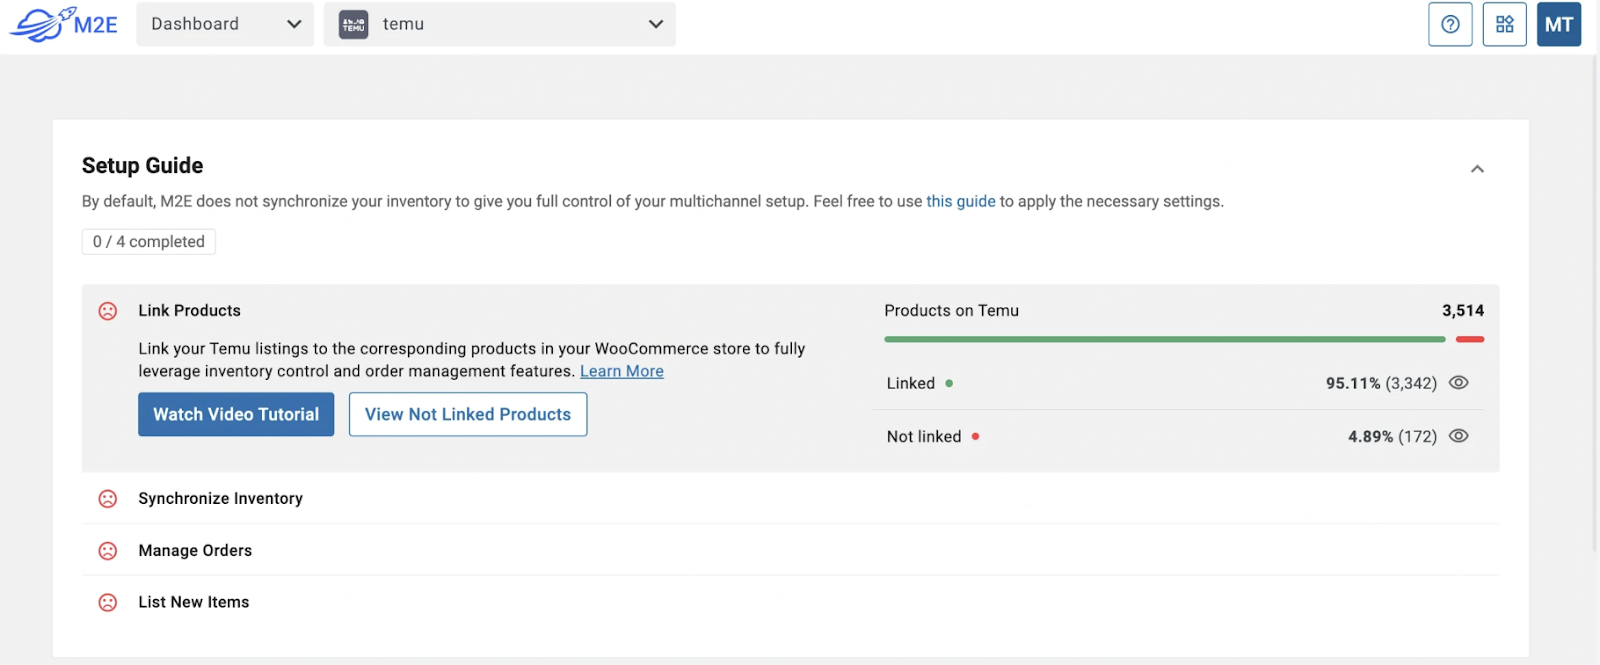
- Link each Temu listing to the correct WooCommerce product.
Only linked items can sync, so complete this step before you continue.
3. Enable inventory sync
↑ Back to topOnce products are linked, turn on inventory sync so WooCommerce updates can flow to Temu.
- Move to the Synchronize Inventory step.
- Click View Not Synced Products.
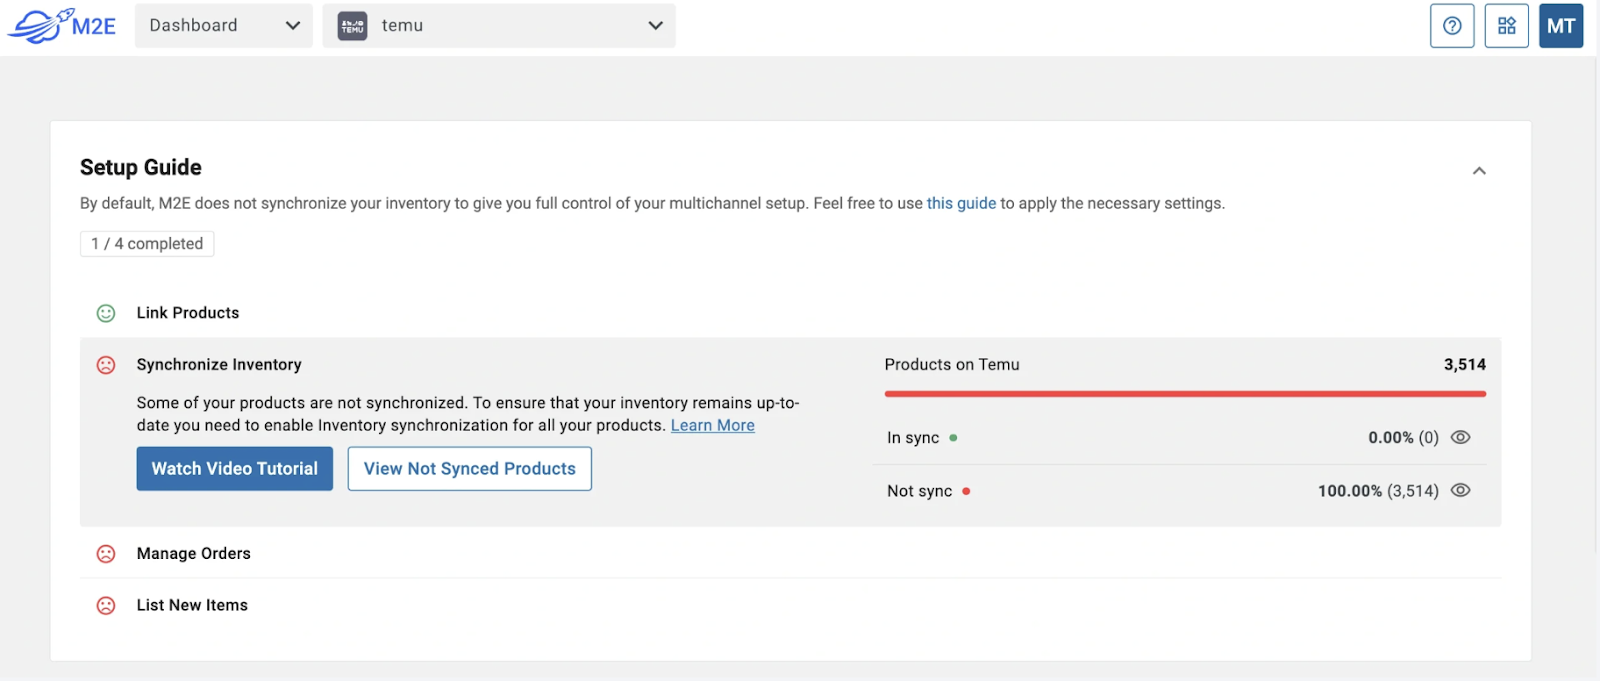
- Enable sync for selected items or apply it in bulk.
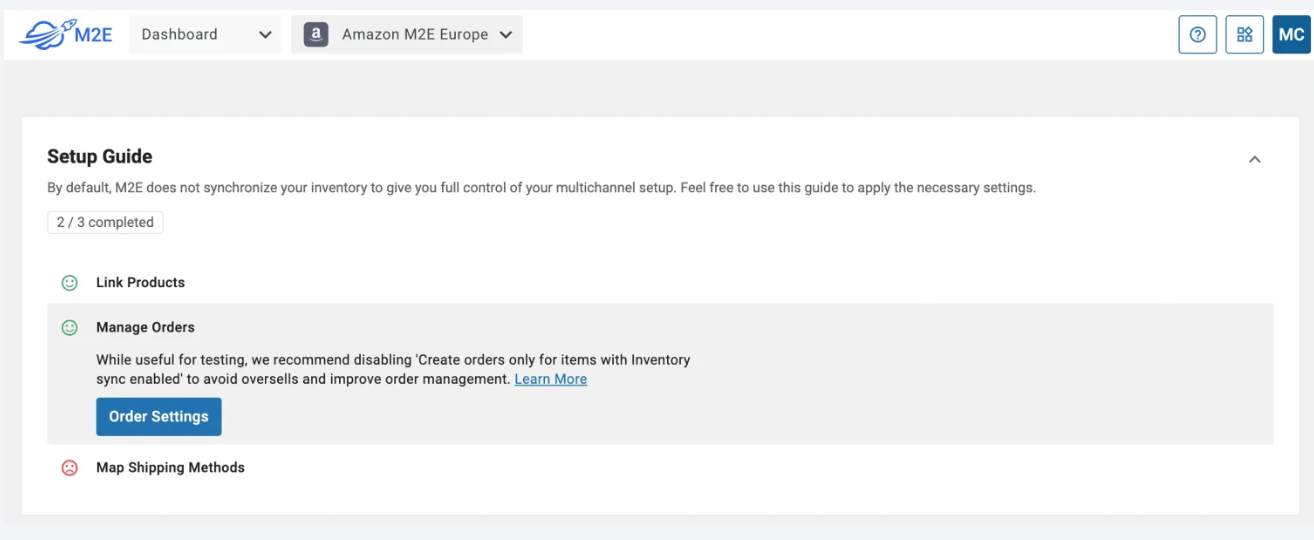
4. Adjust order handling preferences
↑ Back to topNext, decide how Temu orders should behave inside WooCommerce.
- Open Manage Orders, then go to Order Settings.

- Turn on Create Temu orders in WooCommerce.

Each Temu sale will now appear as a WooCommerce order so that you can track and fulfill everything in one place.
5. List new products on Temu
↑ Back to topNow you can start sending WooCommerce products to Temu.
- Open the List New Items step in the Setup Guide.
- Click List on Temu.

- Follow the prompts to publish selected WooCommerce products to Temu.
Once these steps are done, WooCommerce is fully connected to Temu. You can manage listings, inventory, and orders in a single streamlined system while focusing on growing your Temu sales.
Working in the M2E dashboard
↑ Back to topAfter onboarding, most of your work happens in the M2E dashboard. It shows Temu listings and other connected channels (if there are any), so you can see what needs attention at a glance.
- Orders overview. See how many Temu orders you have for a chosen period and how they are split by status, such as new, in progress, shipped, or failed. This helps you spot delays early.
- Products and listings. Check how many products are linked to Temu and how many are active. You can quickly find items with errors or pending status and fix them before they affect sales.
- Recent sync activity. Review recent inventory and order sync events. You can confirm that new listings went through, price changes reached Temu, and no sync failed.
- Subscription and limits. See your current M2E plan, how much GMV or order volume you have used, and when the next billing date is. This helps you plan campaigns without hitting limits.
Many sellers use the dashboard as a quick daily check. Open it, review Temu orders, listings, and sync activity. If everything looks fine, you go back to the routine. If something is off, the dashboard shows you where to go next.
List new items
↑ Back to topOnce onboarding is done, you can start sending WooCommerce products to Temu.
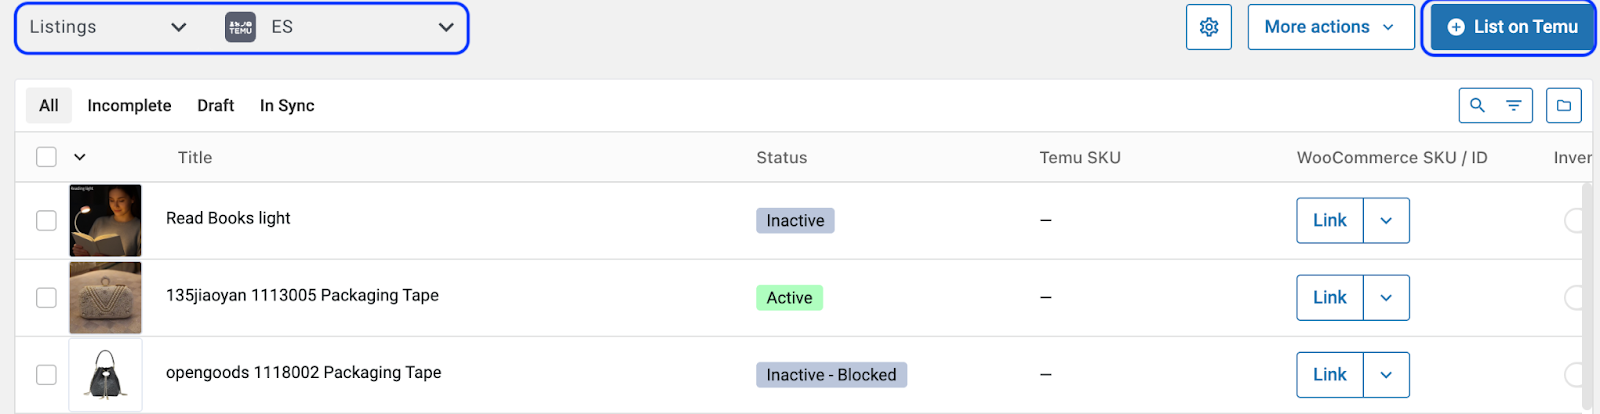
Step 1. Open your Temu listings
Go to the Listings tab in M2E Multichannel Connect. Select your Temu account, then click List on Temu to begin.
Step 2. Set product policies
Before you list anything, choose the policies that will control how your items work on Temu:
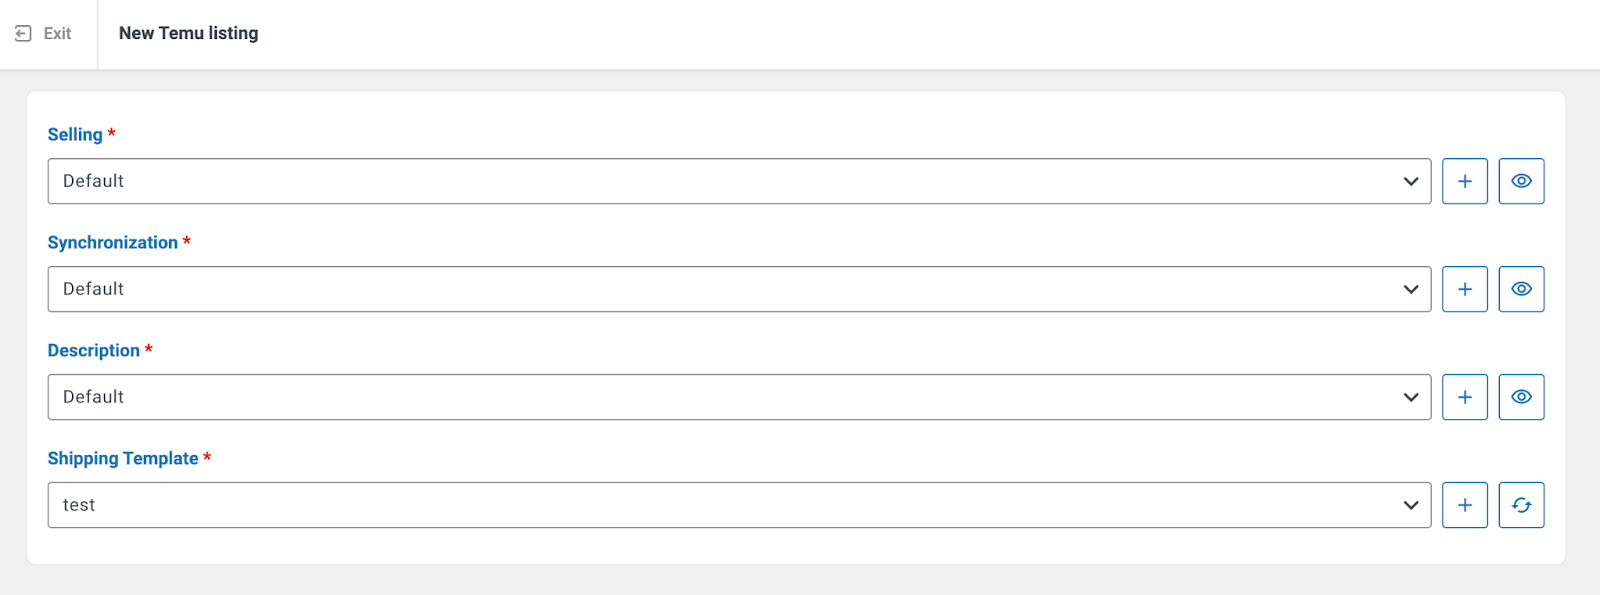
- Selling Policy for price and quantity
- Synchronization Policy for stock and detail updates
- Description Policy for titles and descriptions
- Shipping Template for delivery methods
If you already have shipping templates in Temu Seller Central, they will appear in the list. Otherwise, you can create a new one.
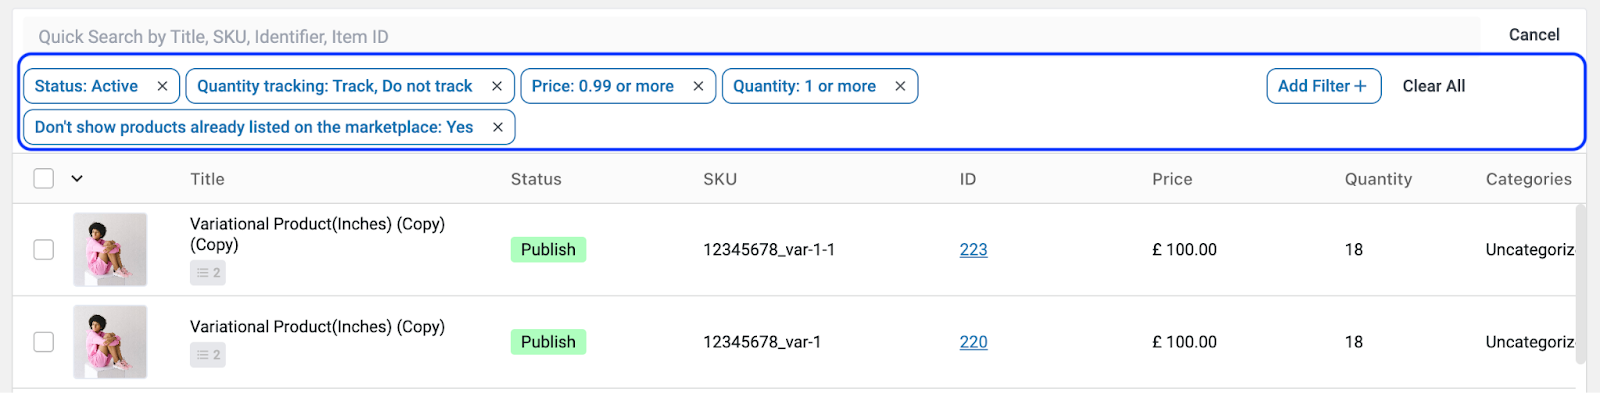
Step 3. Select products to list
Pick products from your WooCommerce Store to publish on Temu.
Use search and filters to find items by title, SKU, category, or attributes. When you are done selecting, click Next.
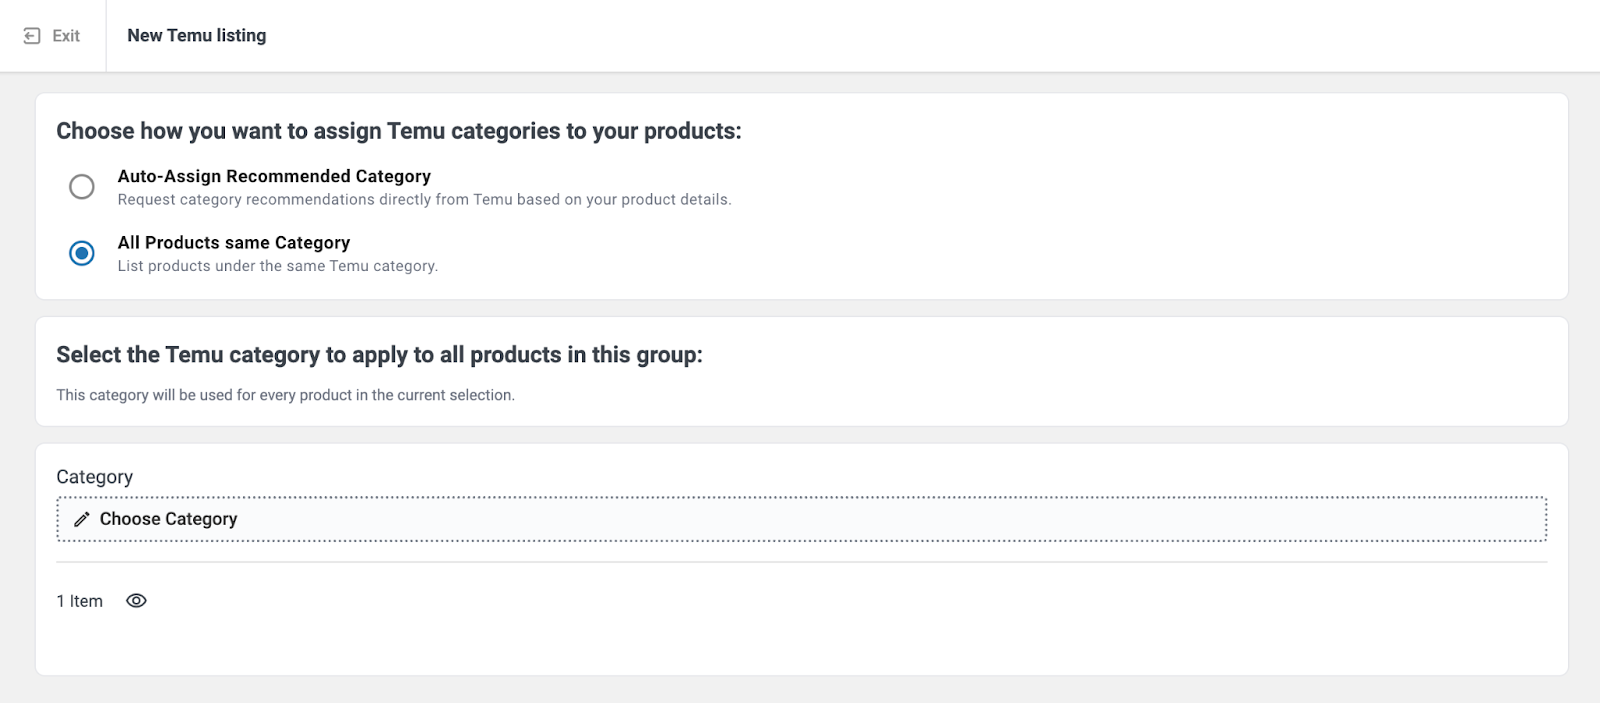
Step 4. Assign a Temu category
Temu needs every product in the correct category. You can:
- Choose Auto-Assign Recommended Category and ask Temu to suggest a category based on your product details (click Get recommended categories, then confirm or edit it)
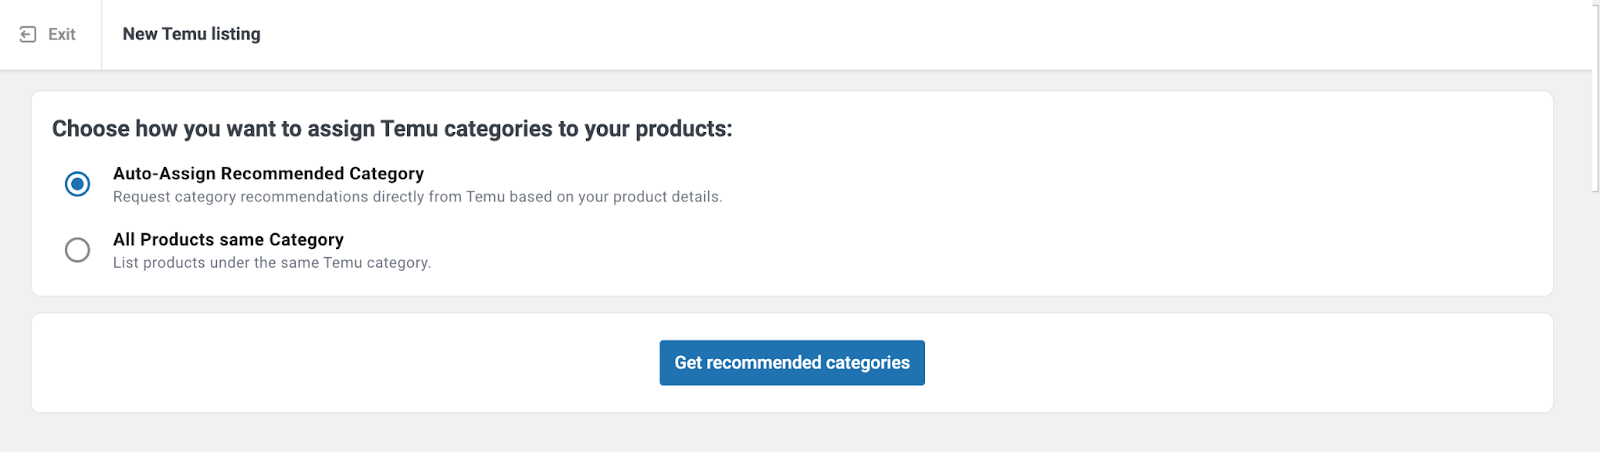
- Choose All Products same Category to apply one Temu category to all items in the batch if they belong to the same type.
Step 5. Fill in product attributes
Next, complete the attributes for the chosen category. You may see:
- Required attributes that must be filled
- Recommended attributes that help visibility
- Safety and compliance attributes for regulated products
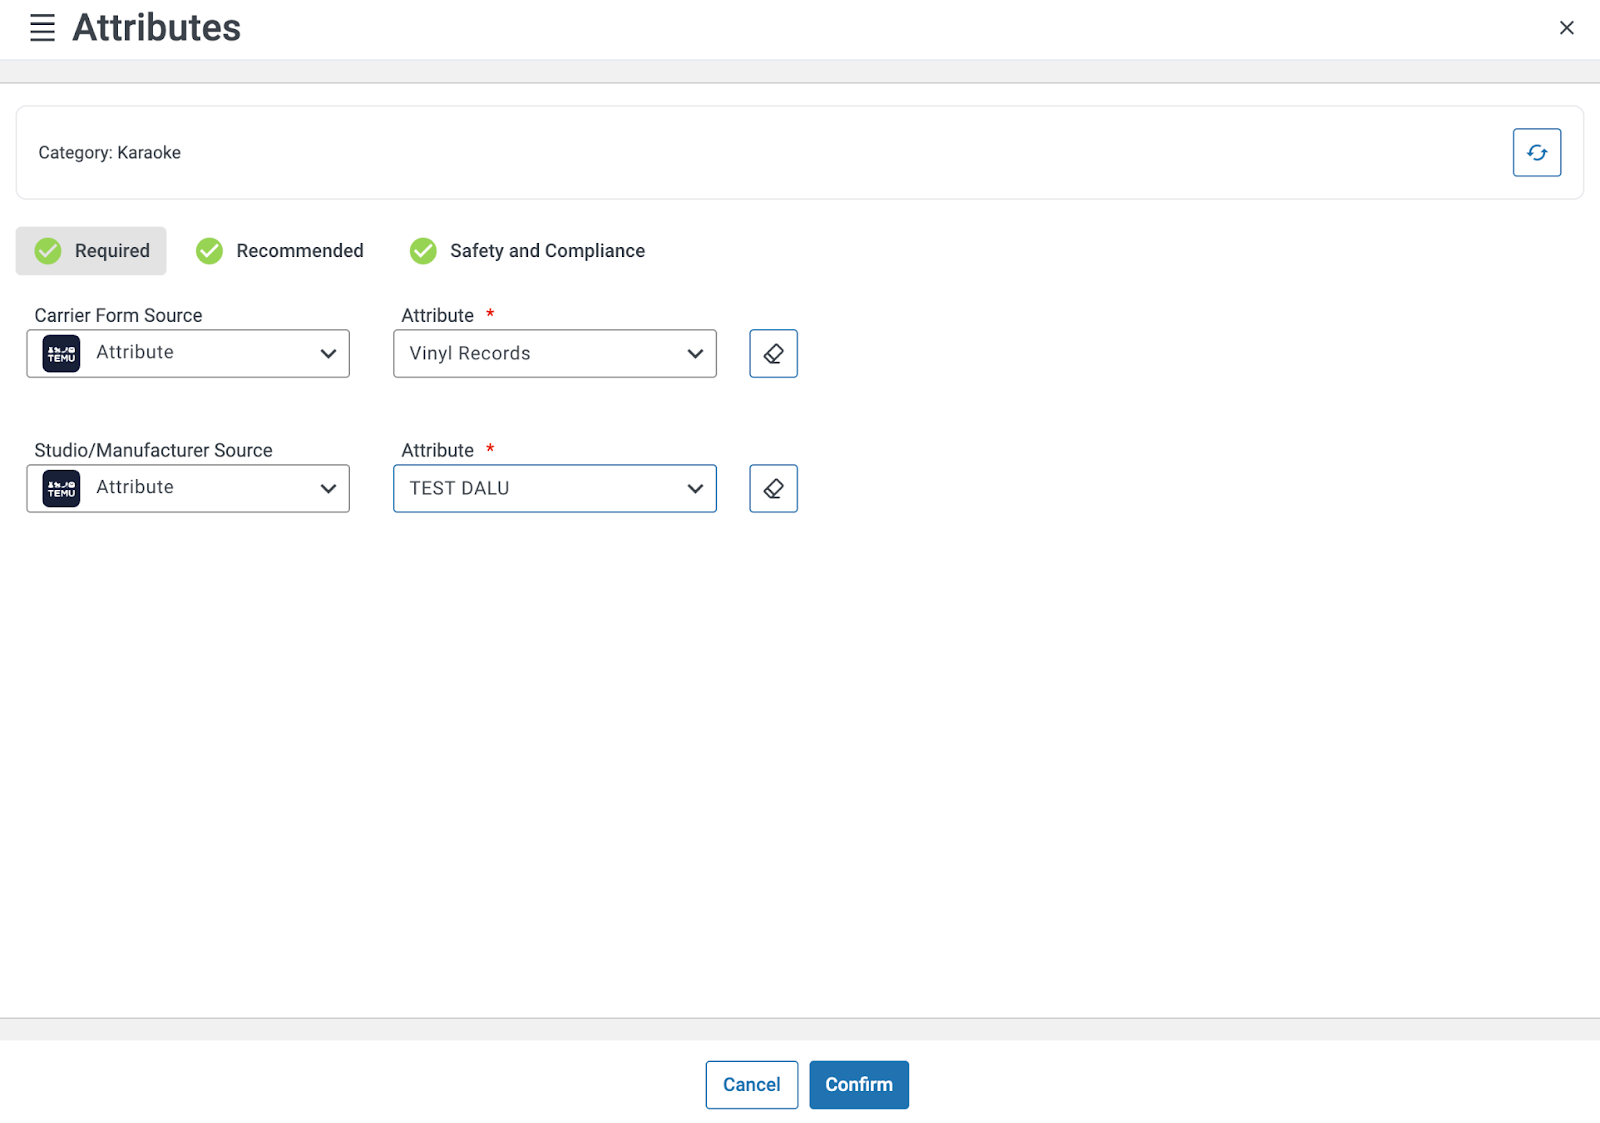
You can use Temu’s built-in options, pull values from existing WooCommerce attributes, or create custom attributes in M2E if something is missing.
Step 6. Publish products on Temu
Check your settings and click List Now to send products for Temu review.
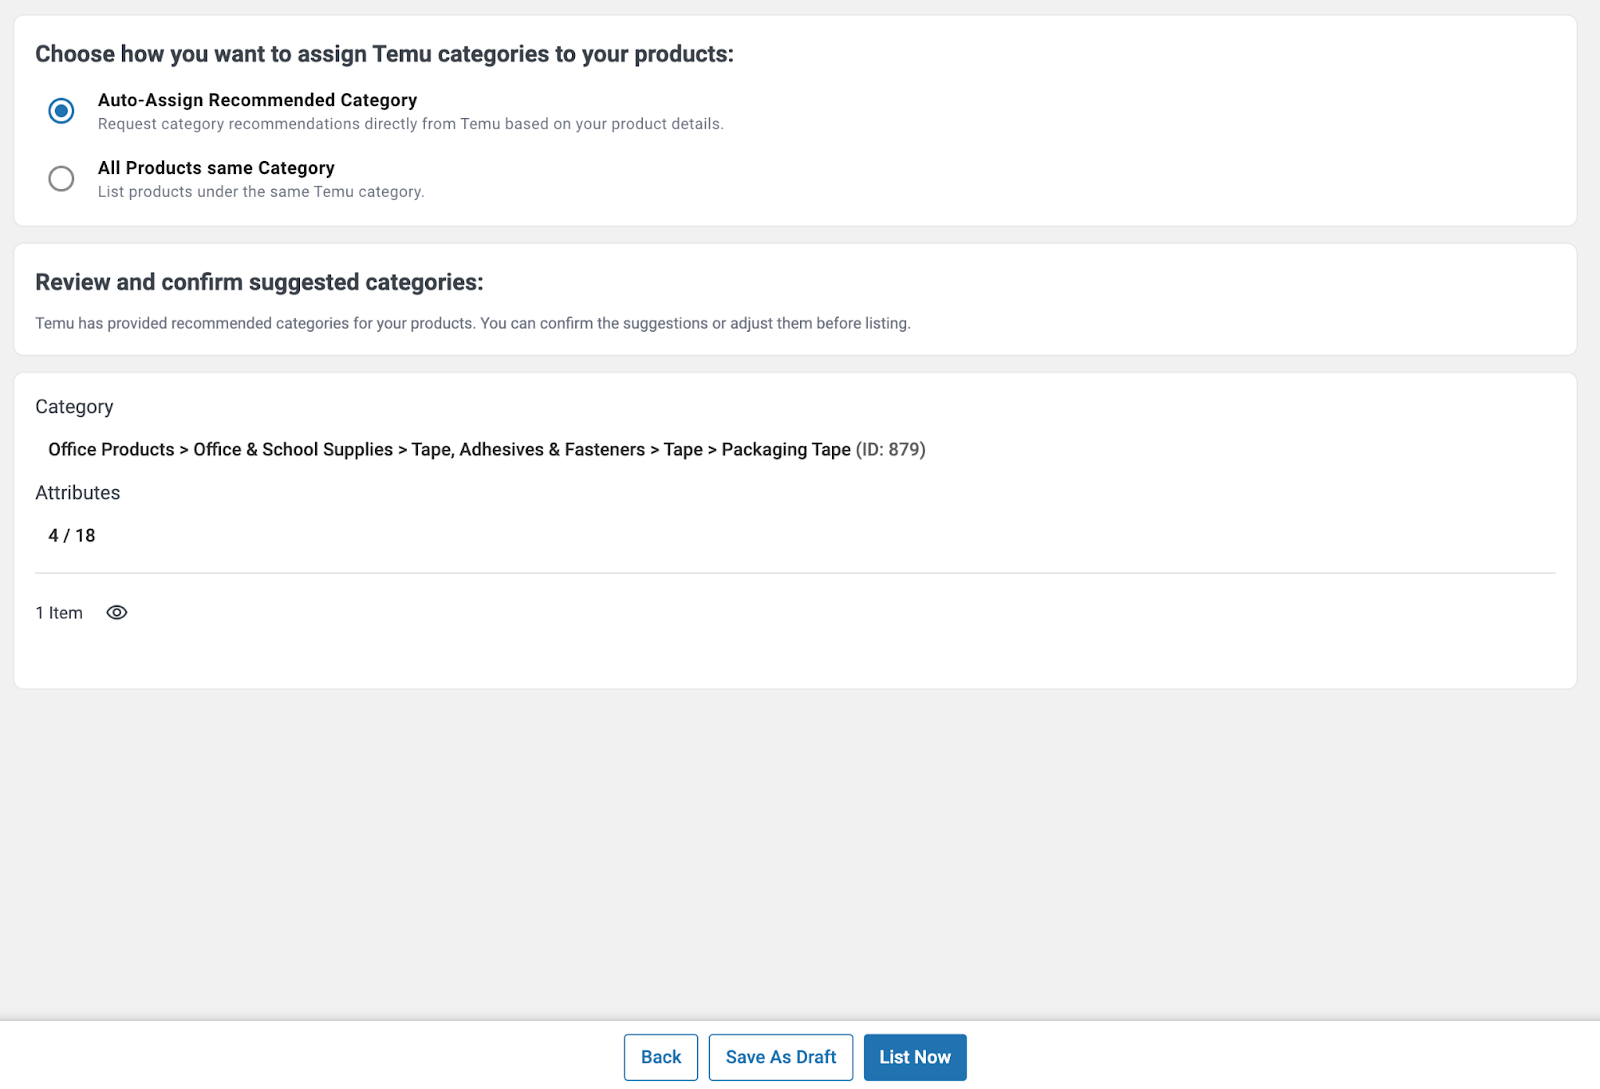
If you prefer to finish later, choose Save as Draft. Drafts stay in M2E until you publish them. Keep in mind that products with Draft or Hidden status in your WooCommerce store will not sync to Temu.
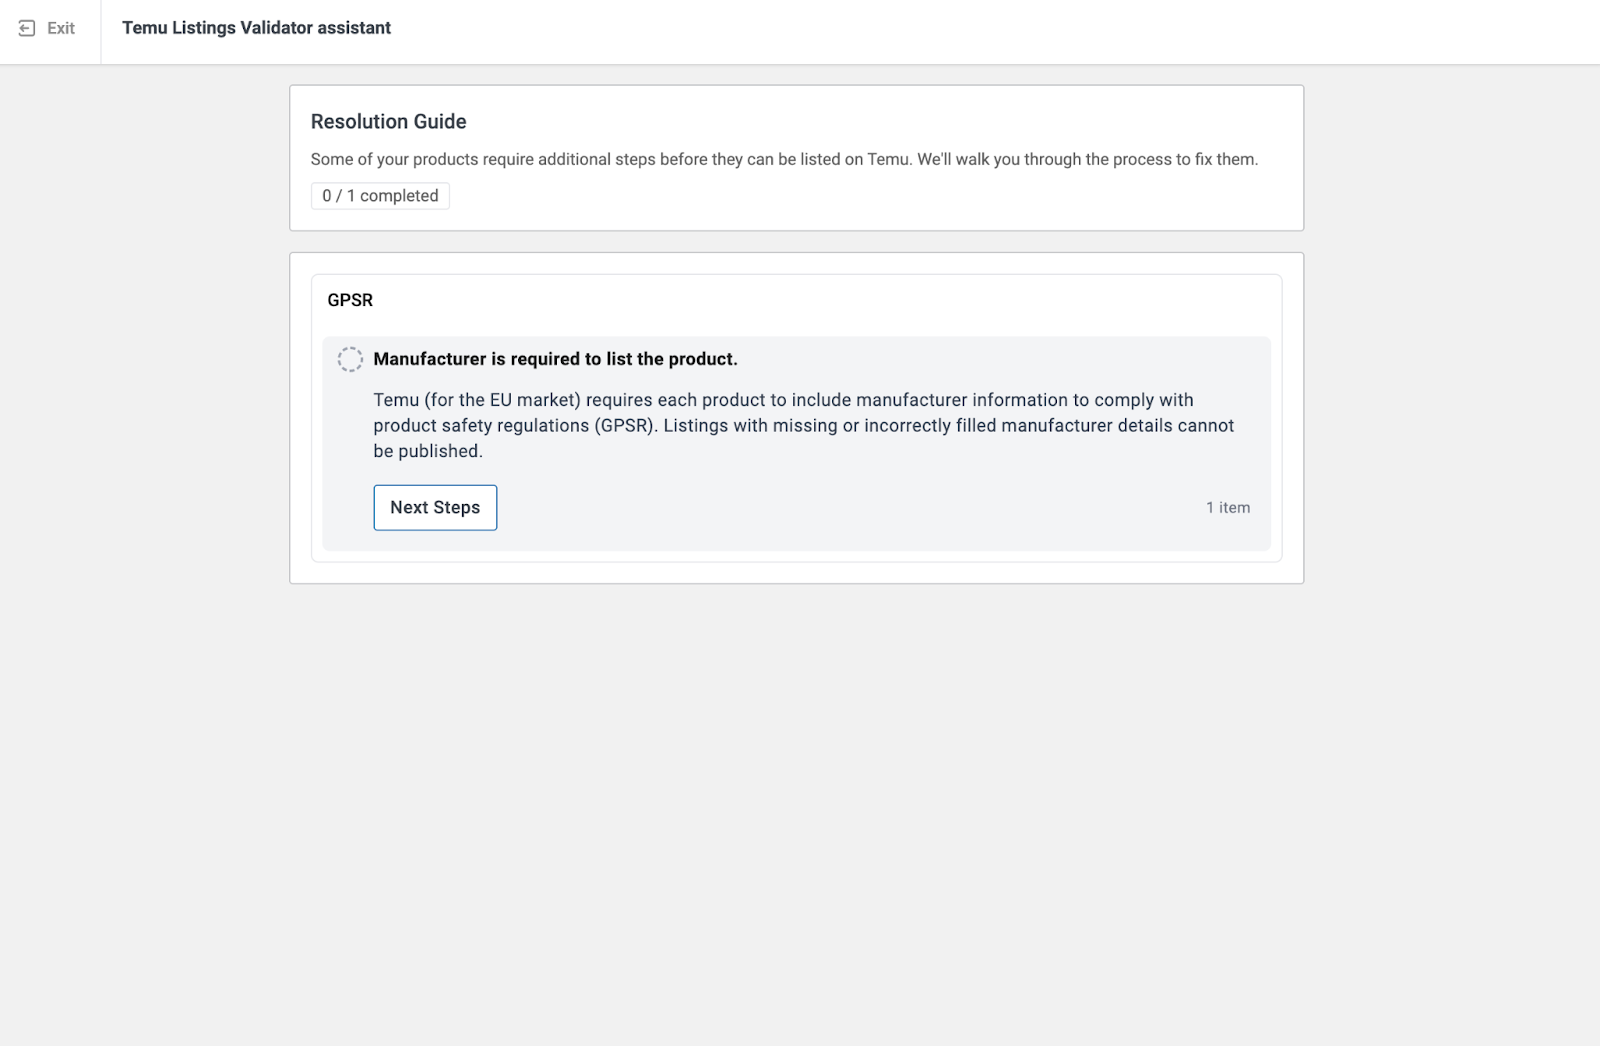
Step 7. Verify listing data
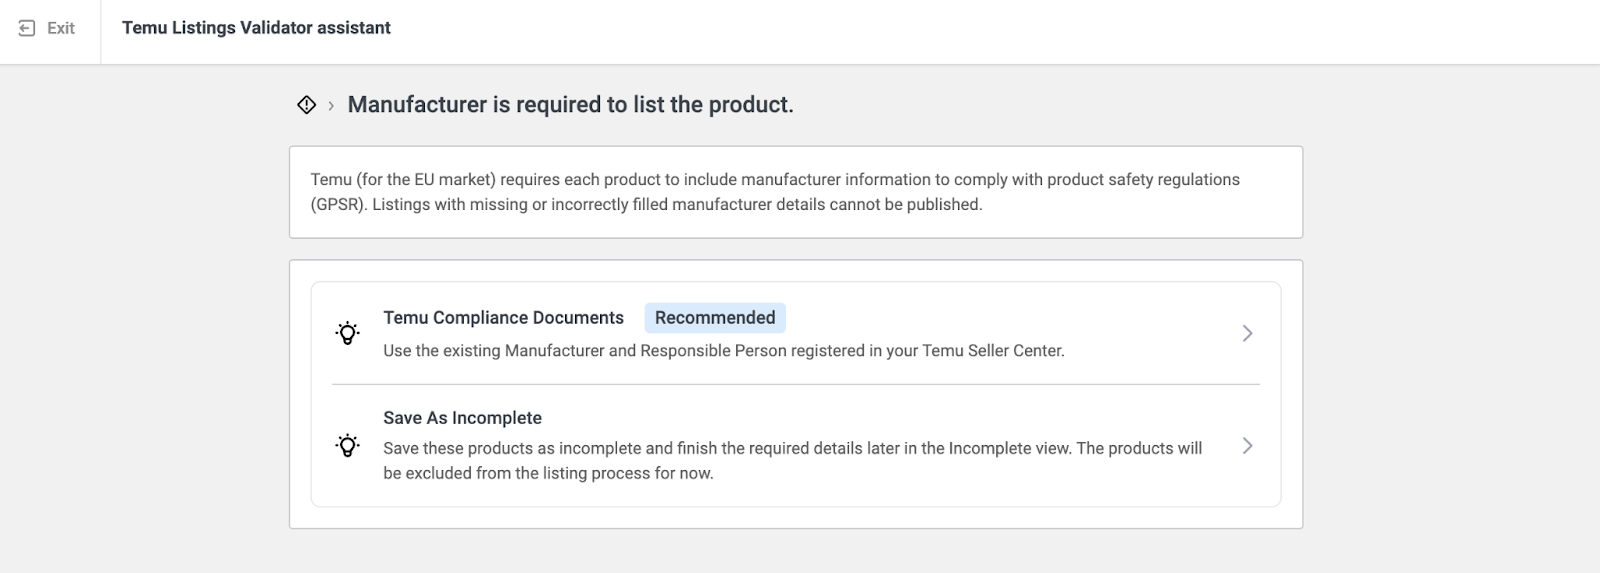
Before submission, the Temu Listing Validator Assistant checks your listings. If anything is missing or breaks Temu rules, you will see a list of issues with tips on how to fix them.
You can correct the problems and click List Now again to publish.
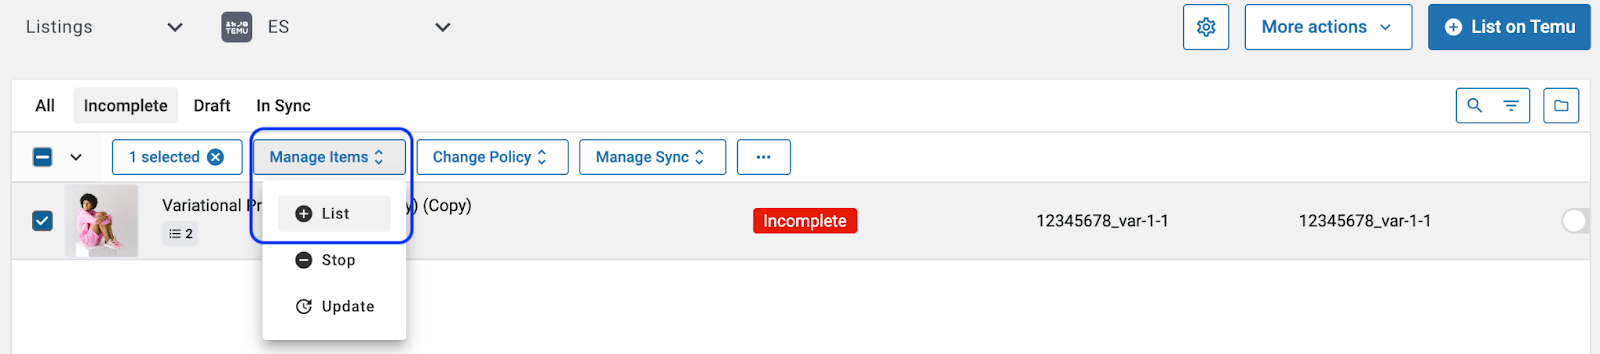
If you are not ready to finish, save the products as Incomplete. Later, open the Temu Listings page, filter by Incomplete, make your updates, and use Manage Items → List to resubmit them for review.
Check your listings
↑ Back to topThe Temu Listing Validator Assistant is built into M2E. Its main job is to check your products before they reach Temu, so you publish clean listings without guesswork.
What does the Assistant do?
- Check all required Temu fields before you submit listings.
- Highlight anything that can block approval, such as missing weight, incorrect attributes, or invalid values.
- Group issues by type, so you see how many products are affected and why it matters for Temu rules.
This helps you avoid rejected or stuck listings and cuts delays before new products go live.
You meet the Assistant at the end of the listing flow, as we already described.
- You prepare products and click List Now.
- M2E runs a quick validation.
- If there are problems, the Assistant opens and shows a list of issues.

- If everything is fine, it doesn’t appear, and your products move straight to Temu.
Get guided fixes
↑ Back to topNext to each issue, you see a Next Steps button. When you click it, the Assistant explains what is wrong and how to fix it.
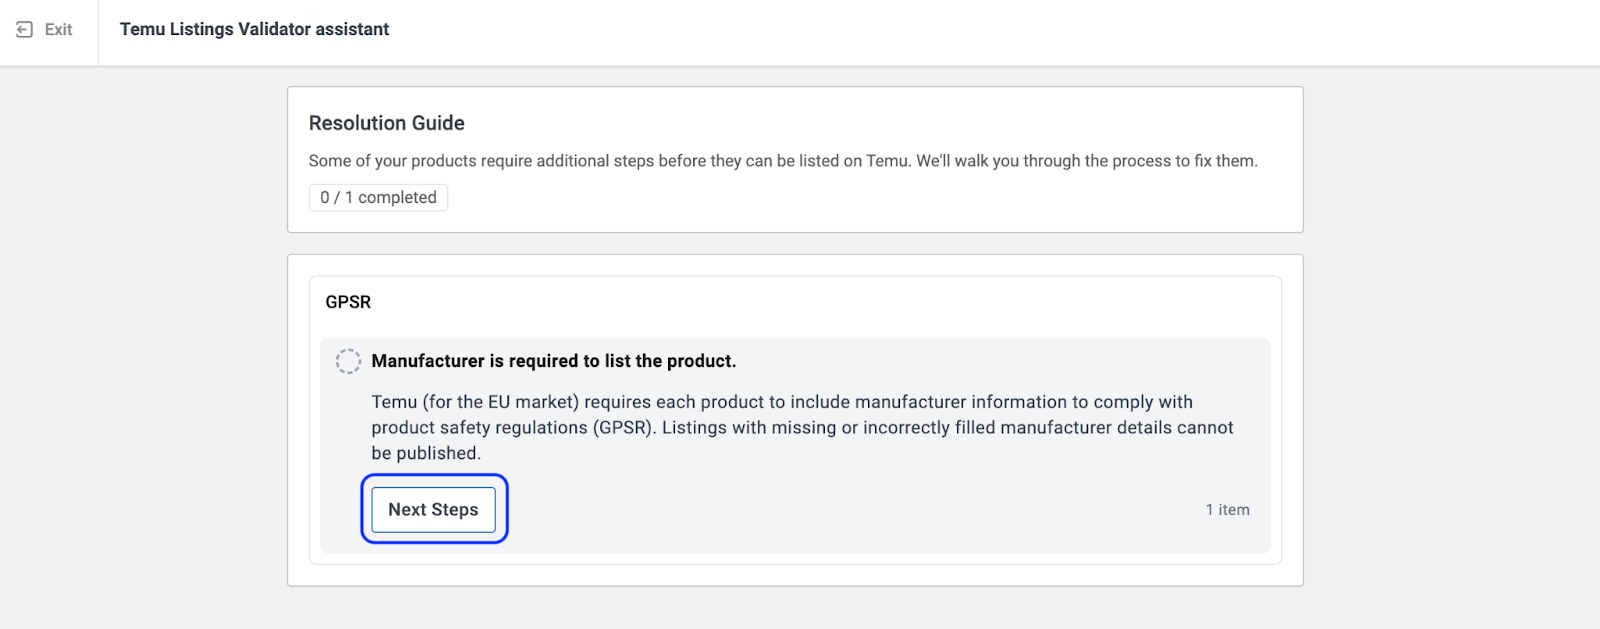
It can:
- Take you to the exact field in a Selling, Description, or Category policy, with the problematic attribute highlighted.
- Tell you what to change in your WooCommerce store, for example, missing text or an unsupported size format.
- Suggest different ways to update multiple items at once, such as exporting and importing.
You can map attributes such as Brand, Manufacturer, GPSR data, variation options, or correct values that do not match Temu rules.
After changes, click List Now again. The Assistant rechecks your products and sends valid ones to Temu for review.
Save unresolved items
If you cannot finish everything at once, you can click Save as Incomplete.
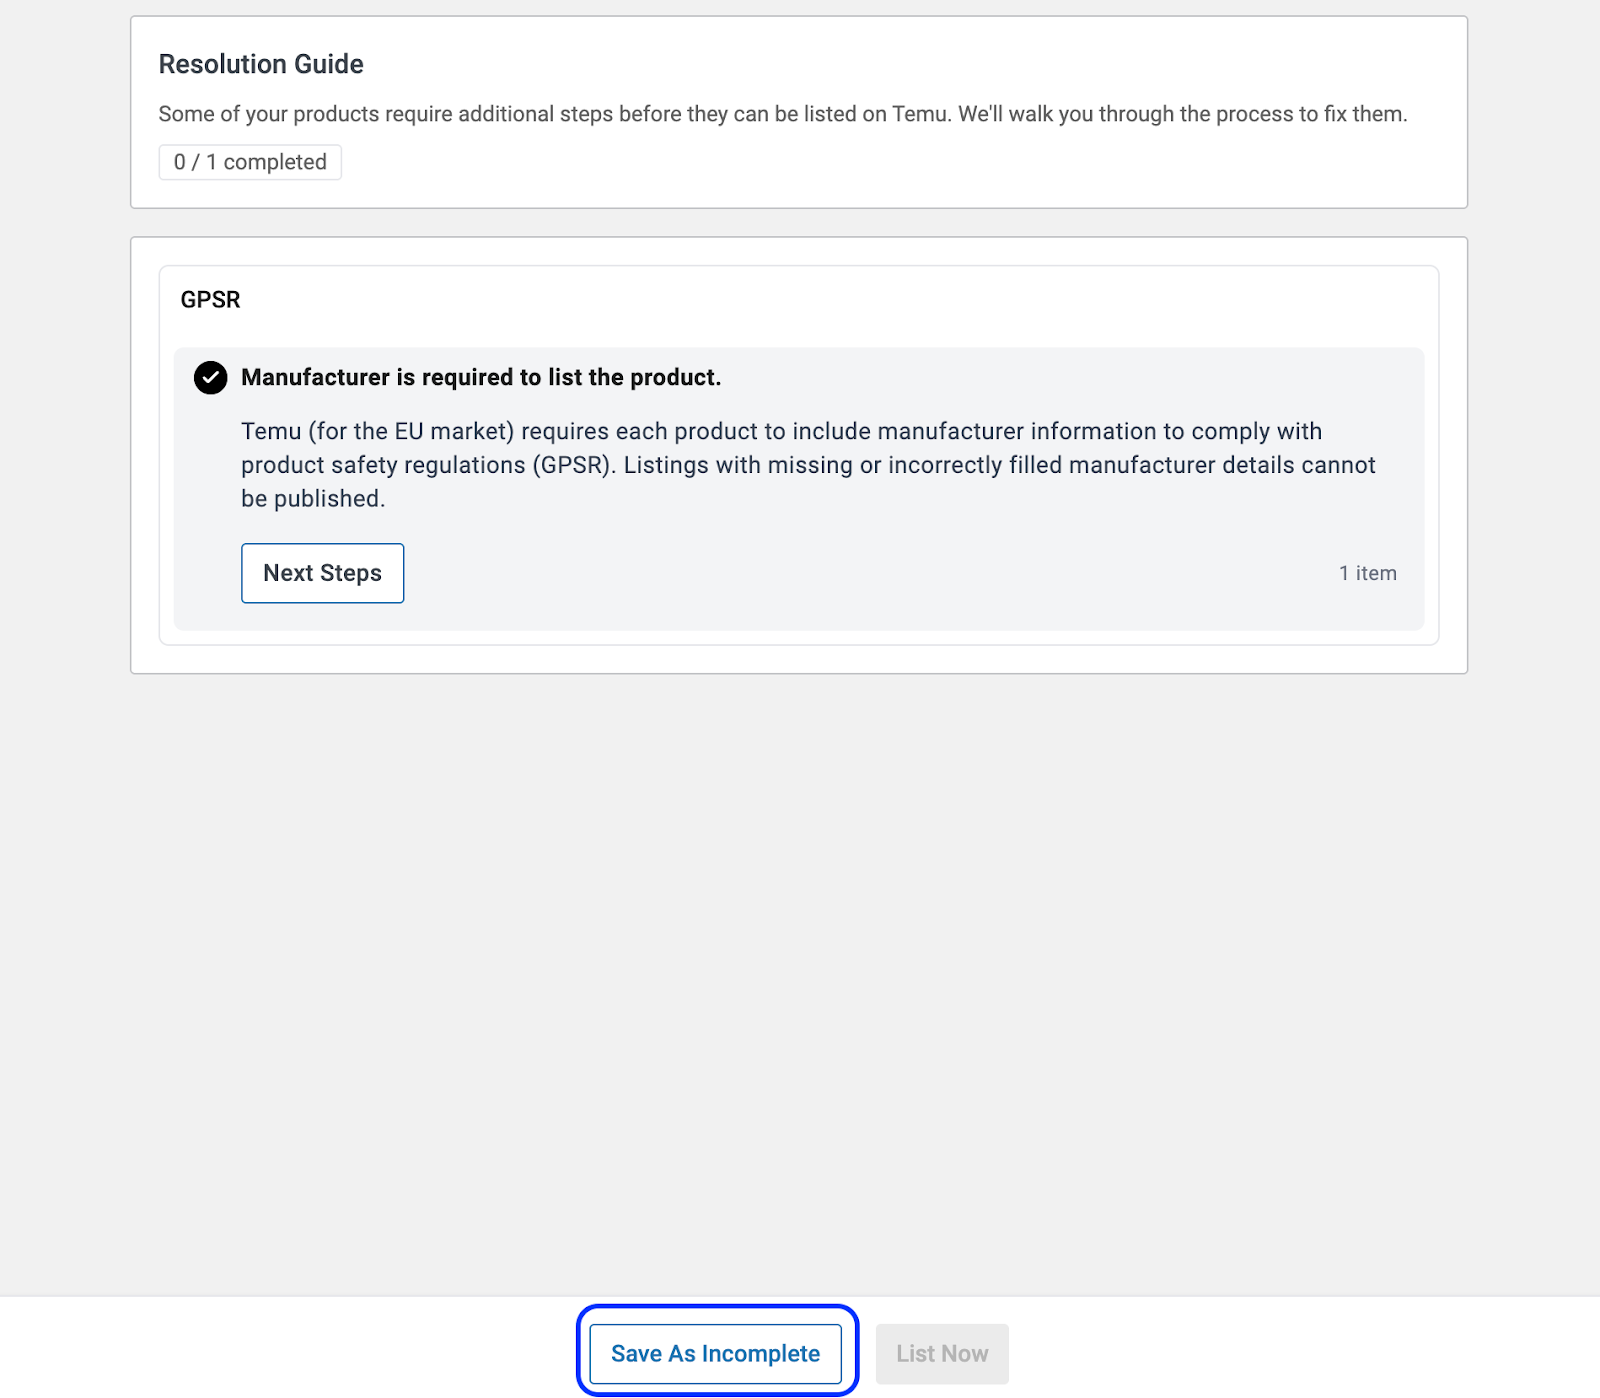
- These products appear in the Temu Listings page with an Incomplete status.

- Later, you can filter by Incomplete, open Manage Items → List, and the Assistant will reopen with the same issues ready to continue.

The result is simple. Correct products move forward right away. Items that still need work stay visible until you add the missing details. You spend less time chasing errors after the fact and more time growing Temu sales.
Beyond listing and sync, M2E provides additional tools to help you grow Temu sales and keep operations lean.
Keep an eye on analytics
↑ Back to topM2E Temu Sales Analytics lets you see how Temu really performs, without building your own reports. It is included for free for M2E Multichannel Connect users.
With Analytics, you can:
- Track sales for any period and spot demand shifts or seasonal spikes
- Monitor revenue, orders, and units sold in real time
- See how promotions and fees affect your profit
- Compare products to see which ones drive results and which need work
- Understand customers better through geography and behavior data
- Focus only on Temu or look at Temu in the context of your other marketplaces
Fulfill orders with Amazon MCF
↑ Back to topIf you store products in Amazon FBA, you can let Amazon fulfill Temu orders for you through Amazon Multichannel Fulfillment, which is connected via M2E Cloud.
Here is how the flow works:
- A customer places an order on Temu.
- The order syncs to your WooCommerce store.
- M2E checks if the ordered item is available in Amazon FBA.
- If so, M2E automatically creates an Amazon MCF fulfillment request.
- Amazon picks, packs, and ships the product from its FBA warehouses.
- Tracking details are sent back through M2E and synced with Temu so the buyer can follow delivery.
You keep inventory centralized in FBA. You don’t need a separate warehouse or extra shipping staff for Temu. This is useful if you already rely on FBA for other channels and want Temu to plug into the same logistics setup.
The setup looks like this:
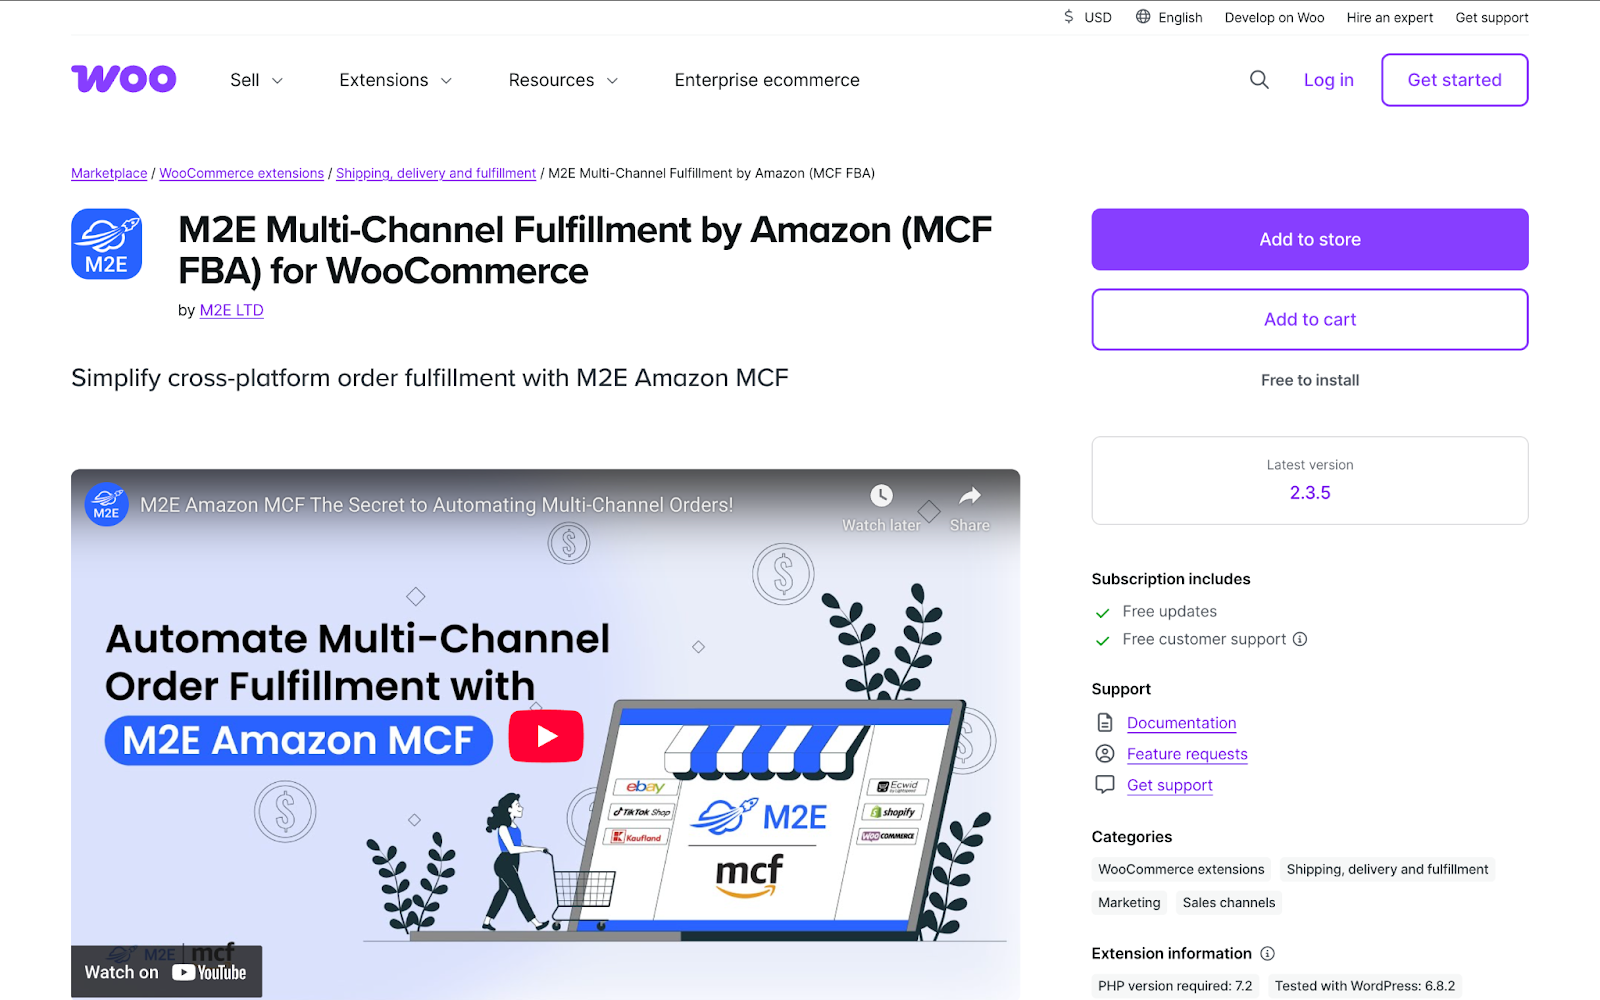
Step 1. Install the app
Install M2E Multi-Channel Fulfillment by Amazon (MCF FBA) for WooCommerce and connect your Amazon account.
M2E automatically redirects you to Amazon. Log in and grant M2E Cloud access to your seller account.
After that, Temu orders from WooCommerce can flow to Amazon for fulfillment with almost no manual work, while M2E keeps stock and tracking in sync across all systems.
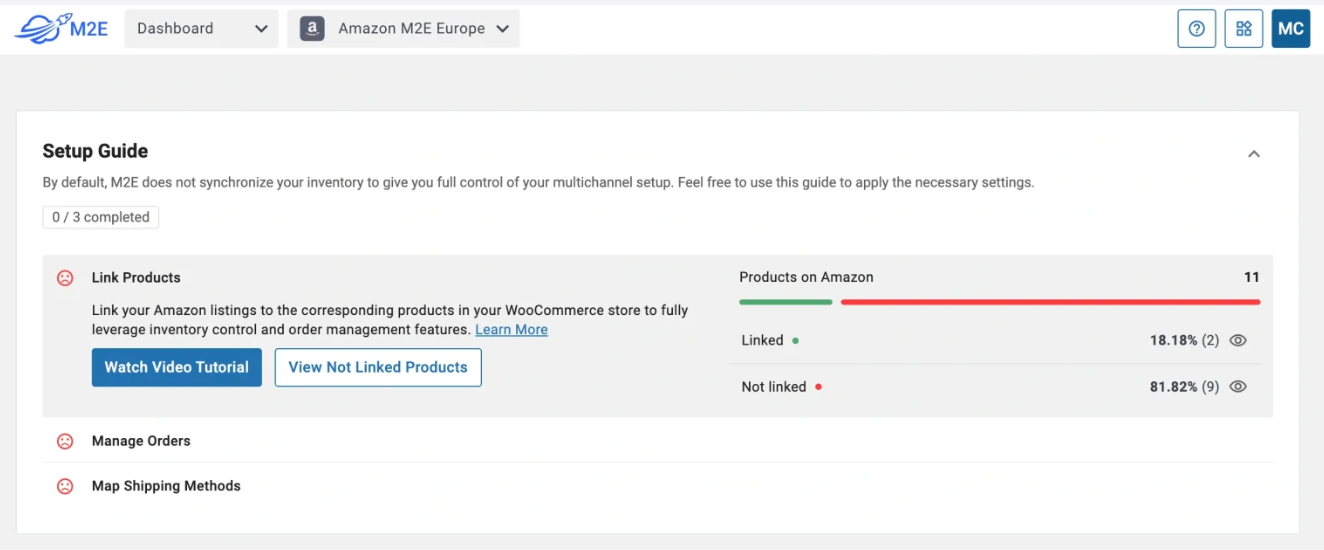
Step 2. Link existing products
M2E will try to match WooCommerce products with Amazon FBA items by SKU or Product ID.
- If a match is found, the products link and sync automatically.
- If not, you can link them by hand:
- Open Link Products and click View Not Linked Products.
- You will move to the Listings tab, where you can finish linking.
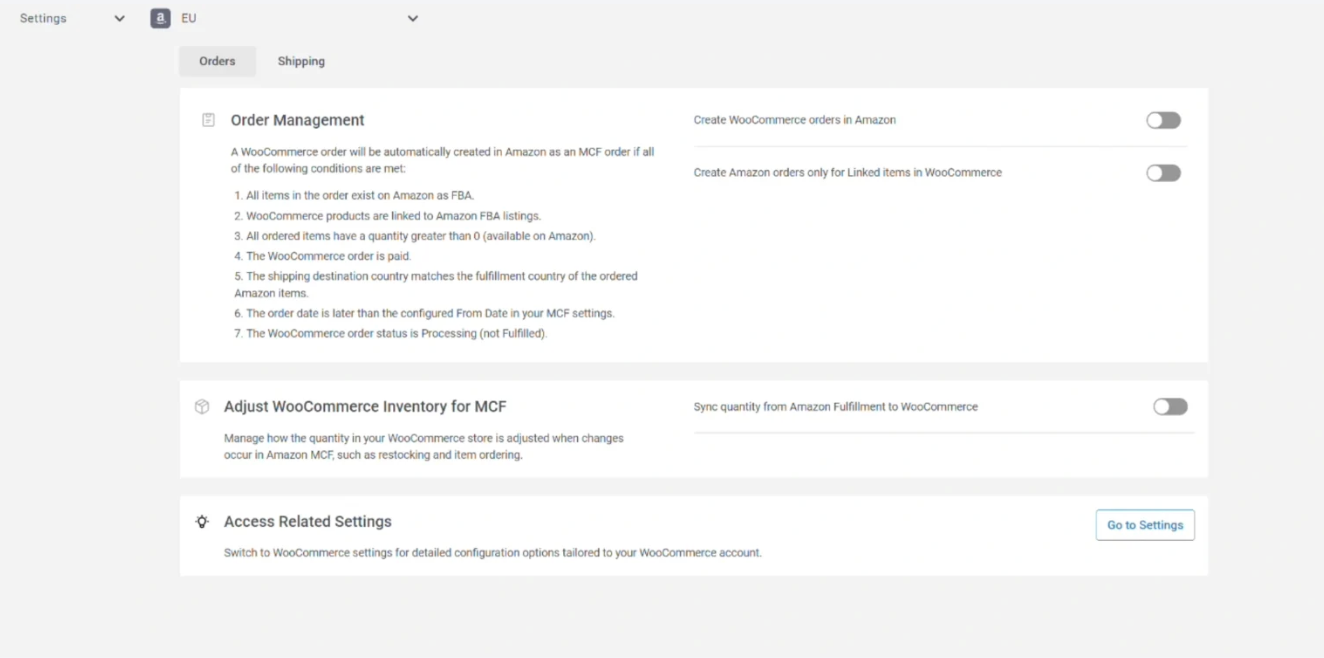
Step 3. Configure order processing
Go to Manage Orders → Order Settings.
Here, you control how WooCommerce orders go to Amazon MCF and how stock stays in sync:
- Order Management. Turn on Create WooCommerce orders in Amazon to send new paid Woo orders to MCF. You can limit this to items already linked to FBA. Orders are sent only to MCF if the product is in FBA and has enough stock.
- Adjust WooCommerce inventory for MCF. Turn on inventory sync, then choose whether Woo stock should mirror FBA quantities or be added to existing store stock.
Step 4. Map Woo and Amazon shipping methods
To get correct shipping options and tracking, map Woo shipping methods to MCF services.
- Open Shipping Settings in the app.
- For each Woo shipping method, pick the matching Amazon MCF option.
- Save your changes.
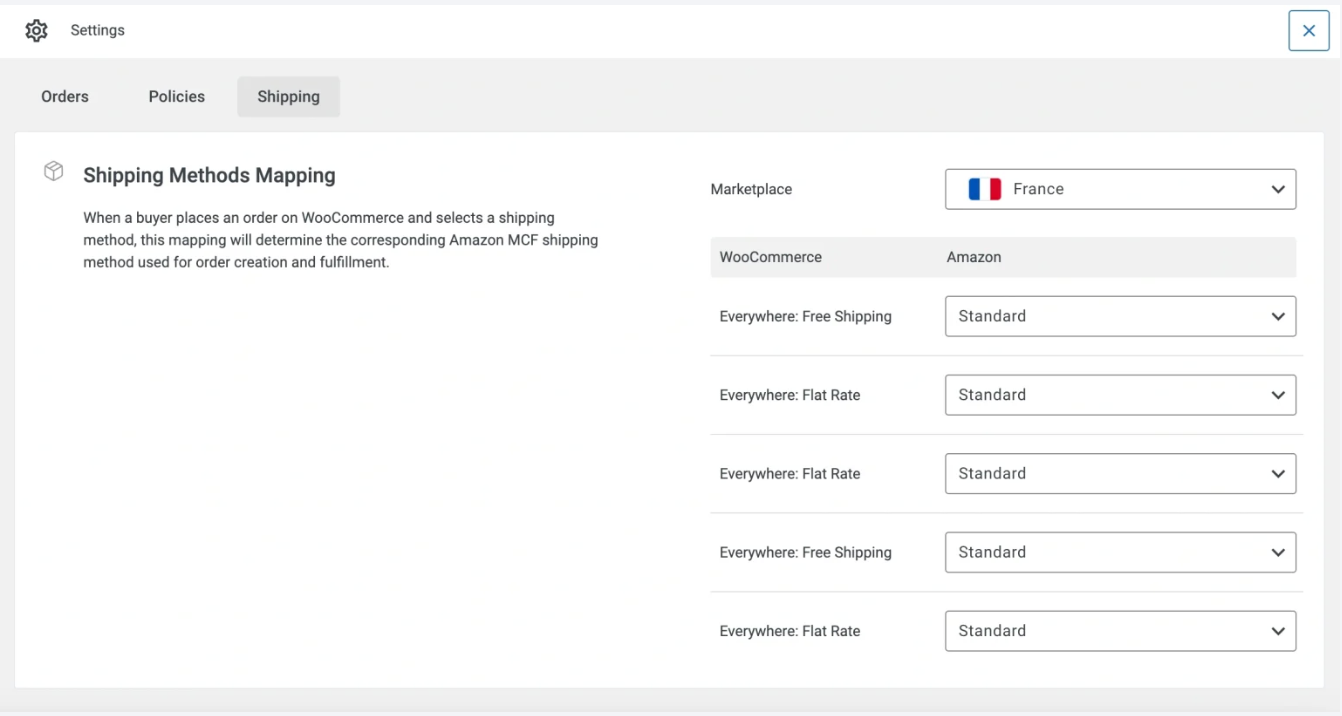
This mapping lets the app send the correct shipping speed to Amazon and return accurate tracking to your customers.
Pricing
↑ Back to topWooCommerce Temu Integration by M2E runs on M2E Cloud’s GMV-based pricing. You pay based on marketplace sales volume, not on the number of SKUs you sync. Temu sales are counted together with other connected marketplaces. Orders placed through your WooCommerce store do not count toward GMV.
You choose a plan according to your monthly Temu and marketplace sales:
- Starter. Free tier for early Temu tests and tiny volumes. It includes up to roughly 600 USD of monthly gross merchandise value (GMV) at no subscription cost, plus basic ticket support.
- Starter 5k/10k/20k. Paid tiers for growing stores. They cover up to $5k, $10k, or $20k USD of monthly GMV and keep the same core features. You move up only when your sales justify it.
- Business 100k and above. Higher plans are made for brands and established multichannel sellers. They cover up to $100k USD in GMV per month, then jump to larger annual tiers for six- or seven-figure volumes.
If you exceed your allowance, you pay a small fee per additional $1,000 USD of GMV, rather than losing access.
In practice, you install the WooCommerce extension, connect your M2E account, start on a free or trial tier, then upgrade your GMV plan only when Temu sales begin to scale.