
Transactional emails are a key piece of your order fulfillment process. They update your customers on their order status, provide valuable information about policies and returns, and are opportunities to encourage repeat sales.
In fact, transactional emails have an open rate of 80-85%, while most marketing emails only average around 20-25%. In spite of those impressive numbers, the majority of businesses don’t customize their transactional emails. And if they’re generic, it’s likely that your shoppers will simply glance at the information they need and move on. This is a big missed opportunity!
Customizing the content of your emails builds trust by providing helpful information that will enable shoppers to make the most of their purchase. Using your own colors, fonts, and language reinforces your brand, provides consistency, and helps you be remembered. And including related products and coupon codes can even lead to additional purchases.
WooCommerce provides built-in functionality that automatically sends customers emails based on order status. How can you adapt these to best fit your business and brand?
How to edit your transactional emails
↑ Back to topTo view and update email settings, log into your WordPress dashboard. In the left-hand menu, click on WooCommerce → Settings.
There, you’ll find several tabs at the top. Click Emails to view the following templates:
- New Order: Sent to the store admin to notify them of a new order.
- Canceled Order: Sent to the store admin to notify them of a canceled order.
- Failed Order: Sent to the store admin to notify them of a failed order.
- Order On-Hold: Sent to customers with details if their order is placed on hold.
- Order Processing: Sent to customers after a completed payment; contains order details.
- Order Completed: Sent to customers when their orders are marked completed; indicates that the order has been shipped.
- Order Refunded: Sent to customers when an order is refunded.
- Customer Invoice: Sent to customers; contains order information and payment links.
- Customer Note: Sent when a customer note is added in the dashboard.
- Password Reset: Sent to a customer after they request to reset their password.
- New Account: Sent to the customer when they create an account.
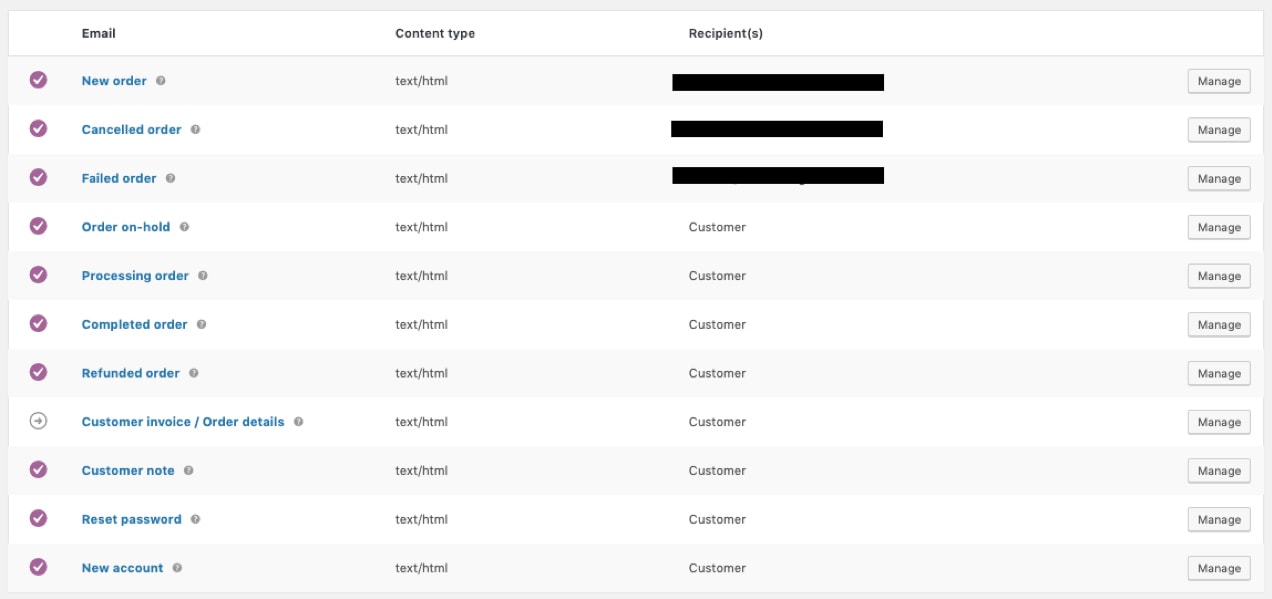
Click the Manage button to the far right of the email template that you’d like to edit. There, you can customize the email subject line, heading, content, and type. You can also use placeholder values to quickly and automatically fill in relevant information, like your {site_title}, the {order_date}, or {order_number}. These variables let you personalize emails for each individual order.
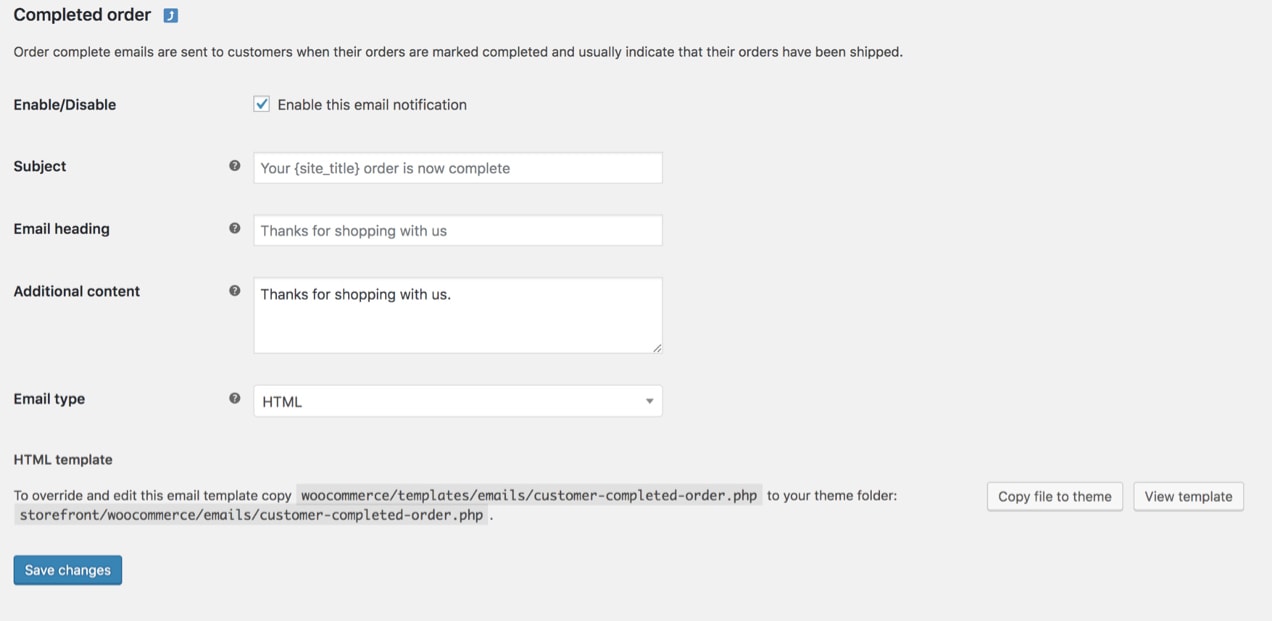
The Additional Content field can be especially helpful for emails that are sent to your customers, like the Completed Order email. Including a special thank you note helps your buyers feel appreciated and adds a touch of brand personality.
Also consider linking to warranty information, return policies, and other documentation that applies to all of your products. Customers should be able to easily access everything they need to know after they make a purchase.
Common design customizations
If you scroll below the list of email templates in WooCommerce Settings → Emails, you’ll see global customization options. Note that changing these options will update all of your email templates at once.
You can make changes to your:
- Header image: An image that you’d like to display at the top of all emails. You might want to use your logo or other brand graphics here.
- Footer text: Information found at the bottom of each email. Include a link to your website and contact information to make it easy for your customers to get in touch.
- Base color: The color used for headings, links, and the background of your email title.
- Background color: The color used for the background of the email.
- Body background color: The color of your email content background.
- Body text color: The color for all written email content.
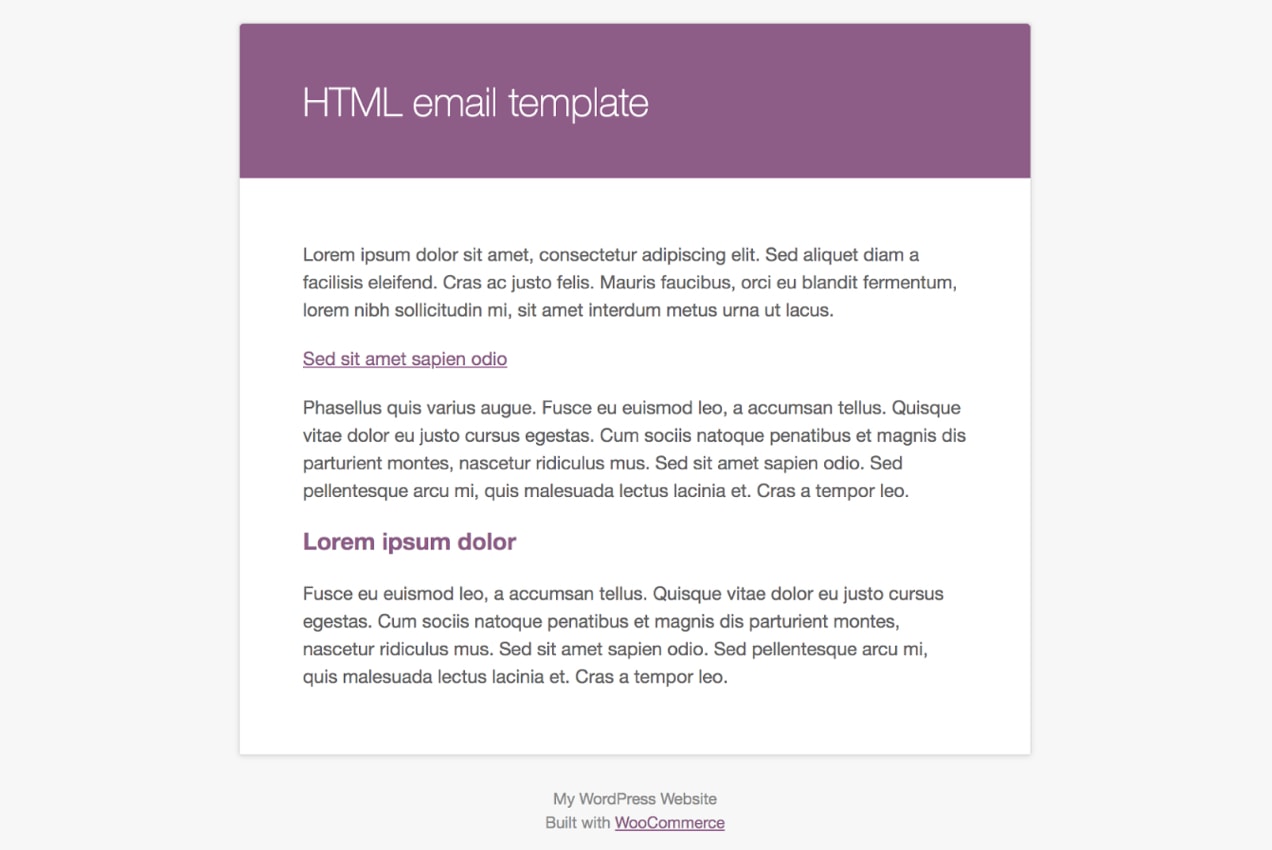
Click the link that says, “click here to preview your email template” to preview your emails.
Updating elements like color and font to match your website and branding provide a more seamless experience for your customers. After all, if your website uses a blue and yellow color scheme, and the email that your customer receives is orange, they might be confused. If a shopper knows what to expect and feels comfortable with a brand, they’re more likely to become a long-term, loyal customer.
Adding product-specific information
If you sell different types of products, you might want to include specific information that applies to each one in your customer emails. To do this, go to Products and click Edit under the product you want to change. Scroll down to the Product Data section and click Advanced. There, you’ll see a blank box where you can add a Purchase Note.
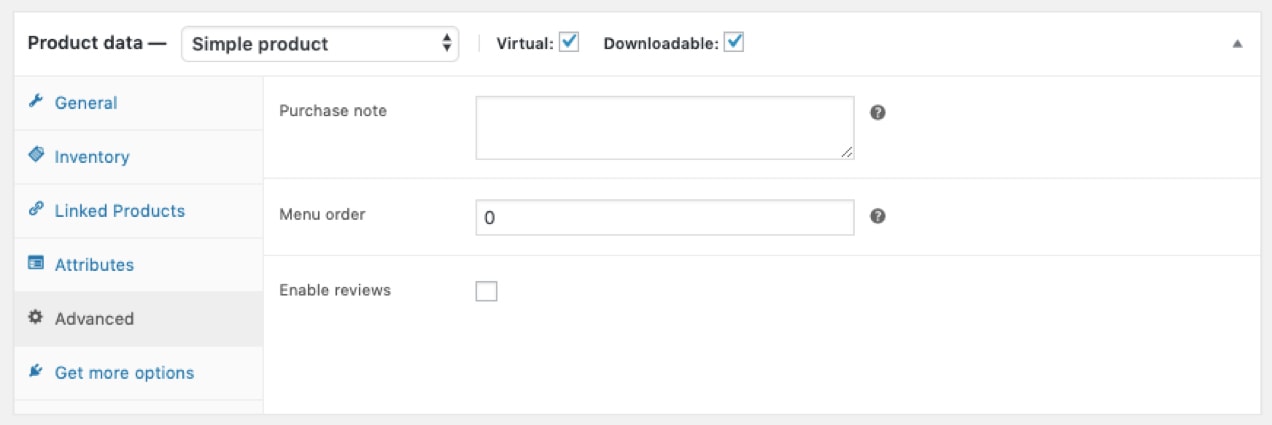
Purchase Notes can be used in a variety of ways. You could link to a PDF instruction manual or page your customer has special access to. Or, you could include a coupon code for a discount off their next purchase. The goal is to provide as much valuable information as possible to your customers so that they’ll love your products and keep coming back.
Customizing emails with Klaviyo
↑ Back to topWith the Klaviyo WooCommerce extension, you can take advantage of powerful tools, like high-converting email templates, customized triggers, A/B testing, cart reminders, and more. It syncs seamlessly with your online store so that you can truly personalize your email marketing. Here’s how to get started:
- Install the Klaviyo for WooCommerce extension linked above, then activate it.
- In your WordPress dashboard, go to Marketing → Klaviyo. Click Connect, then proceed through the setup prompts.
Now, you’ll create and customize your transactional emails within your Klaviyo account. To create a transactional email:
- Navigate to the Flows tab inside of Klaviyo.
- Choose Create Flow → Build your own.
- Design your flow using Klaviyo’s builder, and customize your flow emails.
- Select a transactional message and click Apply for transactional status. Klaviyo will review your message and approve or reject it within 24 hours.
The Klaviyo email template editor enables you to build transactional emails using blocks and layouts. By dragging and dropping these into place, you can add text, images, buttons, and more. Plus, you can use the Styles tab to make design changes to the entire email — e.g. edit the background, width, heading style, font, text alignment, and mobile design.
If you want to get a jumpstart on creating your flow — or build additional email marketing funnels — you can choose from a wide range of pre-built options that are completely customizable. There are 60+ available, including:
- Abandoned cart reminders
- Welcome series
- Post-purchase follow-ups
- Back in stock reminders
- Browse reminders
Here’s a visual of some of the flow use cases:

You can also set advanced segmentation rules based on everything from customer behavior and demographics to channel history and location. The options are truly endless!
Customizing emails with MailPoet
↑ Back to topThe MailPoet extension allows you to harness the marketing and customization power of MailPoet for your transactional emails. Start by installing the extension from your WordPress dashboard, just as you would any other plugin. Then:
- Go to MailPoet → Settings → WooCommerce in your WordPress dashboard, select Use MailPoet to Customize Your WooCommerce Emails and save your settings.
- Click Open Template Editor.
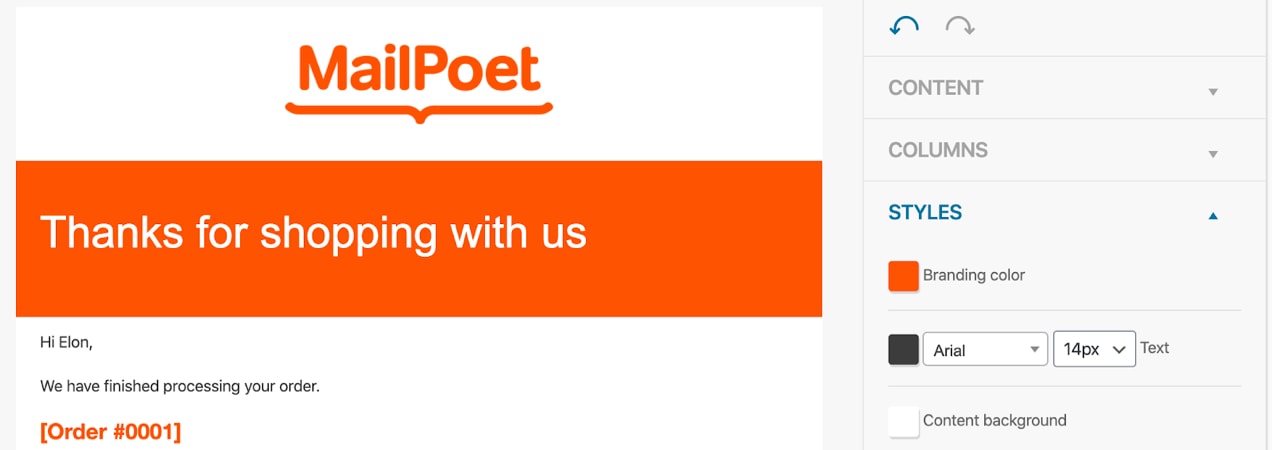
Now, you’ll use MailPoet’s drag-and-drop editor to make the changes you’d like. Note that the template you’re editing controls the look and feel of all WooCommerce emails, not each one individually. But you can freely edit the areas above and below the email header and primary content area (the space where order information, etc. is displayed). Here are a few things you can do:
- Add your logo to the top of the email
- Change the colors to match your brand
- Include illustrations or other eye-catching images
- Add a button that links to important content, instruction manuals, support forums, or exclusive offers for new customers.
- Place links to your social media accounts to encourage engagement
Each of those changes just require you to drag and drop content into place — that’s it! No editing templates or writing code. For more information, see the guide to editing WooCommerce emails with MailPoet.
And the best part is that, with MailPoet, you can also take advantage of other marketing tools. Send email newsletters with updates, discounts, or product recommendations. Reach out to new customers with a welcome message or exclusive coupon. Tailor messaging based on the specific product each person purchased. Send abandoned cart emails to those who add products to their cart without checking out. The sky’s the limit!
The audience segmentation options in MailPoet are robust, and allow you to customize your emails so they’re hyper relevant. Here are just a few of the segmentation options you can use:
- Number of email opens
- Whether or not someone clicked a specific link (or any link)
- Subscribe date
- Number of orders
- Whether someone purchased a specific product
- Whether someone purchased within a specific category
- Total spent
- Customer country
- Whether someone has an active subscription
You also won’t have to worry about email deliverability — MailPoet has a 99% deliverability rate, so you can rest easy knowing that your transactional emails will arrive in the customer’s inbox.
Creating custom templates with code
↑ Back to topIf you’re a developer or are comfortable editing PHP files, WooCommerce provides everything you need to make changes to transactional email templates.
In the left-hand menu of your WordPress dashboard, select WooCommerce → Settings. Then, click the Emails tab at the top. Find the email that you’d like to customize and click the Manage button at the far right. At the bottom of that page, there’s a note that tells you which PHP template is associated with that email.
Every transactional email consists of a combination of templates. This allows you more control over customization than the other methods listed here.
For example, if you only want to edit your email header, you’ll just need to make edits to the email-header.php file. For changes in the footer, you’ll work with email-footer.php. To edit a specific email template, like the customer invoice, you’ll change customer-invoice.php.
Let’s say that you want to update the color of any links included in your emails:
- Copy the file found at wp-content/plugins/woocommerce/templates/emails/email-styles.php into your store’s child theme. Note that if you customize the parent theme rather than the child theme, any changes will be overwritten with theme updates.
- Find the “link” class in the copied file.
- Edit the code to change the link color.
.link {
	color: #a4bf9a;
}
There are endless customizations you can make. To find out more information on the template structure for WooCommerce emails, check out the Template Structure documentation.
WooCommerce hooks
WooCommerce hooks are a great way to add content to the layout of your emails. Keep in mind that hooks will allow you to add content but not modify existing text. To modify text, see the section above on customizing templates.
Add the snippets below to your child theme’s functions.php file. The hooks that you use depend on what you want to add and where you want to place the content.
Below the header:
To add content below the header, use the woocommerce_email_header( $email_heading, $email ) hook:
<?php
add_action( 'woocommerce_email_header', 'mm_email_header', 10, 2 );
function mm_email_header( $email_heading, $email ) {
	echo "<p> Thanks for shopping with us. We appreciate you and your business!</p>";
}
After the table:
To add content below the order table, use the woocommerce_email_after_order_table ($order, $sent_to_admin, $plain_text, $email) hook:
<?php
add_action( 'woocommerce_email_after_order_table', 'mm_email_after_order_table', 10, 4 );
function mm_email_after_order_table( $order, $sent_to_admin, $plain_text, $email ) {
       echo "<p>Hey! Thanks for shopping with us. As a way of saying thanks, here’s a coupon code for your next purchase: FRESH15</p>";
}
Above the footer:
To add content above the footer, use the woocommerce_email_footer($email) hook:
<?php
add_action( 'woocommerce_email_footer', 'mm_email_footer', 10, 1 );
function mm_email_footer( $email ) { ?>
	<p><?php printf( __( 'Thank you for shopping! Shop for more items using this link: %s', 'woocommerce' ), '<a href="' . get_permalink( wc_get_page_id( 'shop' ) ) . '">' . __( 'Shop', 'woocommerce' ) . '</a>' ); ?></p>

<?php
}
Note: These hooks and customization options are tightly linked to the theme you’re using because of the functions.php file location within your theme files. If you change your theme, you’ll have to move your modified template files or hooks to your new theme.
For more information, read our WooCommerce Hooks documentation..
Start customizing your emails
↑ Back to topCustomizing the design and content of your emails helps you more successfully update buyers on order progress, promote brand awareness, and encourage repeat sales. No matter what level of coding experience you have, WooCommerce provides a variety of ways to make the changes that you need.
How have you customized your transactional emails to increase sales? Let us know in the comments.
Feeling stuck with your ecommerce solution? Let’s talk.
About
This is a great resource. I will share this with our customers! Thank you.
Glad you found it helpful, Mitchell!
Great and very resourceful
Thanks, Mustapha!
i want to change the subject line of the new orders email that goes to admin, essentially i want to swap the order number for the product id, so i can search which customers have bought that product in my mail inbox
How do i do this?
Abbco123, you can change the subject line by going to Woocommerce -> Settings – Emails – Click on each email you want to edit.
I highly recommend you check out Metorik. Many functions including beyond amazing reporting features.
Derek,
I, too, want to change the subject line on all the Woo email templates from pulling in “{site_title}. My site title is too long and contains important keywords. So I want to manually enter the subject for each email. I”m perplexed, because I have read in several articles and Woo’s documentation that I can edit the subject line; but this is, in fact, greyed out and not directly editable from the “manage” tab. What am I missing?
Hi Kristen! We’d love to help you and abbco123. Could you reach out to our team here: https://woocommerce.com/contact-us/ so we can provide more personalized support?
Hi,
You may want to review these lines..
“You can also use template variables to quickly and automatically fill in information, like {customer_name}, {order_shipping_address}, or {item_names}. These variables let you personalize emails for each individual customer”
This is NOT AVAILABLE in vanilla Woocommerce. You require a PAID PLUGIN – WooCommerce Follow-ups which is a premium extension.
Thanks
Excellent point! We’ll be updating the post to make that more clear. Thanks!
This is a great resource. Thank you.
Glad you found it useful, Daniel!
Finally document which makes sense. I like it a lot.
Thanks, Vlado!
How do I as a store owner get “Completed order” emails? There is no option under the option to do so under Settings >> Emails >> “Completed orders” to add an a CC email, just options to Enable/Disable and a few basic field options for Subject etc. which enables it only for the customer. How to? Am I missing the obvious or is it ANOTHER to plugin just to enable something so simple? Frustrated!
Hi Steve! We’d love to help. Could you reach out to our team here: https://woocommerce.com/contact-us/ so we can provide more personalized support?
Trending
An AI’s answer is only as up-to-date as the documentation it uses
By David Wilson •
Meet your customers where they’re already deciding with Reddit Ads for WooCommerce
By Patrick Allanach •
Why grüum evaluated Shopify and Magento — and chose to stay with WooCommerce
By Christina Bevitori •
Never miss a beat — join our mailing list
Please enter a valid email.
View our privacy policy. You can unsubscribe anytime.
There was an error subscribing; please try again later.
Thanks for subscribing!
Emails will be sent to
You're already subscribed!
Emails are sent to