
Subscription includes
Support
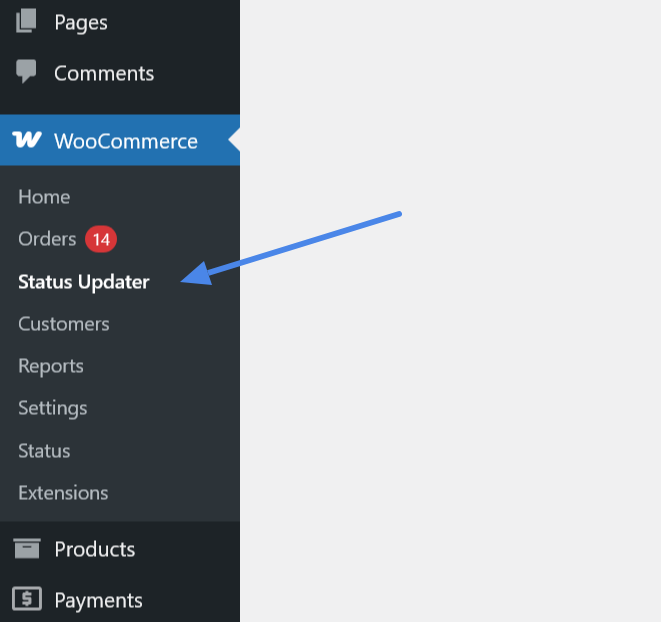
1. Access the Tool
– Navigate to WooCommerce > Status Updater in your WordPress admin dashboard, or use the “Updater Page” link from the Plugins page (available to shop managers and admins).
2. Choose Selection Method
– Date Range: Select “Date Range” to update orders within a specific time period.
– Enter “Start Date” and “Cutoff Date.”
– Pick one or more “Current Statuses to Update” (e.g., “Pending,” “Processing”).
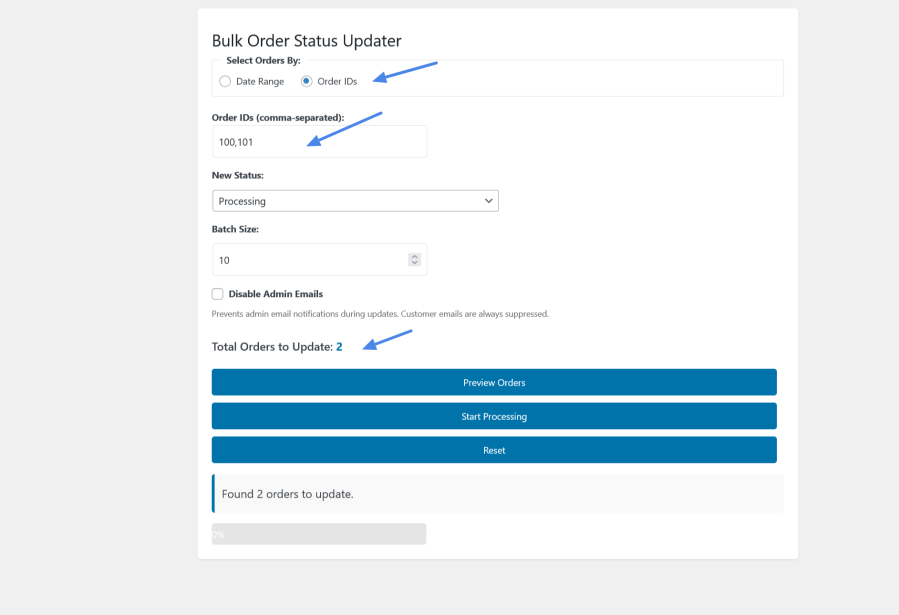
– Order IDs: Select “Order IDs” to update specific orders by their IDs.
– Enter comma-separated order IDs (e.g., “24, 25, 26”). No current status selection is required.
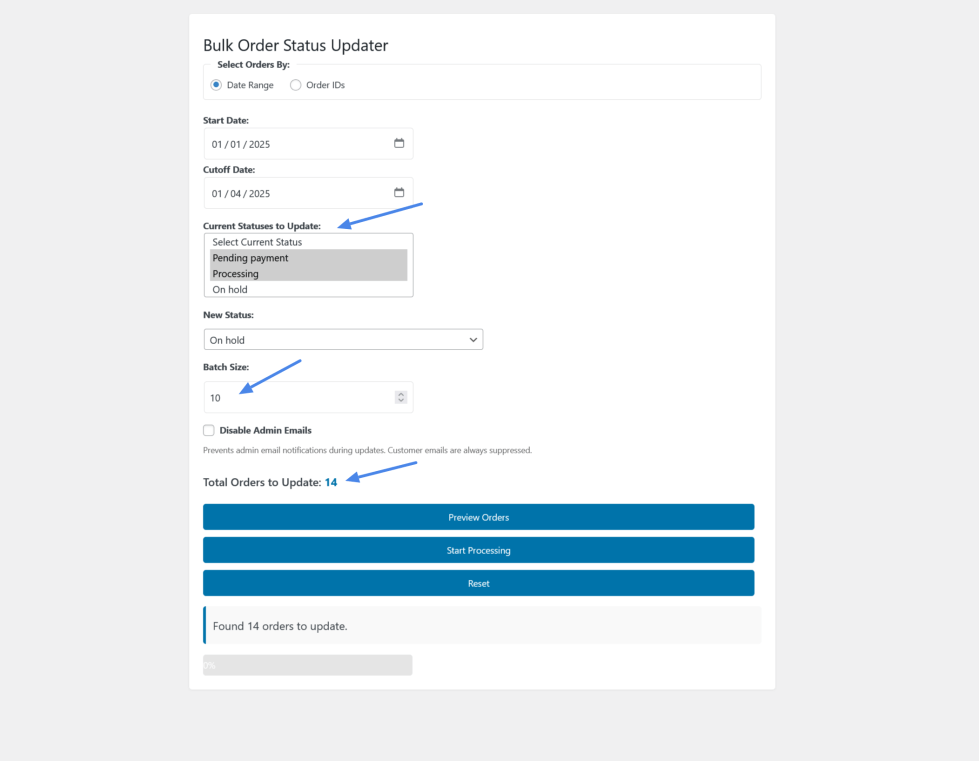
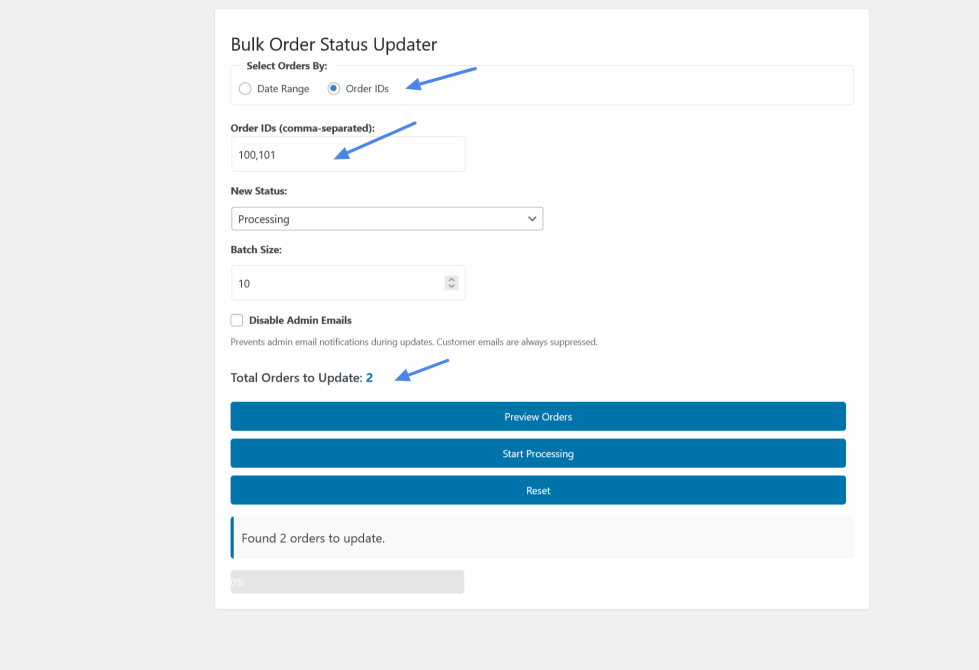
3. Set New Status
– Choose a “New Status” from the dropdown (e.g., “Completed,” “Cancelled”).
4. Configure Options
– Set “Batch Size” (default 10) to control how many orders process at once.
– Check “Disable Admin Emails” to suppress admin notifications during updates (customer emails are always suppressed).
5. Preview and Process
– Click “Preview Orders” to see the total orders that will be updated.
– If the new status matches a selected current status for a date range, you’ll see “Cannot process”—adjust statuses and try again.
– Click “Start Processing” to begin. Watch the progress bar update in real-time.
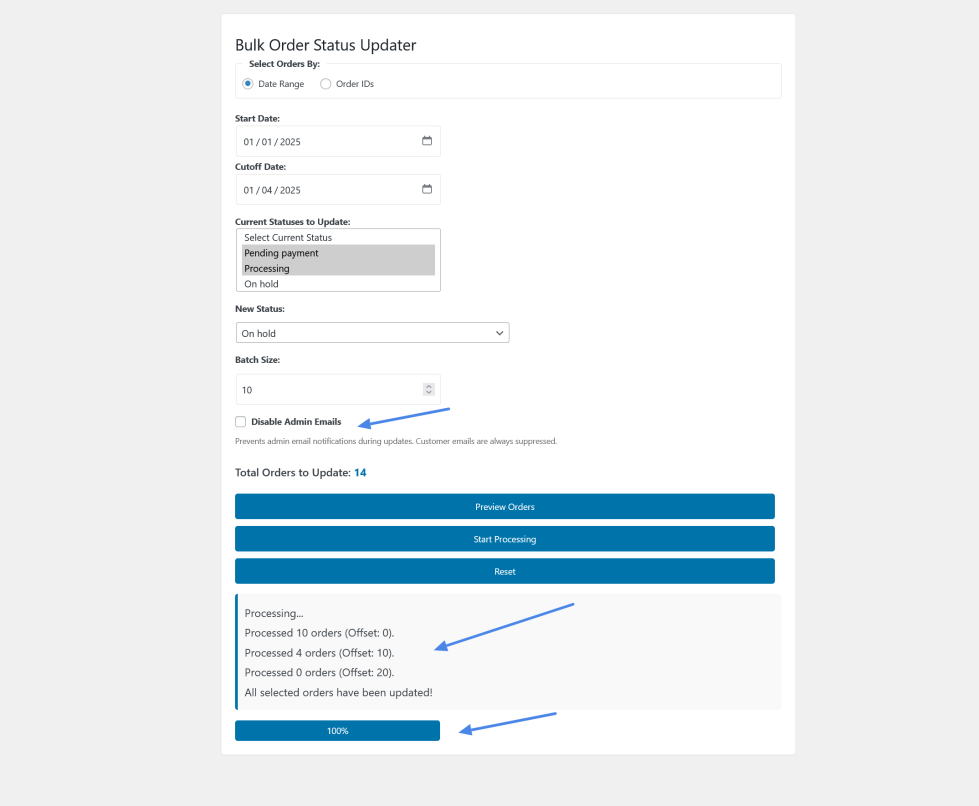
6. Reset
– After processing (or to start over), click “Reset” to clear the form. Both “Current Statuses” and “New Status” will revert to “Select” options.
7. Preview Updated
– Preview orders in a detailed table before processing — see Order #, Customer Name, Date, Status, and Total at a
glance before making any changes
8. Rollback
– One-click undo/rollback — made a mistake? Instantly revert all affected orders to their previous statuses with a
single click (keeps up to 5 recent snapshots)
9. Export CSV
– Download a full report of every processed order with before and after statuses, perfect for auditing
and record-keeping
No. All customer email notifications are automatically suppressed during bulk updates. You can also optionally disable
admin email notifications with a single checkbox.
Yes. The plugin stores up to 5 recent update snapshots. After processing, an Undo button appears that lets you revert all affected orders to their previous statuses with one click.
Yes. The plugin is fully compatible with WooCommerce HPOS (Custom Order Tables) as well as the legacy post-based storage.
No. Inventory changes are disabled during bulk updates. Your stock levels remain exactly as they were.
The plugin uses batch processing, so it can handle hundreds or thousands of orders. You control the batch size to suit your server's capacity. It has been tested with 350+ orders.
Yes. Click Preview Orders to see a detailed table showing Order #, Customer Name, Date, Status, and Total for all matching orders before you make any changes.
Yes. After processing, an Export CSV button appears. The downloaded file includes Order ID, Customer Name, Email, Date, Old Status, and New Status for every affected order.
Users need the Shop Manager or Administrator role (specifically the manage_woocommerce capability) to access and use the plugin.
Extension information
Quality Checks
Countries