
Creating coupons with WooCommerce is straightforward, and coupons are effective tools to market your store and products, convert visitors into customers, and retain loyal shoppers.
But how exactly do you use them to drive revenue and customer loyalty? Here are some tried and tested customer retention tactics with coupons.
Start by collecting email addresses

Do you have email addresses for your store visitors? Collecting them is the first step to a good ecommerce email marketing strategy: One of the most effective ways to market coupons and stay in touch with your customers is through email.
MailChimp for WooCommerce is your ally here. MailChimp is loved by marketers because it makes life easier. It also offers more than just email marketing tools — for free! Let’s learn how to use MailChimp to display a popup window offering your customers a coupon in exchange for their email.
In WooCommerce
- Create your coupon.
- Install the official MailChimp for WooCommerce extension. Following the prompts to configure it.
- Install the Insert Headers and Footers plugin. We’ll come back to this later!
In MailChimp
After creating your account and logging in to MailChimp:
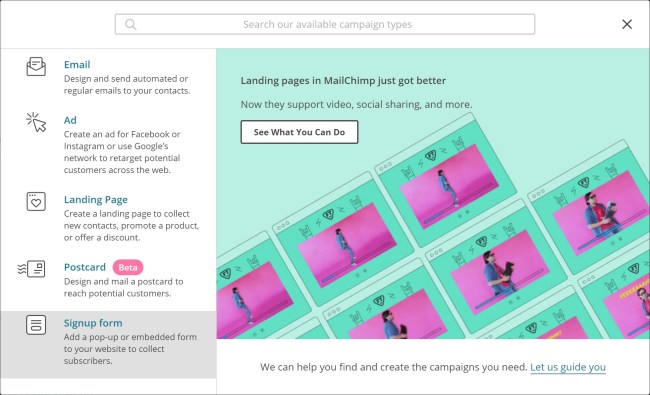
- Click Create at the top right corner, then click Signup form — it’s at the bottom of the list.
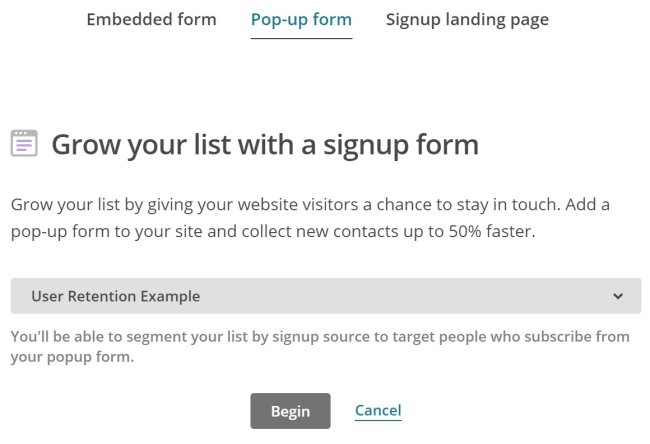
- Click Pop-up form, select a mailing list from the drop-down menu, then click Begin. If you haven’t created a list yet, here is some guidance around that.
- Customize your pop-up. The MailChimp pop-up creation tool offers a lot of style and functionality options, so play around. For more detail, take a look at MailChimp’s in-depth explanation on pop-ups.
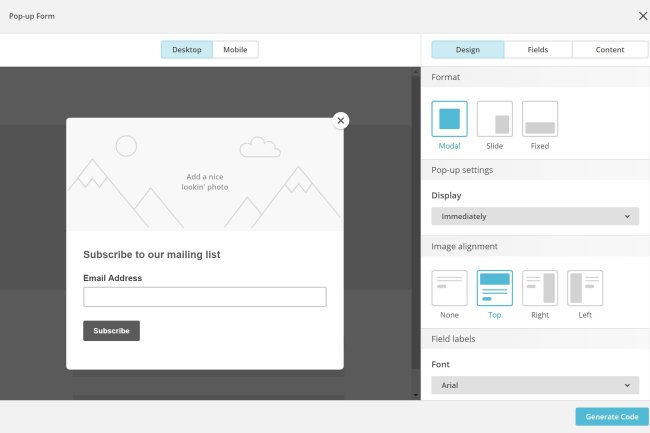
- When you’re happy with your your pop-up, click Generate Code.
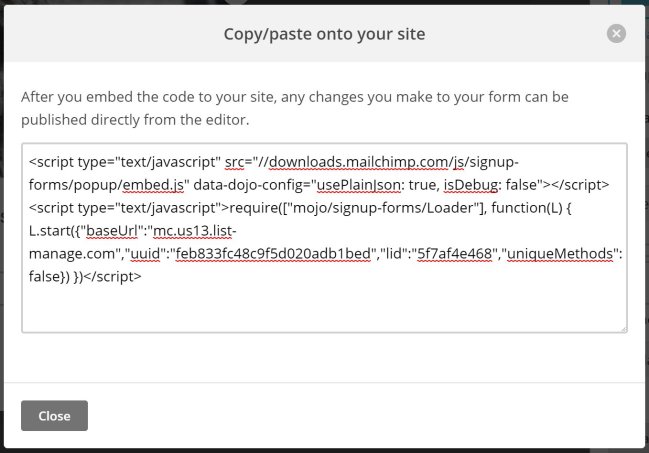
- Copy the code.
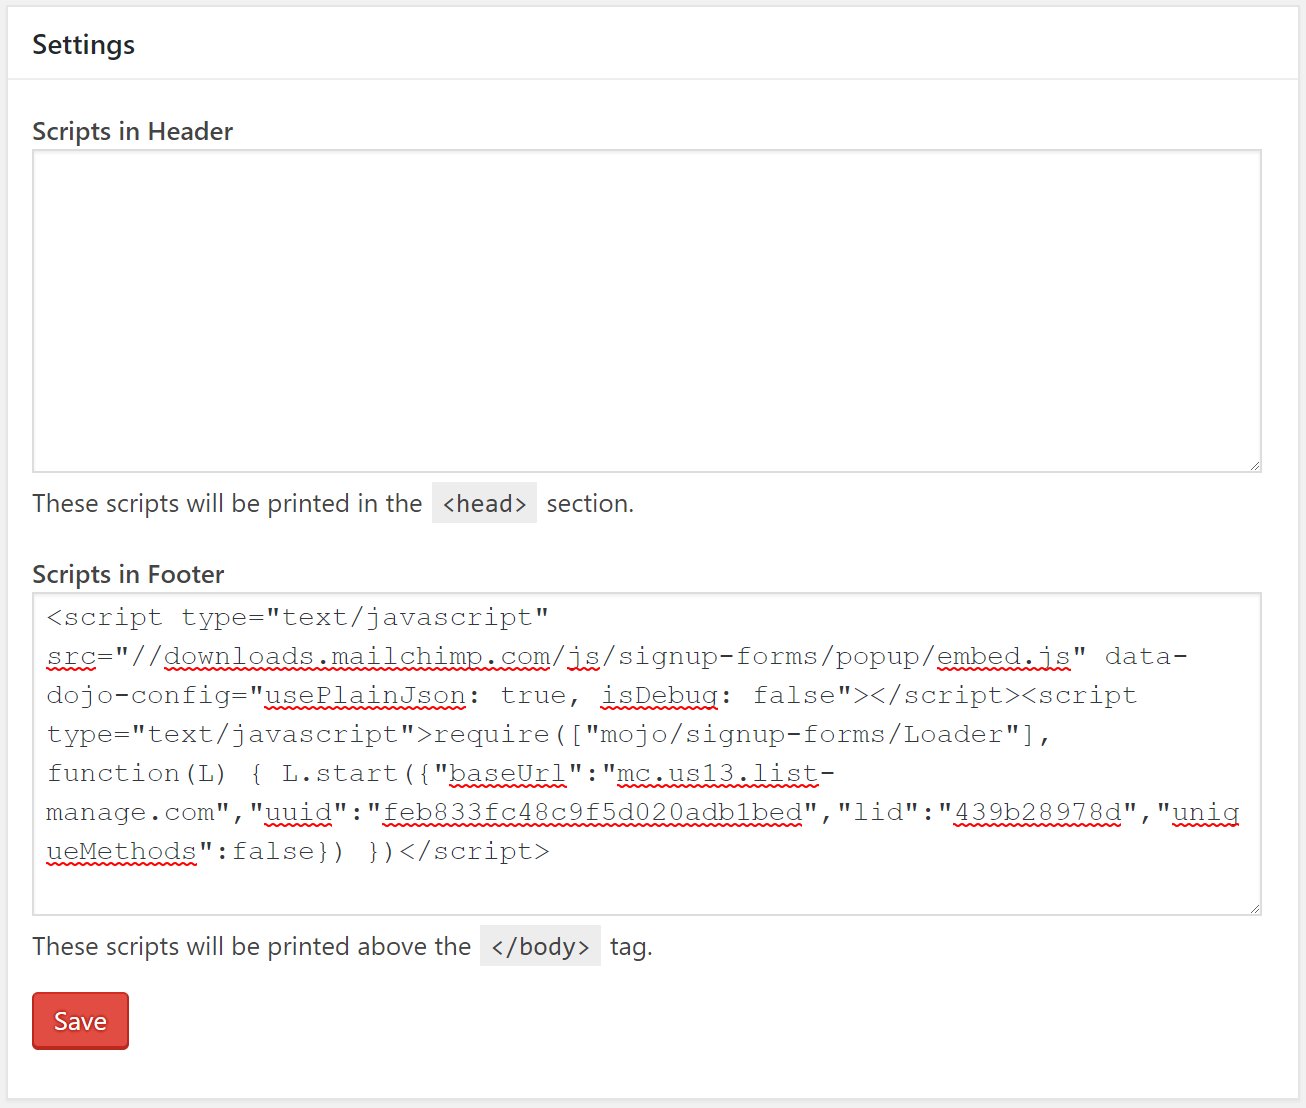
Now, head back to your WordPress admin page. Remember the Insert Headers and Footer plugin you installed? You’ll find it in Settings → Insert Headers and Footers. Paste the code in the Scripts in Footer box, then click Save.
Your store should be displaying the pop-up as configured! The next step is to give your customers the coupon your promised them.
The promised coupon
You have two options in MailChimp for passing the coupon on to your customers.
Approach 1: Display the coupon on the pop-up success message
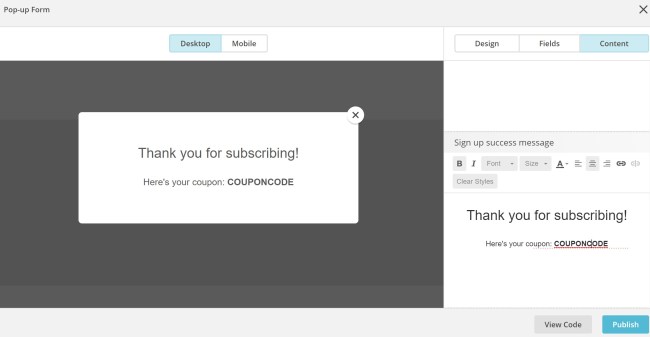
The simpler option is to display the coupon code in the success message, right after your customer subscribes via pop-up. You can do this by editing the Sign up success message under Content tab. up, without leaving your store.
Approach 2: Send the coupon in a “thank you” email
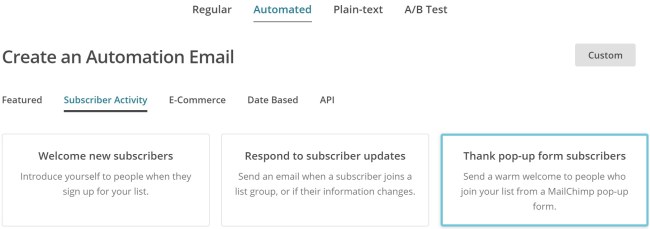
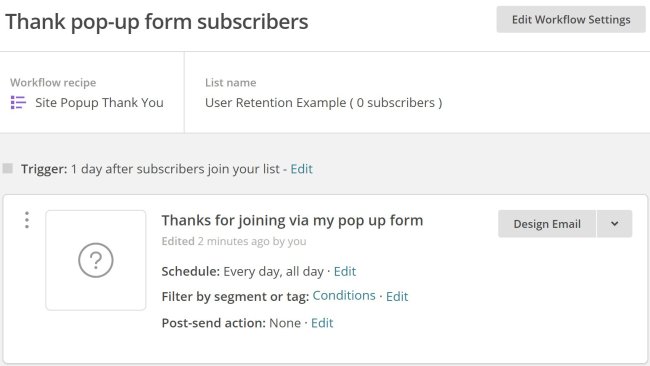
In the second approach, you’ll set up an automated email that’s sent every time someone subscribes using the pop-up form.
- Click Create, then Email. Select the Automated tab, then Subscriber Activity. Select Thank pop-up form subscribers option.
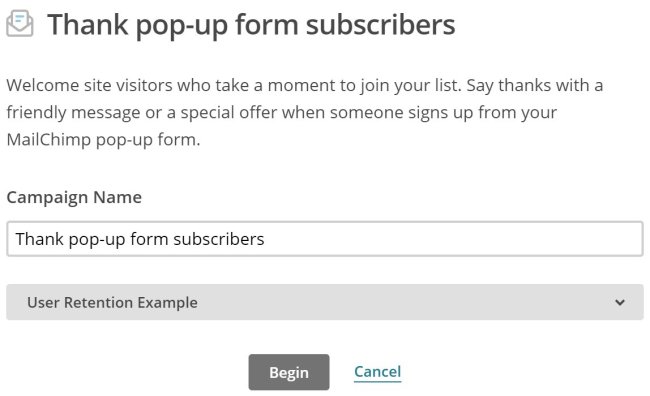
- Give the campaign a name and link it to a list.
- Your new email workflow now exists, but needs a little configuration.
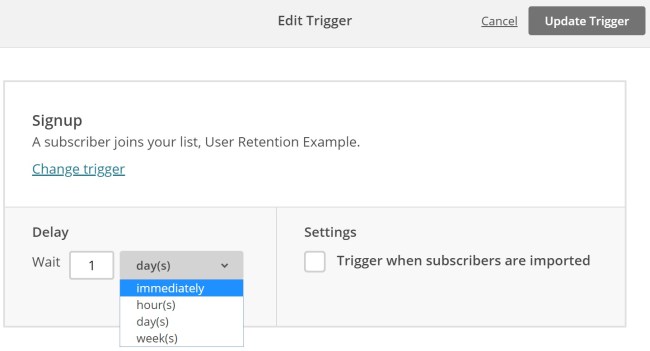
Editing the Trigger will change the frequency with which the emails are sent. In this example, you want your customers to have the coupon Immediately:
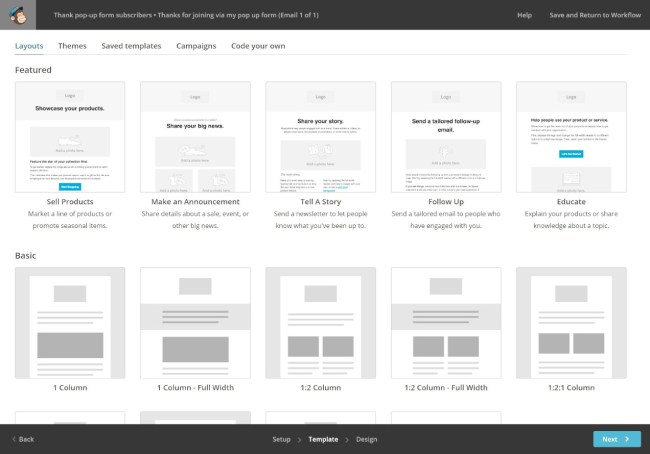
 Click Design Email and fill the Email information section. You’ll be presented with lots of layouts and themes. Choose a theme and tweak it, or select a blank layout and build your email from scratch.
After saving your email design (don’t forget to mention the coupon code!), you’ll return to the workflow page. Click Next on the bottom right corner to proceed to the last step, then Start Workflow. Well done! Now everyone who subscribes to your pop-up form will receive the configured email.
Following up
Whichever approach you choose, you will have an effective way to start building your email list and can entice them back to your store over and over again. Automated campaigns help you make this possible. To take your email marketing even further, I recommend Kazia Galazka’s great post on getting the most out of MailChimp.
Recovering abandoned carts (and that lost revenue)
Abandoned carts are a big concern for eCommerce stores. The Baymard Institute says the average cart abandoned rate is 69%. That means 7 out 10 customers are interested in your products, search for them, add them to their carts, then leave without buying.
Fear not. You can recover 60% of them using abandoned cart recovery emails. MailChimp offers an automated workflow for that, or you can try a specialized service like Jilt.
We hope these tips will help you grow your customers’ loyalty. Finally: Get deeper into MailChimp. They have a lot to offer, especially if you’re running a small business.
Was this post helpful to you? Let us know your marketing and couponing experiences in the comments below.
About
this is great tool but can you say that it work on amp version of website?
Hey Harshil Patel. the procedures may be different.
This post may be helpful for you: https://searchwilderness.com/amp-forms/#gref
This is a great article I must say. It has all the information with much clarity.
Hello Samuel,
I was thinking about email list building for the DBPMagazine. I’m a Graphic designer and aspiring artist as well as Design Editor here. So I thought about the events e-mail campaign for the autumn meetings.
I’ve been using the MailChimp for the design campaigns, but never customized pop ups. Thanks for the tips.
All the best,
RJ Moonk
Hey RJ Dowell. I suggest you explore MailChimp settings. There are a lot of hidden gems in there! 😉
I love MailChimp and thanks for telling me about this features.
Both WooCommerce and MailChimp is a best combination. Thanks for the information published.
Yes, undoubtedly! 🙂
Good method to grab customers.
I love your tips and it is definitely provide me more sales.
Thanks Samuel for sharing these tips. I will try them very soon 🙂
Thank you for sharing this article
One of the best ways to communicate with customers and inform them is to have an email audience that has proven to be an experience for me.
These are really awesome ideas. We need to take of laws as well in the process..
Great tips! Thank you for sharing the step by step guide!
Hey thanks for sharing this content. https://mcgarrypartners.com.au/ these guys can assist regarding tax and accounting if you need to know. They are based in Brisbane.
Tendência
An AI’s answer is only as up-to-date as the documentation it uses
By David Wilson •
Meet your customers where they’re already deciding with Reddit Ads for WooCommerce
By Patrick Allanach •
Why grüum evaluated Shopify and Magento — and chose to stay with WooCommerce
By Christina Bevitori •
Nunca perca uma novidade — junte-se à nossa lista de e-mails
Digite um e-mail válido.
Veja nossa política de privacidade. Você pode cancelar a inscrição a qualquer momento.
Houve um erro na inscrição; tente novamente mais tarde.
Obrigado por se inscrever!
E-mails serão enviados para
You're already subscribed!
E-mails são enviados para