
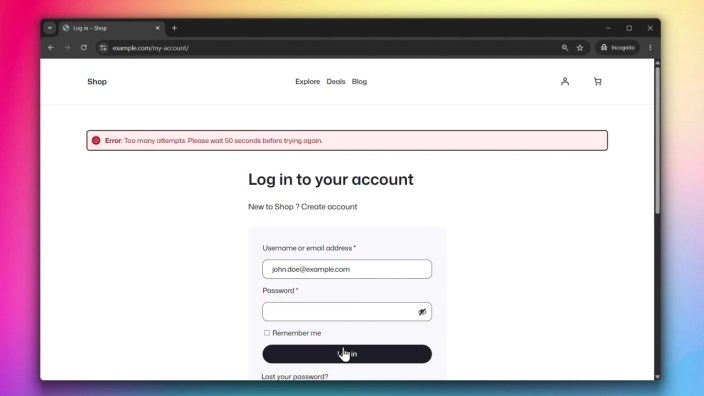
Rate Limiting blocks excessive requests on your authentication forms and protects your store against brute force attacks by limiting how many requests a single IP address can make within a given time window.
How it works
↑ Back to topThe plugin uses the same rate limiting functionality as WooCommerce’s Store API. Requests are tracked by IP address for unauthenticated users and by user ID for logged-in users. Once the configured limit is exceeded, further requests from that IP are blocked until the time window resets.
Accessing Rate Limiting Settings
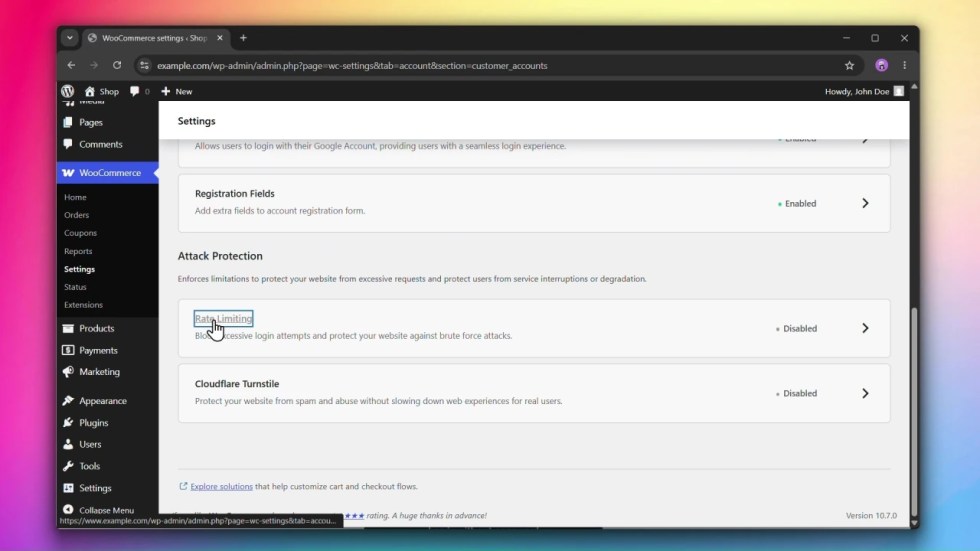
↑ Back to topGo to WooCommerce > Settings > Accounts & Privacy > Customer Accounts and click on Rate Limiting.
Steps
↑ Back to topStep 1: Enable Rate Limiting
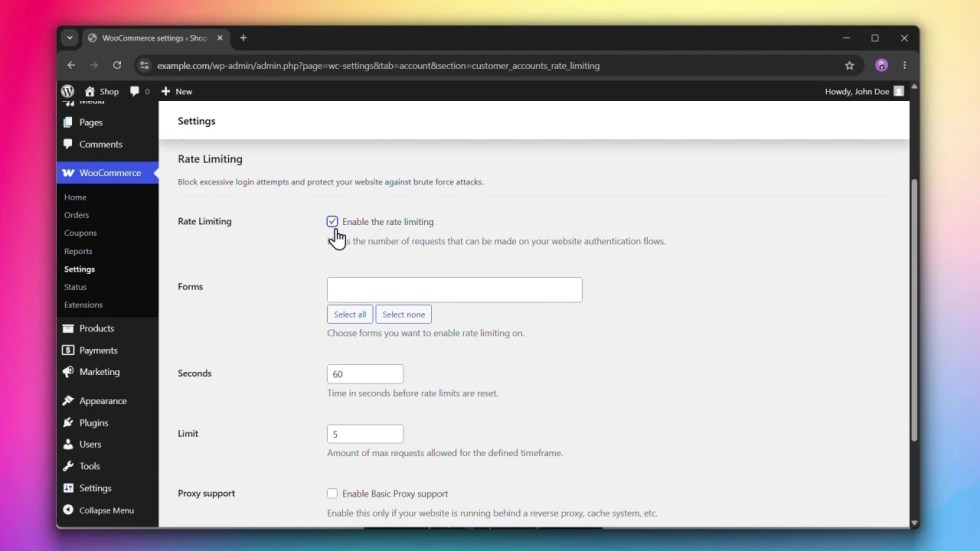
↑ Back to topUnder Rate Limiting, check Enable the rate limiting.
Step 2: Select the forms to protect
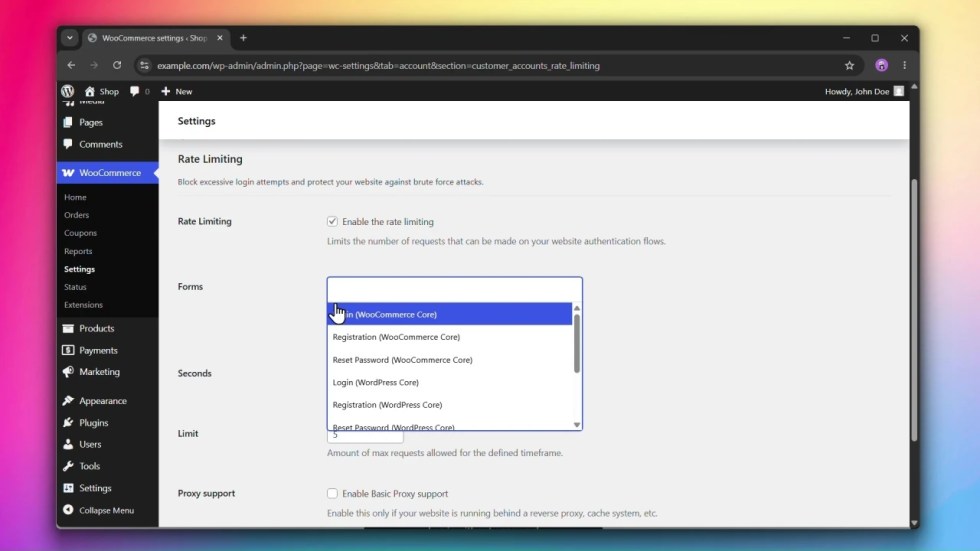
↑ Back to topUnder Forms, select which forms you want to apply rate limiting to.
Supported forms
WooCommerce
- Login
- Registration
- Reset Password
WordPress
- Login
- Registration
- Reset Password
Enhanced Customer Accounts for WooCommerce
- Send Login Email (Passwordless Login)
- Verify Login (Passwordless Login)
- Send Verification Email (Email Verification)
- Verify Email (Email Verification)
To protect the checkout form with Rate Limiting, enable the Modern Login experience on checkout and configure Rate Limiting under Configuring Rate Limiting. To add Turnstile protection to the checkout form, see Configuring Cloudflare Turnstile.
Step 3: Set the time window and limit
↑ Back to top- Seconds — the length of the time window. Once a user hits the limit within this period, further requests from that IP are blocked until the window resets. Default:
60. - Limit — the maximum number of requests allowed from a single IP within the time window. Default:
5.
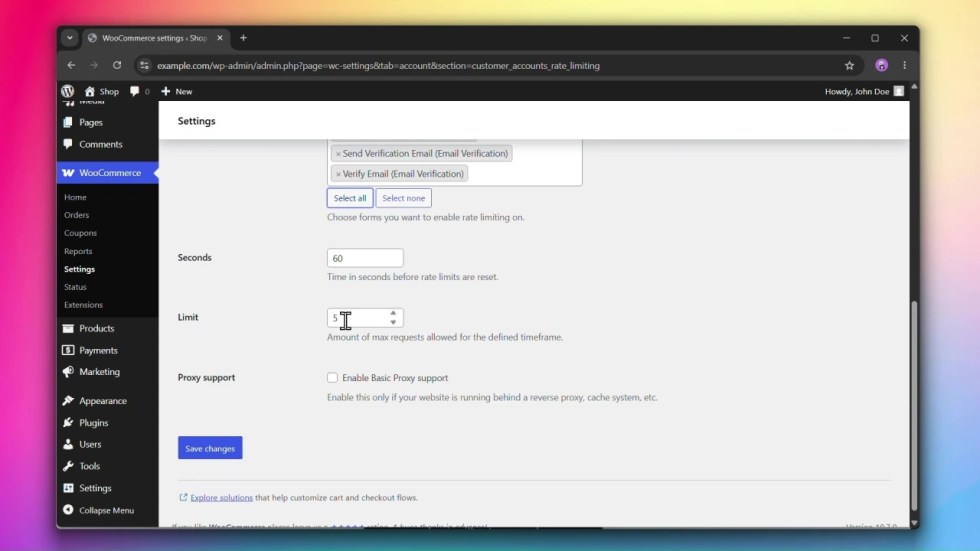
Step 4: Configure Proxy Support
↑ Back to topIf your site runs behind a reverse proxy, load balancer, CDN, or cache service, check Enable Basic Proxy support. This allows the plugin to read the real client IP from forwarding headers (X-Forwarded-For, X-Real-IP) rather than the server’s IP, ensuring rate limits are applied per user correctly. This is disabled by default.
Step 5: Click Save changes
↑ Back to topClick Save changes to apply your settings.
Combining with Cloudflare Turnstile
↑ Back to topRate Limiting and Cloudflare Turnstile work well together. Rate Limiting caps request frequency by IP across your authentication forms, while Turnstile blocks bots at the form level before a request is even processed. Using both provides layered protection for your store.

