
Endpoints are extra parts appended to your page URLs that display different content without the need for multiple pages. For example, appending /login to your My Account page URL shows the login page instead of the default My Account page.
The plugin adds its own endpoints on top of the existing WooCommerce account endpoints, giving you dedicated URLs for login, registration, authentication, and email verification.
Available Endpoints
↑ Back to top- Authentication (
auth) — handles the authentication page under My Account and checkout. - Verification (
verification) — handles the email verification page under My Account. - Log in (
login) — handles the login page under My Account and checkout. Only active when Modern Login is enabled. - Registration (
register) — handles the registration page under My Account and checkout. Only active when Modern Login is enabled.
The resulting URLs will look like this:
https://www.example.com/my-account/login/
https://www.example.com/my-account/register/
https://www.example.com/my-account/auth/
https://www.example.com/my-account/verification/

https://www.example.com/checkout/login/
https://www.example.com/checkout/register/
https://www.example.com/checkout/auth/
The Log in and Registration endpoints are only registered when Modern Login is enabled on the account page or checkout. See Enabling Modern Login Experience.
Accessing Endpoints Settings
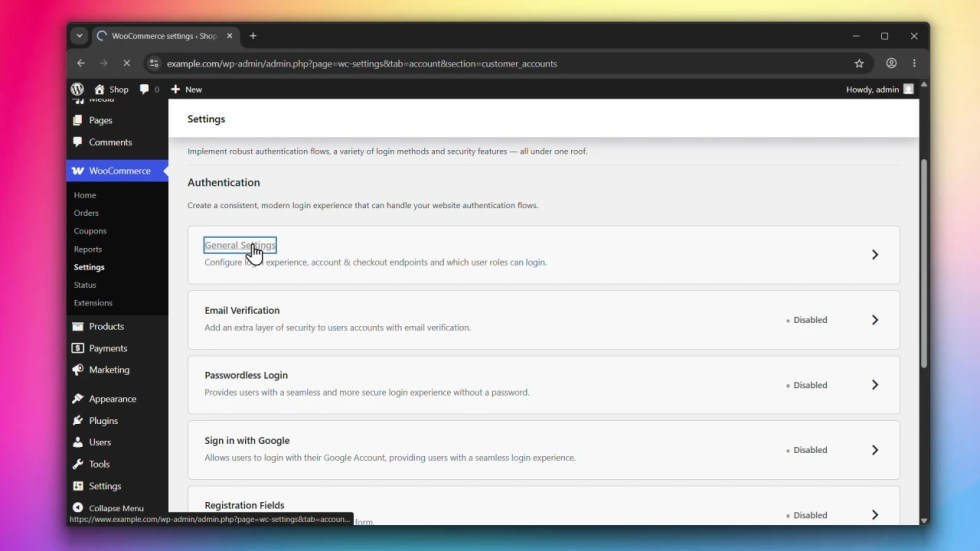
↑ Back to topGo to WooCommerce > Settings > Accounts & Privacy > Customer Accounts, click on General Settings, and scroll down to the Endpoints section.
Steps
↑ Back to topStep 1: Update the endpoint slugs
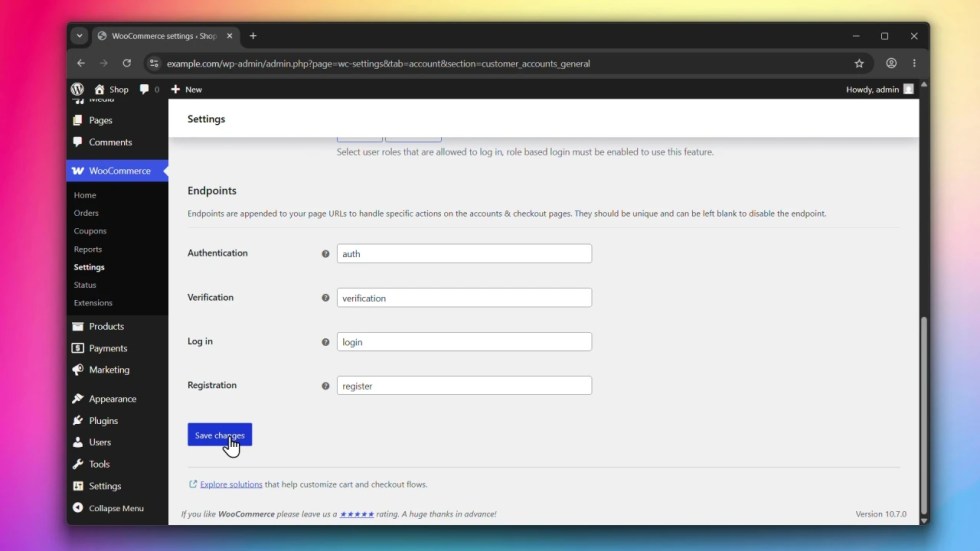
↑ Back to topEdit any of the endpoint fields to use a custom URL slug. Make sure each slug is unique across your site to avoid conflicts with existing WooCommerce or WordPress endpoints.
Step 2: Click Save changes
↑ Back to topClick Save changes to apply your changes.
Step 3: Flush permalink rules
↑ Back to topAfter saving, go to WordPress Admin > Settings > Permalinks and click Save Changes — even without making any changes. This ensures the rewrite rules for your new endpoints are registered correctly and prevents 404 errors.
Important notes
↑ Back to topWarning: If you change the Authentication endpoint, the Google Login redirect URIs will also change. You must update them in the Google Cloud Console or the login flow will break. See Setting up Google Login.
If you encounter 404 errors after changing an endpoint, go to WordPress Admin > Settings > Permalinks and save to flush the rewrite rules.

