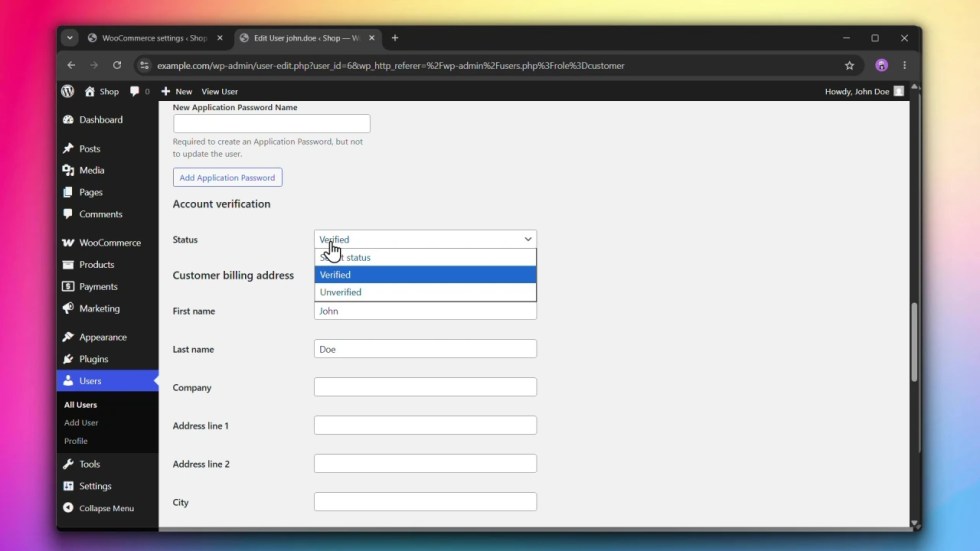
Email Verification adds an extra layer of security to user accounts by requiring users to verify their email address. Users receive a 6-digit verification code or a verification link sent via email.
Accessing Email Verification Settings
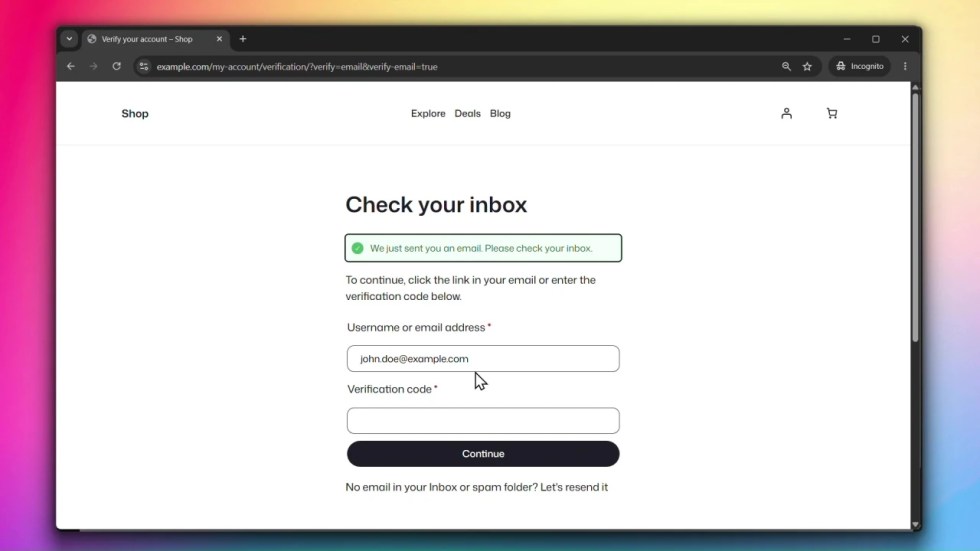
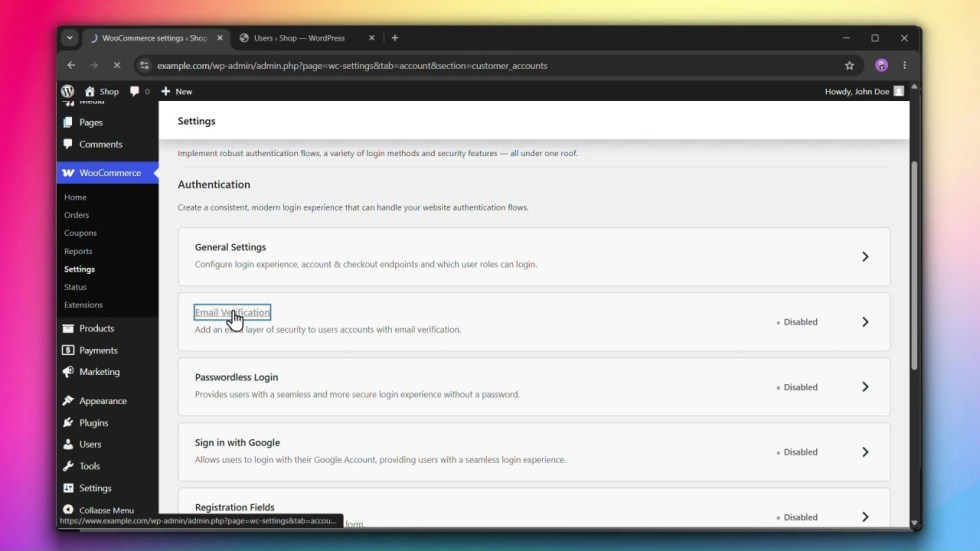
↑ Back to topGo to WooCommerce > Settings > Accounts & Privacy > Customer Accounts and click on Email Verification.
Steps
↑ Back to topStep 1: Enable Email Verification
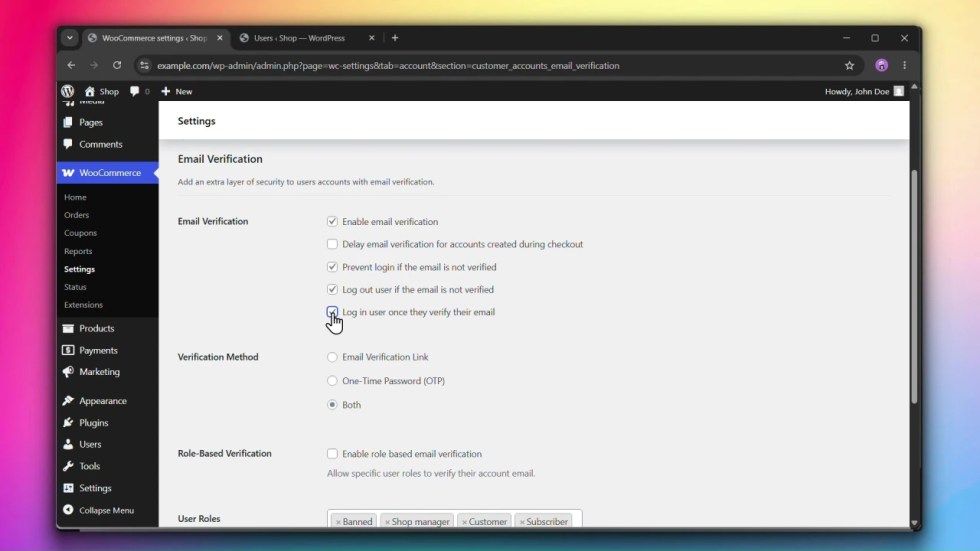
↑ Back to topUnder Email Verification, check Enable email verification to turn on the feature.
Step 2: Configure verification behaviour
↑ Back to topChoose how verification is enforced by checking or unchecking the following options:
- Delay email verification for accounts created during checkout — defers verification until after the order is placed.
- Prevent login if the email is not verified — blocks users from logging in until their email is verified.
- Log out user if the email is not verified — automatically logs out users with an unverified email.
- Log in user once they verify their email — automatically logs the user in as soon as they verify their email.
Step 3: Choose a Verification Method
↑ Back to topUnder Verification Method, select how users receive their verification challenge:
- Email Verification Link — a one-click verification link sent to the user’s inbox.
- One-Time Password (OTP) — a 6-digit verification code the user enters on the verification page.
- Both — lets the user choose between a verification link and a 6-digit code.
Step 4: Configure Role-Based Verification (optional)
↑ Back to topIf you want to require verification only for specific user roles:
- Under Role-Based Verification, check Enable role based email verification.
- Under User Roles, select the roles that must verify their email.
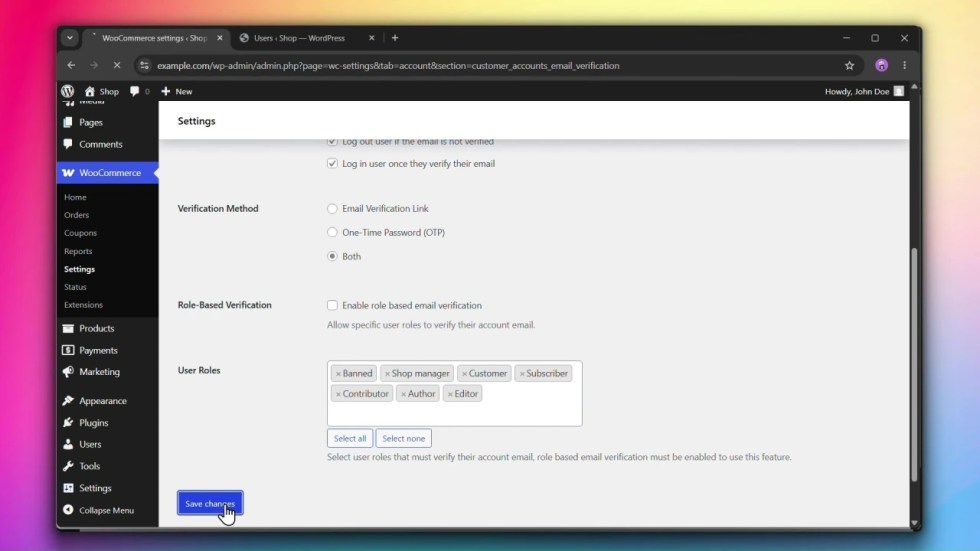
Step 5: Click Save changes
↑ Back to topClick Save changes to apply your settings.
Managing Verification Status
↑ Back to topUsers List
↑ Back to topWhen Email Verification is enabled, an Account Verification column is added to the WordPress Admin > Users list. Each user displays one of the following statuses:
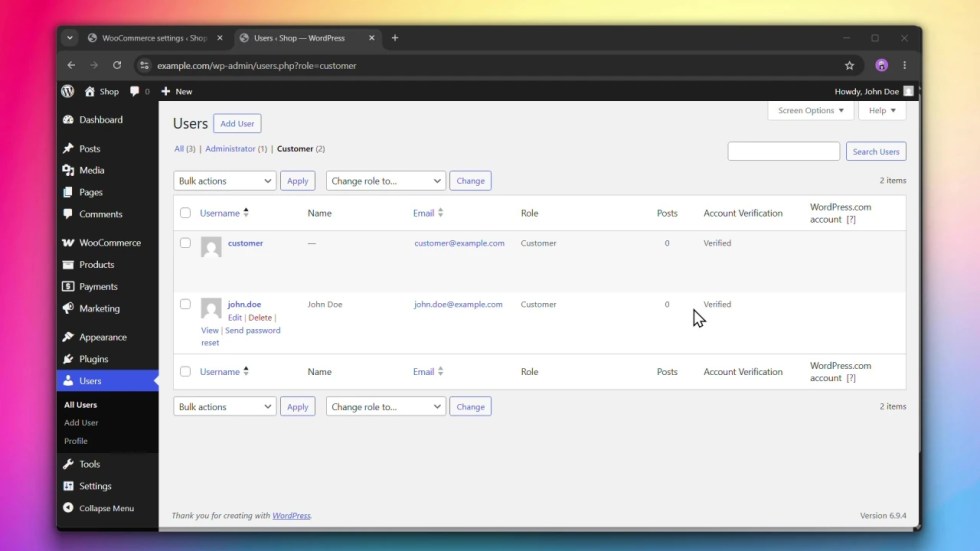
- Verified — the user has verified their email address.
- Pending — a verification email was sent but the user has not verified it yet.
- Unverified — the user registered before Email Verification was enabled.
- Optional — the user is not required to verify their email (e.g. their role is excluded from Role-Based Verification).
Manually Verifying a User
↑ Back to topYou can manually change a user’s verification status from the Edit User page.
- Go to WordPress Admin > Users and click on a user to edit them.
- Scroll down to the Account Verification section.
- Under Status, select Verified or Unverified from the dropdown.
- Click Update User to save.