Variation Monster comes with 43+ powerful features that allow store owners to fully customize how product variations are displayed, ensuring they perfectly match their store’s design and user experience.
Step 1: Enable Variation Swatches
↑ Back to topThis setting acts as the main control switch for enabling variation swatches across your WooCommerce store.
When the admin enables this option from the General Settings, the variation swatches feature will automatically apply to all variable products across the entire website.
Once enabled, the plugin replaces the default WooCommerce dropdown selectors with the selected swatch style, making product variation selection faster and more visually appealing.
Here is how to configure it:
- Find the Variation Swatches Enable field.
- Enabled it.
Click the ‘Save’ button.
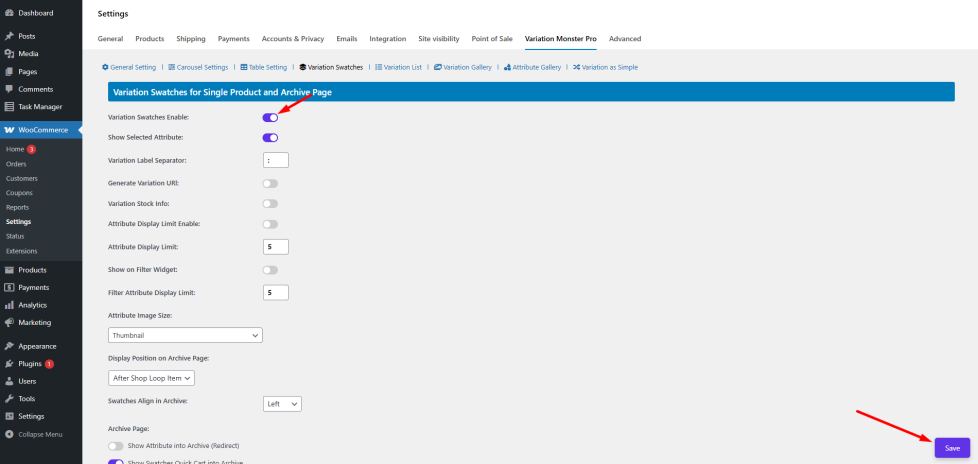
After saving, check your product page to see the updated dropdown replaced with buttons.
However, there may be situations where you want to disable swatches for a specific product. Variation Monster provides this flexibility through the product edit page.
If the admin wants to disable variation swatches for a particular product, it can be done directly from the Product Edit Page by using the product-level settings.
This ensures full control over how variations are displayed for individual products.
Step 2: Configure Attribute Display
↑ Back to topDifferent products require different types of variation displays. For example, clothing stores may prefer color swatches, while electronics stores may prefer button-style selectors.
To accommodate different use cases, Variation Monster for WooCommerce provides four different attribute display styles.
These display types allow you to present product variations in a more visual and user-friendly way.
The available attribute display types include:
Button
Displays variations as clickable buttons. This is commonly used for options like sizes (Small, Medium, Large) or package selections.
Color Button
Shows color variations as colored swatches. Customers can easily select their desired color by clicking on the color option.
Image Button
Displays variation options as images. This is ideal for products where each variation has a unique visual appearance, such as different product styles or materials.
Radio Button
Shows variations using radio button selectors. This option provides a clean and minimal interface while still improving the default dropdown behavior.
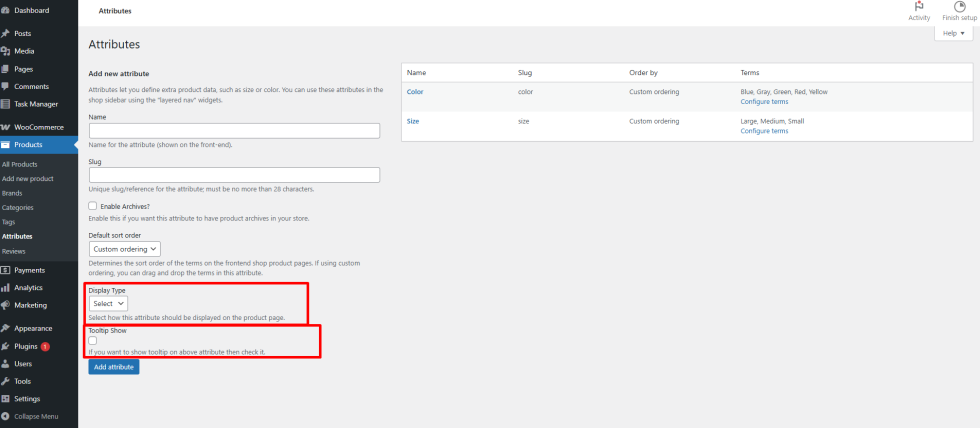
The admin can configure the attribute display type directly from the WooCommerce Attribute Settings for global control.
Note: Here, the admin can also configure the tooltip
Here is how to configure it:
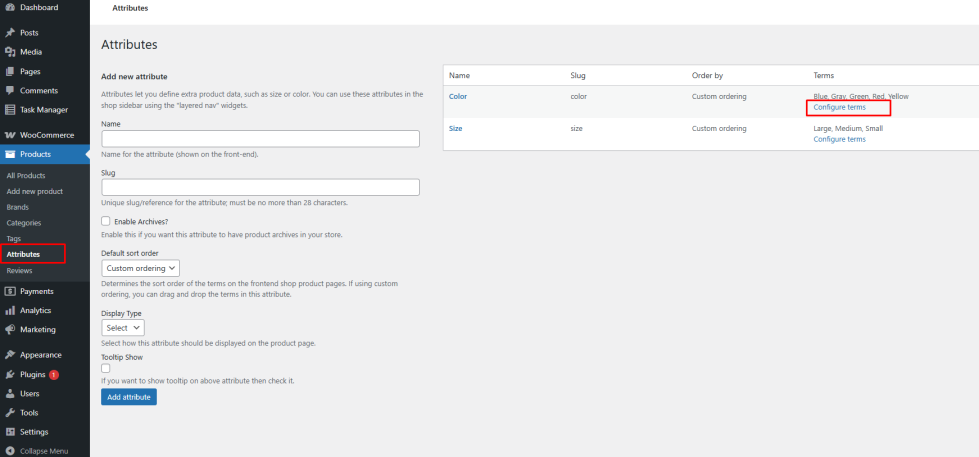
Find the Products section-> Attributes.
New Attribute:
Additionally, Variation Monster allows you to override this setting on a per-product basis from the Product Edit Page. This gives the store owner flexibility to display different swatch styles depending on the product type.

By combining global attribute settings with per-product customization, store owners can create a consistent yet flexible variation selection experience across their WooCommerce store.
Attribute Settings
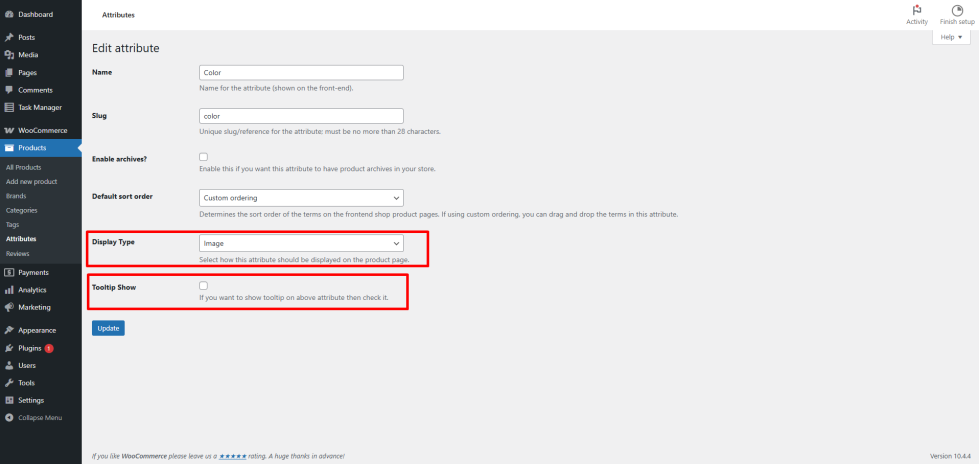
↑ Back to topOnce you select the Attribute Display Type, the next step is to configure the attribute terms. Each attribute type requires slightly different configuration depending on how the variations will appear on the product page.
For example, if you create or edit an attribute such as Size, and set its display type to Button, the variation options will appear as clickable buttons on the product page after the attribute terms are configured and saved.
To configure attribute terms, navigate to the attribute management section in WooCommerce and add or edit the terms associated with that attribute.
Different display types provide different configuration options:
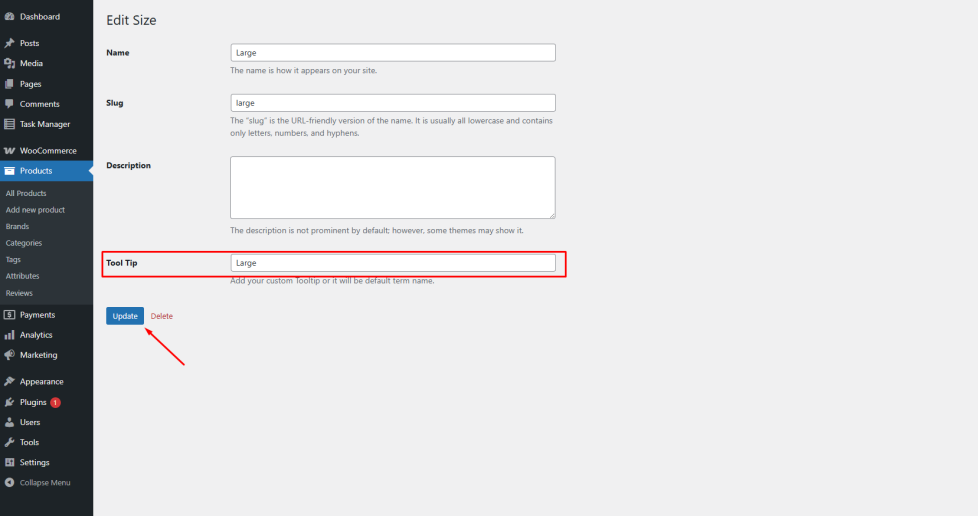
Button and Radio Button
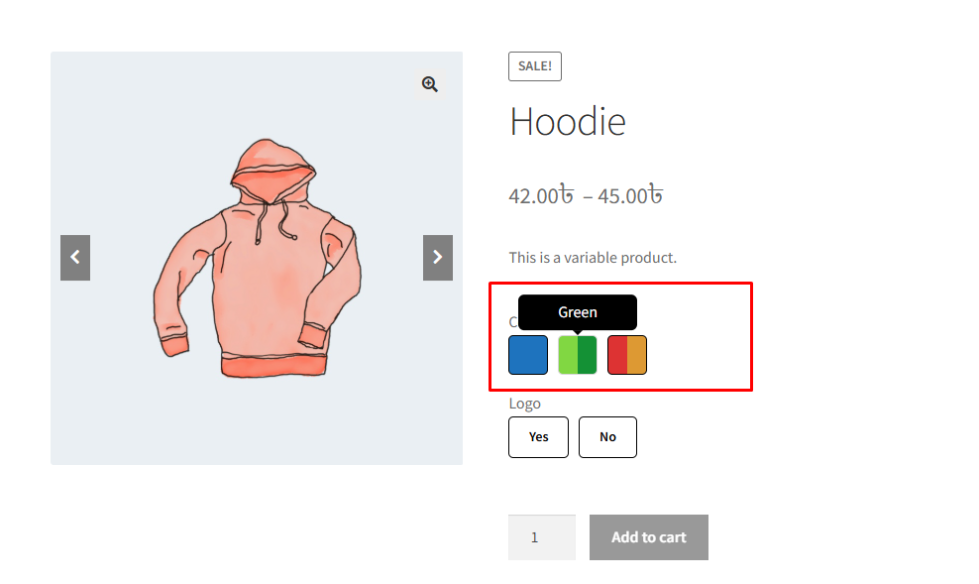
If the attribute display type is set to Button, the main configuration available for each term is the Tooltip Text.
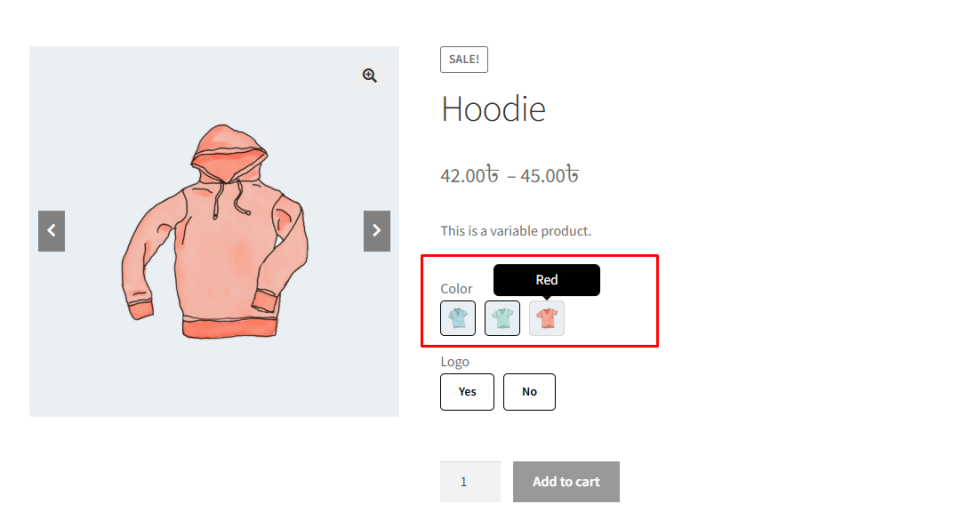
The tooltip text appears when a customer hovers over the variation option. This helps provide additional context or a clearer label for the variation.For example, if the attribute is Size, the tooltip may display text such as Small, Medium, or Large when the user hovers over the button.
Frontend it’s look like the image below
Color Button
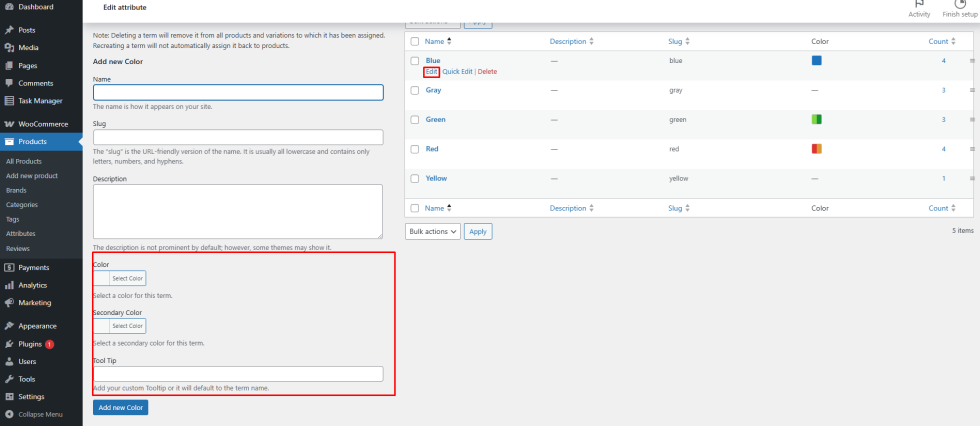
↑ Back to topIf the display type is set to Color Button, additional settings become available for each term.
You will need to configure:
- Primary Color using the color picker
- Secondary Color (optional) for gradient-style swatches
Tooltip Text
↑ Back to top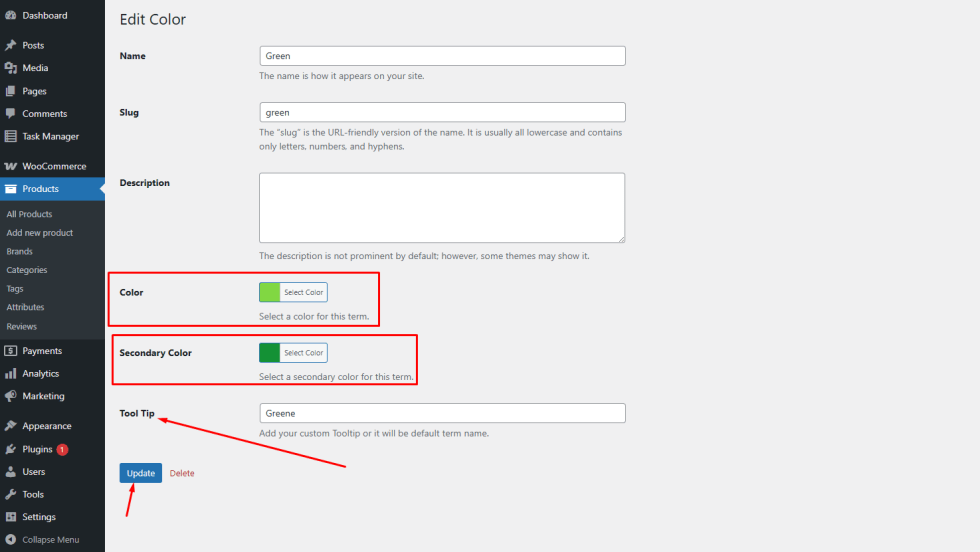
The selected colors will appear directly on the variation swatch, allowing customers to quickly identify available color options.
Image Button
↑ Back to topIf the display type is set to Image Button, each attribute term requires an image.
You will need to configure:
- Upload an Image representing the variation
- Tooltip Text
This option is ideal for products where each variation has a distinct visual appearance, such as different styles, materials, or patterns.
New Term:
↑ Back to top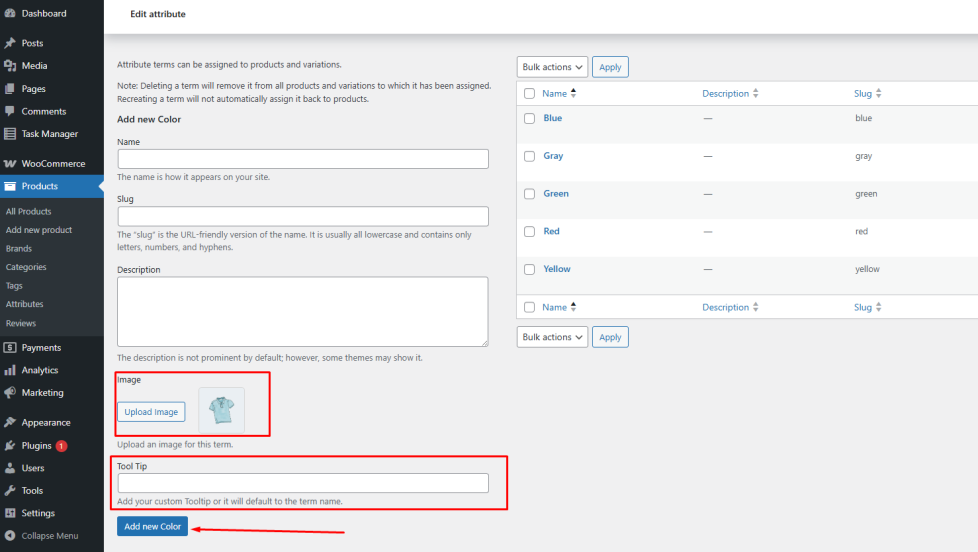
Edit Term:
↑ Back to top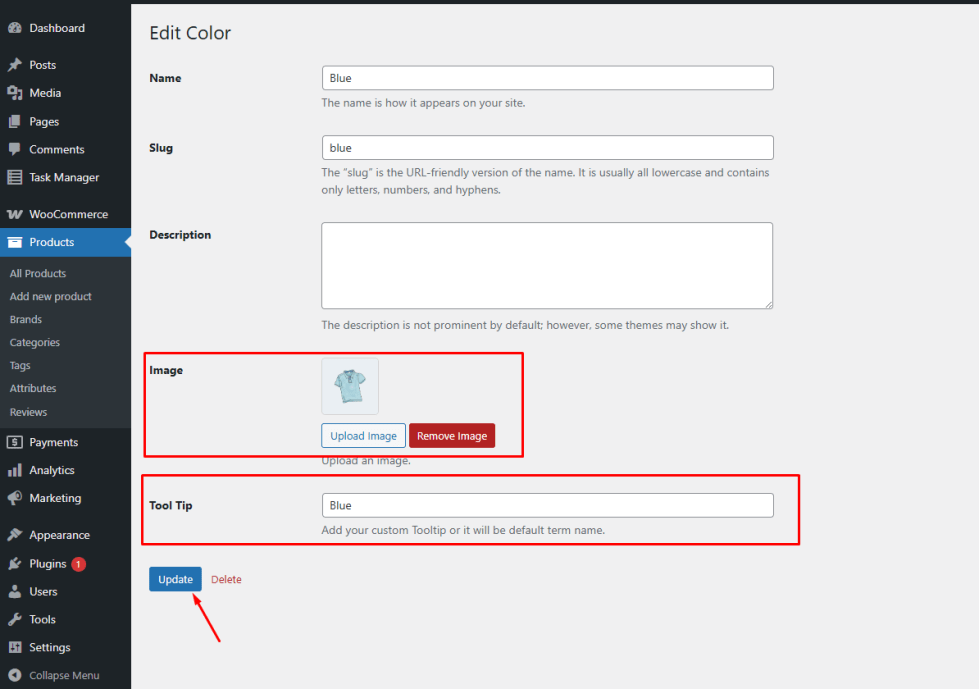
After configuring the terms and saving the settings, the variation swatches will automatically appear on the single product page, replacing the default WooCommerce dropdown selector.
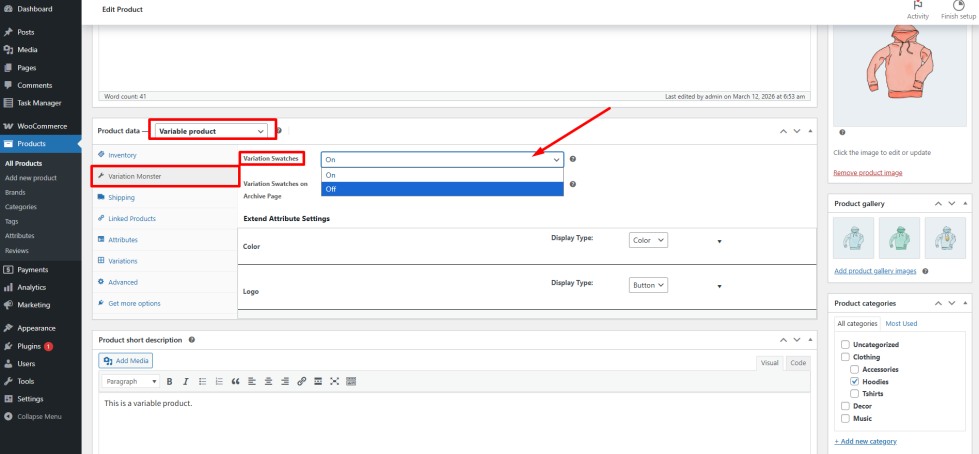
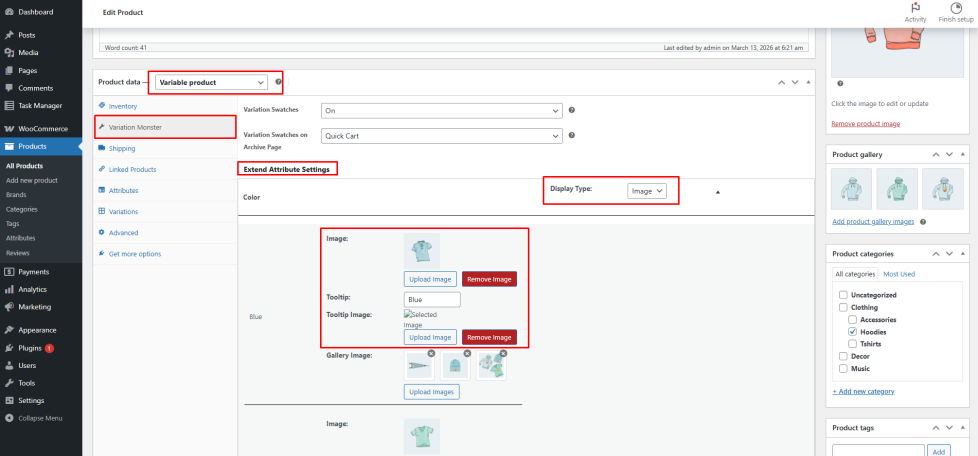
Product Meta Settings
↑ Back to topIn addition to configuring attributes globally, Variation Monster for WooCommerce also allows the admin to customize variation swatches directly from the Product Edit Page.
This is useful when a specific product requires a different swatch configuration than the global attribute settings.
From the Product Meta Settings, the admin can configure the same options available in the attribute settings, including:
- Attribute display type (Button, Color Button, Image Button, or Radio Button)
- Tooltip text
- Color settings for color swatches
- Image uploads for image swatches
These settings allow you to override the default attribute configuration for individual products.
How to Configure It
- Go to WordPress Admin Panel → Products.
- Open the Edit Product page for the desired product.
- Scroll down to the Variation Monster Product Meta Settings section.
- Select the preferred attribute display type for the product.
- Configure the required options such as tooltip text, colors, or images.
Click Update to save the changes.
After saving, the customized variation swatches will appear on the single product page for that specific product.
This flexibility allows store owners to maintain global consistency while still customizing the variation display when necessary.
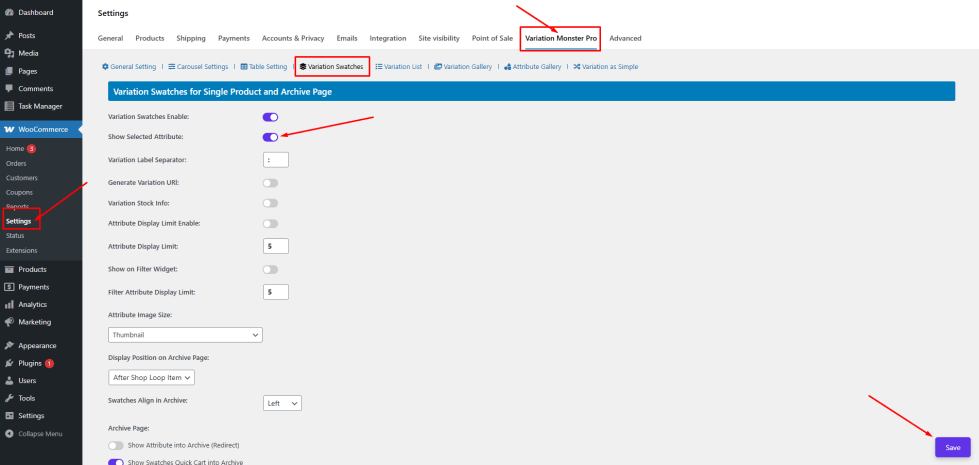
Show Selected Attribute
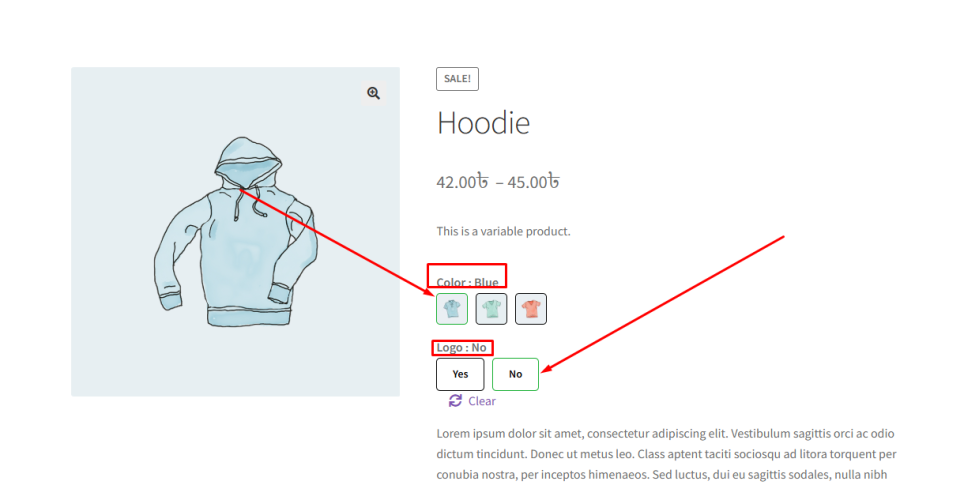
↑ Back to topSometimes customers may forget which variation they have selected, especially when a product has multiple attributes such as color, size, or material. Displaying the selected attribute clearly on the product page helps eliminate confusion and improves the overall shopping experience.
The Show Selected Attribute feature displays the currently selected variation directly on the single product page.
For example, if a customer selects:
- Color → Blue
The product page will display:
Color: Blue
If the customer changes the selection to:
- Color → Black
The display will automatically update to:
- Color: Black
This feature ensures that customers can easily confirm their selected variation before adding the product to their cart.
How to Configure
↑ Back to top- Go to WordPress Admin Panel → WooCommerce → Settings.
- Click the Variation Monster tab.
- Navigate to the Variation Swatches section.
- Enable the Show Selected Attribute option.
- Click the Save button.
After saving the settings, the selected attribute will be displayed automatically on the single product page whenever a variation is selected.
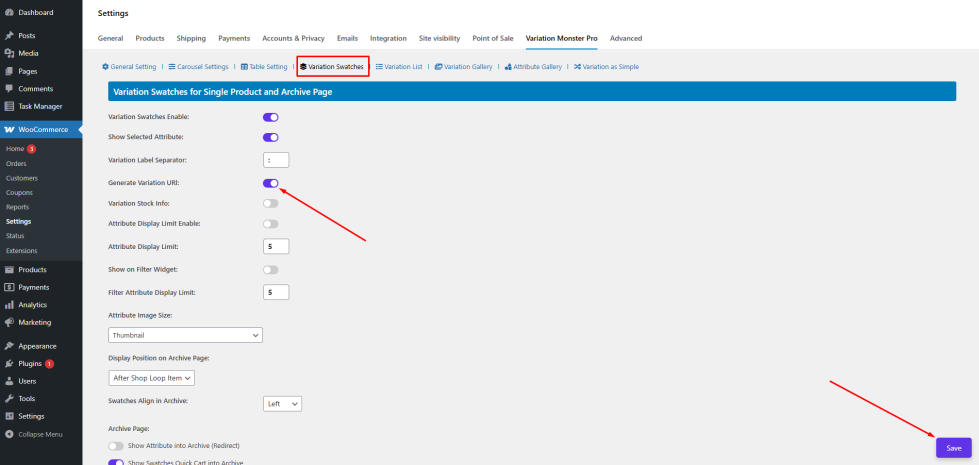
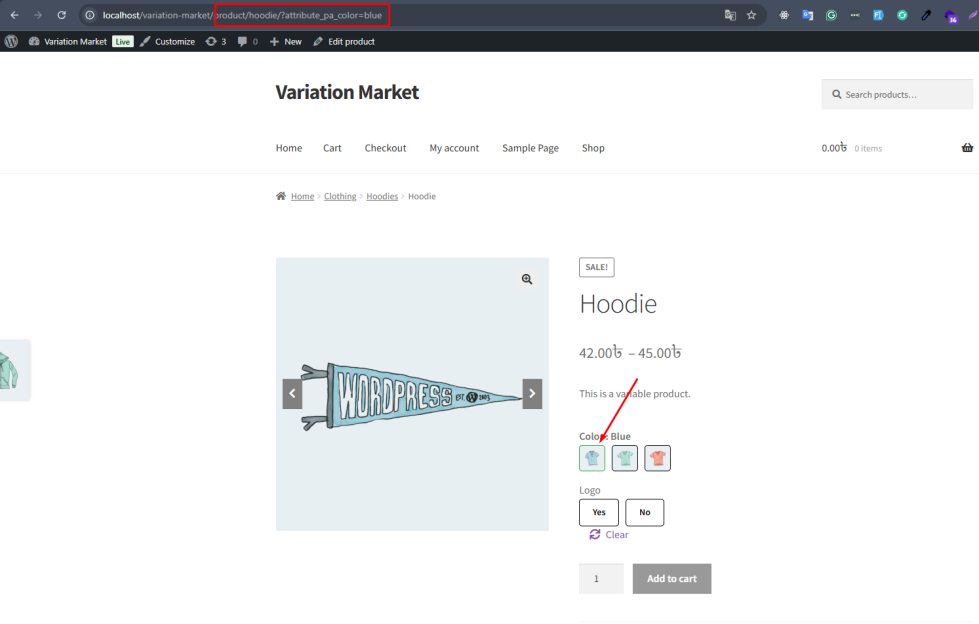
Generate Variation URL
↑ Back to topThe Generate Variation URL feature automatically updates the product page URL when a customer selects a variation.
This allows each selected variation to have a unique URL parameter, making it easier to share or bookmark a specific product variation.
For example, when a customer selects:
Color → Blue
The product URL will update like this:
https://example.com/variation-market/product/hoodie/?attribute_pa_color=blue
If multiple attributes are selected, the URL will include all selected variation parameters:
http://localhost/variation-market/product/hoodie/?attribute_pa_color=blue&attribute_logo=No
This functionality provides several benefits:
- Customers can share a direct link to a specific variation
- Product variations become easier to track and reference
The selected variation can load automatically when the URL is opened
How It Works
↑ Back to topOnce this feature is enabled, the product URL automatically updates whenever a customer selects a variation option. If someone visits the same URL later, the corresponding variation will be preselected on the product page.
This ensures a smoother and more convenient shopping experience for customers.
After saving, if you select an attribute, after url wil be changed.
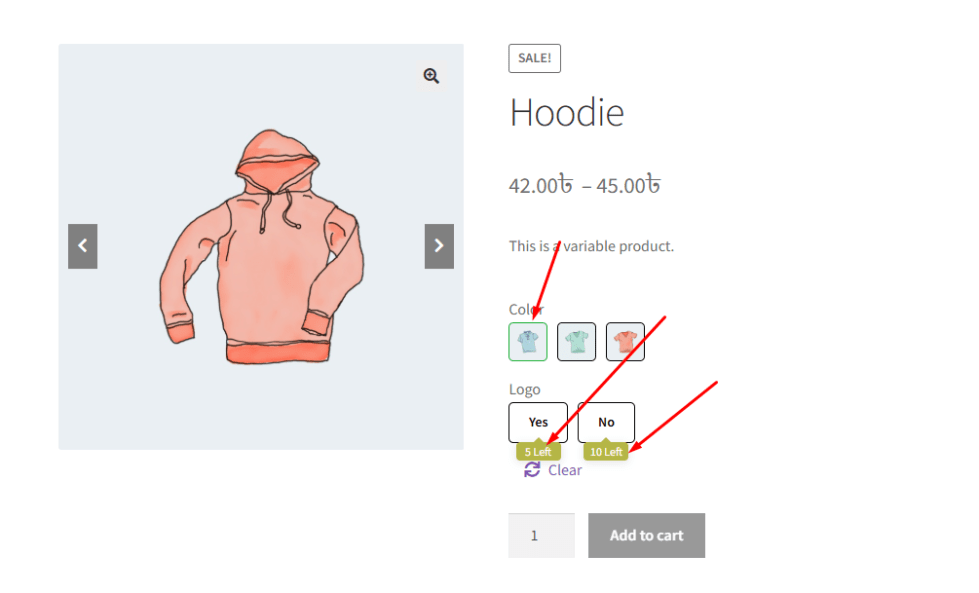
Variation Stock Info
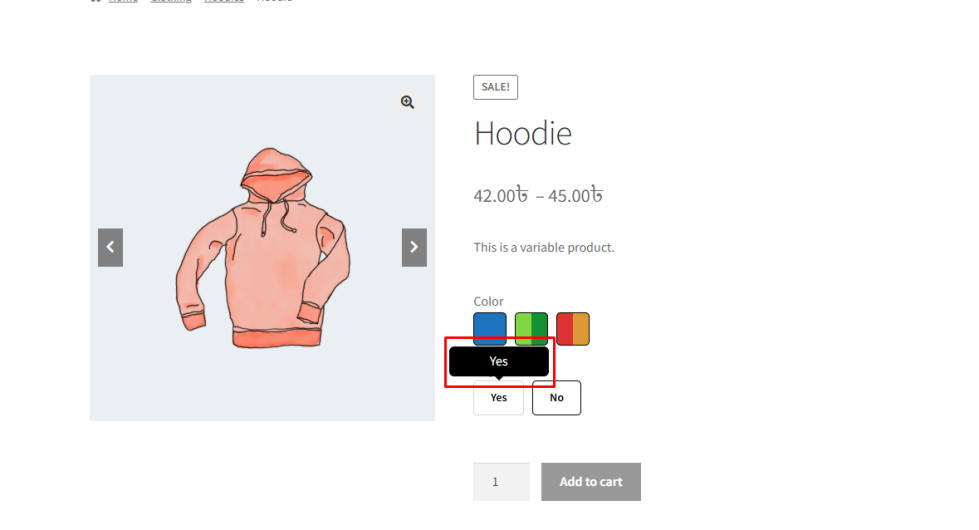
↑ Back to topThe Variation Stock Info feature allows customers to quickly see the available stock quantity for each variation directly within the variation swatches.
This is especially helpful when products have limited stock. Instead of selecting each variation and checking availability manually, customers can immediately view how many items are left. This improves transparency and can create urgency when stock levels are low.
When this feature is enabled, stock information appears inside a tooltip when a customer interacts with a variation option.
For example:
- If a customer selects Color → Blue, the tooltip may display:
Logo: Yes – 5 left in stock - If another variation has more availability, it may display:
Logo: No – 10 left in stock
This allows customers to easily compare variation availability before making a purchase decision.
How to Configure
↑ Back to topClick the Save button to apply the changes.
- Go to WordPress Admin Panel → WooCommerce → Settings.
- Click the Variation Monster tab.
- Navigate to the Variation Swatches section.
- Enable the Variation Stock Info option.
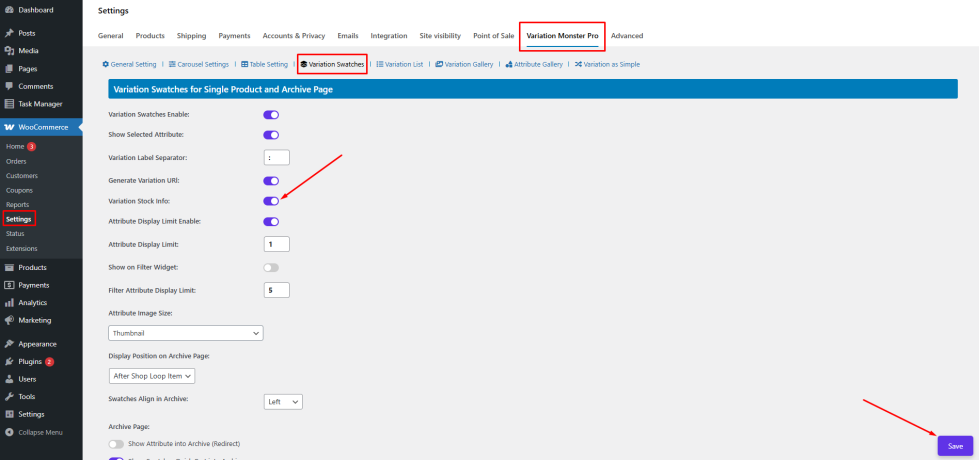
After saving the settings, the stock information will appear in tooltips on the single product page when customers interact with variation swatches.