Introduction
↑ Back to top
Welcome to the official documentation for Pawluxe – Premium WooCommerce Theme for Pet Stores & Pet Care Businesses.
Thank you for choosing Pawluxe! We’ve poured a lot of love and creativity into building this WordPress theme, and we’re excited that you selected it for your pet business. This guide will help you explore key features of Pawluxe, along with how to set up, customize, and manage your pet store effectively.
About Theme
↑ Back to topPawluxe is a modern WooCommerce theme thoughtfully crafted for pet shops, grooming salons, veterinary clinics, and pet service businesses. Whether you’re selling premium pet food, adorable toys, grooming essentials, or everyday accessories, Pawluxe provides the ideal foundation to build a stylish and functional pet e-commerce website.
Developed as a block-based theme with Full Site Editing (FSE) support, it makes extensive use of theme.json, custom block styles, and global settings. Styles are optimized, loaded only when required, and paired with a minified global stylesheet for fast and consistent performance. All bundled images are compressed to ensure quick loading without sacrificing visual quality.
Theme Philosophy
↑ Back to topOver the years, WordPress theme development has evolved, but one principle remains constant – a theme should define how your site looks, not how it works.
A theme should never lock you into specific features or functionalities. Those should always be handled by plugins to ensure flexibility, easy updates, and long-term stability.
For example, Pawluxe doesn’t create or manage your contact forms – it only styles them. You can use a plugin like Contact Form 7, and Pawluxe will automatically style them to blend seamlessly with your site design.
Built around this philosophy, Pawluxe focuses solely on styling WordPress and WooCommerce blocks without modifying your website’s underlying functionality.
System Requirements
↑ Back to topSince Pawluxe is a WooCommerce theme, make sure your server meets official WooCommerce requirements. Please review WooCommerce Server Requirements.
For optimal performance, we recommend:
- WordPress version 6.5 or later
- PHP version 7.4 or later
- Database: MySQL 5.6 or higher, or MariaDB 10.4 or higher
- Memory limit: At least 256 MB
- HTTPS support enabled
It’s also helpful to review general WordPress Server Requirements for full compatibility.
Required Plugins
↑ Back to topTo power your store and product layouts, WooCommerce is required.
Recommended Plugin
↑ Back to topWe’ve included built-in support for several helpful plugins that enhance your pet store experience:
- Contact Form 7 – For creating contact, inquiry, and newsletter forms
Installation
↑ Back to topIn this chapter, we’ll guide you through installing the Pawluxe theme on your WordPress website. If you run into any issues during the installation process, feel free to reach out to our support team for assistance.
While installation services are generally outside the scope of standard support, we offer a one-time free installation service for all our customers. To use this service, simply contact us via our support page and provide your WordPress admin login details. We will install the theme and set it up to match our demo. This service is typically completed within 3 business days.
Installing the Theme
↑ Back to topOnce you have downloaded the pawluxe.zip file, you’re ready to install the theme on your WordPress site.
Using WordPress (recommended)
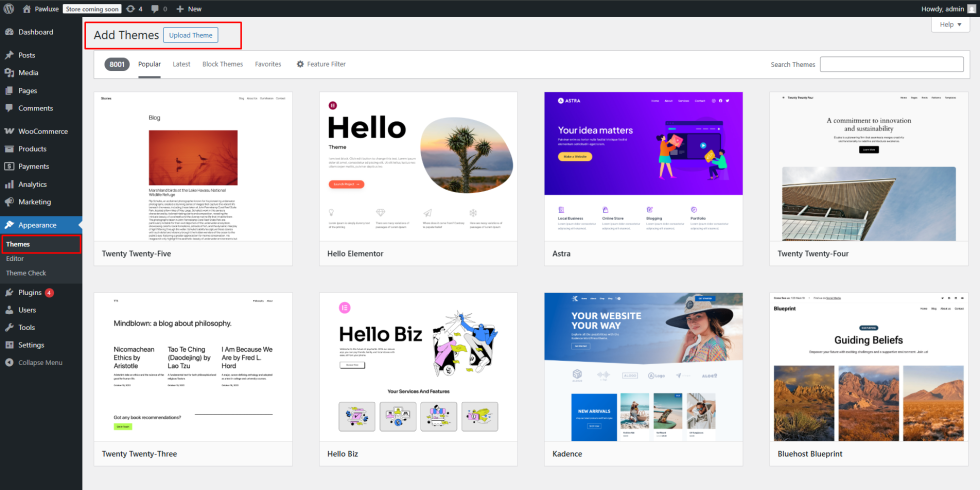
- Navigate to Appearance → Themes in your WordPress dashboard.
- Click the Add Theme button at the top.
- Click Upload Theme next to the Add Themes title.
- Click Select File, then browse your computer and select the
pawluxe.zipfile. - Click Install Now to begin the installation.
- Once the installation is complete, you’ll see a confirmation message indicating that the theme has been installed successfully.
Installing the Theme via FTP
- Unzip the
pawluxe.zipfile on your computer. - Connect to your web host using an FTP client such as FileZilla.
- Navigate to the
/wp-content/themes/directory on your server. - Upload the extracted pawluxe folder into the
wp-content/themesdirectory. - After the upload is complete, go to Appearance → Themes in your WordPress dashboard and verify that Pawluxe appears in the list of installed themes.
Installing Plugins
↑ Back to topWhile Pawluxe can function as a simple catalog or showcase site, we highly recommend installing WooCommerce to take full advantage of its product display layouts and pet store features.
Steps to Install WooCommerce
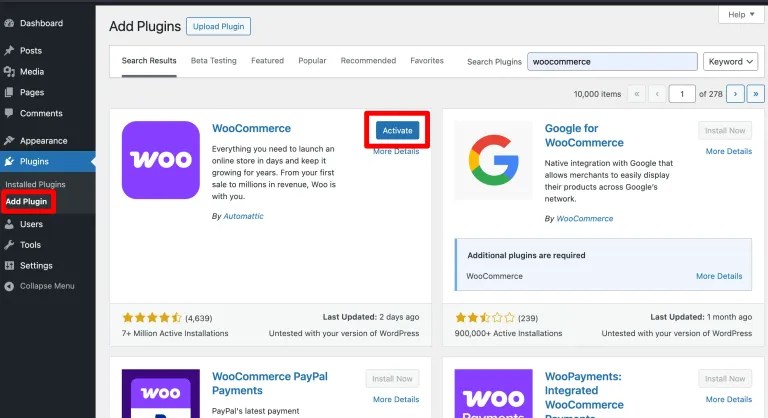
- Navigate to Plugins → Add New in your WordPress dashboard.
- In the Search Plugins field, type WooCommerce and press Enter.
- Locate the WooCommerce plugin in the search results and click Install Now.
- Once the installation is complete, click Activate to enable the plugin on your site.
Activating the Theme
↑ Back to topBefore activating Pawluxe, it is recommended to activate WooCommerce first to ensure full compatibility with all pet product blocks and collection layouts.
Steps to Activate Pawluxe
- Activate WooCommerce if you haven’t already. You may be prompted to complete the WooCommerce onboarding steps — follow the instructions to finish the setup.
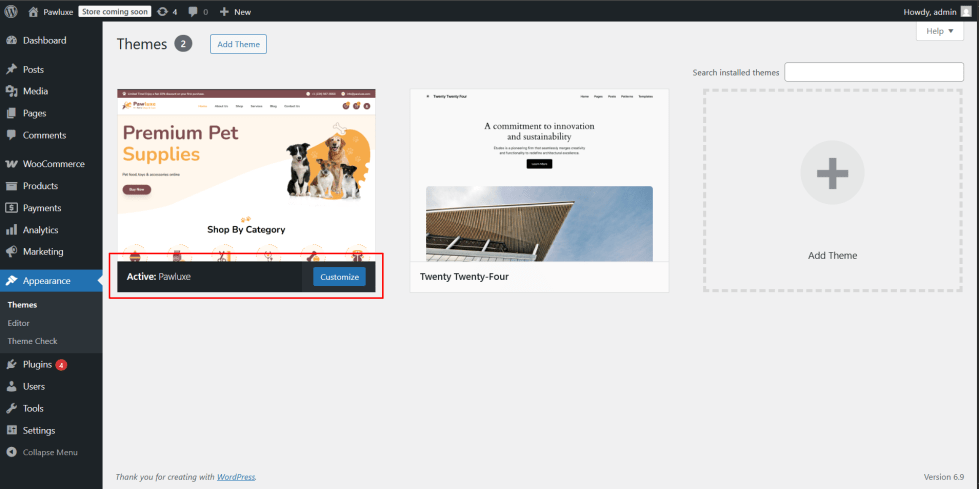
- Navigate to Appearance → Themes in your WordPress dashboard and confirm that Pawluxe appears in the list of installed themes.
- Hover over the Pawluxe theme screenshot and click Activate.
- A confirmation message will appear, indicating that Pawluxe is now the active theme on your website.
Using Demo Content
↑ Back to topPawluxe uses block patterns to build its homepages and inner pages, so there’s no need to import demo data or entire demo sites. You can create beautiful pages instantly by selecting the appropriate patterns from the Site Editor.
Starter Patterns
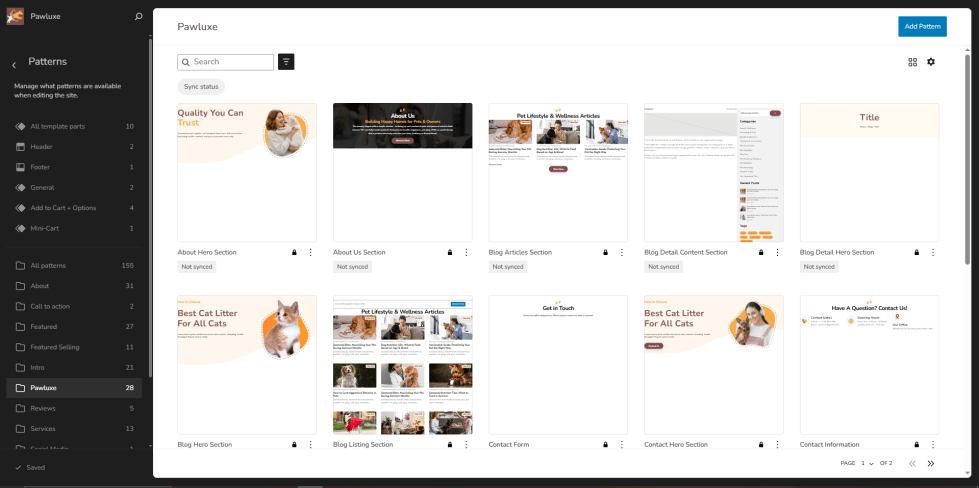
↑ Back to topPawluxe includes 28 pre-designed block patterns specifically created for pet businesses. You can build complete pages by combining these patterns – no demo data import required.
How to Use Patterns
- Go to any page or post editor
- Click the + (Add Block) button
- Select the Patterns tab
- Browse the Pawluxe category patterns
- Click on any pattern to preview
- Click Insert to add it to your page
- Customize content, images, and text with your own information
Key Benefits
- No Demo Data Needed: Build pages using patterns without importing sample products or posts
- Complete Control: Customize each section with your own content from the start
- Fast Setup: Insert entire page sections with one click
- Flexible Design: Mix and match patterns to create unique layouts
Setup Pages
↑ Back to topHome Pages
↑ Back to topPawluxe comes with beautifully designed homepage layouts that you can customize using the Site Editor. Each homepage is carefully structured to showcase featured products, best sellers, promotions, and pet categories in an organized and engaging way.
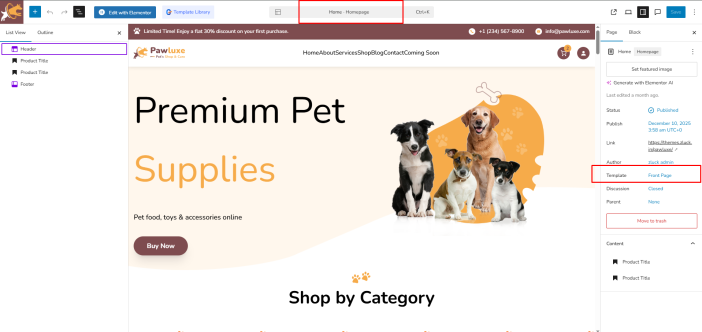
Creating and Assigning Your Homepage
- Go to Pages → Add New
- Enter “Home” as the page title
- Click Publish to create the page
- Open the Home page you just created
- In the right sidebar, under the Page tab, find the Template section
- Click Change Template and select the “Front Page” template
- Click Update to apply the template
- The page will now display the complete Home layout with your content
Assigning Templates to Pages
After creating your pages, you need to assign the appropriate templates to ensure they display correctly:
- Go to Pages → Add New in your WordPress dashboard.
- Enter a title for your Page Name.
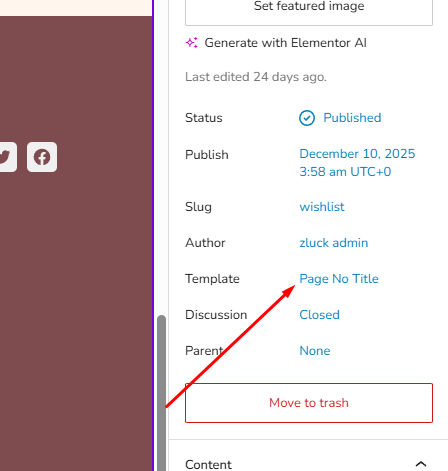
- In the right sidebar, under the Page tab, find the Template section
- Click Change Template and select the appropriate template:
- Default Template – Uses global header and footer across the site
- Page No Title Template – Allows you to manually insert patterns.
- Use the Preview icon to see how your
- Click the Add Block (+) button to insert content.
- Select the Patterns tab and browse Pawluxe patterns.
- Click on any pattern to preview it, then click Insert to add it to your page.
- Customize the content, images, and text to match your brand.
- Click Publish to make your page live.
- page looks with the selected template
- Click Update to save your template assignment
Static & Inner Pages
↑ Back to topPawluxe includes pre-built templates for all essential pages. Open the page you want to assign (e.g., Home, Shop, About, Service, Blog, Contact, 404, Coming Soon) that your pet business needs. Simply create the page and assign the appropriate template – no patterns needed.
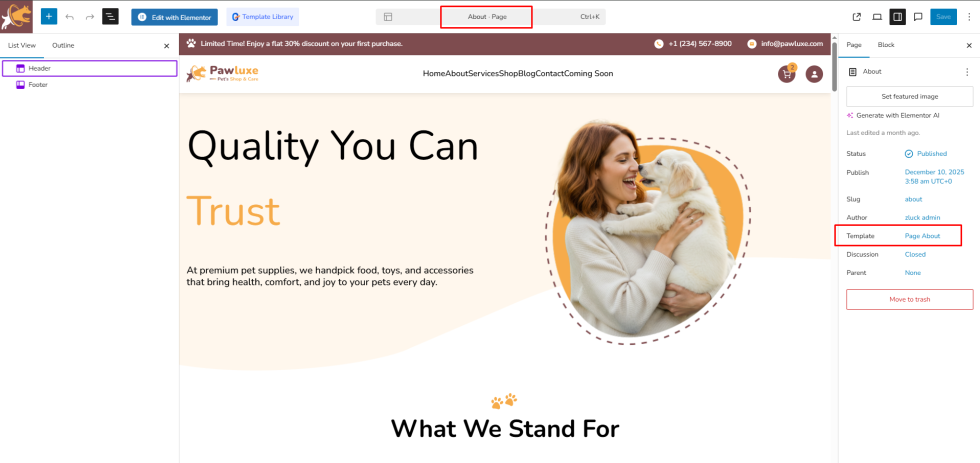
About Page
- Go to Pages → Add New
- Enter “About” as the page title
- Click Publish to create the page
- Open the About page you just created
- In the right sidebar, under the Page tab, find the Template section
- Click Change Template and select “About Page” template
- Click Update to apply the template
- The page will now display the complete About layout with your content
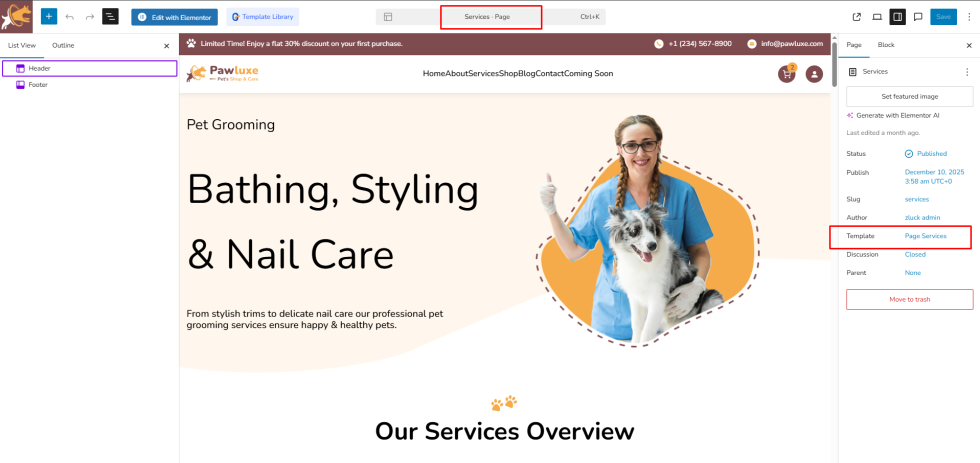
Services Page
- Go to Pages → Add New
- Enter “Services” as the page title
- Click Publish to create the page
- Open the Services page
- In the Template section, select the “Services Page” template
- Click Update to apply the complete services layout
- Customize the service descriptions, pricing, and images as needed
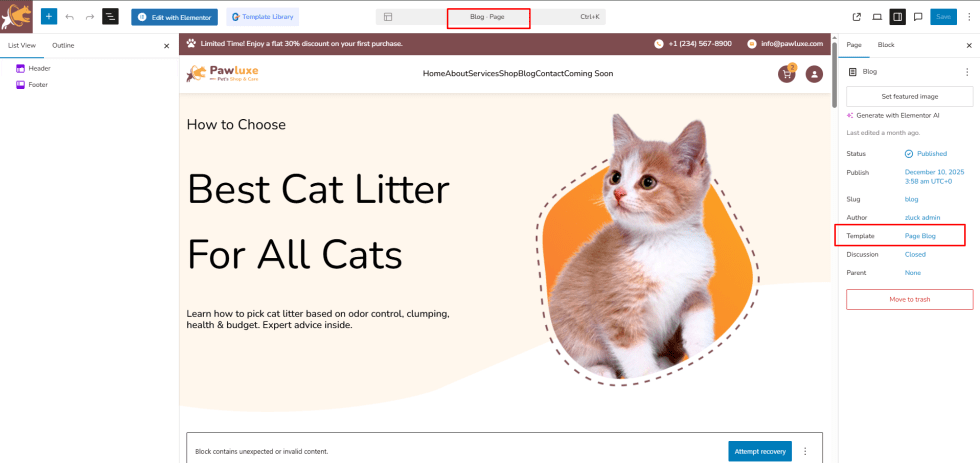
Blog Page
- Go to Pages → Add New
- Enter “Blog” as the page title
- Click Publish to create the page
- Open the Blog page
- In the Template section, select the “Blog Page” template
- Click Update to apply the blog layout
- Your blog posts will automatically appear in the proper blog format
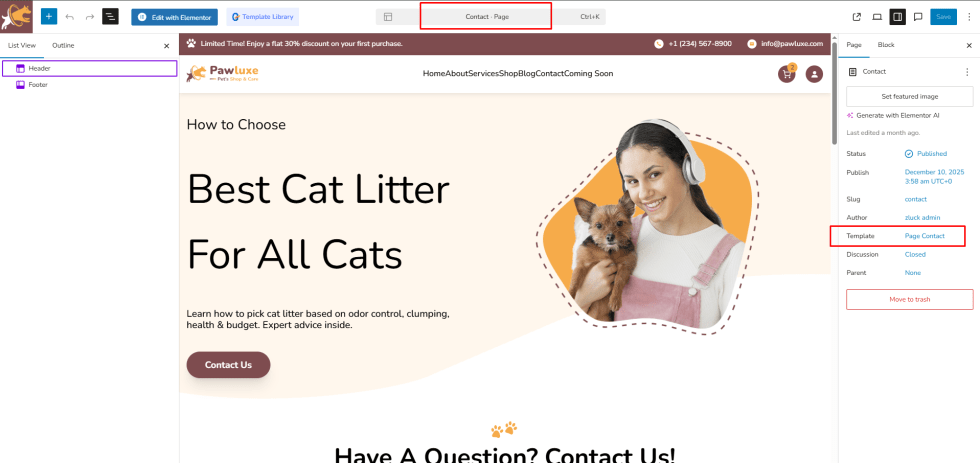
Contact Page
- Go to Pages → Add New
- Enter “Contact” as the page title
- Click Publish to create the page
- Open the Contact page
- In the Template section, select the “Contact Page” template
- Click Update to apply the contact layout with form and information sections
Template Assignment Benefits
- Customizable: Edit content, images, and text within the template structure
- No Pattern Building: Templates are pre-built and ready to use
- Consistent Design: Each template maintains professional layout standards
- Quick Setup: Create pages in minutes, not hours
Header & Footer
↑ Back to topHeader
↑ Back to topThe header is an essential part of your pet store website, appearing on every page and helping visitors quickly explore your products and categories.
In Pawluxe, the header is fully block-based and can be customized using the WordPress Site Editor. The theme includes beautifully designed header styles, giving you the flexibility to choose the layout that best matches your brand.
Accessing and Editing the Header
- Go to Appearance → Editor → Patterns → All Template Parts.
- Under All Template Parts, locate the Header template part.
- Click Header to edit it directly or replace it with one of the pre-designed Header patterns included with Pawluxe.
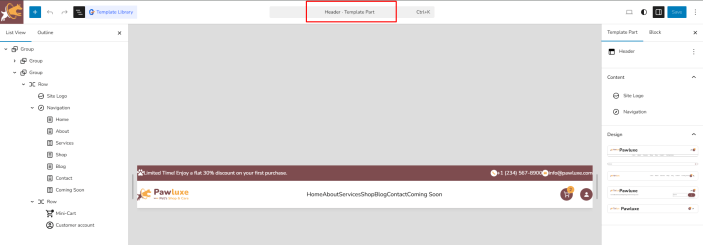
Key Features
- Logo: Upload your Pawluxe store logo and link it to your homepage.
- Navigation Menu: Add pet food categories, accessories, pages, and custom links.
- Search Bar: Allows pet parents to quickly find exactly what they need.
- Mini Cart: Shows added items at a glance for faster checkout.
- Account Icon: Offers easy access to customer accounts and order history.
Customizing the Header
- Use the block editor to add, remove, or rearrange elements such as menus, icons, or call-to-action buttons.
- Switch between the available Header patterns to instantly apply a layout that fits your style.
- Adjust spacing, colors, and typography to match your store’s branding.
- Click Save to apply your changes across the entire site.
💡 Tip: Each homepage layout in Pawluxe is designed to pair perfectly with header styles. You can stick with the matching header for consistency or mix and match header styles to create a look that feels uniquely yours.
Navigation
The navigation menu plays a key role in helping visitors explore your pet store — from pet food and treats to toys, grooming supplies, and accessories. In Pawluxe, navigation is fully block-based, giving you complete control through the WordPress Site Editor.
Accessing Navigation
- Go to Appearance → Editor → Navigation.
- Here, you’ll see all the navigation menus currently used on your site.
- Select the menu you want to edit, or click Add New to create a new one.
Editing the Menu
- Click any menu item to rename it or link it to a page, category, or custom URL.
- Use the + (Add Block) button to add new links or dropdown submenus.
- Drag and drop items to reorder them as needed.
- Create multi-level dropdown menus by nesting items under a parent item — perfect for categories like Dog Food → Dry Food / Wet Food or Accessories → Collars / Beds / Toys.
Assigning the Menu
- After editing your navigation, go to Appearance → Editor → Patterns → All Template Parts.
- Open the Header template part.
- Replace or assign the navigation block in the header with the menu you created.
💡 Tip: Create multiple menus for different areas of your site – for example, a main navigation for your header and a compact version for your footer. You can switch between them anytime from the Navigation screen.
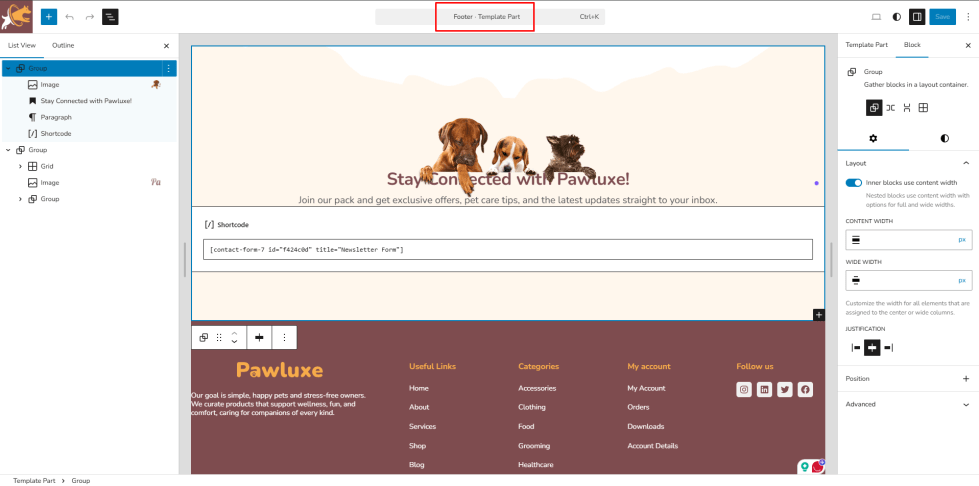
Footer
↑ Back to topThe footer provides important information and helps with site navigation. Pawluxe includes customizable footer patterns that you can edit using the Site Editor.
Customizing the Footer
- Go to Appearance → Editor → Patterns → All Template Parts.
- Locate and click on the Footer template part.
- Customize the footer content, links, and layout using the block editor.
- Save changes to apply across your entire site.
WooCommerce Setup
↑ Back to topShop Page
↑ Back to topThe Shop page is the main showcase of your pet store, displaying all your products – from nutritious pet food to toys, grooming essentials, and accessories. In Pawluxe, the Shop page uses WooCommerce blocks and is styled to perfectly match the theme’s warm and friendly design.
Setting Up the Shop Page
- Go to Pages → Add New.
- Enter a title — for example, Shop.
- Keep the Template set to Default.
- Click Publish to create the page.
Assigning the Shop Page in WooCommerce
- Go to WooCommerce → Settings → Products.
- Under the General tab, find the Shop page option.
- Choose the Shop page you just created from the dropdown.
- Click Save Changes.
Customizing the Shop Layout
- Go to Appearance → Editor → Templates.
- Open the Shop or Archive Product template.
- Use the block editor to customize your shop page layout – for example:
- Adjust products per row or grid spacing.
- Enable or reorder sorting and filtering options.
- Add banners such as “Tail-Wagging Deals” or “Pawsome Savings!!” above the product grid.
- Save your changes once you’re done.
Features of the Shop Page
- Responsive Product Grid – Displays perfectly on desktops, tablets, and mobile.
- Filters & Sorting – Helps pet parents narrow down items quickly.
- Add to Cart Buttons – Ensures a fast and smooth shopping experience.
- Categories & Tags – Organizes your catalog into clear sections like Dog Food, Cat Toys, or Grooming Kits.
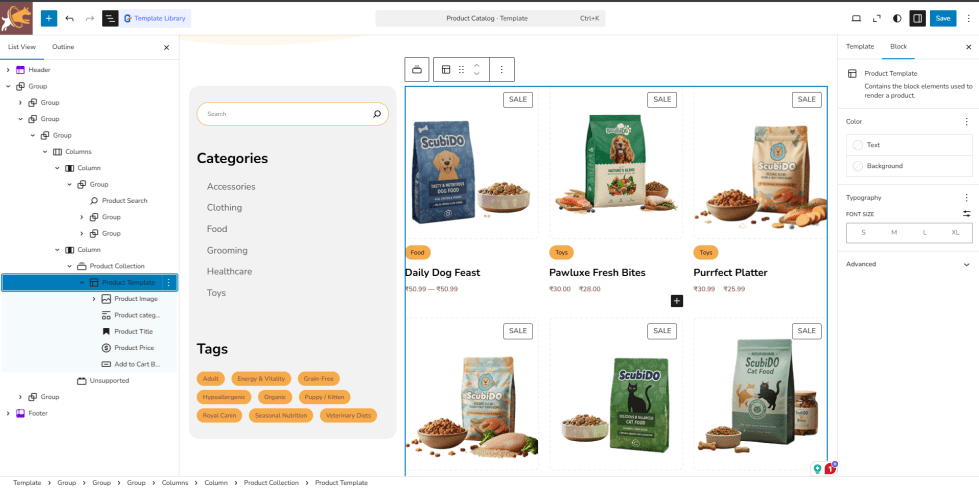
Products
↑ Back to topThe Products section is where you showcase everything your pet store has to offer – from premium pet food to toys, treats, grooming essentials, apparel, and accessories. In Pawluxe, products are powered by WooCommerce and displayed using beautifully crafted block-based layouts optimized for performance and visual consistency.
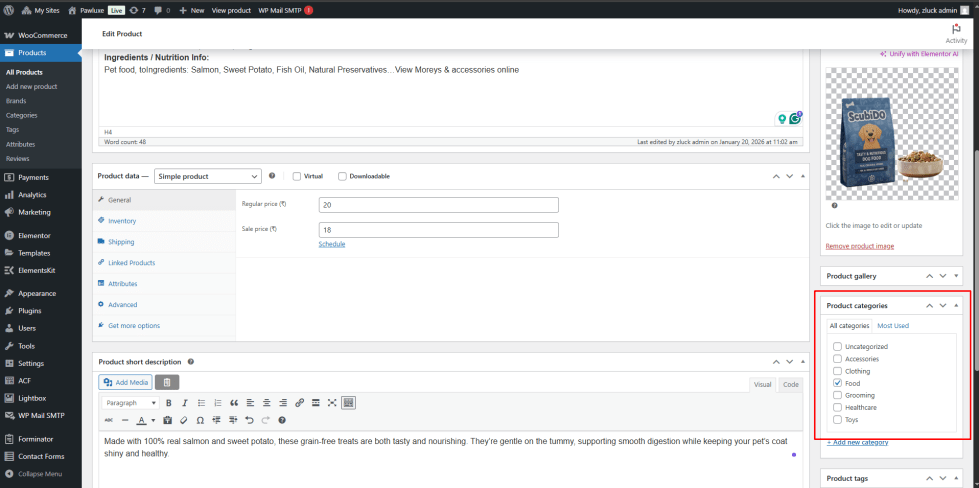
Adding a New Product
- Go to Products → Add New in your WordPress dashboard.
- Enter the Product Name and a detailed Description (great for explaining benefits, ingredients, or usage tips).
- Configure the Product Data:
- Regular Price and Sale Price
- Inventory details such as SKU and stock status
- Shipping details like weight and dimensions — helpful for bulky items like pet beds
- Linked Products to recommend upsells or cross-sells
- Upload a Product Image and additional photos in the Product Gallery.
- Assign the product to appropriate Categories (Dog Food, Cat Toys, Grooming, etc.) and Tags.
- Click Publish to make the product live on your store.
Pawluxe provides beautiful styling for all WooCommerce product types and layouts.
Product Types Supported
- Simple Products: Single pet items with fixed pricing
- Variable Products: Products with variations (size, color, flavor)
- External Products: Items that link to other stores
- Affiliate Products: Commission-based product listings
Single Product Page Features
- Professional product image galleries
- Clear pricing and variation selection
- Customer reviews and ratings
- Related products suggestions
- Add to cart with quantity options
Cart Page
↑ Back to topThe Cart Page is where customers can review the pet products they’ve added – from toys to treats – adjust quantities, apply coupons, and continue to checkout. In Pawluxe, the Cart Page is fully integrated with WooCommerce and styled to complement the theme’s warm and playful pet-store look.
Accessing and Editing the Cart Page
- Go to Pages → All Pages and select the Cart page created automatically by WooCommerce.
- You can edit it using the block editor to add custom notices, banners, or patterns above or below the cart table.
- To customize the layout globally, go to Appearance → Editor → Templates → Cart.
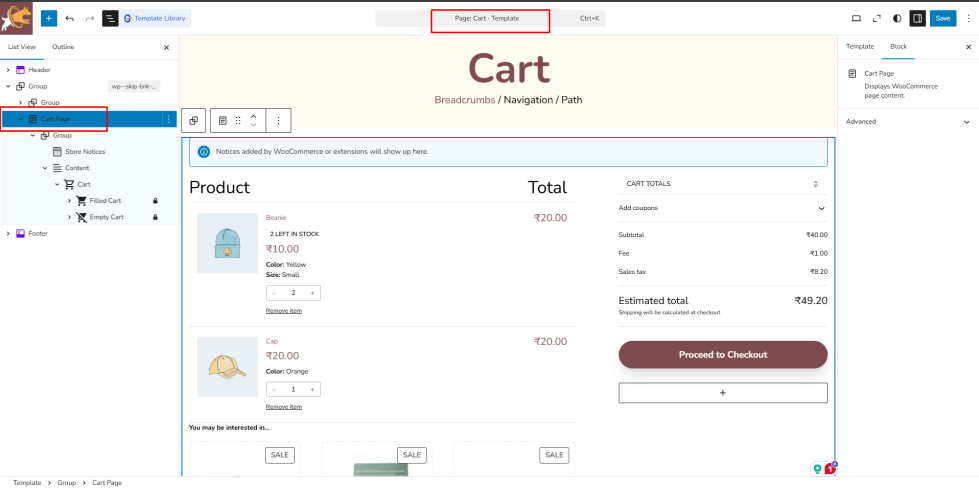
Key Features of the Cart Page
- Product List: Displays all items customers added to the cart with thumbnails, product names, pricing, and quantity controls.
- Remove / Update Items: Customers can easily remove a product or adjust the quantity.
- Coupon Field: Apply discount codes for instant savings.
- Cart Totals: Shows subtotal, shipping, taxes, and the final total before checkout.
- Proceed to Checkout Button: A clear call-to-action that guides customers to the payment step.
Customization Tips
- Add trust badges, free-shipping notices, or pet-care messages above the cart area using patterns.
- Rearrange or style cart elements using block settings to match your brand’s colors and style.
- Include optional elements like shipping calculators, bundle suggestions, or related pet products to improve conversions.
Checkout Page
↑ Back to topPawluxe ensures a fast, simple, and stress-free checkout process. With clear navigation, minimal steps, and WooCommerce-optimized flows, customers can complete purchases quickly and confidently, helping to reduce cart abandonment and improve conversions.
Accessing and Editing the Checkout Page
- Go to Pages → All Pages and select the Checkout page created automatically by WooCommerce.
- Use the block editor to add custom notes, banners, or patterns above or below the checkout form.
- To customize the layout globally, navigate to Appearance → Editor → Templates → Checkout.
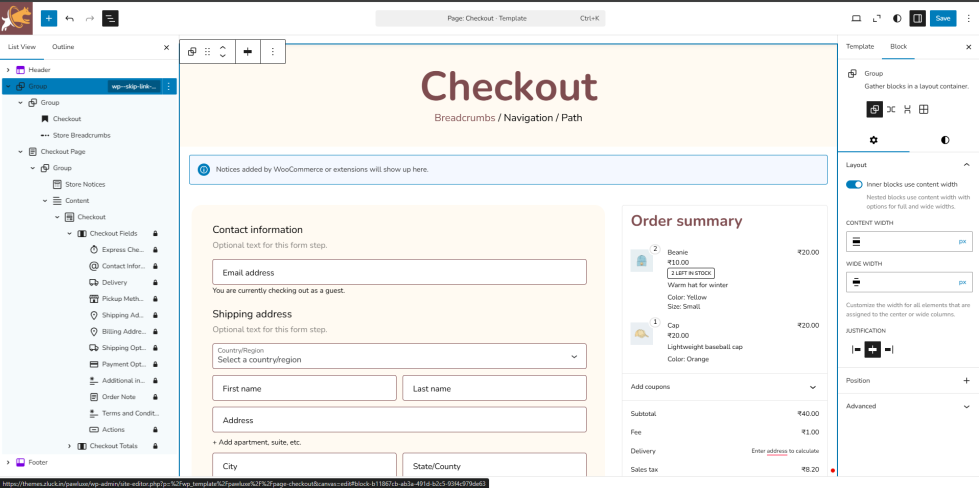
Key Features of the Checkout Page
- Billing & Shipping Details: Customers enter their contact and delivery information for their pet supplies.
- Order Summary: Shows all the items in the cart — toys, treats, grooming essentials, and more.
- Payment Methods: Includes all supported payment gateways enabled in WooCommerce.
- Place Order Button: Confirms the order and completes the purchase.
- Additional Notes: Customers can leave special instructions (like delivery notes for anxious pets!).
Customization Tips
- Add trust badges, free-shipping reminders, or pet-care tips above the checkout form using patterns.
- Rearrange or style the checkout form using block settings to match your brand’s look.
- Keep the layout clean, simple, and distraction-free to improve checkout completion rates.
Customizations
↑ Back to topSite-level Customizations
↑ Back to topPawluxe offers extensive customization options through WordPress’s built-in tools:
Global Styles
- Go to Appearance → Editor → Styles
- Customize colors, typography, and layout elements
- Changes apply across your entire site
Color Palette
- 9 pre-designed colors optimized for the pet industry
- Custom color options available
- Consistent color schemes throughout

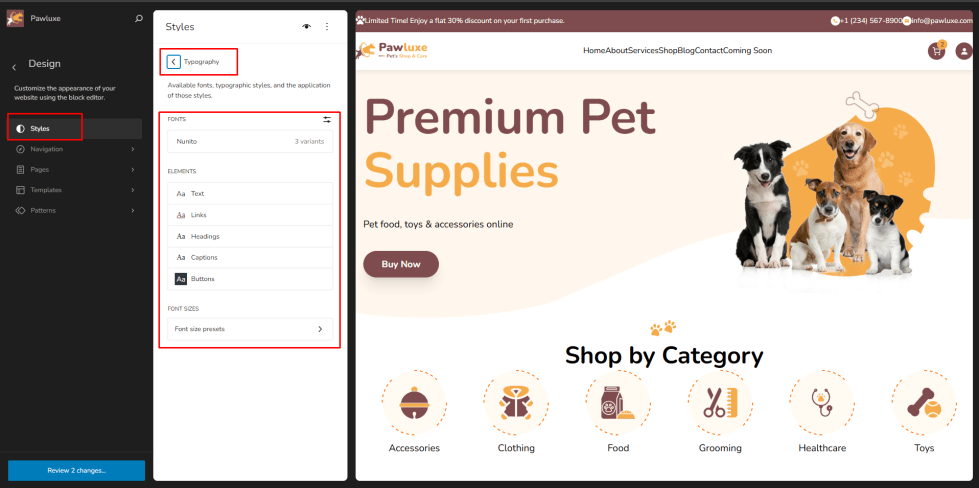
Typography
- Nunito font family for readability
- Adjustable font sizes and weights
- Professional hierarchy for content
Layout Controls
- Block-level adjustments
- Custom spacing options
- Responsive design controls

FAQs
↑ Back to topHelp customers by answering commonly asked questions.
Where is my license key?
Your license key is available in your WooCommerce.com account under Downloads after purchasing Pawluxe.
How do I create pages without using patterns?
Pawluxe provides pre-built templates for all major pages. Simply create a new page, then assign the appropriate template from the Template dropdown. No pattern building required – the complete layout is applied instantly.
Can I customize the templates after assigning them?
Yes! After assigning a template, you can still edit all content, images, text, and styling using the WordPress block editor. The template provides the structure, and you provide the content.
Can I import demo content?
Pawluxe focuses on patterns rather than demo data import. This gives you complete control to add your own products, images, and text directly into the pre-designed layouts.
Need Help?
↑ Back to topTo understand what’s included in our support, please review our official Support Policy. Our team is committed to helping you succeed with your pet store using Pawluxe.
Thank you for choosing Pawluxe for your pet business! We’re excited to see what you create.