Installation
↑ Back to top- Download the .zip file from your WooCommerce account.
- Go to: WordPress Admin > Plugins > Add New and Upload Plugin. Choose File (for the file you have downloaded in step 1).
- Install Now and Activate Plugin.
Configuration
↑ Back to topAfter activation of the Product Stock Manager extension, the “Stock Manager” menu will be visible under the WooCommerce navigation menu. Click to access extension settings.
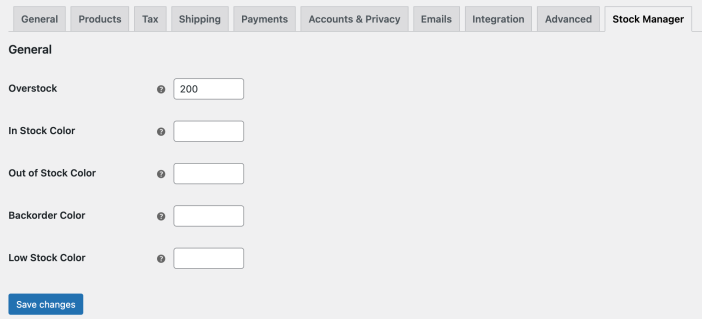
General Settings:
↑ Back to top- Set overstock value
- Select in-stock color
- Select out-of-stock color
- Select backorder color
- Select low stock color
Dashboard:
↑ Back to top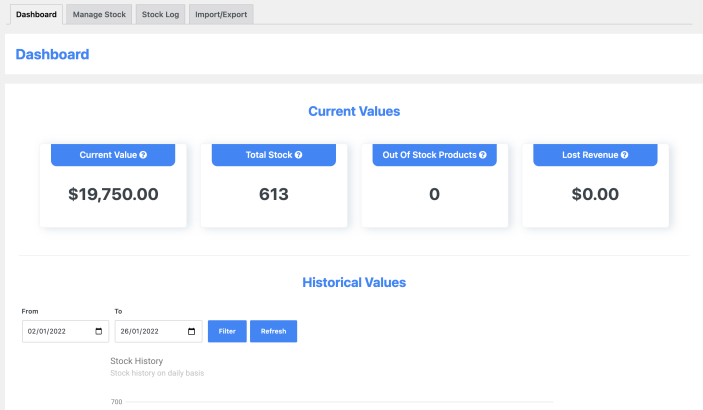
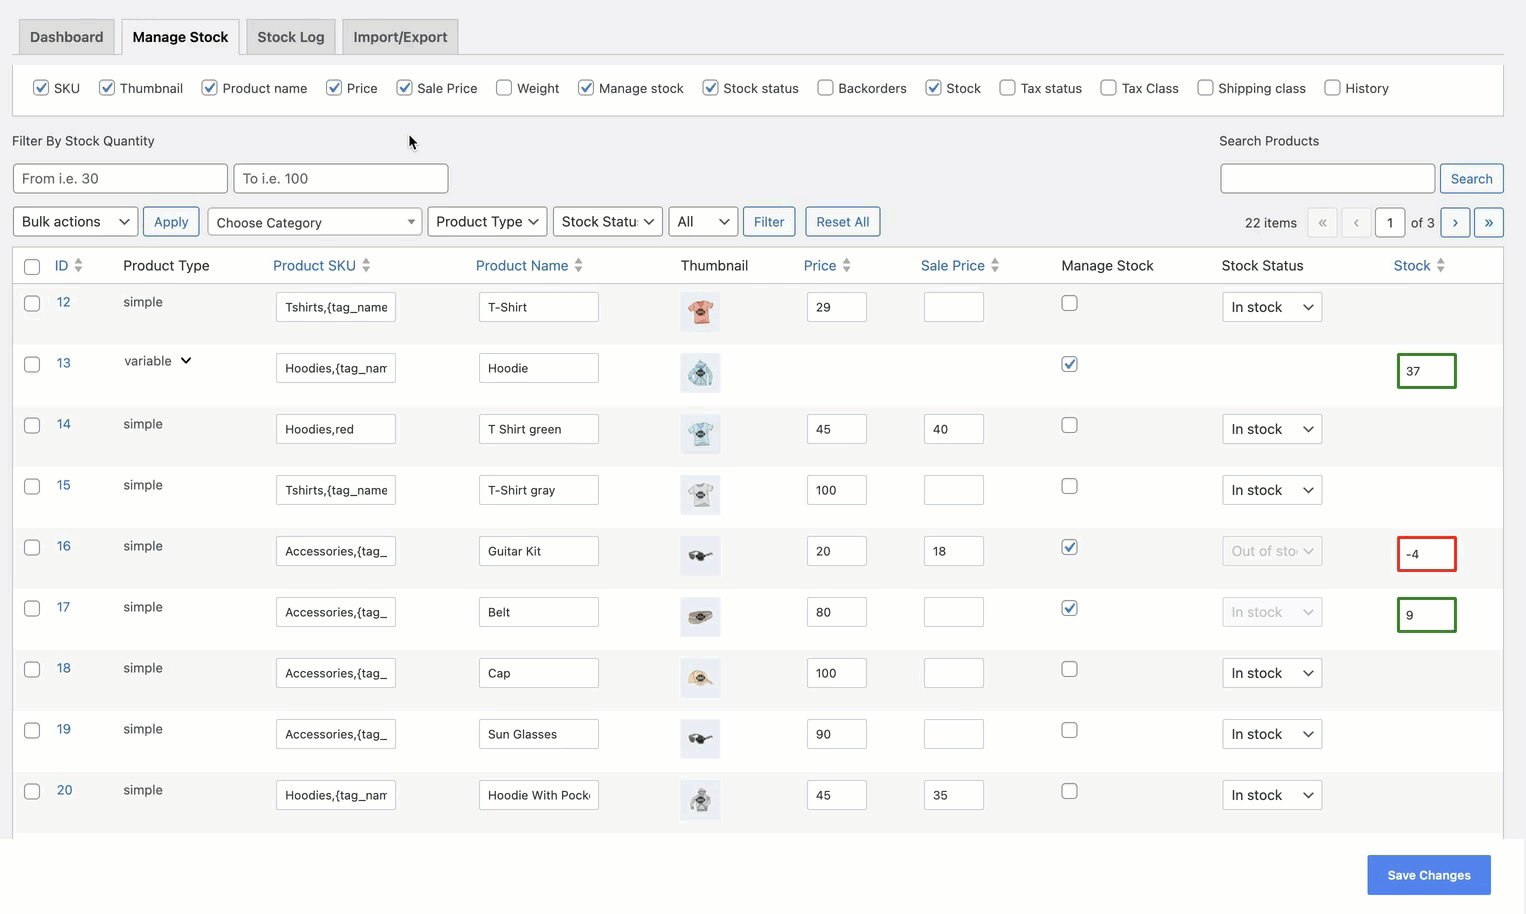
Stock Management:
↑ Back to top- Stock status and backorder option
- Product name, SKU
- Tax status and tax class
- Shipping class and weight
- Regular price and sale price
- Filter by
- Stock range (min/max)
- Category
- Product type (simple, variable, grouped)
- Stock status (in stock, out of stock, backorder)
- Manage/Unmanaged stock
- Search by product name and SKU
- Sort by
- Product
- Price
- Stock quantity
Stock Log:
↑ Back to top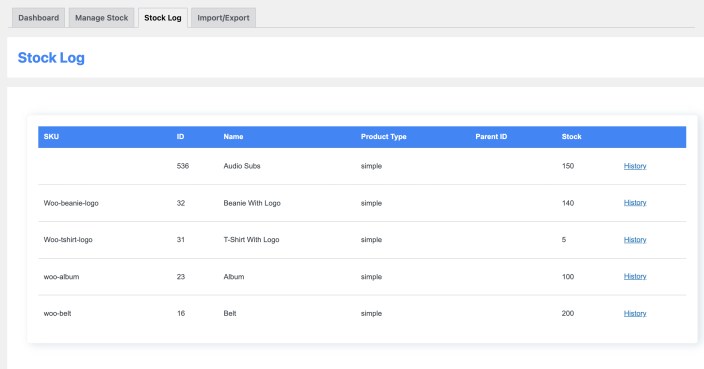
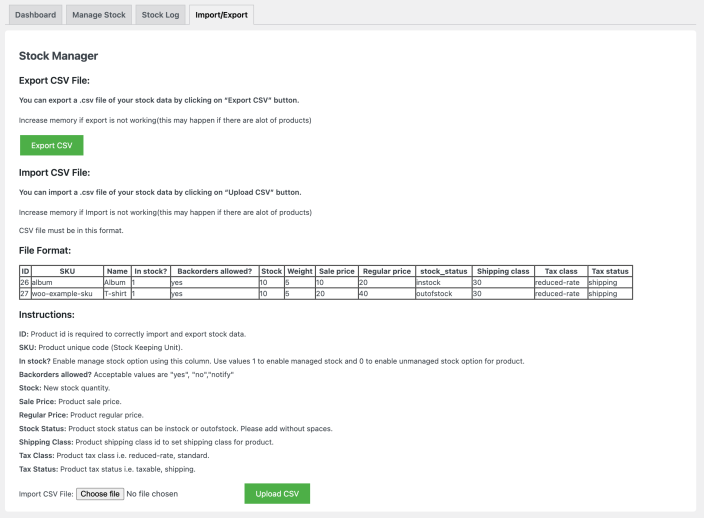
Import / Export:
↑ Back to top- Name
- In stock? (Manage stock – yes/no)
- Backorders allowed? (yes/no/notify)
- Stock quantity
- Weight
- Sale price
- Regular price
- stock_status (in stock / out of stock status
- Shipping class
- Tax class
- Tax status