This scenario will walk you through using WooCommerce and WooCommerce Bookings to create multiple bookable products with shared resources and a buffer period, where customers can choose from two different locations and select from several resources that can be booked for either.
Scenario
↑ Revenir en hautYou own a fitness center that offers personal training sessions with a trainer. You also have two locations, one Downtown and one Uptown. You also have several trainers who can train at either of these locations. You would like for your customers to be able to schedule the trainer they prefer at the location they prefer.
The two locations are about 30 minutes apart. So for example, if a trainer was to be scheduled at the Downtown location at 5:00 AM and then at the Uptown location at 6:00 AM, that would not work. So you also need a way to allow your trainers time to clean up, travel, and then set up for the session.

Products Used
↑ Revenir en hautSetup and Configuration
↑ Revenir en hautCreating a Bookable Product
↑ Revenir en hautFirst, we must create two Bookable Products, one for each location. We will call ours Uptown and Downtown. Follow these steps to do so:
- In the sidebar of your WordPress Admin dashboard, click on Products.
- Click on the Add New button on the top of the page.
- Under Product data select
Bookable product. - To the side of the Product data box you will then tick the checkboxes for Virtual and Has Resources.
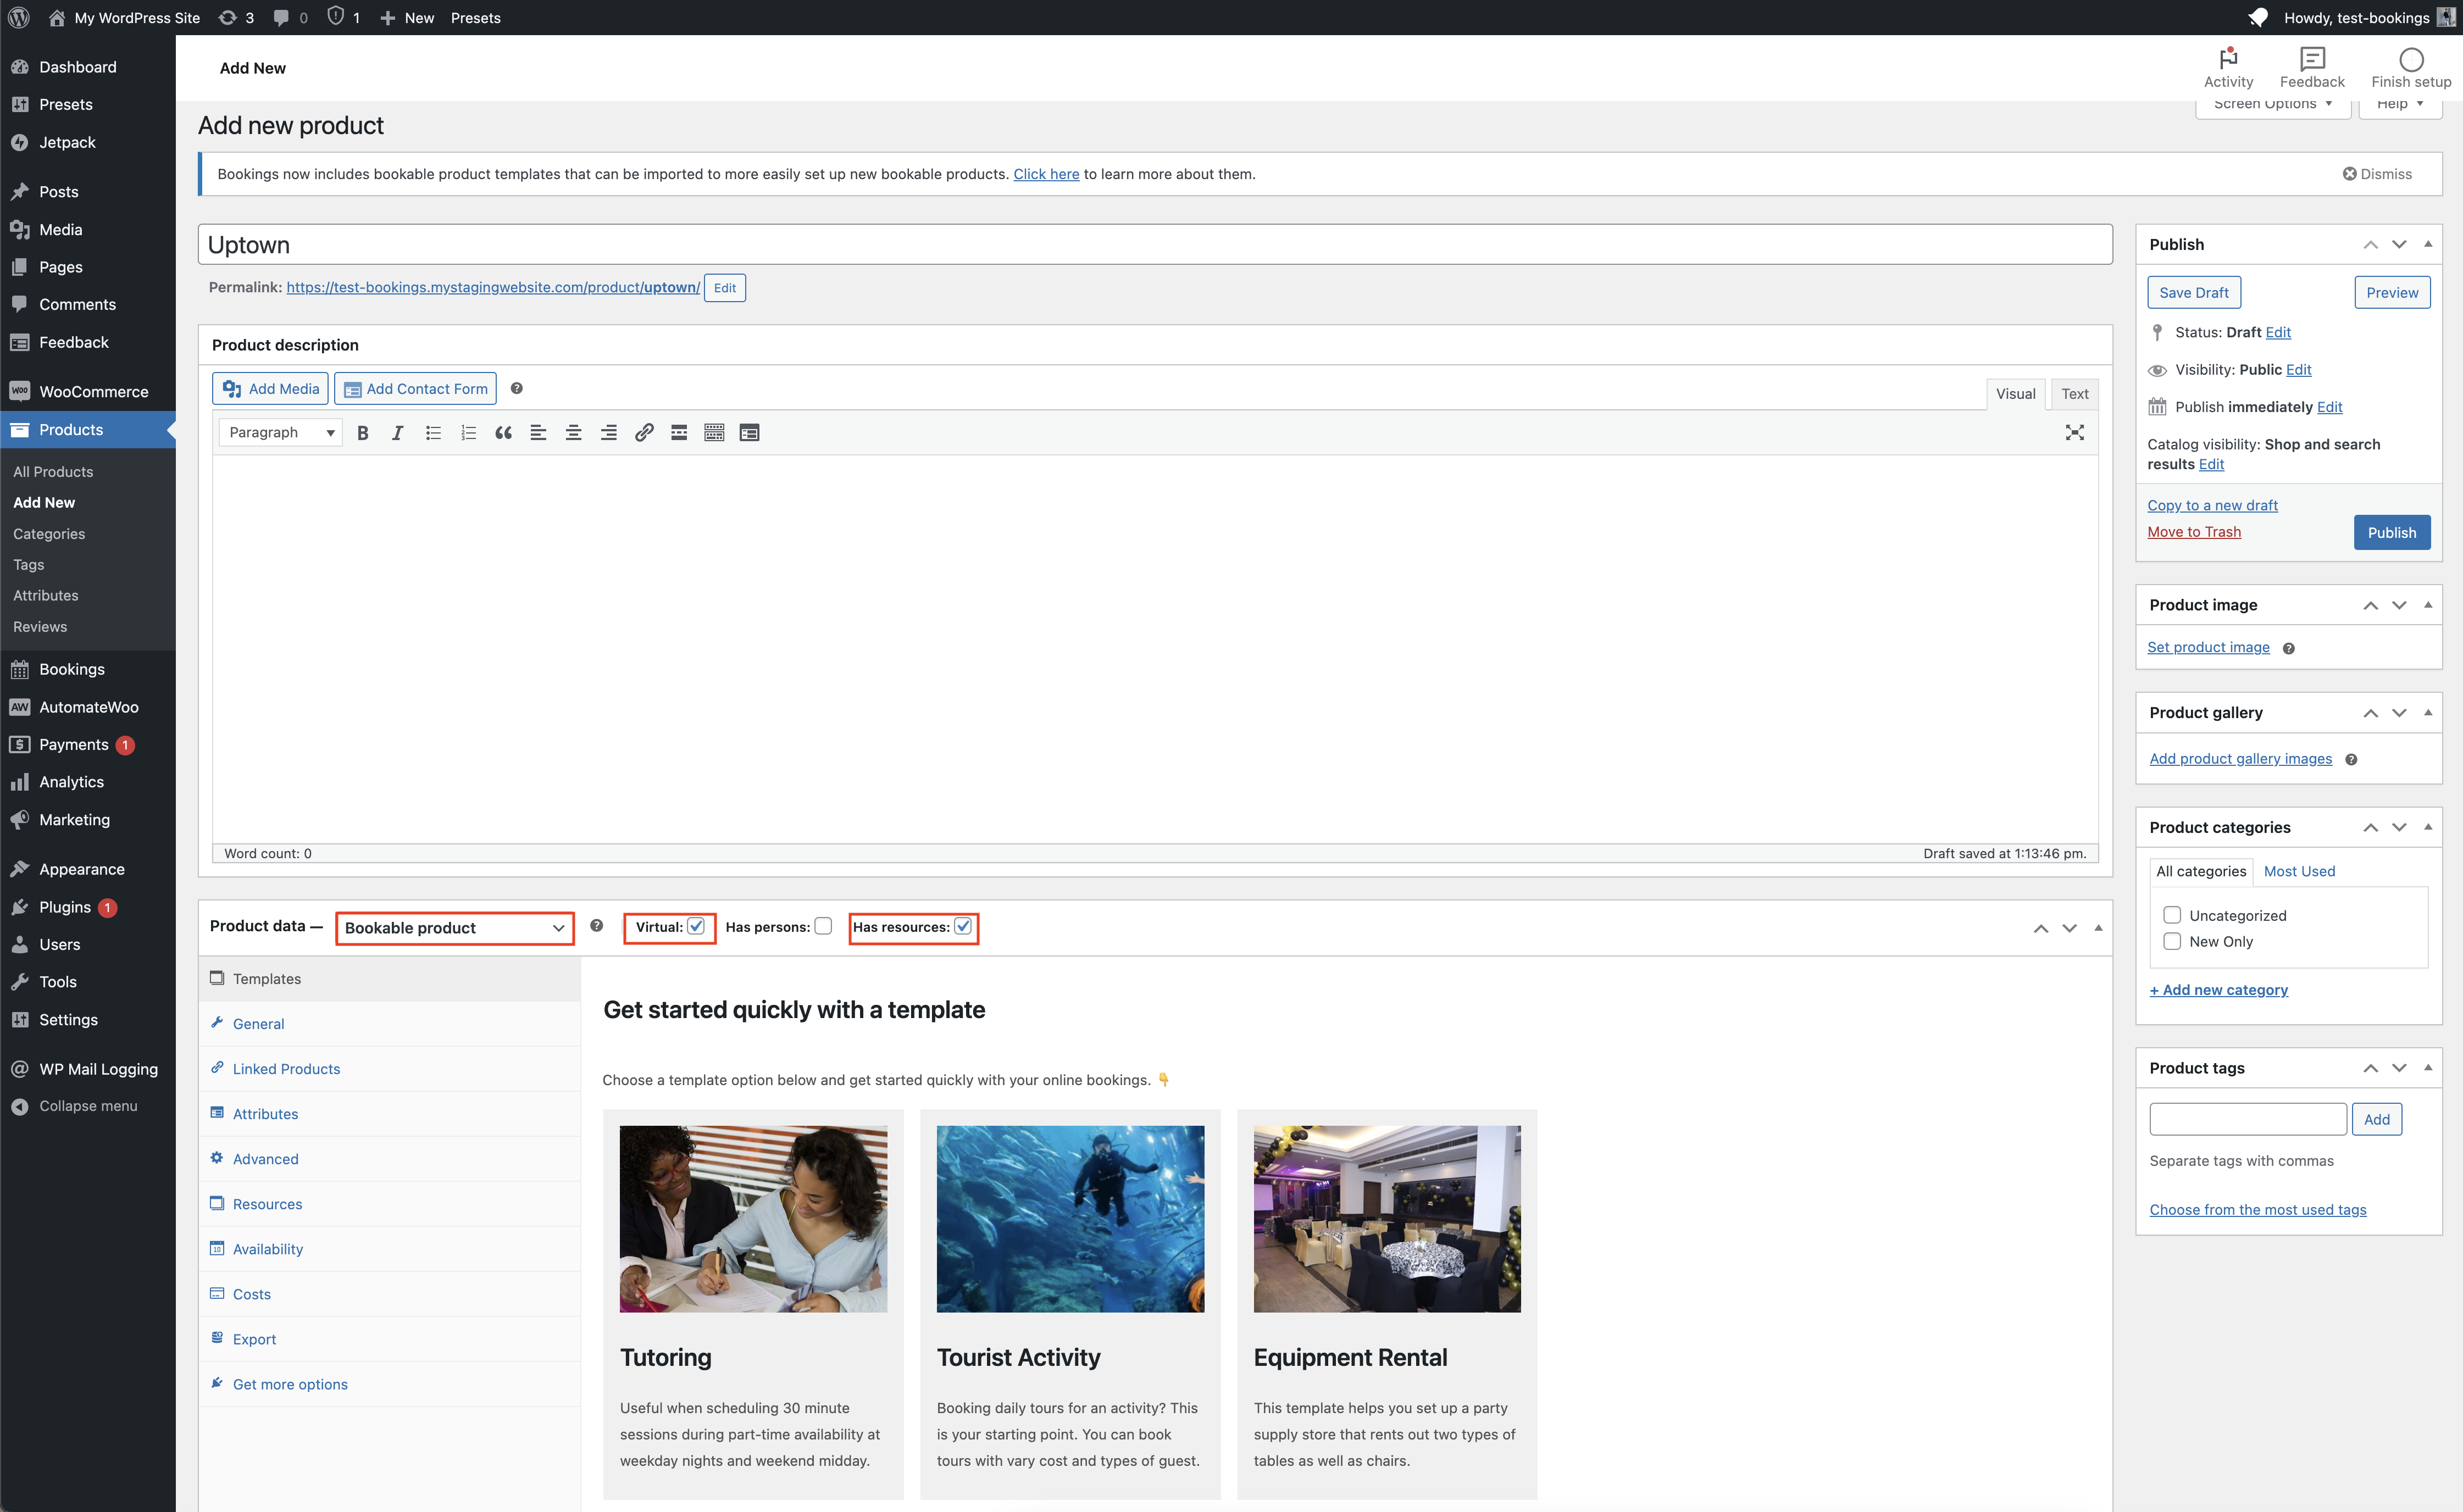
You’ve created a basic Bookable Product that we can use for our two locations. Now it’s time to configure the booking product. There are primarily three tabs that we are concerned with.
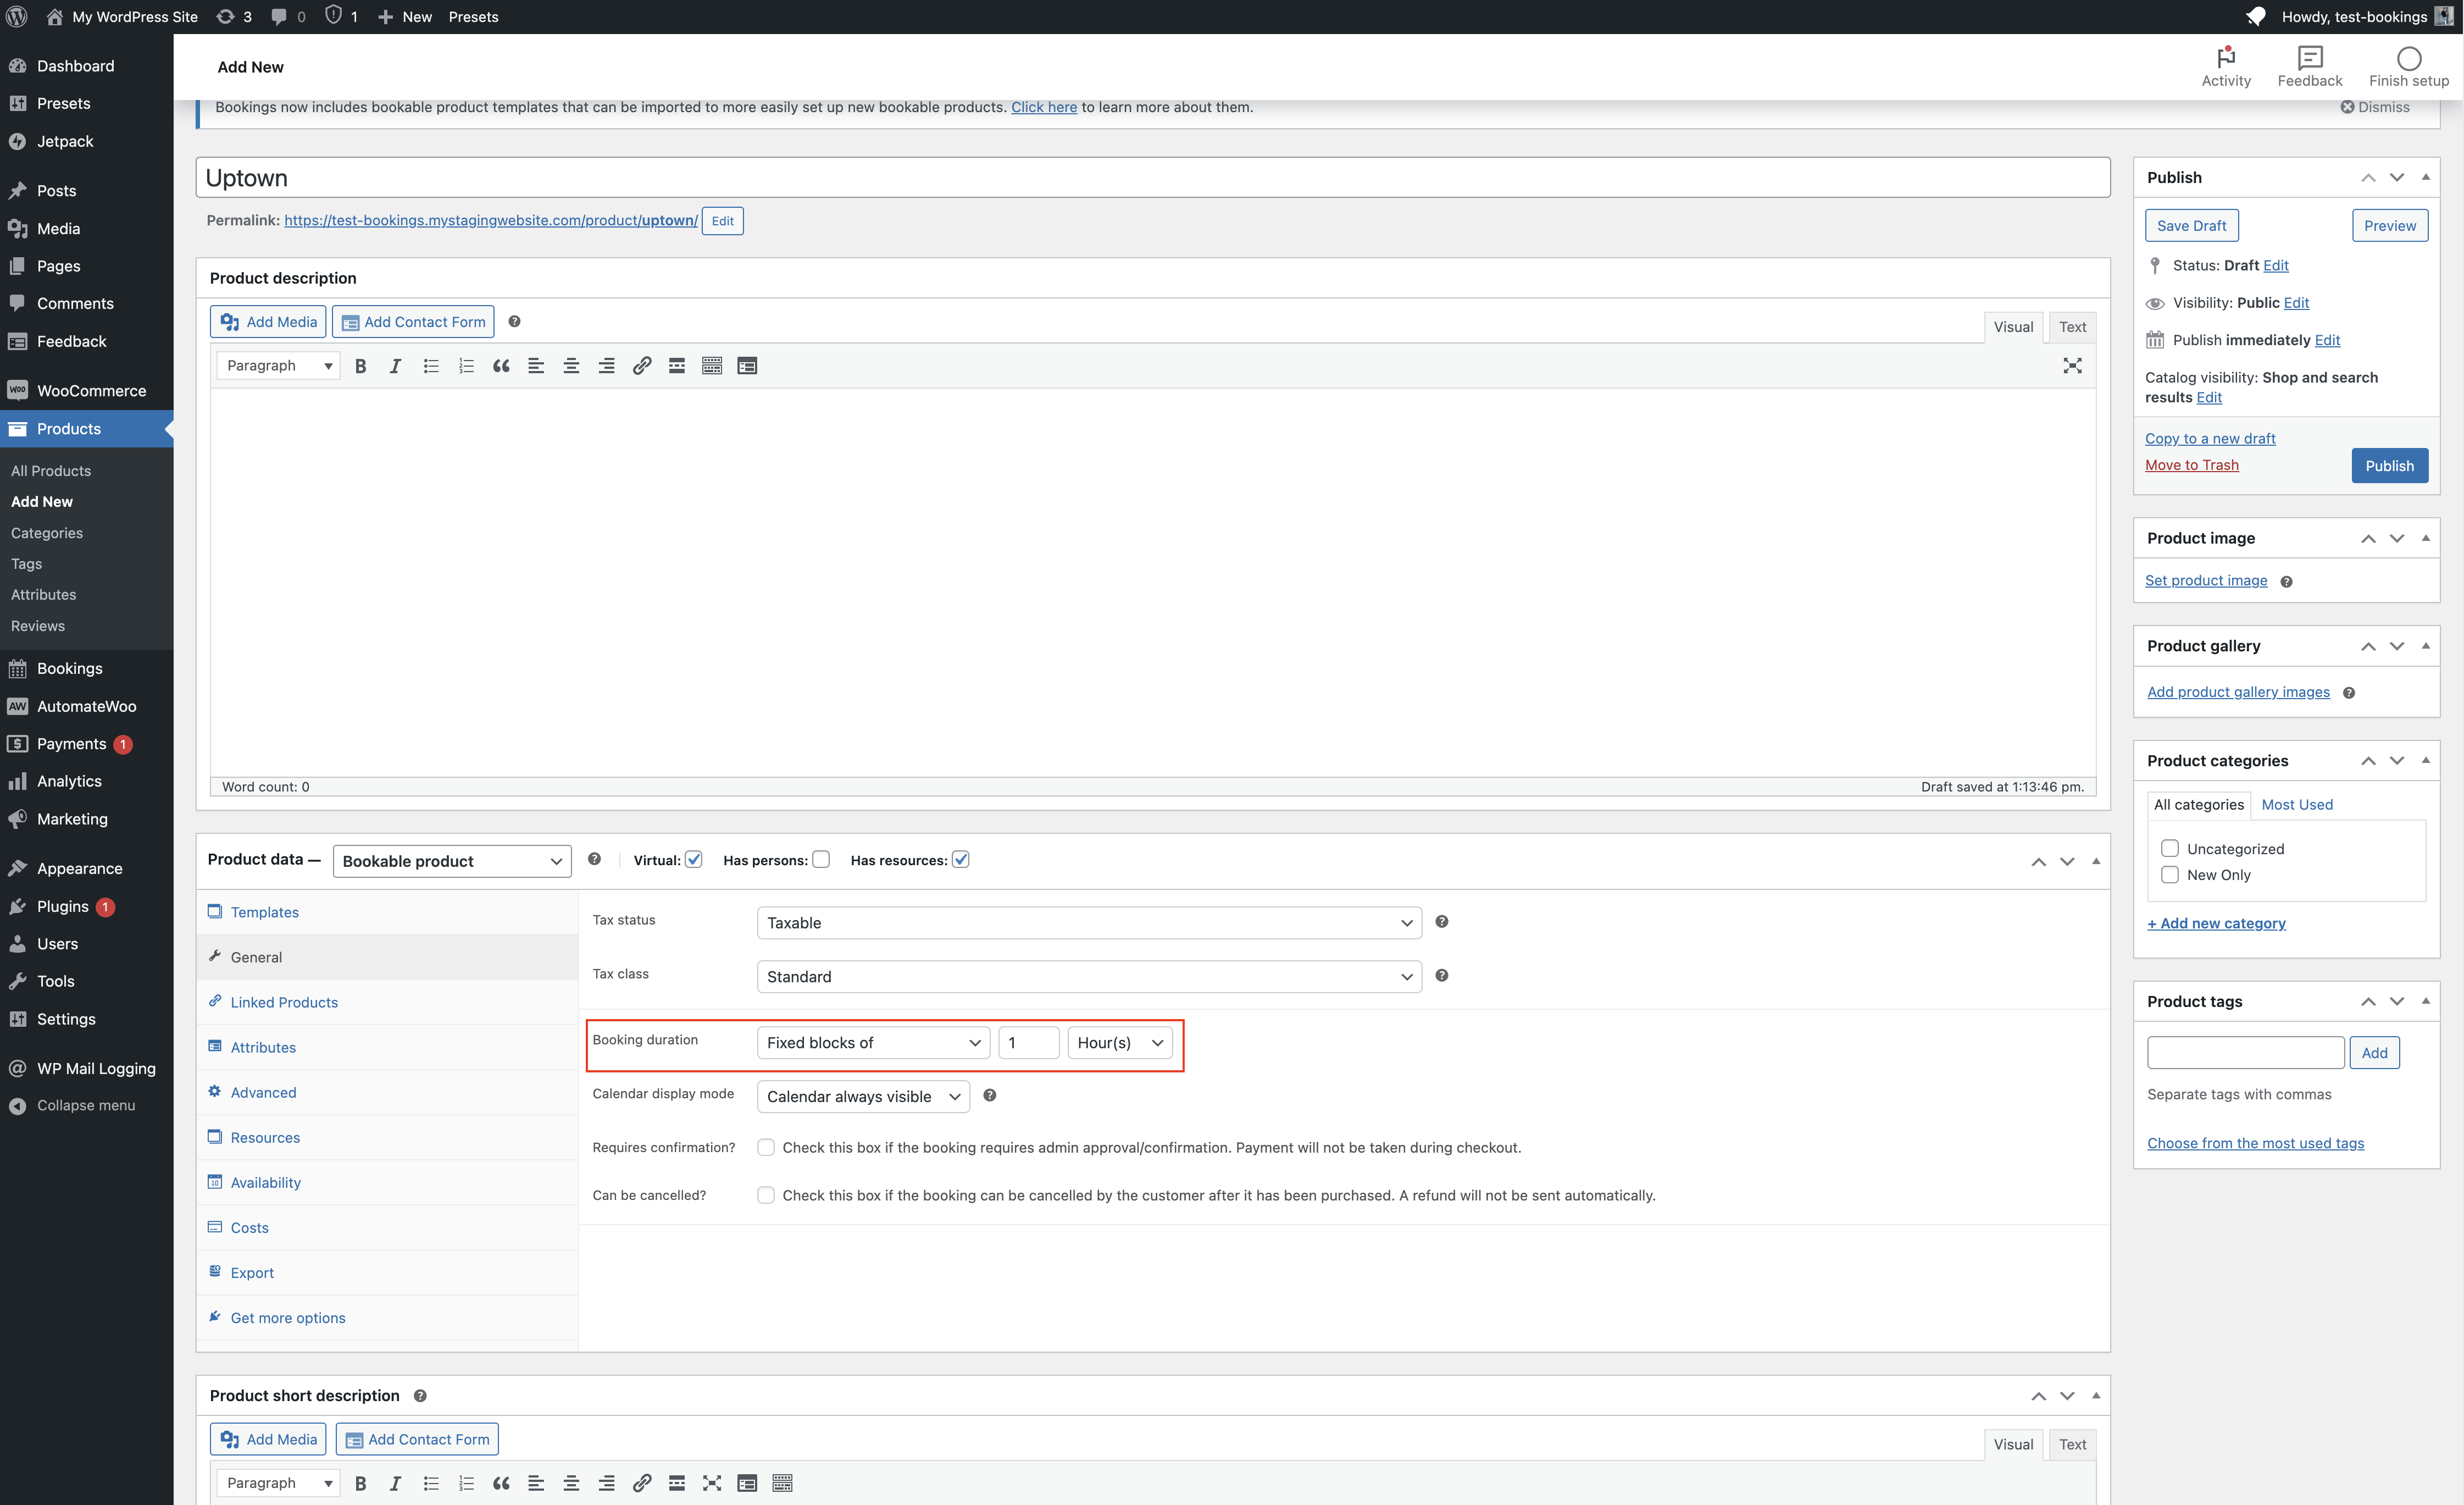
Configuring the General Tab
↑ Revenir en hautIn the General tab, keep everything as-is except for the Booking duration field. For that, ensure that the booking product is set to Fixed blocks of 1 hour.
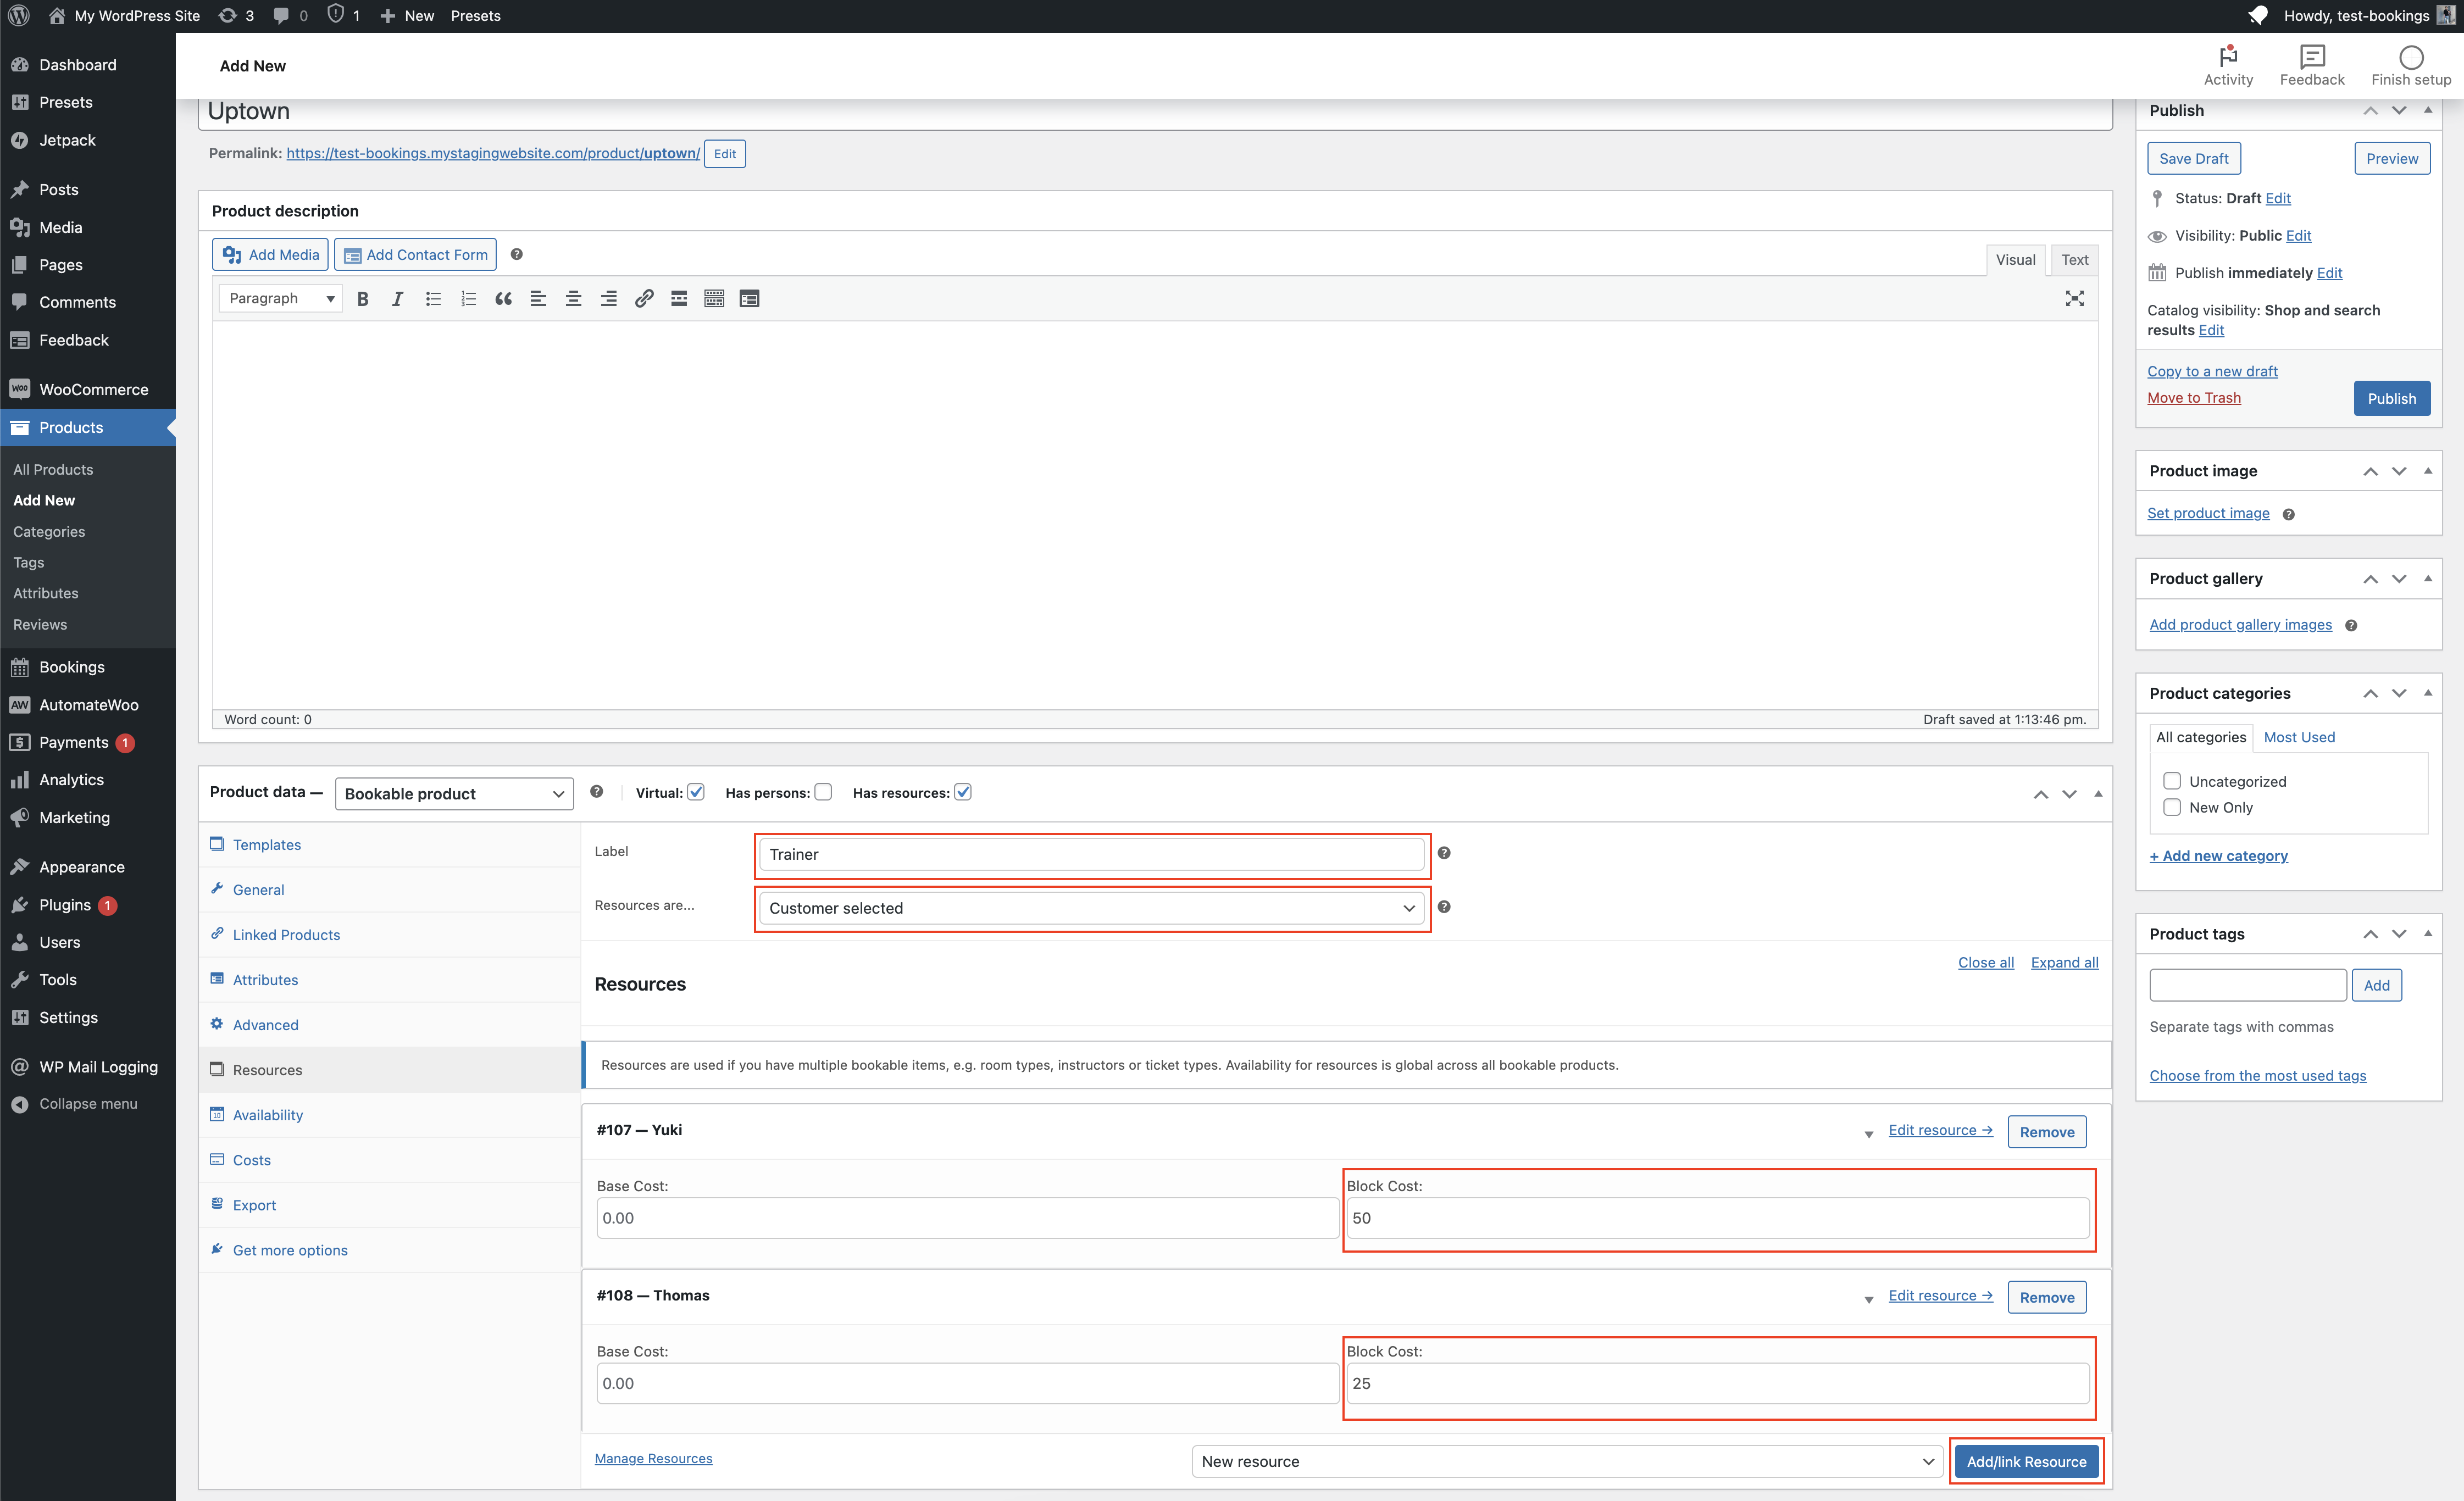
Configuring the Resources Tab
↑ Revenir en hautThe Resources tab is where you configure how your resources will be used (we will talk about how to create a resource later in this guide). We want our resources to be selectable by our customers, instead of being automatically assigned. Follow these steps to configure the bookable product’s resources:
- Change the Label field to “Trainer”.
- Ensure that the Resources are… field has the value Customer selected.
- Add resources by clicking on the Add/link Resources button.
- Set individual prices for each resource created.
Configuring the Availability Tab
↑ Revenir en hautThe Availability tab is where you configure which times are available for this bookable product in your store. Follow these steps to configure the bookable product’s availability:
- Since we have resources, the Max bookings per block field will be configured separately for each individual resource.
- Set the Require a buffer period of field to
1hours between bookings. - Set the All dates are… field to
not-available by default.
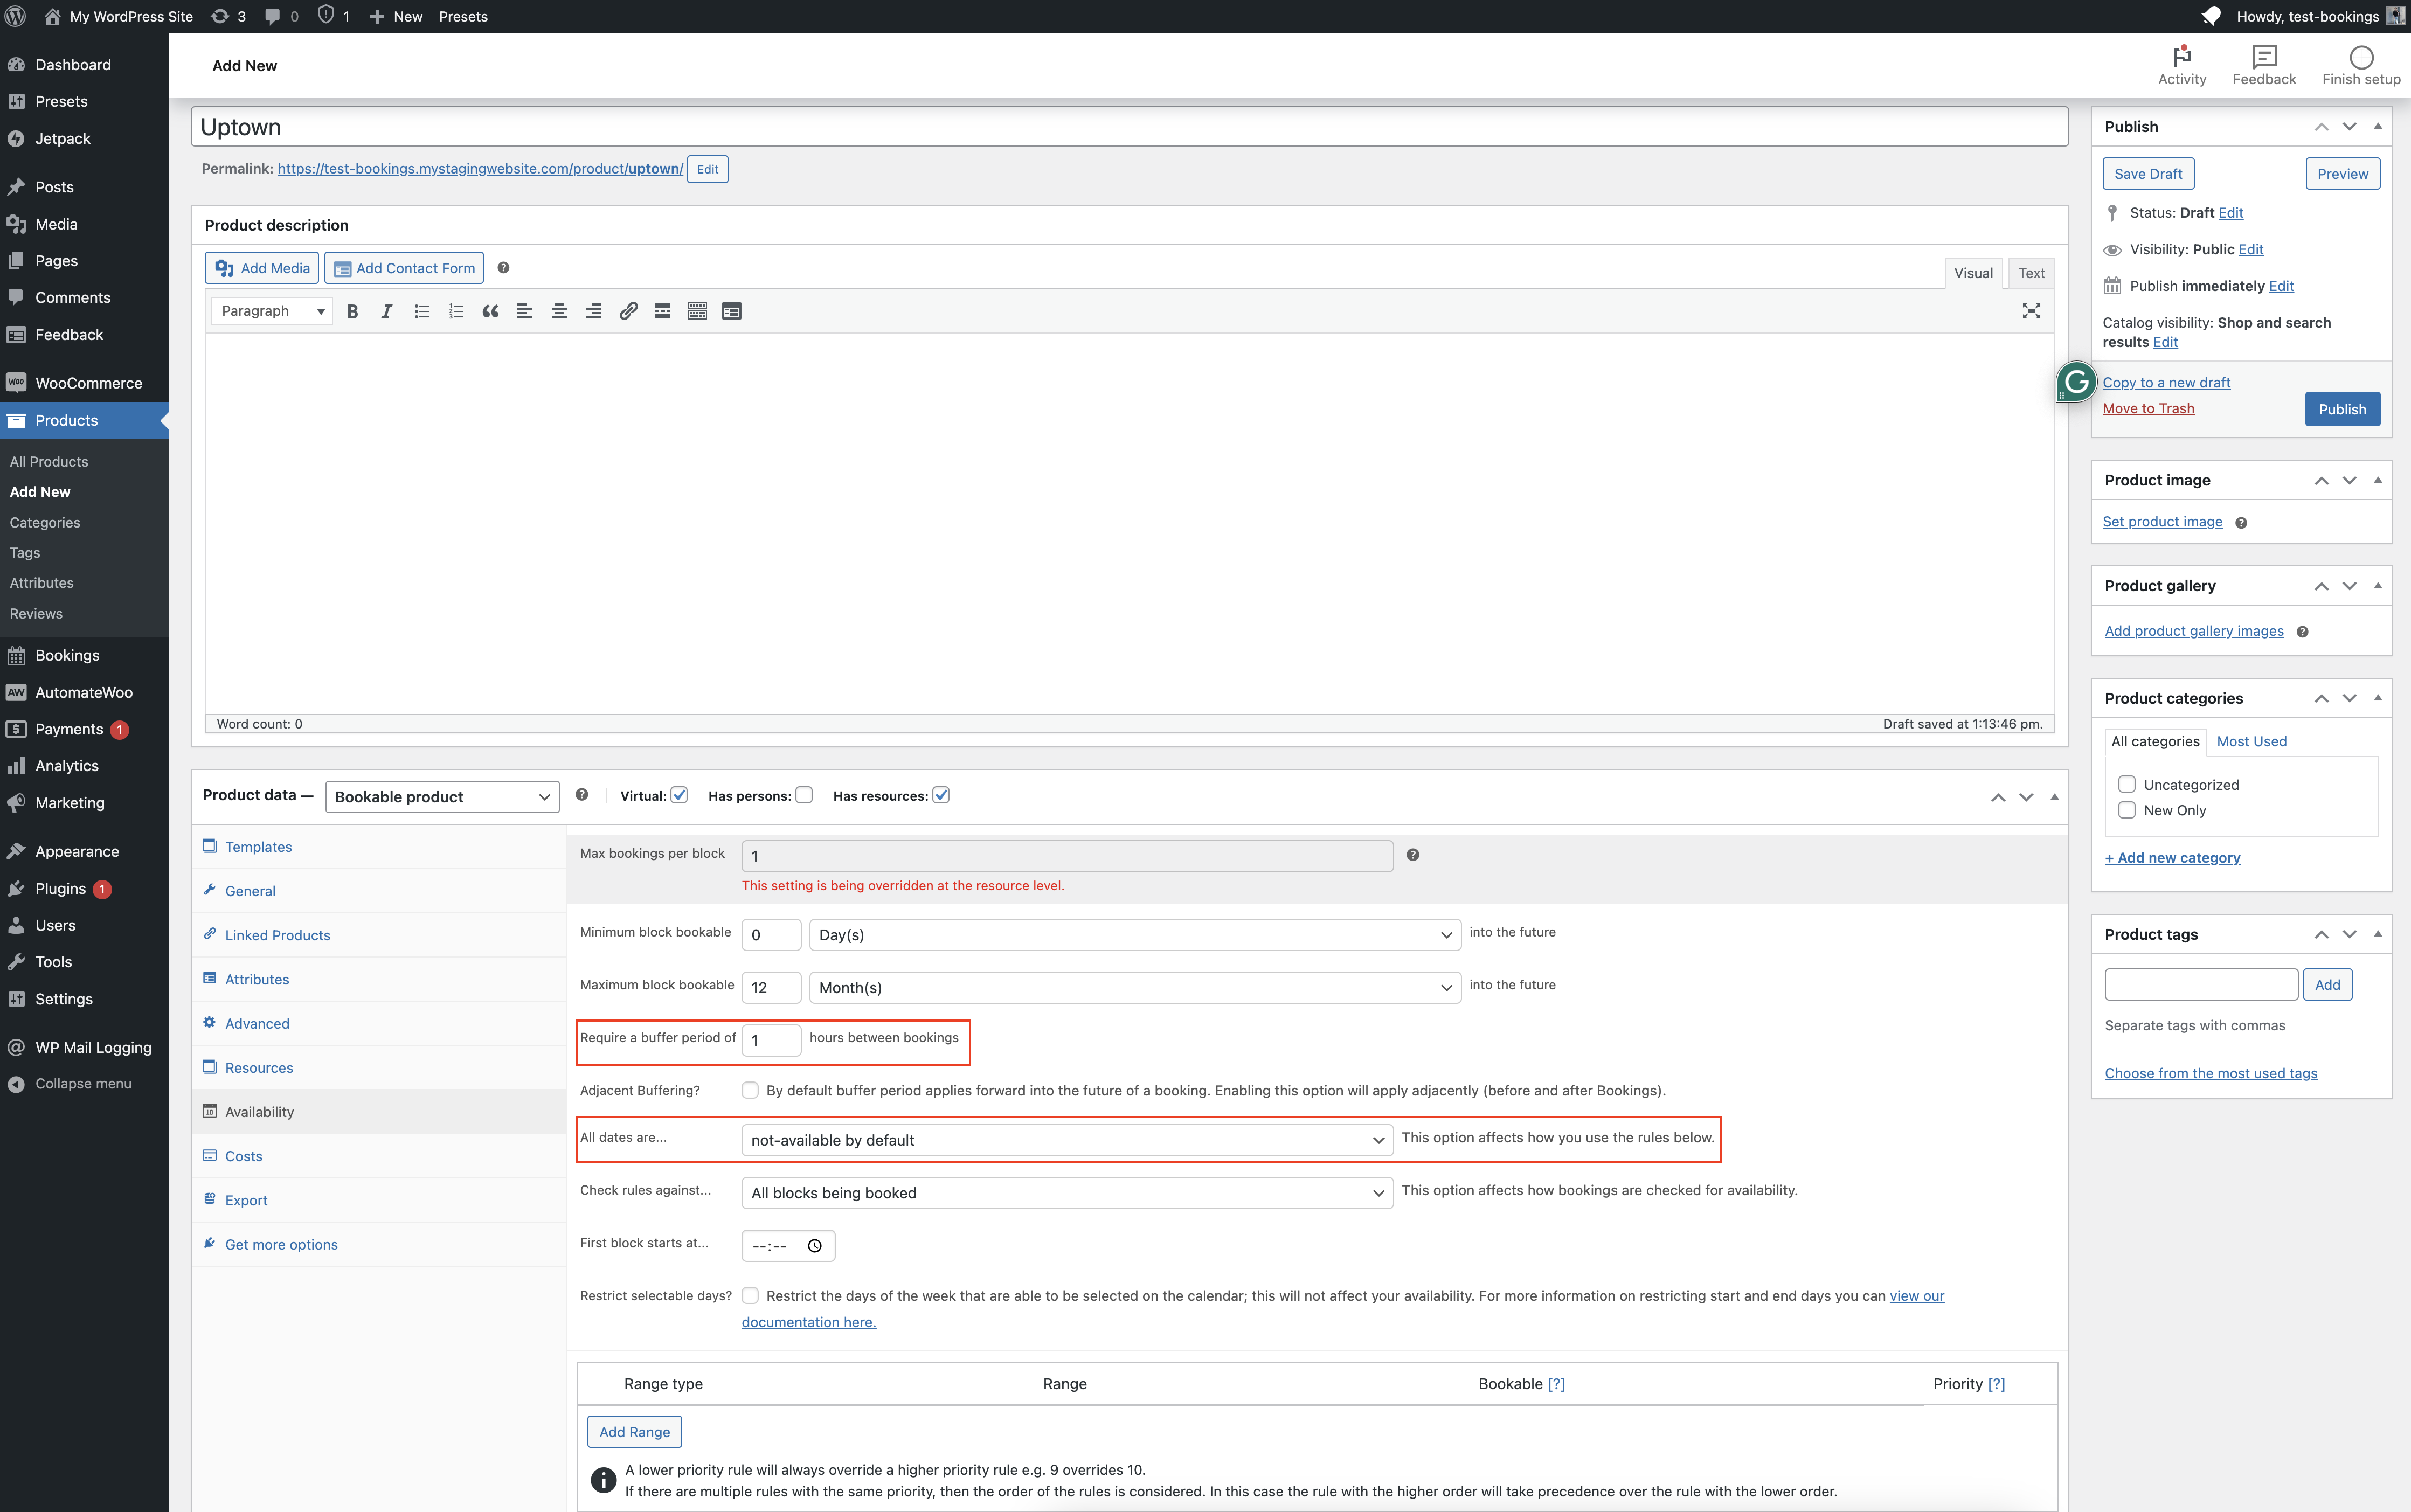
Setting the All dates are… to not-available by default is often the best approach when creating complex availability rules. It’s easier to add what is available than to add what is and what is not. The buffer period we set here allows our trainers time to travel between locations.
Creating and Configuring Resources
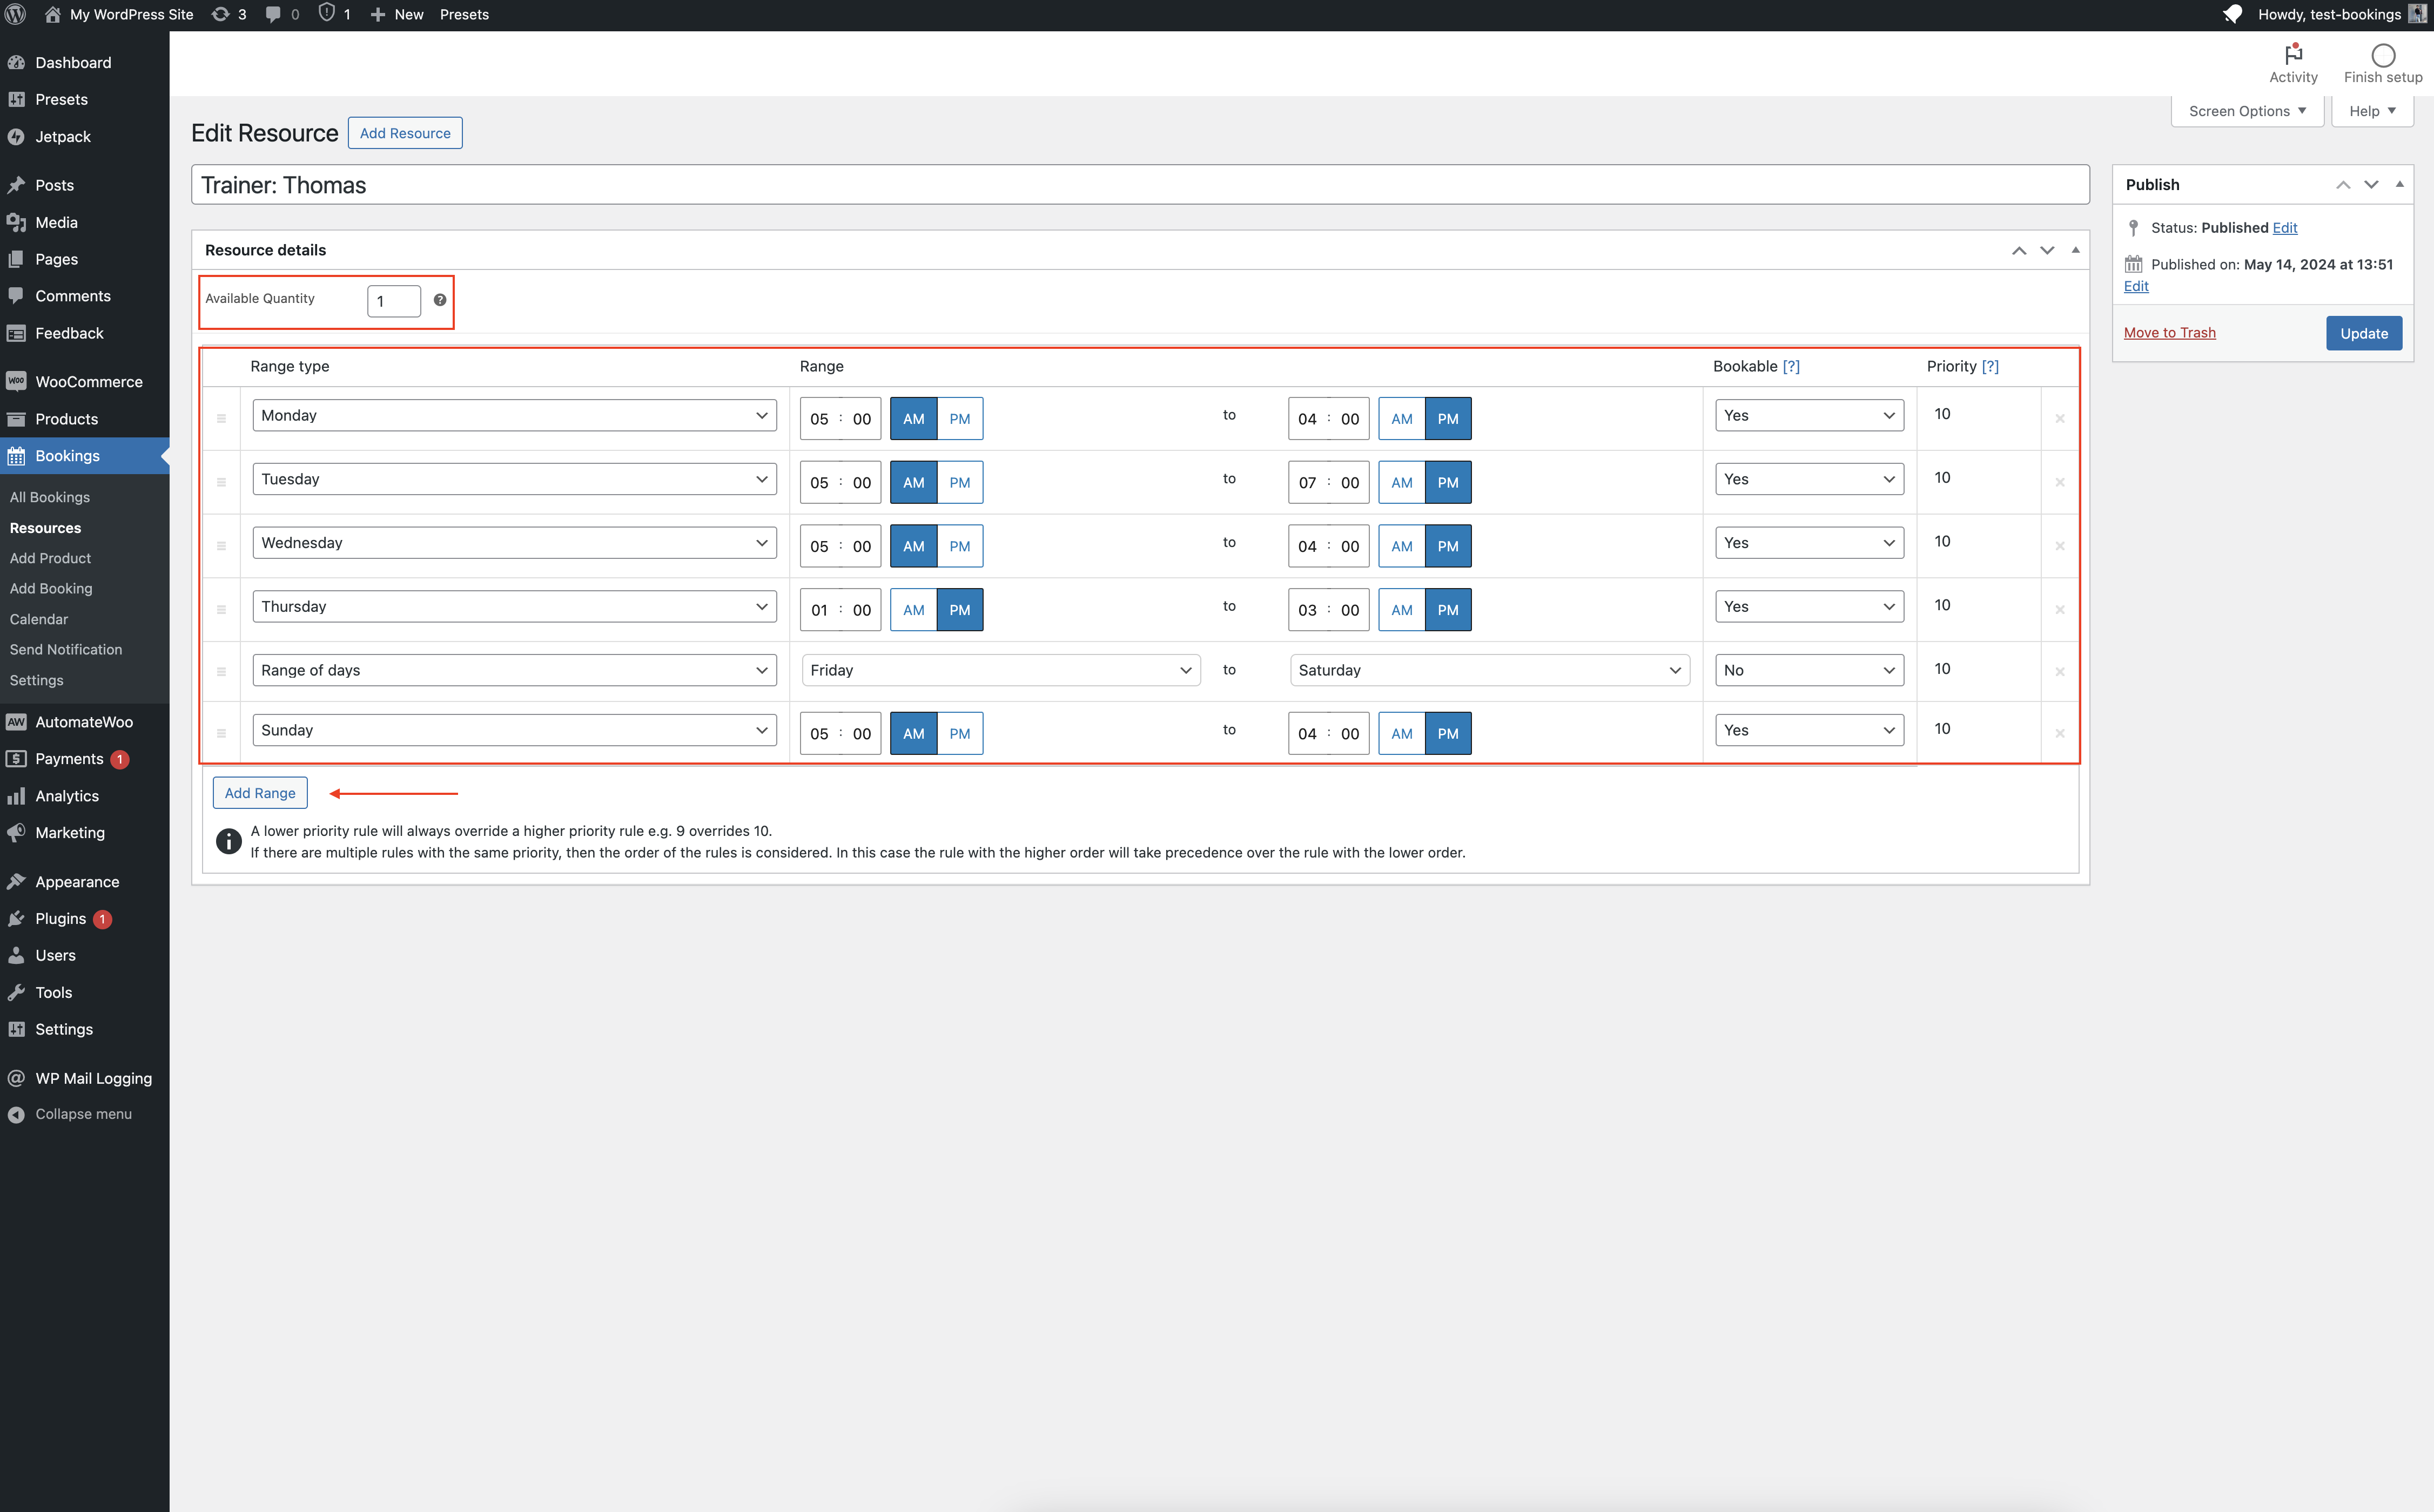
↑ Revenir en hautFor our example, we are giving each trainer a name as well as setting the quantity of this resource to just 1. That means that this resource can only be used for one bookable slot. Follow these steps to create and configure the individual resources.
- From your WordPress Admin Dashboard, navigate to the Bookings > Resources page and click on the Add Resource button to create a resource.
- You will be on the page to create and edit a resource. Start by setting the Title of the resource to the name of the trainer.
- Set the Available Quantity field to
1. - Click the Add Range button to add the Availability Ranges for this resource as desired.
- Rinse and repeat for all other resources.
Once you’ve published the bookable products, then create the second location remembering to attach the resources there as well, and you’re set!
Questions and Support
↑ Revenir en hautSomething missing from this documentation? Do you still have questions and need assistance?
- Have a question before you buy this extension? Please fill out this pre-sales form – please include the name of this extension in your query.
- Already purchased and need some assistance? Get in touch with a Happiness Engineer via the WooCommerce.com Support page and choose this extension name from the “I need help with” dropdown