WooCommerce includes a number of blocks that you can insert in posts, pages and Site Editor patterns and templates to customize your catalog, promote your products, and deliver a great checkout experience to your customers.
In this guide, we cover the basics of how blocks work, where to find their settings, and how to revert to the classic templates if you run into any issues. By understanding how to insert, customize, and manage blocks (and when to fall back to classic templates), you’ll have the flexibility to build a store that works exactly the way you want.
Requirements
↑ Back to topTo get the most out of the site editing features built into WooCommerce, you’ll need to use a block theme. It is still possible to utilize blocks without a block theme; however, you’ll only be able to use blocks on posts and pages, and you will not have access to the site editor for customizing your shop’s templates.
As always, to make the most of the latest WooCommerce features, including blocks, we highly recommend updating WordPress and WooCommerce to the latest stable version.
What are Blocks?
↑ Back to topBlocks are content elements that make up your site and store. Each item you add to a post or page is a block. Blocks can be added and customized visually in the Site Editor. You can use blocks to create and edit:
- Pages and posts
- Templates (eg, single product or checkout pages)
- Reusable patterns and layouts
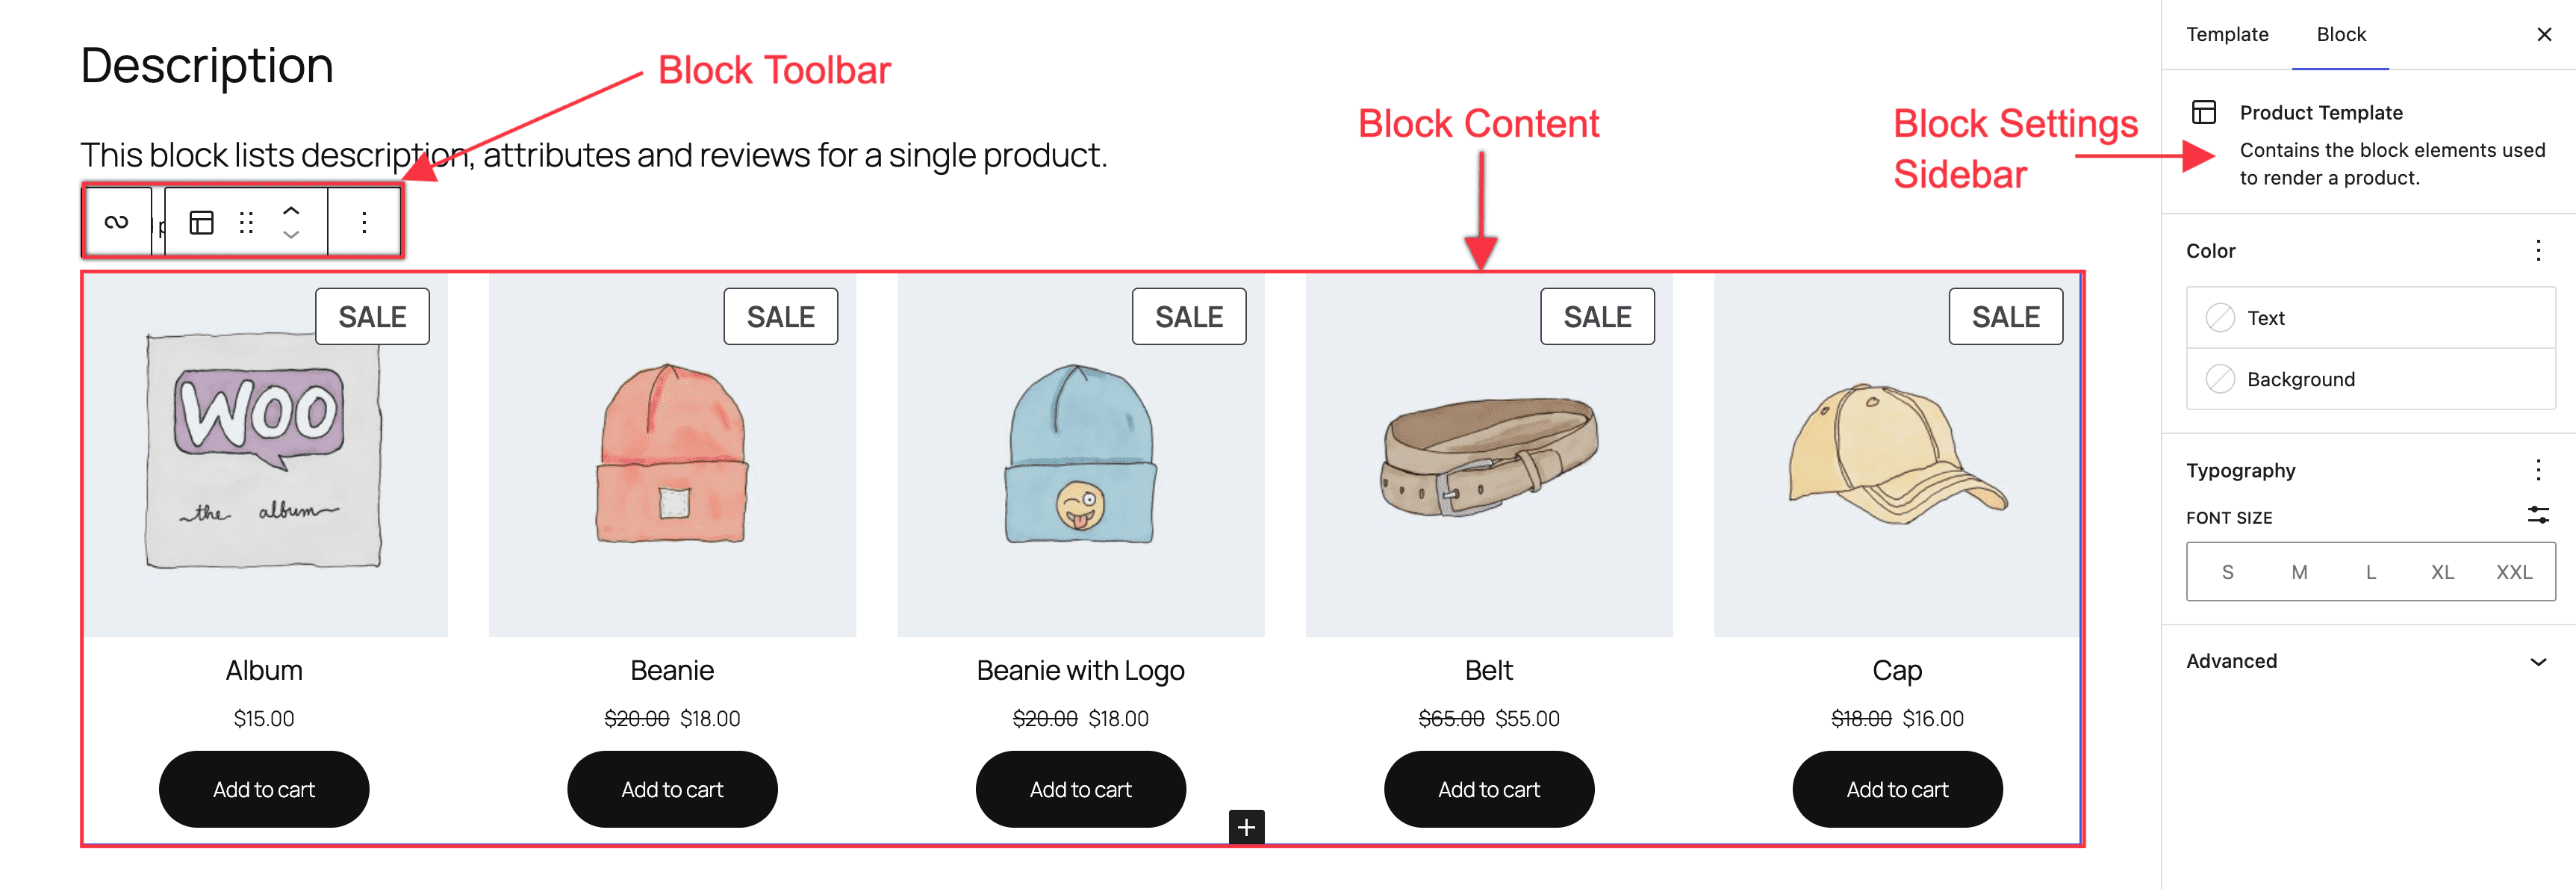
Anatomy of a Block
↑ Back to topEach block has options in the Block Toolbar and Block Settings Sidebar. The Block’s Content displays in the center of the editor. Depending on the block’s purpose, the options on the Block Toolbar and Block settings sidebar will change.
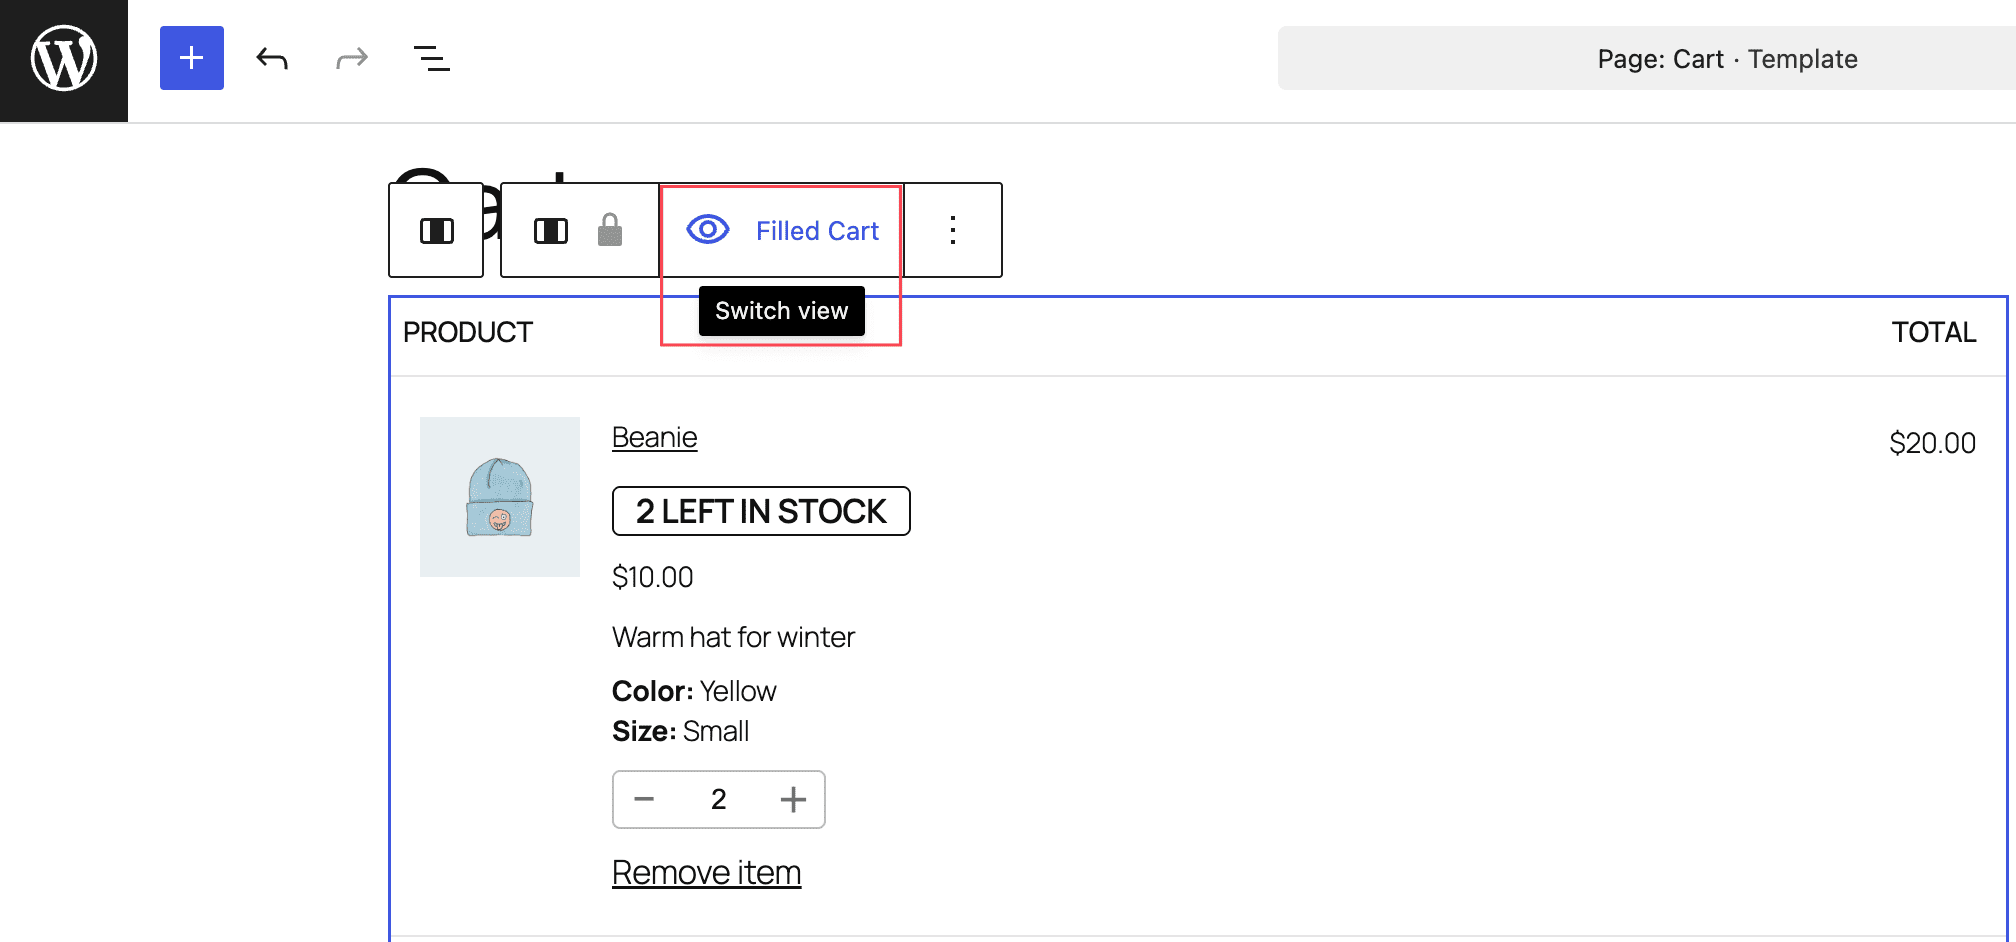
Many WooCommerce blocks use dynamic content to match the current context (e.g., showing what each customer currently has in their cart;). In the site editor, these dynamic blocks will show sample content.
Using Blocks in the Site Editor
↑ Back to topAdding Blocks
↑ Back to topThere are multiple ways to insert blocks throughout pages.
- At the top left of the page, you’ll notice a toolbar with a square + icon. Clicking this icon opens the Block Inserter. It will allow you to search for blocks and insert them. It also shows additional information per block and a small preview.
- In the editor field, you will see a block inserter option, also with a + icon when you click above, in between, or below blocks that you already have in the editor.
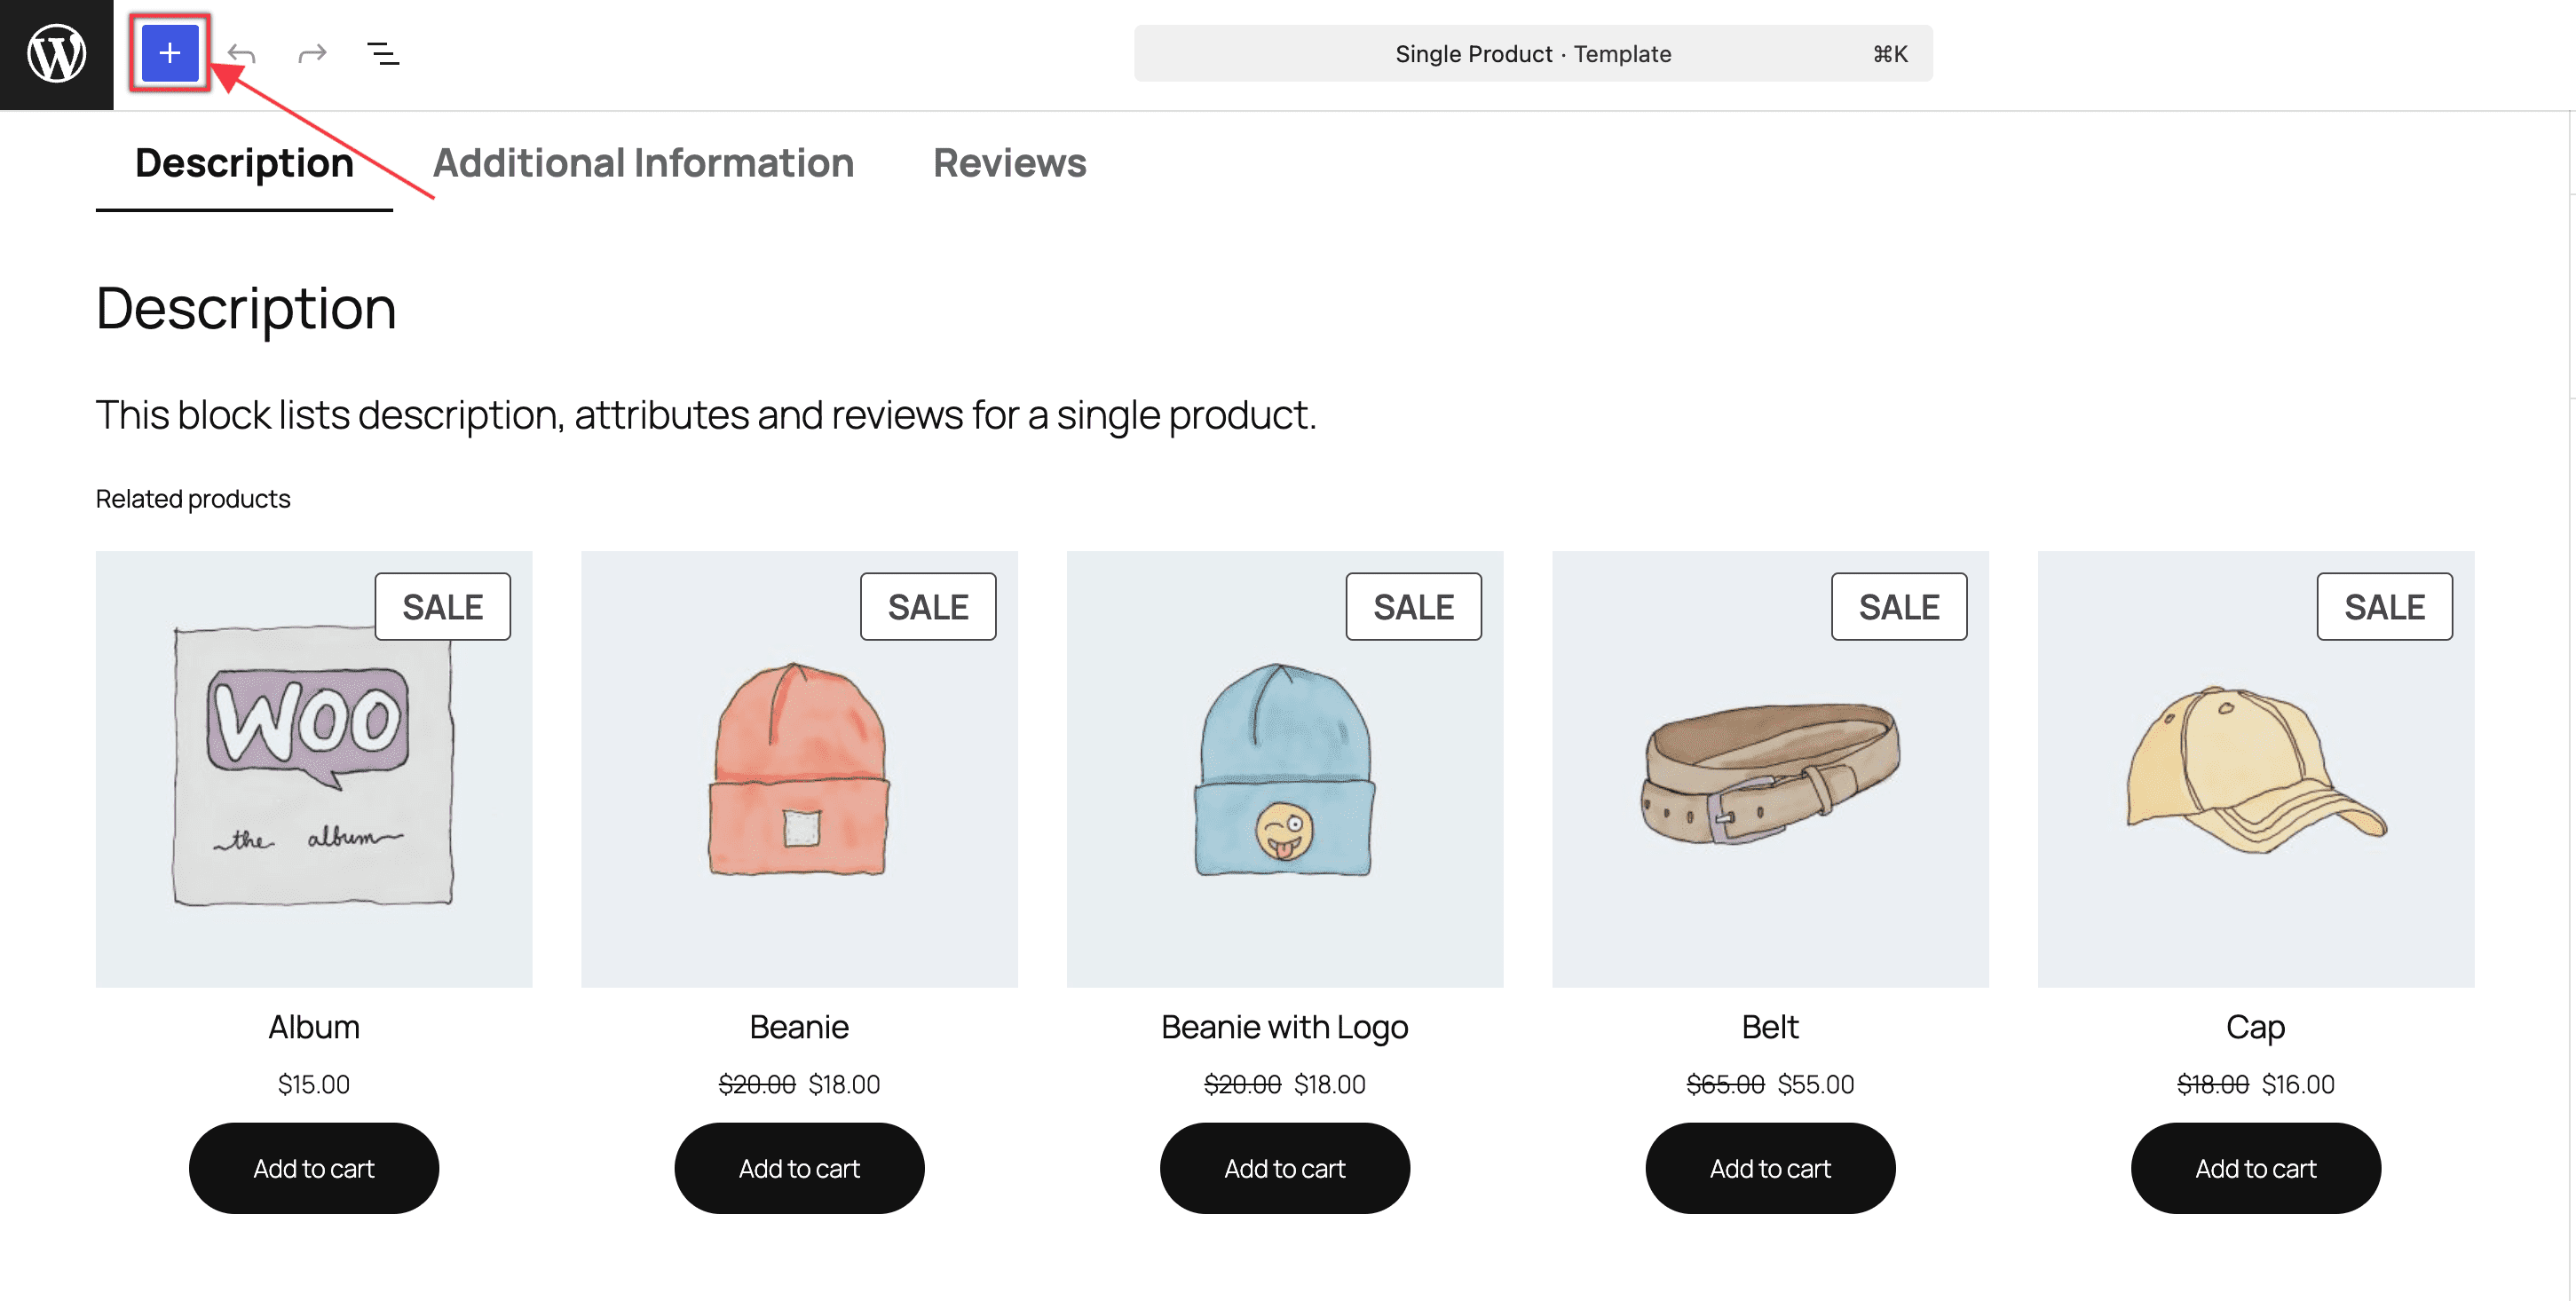
💡 Tip: A shorthand trick for adding a new block is to type “/” and the block name that you want to insert. This is called the Slash command.
Searching for Blocks
↑ Back to topYou can search for blocks using:
- Block Inserter: Type the beginning of a block name or keyword, for example, “image” or “heading”, in the inserter’s search field.
- Slash Command: Start typing the beginning of a block name or keyword, and auto-suggested search results will appear.

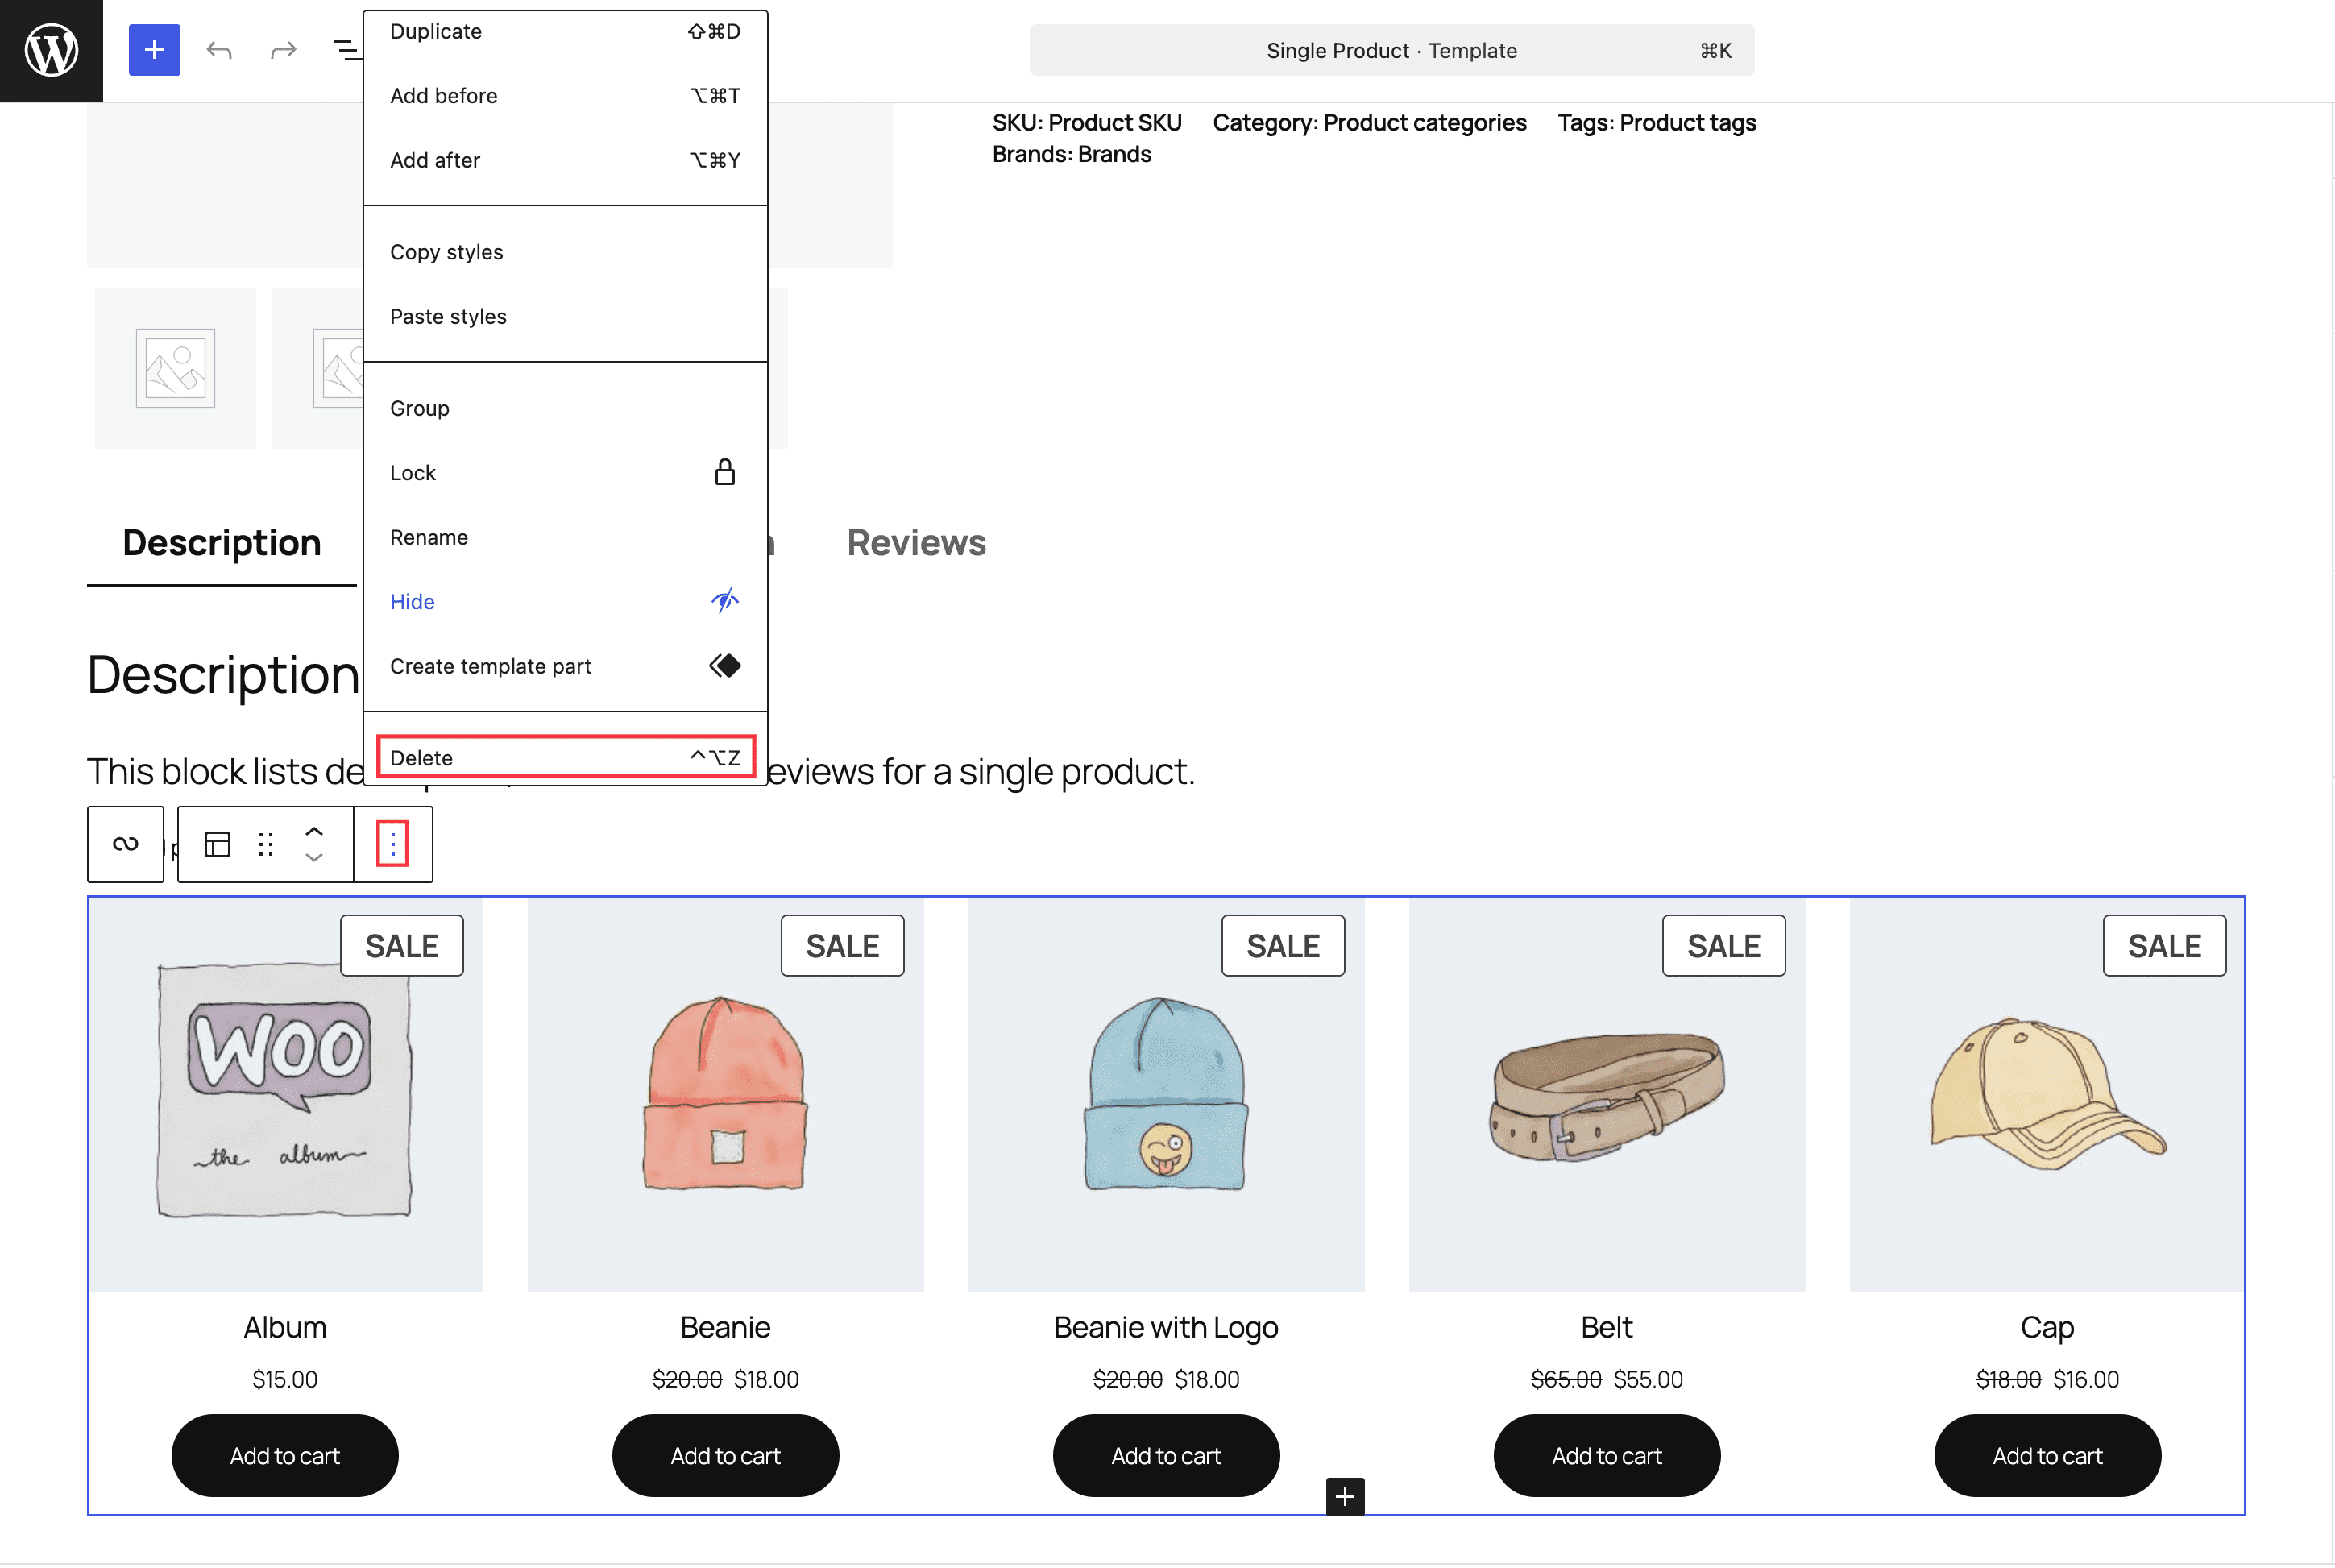
Deleting Blocks
↑ Back to topIf you’d like to remove a block from a page or template, you have several options. To remove a block:
- Select the block.
- Click on the three-dot icon in the block’s toolbar or the list view.
- Click the “Delete” option.
Another way to delete a block is to select the block and press the keyboard shortcut. (Control + Option + Z on Mac, or Shift + Alt + Z on Windows.) Some blocks can be deleted by pressing the “delete” or “backspace” button on your keyboard after selecting them.
Some templates include placeholder blocks that indicate where the actual content of your store will appear once you publish your changes.
We recommend that you do not delete placeholder blocks from your templates without testing to be sure you understand the effects, to avoid unintended errors or missing information on your store.
Block Contexts
↑ Back to topWhen searching for a block, you may not always find it available. This is because blocks can be restricted to specific contexts (such as templates, areas, or inner blocks), and developers can define which blocks are allowed in which locations.
Examples of Contextual Restrictions
↑ Back to top- Blocks limited to certain areas: Some blocks can only be added in specific contexts. For example, the Cart Cross-Sells block can only be placed inside the Cart Items section of the Cart block.
- Contexts limiting available blocks: Certain contexts only permit specific types of blocks. For example, within the Cart Totals section of the Cart block, only the following blocks can be added: Paragraph, Image, Separator, Accepted Payment Methods
- Blocks restricted to one instance per template or area: Some blocks can only be used once in a given template or area. For example, the “Accepted Payment Methods” block can only appear once in the Cart Totals section of the Cart block.
Why these Restrictions exist
↑ Back to topThese rules allow developers to control where and how blocks are used. By limiting placement, they ensure that blocks function as intended within specific implementations and prevent conflicts or duplication that could break the layout or user experience.
How to Customize Blocks
↑ Back to topTo customize a block, first select the block you want to customize. Select a block by clicking on the block in the content area, or using the List View to find a specific block and selecting it in the list.
You can then access the block’s customization options in two places: the block toolbar and the block settings.
Block Toolbar
↑ Back to topWhen you click on a block, the block’s toolbar will appear above or below it. The toolbar contains essential options for working with that block.
Hover over the icons in your Block Toolbar to display a tool-tip explaining what each icon does:
Global Block Toolbar Options
↑ Back to topSome options will show in most blocks’ toolbars. These are explained below:

- Transform: Change a block to a similar block type. For example, if you want to change your Cart block to the classic version of the cart, clicking this icon will give you the option.
- Drag: Click and hold the icon that looks like six dots to drag the block to another section of the page.
- Move up/down: Click the up or down arrow to move the block up/down one position on the page.
- Alignment: Change the positioning of the block. If available, you will usually find left, right, and center, as well as wide and full width if supported by your theme.
- More Options: The three vertical dots at the end of the toolbar opens a menu with additional actions:
- Copy: Make a copy of the block to your clipboard, which you can then paste elsewhere.
- Duplicate: Create a copy of the block directly below the original.
- Add before: Create a space above the current block to add a new block.
- Add after: Create a space under the current block to add a new block.
- Copy styles: Copy the Styles used on the block.
- Paste styles: After copying a block’s Styles, paste those Styles onto the selected block.
- Group/Ungroup: Using this option, you can group multiple blocks together – useful for applying colors and padding to a set of blocks.
- Lock: Disable the option to move and/or delete the block. Read more about locked Blocks
- Create Pattern: Save the block with your customizations so you can add it to other areas throughout your site. Read more about block patterns
- Rename: Assign a new name to a block as it appears in List View.
- Move to: Click this option, and then click on another section of your page to move the block to that section of the page.
- Edit as HTML: Edit the block content in HTML.
- Delete: Removes the current block from your page.
Not all of these settings will be available for every block. For example, if a block is locked, you won’t see the option to delete it, and may not see the option to move it.
Block-Specific Toolbar Options
↑ Back to topEach block will also have its own toolbar options specific to that block. For example, the Image block toolbar contains settings to add a link, crop the image, and more:

Selecting Parent Blocks
When you’ve selected a block that is nested inside of another block, the block toolbar will have an extra, separate button floating to the left of it. Clicking this button will move your selection to the current block’s immediate parent.

Block Settings
↑ Back to topThe Block Settings sidebar contains more customization options for the block you’re working on. Each block has its own settings that you can find in the settings sidebar:
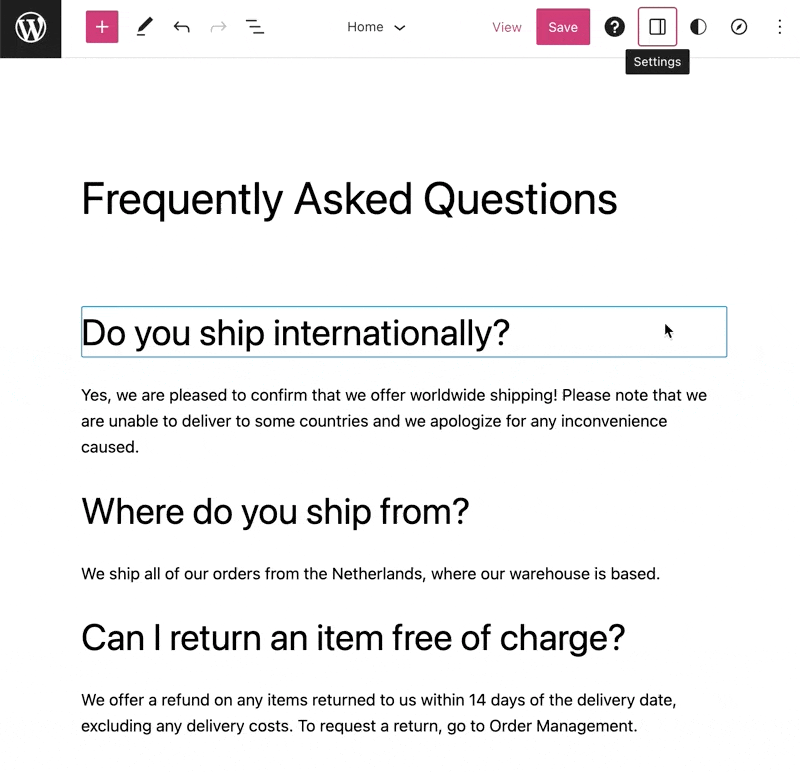
If you don’t see the sidebar, click the settings icon next to the Save button in the top right corner of the editor. This icon looks like a square with two uneven columns:

Note that at the top of the sidebar, which expands, there are two tabs. To see the settings for your currently selected block, ensure you’re viewing the “Block” tab. Available options will vary from block to block; some blocks have no settings to alter in the sidebar.
Locked Blocks
↑ Back to topLocked blocks are a feature of the block editor that allows developers and site administrators to restrict certain actions on specific blocks. This is especially useful when building custom block patterns or templates.
How Locked Blocks Work
↑ Back to top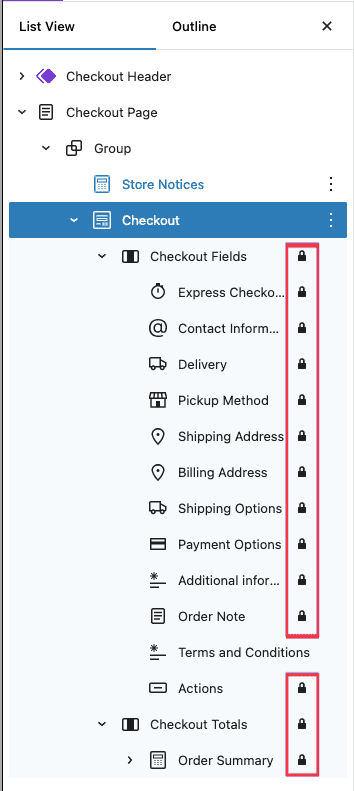
Locking in the editor: When creating layouts, you can lock blocks to prevent them from being moved or deleted. If you lock a block yourself, it can later be unlocked through the More Options (three-dot) menu in the block toolbar.
Developer-locked blocks: Developers can lock blocks at the template level to protect critical layouts, content, and functionality. For example, many WooCommerce templates use locked blocks to:
- Prevent blocks from being moved outside of their required context.
- Ensure certain elements remain in the correct order or position.
Unlocking Behavior
↑ Back to top- Editor-locked blocks: Can be unlocked manually from the [block toolbar].
- Developer-locked blocks: Often cannot be unlocked by users, since they are locked by default to preserve the integrity of the template.
WooCommerce Blocks
↑ Back to topWooCommerce includes a growing set of powerful blocks that you can use to highlight products, personalize your shop and category pages, create layouts, and build a seamless shopping experience for your customers, from discovery to checkout.
Please refer to Using Templates in WooCommerce for an overview of how WooCommerce integrates with block themes, and to learn how you can use WooCommerce blocks to customize your store.
Questions and support
↑ Back to topDo you still have questions and need assistance?
This documentation is about the free, core WooCommerce plugin, for which support is provided in our community forums on WordPress.org. By searching this forum, you’ll often find that your question has been asked and answered before.
If you haven’t created a WordPress.org account to use the forums, here’s how.
- If you’re looking to extend the core functionality shown here, we recommend reviewing available extensions in the WooCommerce Marketplace.
- Need ongoing advanced support or a customization built for WooCommerce? Hire a Woo Agency Partner.
- Are you a developer building your own WooCommerce integration or extension? Check our Developer Resources.
If you weren’t able to find the information you need, please use the feedback thumbs below to let us know.