Every product in your store can be edited at any time to update pricing, description, imagery, etc. On this page, you’ll learn about each of the settings in the product editor and how to edit each one.
Which settings are in the WooCommerce Product Editor?
↑ Back to topThe Product Editor can be found by navigating to Products > All Products in your WP Admin dashboard and clicking Edit on a product you want to modify. Below are the main settings you can modify:
- Product name
- Product description
- Product data
- Product short description
- Reviews
Then, in the top-right column:
- Publish
- Product image
- Product gallery
- Product categories
- Product tags
Two additional panels, Custom Fields and Slug, are hidden by default.
You can change the order of these settings panels (except for Product name and Product description). You can also toggle the visibility of some panels using the Screen Options tab at the top right of the screen. Remember that some themes and page builders override the default appearance of the Edit product screen entirely.

Let’s take a closer look at the settings.
Product name
↑ Back to topThe Product name field is for the name of your product.
This field also auto-generates a slug for new products, which is the final segment of a product’s URL. The field accepts letters, numbers, special characters, emojis, and even HTML. Changing the title of an existing product does not alter the slug. To change the slug, you can use the “Edit” button that appears next to the URL below the Product name field after the initial save, or you can modify it through the Slug panel.

Product description
↑ Back to topThe Product description is for the detailed description of your product. This field will accept just about any type of content including text, image and video embeds, tables, HTML (using the “text” tab in the editor), or whatever else you may need to convey the value and benefits of a product to your customers.
Product data
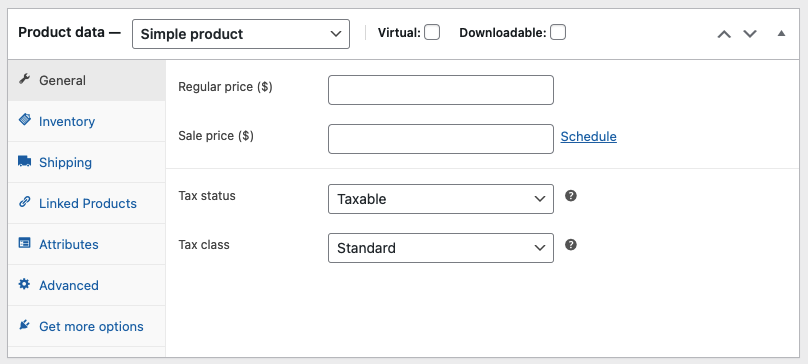
↑ Back to topThe Product data panel is where to add the majority of important data about your products.
At the top of the box is Product type which always defaults to Simple product. Next to it are two checkboxes, Virtual and Downloadable. The state of these three together influences the visibility and content of each of the sections in this panel. The default sections are General, Inventory, Shipping, Linked Products, Attributes, Advanced, and Get more options.
Product type
↑ Back to topSome product types may require different treatments and show more settings than others, so it’s vital to decide which type the product you’re adding. WooCommerce includes the following default product types:
- Simple – covers the vast majority of products you may sell. A simple product requires no consideration from the customer’s point of view beyond buying it or not. It defaults to being a physical product, which means shipping applies.
- Grouped – A container holds various products, forming a collection for customers to purchase together.
- External or Affiliate – List and describe products on your website that are sold elsewhere.
- Variable – a product with variations, each of which may have a different SKU, price, stock options, and shipping settings. For example, a t-shirt available in different colors and sizes.
- Other extensions might add more product types here, and their documentation should cover those.
The Virtual and Downloadable settings are available for Simple products and the variations of Variable products.
- Virtual – a virtual product (e.g. a service) doesn’t require shipping. When checked, this option disables the Shipping section. A virtual product by itself does not trigger the shipping calculator in cart and checkout (although any physical products purchased in the same order still have shipping applied).
- Downloadable – checking this option activates additional fields where you can provide a downloadable file. After customers make a successful purchase, the order notification email sends them a download link. This option suits products that are, for example, a digital album, a PDF, or a photo. It relies on Downloadable product settings.
General section
The General section is where you configure essential product data. It’s visible for Simple, External/Affiliate, and Variable product types, but contains more or fewer settings depending on the selected product type. The products in the group provide information to the grouped products.
Simple and External/Affiliate include the following settings. For Variable products, each variation has its own settings, which are not in the General sections. Learn more about adding variation data.
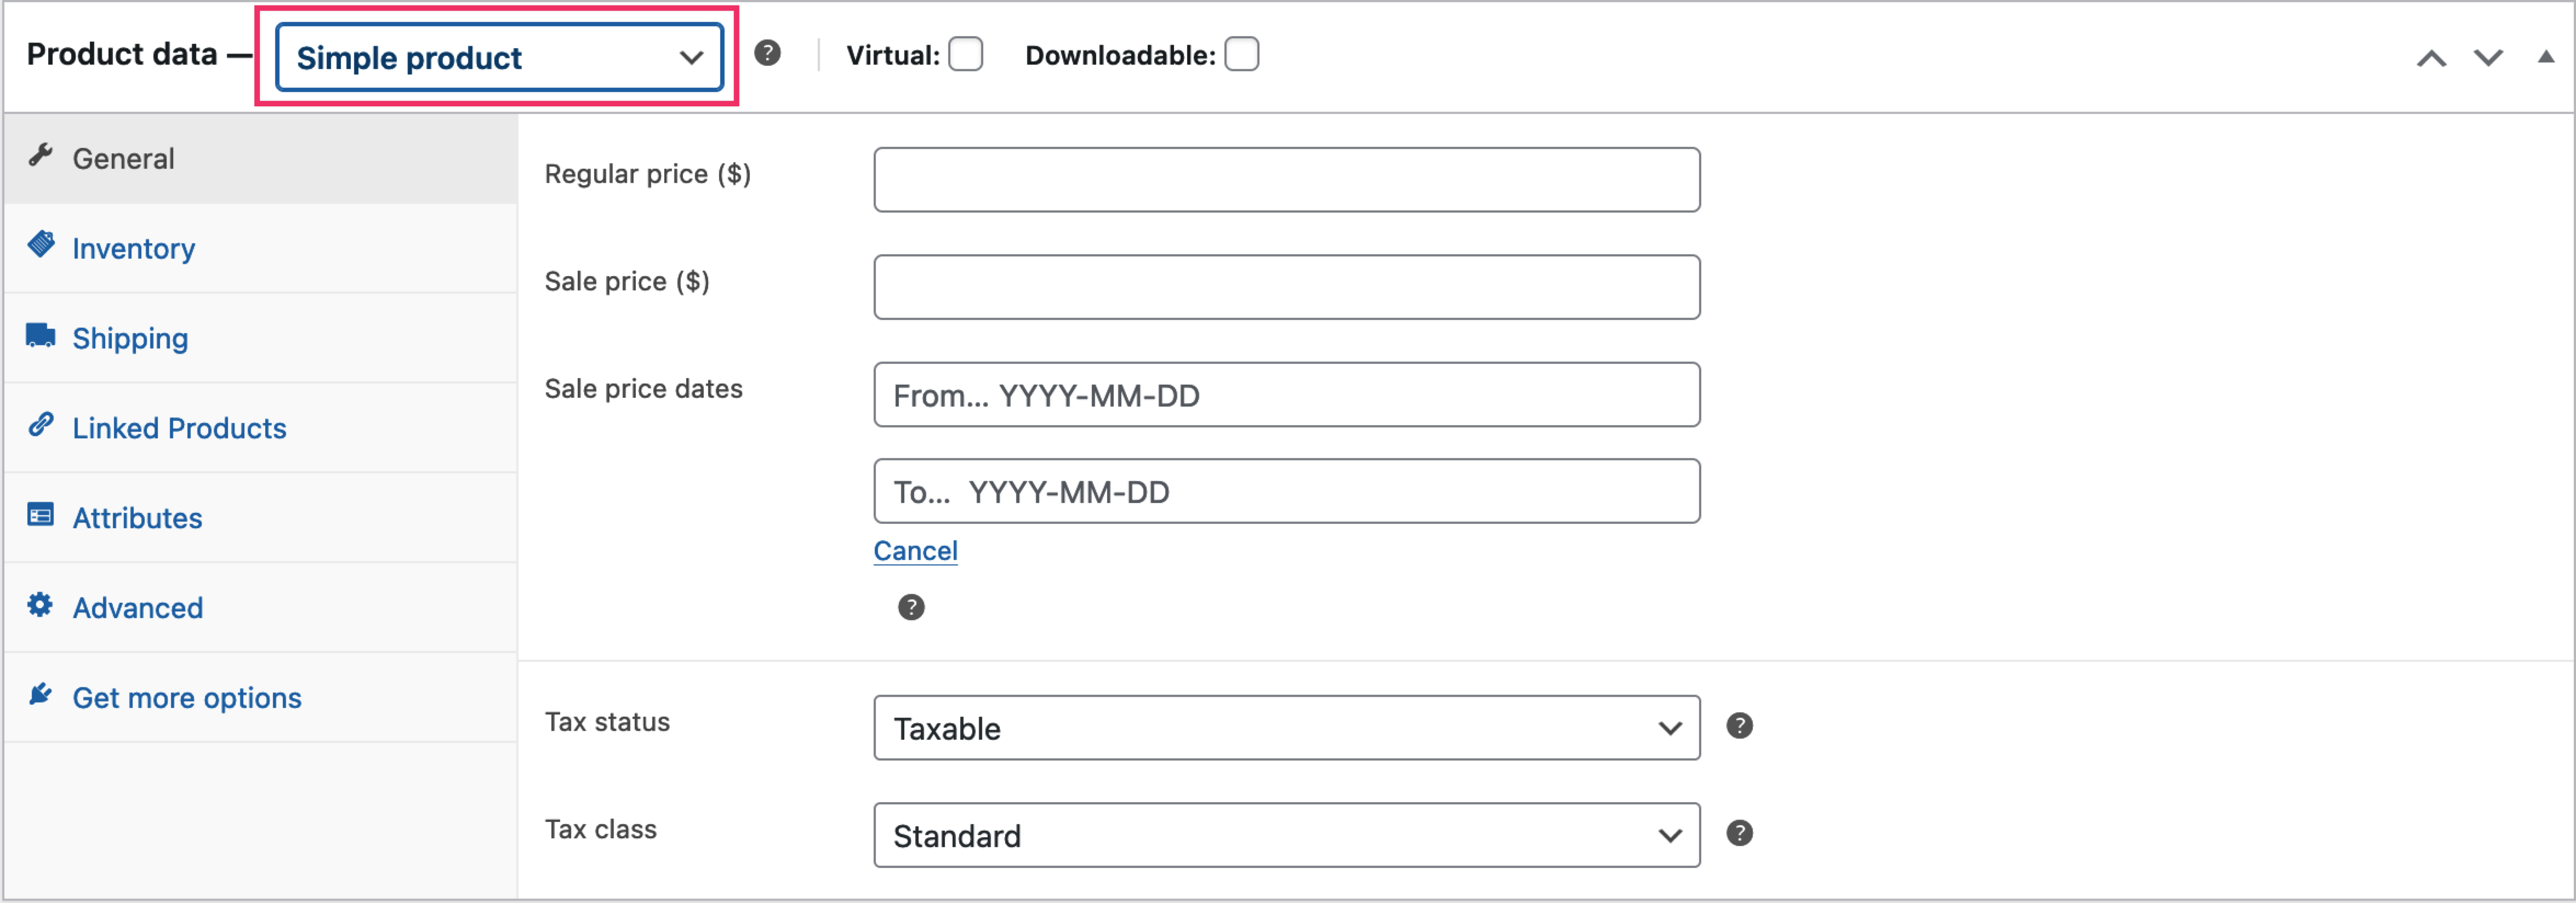
- Regular price – the regular price of the item.
- Sale price – If you enter the discounted price for the item, it will display. Clicking the Scheduled link adds two additional fields:
- Sale price dates – From: the date on which the sale price should start displaying.
- Sale price dates – To: the date on which the sale price should stop displaying (expires at 11:59 pm).
Simple, External/Affiliate, and Variable product types include these settings.
- Tax status –You can set it to Taxable, Shipping only, or None.
- Tax class – This defaults to Standard, but you can assign other tax classes.
Learn more about variable products and variations.
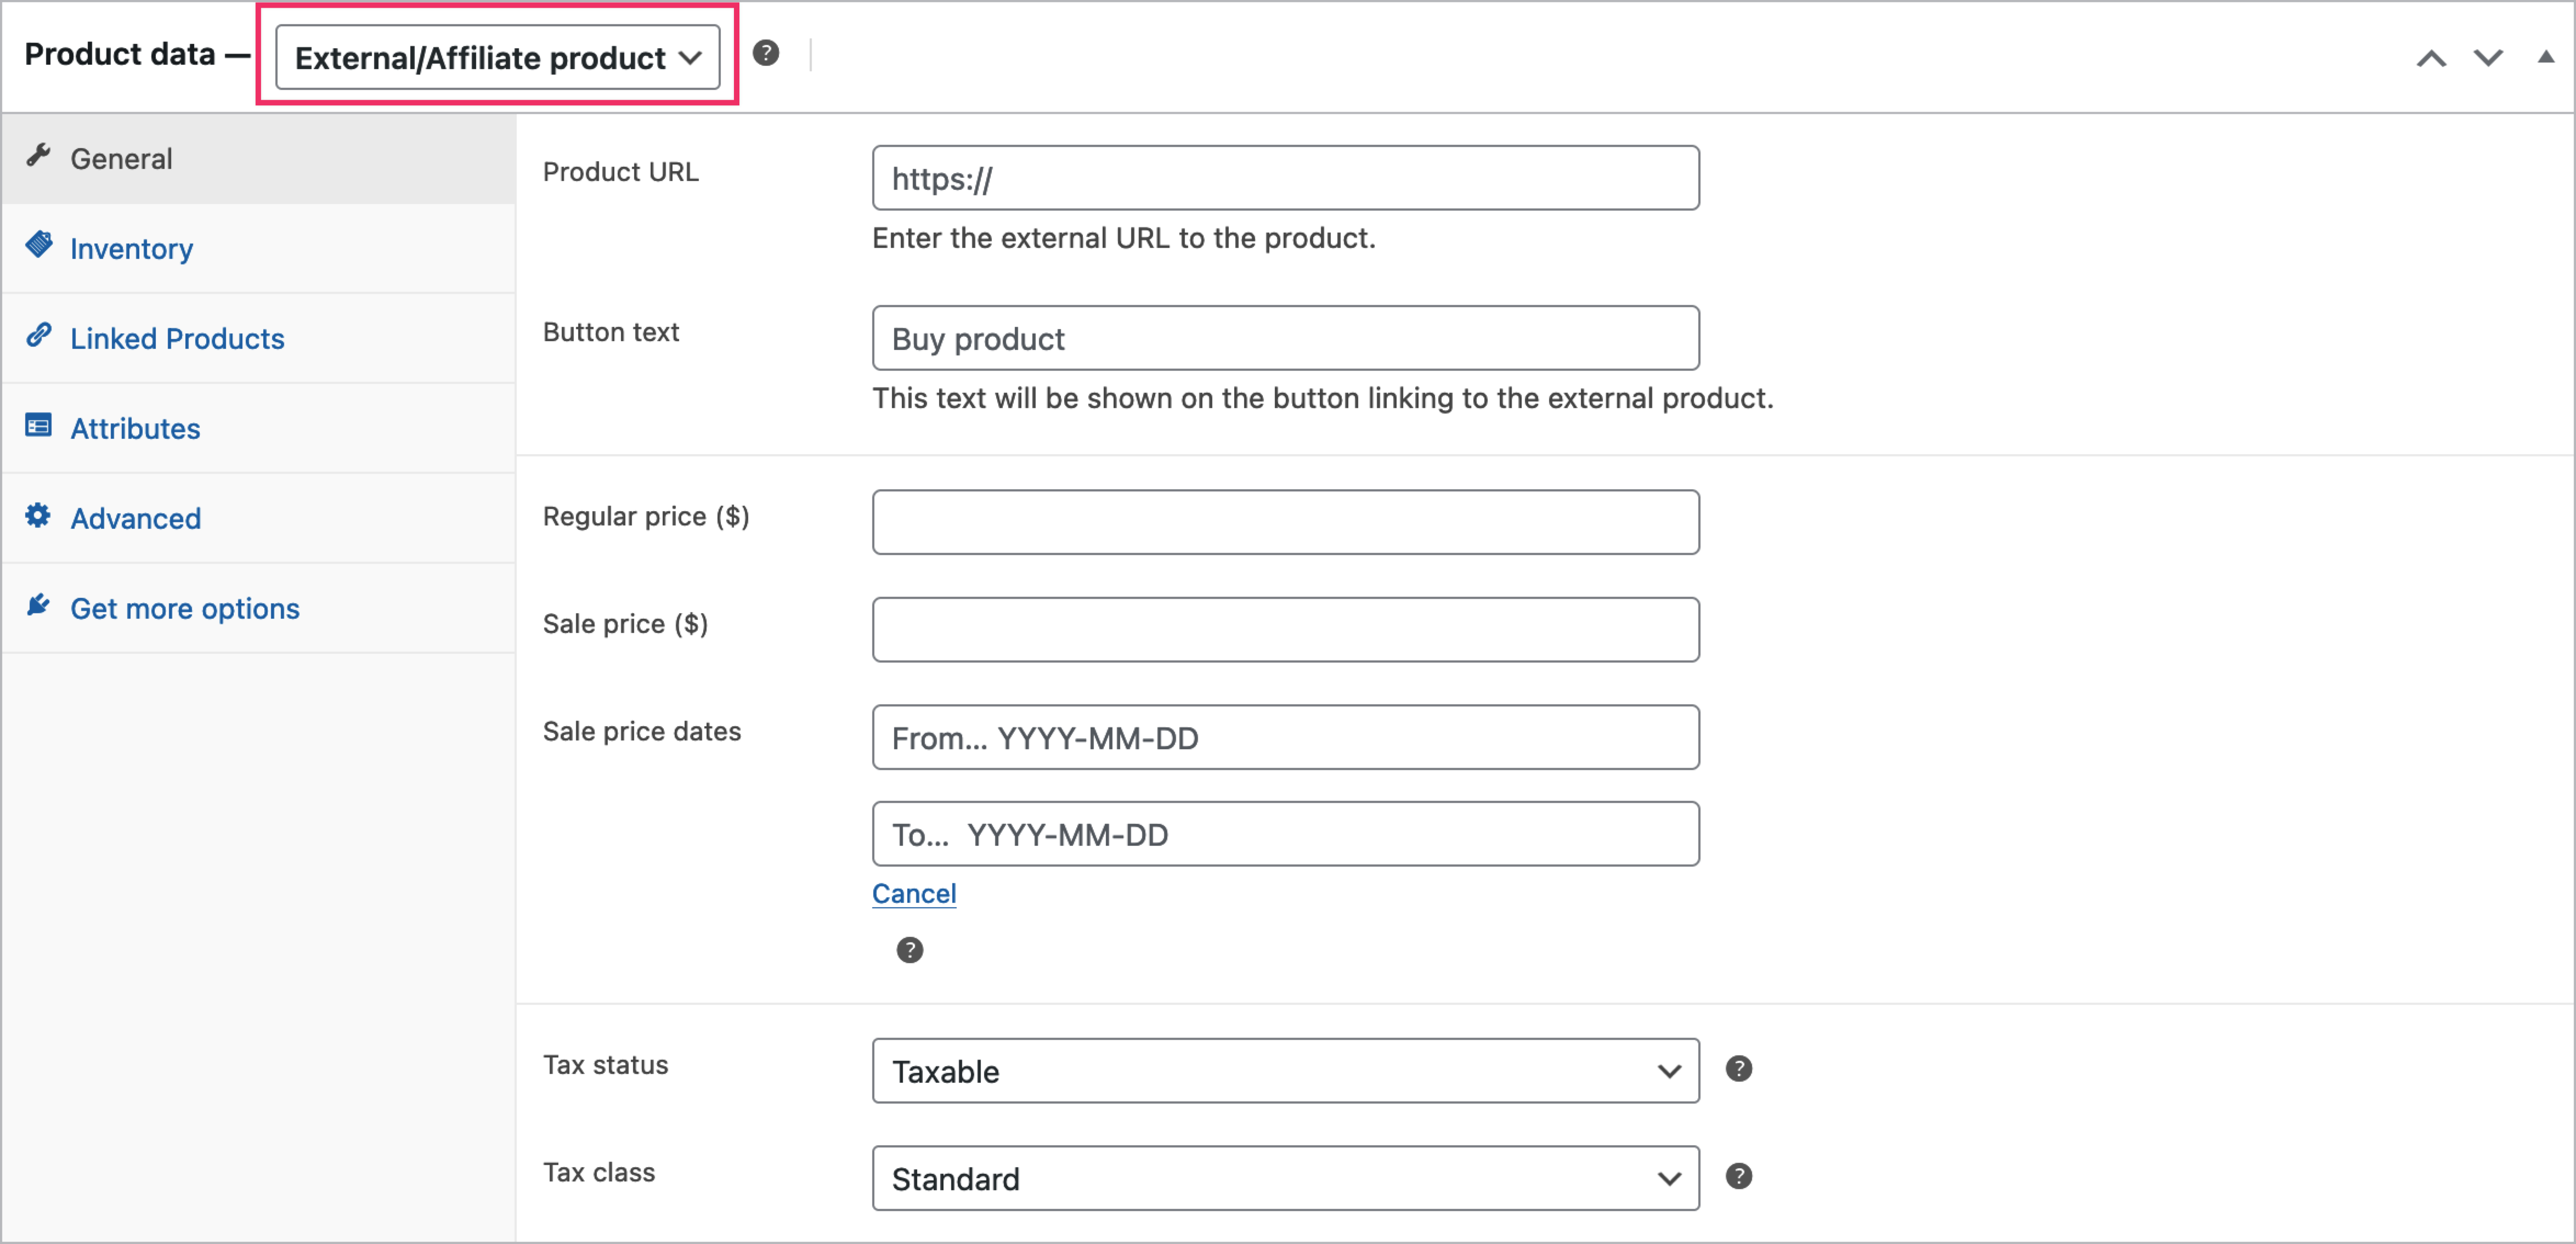
External/Affiliate product type also has these additional settings:
- Product URL – customers can buy the product at this external URL.
- Button text – The button that links to the external product will display the text you enter here.
Inventory section
The Inventory section allows you to manage stock settings related to an individual product and override some of the site-wide settings (configured under Products > Inventory > Manage stock).
Grouped and External/Affiliate show only the SKU option, while the Single product type includes all the options. The Variable type shows all options unless otherwise stated.
- SKU (optional) – the stock-keeping unit (SKU) is a unique reference that identifies individual items. It accepts alphanumeric values and some special characters explained in more detail here.
The stock-keeping unit (SKU) is a unique reference assigned to a product to improve searchability and keep track of inventory. The SKU field accepts up to 255 characters, including alphanumeric values and special characters. It most commonly consists of alpha numerals and a dash, e.g. SKU-501-RED.
The input is validated by the WordPress function santize_text_field, which strips out HTML, invalid UTF characters, and octets. An octet is defined as % followed by two characters with a value in the range of a-f or 0-9).
- Stock management – Visible only if you enable Manage stock under Products > Inventory.
- If you don’t check Stock management, the product’s stock status relies on the next setting, Stock status. Alternatively, for a Variable product, it uses the variation-level setting.
- If you check Stock management, it uses the Quantity setting below.
- Stock status – It becomes visible if you don’t check Stock management. Options include:
- In Stock – sales can continue indefinitely.
- Out of stock – The item is out of stock, it can’t be purchased.
- On back order – Customers can buy the product, but a notice on the single product page indicates it’s on back order, signaling a delay because it needs time to restock. As stock is not tracked, no further notices are displayed on the cart or checkout pages, in the order, or in customer emails.
- Quantity – It’s visible only when you check Stock management. Add the specific availability of an item, so WooCommerce can keep track and automatically set the item as Out of stock when depleted. On a variable product, this quantity includes all variations.
- Allow back orders? – only visible when Stock management is checked. Options include:
- Do not allow – customers cannot back-order products.
- Allow, but notify customer – allows back orders and displays a notice to inform customers. A backorder notice appears on the single product page, on the block-based cart and checkout pages, in the order, and emails sent to the customer.
- Allow – allows back orders and to customers it appears no different than an in-stock item.
- Low stock threshold – visible when Stock management is checked. The stock level at which the store manager is notified via email. By default, it displays the store-wide level, but you can override it on the product or variation level.
- Sold individually – when checked, this option allows customers to only purchase one of these items per order. Useful for items that have limited quantities. However, it does not prevent customers from making multiple orders and purchasing the item again. Please note that when the “Sold individually” setting is active, customers will not be able to adjust the quantity of an item in their cart.
Note: by default In Stock will only be displayed on the product page if a product’s Track stock quantity option is enabled under the Inventory tab. A snippet in the WooCommerce settings docs can be used to force the display of In Stock for products that are in stock, even if the quantity is not tracked.
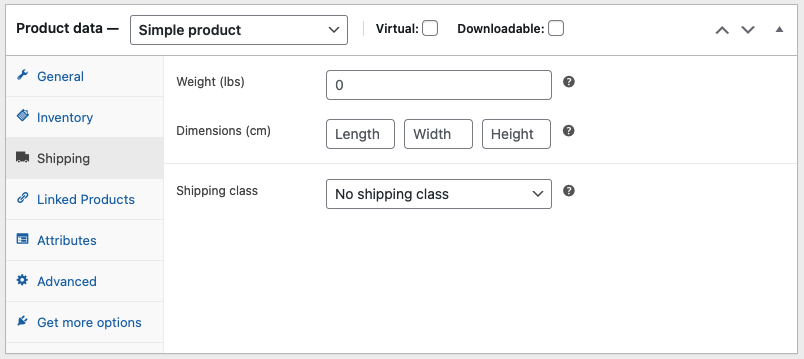
Shipping section
The Shipping section is where to add data relevant to the shipping of a product. The Shipping section only appears on Simple and Variable product types not marked as Virtual. For Variable product types, these settings apply to all variations unless you add specific settings for each variation.
- Weight – weight of the item (units can be configured under WooCommerce > Settings > Products > General).
- Dimensions – length, width, and height of the item.
- Shipping Class – Certain shipping methods use shipping classes to group similar products.
Linked Products section
In the Linked Products section, you can add products for cross-promotion as upsells (a product that is more beneficial for you or your customer) or cross-sells (a complementary product). Add products by clicking in the respective field, searching, and selecting a result. This section is available for all product types.
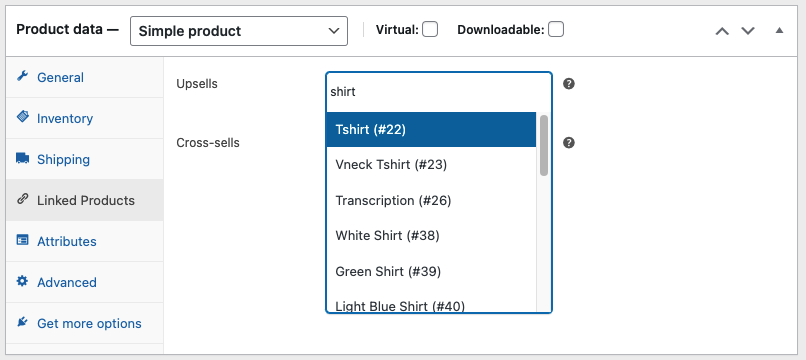
Upsells
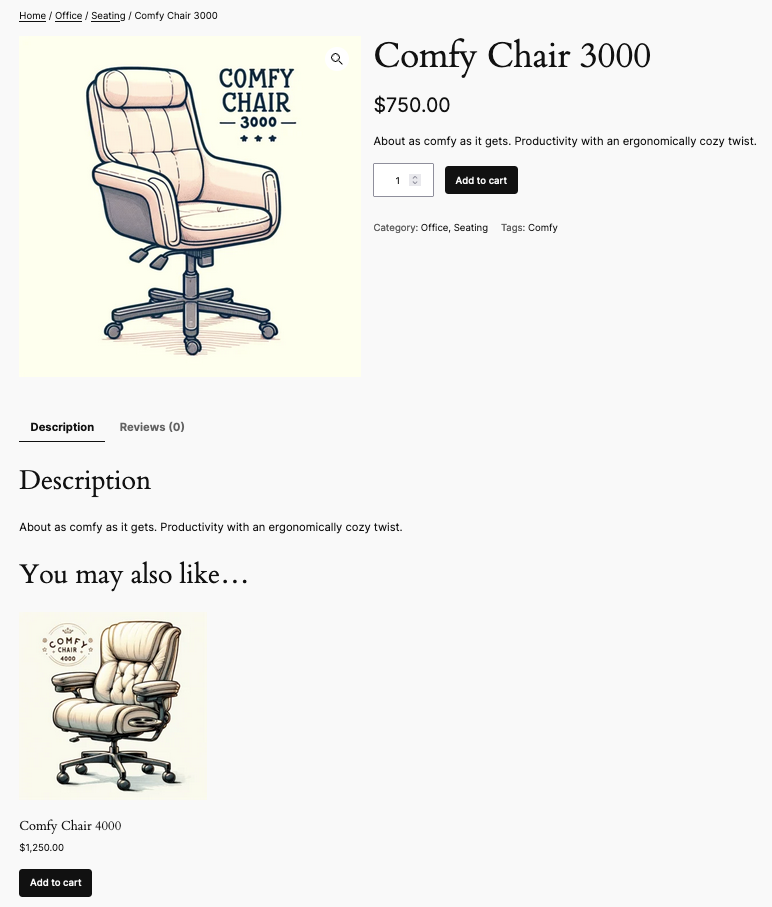
Upsells are shown to customers on the product detail page. They are products you want to encourage customers to upgrade to, based on the product they are currently viewing.
For example, if a customer looks at the Comfy Chair 3000 while browsing for office chairs, you could offer the Comfy Chair 4000 as an upsell. (It has a cup holder!) It also has better profit margins, making it a more beneficial sale for you too.
Cross-sells
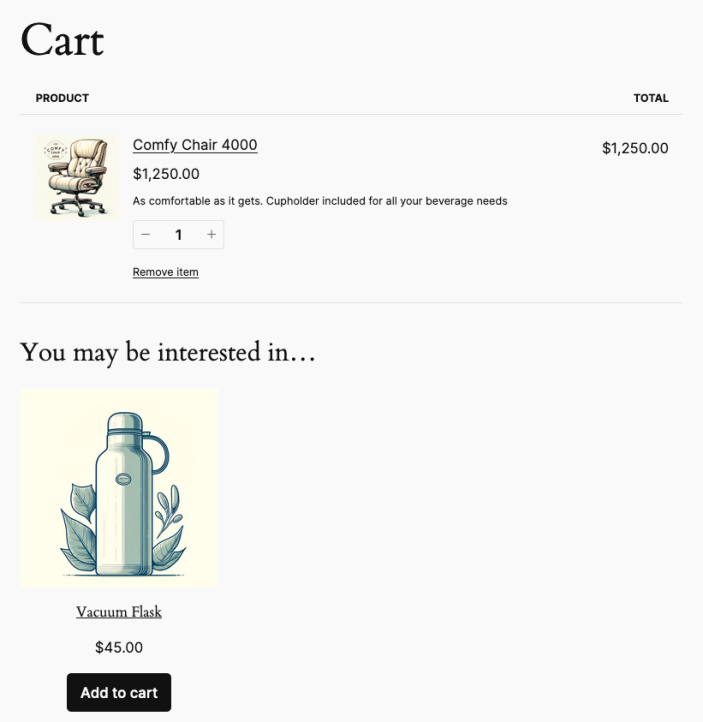
Cross-sells are shown to the customer on the cart page. They relate to products in the customer’s cart. By suggesting additional products that complement or are related to an item the customer is in the process of purchasing, you can boost your average order total. This could include accessories or related products that enhance the main product’s value.
To extend our above example, if the customer opted to purchase the Comfy Chair 4000 for its cup holder, we suspect they value having a drink nearby. Based on this, we can present a vacuum flask as a cross-sell as it’s custom-made for the chair’s cup holder — the perfect complement.
Attributes section
↑ Back to topThe Attributes section is for adding structured details to a product. All default product types show this section from where to add either pre-configured Global attributes (see Managing Product Categories, Tags and Attributes) or new attributes (which would be available to the particular product only).
- Add new – It adds a New Attribute section to enter attributes for this product only, or you can choose an existing Global attribute from the “Add existing” dropdown instead.
- Add existing – a dropdown populated by the Global attributes configured under Products > Attributes.
- New attribute
- Name – the name of an attribute, e.g. Color.
- Value(s) – the values of the attributes, e.g. Red, Blue, Yellow.
- Visible on the product page – if checked, attributes appear in the Additional Information section of the single product page (visibility depends on the design of your theme or page builder).
- Used for variations – only applicable to Variable product types. Checking this box makes the attribute available for use in the Variations section of a Variable product.
Variations section
The Variations section enables you to create variations for a Variable product. Learn more about about adding variation data.
Advanced section
The Advanced section contains the following settings:
- Purchase note – only available for Simple and Variable products. An optional note appears below the product on the order confirmation screen and in order-related emails.
- Menu order – custom ordering position for this item. When displaying products in the shop, WooCommerce outputs products from lowest to highest menu order. Products that have the same menu order are output alphabetically. When you use other sorting methods, this setting becomes secondary. (e.g., when sorting by popularity)
- Enable Reviews – enable/disable customer reviews for this item. Learn more about managing reviews.
- Available for POS – Controls whether the product should be available in the Point of Sale. This setting was introduced in WooCommerce 10.5 and is only visible when Point of Sale is enabled under WooCommerce > Settings > Advanced > Features.
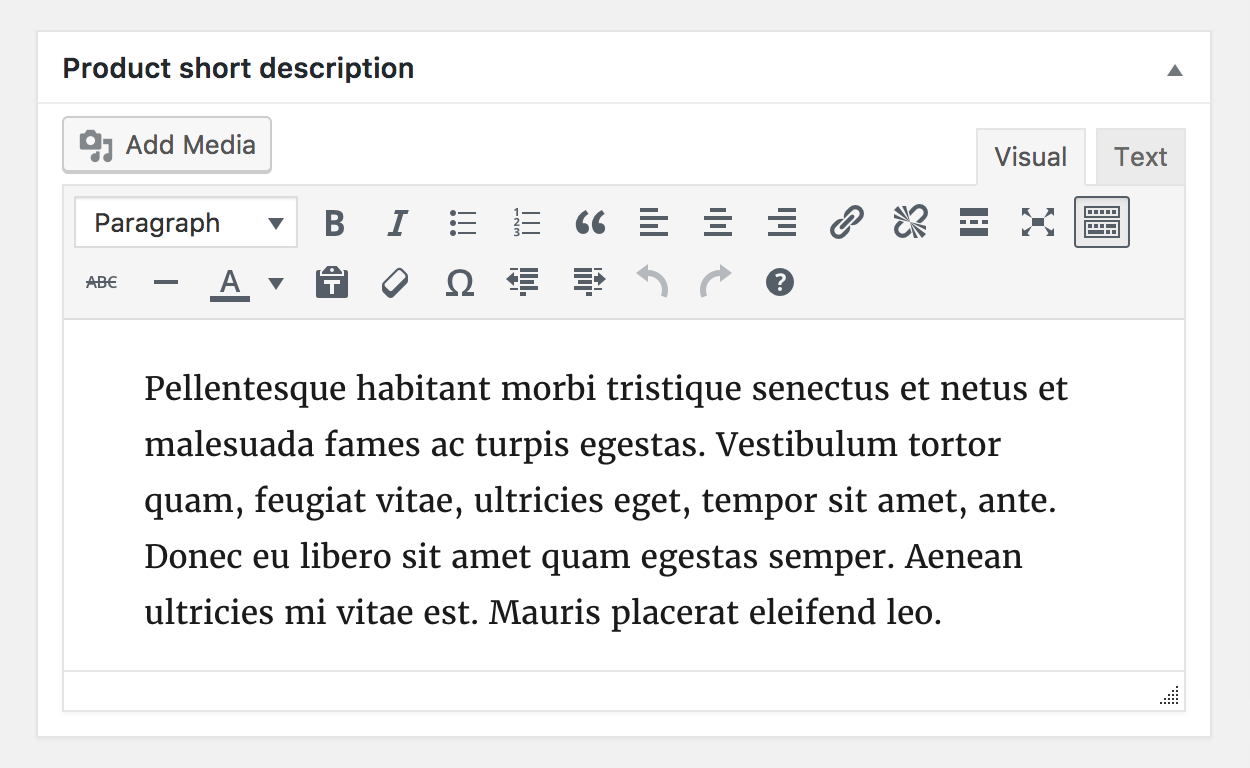
Product short description
↑ Back to topThe product short description is a succinct summary of the long description. This typically appears next to product imagery on product listing pages; you can embed videos here as well.
Publish: product and catalog visibility
↑ Back to topThe Publish panel indicates the product’s published and visibility status. You can also use it to set catalog visibility options and feature status.
- Save Draft – save changes while in draft mode. The button disappears once you publish the product.
- Preview – show a preview of the product’s current state. Especially useful to see what changes look like before saving.
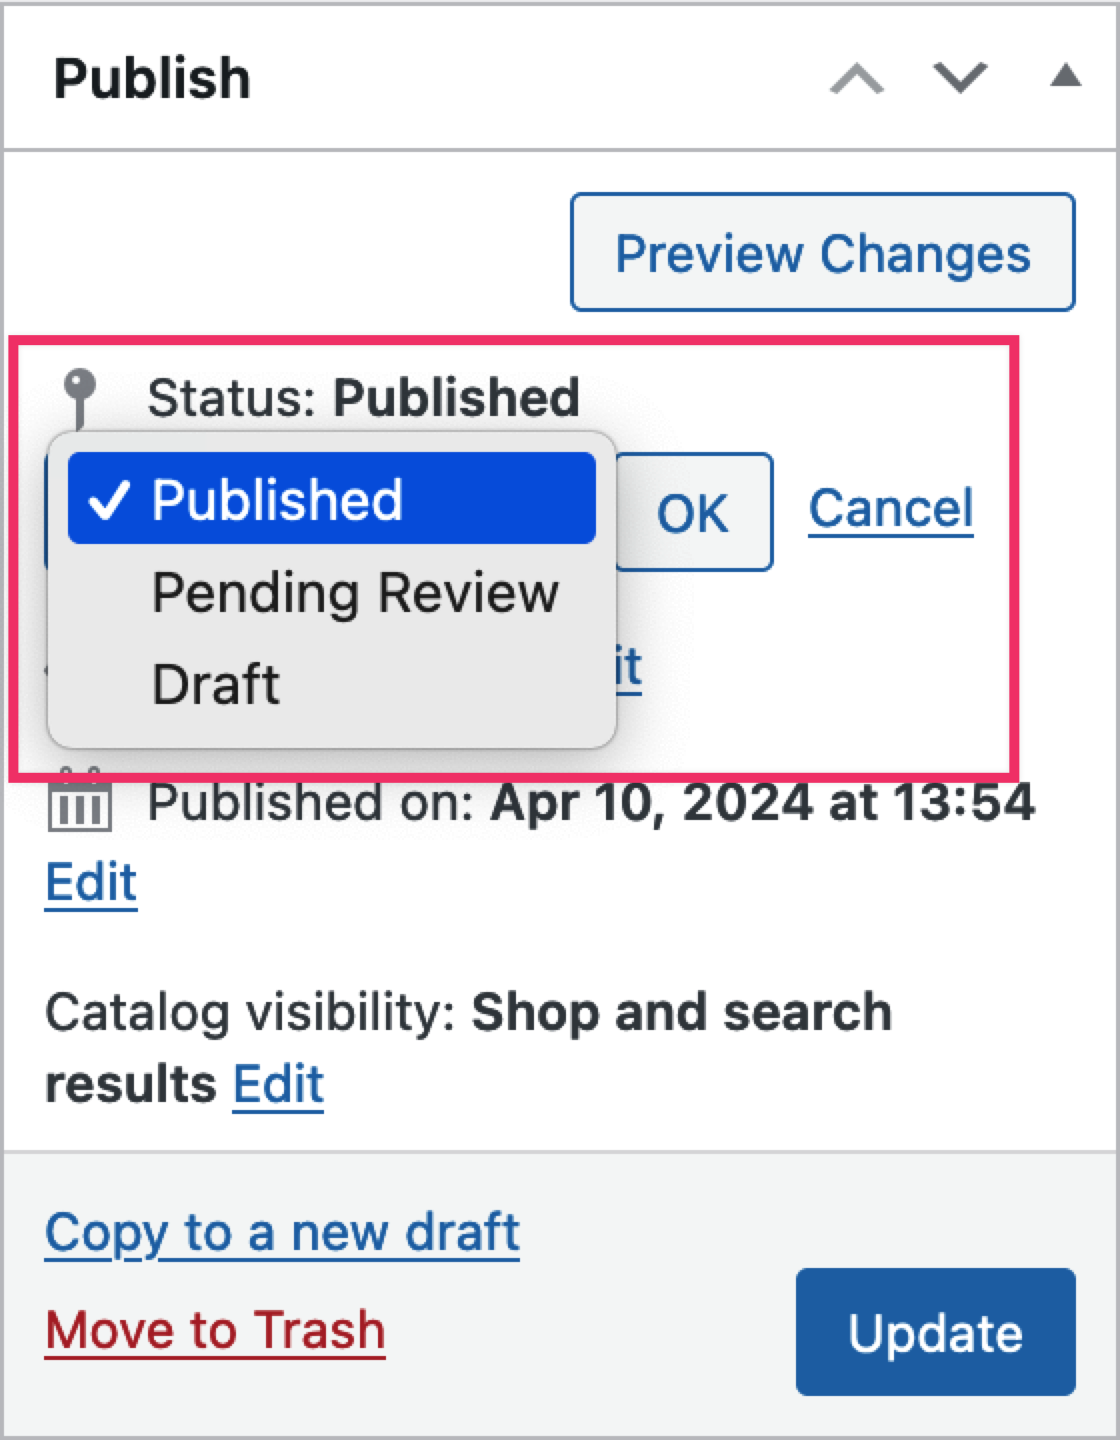
- Status – shows the published status of a product. Includes the following options:
- Published – the product is accessible to customers.
- Pending review – A site admin must approve the product before it can be published, so customers can’t see it yet.
- Draft – not yet published.
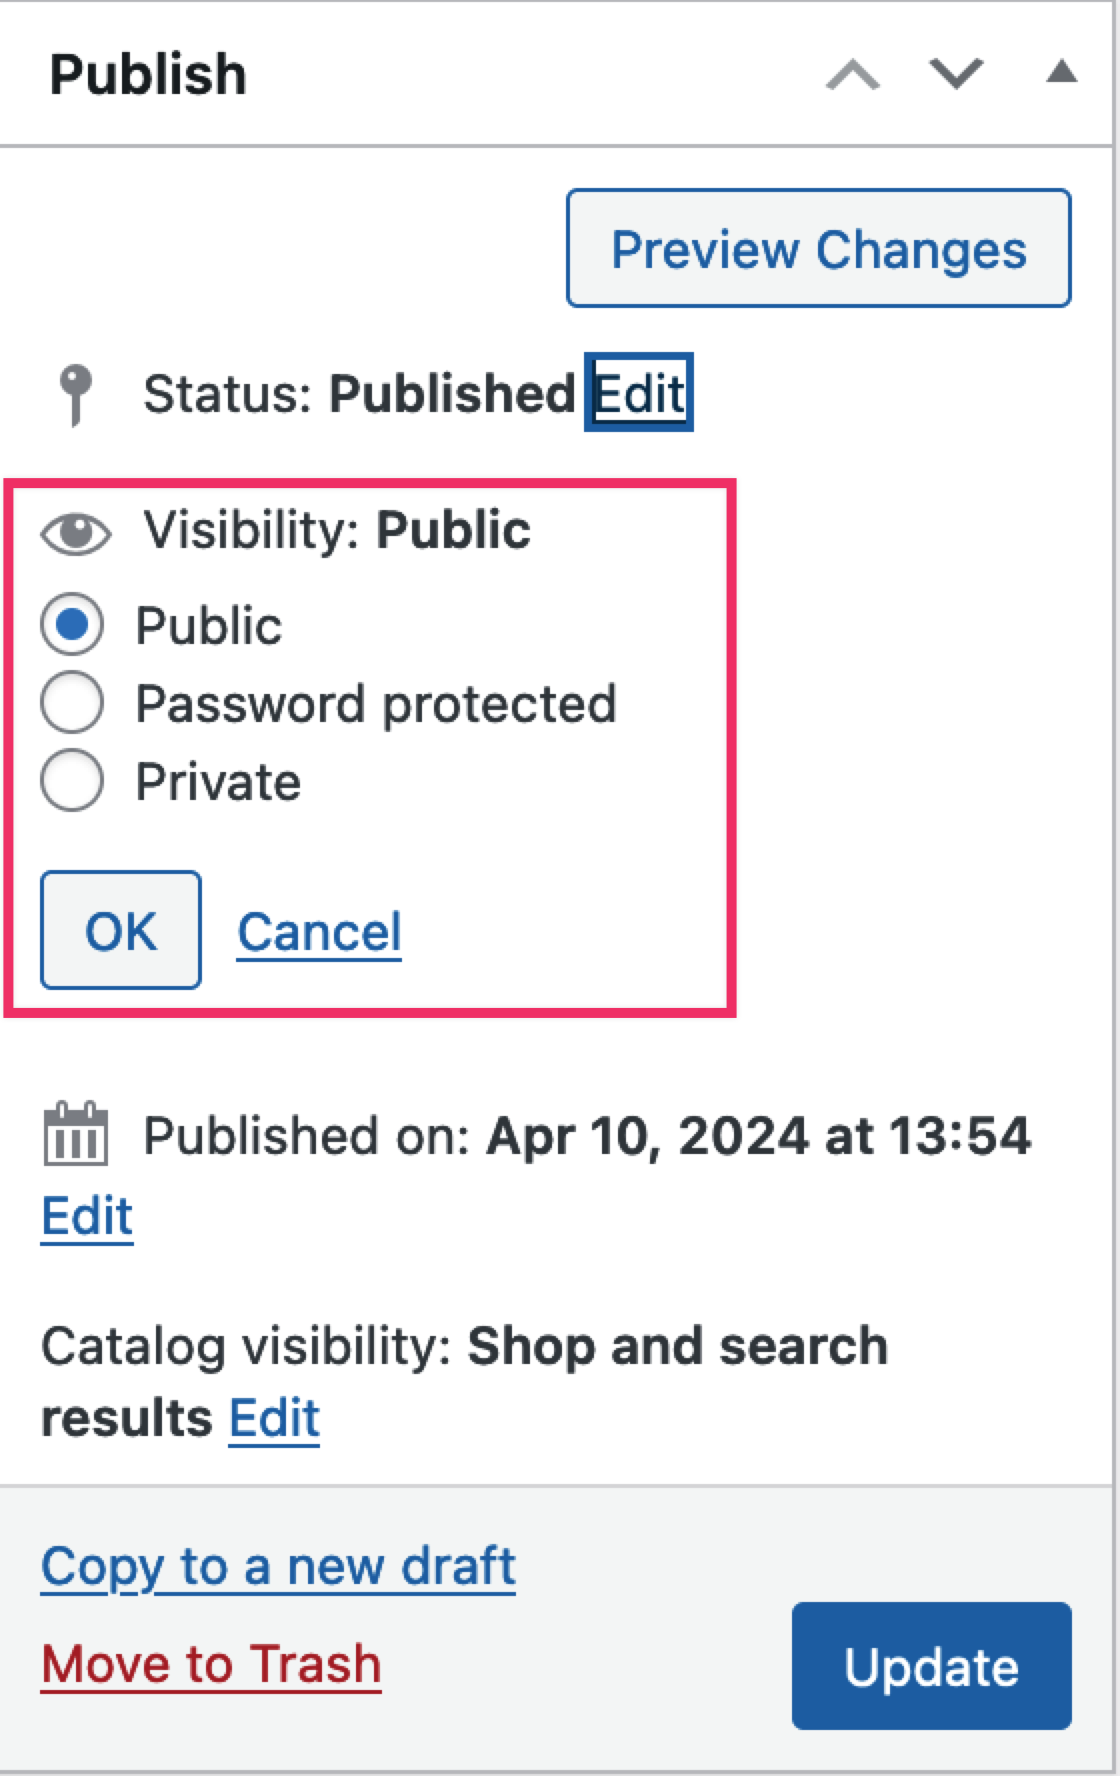
- Visibility – allows a product’s content to be conditionally visible, based on these options:
- Public – the default, means a page and all its content are accessible without restrictions.
- Password protected –The product appears in the catalog, and everyone can access the page, but they need a password to view the content. Useful to demo a product or give conditional access to a select few.
- Private – After publishing, only site Admins and Editors can view the product.
- Published on – After you publish the product, it shows the date and time of publication. To change these details, click the Edit link.
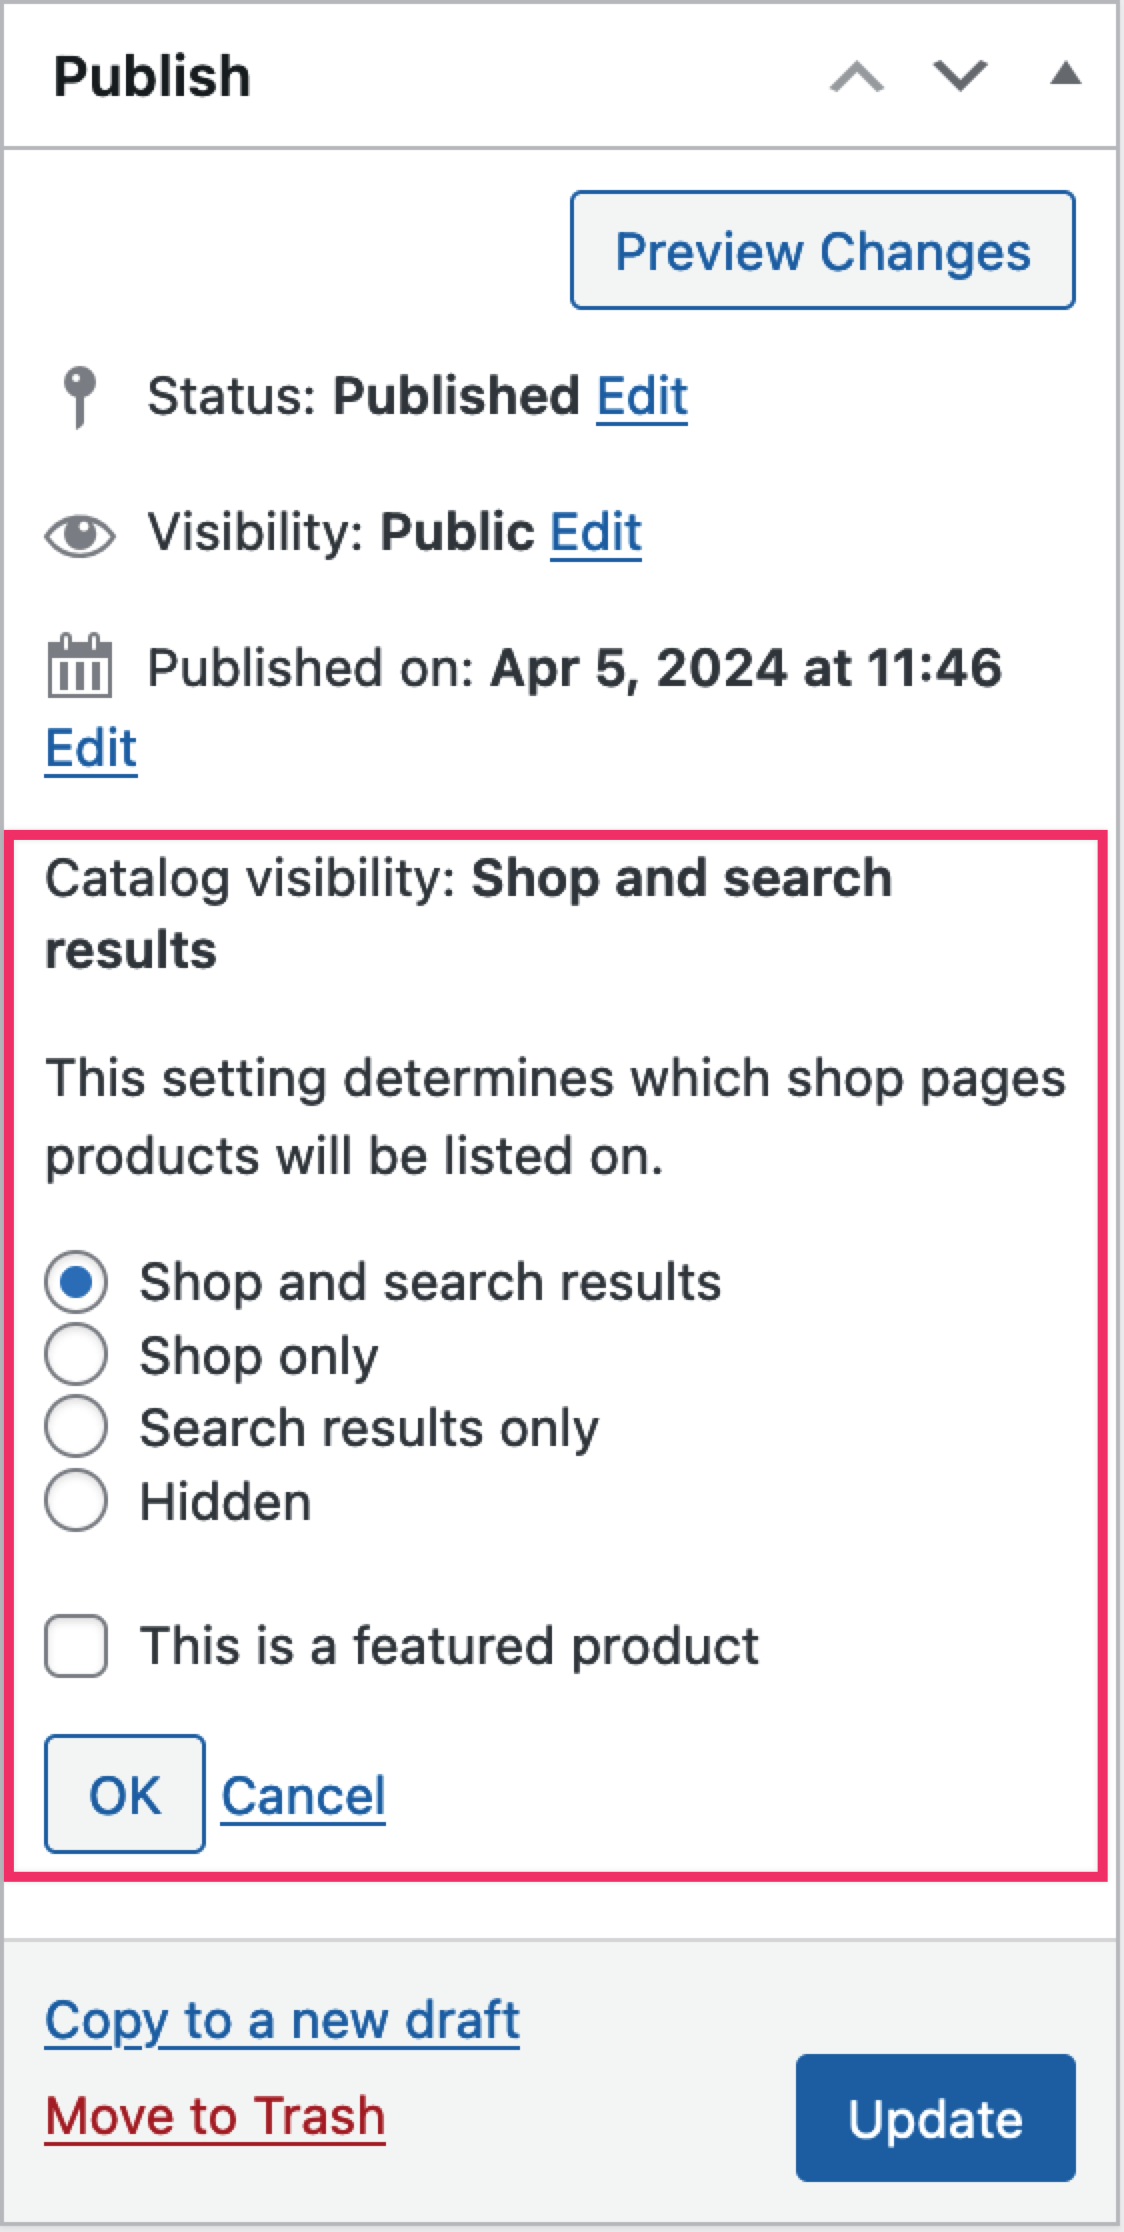
- Catalog visibility – The Catalog lists all your products displayed on pages like the Shop page, product collections, categories, and more.. You can determine where and how Published products appear via the following options:
- Shop and search – the default, visible everywhere, shop pages, category pages, and search results.
- Shop only – visible in shop pages and category pages, but not search results.
- Search only – visible in search results, but not in the shop page or category pages.
- Hidden – only visible on the single product page, and nowhere else.
- This is a featured product – checking this option gives prominence to the product for promotions across various sections of the shop that promote featured products. It’s equivalent to clicking the star icon displayed next to the product in the Product list view.
- Copy to a new draft – Clicking the button copies the product and all its settings as a new product, adding “(Copy)” to the Product name. Useful when adding products with similar settings.
- Publish/Update button – While the product is in Draft or Pending review, the button displays as Publish (so use the Save Draft button to save changes). After you publish the product, the button changes to Update.
Product image and product gallery
↑ Back to topAdding a product image shows prospective customers what they’re purchasing. It builds customer confidence, makes the product offer visually appealing, and adds an element that search engines and social media use to enhance offsite listings as well, increasing click-through rates to your site.
Adding additional images via the product gallery multiplies that effect.
See how to add a product image and product gallery.
Product categories
↑ Back to topProduct categories and product tags are specific to products but work in much the same way as categories and tags do when for posts in WordPress. The Product categories panel contains the following:
- All categories – a list of existing product categories. Check one or more categories to which you want to add this product.
- Most used – a view that shows a selection of only the most frequently used product categories.
- Add new category link – for adding new categories. Clicking it reveals:
- a new field for adding a new category name.
- Parent category – assign a parent for the new category to nest your new category inside an existing category.
- Add new category button – required to add the new category.
The panel above allows you to quickly manage a store with only a few categories. However, the Managing Product Categories, Tags, and Attributes documentation explains another way to handle a large number of categories in detail.
Product tags
↑ Back to topSimilar to categories, Product tags function much like WordPress post tags do. Type a new tag into the field provided and click the Add button. The newly added tag shows up below the field with an “x” that you can click to remove it. After you add and save tags, you can access them by clicking “Choose from the most used tags” and then selecting an option from the revealed list.
The Managing Product Categories, Tags, and Attributes documentation explains another way to manage tags in detail.
Is it possible to edit several products at the same time?
↑ Back to topYes; refer to Bulk Editing Products.
Questions and support
↑ Back to topDo you still have questions and need assistance?
This documentation is about the free, core WooCommerce plugin, for which support is provided in our community forums on WordPress.org. By searching this forum, you’ll often find that your question has been asked and answered before.
If you haven’t created a WordPress.org account to use the forums, here’s how.
- If you’re looking to extend the core functionality shown here, we recommend reviewing available extensions in the WooCommerce Marketplace.
- Need ongoing advanced support or a customization built for WooCommerce? Hire a Woo Agency Partner.
- Are you a developer building your own WooCommerce integration or extension? Check our Developer Resources.
If you weren’t able to find the information you need, please use the feedback thumbs below to let us know.