
Tax configuration is an important part of setting up a store. This guide explains how to enable and configure taxes in WooCommerce, add tax rates, and understand each available setting.
This documentation covers how to set up tax rates in WooCommerce, as well as how the platform handles taxes/VAT/GST based on these settings — not when or what to charge.
We are not tax professionals; our advice only applies to how to use our software. For advice on what — or when — to charge tax/VAT/GST etc., we recommend consulting a tax professional or accountant.
Every business is unique, and we are unable to cover all possibilities here.
Related guides
↑ Back to top- How taxes work in WooCommerce
- How to configure specific tax setups in WooCommerce
- Setting up EU VAT rates for digital products
How to enable taxes in WooCommerce
↑ Back to topBefore you can configure taxes in WooCommerce, you need to enable the Tax settings tab:
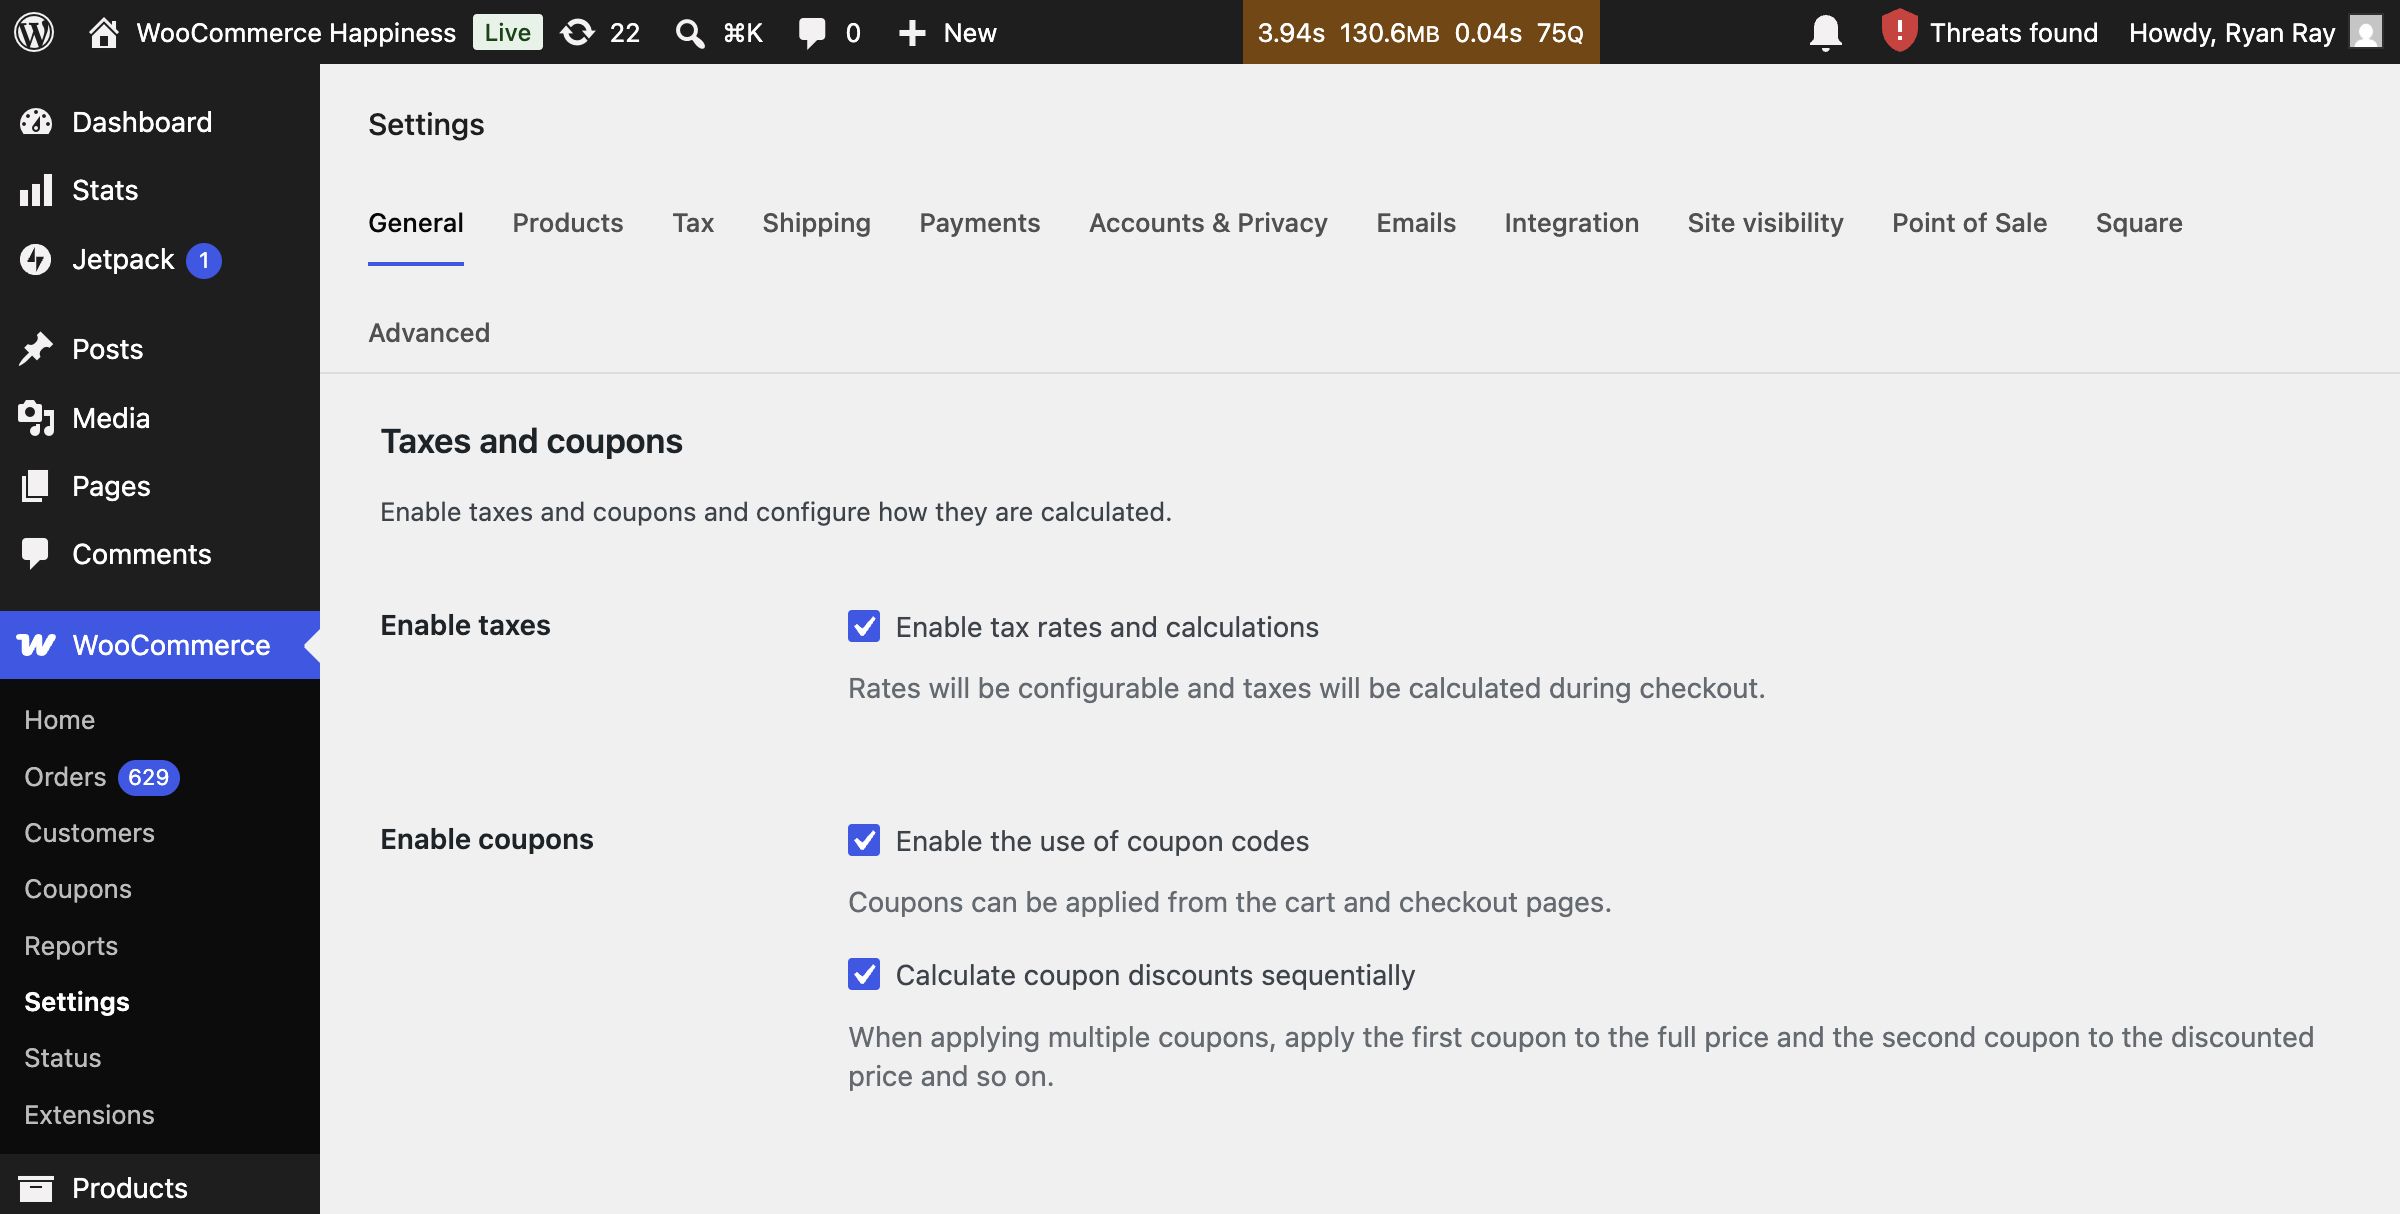
- From your WordPress dashboard, go to WooCommerce > Settings > General.
- Scroll to the Taxes and coupons section and select Enable tax rates and calculations.
- Scroll to the bottom of the page and click Save changes.
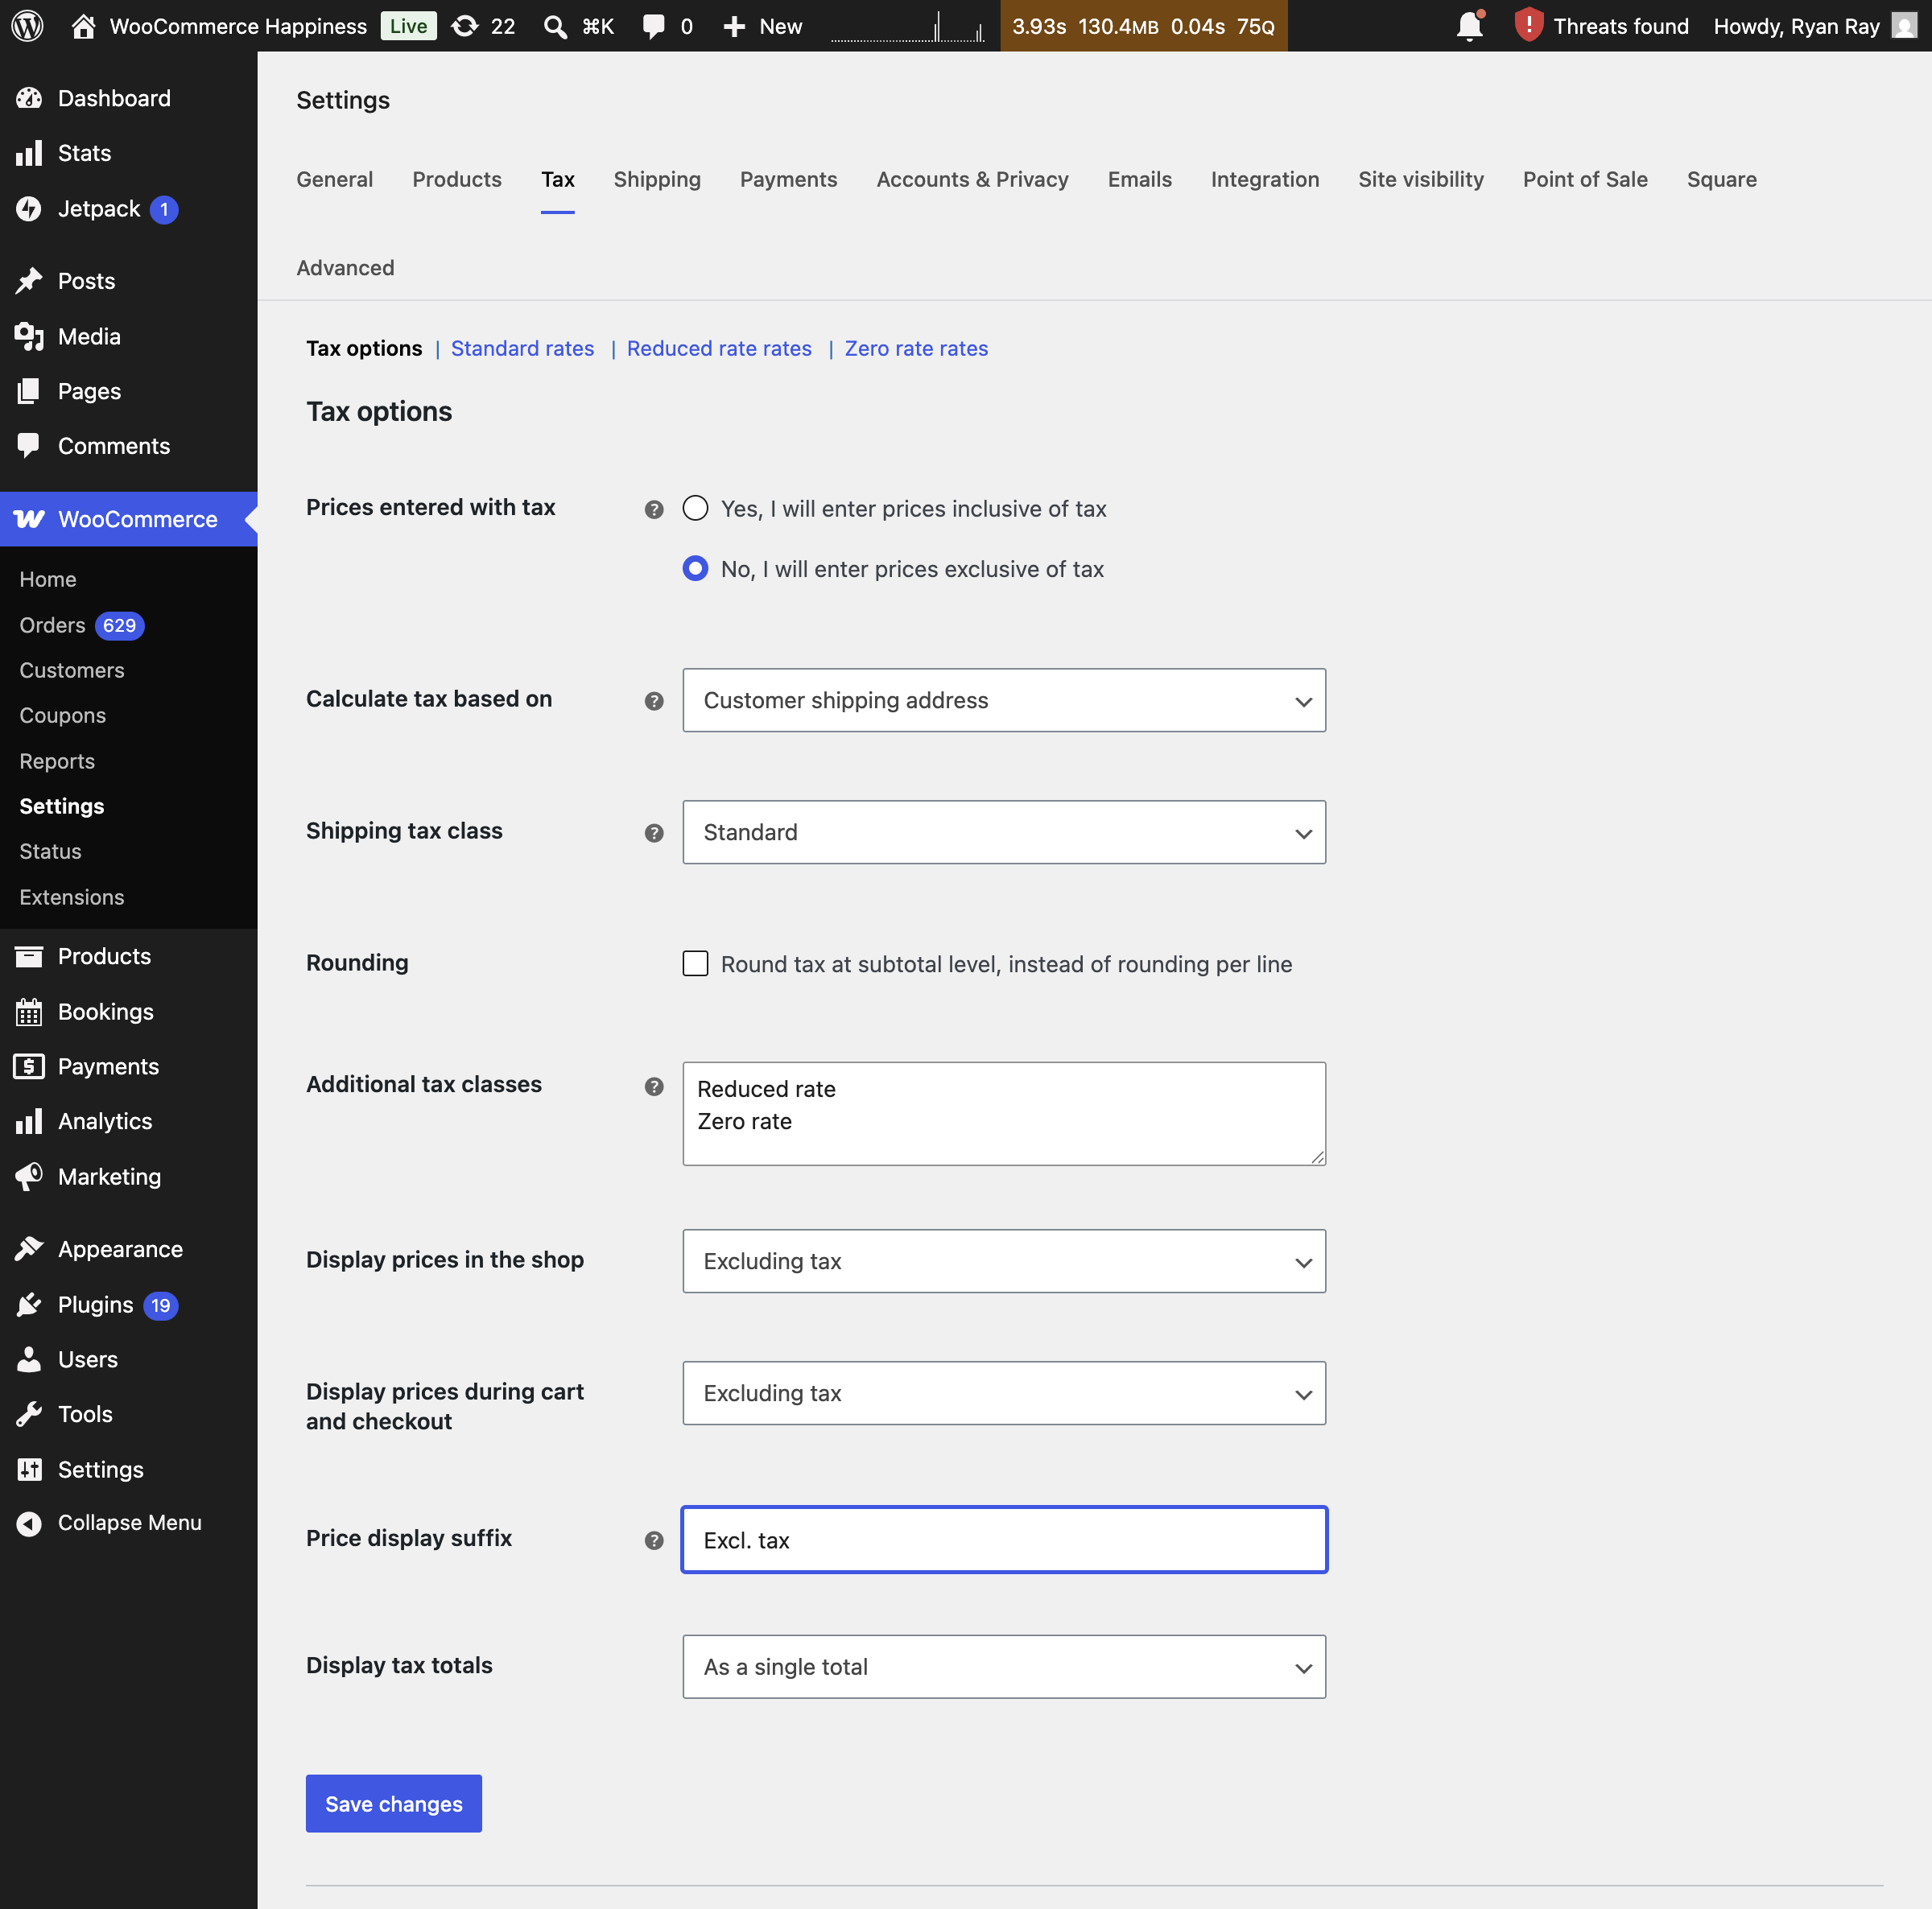
How to configure tax options in WooCommerce
↑ Back to topOnce enabled, access the WooCommerce tax settings by going to WooCommerce > Settings > Tax.
Your choices depend on the tax jurisdiction where your store operates. Check with a qualified tax professional to confirm that your configuration is appropriate. Continue below to learn about each setting, or review our guide to configuring common tax scenarios.
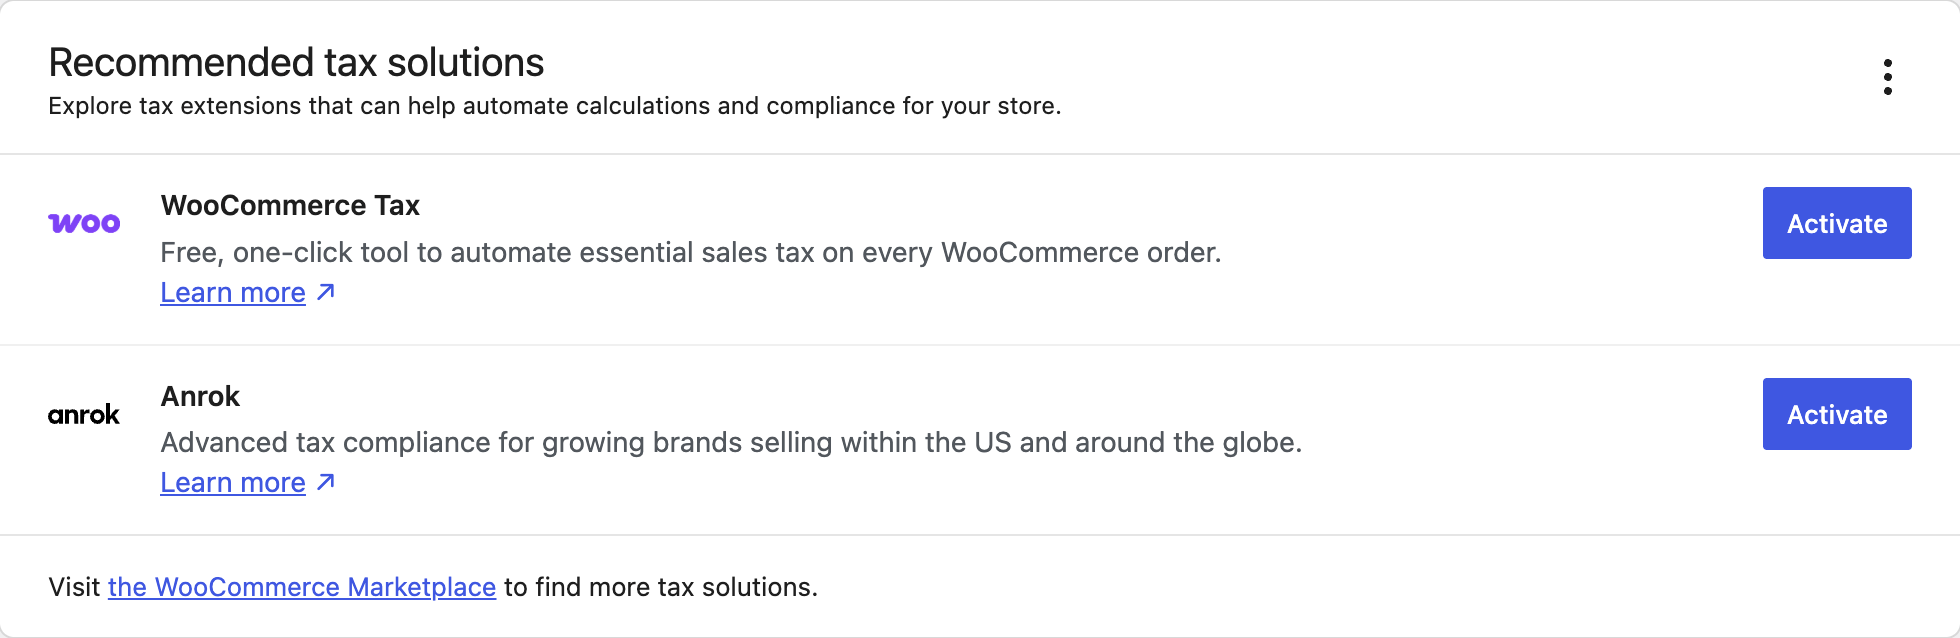
Recommended tax solutions
↑ Back to topOn the main Tax settings screen, the Recommended tax solutions panel can help you discover tax extensions for your store. It does not appear on tax-rate subtabs such as Standard rates.
Recommendations vary by your store country and by extensions that are already installed or active. Depending on your current setup, a solution may show an Install, Activate, or Active button. The panel appears only when WooCommerce can load extension suggestions and your account has permission to install or activate plugins.
Tax extensions can help automate calculation or compliance workflows, but these recommendations do not determine your legal obligations. Confirm your responsibilities with a qualified tax professional and configure any chosen extension for the jurisdictions where you are required to collect tax.
Prices entered with tax
↑ Back to topThe Prices entered with tax option determines how you enter product prices.
There are two options to choose from:
- Yes, I will enter prices inclusive of tax: enter all product prices including your store’s base tax rate.
- No, I will enter prices exclusive of tax: you should then enter product prices without tax.
For example, suppose you want a product to cost £9.99 including tax. Your store is in the UK, where the applicable rate is 20%.
- If you select Yes, I will enter prices inclusive of tax, enter £9.99 as the total product price. WooCommerce works backward from that total and calculates that it includes a base product price of £8.325 and £1.665 in tax. The displayed amounts are rounded automatically.
- If you select No, I will enter prices exclusive of tax but want the same total price, enter £8.325 as the product price. WooCommerce adds 20% tax and displays the same rounded total of £9.99.
Learn more about how taxes are calculated in WooCommerce, and refer to the rounding section below to understand how other settings can affect the result.
Calculate tax based on
↑ Back to topUse the Calculate tax based on setting to choose which address WooCommerce uses for tax calculations.
Choose from three options:
- Customer shipping address (default)
- Customer billing address
- Shop base address
The first two options require customers to enter the corresponding address.
If you select Shop base address, taxes are always calculated based on your store’s location, regardless of the customer’s address.
Shipping tax class
↑ Back to topThe Shipping tax class setting uses your store’s tax classes to determine how WooCommerce calculates tax on shipping costs. Each tax class in your store appears as an option.
This setting always includes the following options:
- Shipping tax class based on cart items (default)
- Standard
- Reduced rate
- Zero rate
The default is Shipping tax class based on cart items. In this case, shipping tax is inherited from the tax class assigned to the products being shipped.
For example, if a product such as baby clothing uses a reduced tax class, the rate from that class also applies to the shipping charge. If your jurisdiction treats shipping differently, select a specific tax class for shipping instead.
In cases where there are multiple products with different tax rates in the order, the shipping tax is applied as follows:
- If an order contains a product in the Standard rate tax class, that class is used for shipping, even if it is not the highest rate.
- If the order does not contain a product in the Standard rate tax class, WooCommerce uses the first rate found in the Additional tax classes list.
If your products do not use the Standard rate tax class and the highest rate from another class must apply to shipping, list the highest rate first under Additional tax classes. See a detailed example.
Rounding
↑ Back to topSelect Round tax at subtotal level, instead of rounding per line to calculate rounding at the subtotal level instead of on a per-line basis.
In certain circumstances, this can lead to slight variances. Consult a qualified tax professional to confirm which rounding method is appropriate for your store.
Off-by-one rounding errors
Off-by-one rounding errors are not affected by this setting. These can result if a series of three other tax display settings are not all set to either include or exclude tax.
The series consists of:
- Prices entered with tax
- Display prices in the shop
- Display prices during cart and checkout
When these settings are mixed, a calculated price can have more decimal precision than the store displays, which can cause unexpected rounding.
If these three settings do not use the same tax display method, WooCommerce displays a warning that the settings conflict.
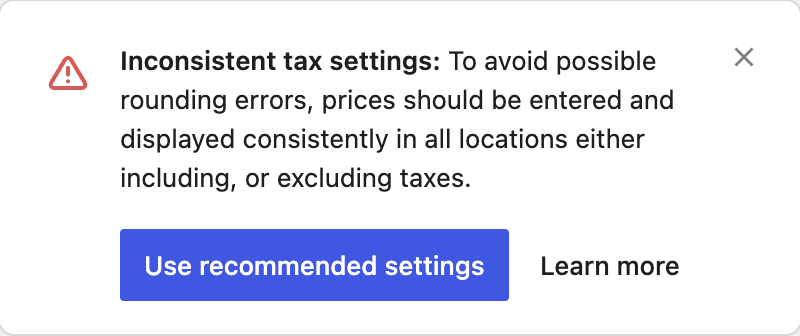
Click Use recommended settings to align all three settings with Prices entered with tax.
Additional tax classes
↑ Back to topThe default Standard rates class is sufficient for most stores. If you sell products that require different tax classes, add one class per line. You can add or remove other classes as needed, but you cannot remove Standard rates.
After clicking Save changes, your added tax classes appear as sub-navigation links near the top of the page. Select a tax class to add and manage its tax rates.
Display prices in the shop
↑ Back to topThe Display prices in the shop setting determines how prices are displayed in your store catalog. Choose Including tax or Excluding tax from the dropdown menu.
Refer to the rounding section to understand how other settings can affect this choice.
Display prices during cart and checkout
↑ Back to topThe Display prices during cart and checkout setting determines how prices are displayed in the cart and at checkout. Choose Including tax or Excluding tax from the dropdown menu.
Note:
If your tax table distinguishes between locations, the customer must enter an address before WooCommerce can calculate tax.
Refer to the rounding section to understand how other settings can affect this choice.
Price display suffix
↑ Back to topThe Price display suffix setting lets you add text after product prices and, optionally, show the price including or excluding tax.
You can use the following dynamic placeholders and add text around them:
{price_including_tax}{price_excluding_tax}
For example, entering Price incl. tax: {price_including_tax} displays as “Price incl. tax: $59.74” in your store. This lets you show the tax-inclusive price when your store displays prices excluding tax, or vice versa.
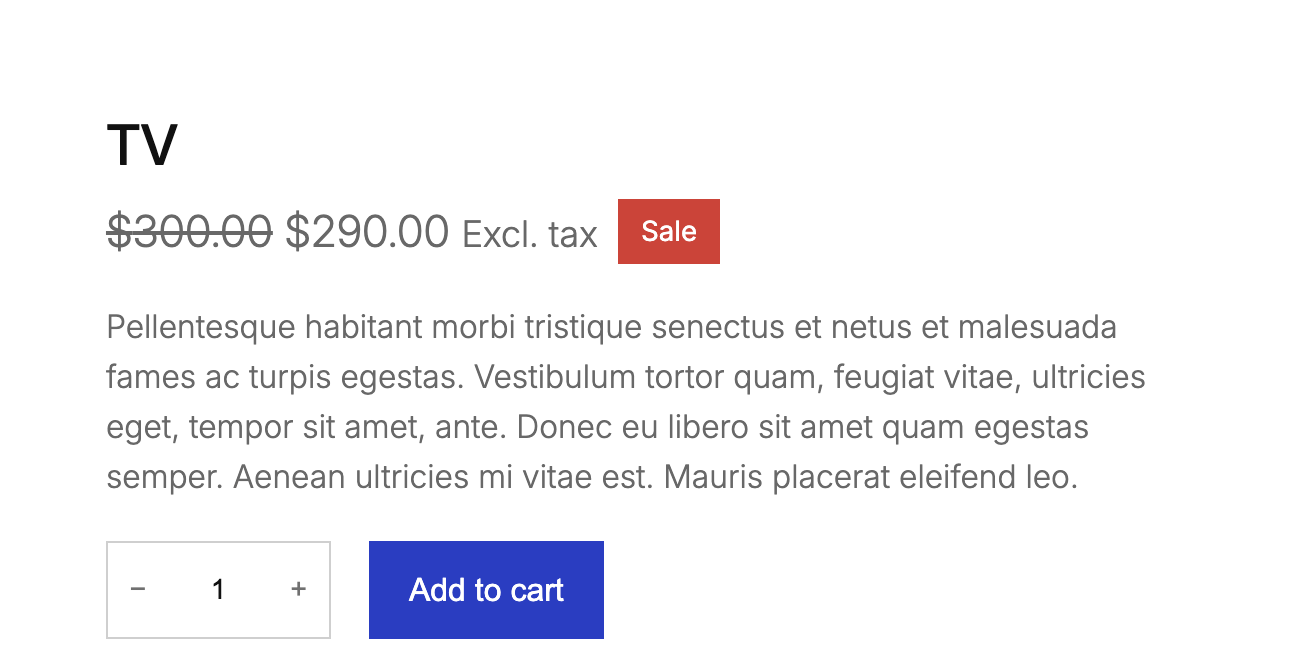
Suffixes on variable products
On a variable product, the suffix appears with the initial price range. After a shopper chooses a variation, WooCommerce updates the displayed price and keeps the suffix with the selected variation’s price.
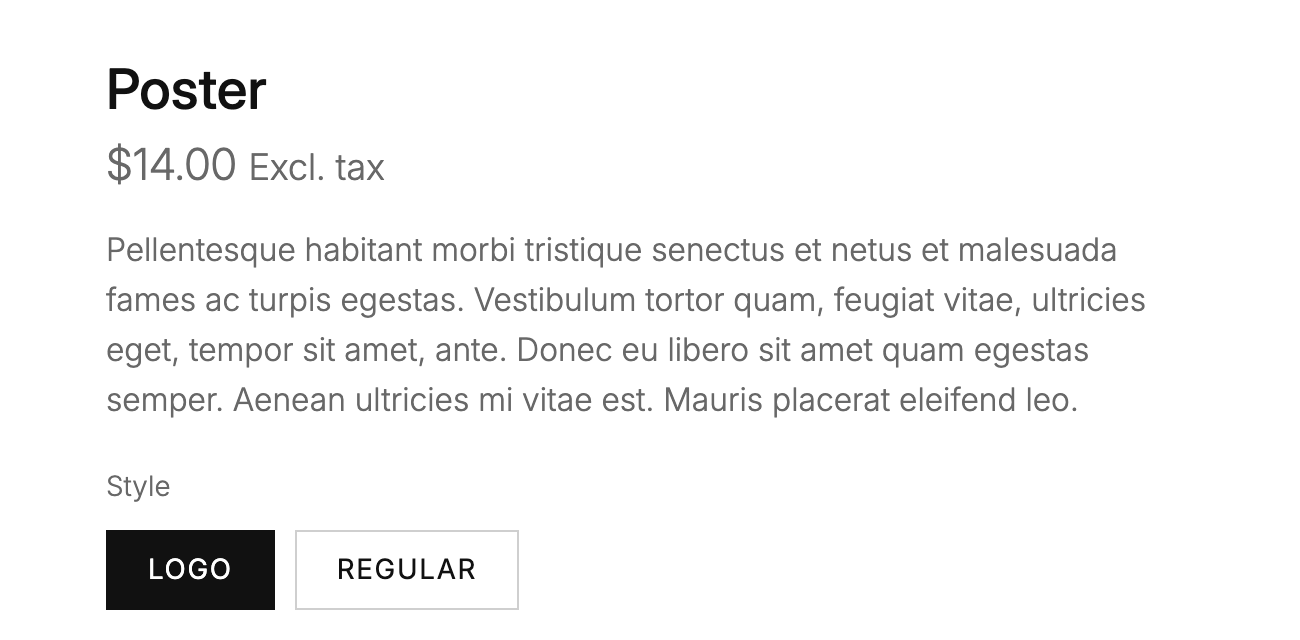
Display tax totals
↑ Back to topThe Display tax totals setting determines whether multiple taxes are displayed as one total or as an itemized list in the cart and at checkout.
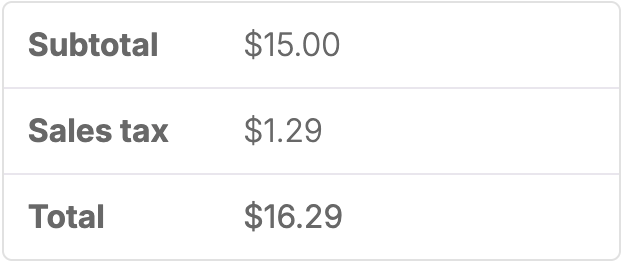
When set to Itemized, this setting displays each tax rate’s name in the cart and at checkout. This can be useful when you use one tax rate per location and give each rate a location-appropriate name. In the example below, the tax name is Sales tax.
When Display tax totals is set to As a single total, the combined amount appears under the default English label Tax.
When you change Display tax totals to Itemized, the cart and checkout display the name from the tax rate setup, such as Sales tax.
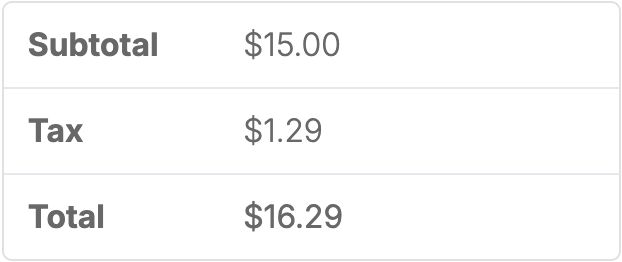
To change the default English label (Tax) without renaming individual rates, create a custom translation.
Why are tax options grayed out?
↑ Back to topIf your settings are grayed out, look for an Automated taxes setting that is set to Enable automated taxes. In this case, the WooCommerce Tax extension manages tax calculations, so most of the manual settings in this guide do not apply.
To use WooCommerce’s manual tax settings, change Automated taxes to Disable automated taxes, then click Save changes.
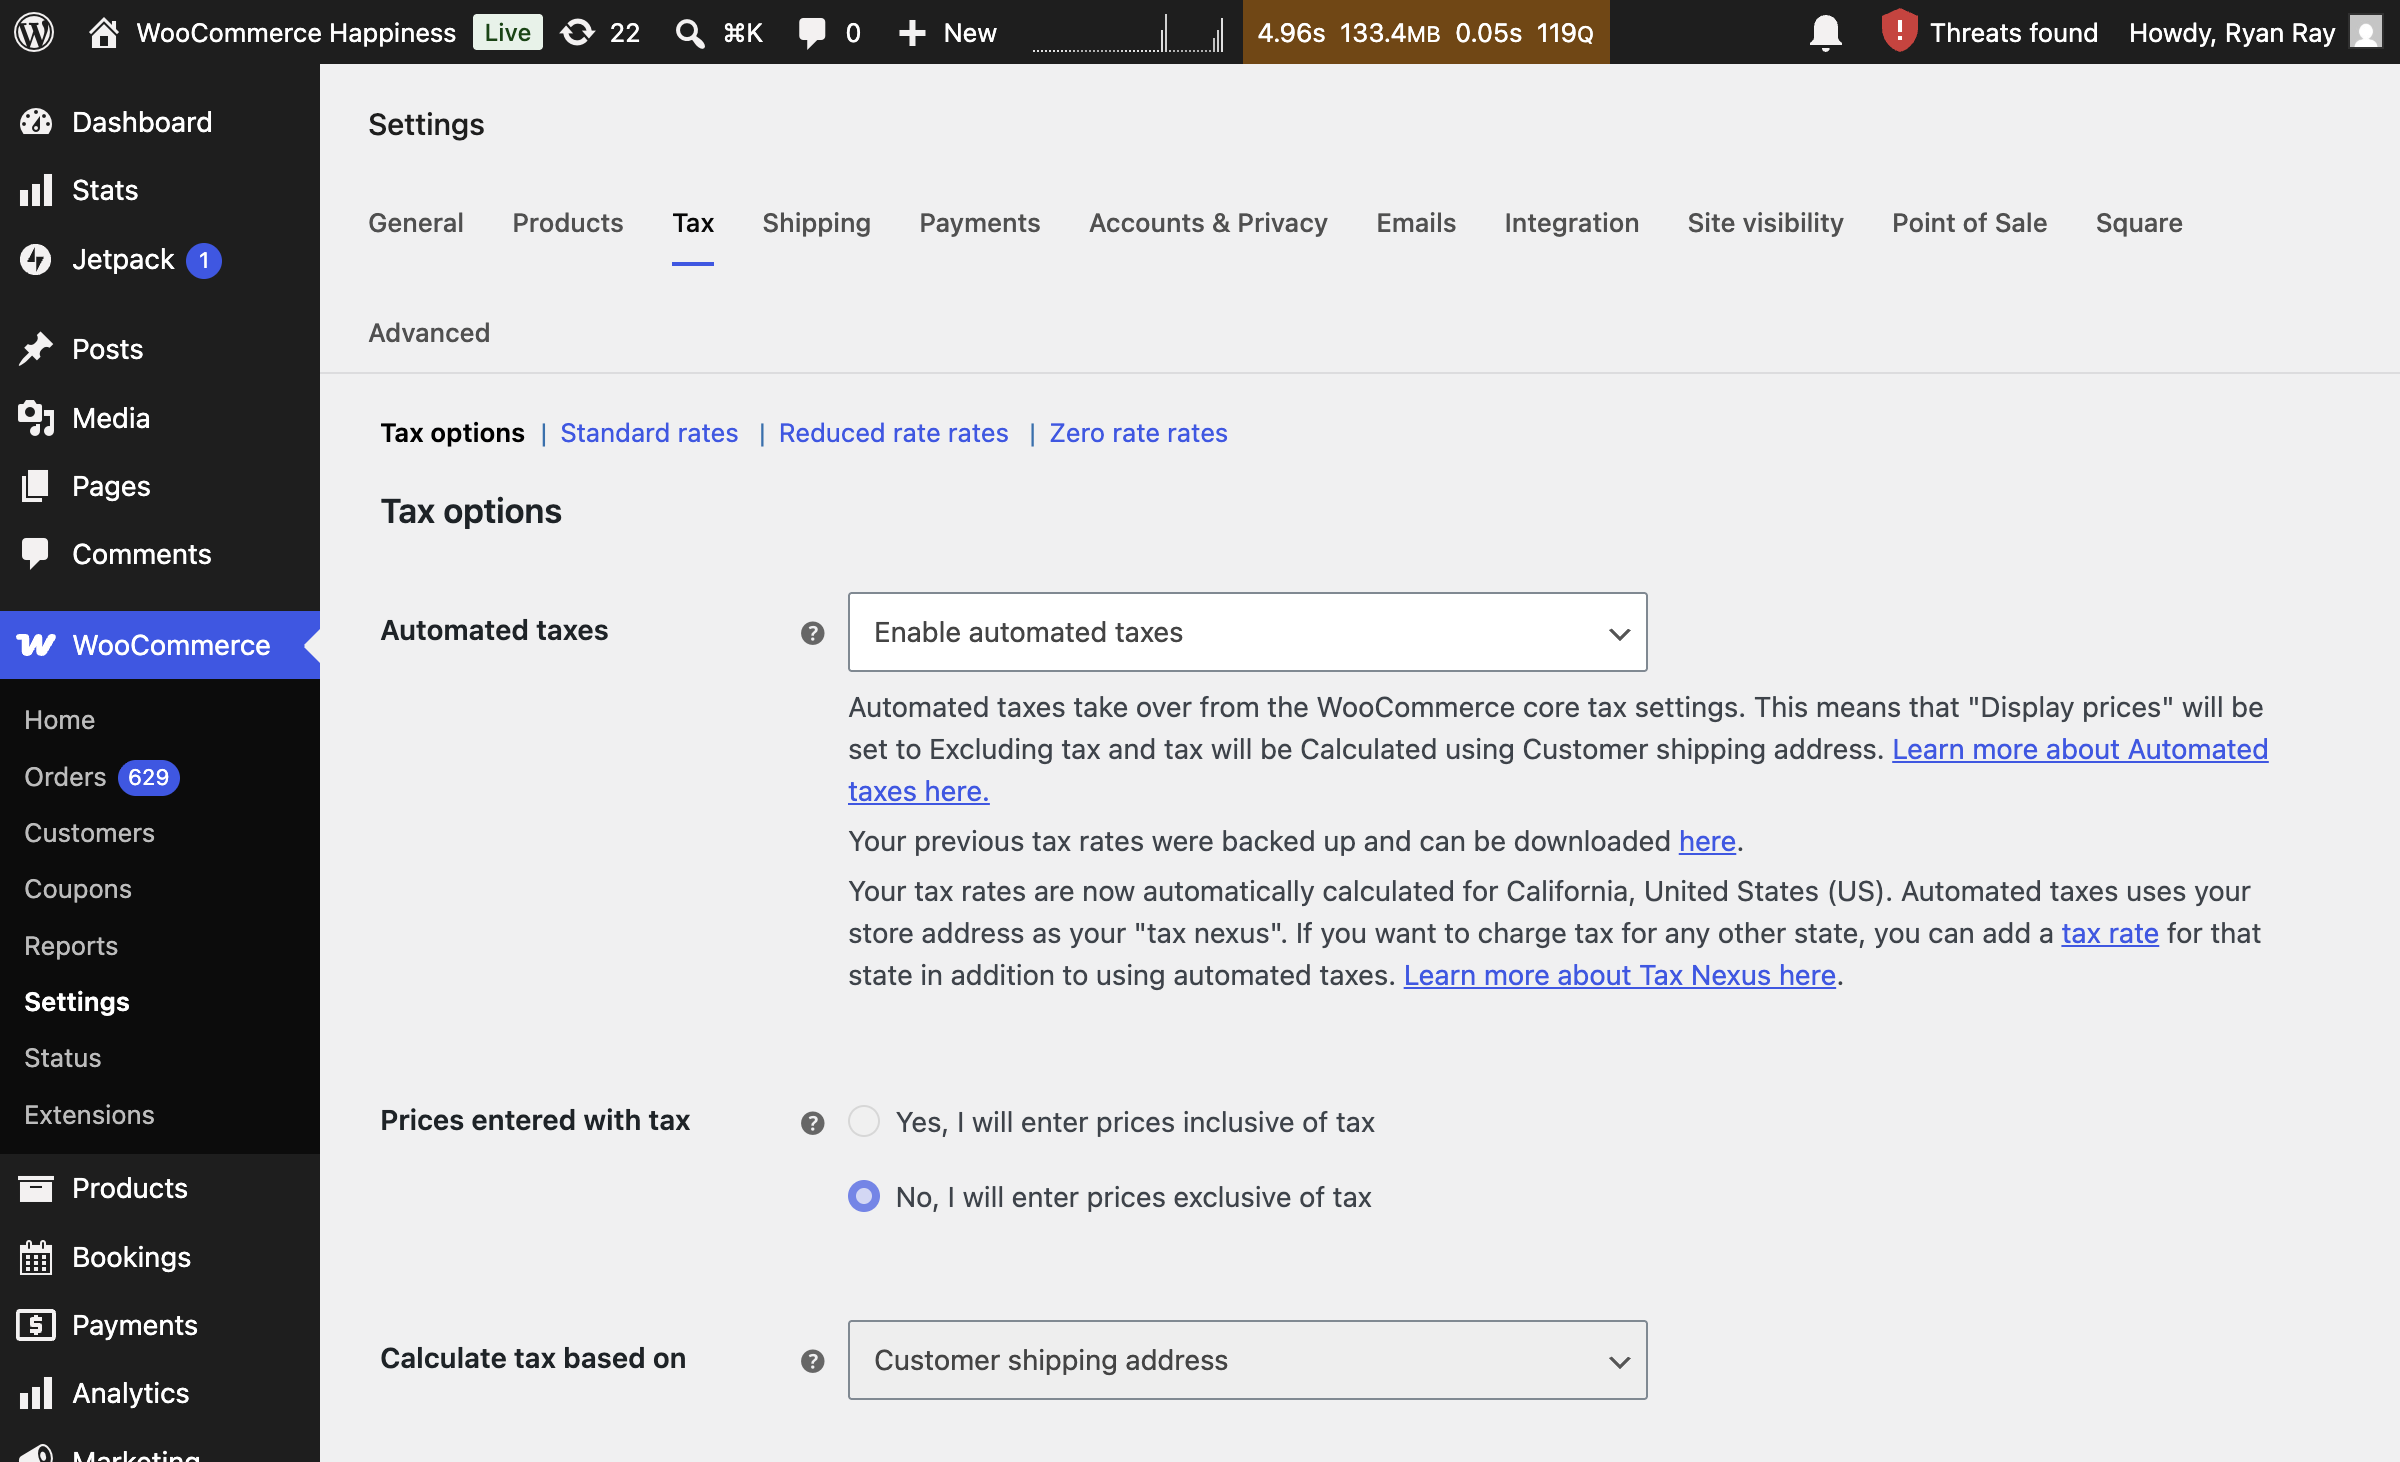
The Automated taxes setting is added by an extension, in this case WooCommerce Tax. Refer to the WooCommerce Tax documentation for information on how it works.
Configuring tax rates in WooCommerce
↑ Back to topTax rate table settings in tax classes
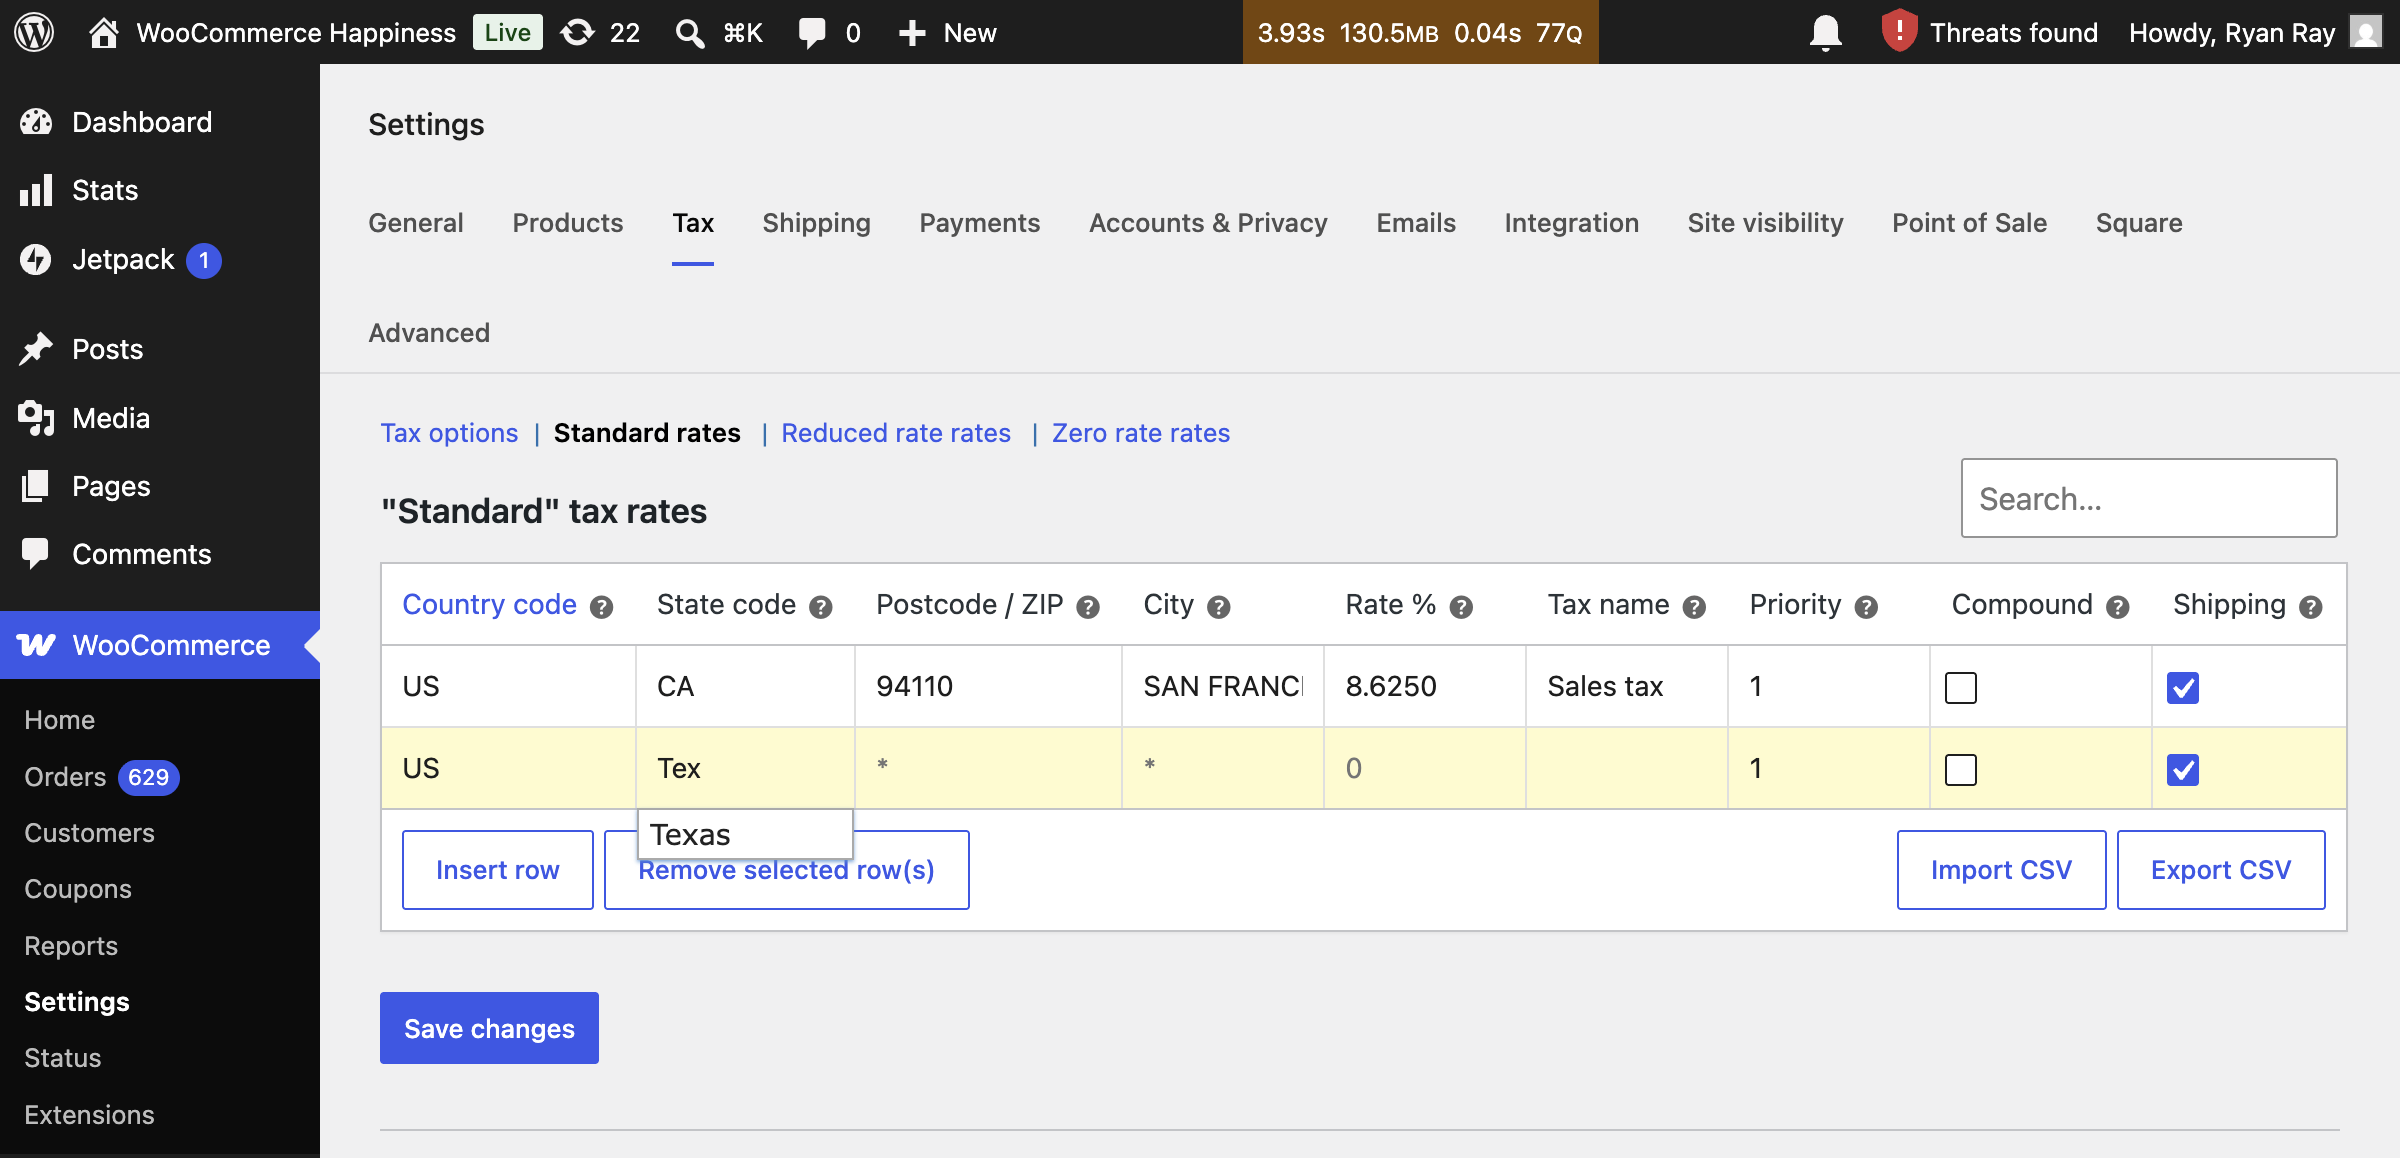
↑ Back to topTax classes appear as subtabs at the top of the Tax settings screen. Select a tax class to open its tax rates table, where you define the rates that apply to customers.
Each tax rate row has the following attributes:
- Country code: enter the two-letter country code that the rate applies to, or leave the wildcard
*to apply the rate to all countries. You can find all country codes in the WooCommerce countries list on GitHub. - State code: choose a country first, then enter at least two characters of the state or province name or code. Suggestions are scoped to the selected country and can match an exact code, the beginning of a code or name, or text within a name. You can also enter the full name or code. If the country is blank or unknown, WooCommerce searches across all known states and provinces. Leave the wildcard
*to apply the rate to all states. You can find the available codes in the WooCommerce states list on GitHub. - Postcode/ZIP: enter the postcodes that the rate applies to. Separate multiple values with a semicolon (
;). Use the wildcard*to match all postcodes, or add it after letters or numbers to match a prefix. For example,PE*matches all postcodes beginning with PE, and90210*matches ZIP+4 postcodes beginning with 90210. Use a numeric range, such as2000…3000, to include all values between the start and end. - City: enter a semicolon-separated list of cities that the rate applies to, or use the wildcard
*to apply it to all cities. City matching is exact. For example, a rule for “Cape Town” does not match “Capetown”. - Rate %: enter the tax rate, for example, 20 for a tax rate of 20%.
- Tax name: give the tax a name, such as “VAT”.
- Priority: assign a priority to the tax rate. WooCommerce uses only the first matching rate at each priority. Give rates different priorities to apply multiple tax rates to one area. Priority 1 is considered before priority 2, which is considered before priority 3, and so on. See a detailed practical example.
- Compound: select this option if the rate is compound, meaning it is applied on top of all prior taxes.
- Shipping: enabled by default. Select this option when the tax rate also applies to shipping.
Configuring specific tax setups
↑ Back to topFor how-to guides for configuring specific tax setups, see how to configure specific tax setups in WooCommerce.
Manually inserting tax rates
↑ Back to topTo enter tax rates manually:
- Click Insert row.
- Enter the required value in each column, as described above.
- Click Save changes.
Importing and exporting rates
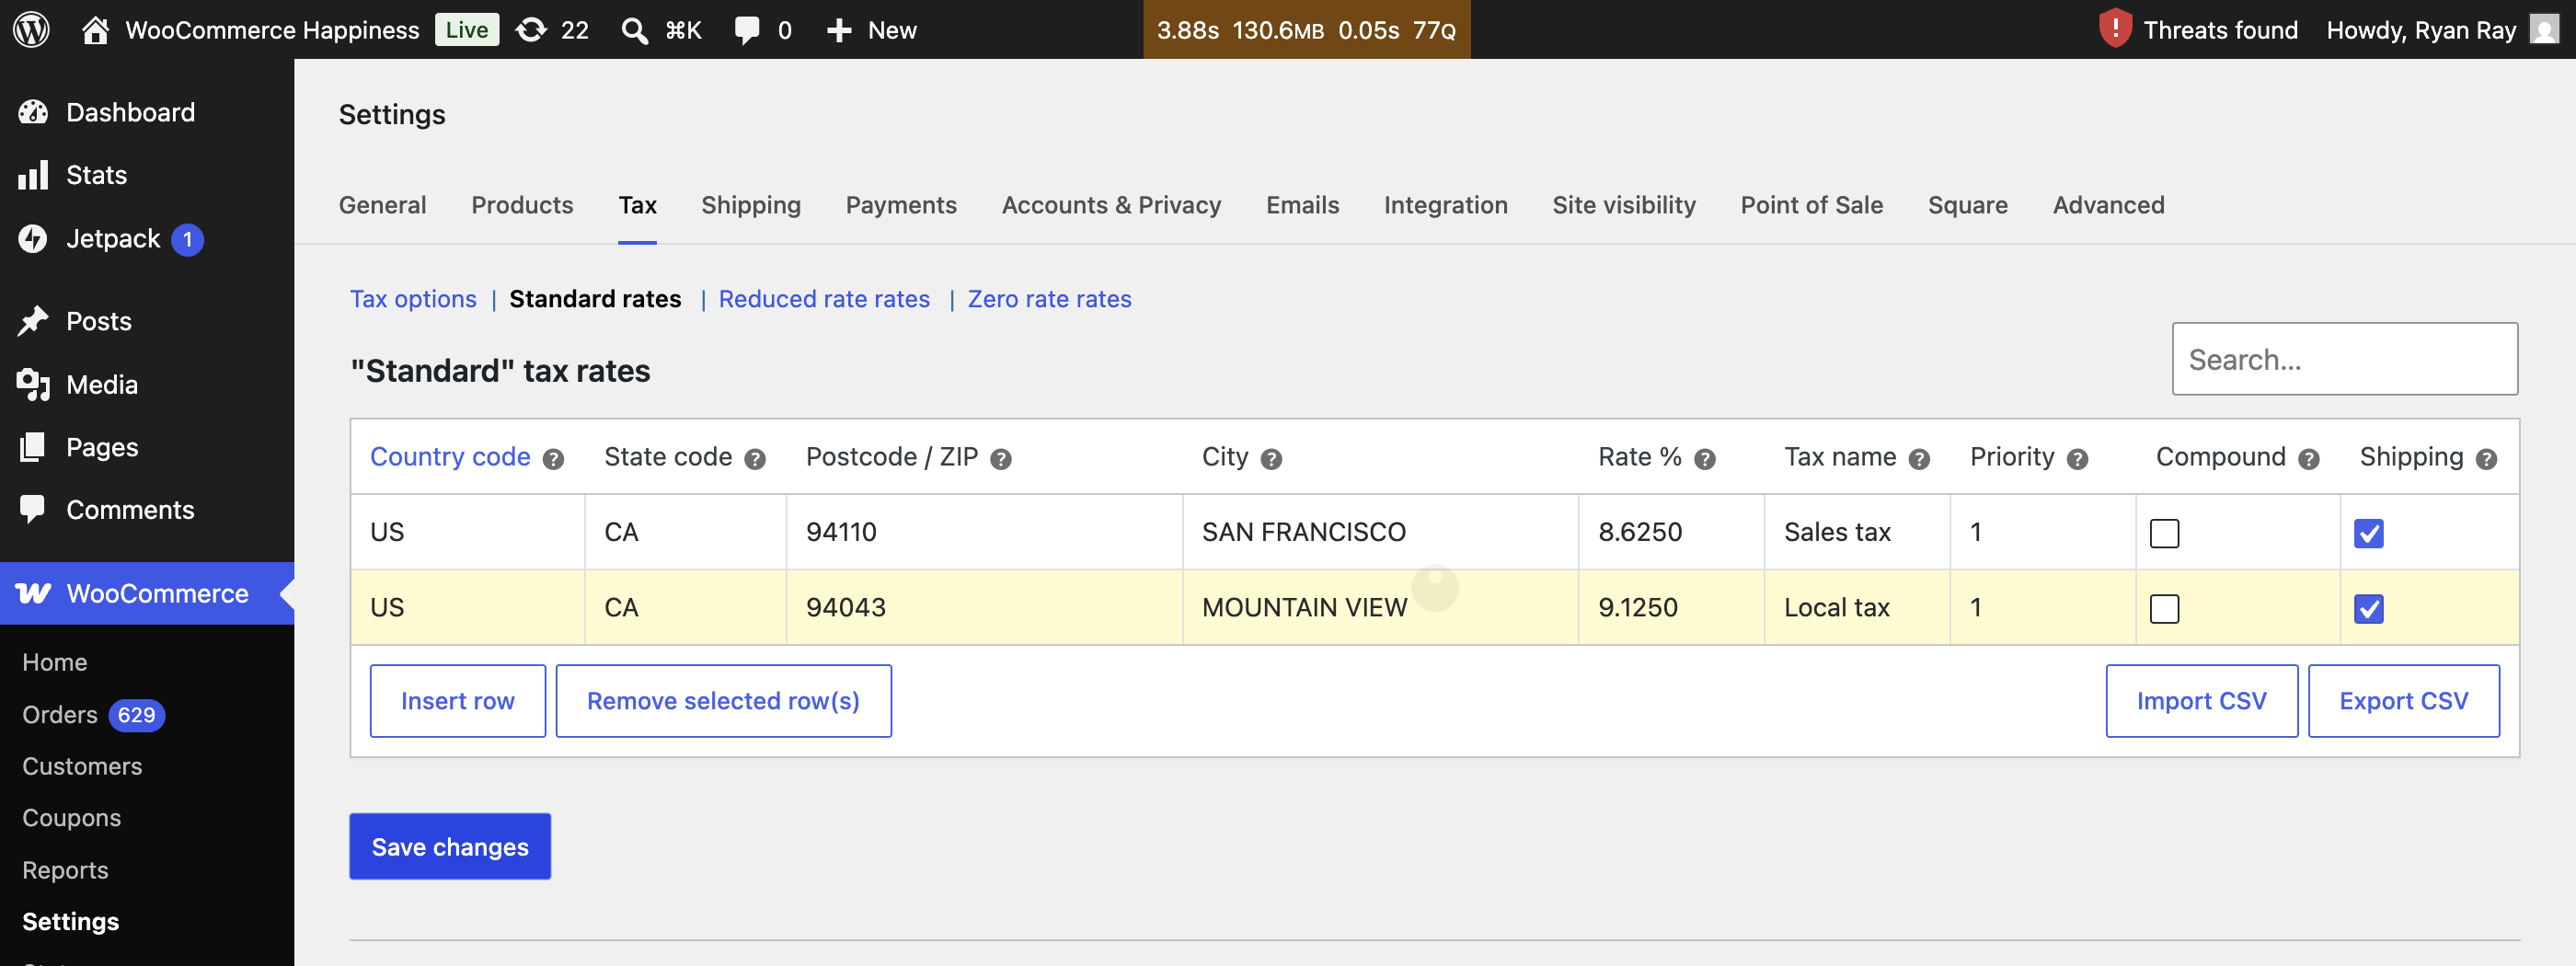
↑ Back to topTax rates can also be exported to or imported from comma-separated value (CSV) files. Below is an example of a tax rate table in WooCommerce > Settings > Tax > Standard rates, with the Import CSV and Export CSV buttons visible:
To create a CSV file for importing tax rates, enter one rate manually and export it. The exported file includes the 10 required columns and can serve as a template for your changes or additions.
The columns are:
- Country code
- State code
- ZIP/Postcode
- City
- Rate %
- Tax name
- Priority
- Compound
- Shipping
- Tax class
We’ve provided a sample tax rate CSV that you can download and import for the United States based on state tax only. Leave Tax class blank for standard rates.
Download a sample tax rate CSV.
This sample tax rate CSV should not be used for production/live purposes, as tax rates frequently change. Double-check any rate for accuracy before using.
Deleting tax rates
↑ Back to topTo delete one or more tax rates:
- Go to WooCommerce > Settings > Tax and select the appropriate tax class, such as Standard rates or Reduced rates.
- Select rows in the tax rates table. Hold Shift to select consecutive rows, or hold Command (macOS) or Ctrl (Windows) to select specific rows. Selected rows are highlighted in yellow.
- Click the Remove selected row(s) button to delete the highlighted row(s).
- Click Save changes to finalize the action.
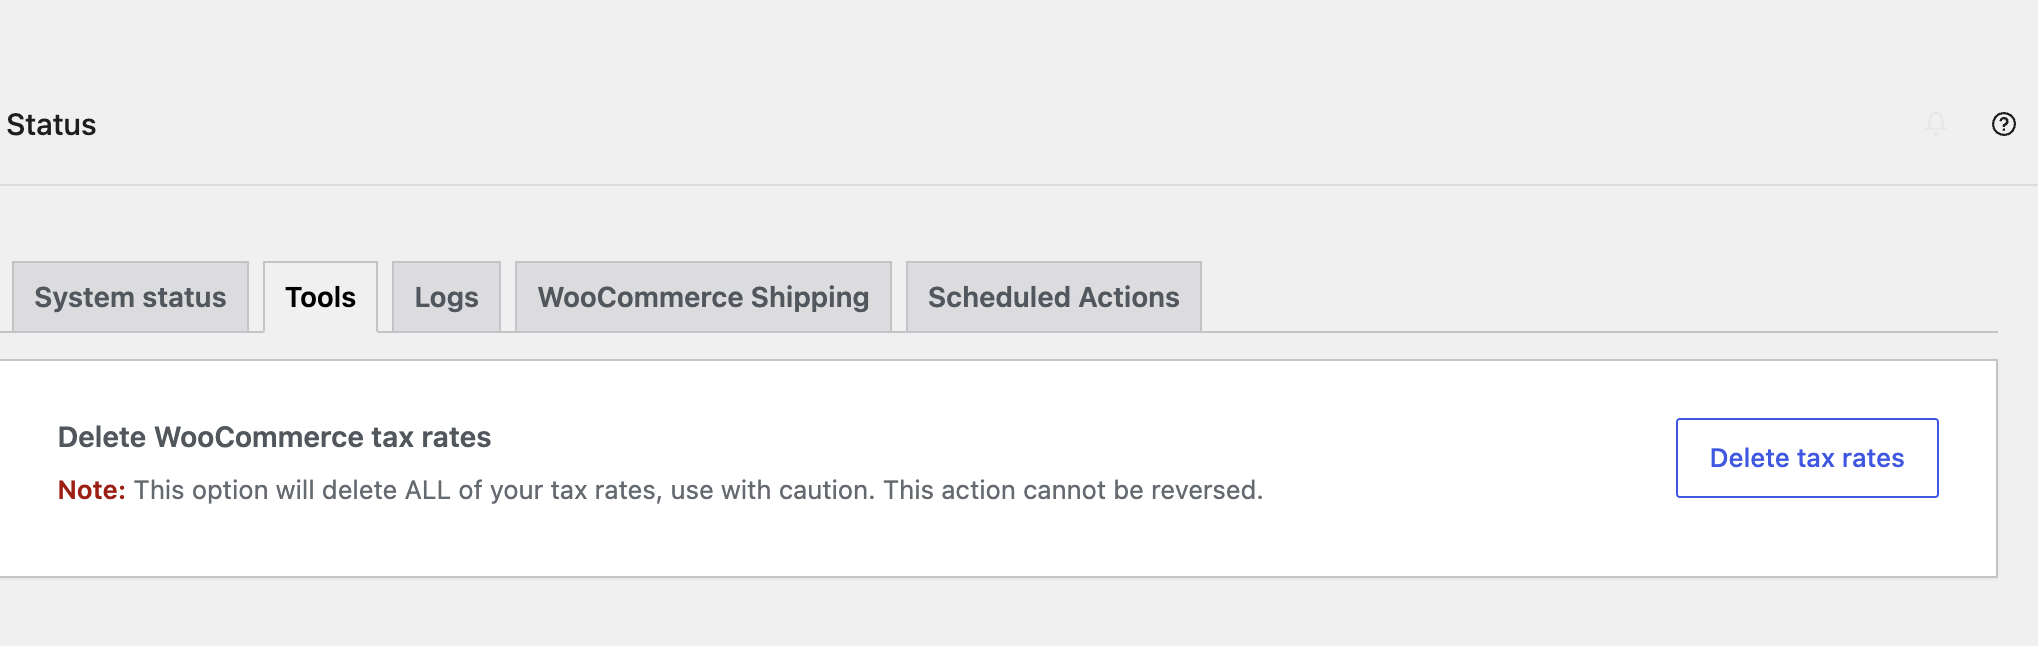
To delete all tax rates at once, go to WooCommerce > Status > Tools, find Delete WooCommerce tax rates, and click Delete tax rates.
Warning: This action cannot be undone.
Viewing tax reports
↑ Back to topFind tax reports under WooCommerce > Analytics > Taxes. See the Taxes report documentation for details.
Questions and support
↑ Back to topDo you still have questions and need assistance?
This documentation is about the free, core WooCommerce plugin, for which support is provided in our community forums on WordPress.org. By searching this forum, you’ll often find that your question has been asked and answered before.
If you haven’t created a WordPress.org account to use the forums, here’s how.
- If you’re looking to extend the core functionality shown here, we recommend reviewing available extensions in the WooCommerce Marketplace.
- Need ongoing advanced support or a customization built for WooCommerce? Hire a Woo Agency Partner.
- Are you a developer building your own WooCommerce integration or extension? Check our Developer Resources.
If you weren’t able to find the information you need, please use the feedback thumbs below to let us know.