This documentation covers how to set up tax rates in WooCommerce, as well as how the platform handles taxes/VAT/GST based on these settings — not when or what to charge.
We are not tax professionals; our advice only applies to how to use our software. For advice on what — or when — to charge tax/VAT/GST etc., we recommend consulting a tax professional or accountant.
Every business is unique, and we are unable to cover all possibilities here.
WooCommerce Tax calculates sales tax at checkout using your store address and the customer’s address. It does not file returns, remit tax, or determine where your business has a tax obligation. Consult a qualified tax professional about your obligations.
Set up WooCommerce Tax
↑ Back to topBefore you start
↑ Back to top- Install and activate WooCommerce and WooCommerce Tax.
- Use a complete store address under WooCommerce > Settings > General. WooCommerce Tax uses this address as your primary tax location.
- Connect the site to WordPress.com. The connection is required to authenticate the site with the WooCommerce Tax service. The standalone Jetpack plugin is not required.
- Review any manual tax rates before enabling automated taxes. WooCommerce Tax backs them up to a downloadable CSV, then removes them from the tax-rate table.
Connect the site to WordPress.com
↑ Back to top- Go to Plugins > Add New Plugin, search for WooCommerce Tax, then install and activate it.
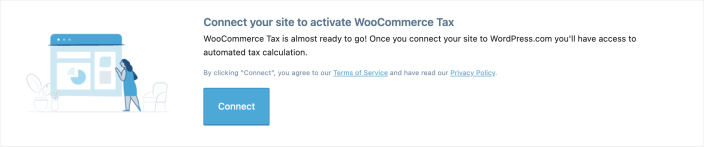
- Find the notice titled Connect your site to activate WooCommerce Tax.
- Select Connect and sign in to WordPress.com, or create an account when prompted.
- Return to your store and go to WooCommerce > Status > WooCommerce Tax.
- Confirm that WordPress.com Connection shows Connected to WordPress.com.
The WordPress.com connection gives the site a secure token for requests to the WooCommerce Tax service and helps prevent unauthorized use of the service. Installing Jetpack separately is optional; WooCommerce Tax includes the connection components it needs.
Enable automated taxes
↑ Back to top- Go to WooCommerce > Settings > General.
- Select Enable tax rates and calculations, then save your changes.
- Open the new Tax tab.
- Set Automated taxes to Enable automated taxes.
- Save your changes.
When enabled, WooCommerce Tax calculates tax using the customer’s shipping address, sets prices to be entered and displayed excluding tax, and sets the shipping tax class to the standard behavior. These values cannot be changed while automated taxes are enabled.
To download a backup of rates that existed before automated taxes were enabled, go to WooCommerce > Status > WooCommerce Tax > Tax Rates.
Coverage and tax locations
↑ Back to topSupported store countries
↑ Back to topAutomated tax calculations are available to stores based in the United States, Canada, Australia, the United Kingdom, and these European Union countries:
Austria, Belgium, Bulgaria, Croatia, Cyprus, Czechia, Denmark, Estonia, Finland, France, Germany, Greece, Hungary, Ireland, Italy, Latvia, Lithuania, Luxembourg, Malta, the Netherlands, Poland, Portugal, Romania, Slovakia, Slovenia, Spain, and Sweden.
The store country comes from WooCommerce > Settings > General > Store Address. United States territories, including Puerto Rico, are not in the current supported-country list.
Understand the primary tax location
↑ Back to topFor a United States store, WooCommerce Tax treats the store address as the primary tax location. It calculates automated rates for that location; it does not discover or maintain every state where your business may have a tax obligation.
If you need to collect tax in another state, enable automated taxes first, then add a manual rate for that state. Manual rates added this way can work alongside WooCommerce Tax, but WooCommerce Tax does not calculate or update them. For other approaches, see the limits of core and automated taxes.
If the business moves, update the store address and review all manual rates before testing checkout from the new location. Do not assume that changing the store address updates manually entered rates.
Florida shipping tax
↑ Back to topFor a store based in Florida, WooCommerce Tax applies tax to shipping by default for shipments to Florida. Whether shipping is taxable can depend on how delivery is offered, so confirm the correct treatment with a tax professional. Developers can change this behavior using the Florida shipping tax filter.
Reports and stored rates
↑ Back to topWooCommerce Tax stores calculated rates as separate jurisdiction entries. A single order can therefore create several lines in Analytics > Taxes, such as city, county, and state tax.
Existing orders keep the tax labels and amounts saved when the order was placed. Only later orders use the current itemized format, so reports can contain both older combined labels and newer itemized labels.
Troubleshoot WooCommerce Tax
↑ Back to topAutomated taxes are not calculating
↑ Back to top- Go to WooCommerce > Status > WooCommerce Tax.
- Confirm that WooCommerce is configured correctly and the site is connected to WordPress.com.
- Confirm that the store country is supported and the store address is complete.
- Confirm that core taxes and Automated taxes are enabled.
- For a United States store, test checkout with a customer address in the same state as the store address. A $0 tax result outside that state can be expected when no additional manual rate applies.
WordPress.com connection errors
↑ Back to topIf the status page shows Not connected to WordPress.com, return to the WooCommerce Tax connection notice and select Connect. Complete the WordPress.com sign-in with an account that has permission to connect the site, then check the status page again.
If the site appears connected but requests fail with a missing, malformed, or invalid WordPress.com token, reconnect the site before testing again. If you cannot reconnect or the error continues, contact support and include the WooCommerce Tax status and tax-request logs.
Review tax-request logs
↑ Back to top- Go to WooCommerce > Status > WooCommerce Tax.
- Enable Logging, reproduce the problem, then return to the status page.
- Review Taxes Log for recent requests. For older log files, go to WooCommerce > Status > Logs.
A rate looks incorrect
↑ Back to top- Check the complete store and customer addresses, including the state and ZIP or postal code.
- Confirm that the product is taxable and uses the intended tax class.
- For a United States address, compare the result with the TaxJar sales tax calculator.
- If the difference remains, confirm the expected rate with the relevant tax authority, then contact support with the addresses, expected rate, authority reference, and tax-request log.
Developers who need to change the primary address sent to the tax service can use the WooCommerce Tax nexus-address filter. Test customizations on a staging site before using them in production.
Questions and support
↑ Back to topSomething missing from this documentation? Still have questions and need assistance?
- If you have a question about a specific extension or theme you’d like to purchase, contact us to get answers.
- If you already purchased this product and need some assistance, get in touch with a Happiness Engineer via our support page and select this product’s name from the Product dropdown.