Thank you for choosing the Kidora WordPress Theme to power your WooCommerce website.
This comprehensive guide will walk you through the process of setting up and customizing your theme, empowering you to build a stunning, user-friendly, and conversion-focused online store with ease.
Introducing Kidora Theme
↑ Back to topKidora is a colorful and user-friendly WooCommerce theme for toys, games, and gift stores. Built with WordPress Full-Site Editing, it lets you customize your entire store visually—no coding required. Fast, mobile-ready, and optimized for conversions.
Installation
↑ Back to topThe easy way to install Tecky is through the WordPress dashboard.
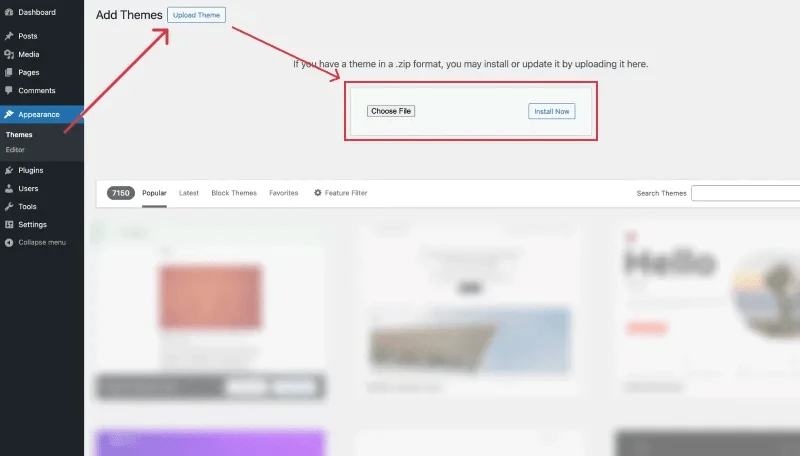
- In your Dashboard go to Appearance > Themes.
- Click on the Add New button on top.
- Click Upload New button on top.
- In the new interface click Choose File and browse your computer to locate kidora.zip file you downloaded.
- Click Install Now.
- After installation Activate the theme.
Setup Kidora Demo Content
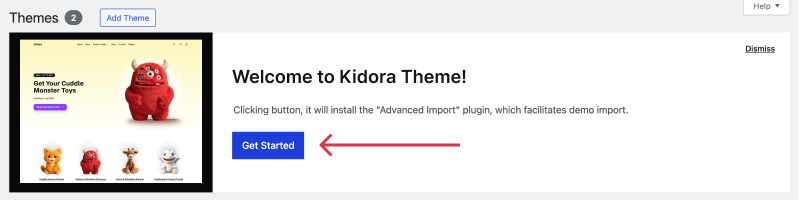
↑ Back to topOnce you activate the theme, a setup notification bar will appear at the top of your dashboard. This will guide you through the initial steps, including the installation of WooCommerce, essential plugins, and demo content.
Step 1: Click “Get Started”
↑ Back to topBegin the setup process by clicking the Get Started button in the notification bar.
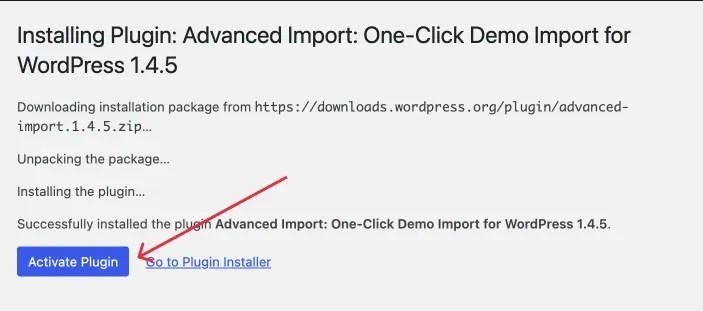
Step 2: Install Required Plugins
↑ Back to topThe installer will automatically handle the installation of all necessary plugins. Simply click the Activate Plugin button to proceed.
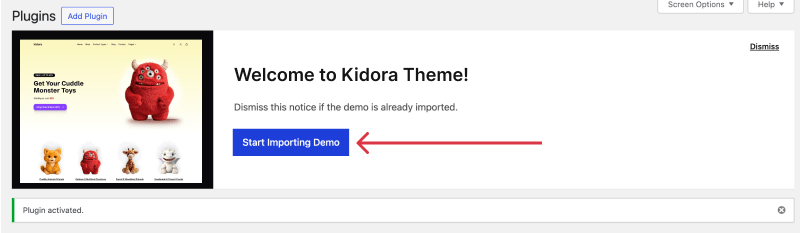
Step 3: Import Demo Content
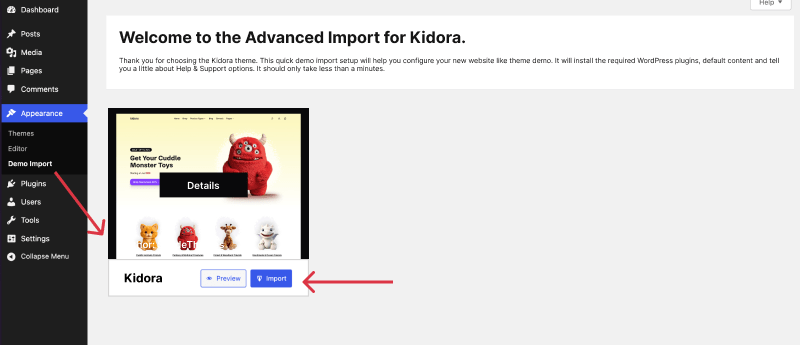
↑ Back to topAfter activating the plugins, you’ll see another prompt to import the demo content. Click “Start Importing Demo” to be redirected to the Demo Import page.
On the import page, click the “Import” button next to your preferred demo. A popup will appear—confirm by clicking “Yes, Import Demo!” The import process will begin and may take a few minutes depending on your selected demo and hosting performance.
Once the demo content is successfully imported, you’ll be given two options:
- Preview your website to see it in action
- Return to the WordPress Dashboard to begin customizing your site
Your website is now ready for customization. Start editing and make it uniquely yours!
Setup Manually
↑ Back to topPrefer to build your website manually? No problem! With the Kidora theme and built-in WordPress features, you can customize your site from scratch and tailor it exactly to your needs.
Set Up Homepage & Blog
↑ Back to topBy default, the Kidora theme shows your most recent blog posts on the homepage. While this works for standard blogs, eCommerce websites benefit more from a dedicated homepage that highlights featured products, categories, and promotional banners—similar to what you see in our demo.
To manually create and assign a custom homepage and blog page, follow these steps:
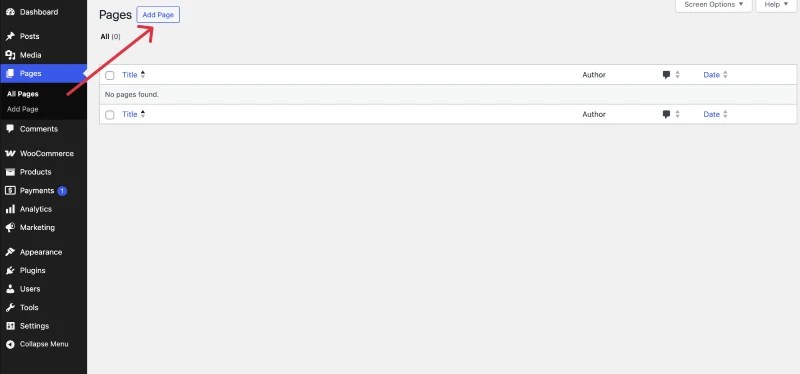
Step 1: Create a Homepage
- Go to Pages > Add New.
- Give your page a title—e.g., Home.
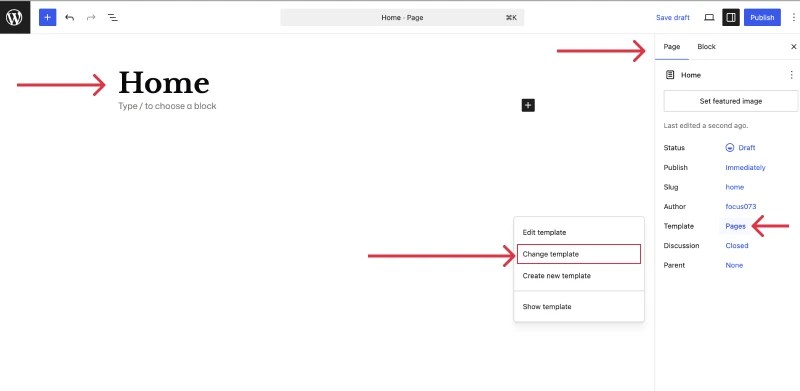
- On the right sidebar under Template, select Home 1 as your template.
- Click Publish to save the page.
💡 Need help creating a page? Check this guide:
Creating a New Page – WordPress Documentation
Step 2: Assign a Template to the Home Page
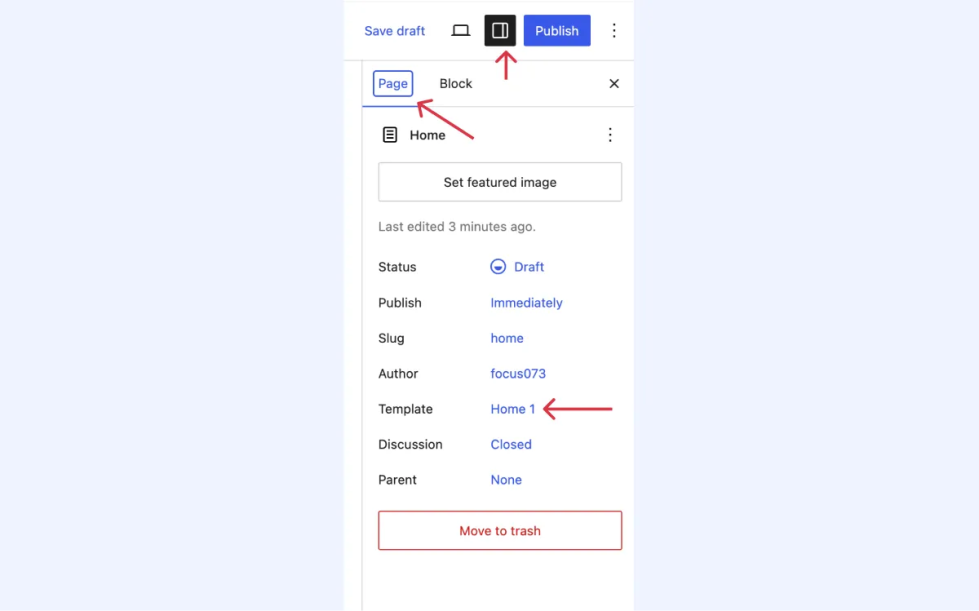
- From the Page Editor, click the Settings icon (⚙️) next to the Update/Publish button.
- Under the Page tab, find the Template section.
- Click Swap Template to browse available templates.
- Choose Home 1 by clicking its preview.
- Click Save to apply the changes.
- Use the Preview icon to view your homepage design in action.
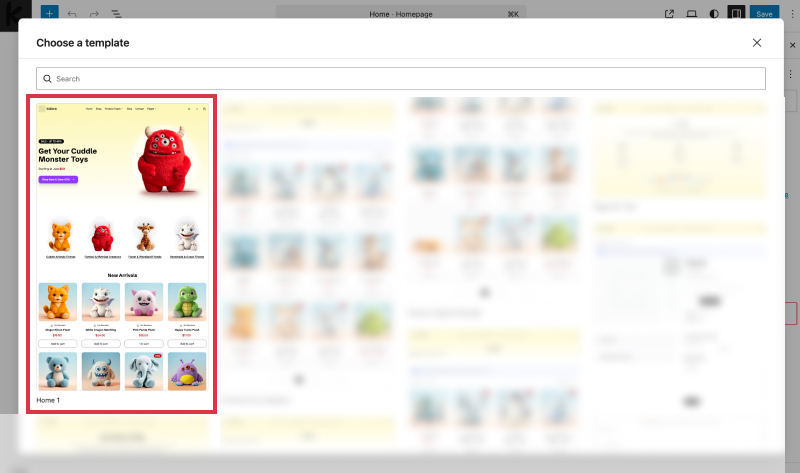
Your new home page should now resemble the Kidora demo homepage, complete with layout and design.
📌 Tip: You can follow similar steps to create and assign templates for other pages like “Contact.”
Step 3: Create a Blog Page
To keep your articles separate from the homepage:
- Go to Pages > Add New.
- Title it Blog.
- Leave the template as default (no need to assign a custom one).
- Click Publish.
💡 Need help creating a page? Check this guide:
Creating a New Page – WordPress Documentation
Step 4: Set Static Pages for Homepage and Blog
To let WordPress know which pages to use:
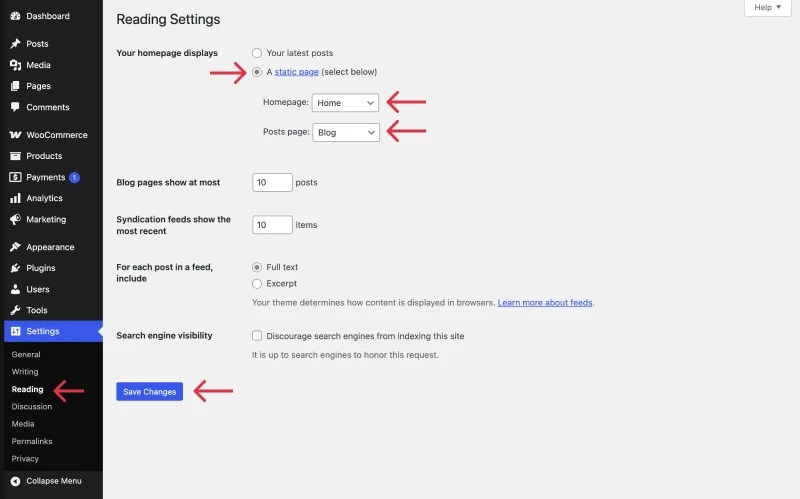
- Go to Settings > Reading in your WordPress dashboard.
- Under Your homepage displays, choose A static page.
- For Homepage, select the Home page you created.
- For the Posts page, select the Blog page.
- Click Save Changes.
Now, your site will show a fully designed landing page as the homepage, and a separate page for blog posts. You’re all set to start adding products, writing articles, and customizing your store to reflect your brand!
Set Up Your Site Logo
↑ Back to topTo add your site logo using the Block Editor:
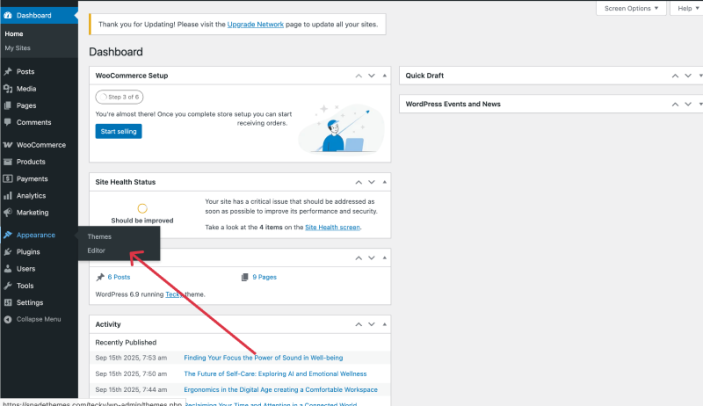
- Go to Appearance > Editor.
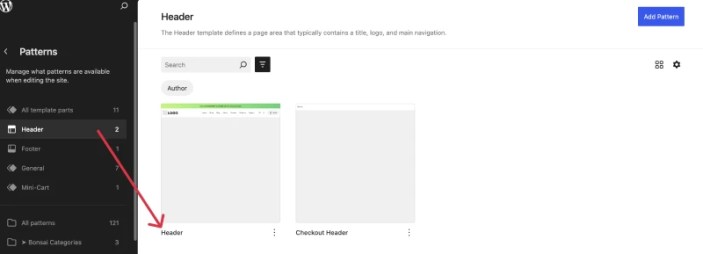
- In the Site Editor, use the search bar or navigate to Patterns > Header > Header.
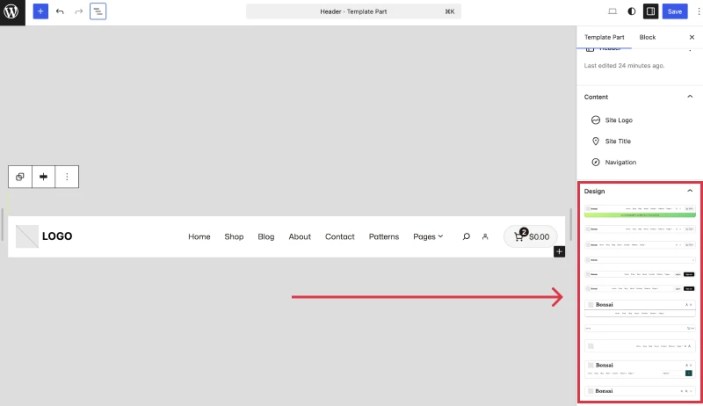
- Click on the Site Logo block. You can upload a new logo or choose one from your Media Library.
- Once uploaded, make sure your logo is sized correctly.
- Click Save in the top-right corner to apply changes.
Set Up Your Navigation Menu
↑ Back to topCreating a clean and functional navigation menu is key for a great user experience.
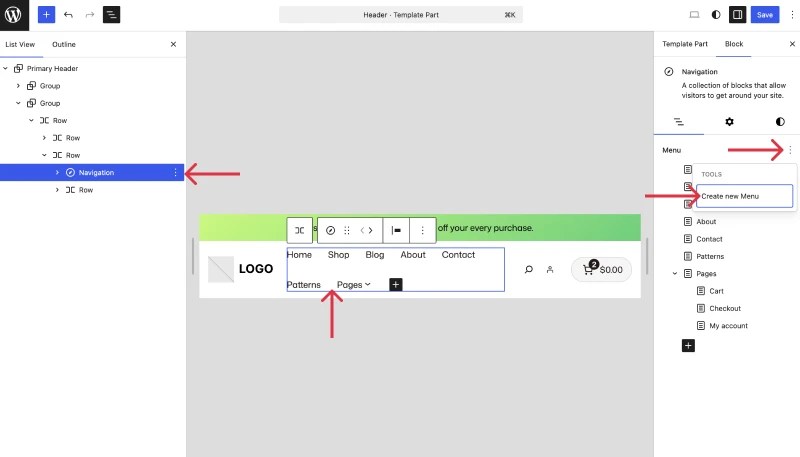
- In the Site Editor, locate the Navigation block—typically inside the header area.
- Click Create a new menu to begin building your navigation.
- Add links to pages, posts, categories, or custom URLs by clicking the + icon.
- Once your menu is ready, click Save to apply.
Need more help? Check out WordPress’s Navigation Menu Guide.
Customize with Global Styles
↑ Back to topMaintain visual consistency with Global Styles:
- Go to Appearance > Editor.
- Click the Styles icon (half black/half white circle) in the top-right corner.
- Browse through the four built-in style presets or adjust fonts, colors, layout widths, and shadows as needed.
- Preview your changes in real-time and click Save when you’re happy with the look

Change the Header Template
↑ Back to topWant a different header design? Here’s how:
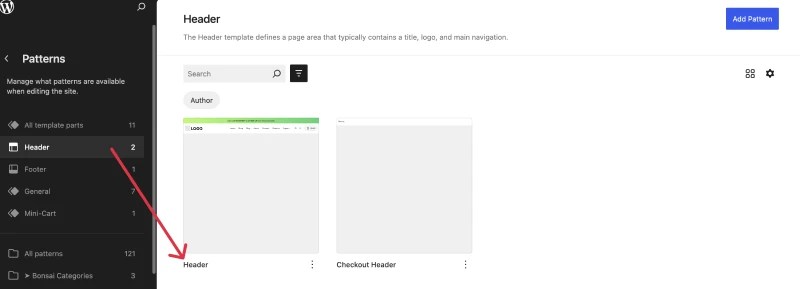
- Go to Appearance → Editor to open the Site Editor.
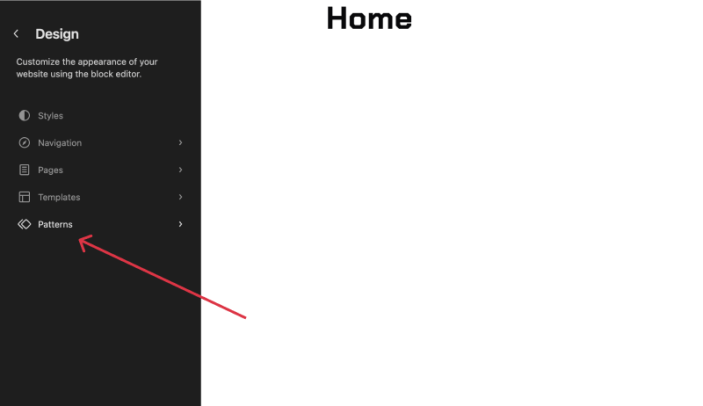
- In the left sidebar, select Patterns → Header (Template Part).
- Click the Header pattern to open it.
- Choose or modify the header layout as needed.
- Click Save to apply the new header.
Check Video if needed
Add Products with WooCommerce
↑ Back to topAdding products works just like any other WooCommerce site. This theme fully supports:
- Simple Products
- Grouped Products
- External/Affiliate Products
- Variable Products
For detailed steps, check out the Official WooCommerce Product Guide.
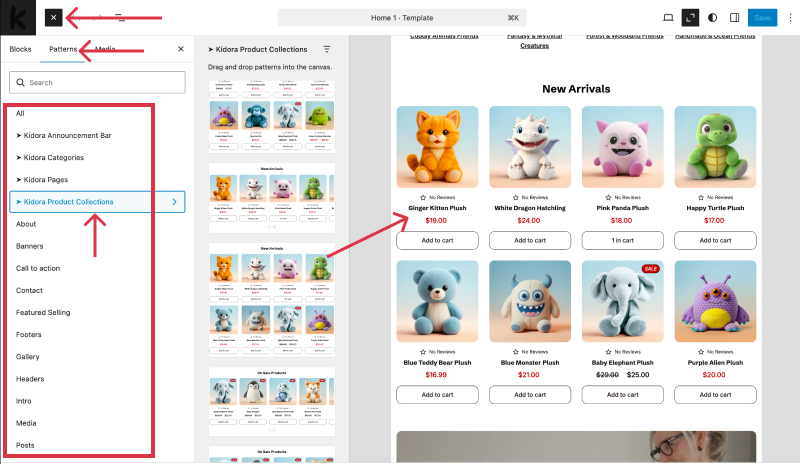
Use Block Patterns for Quick Layouts
↑ Back to topBlock Patterns let you quickly build beautiful sections without starting from scratch.
- Open any page or template in the Editor.
- Click the + icon (top-left) to open the block inserter.
- Switch to the Patterns tab.
- Browse categories like Headers, Galleries, Text Blocks, Forms, and more.
- Click on a pattern to insert it into your layout.
- Edit text, images, or blocks as needed.
To explore all available patterns, click Explore all patterns at the bottom of the patterns panel.
Why Are Some Section Empty?
↑ Back to topSome WooCommerce blocks—such as On Sale Products, Hand-Picked Products, or Products by Category—only display items if certain conditions are met. If those conditions aren’t satisfied, the block will appear empty.
Examples
↑ Back to top- On Sale Products: This block will only show products that have a sale price set. If no products are currently on sale, the section will remain blank.
- Hand-Picked Products: You must manually select which products to display from the block settings sidebar. If none are chosen, the block won’t show anything.
- Products by Category: This block requires you to select a product category in the settings sidebar. If no category is selected, or if the chosen category has no products, the section will appear empty.
✅ Tip: Always check the block settings and make sure the required products or categories are configured to avoid empty sections on your page.
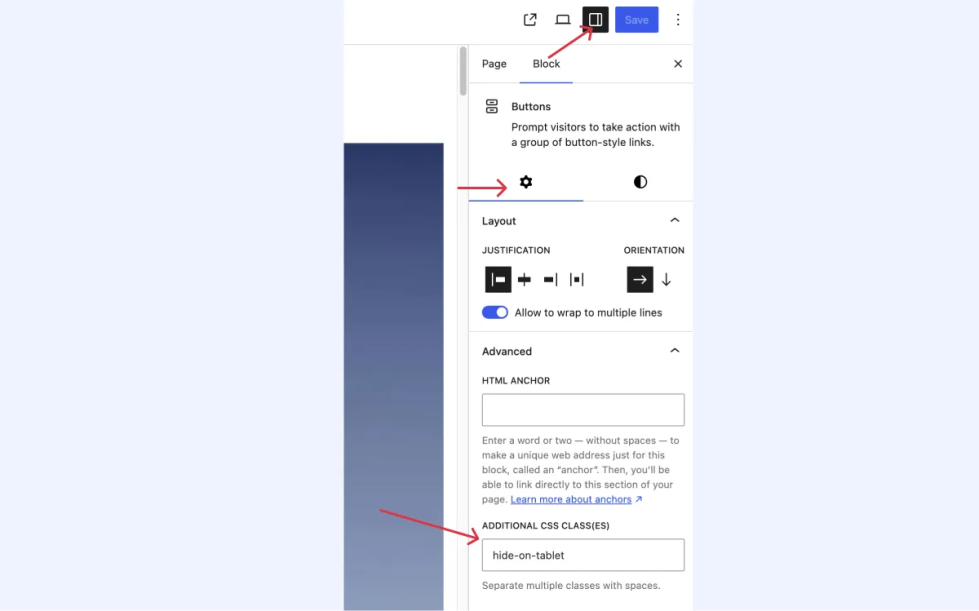
Custom CSS Classes (Advanced)
↑ Back to topNeed advanced styling control? You can assign custom CSS classes to any block:
- Select the block you want to style.
- In the right sidebar under Advanced, find Additional CSS class(es).
- Enter your custom class, like:
- hide-on-mobile – hides the block on mobile view
- hide-on-tablet – hides the block on tablet view
- hide-on-desktop – hides the block on desktop view
NOTE: Don’t add dot (.) before class.
FAQs
↑ Back to topHelp customers by answering commonly asked questions.
Why Are Some Product Blocks Empty?
Certain blocks, like On Sale Products, HandPicked Products only display items that meet specific criteria. If those conditions aren’t met, the block will appear empty.
Example:
If your “On Sale” block shows nothing, make sure at least one product has a sale price set. For “Hand-picked” you need to select the product manually from setting sidebar.
How do I upload a favicon?
Go to Dashboard > Settings > General, then scroll down to Site Icon. Upload a 512×512px image and click Save Changes.