When creating a subscription product, you can set a specific length to the subscription, for example, 12 months, or 2 years. After this defined period of time, the subscription will expire(or end).
When a customer purchases a subscription with a defined length, it will renew until that number of recurring payments has been completed, and then be set to the “expired” status. But what if your customer wants their set-length subscription to go on for longer? In this document we address your options.

Resubscribe to the Subscription after expiration
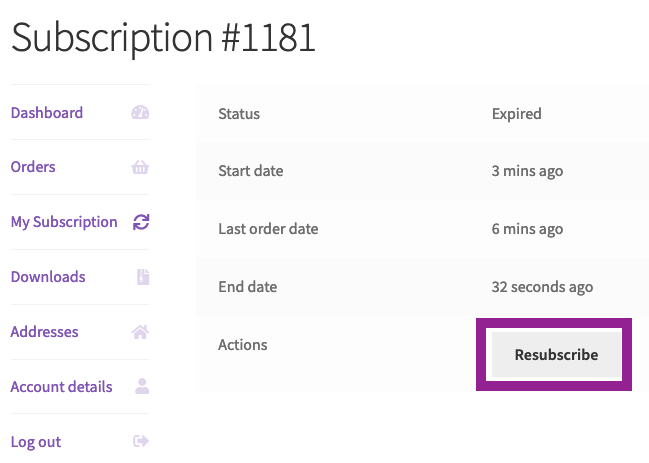
↑ Back to topAfter their subscription expires, customers can login to your store and create a new subscription to that exact product by resubscribing from their My Account page. This is the simplest way for a customer to extend a subscription with an expiration. After clicking to resubscribe the customer is taken directly to checkout to purchase a new subscription that matches the one that had expired.

Extend before expiration
Allowing a customer to extend a subscription before it expires is more complicated. The only way for customers to extend a subscription before it expires is to switch their existing subscription to a new subscription with a longer length.
To allow customers to do this, first, you need to set up switching between subscription products. To do this:
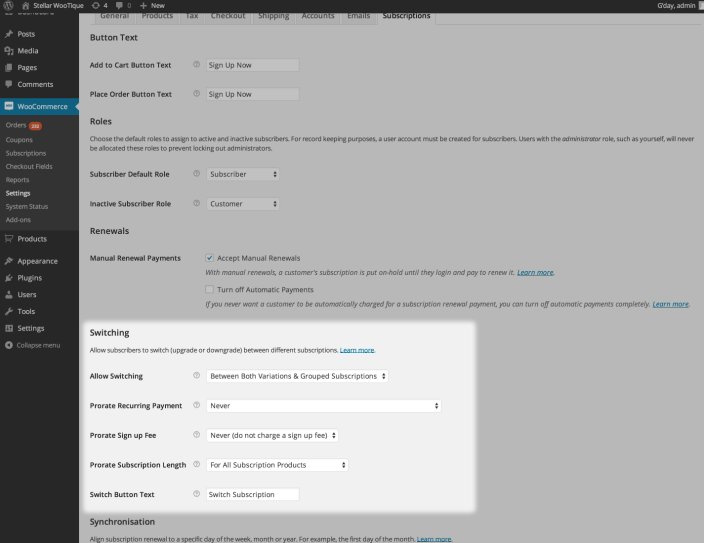
- Go to: WooCommerce > Settings > Subscriptions administration screen
- Scroll down to the Switch Settings section (titled Switching)
- Enable switching by changing the Allow Switching select box to anything other than “Never”
- If you’d like the new subscription to account for payments that have already been made on the current subscription, enable proration of the expiration by changing the Prorate Subscription Length to anything other than “Never”. If you leave this set to “Never” the new subscription will start a brand new term based on the length assigned on the product.

After you have set up switching, you need to create a product which allows customers to switch to a longer subscription. To do this:
- Go to: Products > Add Product administration screen
- Select Variable Subscription as the product type
- Click the Attributes tab on the Product Data metabox to define the variation attributes
- Add a Length attribute (either as a custom product attribute if you will only use this on one product, or as a global product attribute if it will be used on multiple products)
- Define the lengths you will allow for each variation
- Add variations for each length defined above
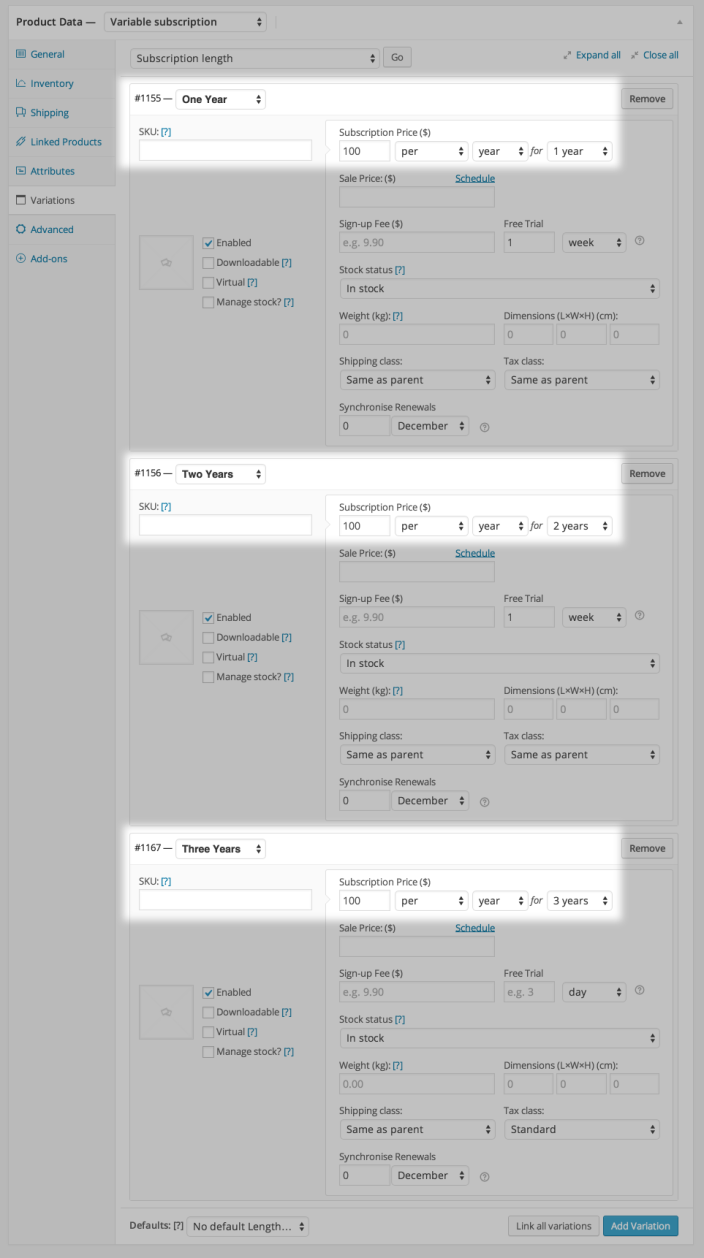
For example, the screenshot below shows 3 variations with 3 different lengths – 1 year, 2 years and 3 years.

Customers can then use the upgrade process to choose a longer subscription.
What About Altering the Expiration Date?
↑ Back to topAlthough the two other methods mentioned allow your customers to extend their subscriptions, they both create a new subscription with the extended expiration date rather than changing the expiration date of the existing subscription.
These are the preferred methods to extend a subscription because not all payment methods support payment date changes after a subscription has been created and therefore, WooCommerce Subscriptions can only be assured all payment gateways will be able to extend the expiration date by creating a new subscription with the payment gateway.
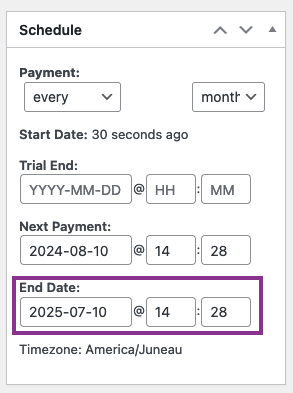
That said, if your payment gateway supports changing payment dates on existing subscriptions, then you are able to extend an existing subscription by changing the end date in the Schedule section of the “Edit Subscription” page. Be sure to check whether your payment gateway supports this method of extending subscriptions. There is no customer-facing way to extend a subscription’s end date like this.

Questions and support
↑ Back to topSomething missing from this documentation? Still have questions and need assistance?
- If you have a question about a specific extension or theme you’d like to purchase, contact us to get answers.
- If you already purchased this product and need some assistance, get in touch with a Happiness Engineer via our support page and select this product’s name from the Product dropdown.
