
Ticket Transfer allows ticket holders to hand their tickets over to someone else — safely, verifiably, and without any admin involvement. The owner initiates the transfer from their account, the recipient confirms by email, and the ticket’s ownership changes only after that confirmation is complete.
No more manual ticket edits. No more support emails asking to change a name. No more worrying about whether the original QR code is still floating around.
Why It Matters
↑ Back to topWhen a customer can’t attend an event, they usually reach out to the store owner to ask for a name change. That starts a slow, manual process that is easy to get wrong:
- The store owner becomes an unpaid middleman, processing every transfer by hand.
- Manual changes often leave the original QR code still valid — a fraud risk that only surfaces at the door.
- There is no audit trail. If a dispute comes up, no one can prove what happened.
- The customer has to email, wait, and then forward a confirmation to their friend.
- At scale, the process becomes impossible to keep up with.
Ticket Transfer replaces this with a self-service flow that is verified by email, safe against fraud, and logged end to end.
Who It’s For
↑ Back to topTicket Transfer is most useful for businesses where tickets change hands between customers:
- Concerts and live music venues — tickets are frequently passed between friends
- Theatres and performing arts — where plans change at the last minute
- Sports events and stadiums — where high-value seats are often gifted or resold
- Festivals — where multi-day passes move between attendees
- Ski resorts and theme parks — where season passes and day passes are lent or gifted
- Conferences and trade shows — where corporate tickets are reassigned
If you have ever received a late-night email asking “can I give this ticket to my friend?”, this feature was built for you.
How the Flow Works
↑ Back to topStep 1 — The owner initiates the transfer
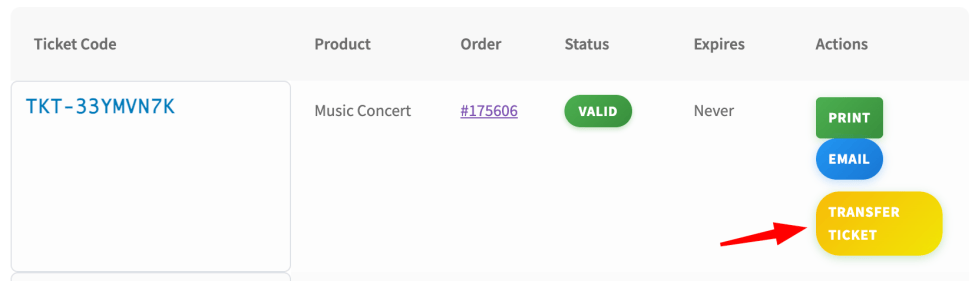
↑ Back to topThe ticket holder logs in and goes to My Account → My Tickets. Under the actions for any eligible ticket, a Transfer Ticket button appears. Clicking it opens a small form asking for the recipient’s first name, last name, and email address.
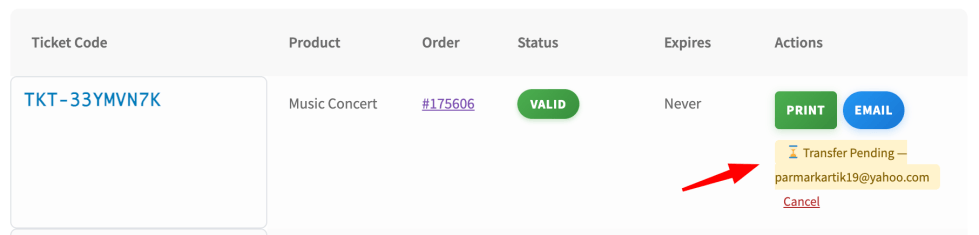
After submitting, the ticket immediately moves into a Transfer Pending state. The owner sees a “Transfer Pending” badge next to that ticket and can cancel the transfer at any time before the recipient responds.
Step 2 — The recipient receives an email
↑ Back to topWithin seconds, the recipient receives an email from the store saying that a ticket has been transferred to them. The email includes:
- The original owner’s name
- The store name
- The ticket code
- The product name
- Two buttons — Accept and Decline
- The number of hours before the link expires
The links are single-use. Once the recipient clicks one, the other immediately stops working.
Step 3 — The recipient decides
↑ Back to topIf the recipient declines: the ticket unlocks back to the original owner, who is notified by email. Nothing about the ticket itself changes — the owner can use it themselves or try transferring it again.
If the recipient accepts: ownership is transferred to them immediately. The recipient receives the full ticket email with the QR code (and any PDF attachment, if enabled) exactly as if they had purchased the ticket themselves. The original owner is notified that the transfer was accepted. No account is required for the recipient — they simply show the QR code at the door.
Step 4 — Fraud is stopped at the source
↑ Back to topWhen the store has enabled the Regenerate Ticket on Transfer setting, accepting a transfer will generate a brand-new ticket code and permanently invalidate the old one. The seller’s original QR code — whether it lives in an inbox, a screenshot, or a printed copy — immediately stops working.
That means two valid QR codes for the same seat can never exist. Door staff scan with confidence, and fraud is closed off before it starts.
Enabling the Feature
↑ Back to topTicket Transfer is off by default. To enable it, go to WooCommerce → Settings → Tickets → Settings and scroll to the Ticket Transfer Settings section.
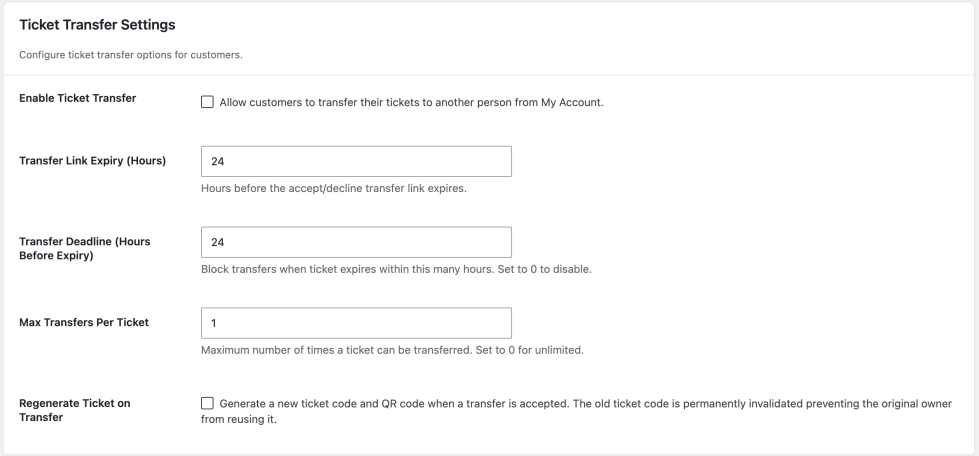
| Setting | Default | What it does |
|---|---|---|
| Enable Ticket Transfer | No | Must be set to Yes for the feature to work at all. |
| Transfer Link Expiry (Hours) | 24 | How long the email link stays valid. After this window, the link stops working and the owner can re-initiate. |
| Transfer Deadline (Hours Before Expiry) | 24 | Blocks transfers when a ticket is close to expiring, so a recipient never receives an unusable ticket. Set to 0 to disable. |
| Max Transfers Per Ticket | 1 | How many times a single ticket can be transferred. 0 = unlimited. Only accepted transfers count against the limit. |
| Regenerate Ticket on Transfer | No | When Yes, the old ticket code is invalidated on acceptance and a new one is issued. Recommended for high-value or fraud-sensitive events. |
Per-product control
↑ Back to topNot every product should be transferable. On each ticketed product’s Ticket Settings tab, there is an Allow Transfer setting with three options:

- Use Global Setting — inherit whatever the store-wide policy is
- Allow Transfer — this product is always transferable
- Disable Transfer — this product is never transferable
The per-product setting always wins. That means you can allow transfers on general admission tickets while blocking them on season passes, VIP badges, press passes, or complimentary tickets — all in the same store.
Getting Started
↑ Back to top- Go to WooCommerce → Settings → Tickets → Settings → Ticket Transfer Settings.
- Set Enable Ticket Transfer to Yes.
- Choose your policy for regeneration, max transfers, deadline, and link expiry.
- For any product that should not be transferable, open the product → Ticket Settings tab → set Allow Transfer to Disable Transfer.
- Place a test order and run through the full flow once — initiate from My Tickets, open the recipient email in a different inbox, accept, and confirm the QR code works.
That’s it. The Transfer Ticket button appears automatically on the My Tickets page for every eligible ticket — your customers will discover it on their own.
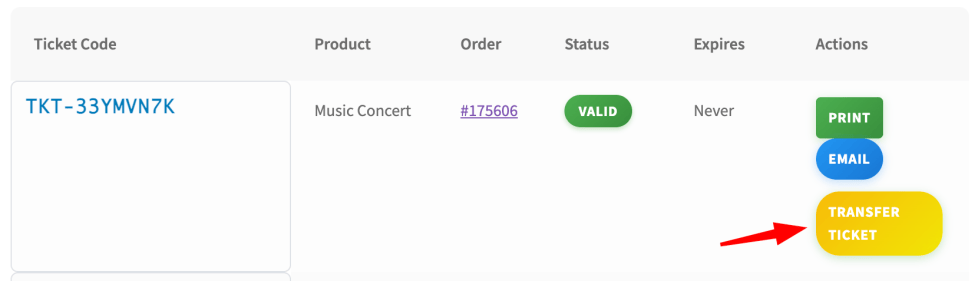
When clicked on the Transfter Ticket button, it will show modal as below to enter the details of the person to whom you want to transfer the ticket.
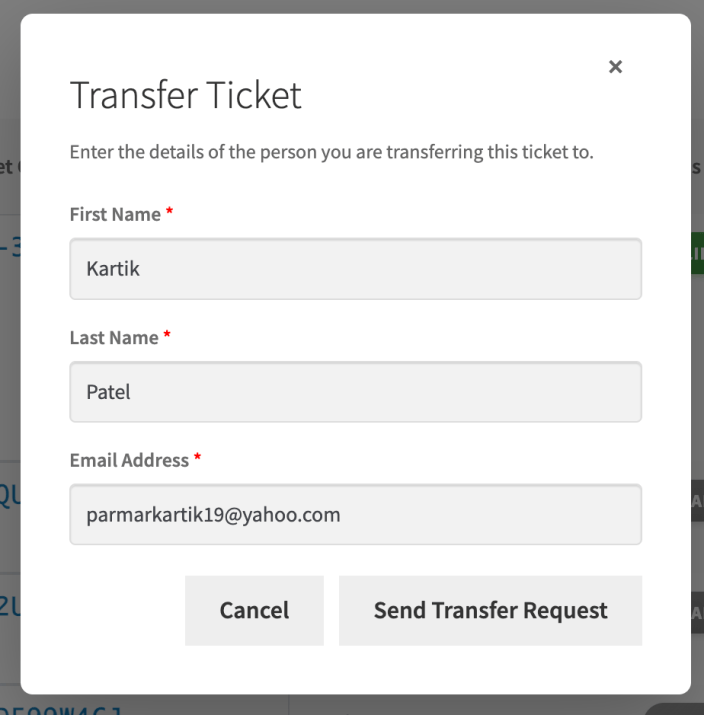
After filling the valid details, clicking on the Send Transfer Request button will initiate transfer.
The person will receive the following email.
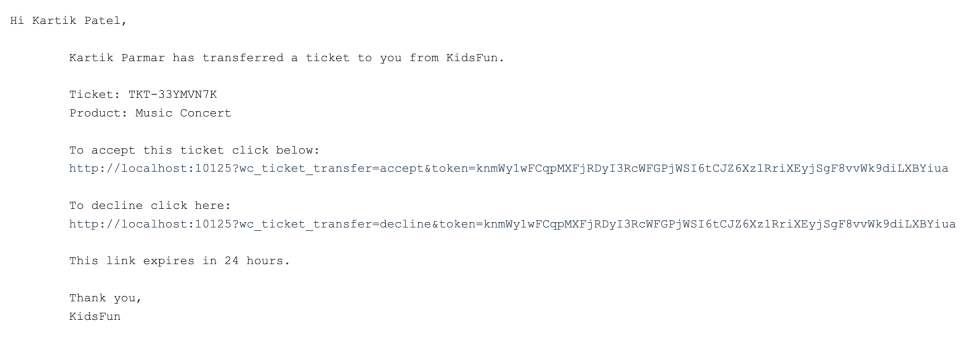
When the received will accept the ticket by clicking the URL mentioned in the accept this ticket, he will be shown the screen as shown below.
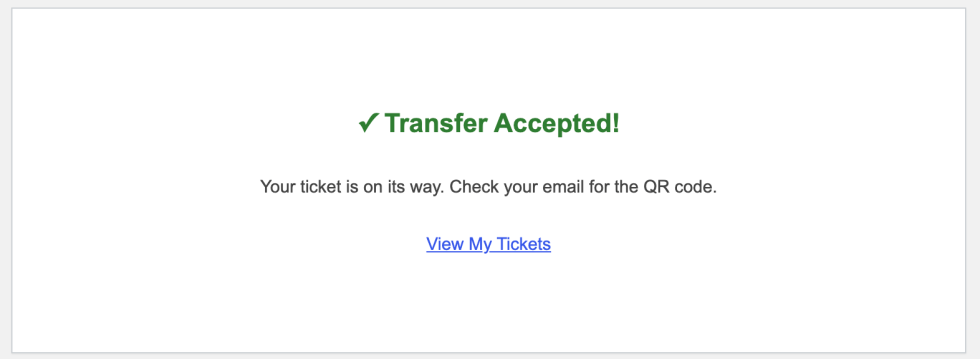
The sender will receive the confirmation as below when the receiver has accepted the ticket transfer.

The person to whom the ticket is transferred will get the Ticket Email for the ticket that is transferred. And the ticket will be de-listed from the sender’s my tickets page.
What Admins Can See
↑ Back to topStore admins do not process transfers manually, but they retain full visibility over what happened:
- All transfer activity is recorded in WooCommerce → Settings → Tickets → Logs, filterable by action. You can see every transfer that was initiated, accepted, declined, cancelled, or expired — complete with timestamps.
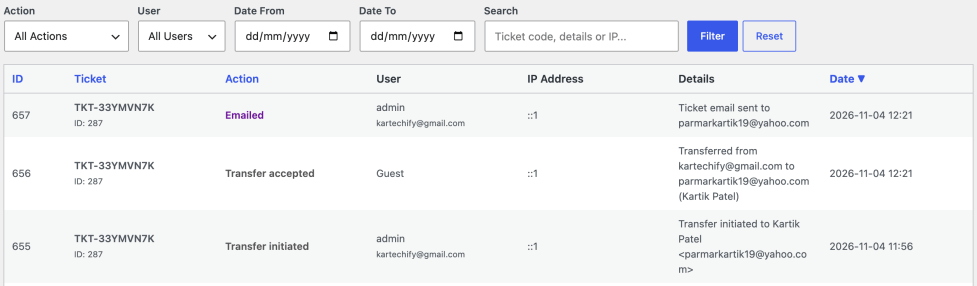
- Ticket status stays fully intact. The transfer only changes who the ticket belongs to; the event, order, product, and check-in state are untouched.
Admins do not have a “transfer on behalf of the customer” button. If a customer calls and asks for a transfer, the recommended flow is to ask them to initiate it from their own account — which is exactly what the feature is designed for.
Frequently Asked Questions
↑ Back to topCan a ticket be transferred more than once?
↑ Back to topYes, subject to the Max Transfers Per Ticket setting. With the default of 1, only the original owner can transfer. Set to 0 for unlimited transfers, or any number in between. Only accepted transfers count against the limit — declines and cancellations do not.
What happens if the recipient’s email is wrong?
↑ Back to topAs long as the transfer is still pending, the owner can cancel it and start again. Once the link expires (default 24 hours), the ticket unlocks automatically and the owner can retry.
Does the recipient need a WooCommerce account?
↑ Back to topNo. The recipient clicks the accept link in the email, confirms, and receives the ticket by email — with the QR code ready to show at the door. If they later create an account using the same email address, the ticket will appear in their My Tickets page automatically.
Does transferring a ticket affect the original order?
↑ Back to topNo. The order, its line items, and its totals are untouched. Only the ticket’s owner details (and, if regeneration is enabled, its code) are updated. The ticket still belongs to the same order and the same event.
What if the original owner’s old QR code is still in someone’s inbox?
↑ Back to topIf Regenerate Ticket on Transfer is enabled, the old QR code is permanently invalidated the moment the transfer is accepted. Any attempt to scan it will fail. If the setting is off, the old code remains valid — so we strongly recommend enabling regeneration for anything where tickets have resale or fraud value.
Can the recipient decline and give the ticket back?
↑ Back to topDeclining simply unlocks the ticket back to the original owner — ownership never leaves them in the first place. The original owner is notified and can use the ticket themselves or try transferring again.
What happens to a ticket transfer if the order is refunded?
↑ Back to topRefunds do not automatically revoke a transferred ticket. However, if the order itself is cancelled, the ticket becomes invalid at scan time. If refunds are part of your workflow, make sure your refund policy also includes cancelling or voiding tickets — the plugin offers manual invalidation from the Tickets management screen.
Is there an audit trail for compliance?
↑ Back to topYes. Every transfer action — initiated, accepted, declined, cancelled, expired — is logged with a timestamp in the plugin’s Logs screen. If a dispute ever arises, the history is right there.
Can I disable transfers on specific products only?
↑ Back to topYes. Each product has its own Allow Transfer setting under the Ticket Settings tab. Set it to “Disable Transfer” on any product that should not be transferable — season passes, VIP tickets, press badges, or anything else.
What happens if a ticket is transferred and then the new owner wants to transfer it again?
↑ Back to topSubject to the Max Transfers Per Ticket setting, yes. With the default of 1, only the first transfer is allowed. Set to 2 or more to support chains, or 0 for unlimited.
Getting Started
↑ Back to top- Go to WooCommerce → Settings → Tickets → Settings → Ticket Transfer Settings.
- Set Enable Ticket Transfer to Yes.
- Choose your policy for regeneration, max transfers, deadline, and link expiry.
- For any product that should not be transferable, open the product → Ticket Settings tab → set Allow Transfer to Disable Transfer.
- Place a test order and run through the full flow once — initiate from My Tickets, open the recipient email in a different inbox, accept, and confirm the QR code works.
That’s it. The Transfer Ticket button appears automatically on the My Tickets page for every eligible ticket — your customers will discover it on their own.
What You No Longer Have To Do
↑ Back to top- Stop manually editing ticket owners by hand.
- Stop losing track of which transfers were requested and when.
- Stop worrying about whether the old QR code is still floating around.
- Stop relying on order comments as your audit trail.
- Stop getting dragged into personal arrangements between customers.
- Stop answering the “can I transfer my ticket?” email.
Customers handle their own transfers in under a minute. Recipients get a clean, verified ticket without needing an account. Staff never touch the process. Door staff scan with confidence. And the full audit trail is searchable whenever you need it.
That’s what ticket transfer should have looked like all along.

