One common use for subscriptions is to accept recurring donations where the subscriber can choose a custom donation amount, then donation payments are made on a regular schedule. When creating a subscription product, a set price is required. However, extensions are available which allow your customers to set their own price, and these can be used in combination with WooCommerce Subscriptions to create recurring donation products where the customer selects a donation amount and even selects a payment schedule.
How can I charge recurring payments for donations?
Two great extensions which work with Subscriptions to allow your customers to name their own price are:
Both of these extensions can be used to add a text field on a subscription product which allows the customer to enter their preferred donation amount. In the below examples we’ll demonstrate using the Name Your Price extension.
Scenario & Required Extensions
↑ Back to topScenario:
You’re a local community organization that relies on donations to keep the lights on, some of your benefactors have asked about setting their donations on “autopilot” so you can have more stability in your budget. Others have asked about choosing a donation schedule that works best for them. Let’s use the WooCommerce Subscriptions and Name Your Price extensions to set this up in your shop!
Required Extensions:
We’ll cover how to set up a simple subscription product with shopper-defined pricing so customers make a donation of a custom amount on a monthly basis. As well as a variable subscription product with shopper-defined pricing that allows supporters to choose from a range of schedules for their recurring donations. In both cases the steps closely follow the normal process of creating subscription products, with the addition of checking the option for shoppers to name their price. See the Name Your Price documentation for more details including settings that allow customers to change their donation amount.
Simple Monthly Donations With Custom Amounts
↑ Back to topAfter you’ve purchased, installed, and activated both WooCommerce Subscriptions and Name Your Price, set up a simple subscription product for monthly donations as follows:
- Create a new product at Products > Add New.
- Give the product a fitting title and description for accepting monthly donations.
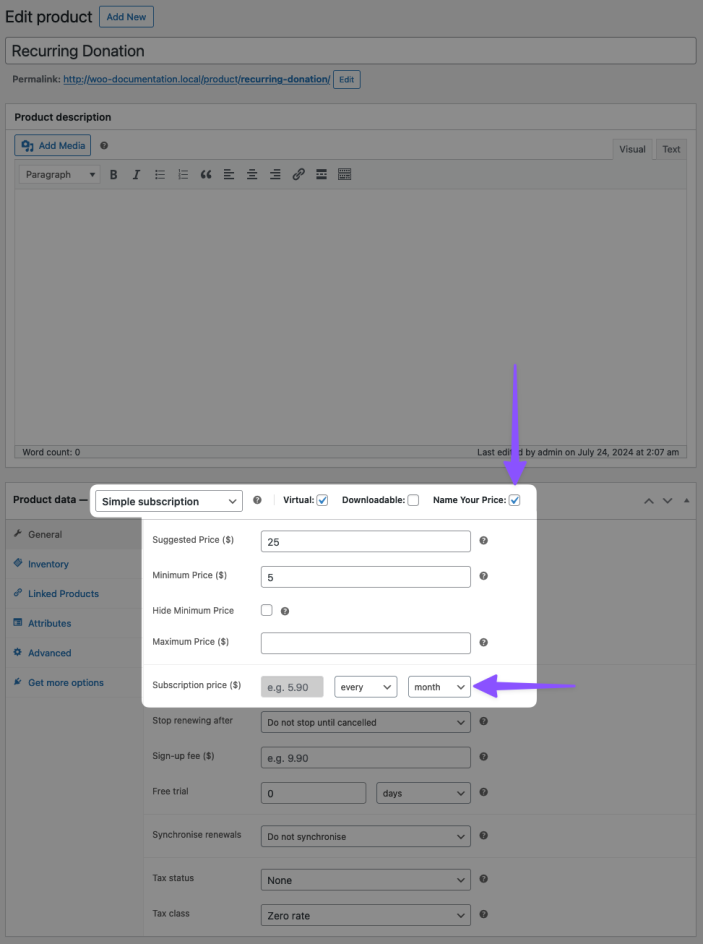
- In the Product data section set the product type to Simple subscription.
- Check the “Name Your Price” box, and you’ll see fields appear for “Suggested Price”, “Minimum Price”, and “Maximum Price”. You can leave fields empty if you don’t want to set values for them.
- Set the subscription product’s schedule to bill every month.

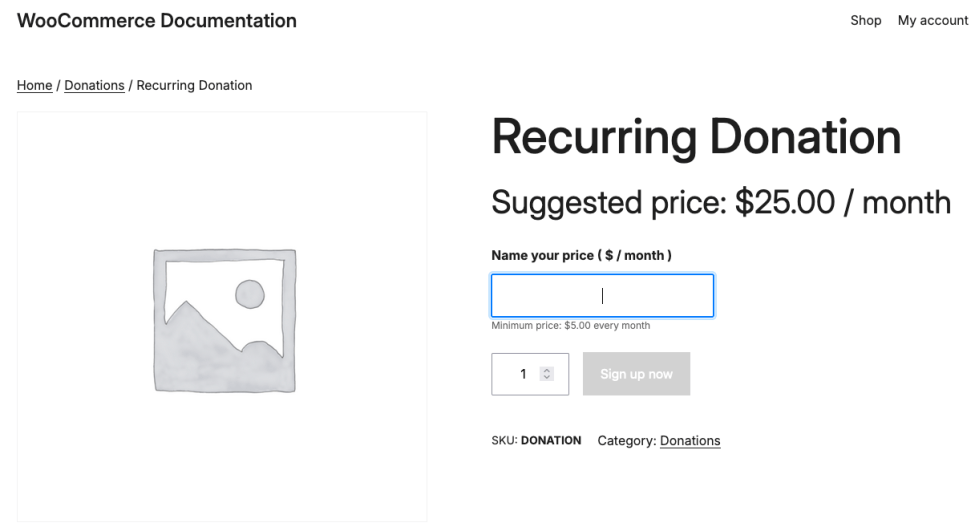
In the shop your customers will see a field to enter their desired donation amount, as well as your suggested and minimum prices if you entered any.

Now your customers can set a donation value of their choice.
Custom Donation Amounts with Variable Schedules
↑ Back to topThe product configuration for offering different donation schedules is very similar, but uses a variable subscription product instead of a simple one, to offer different billing schedules.
After you’ve purchased, installed, and activated both WooCommerce Subscriptions and Name Your Price you can set this up as follows:
- From your site admin area, click Products > Add New.
- Give the product a fitting title and description for accepting donations on various schedules.
- In the top of the “Product data” area, set the product type to Variable Subscription.
- In the “Attributes” section and add an attribute with the name
Frequency, that has values ofWeekly | Monthly | Quarterly | Annualto correspond to the different billing schedules. Check to ensure the “Used for variations” box is checked, then click to save the attributes. - In the “Variations” section, click the button to “Generate Variations”. You’ll see a variation created for each of the frequencies we entered in the last step.
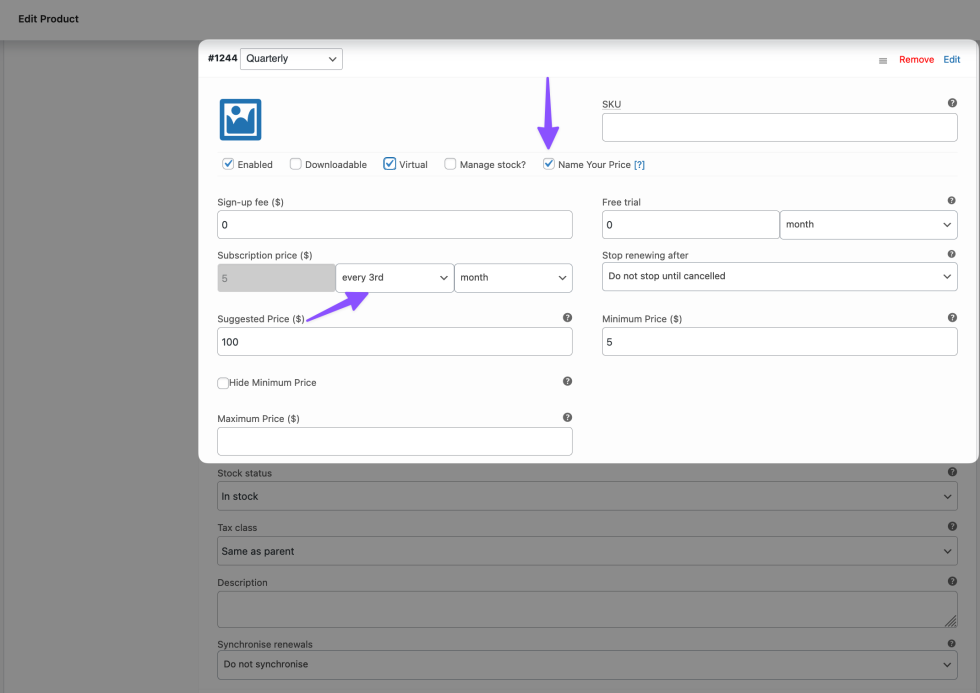
- Expand each variation and enter the following product details:
- If you won’t be shipping anything to your benefactors, check the “Virtual” box so shipping options won’t be offered.
- Check the “Name Your Price” box and enter any suggested, minimum, or maximum price.
- Set the subscription billing schedule to match the name of the variation you’re editing (e.g. for the “Quarterly” variation, set the schedule to bill “every 3rd month”)
- After entering the details and schedules for each variation, click to “Save changes” at the bottom of the variations section.
- Publish the product.

You can also add images, or other details to the different variations as needed, for example if your donations are non-taxable you may want to assign a zero-rate tax class so no tax is collected at checkout.
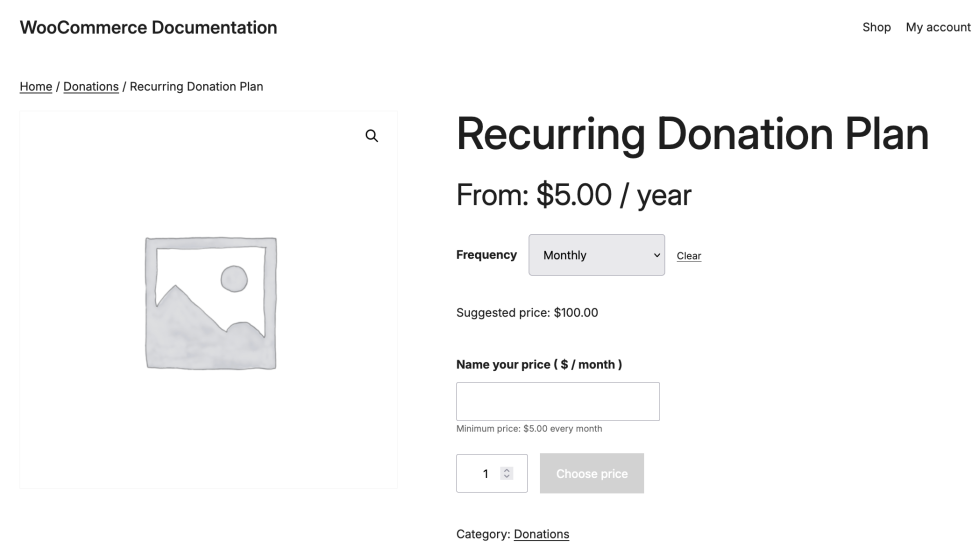
On the product page your customers will see an option to select their billing frequency, and a field to enter their donation amount.

Let the Customer Change their Donation Amount
↑ Back to topThe Name Your Price documentation has a section that explains the switching setting it adds so you can allow your customers to update their chosen payment amount.
Questions and support
↑ Back to topSomething missing from this documentation? Still have questions and need assistance?
- If you have a question about a specific extension or theme you’d like to purchase, contact us to get answers.
- If you already purchased this product and need some assistance, get in touch with a Happiness Engineer via our support page and select this product’s name from the Product dropdown.
