Test accounts allow you to explore WooPayments, simulate transactions, and interact with most features without entering any personal details, business information, or using real money.
NOTE: Test accounts are not supported for merchants in Singapore and the UAE. Merchants in those countries who wish to test WooPayments should onboard as a real account and then use test mode.
How test accounts work
↑ Back to topDuring the WooPayments signup process, you’ll be asked whether you’d like to Start accepting payments or Test payments. Choosing Test payments creates a dedicated test account for your site using simulated information. No personal or business details are required.
You’ll see indicators that you’re using a test account in several places, including:
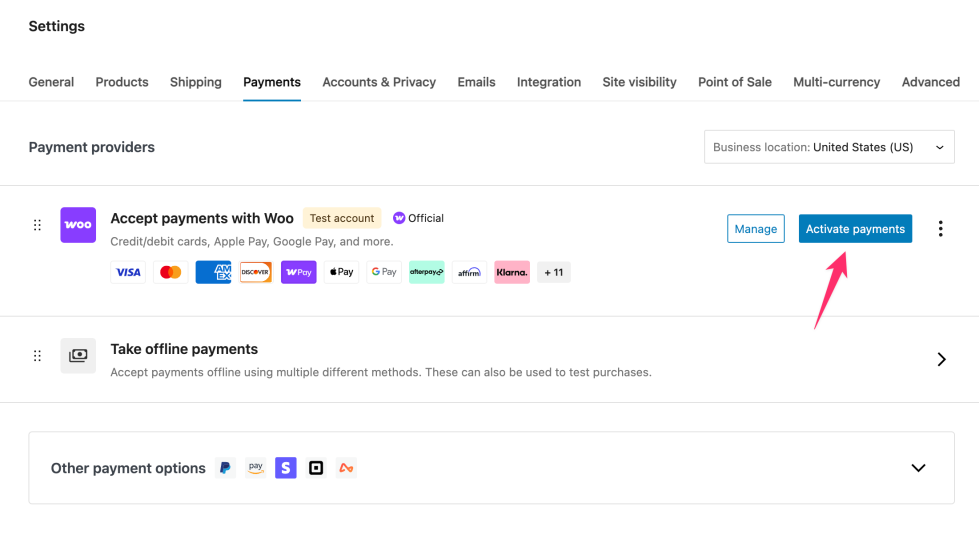
- The WooCommerce > Settings > Payments settings page
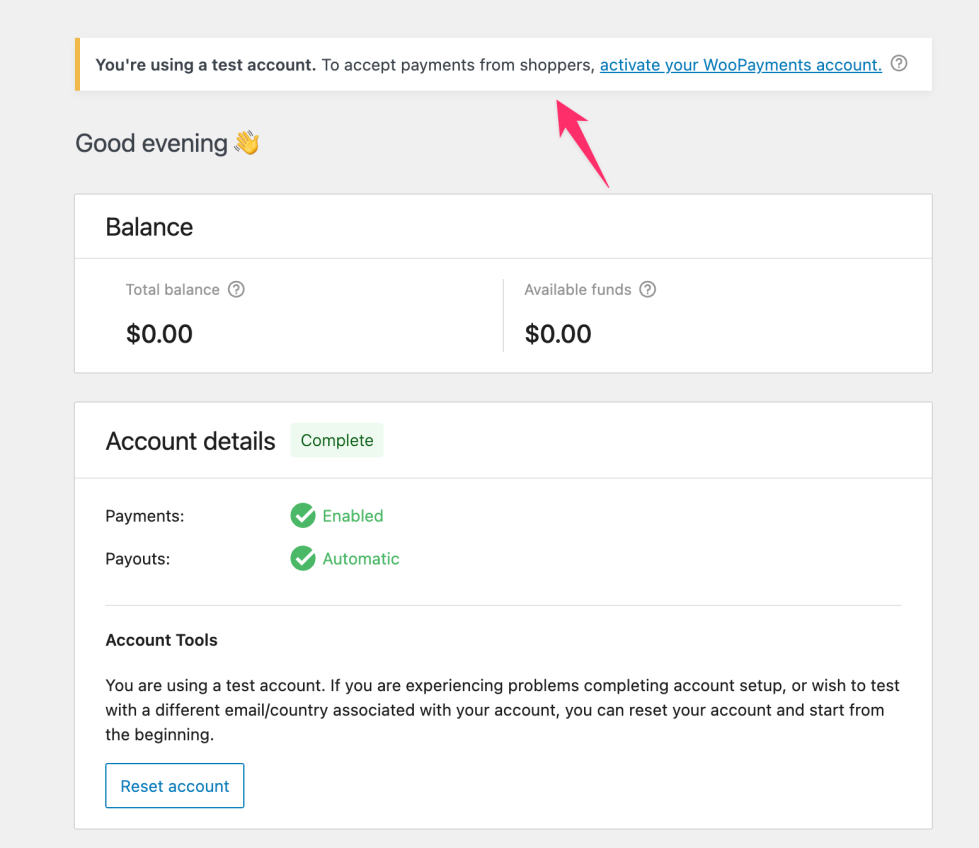
- The WooPayments overview page at Payments > Overview
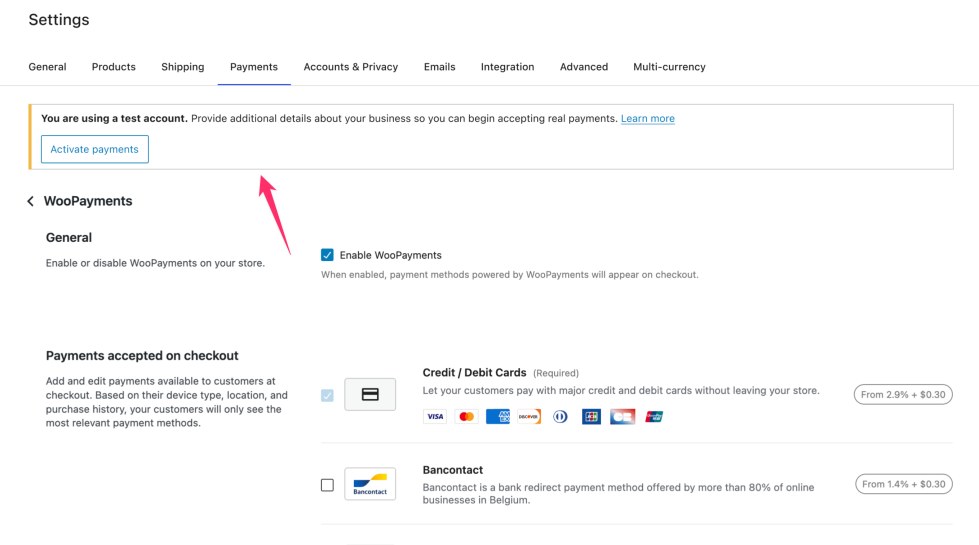
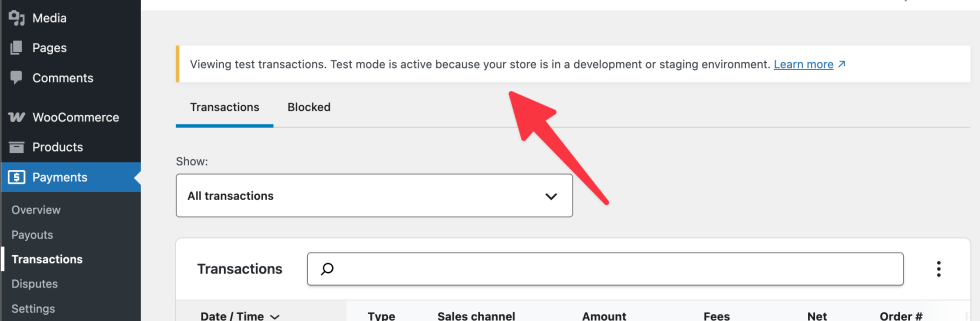
- The WooPayments settings page at Payments > Settings

Note: WooPayments must still be connected to WordPress.com — even when using a test account. If you’re working locally, you’ll need to expose your site to the internet using ngrok or a similar tool.
You can use your test account for as long as you like, and you can transition to a live account when you’re ready to accept real payments from customers.
Moving from a test account to live
↑ Back to topWhile using a test account, you cannot accept live payments. To do so, you will need to activate a live WooPayments account.
Note: When you upgrade to a live account, your test account will be deleted. Transaction data from your test account will still appear under WooCommerce > Orders, but it will not show in Payments > Transactions because test transactions were processed on a separate account that no longer exists.
To activate your WooPayments account, you can either:
- Click the Activate payments button from the WooCommerce payments settings page at WooCommerce > Settings > Payments.
- Click the “activate your WooPayments account” link from the WooPayments overview page at Payments > Overview.
- Click the Activate payments button from the WooPayments Settings page at Payments > Settings.
After selecting one of these options, confirm that you’d like to activate your account. From there, you can proceed through the standard account creation process.
Once your live account is set up, WooPayments will be ready to process real transactions.
Note: If you’d like to continue testing after going live, you can enable test mode at any time — but this will use your live account, not a separate test account.
Developer notes
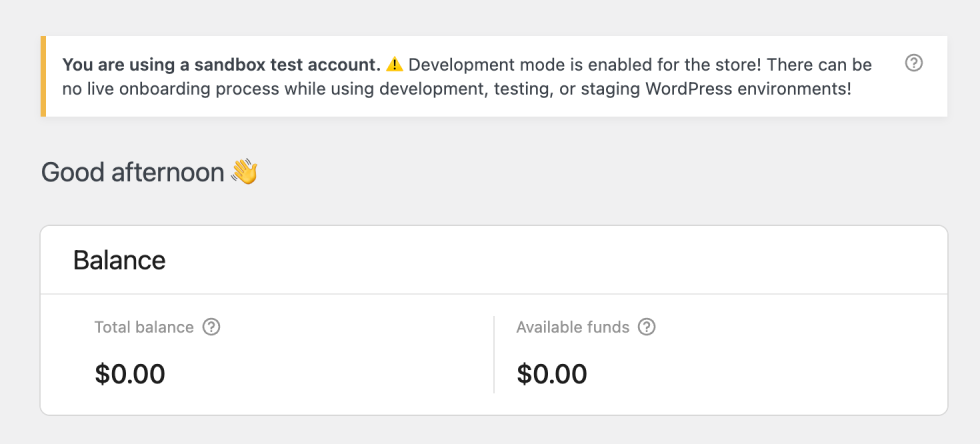
↑ Back to topIf you’re using a development or staging site, WooPayments will only allow test accounts to be created. Sometimes this makes it seem like WooPayments is “stuck” in test mode.
This usually happens when one of the following applies:
WP_ENVIRONMENT_TYPEis set todevelopmentorstagingWP_DEVELOPMENT_MODEis a non-empty stringWCPAY_DEV_MODEis defined and truthy- The
wcpay_dev_modefilter returnstrue
If this is the case, the test account warning banners will mention it:
To create a live WooPayments account from here, you’ll need to remove or update those constants or filters. If you’re unfamiliar with how to do this or do not have access, please contact your hosting provider.