
Whether your goal is to acquire new customers, increase purchase frequency, build customer loyalty, or clear inventory, running a promotion is one of the most effective ways to drive orders.
With WooCommerce, you have a powerful, flexible set of tools to execute a wide range of promotional campaigns. From sitewide discounts and category-specific offers to targeted coupon codes and time-sensitive flash sales, WooCommerce gives you full control over how and when you run a sale.
In this guide, we’ll walk through the key benefits of running sales, break down eight different types of promotions you can create in WooCommerce, and share best practices to run successful sales and maximize ROI without eroding brand value.
The top three benefits of running sales with WooCommerce
↑ Back to topBefore we show you how to host a sale on your WooCommerce store, let’s go over the advantages:
1. More conversions
Great offers prompt action whether you’re targeting new customers or re-engaging existing ones: 86% of online shoppers are more likely to try a new brand just because a coupon is available. Offering a great deal will encourage visitors to purchase for the first time and, paired with a high-quality product and good customer service, could turn them into repeat customers.
On the other hand, three out of four Americans abandon their carts on an ecommerce store due to high prices or the lack of coupon codes. Online shoppers expect value. Meeting them with a timely discount can make the difference between a sale and an abandoned cart.
2. A higher average customer lifetime value (CLV)
Long-term growth depends not just on attracting customers, but on turning first-time buyers into loyal, high-value customers.
Delivering quality products and great service is important, but it’s not the whole picture. Offering exclusive discounts and targeted sales — especially on products or categories customers have already shown interest in — can reinforce customer loyalty and spur repeat purchases.
In fact, 93% of consumers say they’re more likely to buy again from retailers that offer deals and discounts. This shows that you can use personalized promotions to deepen customer relationships, boost lifetime value, and improve the return on your marketing investment.
3. The ability to reduce inventory with minimal waste
Holding underperforming SKUs in your warehouse costs you storage fees and ties up cash flow. But running deep sales on slower-moving items allows you to recover some of that sunk cost while freeing up cash for higher-impact investments.
The eight best ways to run a sale in WooCommerce
↑ Back to topNow, we’re going to show you how to run a sale. We’ll go over eight sales methods and talk about the pros and cons of each.
1. Product discounts
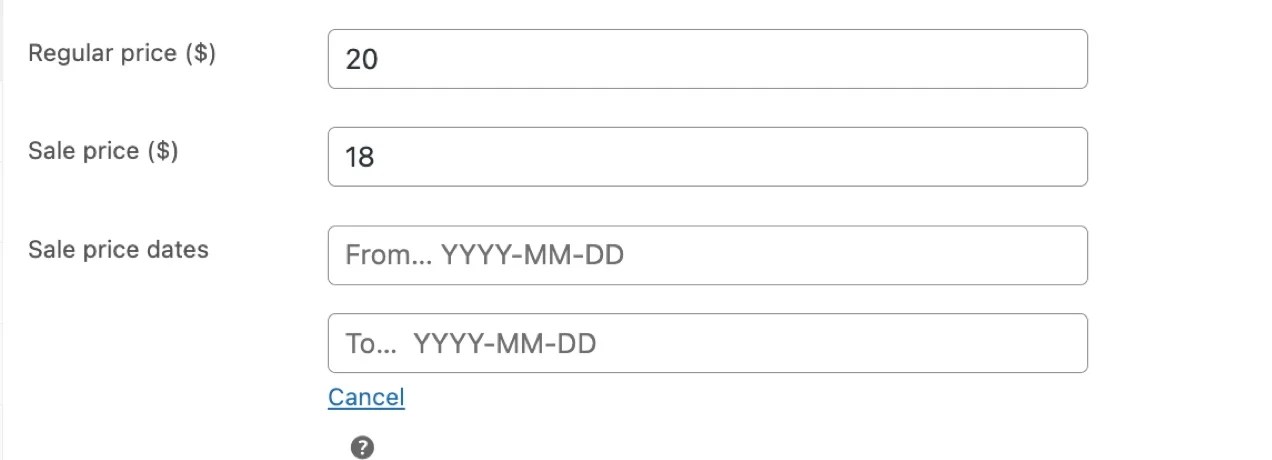
Product discounts are the most straightforward type of sale you can create with WooCommerce. To do this, go to Products → All Products and click on the item you’d like to offer at a discount. Scroll down to the Product data section.
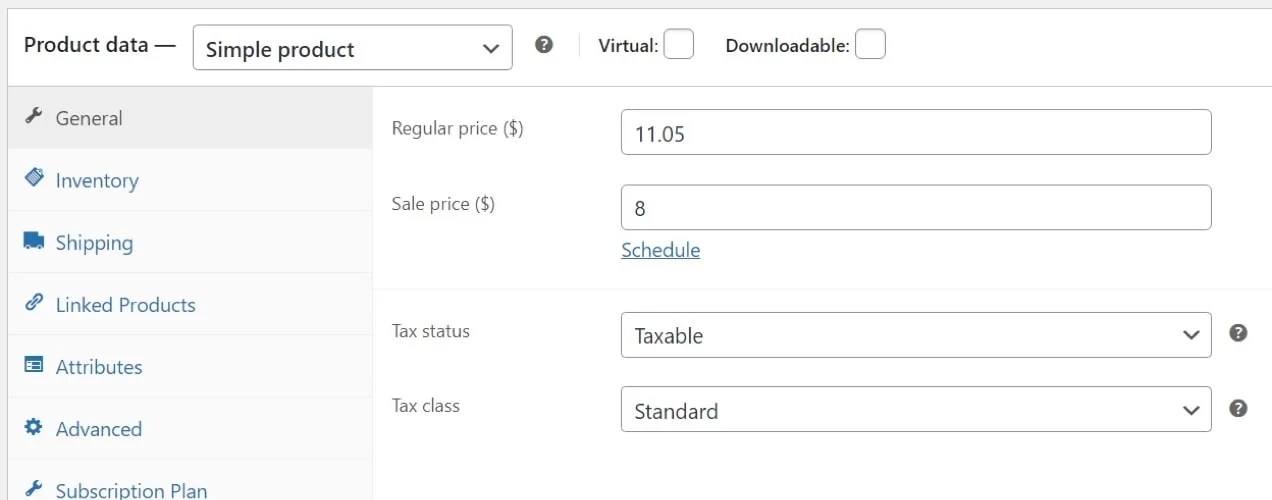
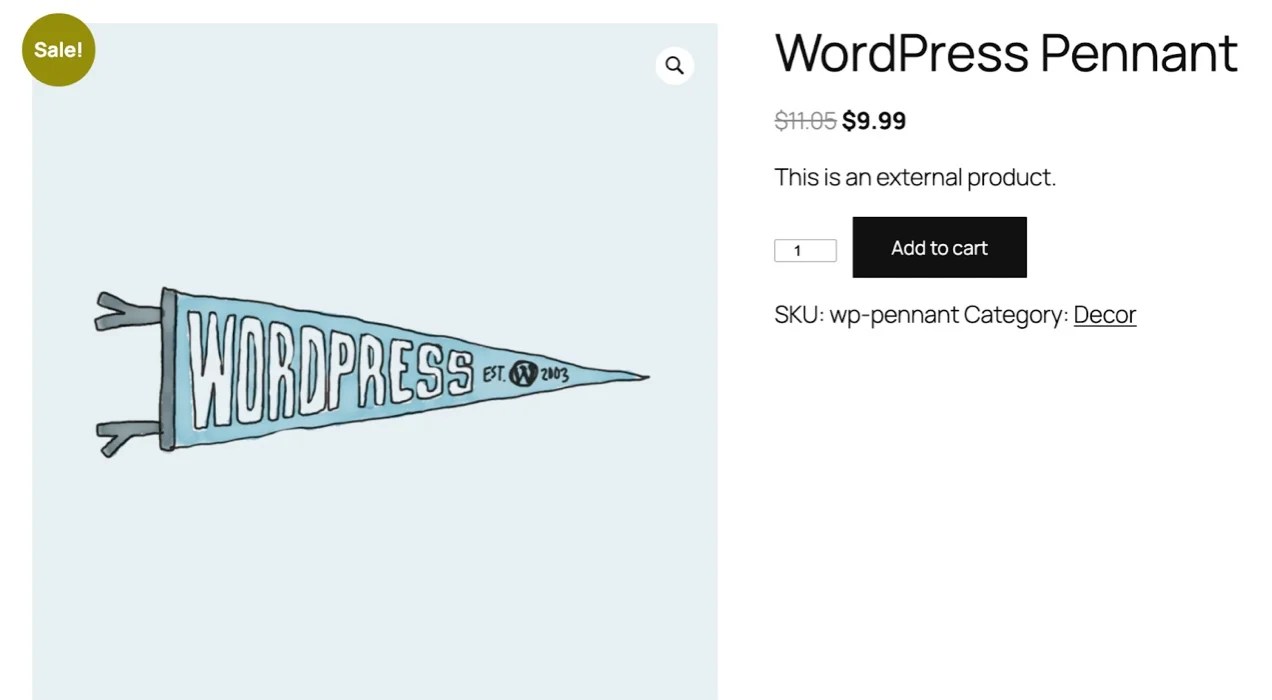
When you enter a value into the WooCommerce Sale price ($) field, it will override the regular price and appear on the front end of your site. It will also cross out the original price to make it clear that the item is discounted:
Of course, if you’re discounting a lot of products at once, this process can become time-consuming. To edit sales prices in bulk, go to Products → All Products.
Select all the items you want to edit by checking the boxes on the left side of the screen next to their names. Next, open the Bulk actions menu, click on Edit, then Apply.

This will open a popup where you can create bulk discounts. Look for the section that says Product data and click on the Sale menu.
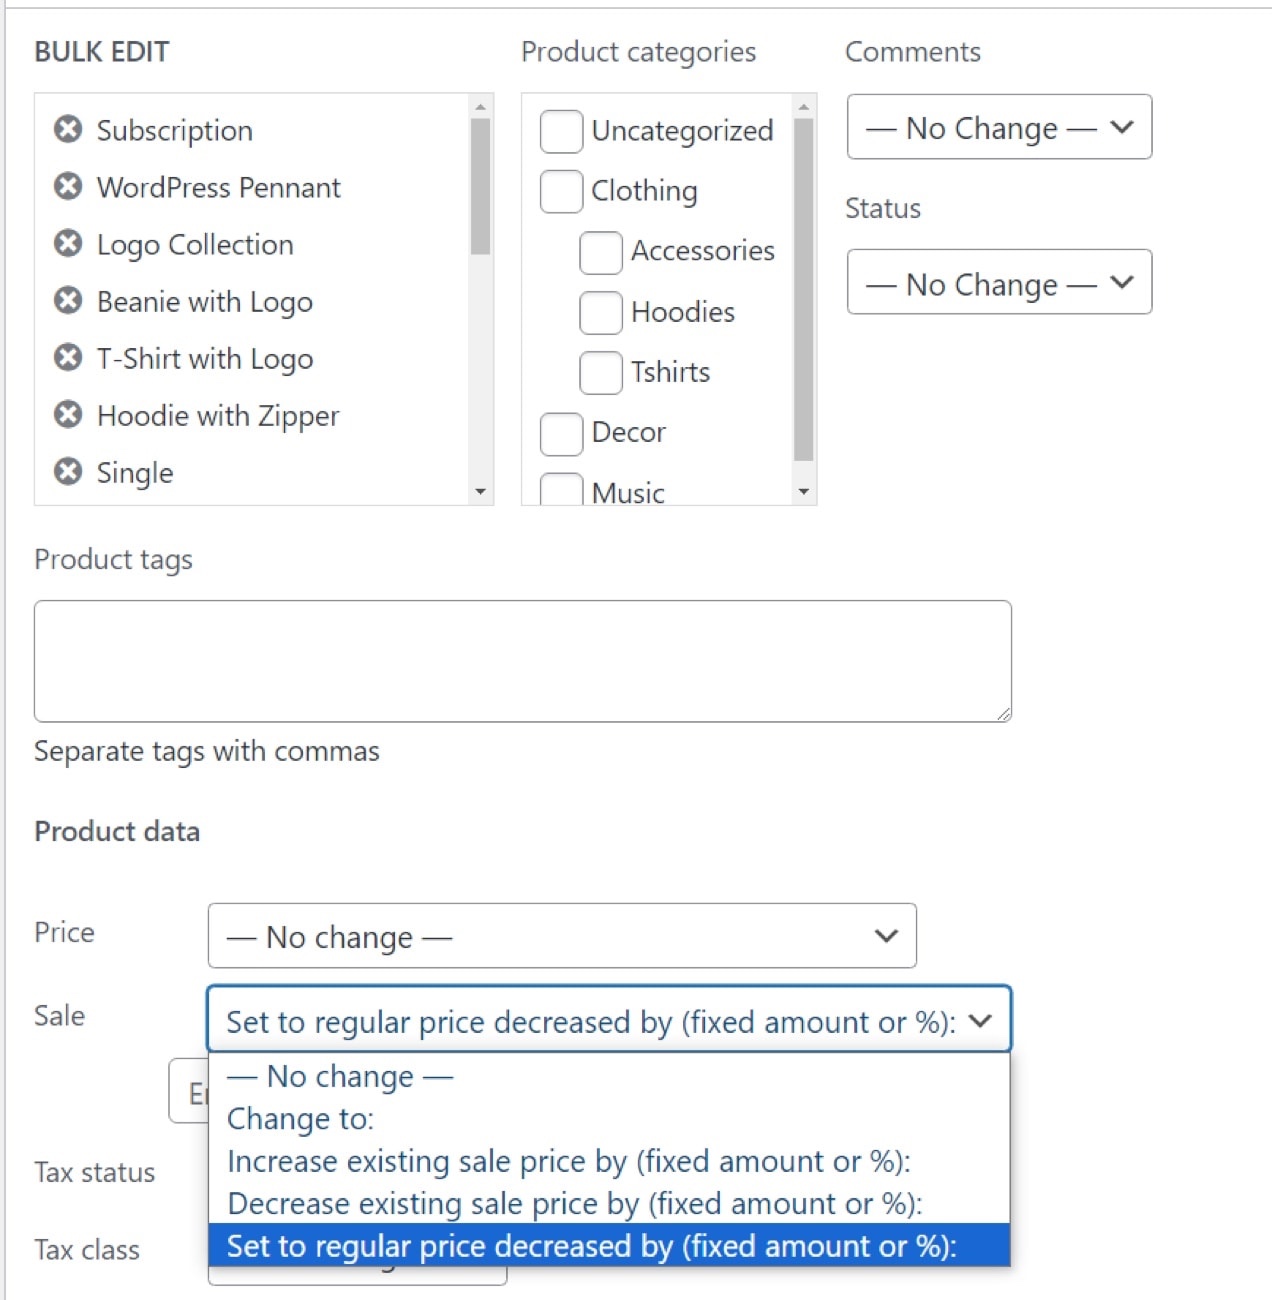
Here, you can choose to increase an existing sale price, decrease an existing sale price, or decrease the regular price by a certain amount. To apply a new bulk discount, you’ll want to choose the third option: Set to regular price decreased by (fixed amount or %). This example illustrates setting a five percent discount:
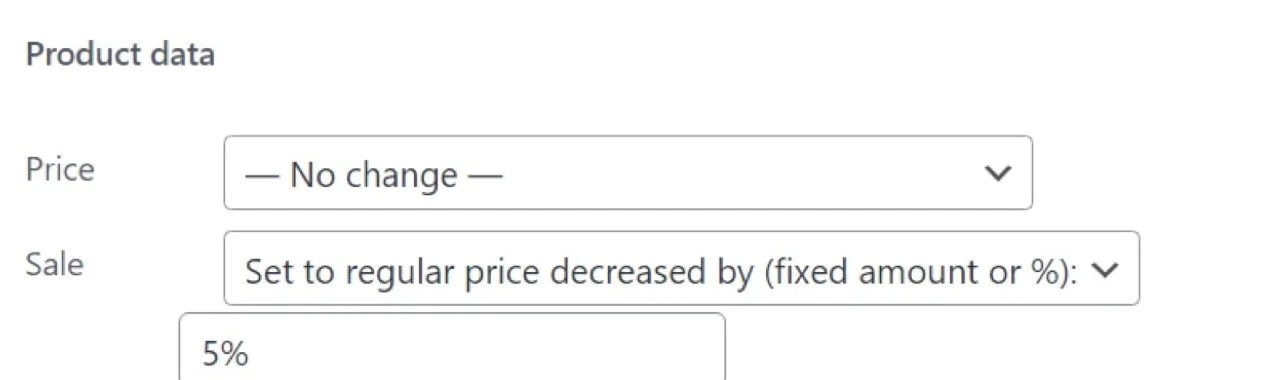
When you’re done, click the Update button to return to the All products screen. If you check the Price column for the selected products, you’ll see that they’re now discounted by five percent.

Just remember to remove the bulk discounts once the sale is over.
2. Flash sales
A flash sale is a discount campaign with a set timeline — typically only a few hours or days. The idea behind this type of campaign is to create a sense of urgency and encourage visitors to make snap decisions on purchases.
By default, WooCommerce doesn’t have a timer feature you can use for a flash sale strategy. But, there are extensions that allow you to add this feature to your store, which we’ll cover below. You can run flash sales that end when product inventory runs out.
To do this, you’ll need to use the Stock management feature in the product editor. Open the item you want to put on sale and go to the Product data box. Click on Inventory and check both the Stock management and Sold individually options.

In the above screenshot, you’ll see a product with a quantity of 100 units in inventory. Each customer is only allowed to buy one per order.
Next, you can add sale prices by going to the Product data → General tab and entering a new value in the WooCommerce Sale price ($) field. This configuration will make it so that the product on sale can run out, thereby ending the discount.
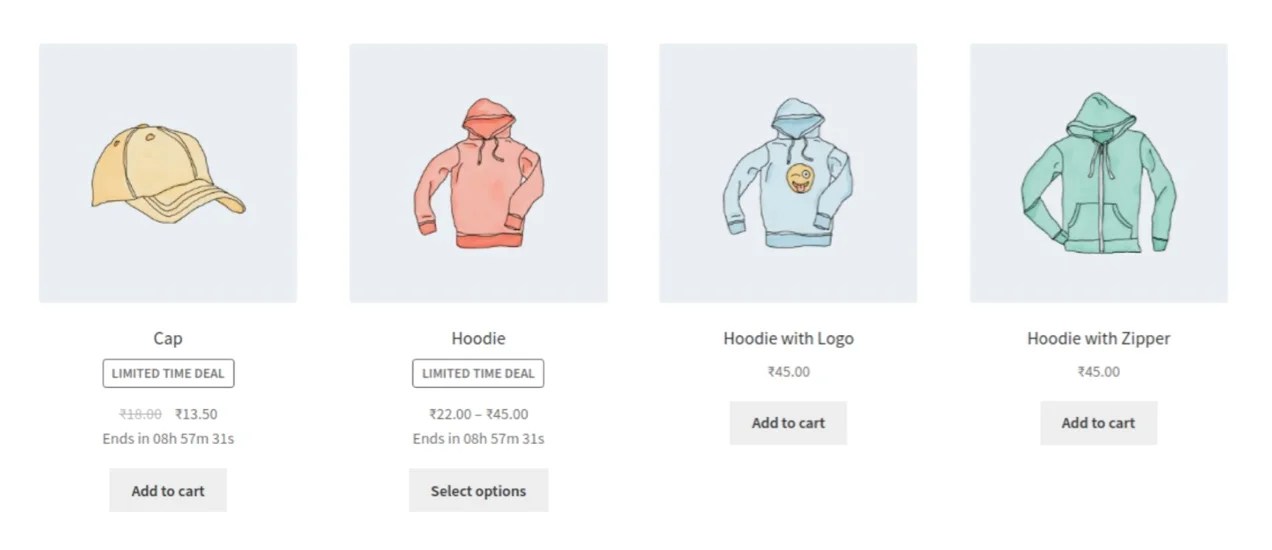
You’ll also want to set some type of notification on your store homepage or Shop page indicating that there’s a flash sale going on. This will let visitors know there’s a product available for discount and the offer will only last until the product is sold out.
Another option is to use the Simple Sale Countdown Timer extension for your flash sale strategy. With this tool, you can create limited-time deals that expire on a specific day and at a specific time. Then, you can display a countdown timer on shop and product pages to further drive sales.
3. Cart discounts
Cart discounts offer discounted prices on entire shopping carts, rather than on a product-by-product basis. One way to do this would be to offer a flat-fee or percentage discount on any purchase over $50.

To implement cart discounts, you’ll need to use an extension like Cart Discounts for WooCommerce, which enables you to configure multiple types of discounts, including:
- Discounts by the total cart amount: This is the most straightforward type of cart discount you can offer — cart discounts only trigger if the total is over a set amount. This is a great way to increase average order value, as you encourage customers to add more to their cart to activate a discount.
- Cart discounts that trigger past a number of items: This type of discount triggers if a customer has a certain number of items in their cart. Note that these discounts can be tricky to manage, since shoppers may be able to purchase multiple cheaper items and still get discounts.
- Discounts for abandoned carts: This approach involves sending discounts via email to visitors who have abandoned their carts to entice them into completing their order. According to research, more than 70% of shoppers abandon their carts, so recouping even a small number of these potential losses can be a big win.
- Discounts by cart weight: If you sell physical items, weight plays an important role due to shipping costs. One creative way to offer cart discounts is to take weight into consideration. This makes sense when you’re selling products that are both heavy and expensive (so you can afford to offer discounts that offset the shipping costs).
Note that any cart discounts you offer should have set conditions. Otherwise, you open yourself up to potential sales exploits where visitors find loopholes that enable them to save money unfairly.
4. Product category discounts
Discounting entire product categories instead of running a storewide sale gives you the opportunity to boost certain styles or departments that aren’t seeing as much traction on your WooCommerce store.
To implement this type of sale, go to Products → All Products and look at the Select a category menu. Click on it and choose the category of products you want to edit.
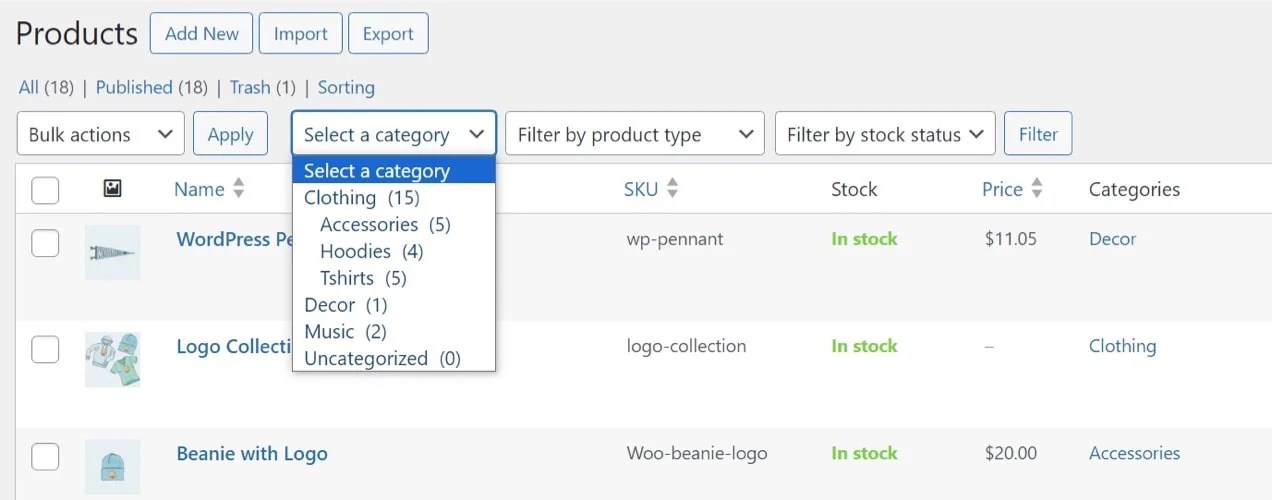
Once you select a category, click on Filter. This will reload the products page and only show you the items in that category.
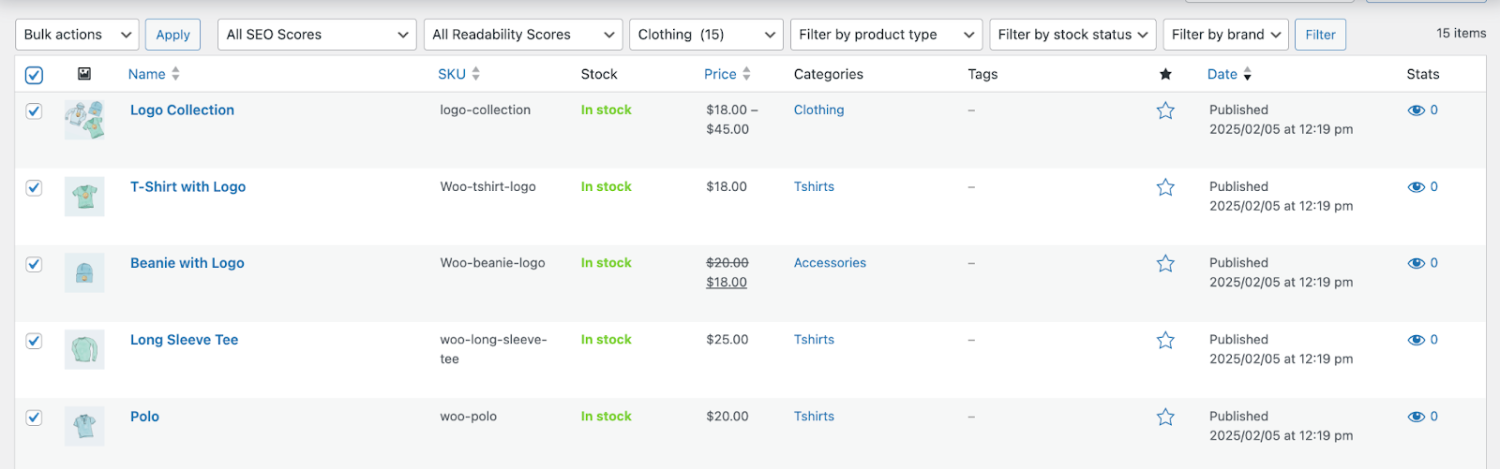
To set discounted prices for these products, select all of them by clicking the checkbox at the top of the list. Then open the Bulk actions menu and choose the Edit option. Next, click Apply.
Locate the Sale drop-down menu and select the option that says Set to regular price decreased by (fixed amount or %). This will reveal a field where you can enter the discount value.
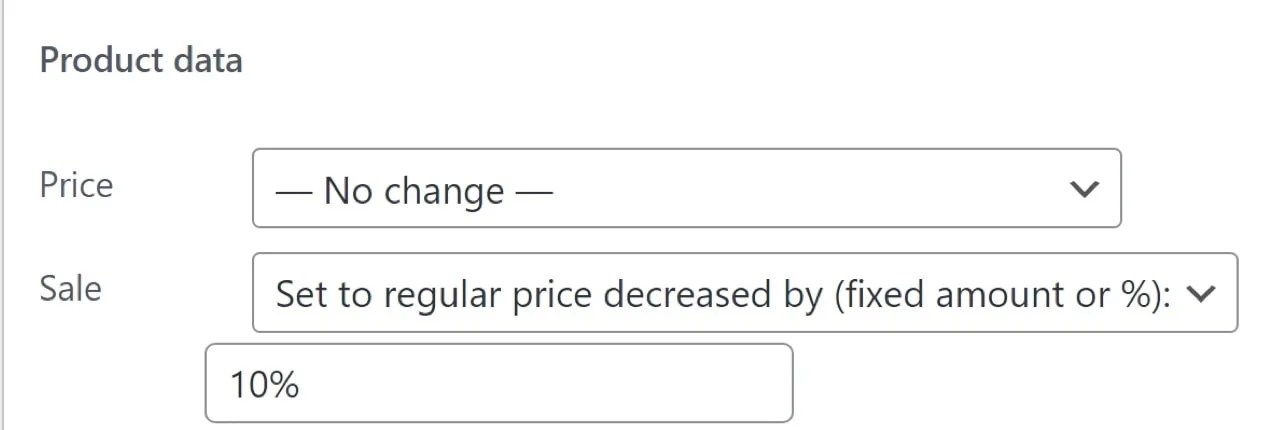
You can set this as either a flat fee or a percentage discount. To set a flat fee discount, simply enter a number. For a percentage discount, enter the number followed by the percent symbol. Click Update to set sale prices for all the products in that category.
5. Free shipping offers
Many shoppers abandon carts due to shipping costs, so running sales that offer reduced or free shipping is a great way to encourage purchases.
With WooCommerce, you can provide free shipping by creating a new shipping zone and then applying it to the products on sale. Go to WooCommerce → Settings → Shipping. Click on the Add zone button next to the Shipping zones header.
First, set a name for the zone for internal identification purposes. Next, select the regions to include in the zone if you only sell to a specific area or country.
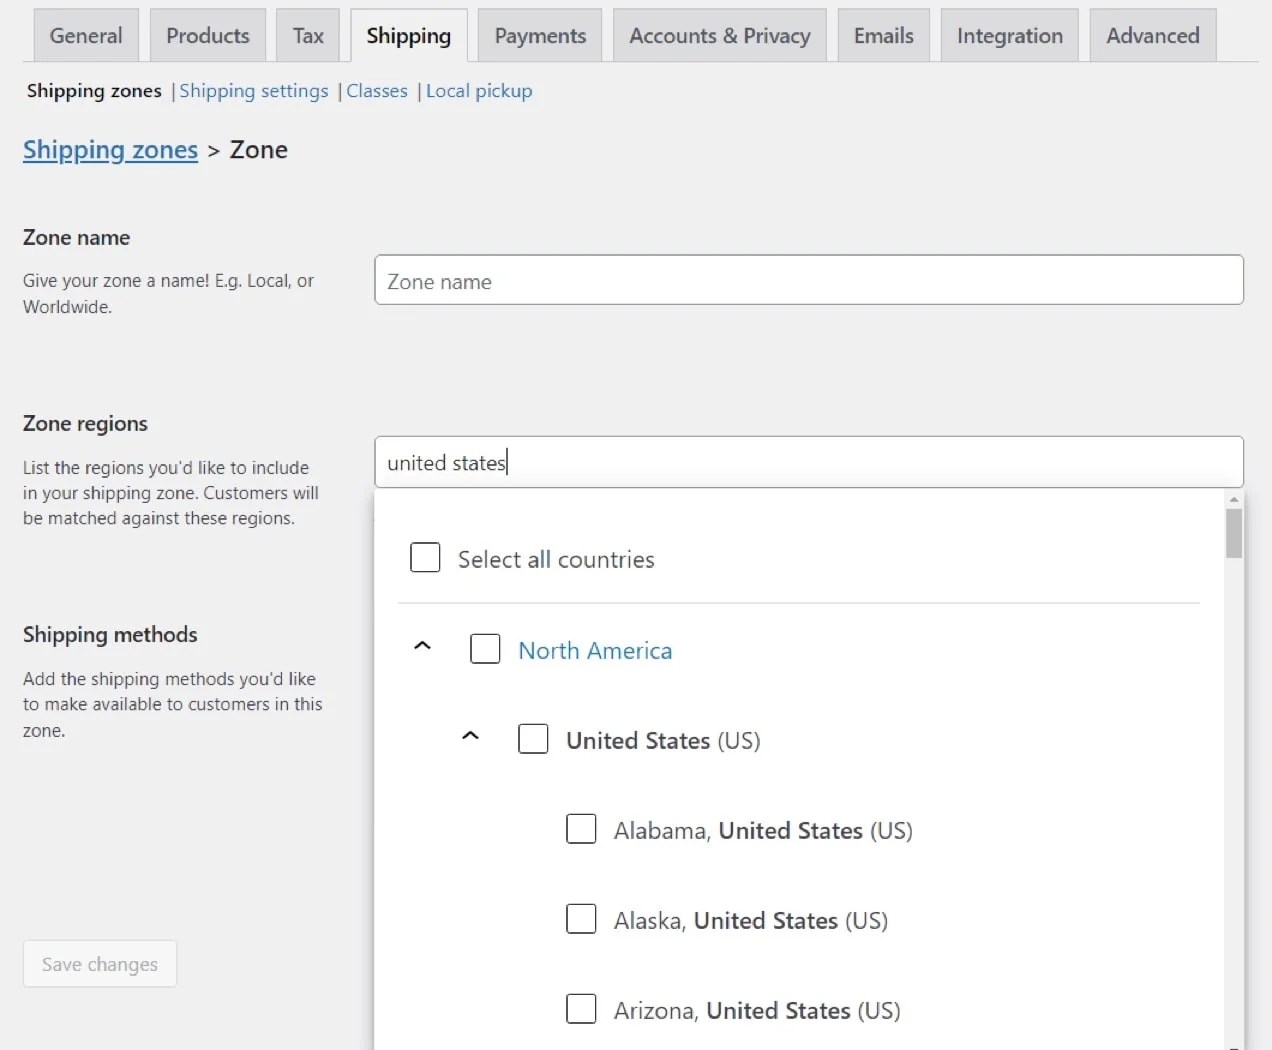
After setting the region, click Add shipping method, which will open a new window. Your options are free shipping, flat rate, or local pickup.
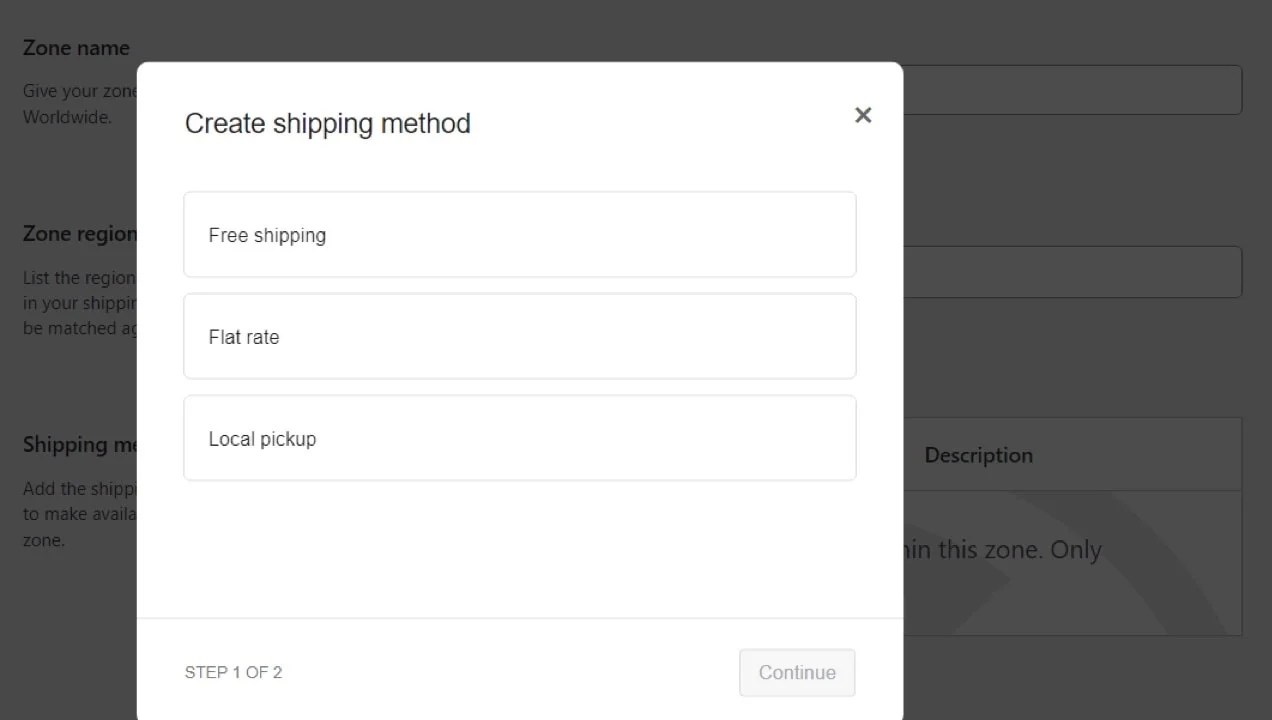
Choose Free Shipping, which will appear under the Shipping methods section for that zone. Click on Edit.
The settings window will enable you to set conditions — like using a specific coupon code or reaching a minimum order amount.
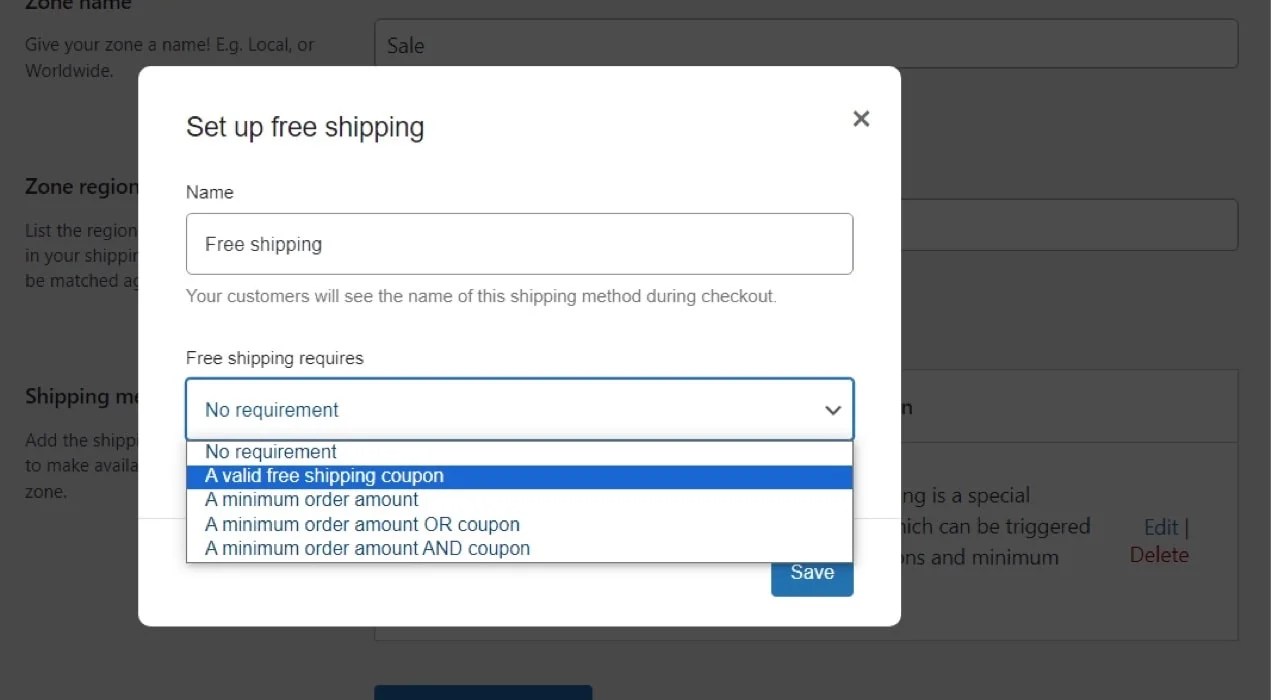
Set the condition you want and click Save. Now all that’s left is to tell existing customers in that shipping zone that you’re offering free shipping.
6. User-specific or personalized discounts
User-specific discounts are offers that vary from customer to customer. For example, you might put products on sale or apply sale prices just for your top customers.
With WooCommerce, you can generate one-time-use coupons and share them with individual customers or specific customer groups. We’ll show you how to create coupons with WooCommerce in the next section.
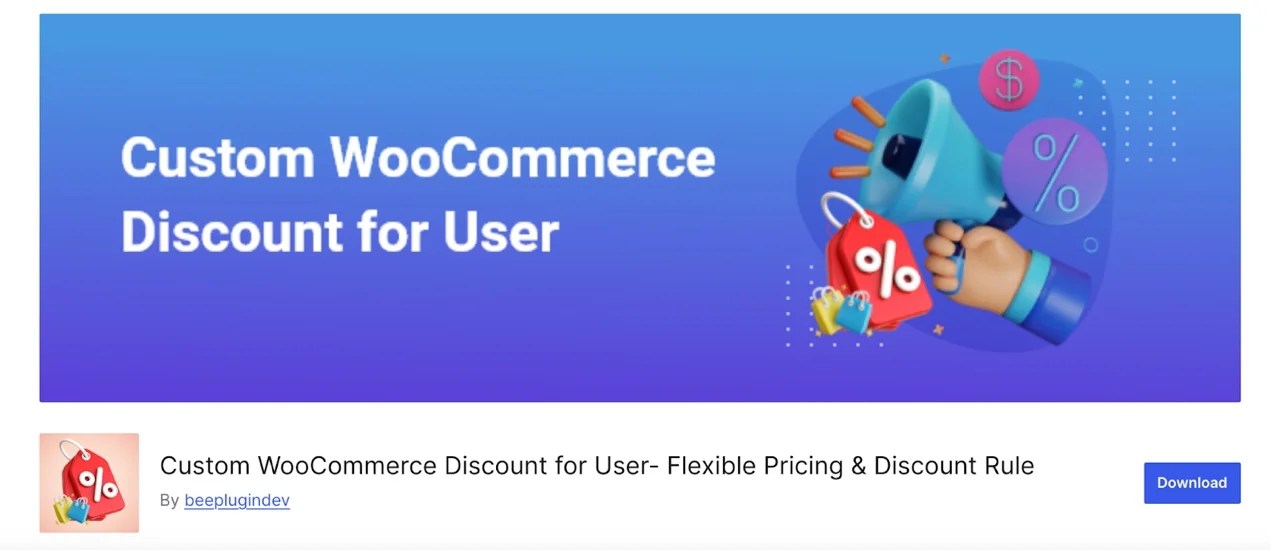
If you prefer not to use coupons, you can use an extension like Custom WooCommerce Discount for User, instead. To do this, go to Manage Customer Discount and use the Select User menu to choose a WooCommerce customer.
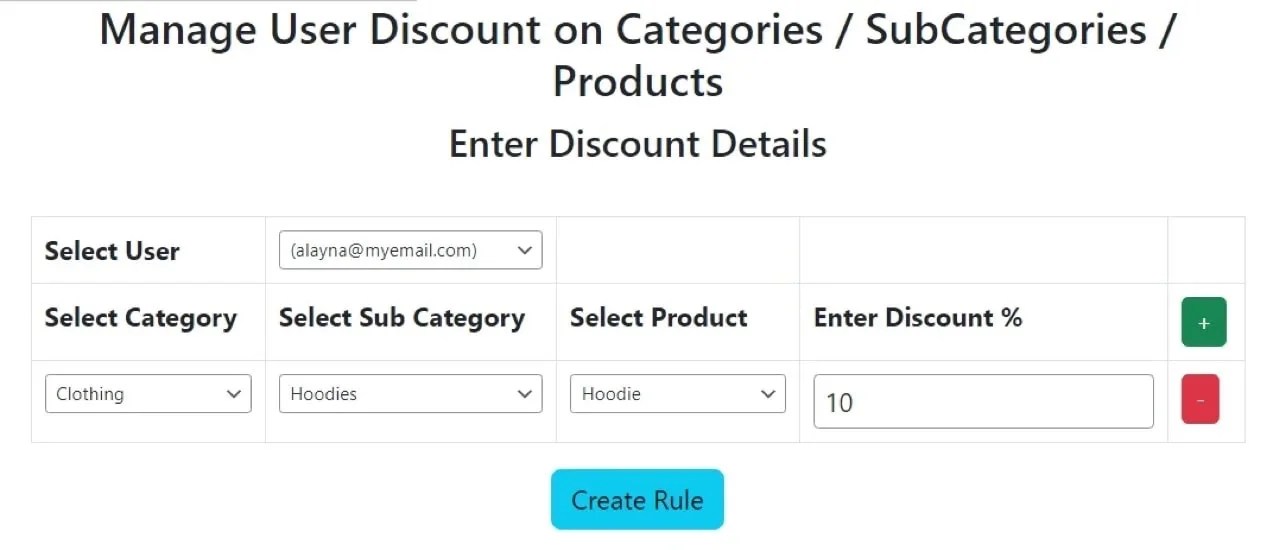
Once you select a customer, set up a rule specifying the products or categories that discounts should apply to. In the screenshot above, you can see a ten percent discount that’s unique to one customer.
Then, of course, you’ll need to communicate the discount to the customer — the simplest way to do this is through a marketing automation platform like Klaviyo.
7. Coupon discounts
WooCommerce includes a coupon code system that’s perfect for hosting sales. You can create coupons that offer discounts for any amount, configure them to only work under specific conditions, and set usage limits.
To create a coupon, go to Marketing → Coupons and click on Add new coupon at the top of the screen.
You can set a code manually or use the Generate coupon code option.

Either option is viable, as long as you don’t set a generic code (like “discount”) that customers can easily guess.
Next, scroll down to Coupon data. Choose a Discount type and set a value using the Coupon amount field.
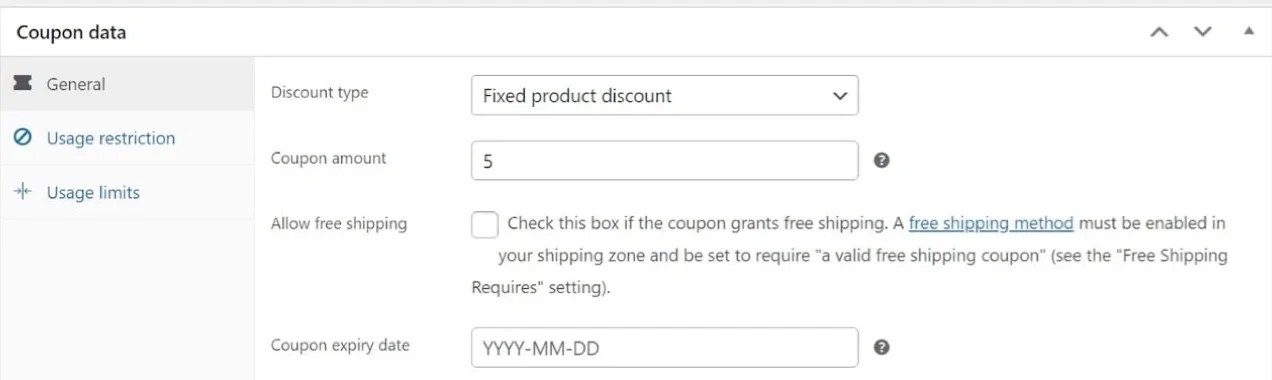
The Discount type menu includes an option called Fixed cart discount. You can use this as an alternative way to run cart discount sales. The Allow free shipping option is also a valid alternative to shipping discounts.
The Coupon expiry date setting can also be incredibly useful for sales, since it means you don’t need to disable or delete the code manually. It’ll simply stop working on the date you set.

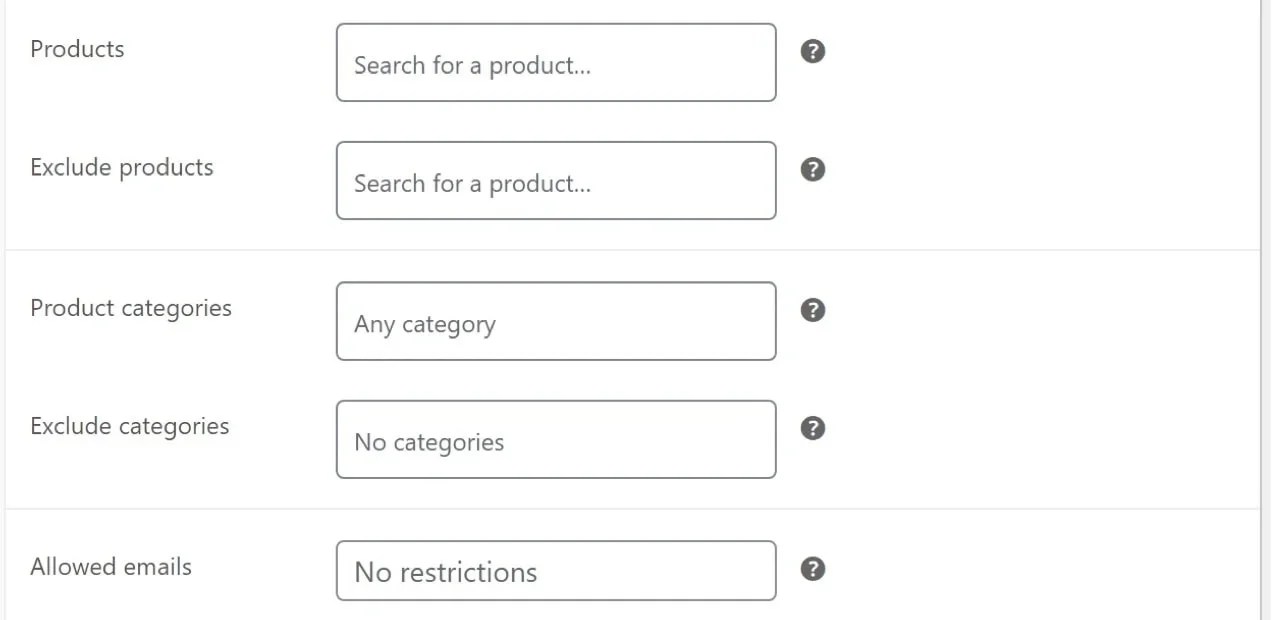
Go to the Coupon data → Usage restriction tab, where you’ll configure the conditions customers must meet to apply sales prices. The options include setting minimum and maximum spends to activate the coupon and excluding sale items. You can even check a box that prevents shoppers from using multiple coupons together.
This tab will also allow you to apply the coupon to specific products, categories, or users — a great way to offer personalized discounts.
When you’re ready, move on to the Usage limits tab.
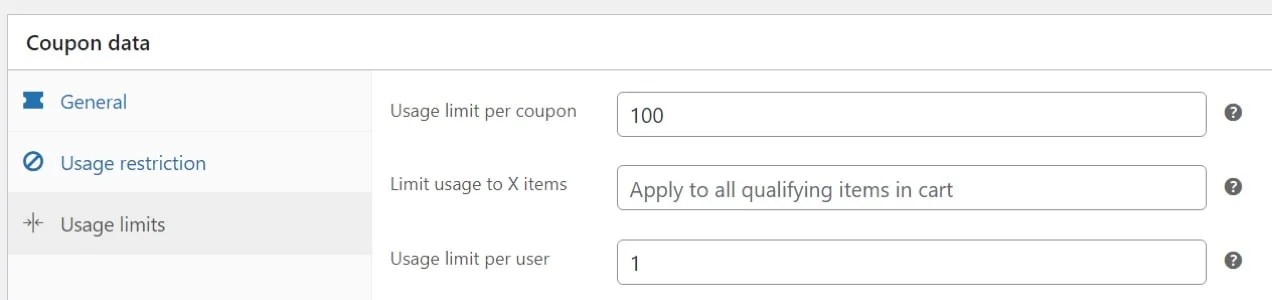
If you only want the coupon to work a set number of times, enter that value in the Usage limit per coupon field.
Likewise, you’ll want to set the Usage limit per user value to “1” in most cases to prevent shoppers from taking advantage of discounts unfairly. When you’re finished configuring the coupon, click Publish.
If you want to leverage coupons even further, you can use them as rewards for a referral system. In this setup, customers get access to exclusive sales or discounts if they refer others to your WooCommerce store and those referrals complete a purchase.
To make this possible, you’ll need to use an extension like Coupon Referral Program for WooCommerce. This tool generates unique links for each customer that they can use to share your online store. These links track activity and give rewards when referrals meet the necessary criteria.
8. Private sales for members
Last but not least, you can also offer exclusive sales so that only current members can access discounts. To do this, you’ll need an extension like WooCommerce Memberships.
With this tool, you can restrict access to certain pages, posts, and products so only members can view it. This is a great way to hold sales that aren’t visible to the public.
When running a private sale, you can opt to use any of the other methods we’ve discussed so far to set discounts. Every aspect of the sale will work as usual, except the way you limit access.
Five key steps for running a successful ecommerce sale
↑ Back to topNow that you know how to create a sale in WooCommerce, it’s time to maximize your success. Here are some basic principles to run a successful sale:
- Set a goal for the sale: This can be as straightforward as reaching a set number of purchases or an overall revenue target. This is useful for documenting each sale’s success, so you can apply what you’ve learned to future events.
- Plan your type of discount: The discount type should be based on the goal you want to achieve. For instance, if you want to motivate first-time buyers, a flat discount might be most appealing. A cart discount with a minimum requirement might be better for loyal customers who already trust your products.
- Build a coordinated marketing strategy to support your promotion: For a sale to drive meaningful results, it needs to reach across your customer touchpoints. Align your social, SMS, email, and on-site messaging to maximize customer engagement.
- Prepare the sale: Once all the planning is done, you’ll need to set up the sale in WooCommerce. This process will vary depending on the type of sale you’re working on.
- Run the campaign and measure the results: Once the sale starts, your job is to ensure it goes off with as few technical difficulties as possible and to provide customer support. When the sale ends, analyze its performance in the reports section of your WooCommerce dashboard to see if it met your expectations. Be sure to take notes on how you can improve the next sale.
Frequently asked questions
↑ Back to topIf you still have questions about how to run a sale, this section will answer them.
What types of sales can you run using WooCommerce?
WooCommerce enables you to offer multiple types of sales and discounts. Those include product-specific discounts, cart discounts, free shipping, exclusive discounts, coupons, seasonal sales, and more. If you use extensions like AutomateWoo, you can access more types of discounts, including referral coupons and private sales for members.
How often should you run sales with WooCommerce?
This depends on your business and the discount types you want to offer. At the very least, you might consider offering discounts around popular holidays.
Do I need premium plugins and extensions to run sales in WooCommerce?
WooCommerce offers built-in functionality to run sales and offer multiple discount types. If you want more options, you can install free and premium plugins or extensions (or both).
Does WooCommerce include sales reports?
WooCommerce includes a highly-detailed analytics and reporting system. This enables online store owners to monitor activity, track customer engagement, and stay on top of sales while they’re running, so they can check on and refine performance.
What’s the best type of sale for clearing out old inventory?
Clearance sales and category-wide promotions are great for moving excess stock. Pairing these with urgency tactics like low inventory messaging or countdown timers make them even more effective.
How can I personalize sales for different customer segments?
WooCommerce allows you to personalize promotions through coupon restrictions, user-specific discounts, and integrations with email platforms like Klaviyo. You can set sales prices based on customer behavior, purchase history, or loyalty tier.
Can I automate sales in WooCommerce?
Yes. You can schedule sales with start and end dates, automate coupon expiration, and use extensions to trigger promotions based on customer actions (like abandoned carts or repeat purchases).
How do I prevent abuse of discount codes or promotions?
WooCommerce allows you to limit coupon usage per customer, restrict stacking multiple discounts, and exclude certain products or categories. Many extensions also include fraud prevention tools or thresholds.
Do I need a developer to set up advanced discounts?
Not in most cases! WooCommerce core tools and extensions cover most scenarios without custom development. However, larger WooCommerce stores may benefit from developer support to implement complex or highly-customized promotions.
Bring your sales strategy to life with WooCommerce
↑ Back to topWhether you’re targeting first-time buyers or loyal customers, discounts can drive conversions. And with the right approach, you can hold sales without sacrificing profit margins.
With WooCommerce, you can run multiple types of promotions, depending on your goal, from product discounts and flash sales to personalized offers and much more. Plus, there are a wealth of available extensions to add even more advanced, specialized functionality.
Start building smarter, more strategic promotions today with WooCommerce.
About

Speaking of discounts/coupons, I’d love to see an article on how Woo handles subscription renewals to give 50% off for a limited time and then how you swap it to to remove the 50% if x amount of time passes.
From my understanding that’s not currently possible with Coupons/Memberships/Subscriptions.
Colour me interested in that aspect. 🙂
Hi Syrehn! This extension should do exactly what you want: https://woocommerce.com/products/discounts-for-woocommerce-subscriptions/
Hi James, I don’t know if you stopped checking comments on the previous post but I wrote about an issue in a comment that a bunch of people are having. We’d really appreciate a response! Thank you!
Please open a support ticket if you haven’t already to receive help for your specific issue. As noted in the Storefront release post, blog comments are not the best way to receive help from our team due to different configurations, etc. 🙂
WooCommerce is an awesome plugin! The flexibility when it comes to designing different types of sales and promos cannot be beat (the customer-email-exclusive discounts is a perfect example). We just featured you in a post on the HostGator blog of our top WordPress plugins for eCommerce, and you’re #1: http://www.hostgator.com/blog/2016/05/16/6-best-wordpress-plugins-for-ecommerce/ Thanks for being awesome!
Thanks Amelia!
Hi all
I need any plugin or script for woo commerce products have timer like 1 min 45 sec then it become 0 seconds below buy button have to active.
Please help me
Hello srinu, at the moment we don’t have any extensions like this, but you might be able to find some custom code or a similar solution offered by third party developers with a quick search.
If this is something you’d like to see us add, please post it as an extension idea here: http://ideas.woocommerce.com/forums/133476-woocommerce/category/39721-category-extension-ideas
We have some ideas contributed about a countdown for a sale ending, but not the buy button being delayed by a timer, so this is an interesting suggestion 🙂
What if some products could be buy one at 10$ or two for 15$ but only the one group, not anything else in stock?
Great idea! Try this extension, Kevin: https://woocommerce.com/products/quantity-discounts-pricing-for-woocommerce/
Trending
How to write product descriptions for SEO, AI agents, and shoppers in 2026
By Vanessa Petersen •
How to prepare your store for AI-driven commerce
By Julia Callicrate •
High-converting landing page design for ecommerce (with examples)
By Erika Ellacott •
Never miss a beat — join our mailing list
Please enter a valid email.
View our privacy policy. You can unsubscribe anytime.
There was an error subscribing; please try again later.
Thanks for subscribing!
Emails will be sent to
You're already subscribed!
Emails are sent to