Timezones refers to the WooCommerce Bookings setting that can be found via Bookings > Settings in the sidebar of the WP-Admin dashboard. This setting controls how Bookings displays the timezone to customers.
Configuring Timezone Settings
↑ Back to top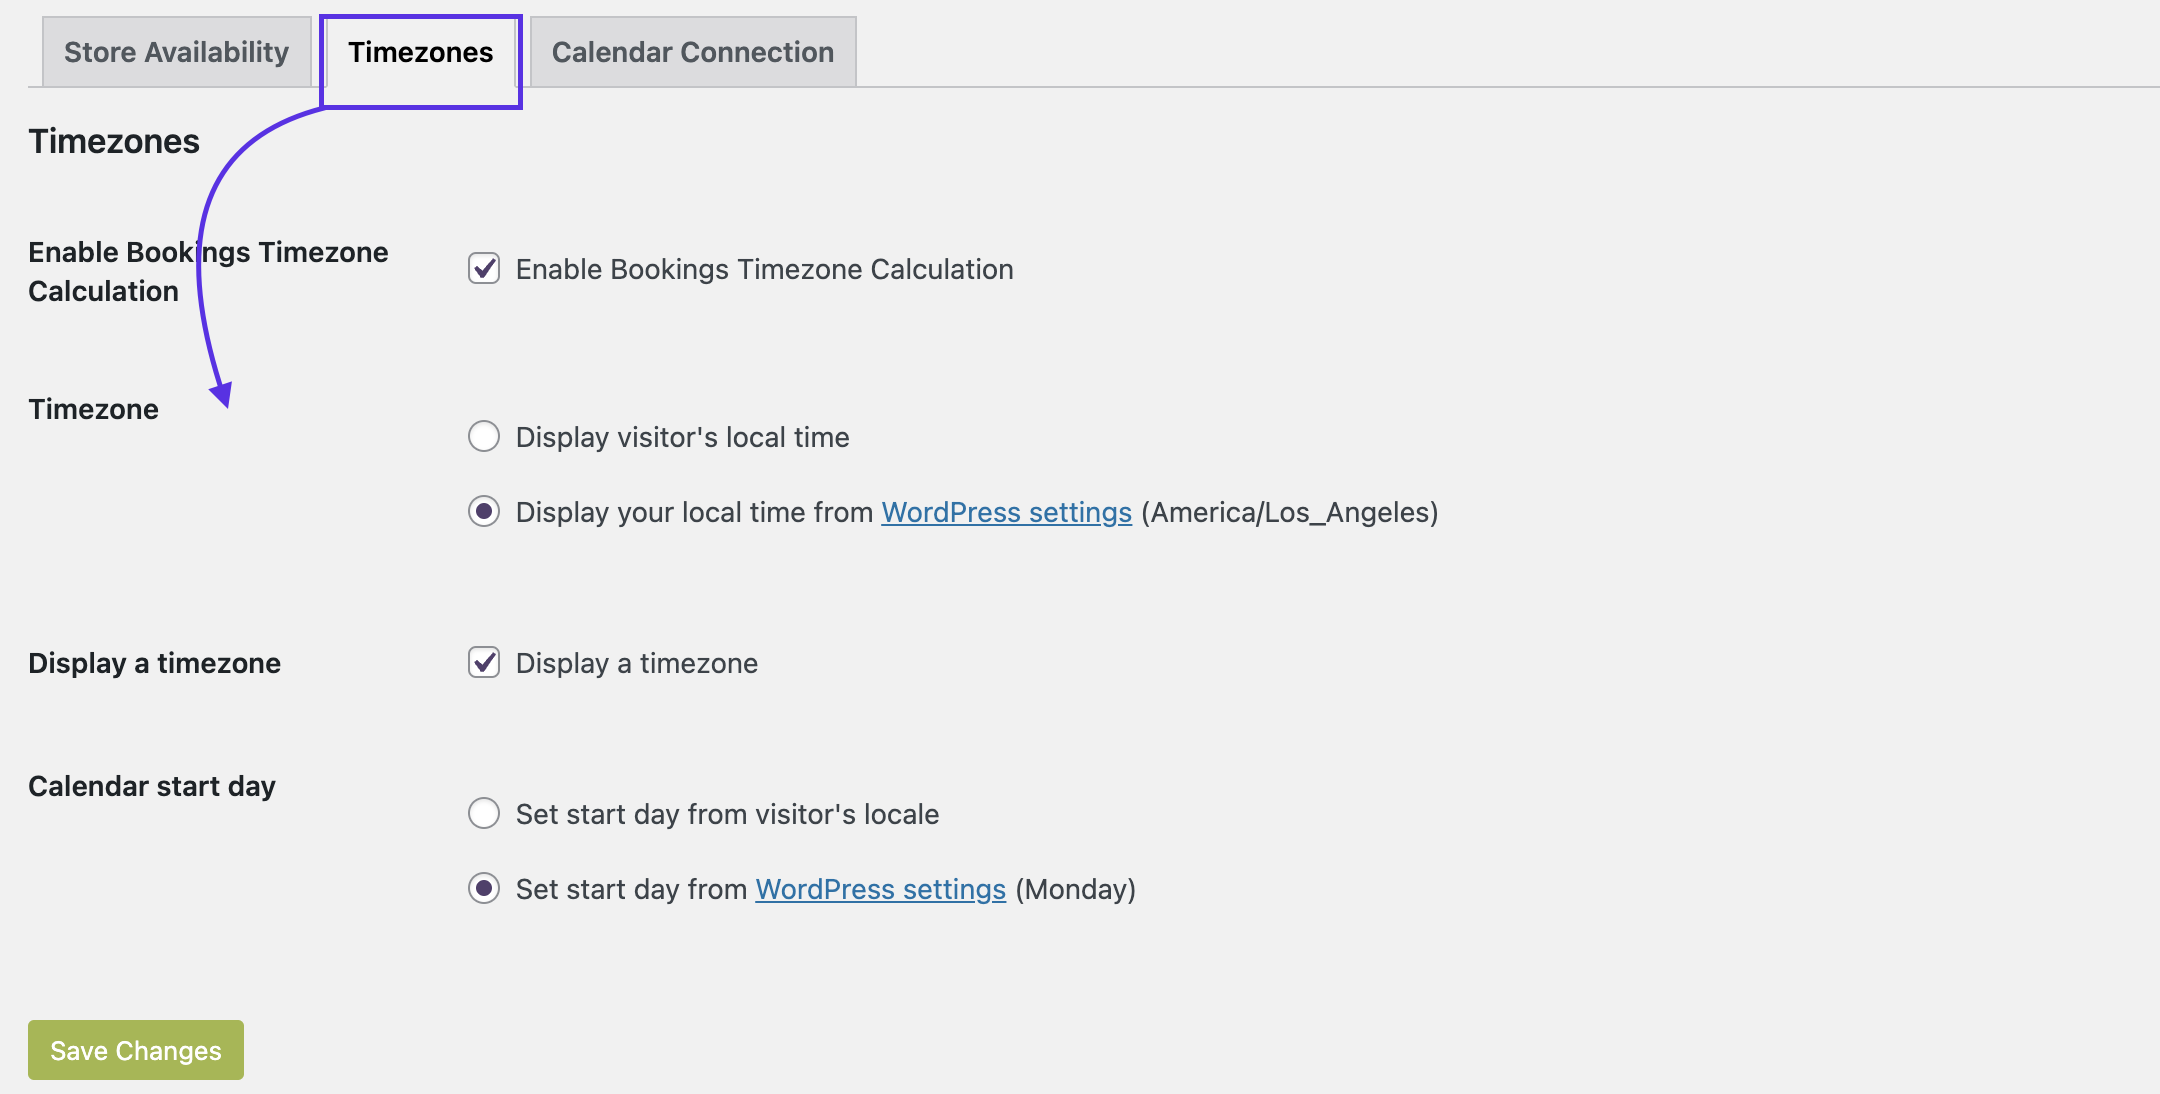
To configure, follow these steps:
- Log into your site’s WP-Admin dashboard.
- With the Bookings plugin installed and activated, navigate to Bookings > Settings > Timezones in the sidebar.
- Tick the box for Enable Bookings Timezone Calculation if you want Bookings emails and other automatic events to be triggered using the site’s configured timezone. If disabled, events are triggered on UTC time.
- Select/tick the following settings:
- Timezone – Use your visitors’ local time or yours. This only affects bookable products with the booking duration configured to either minutes or hours. Bookable products with the booking duration set to days or months are always displayed in the site’s configured timezone.
- Display a timezone – Choose whether or not to display the timezone. If enabled, this will show in the cart and in order confirmation and reminder emails. See Timezones: Usage for screenshots.
- Calendar start day – Use the visitor’s locale or yours. If using yours, the information is pulled from the setting at Dashboard > Settings > General > Week Starts On. Some countries start the week on Sunday; some on Monday.
- Click the Save Changes button.
Timezones: Usage
↑ Back to topTimezone
The frontend Bookings calendar displays in the timezone specified: Visitor or yours.
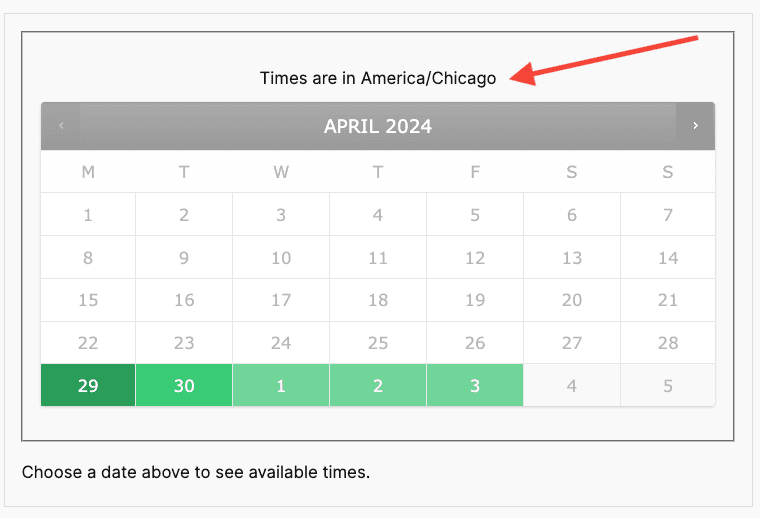
After the booking is made, the time displayed to the customer is in their timezone, including the cart, order confirmation, and reminder emails.
