MEOW is a modern WooCommerce theme designed for pet stores and animal-focused brands that want the flexibility of the WordPress block editor combined with the polished structure of a professionally crafted ecommerce layout. Its warm and friendly design creates an inviting shopping experience for pet lovers while maintaining a clean, conversion-focused storefront.
As a Full Site Editing (FSE) theme, MEOW gives you full control over your entire website. You can customize not only page content, but also key structural elements such as templates, headers, footers, and styles, all directly within the WordPress Site Editor, without needing to write code.
Installation
↑ Back to topTo start using a product from WooCommerce.com, you can use the “Add to store” functionality on the order confirmation page or the My subscriptions section in your account.
- Navigate to My subscriptions.
- Find the Add to store button next to the product you’re planning to install.
- Follow the instructions on the screen, and the product will be automatically added to your store.
Alternative options and more information at:
Managing WooCommerce.com subscriptions.

Install and import demo content
↑ Back to topThe easy way to install Meow is through the WordPress dashboard.
- Go to your Dashboard → Appearance → Themes.
- Click the Add New button at the top.
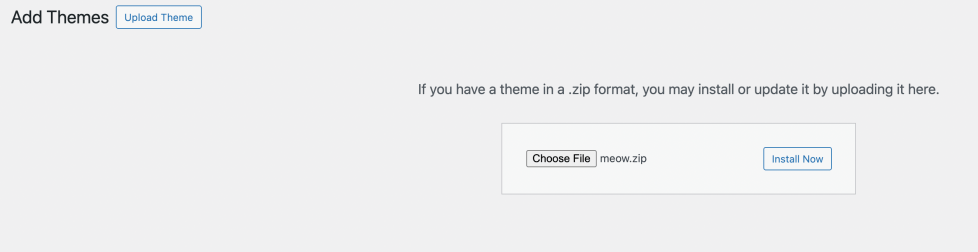
- Then click Upload Theme.
- Click Choose File and select the
meow.zipfile from your computer. - Finally, click Install Now to install the theme.
Setup and Configuration
↑ Back to topIf you prefer to manually customize your site, you can skip this step. However, if you want your website to look like the demo.
Homepage & Blog
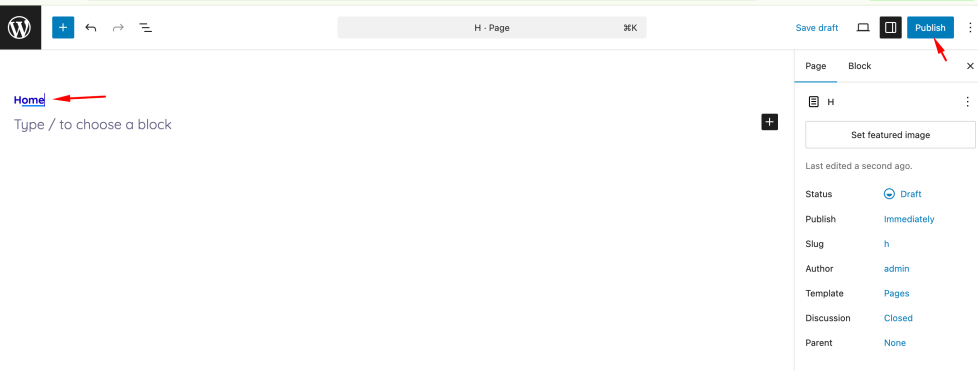
↑ Back to topStep 1: Create Pages
- Go to Dashboard → Pages → Add New.
- Create two pages: Home (for your homepage), Blog (for your posts page)
- Click Publish to save each page.
Additional Resources
If you need more detailed guidance, you can follow the official WordPress tutorial: https://wordpress.org/documentation/article/create-pages/#creating-a-new-page
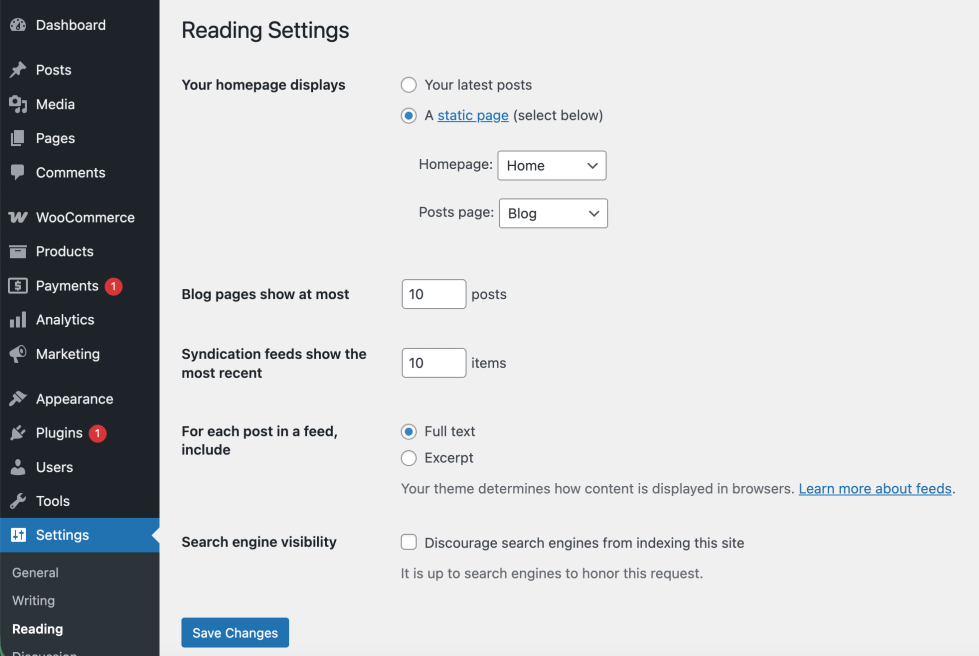
Step 2: Assign Pages in Reading Settings
- Go to Dashboard → Settings → Reading.
- Under Your homepage displays, select A static page.
- Assign: Homepage → select the Home page, Posts page → select the Blog page
This theme includes a dedicated Front Page template that is automatically used as your site homepage.
No configuration is required in Settings → Reading.
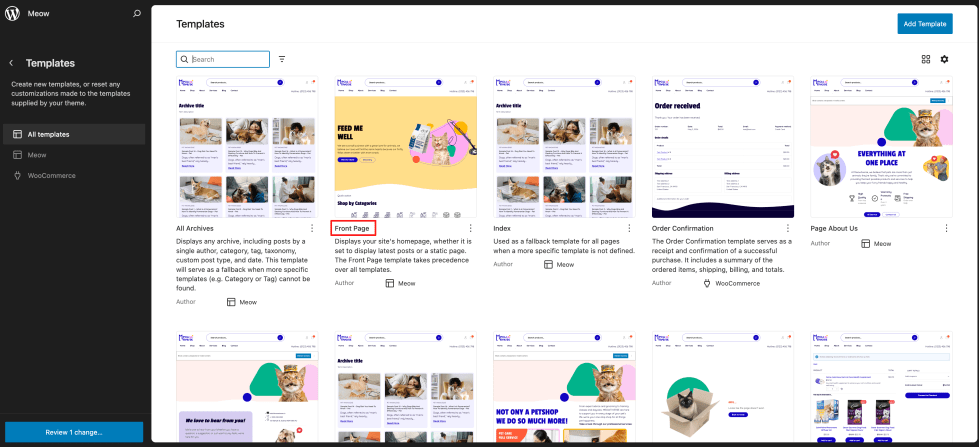
To customize your homepage content:
- Go to Dashboard → Appearance → Editor.
- In the Site Editor, open Templates → Front Page.
- Edit the layout and content using the block editor.
- Click Save to apply your changes.
Your customized Front Page will be displayed automatically as the homepage, regardless of your Reading settings.
Logo
↑ Back to topYou can add your site logo using the Site Editor (Block Editor) by following these steps:
- Go to Dashboard → Appearance → Editor.
- Use the navigator or search, or go to Patterns → Header and select your header layout.
- Locate and click on the Site Logo block (usually in the header area).
- Upload a new logo or choose one from your Media Library.
- Make sure your logo is properly sized and formatted for best display.
- Click Save in the top-right corner to apply the changes.
Navigation Menu
↑ Back to topSetting up your site’s navigation is essential for helping visitors easily browse your content.
Follow these steps to create and manage your menu:
- Go to Dashboard → Appearance → Editor.
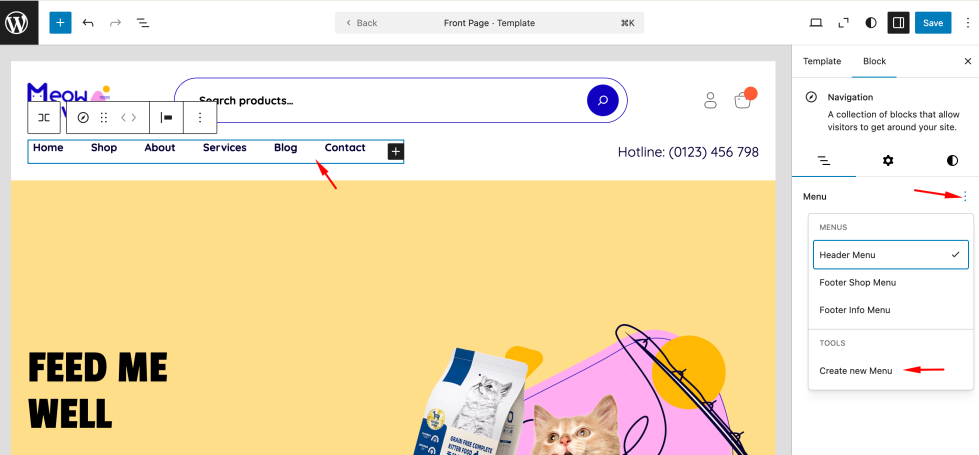
- In the Site Editor, locate the Navigation block (usually placed in the header area).
- Click on the Navigation block to open its settings panel on the right.
- Under the Menu section, you can: Select an existing menu (e.g. Header Menu, Footer Menu), or Click the ⋮ (three dots) icon and choose Create new menu
- Add menu items by clicking the + icon inside the navigation: Pages, Posts, Categories, Custom URLs
- Arrange menu items by dragging them into the desired order.
- Once you’ve finished, click Save in the top-right corner to apply the changes.
Additional Resources
If you need more detailed guidance, you can follow the official WordPress tutorial: https://learn.wordpress.org/tutorial/how-to-create-a-menu-with-the-navigation-block/
Header Layout
↑ Back to topYou can easily switch or customize your header design using the Site Editor.
Follow these steps:
- Go to Dashboard → Appearance → Editor.
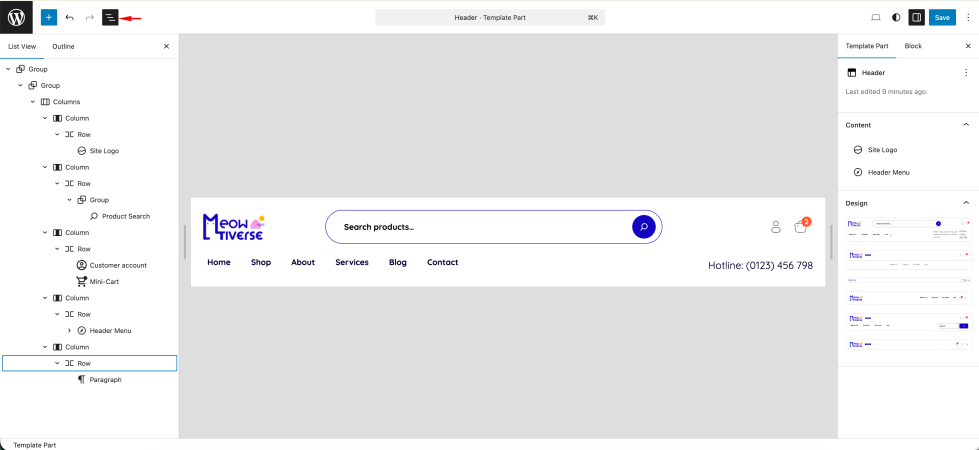
- In the Site Editor, open Patterns → Header (Template Part).
- Select the header you want to edit.
- Customize the layout as needed, or replace it with a different header pattern.
- Click Save to apply the changes across your site.
Customization
↑ Back to topGlobal Styles
↑ Back to topUse Global Styles to maintain a consistent and polished design across your entire site.
Follow these steps to customize your site’s appearance:
- Go to Dashboard → Appearance → Editor.
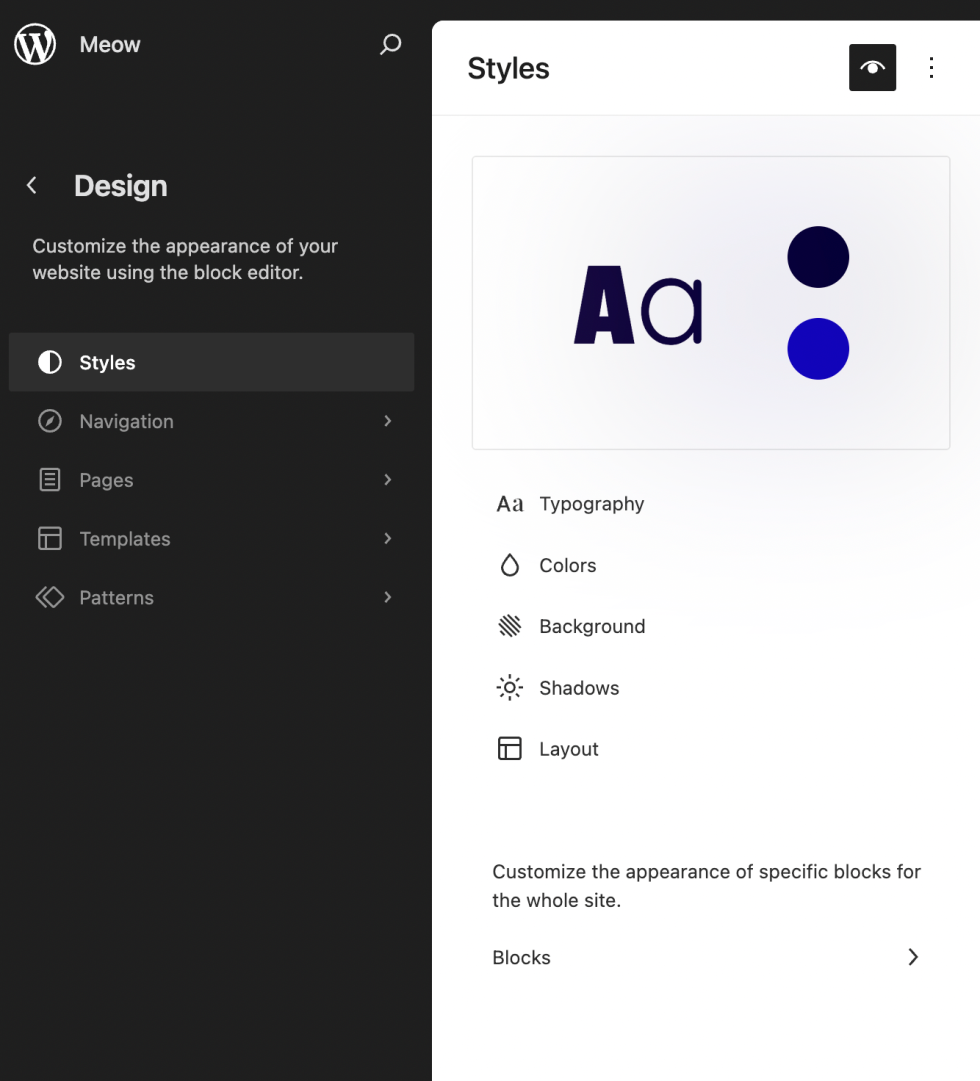
- Click the Styles icon (the half black / half white circle) in the top-right corner.
- Choose a built-in style preset or customize individual elements such as: Typography, Colors, Background, Layout, Shadows
- Preview your changes in real time as you adjust the settings.
- When you’re satisfied, click Save to apply the changes across your site.
Additional Resources
If you need more detailed guidance, you can follow the official WordPress tutorial: https://wordpress.org/documentation/article/styles-overview
Blocks
↑ Back to topCustomizing Posts, Pages using Block Editor
WordPress Block Editor
WooCommerce Blocks
Patterns
↑ Back to topBlock Patterns allow you to quickly build professional layouts without starting from scratch.
How to Access Patterns
↑ Back to top- Open any page, post, or template in the Editor.
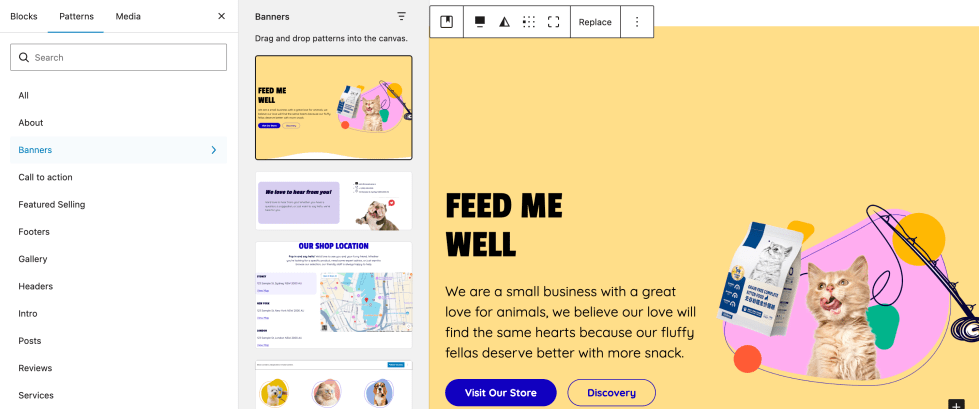
- Click the + icon (top-left) to open the block inserter.
- Switch to the Patterns tab.
- Browse available categories (e.g. Banners, footer).
- Hover over a pattern to preview it.
- Click on a pattern to insert it into your layout.
- To view all available patterns, click Explore all patterns at the bottom of the panel.
Template Customization
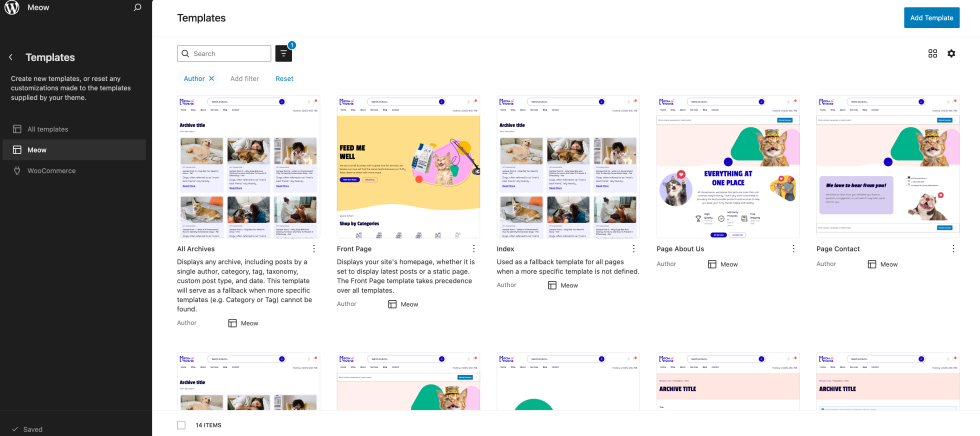
↑ Back to topMeow includes 14 professionally designed templates covering all major page types from homepage and standard pages to blog and WooCommerce layouts.
To view and edit templates:
Go to Dashboard → Appearance → Editor → Templates.
How to Customize a Template
- Navigate to Templates in the Site Editor.
- Select the template you want to edit.
- Modify layout, blocks, or content as needed.
- Click Save to apply changes.
Changes are applied globally to all pages using that template.
Available Templates
↑ Back to topGeneral Templates
- index.html – Default fallback template displaying a blog-style post list.
- front-page.html – Homepage template with a complete pre-built layout (hero, products, banners, services, posts).
- archive.html – Category, tag, and date archives with a 3-column post grid and pagination.
- search.html – Search results page with search bar and post listing.
- 404.html – Custom error page with centered layout and clean design.
Page Templates
- page.html – Default page template with breadcrumbs, title, featured image, content, and comments.
- page-about-us.html – Pre-built About page using multiple content patterns.
- page-contact.html – Contact page with form, team info, and location sections.
- page-services.html – Services page with structured service sections.
- page-blog.html – Blog listing template assignable to a page.
Blog Template
- single.html – Single post template with: Breadcrumbs, Title and metadata, Featured image, Post content, Related posts, Comments section
WooCommerce Templates
- archive-product.html – Shop page with sidebar filters (25%) and product grid (75%).
- single-product.html – Product detail page with gallery, product info, and related products.
- product-search-results.html – Product search results with grid layout and filtering options.
Add Products with WooCommerce
↑ Back to topAdding products in Meow works the same as in any standard WooCommerce setup.
The theme fully supports all core product types, including:
- Simple Products
- Grouped Products
- External / Affiliate Products
- Variable Products
For a more detailed guide on adding and managing WooCommerce products, please refer to the official WooCommerce documentation.
FAQs
↑ Back to topHelp customers by answering commonly asked questions.
Is Meow a block theme?
Yes. Meow is a Full Site Editing (FSE) block theme built to work with the WordPress Site Editor.
Is Meow suitable for beginners?
Yes. The theme is designed to be easy to use while still offering flexibility for more advanced customization.
Do I need coding skills to use this theme?
No. Meow allows you to customize layouts, colors, typography, and content visually using the Site Editor, no coding required.