Introduction
↑ Back to top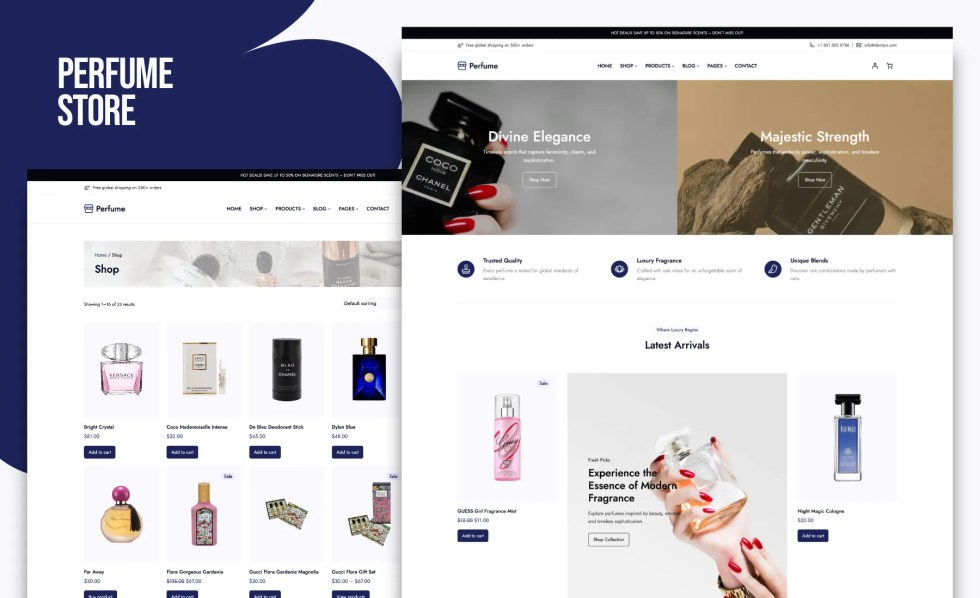
Thank you for choosing the Perfume Store Pro WordPress Theme to power your WooCommerce website.
This setup guide will walk you step-by-step through installing, configuring, and customizing your theme, helping you launch a beautiful, mobile-friendly, and high-converting online perfume store with confidence. Whether you are setting up your first shop or upgrading an existing one, this documentation ensures a smooth and user-friendly experience.
About Perfume Store Pro Theme
↑ Back to topPerfume Store Pro is an elegant and modern WooCommerce theme crafted for online stores selling perfumes, fragrances, cosmetics, beauty products, and luxury gift items. Featuring a fully responsive layout, fast performance, and Full-Site Editing (FSE) support, this theme enables you to create a stunning, conversion-focused online shop without writing a single line of code.
Required Plugins
↑ Back to topWooCommerce is the essential plugin required to run your online store. Perfume Store Pro uses WooCommerce blocks to power product pages, shop layouts, cart and checkout features, and all core ecommerce functionality. Please ensure WooCommerce is installed and activated before setting up your store.
Recommended Plugins
↑ Back to topPerfume Store Pro integrates smoothly with several third-party plugins to enhance functionality and improve the user experience of your online store.
- WPForms – Easily create contact forms, inquiry forms, or newsletter sign-up forms to improve engagement and communication.
Installation
↑ Back to topFollow the steps below to install the Perfume Store Pro theme on your WordPress website. If you run into any issues during setup, our support team is always ready to assist.
Free Installation Service
↑ Back to topAlthough theme installation normally falls outside standard support, we offer a one-time complimentary installation service for all verified Perfume Store Pro customers.
To request this service:
- Visit our contact page and contact the support team.
- Securely share your WordPress admin login details.
- Our team will install the theme and configure it to look exactly like the demo.
Installation is typically completed within 3 business days after receiving your details.
Installing the Theme
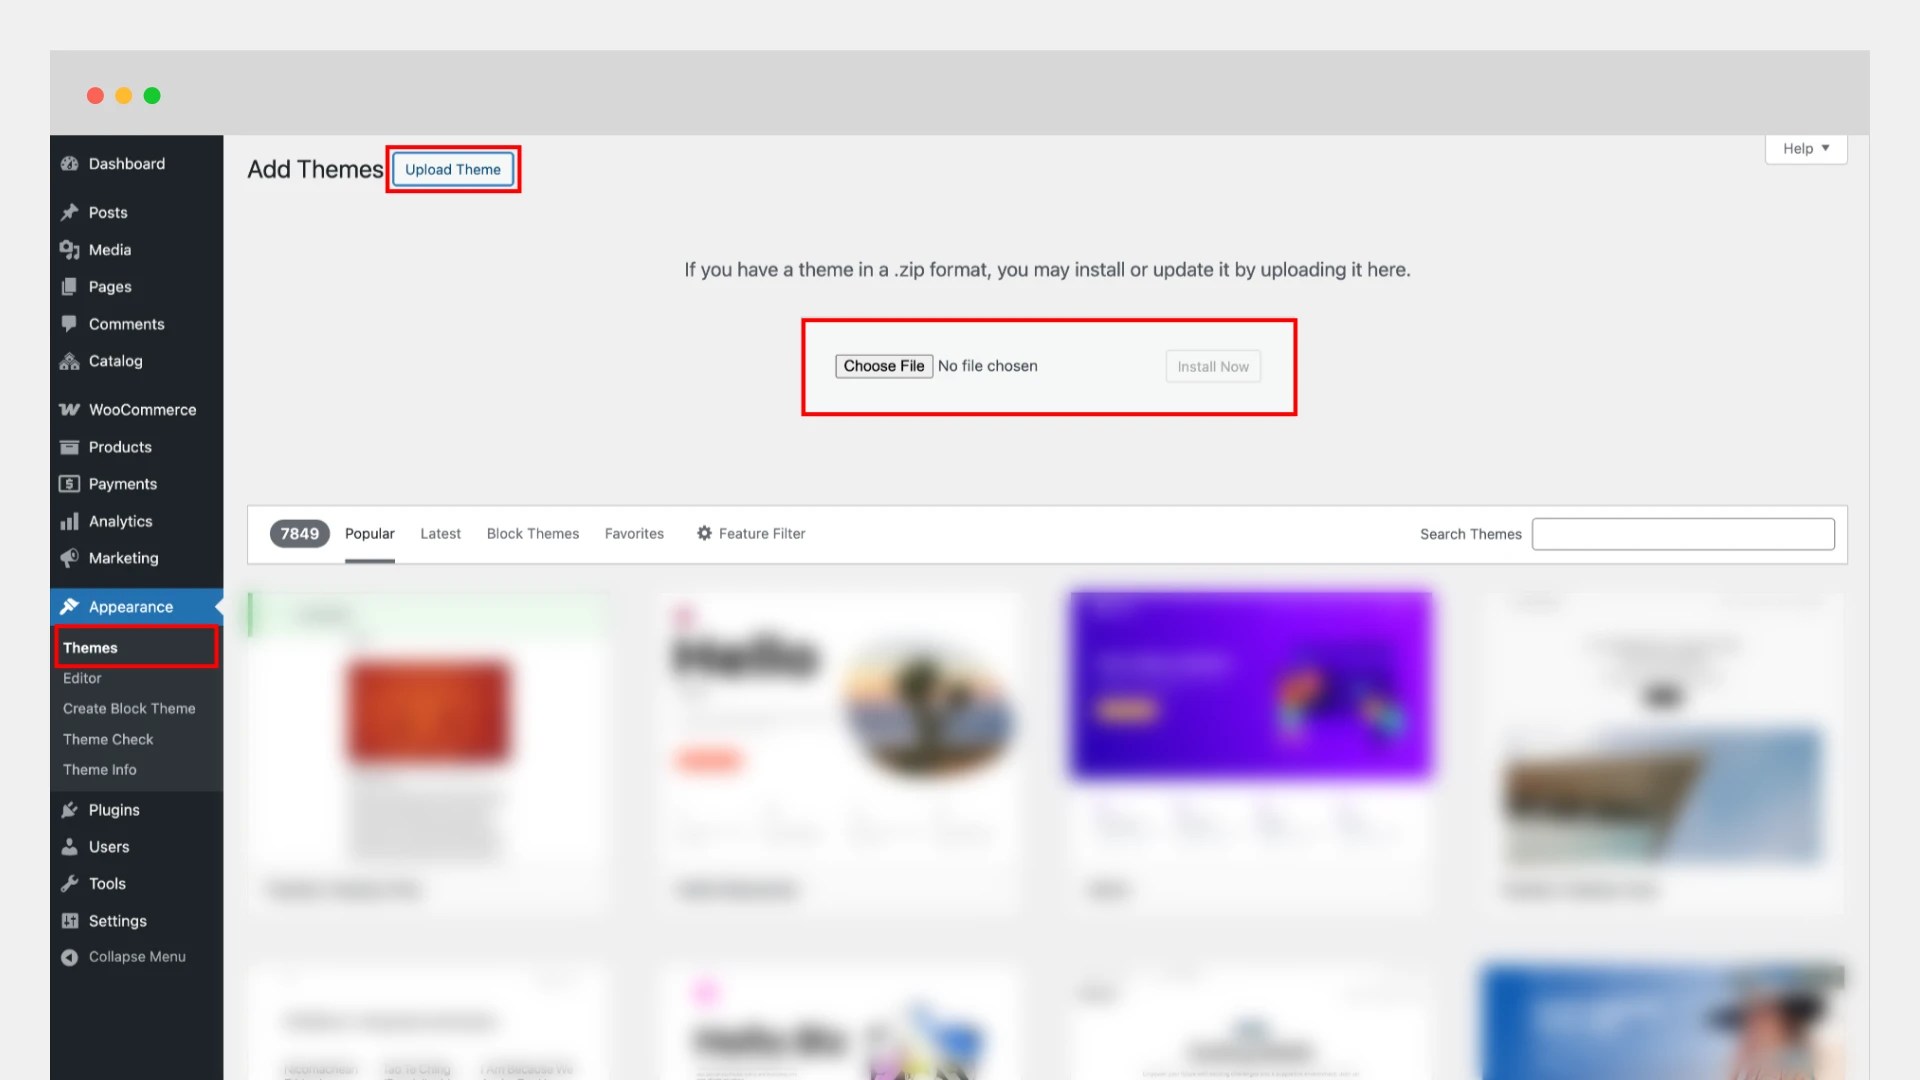
↑ Back to topThe easiest way to install Perfume Store Pro is through your WordPress dashboard.
- Log in to your WordPress Admin Panel and go to Appearance > Themes.
- Click the Add New button at the top.
- Select Upload Theme.
- Click Choose File and browse your computer to locate the perfume-store-pro.zip file you downloaded.
- Click Install Now.
- Once the installation is complete, click Activate to enable the theme on your website.
Your theme is now successfully installed and ready for setup.
Installing Plugins
↑ Back to topWhile Perfume Store Pro can work without WooCommerce, it is strongly recommended to install and activate WooCommerce to unlock the full eCommerce experience, including product listings, shop layouts, cart functionality, checkout pages, and customer account features.
How to Install WooCommerce
- In your WordPress dashboard, go to Plugins → Add Plugin.
- Use the search bar and type WooCommerce, then press Enter.
- Locate the WooCommerce plugin in the results and click Install Now.
- After installation finishes, click Activate to enable it on your site.
Once activated, WooCommerce will guide you through its store setup wizard, allowing you to configure essentials like payments, currency, shipping, and more.

General Setup
↑ Back to topWith the Perfume Store Pro theme and the powerful built-in customization tools of WordPress, you can easily build your website from scratch and tailor every section to match your brand. From layout and colors to typography and WooCommerce settings, the theme gives you full control to create a professional and elegant online perfume store without any coding knowledge.
Homepage & Blog Setup
↑ Back to topBy default, Perfume Store Pro displays a beautifully designed home page featuring sections such as the hero banner, featured products, testimonials, blog previews, and more—similar to the demo layout.
If you prefer to manually create and assign a custom homepage and blog page, follow these steps:
Step 1: Create a Homepage
- Go to Pages > Add Page.
- Enter a title for your page, for example Home.
- Click Publish to save the new page.
If you are new to creating pages in WordPress, refer to the official WordPress guide on creating pages.

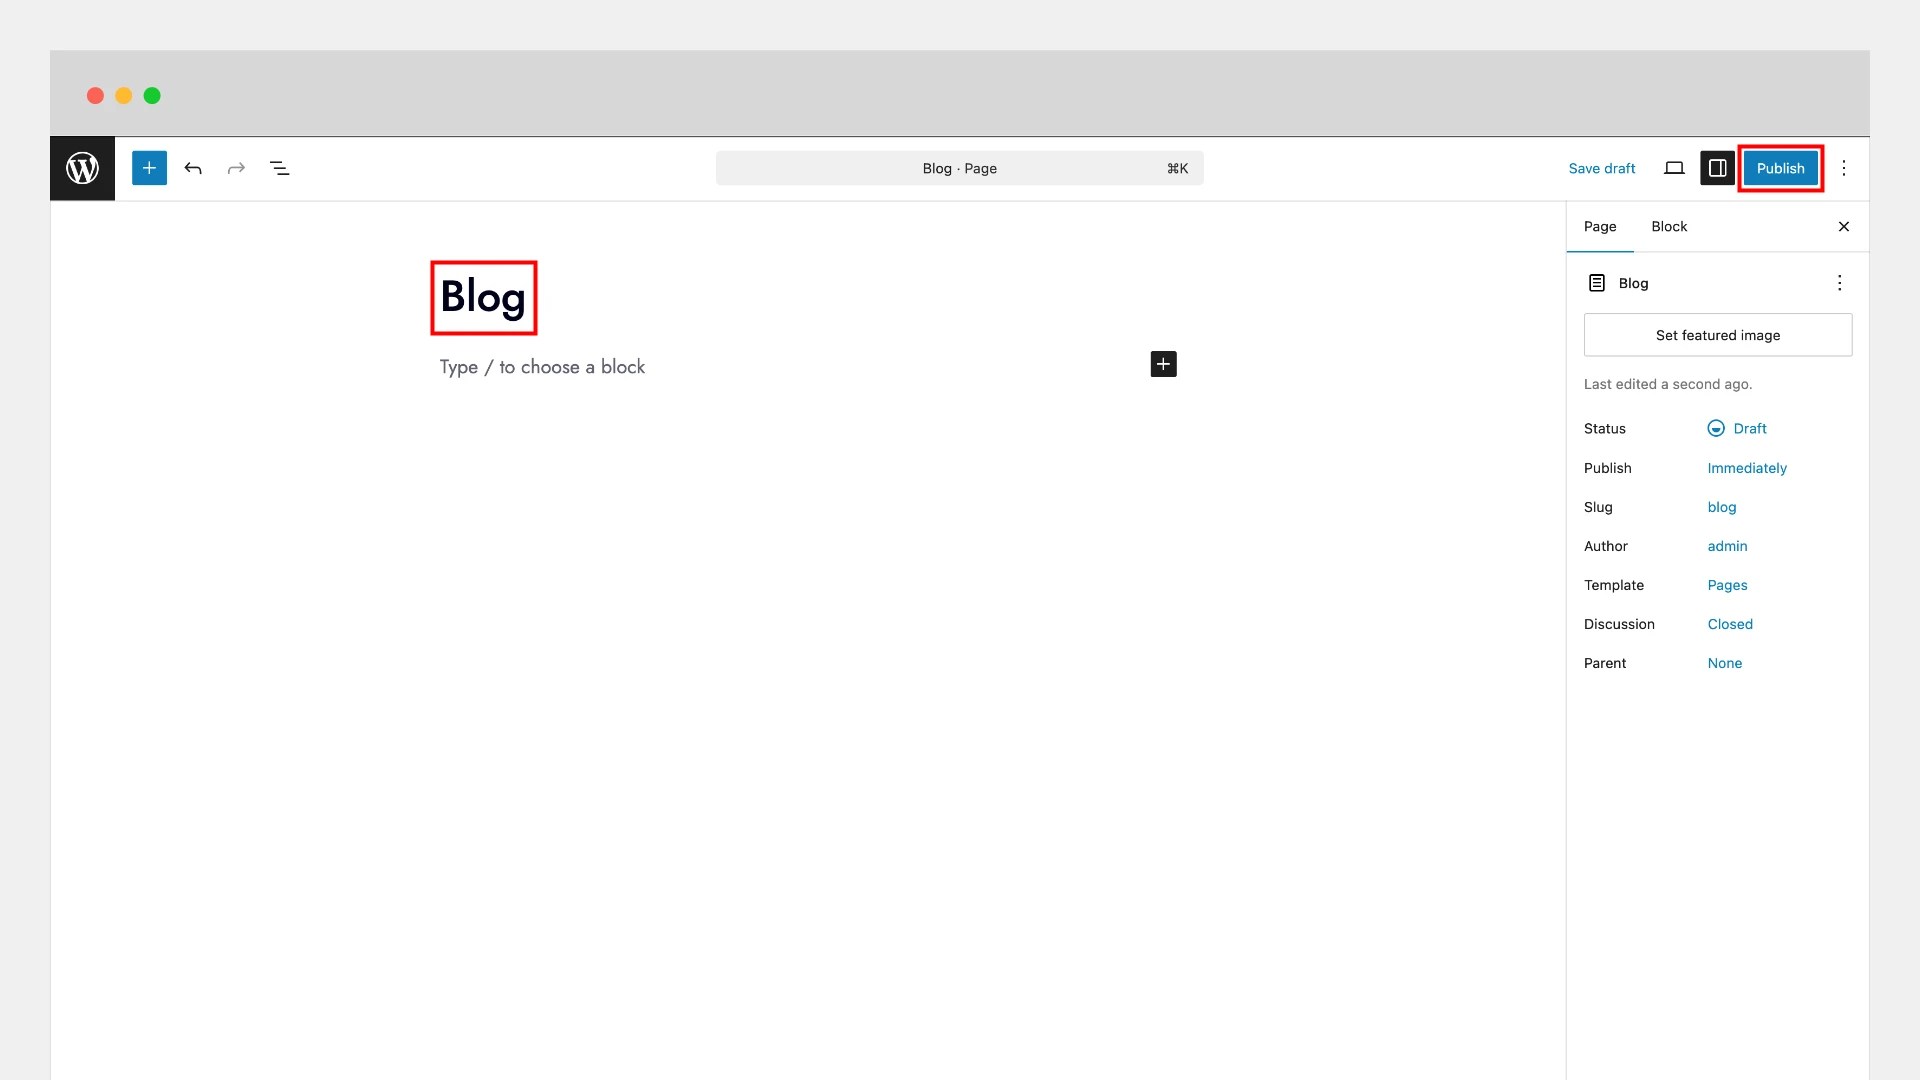
Step 2: Create a Blog Page
- Go to Pages > Add Page.
- Enter a title for your page, for example Blog.
- Click Publish to save the new page.
If you are new to creating pages in WordPress, refer to the official WordPress guide on creating pages.
Step 3: Set Static Pages for Homepage and Blog
Now, tell WordPress which pages should serve as your front page and blog page:
- Go to Settings > Reading in your WordPress dashboard.
- Under Your homepage displays, select A static page.
- For Homepage, choose the page you created for your front page.
- For Posts page, select the page you created for your blog.
- Click Save Changes.
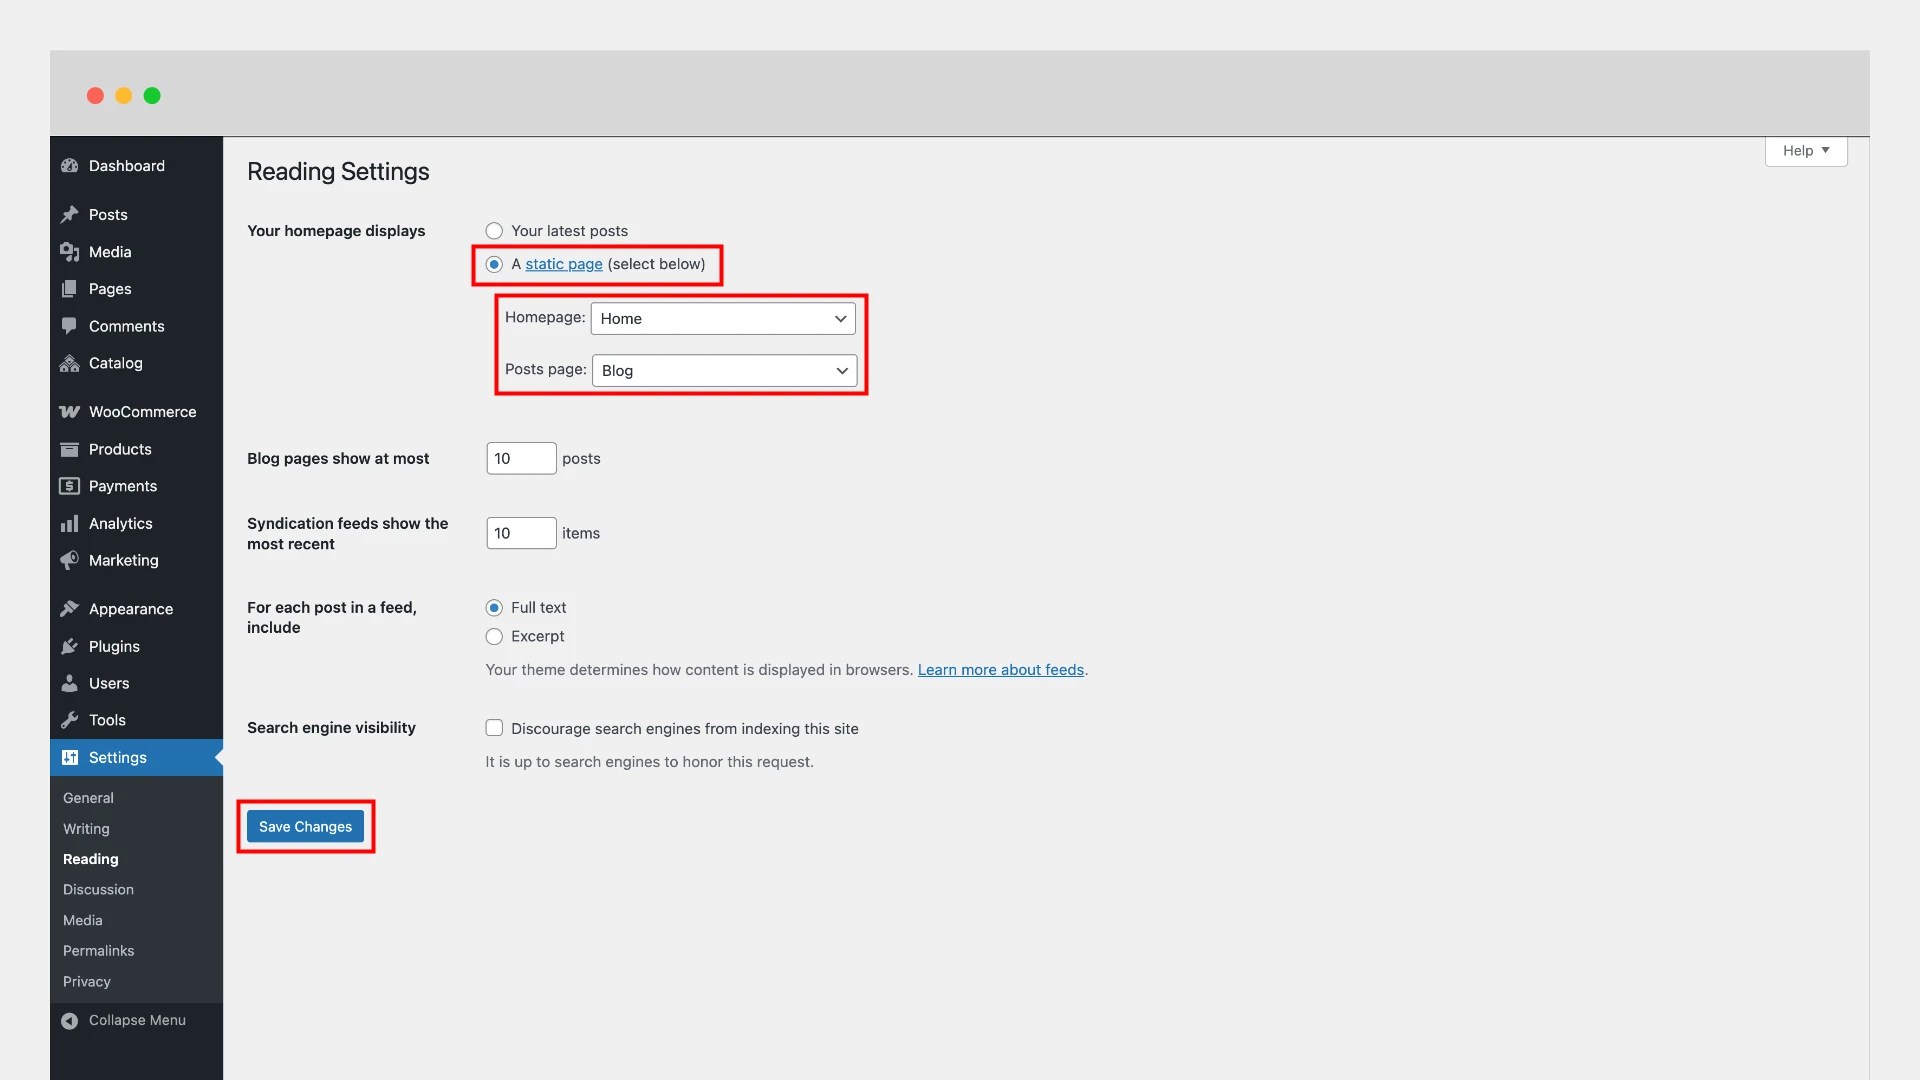
Your website will now display a fully designed landing page as the homepage, with a separate page dedicated to blog posts. You’re ready to begin adding products, publishing articles, and customizing your Perfume Store Pro website to match your brand!
Site Logo Setup
↑ Back to topTo add your site logo using the WordPress Site Editor:
- Go to Appearance > Editor.
- In the Site Editor, use the search bar or navigate to Patterns > Header > Header.
- Select the Site Logo block.
- Upload a new logo or choose one from your Media Library.
- Adjust the size to ensure your logo displays clearly and fits your design.
- Click Save in the top-right corner to apply the changes.
Your site logo is now added and will appear across your Perfume Store Pro website.
Navigation Menu Setup
↑ Back to topA clear and well-structured navigation menu is essential for delivering a smooth browsing experience to your customers.
Adding and Editing Navigation Menus
- Open the Site Editor and locate the Navigation block—usually placed inside the header area.
- Click Create a new menu to start building your navigation.
- Use the + icon to add menu links, including pages, product categories, blog posts, or custom URLs.
- Arrange the menu items as needed.
- When finished, click Save to apply your changes.
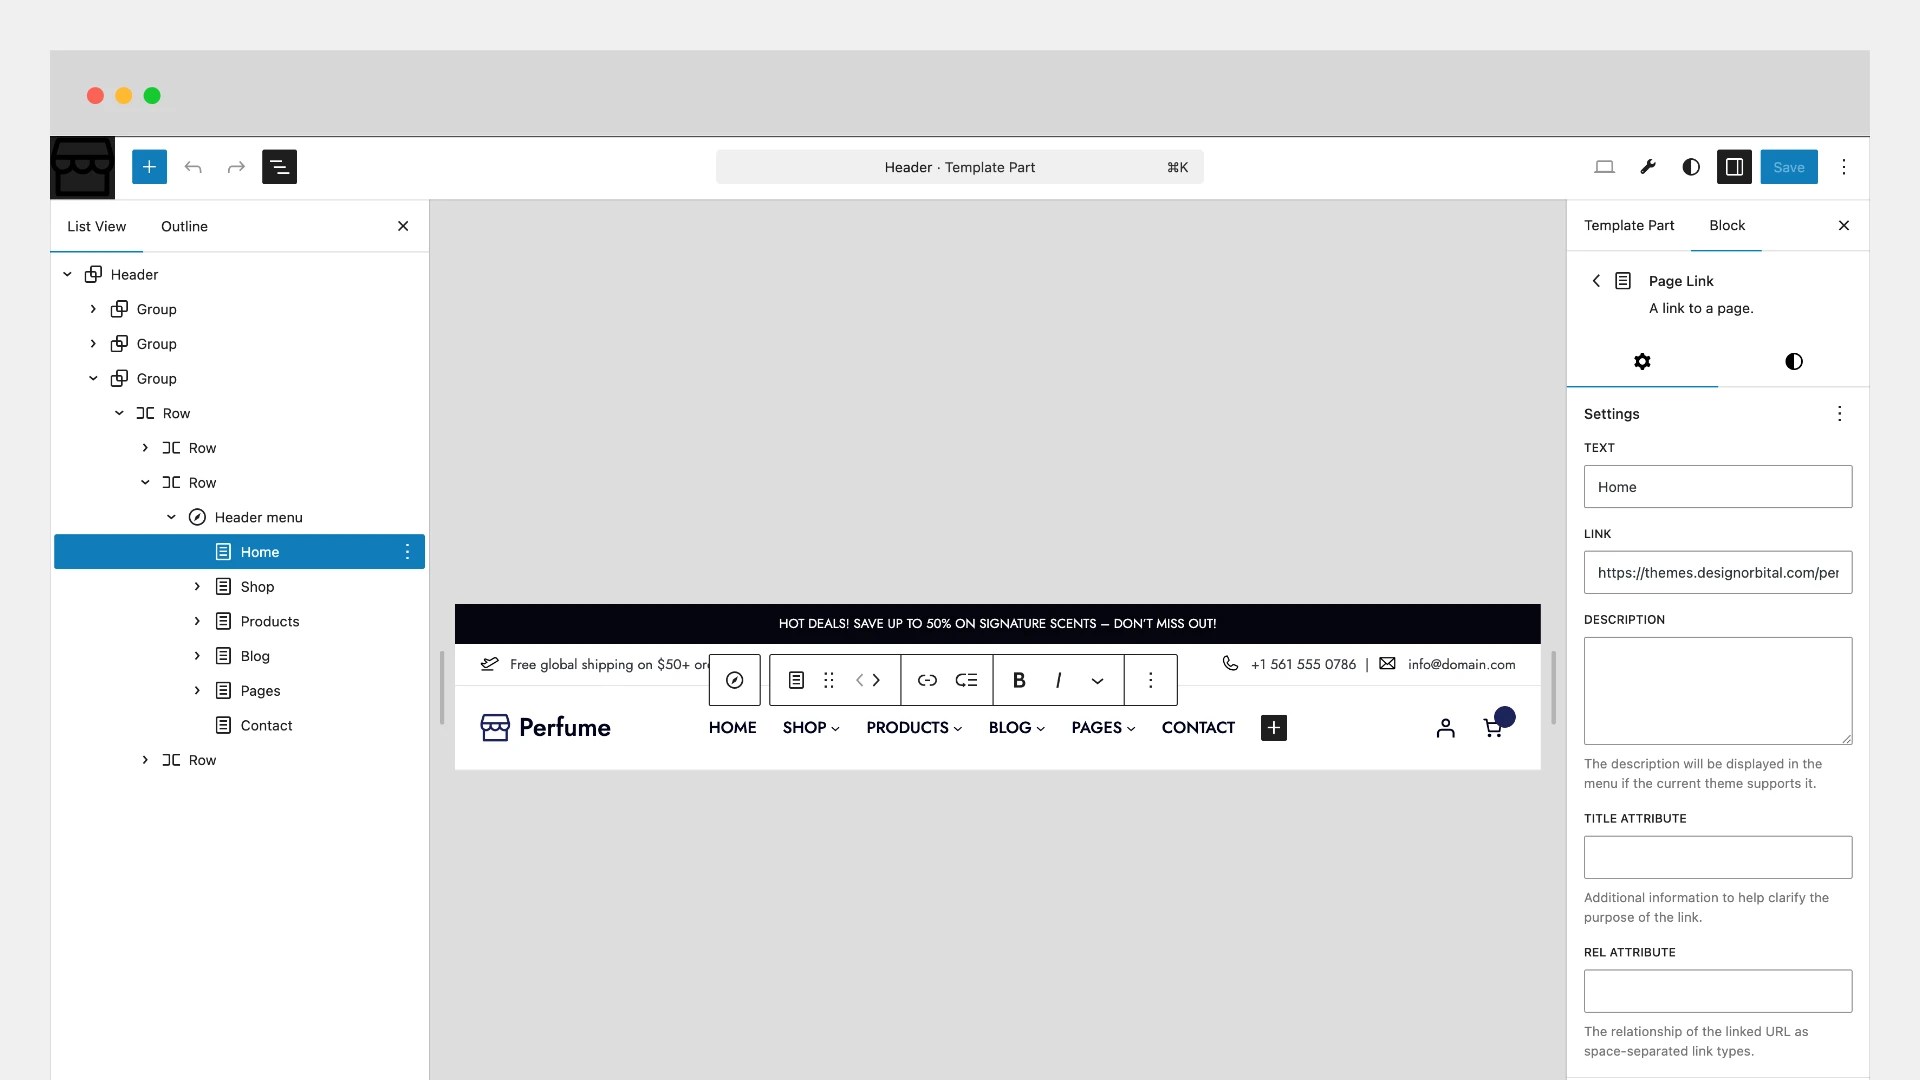
Your navigation menu is now ready and will help visitors move easily throughout your Perfume Store Pro site.
Customization
↑ Back to topPerfume Store Pro is built to give you complete creative control over your website without writing a single line of code. Using the intuitive WordPress Site Editor, you can personalize your fonts, colors, spacing, and layout through Global Styles, fine-tune your homepage design, and manage how products appear on the front page. Whether you’re building a fragrance shop or adapting the theme for cosmetics, beauty products, or skincare brands, customization is simple, visual, and flexible.
Global Styles Customization
↑ Back to topMaintain a consistent and polished look across your entire site using Global Styles:
- Go to Appearance > Editor.
- Click the Styles icon (the half-black, half-white circle) in the top-right corner.
- Choose from the built-in style presets, or customize individual design elements such as colors, fonts, shadows, and layout widths.
- Preview your changes in real time, and when you’re satisfied, click Save to apply.
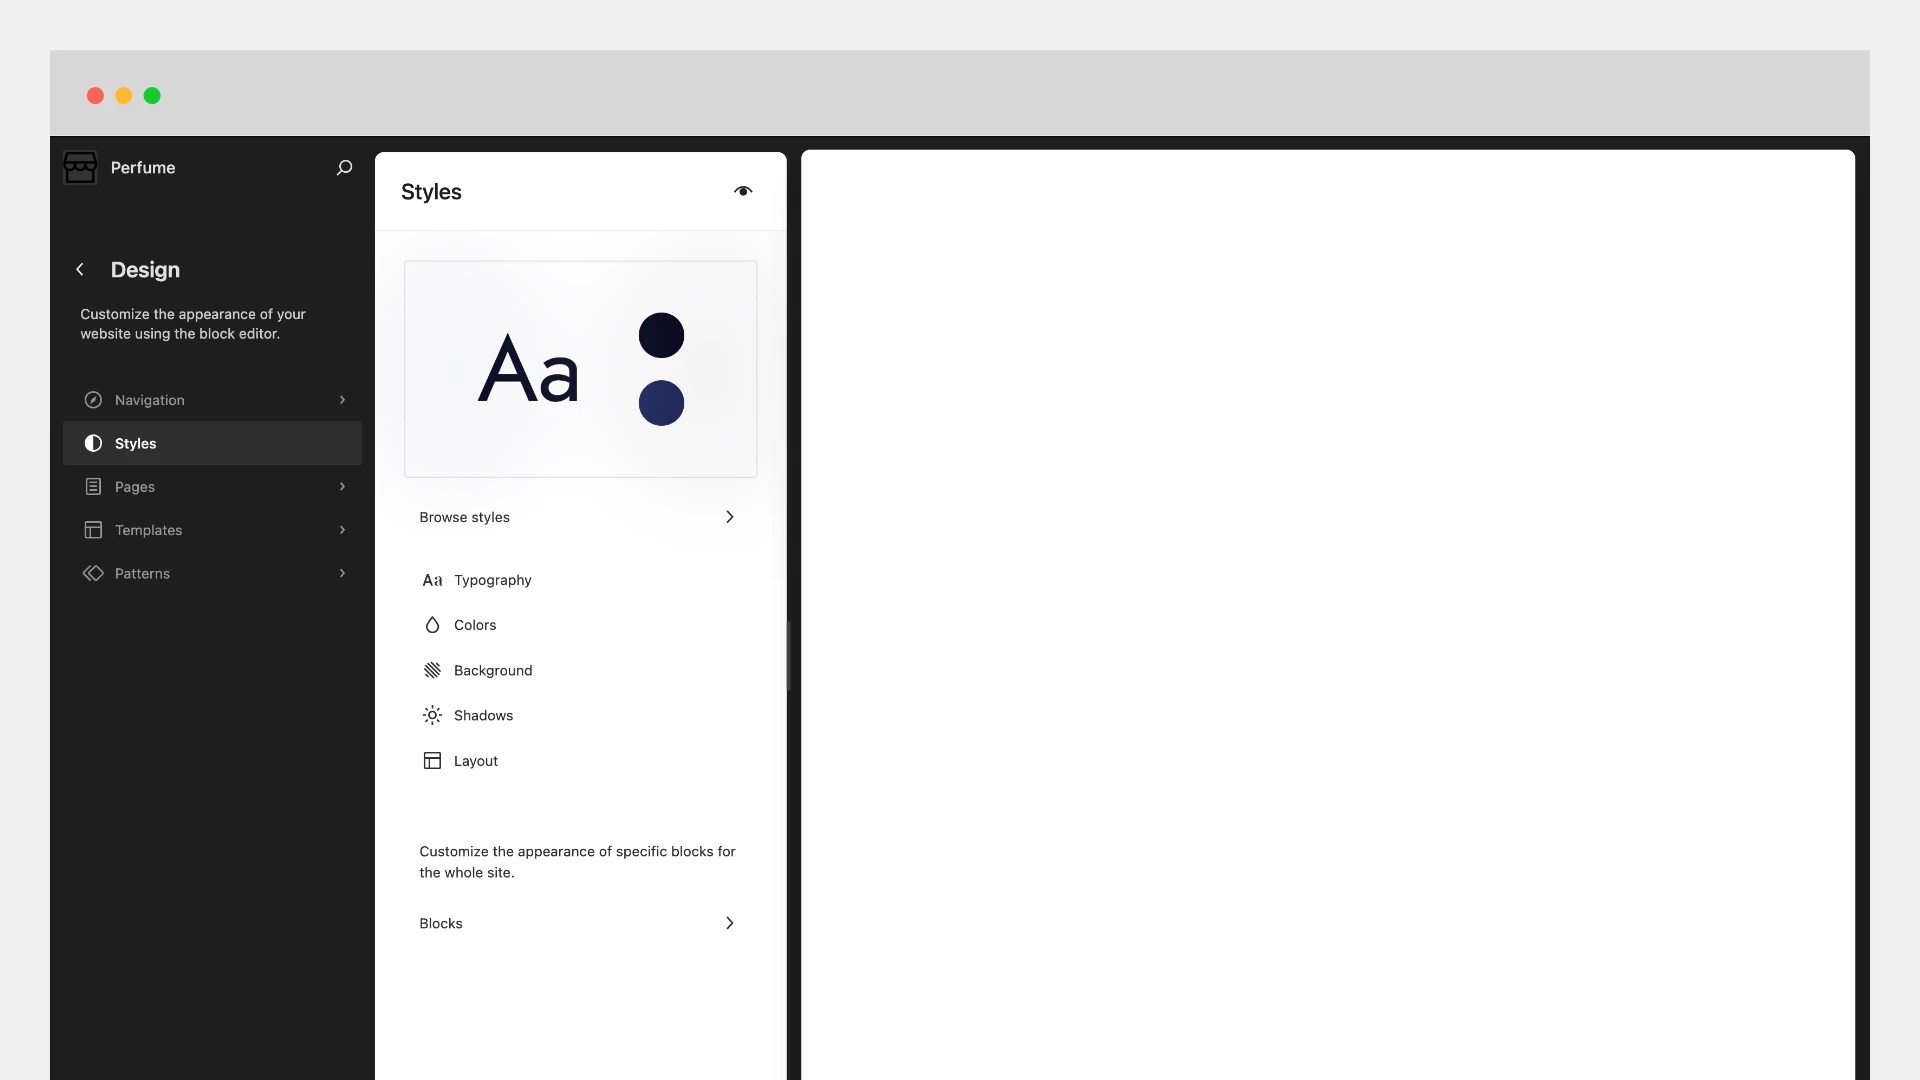
Global Styles ensure your Perfume Store Pro website looks cohesive, professional, and perfectly aligned with your brand.
Homepage Customization
↑ Back to topThis guide will show you how to customize the homepage to suit your needs using the Perfume Store Pro theme.
On the default homepage, each major section is clearly labeled, making it easy to identify and customize. For example, you may see groups such as Hero Aroma, Features, WC New Arrivals, Facts, WC Best Sellers, Logos, Testimonials, and more—similar to what appears in the live demo.
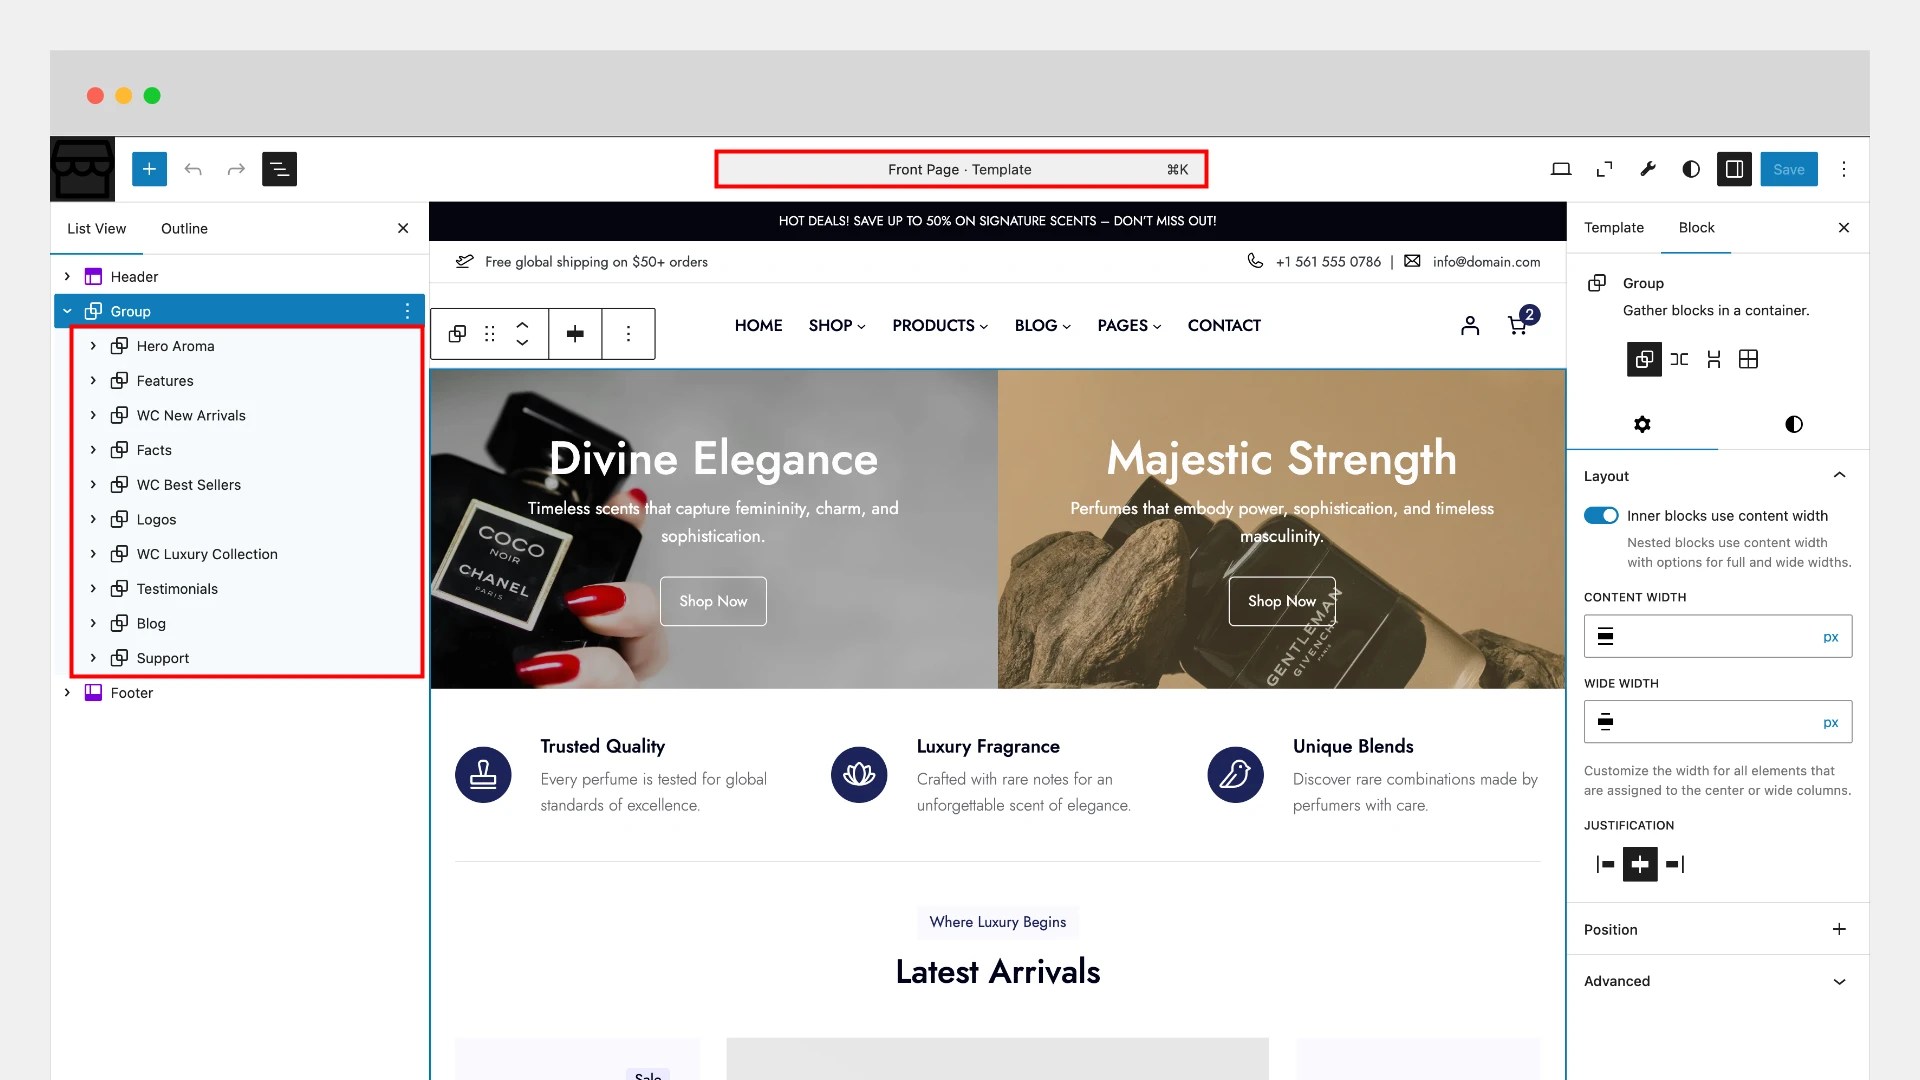
You can edit these sections directly in the Site Editor by opening the Front Page Template, allowing you to adjust content, styling, and layout without any coding.
Homepage Products
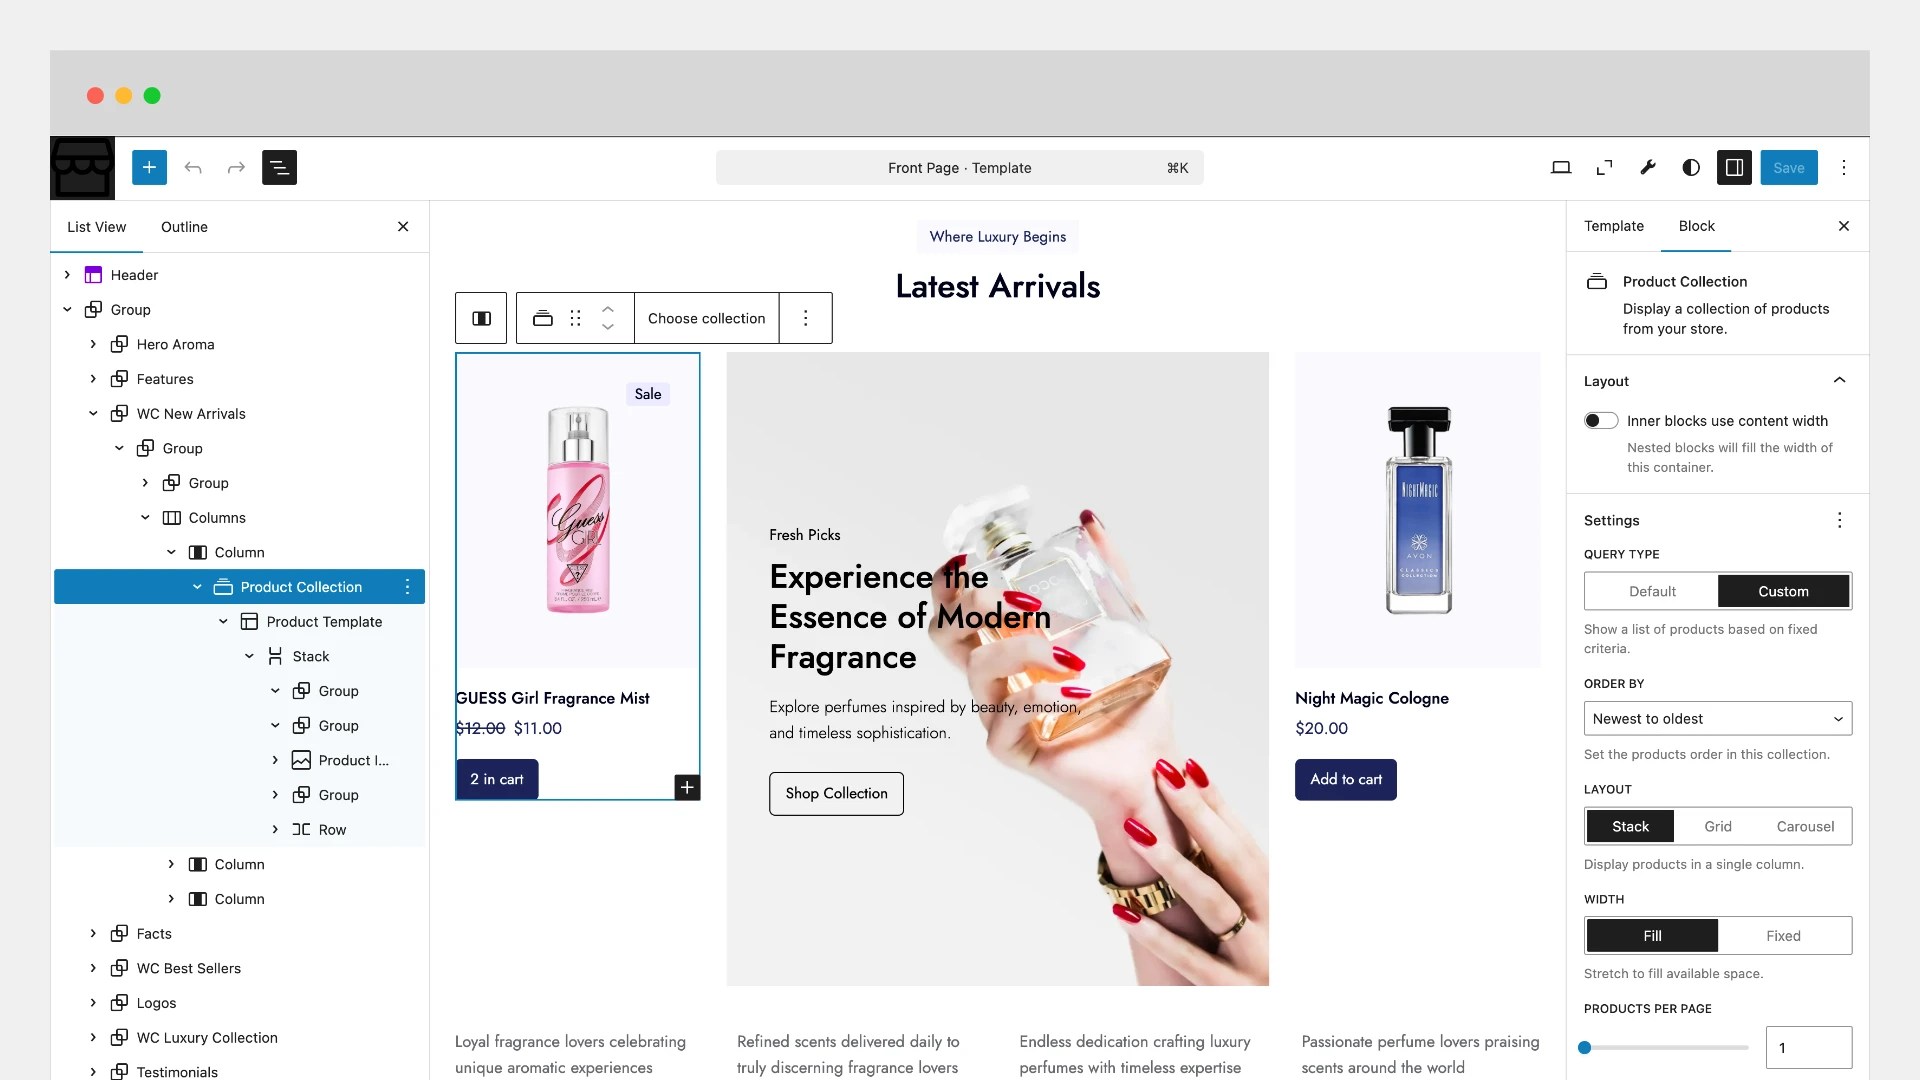
↑ Back to topThis guide will help you showcase products on your homepage using the Perfume Store Pro theme.
WooCommerce sections on the homepage use built-in WooCommerce product blocks—such as Product Collection, Featured Products, or Best Sellers. These blocks are designed to automatically display items from your store. If no products have been added yet, the sections will appear empty.
Once you have products in your store, you can customize these blocks to control what is displayed, such as product categories, sorting options, and layout, ensuring your homepage highlights the items you want customers to see.
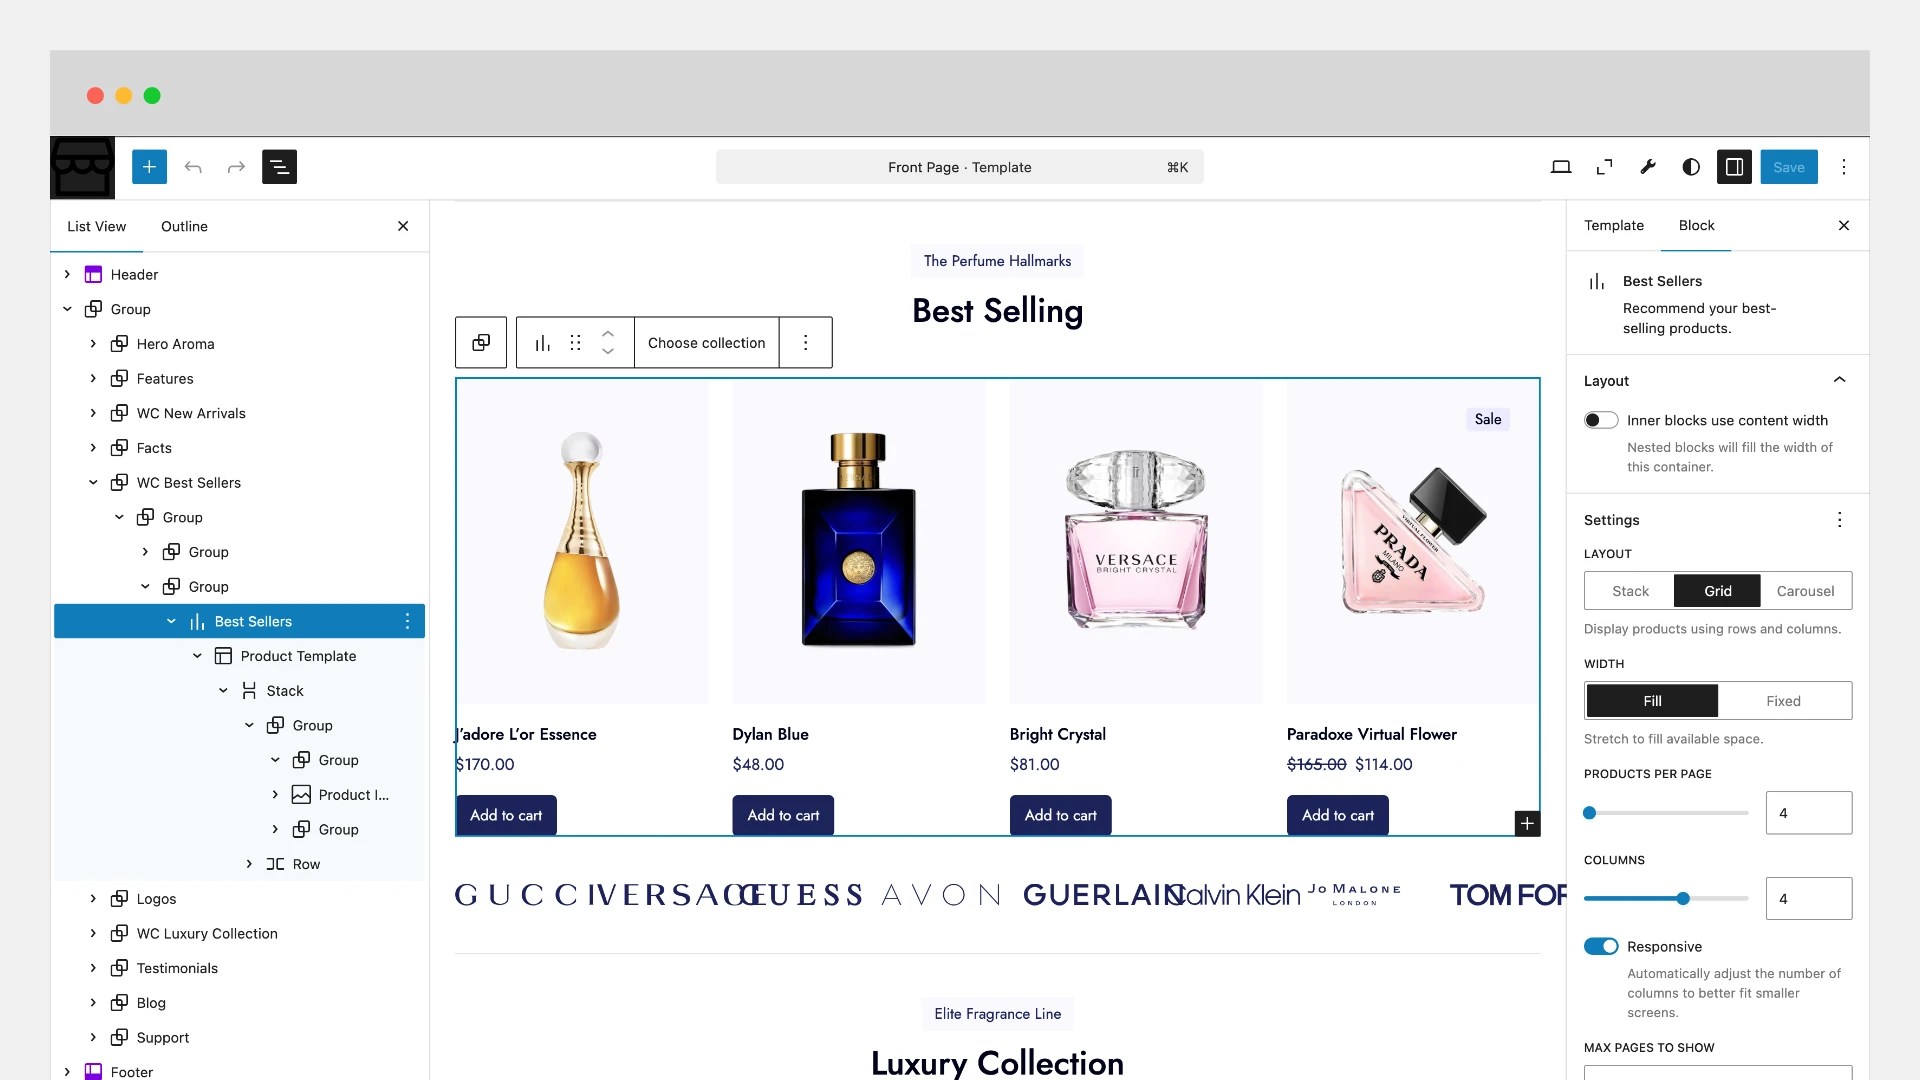
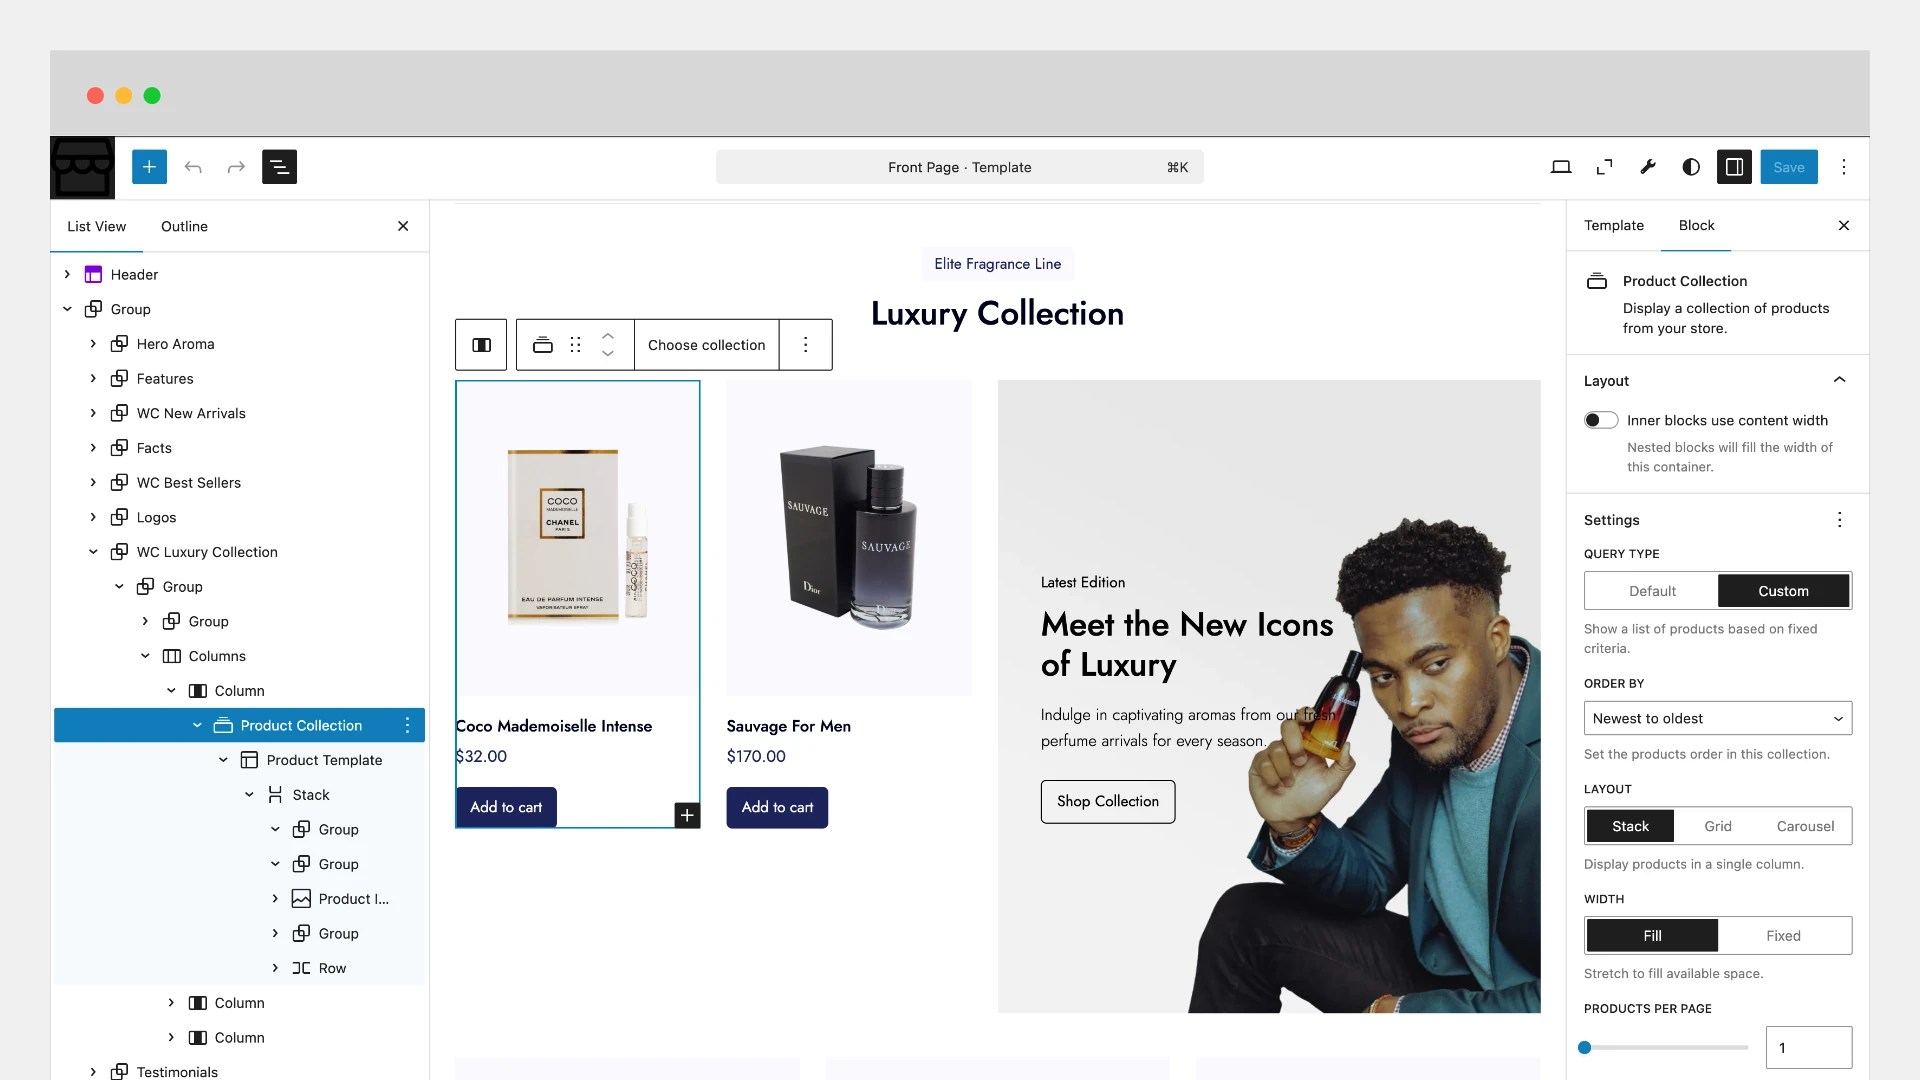
The screenshot below shows the WooCommerce Product Collection block. You can customize this block to suit your needs, including adjusting layout, filters, sorting options, and which products to display.
The screenshot below displays the WooCommerce Best Sellers block. You can customize this block to match your requirements, including selecting which products to feature, adjusting layout options, and modifying display settings.
The screenshot below illustrates the WooCommerce Product Collection block. You can personalize this block to fit your requirements by modifying the layout, filters, sorting options, and the products that appear.
Pages Setup
↑ Back to topPerfume Store Pro includes several pre-designed page templates, such as:
- About
- Testimonials
- FAQ
- Contact
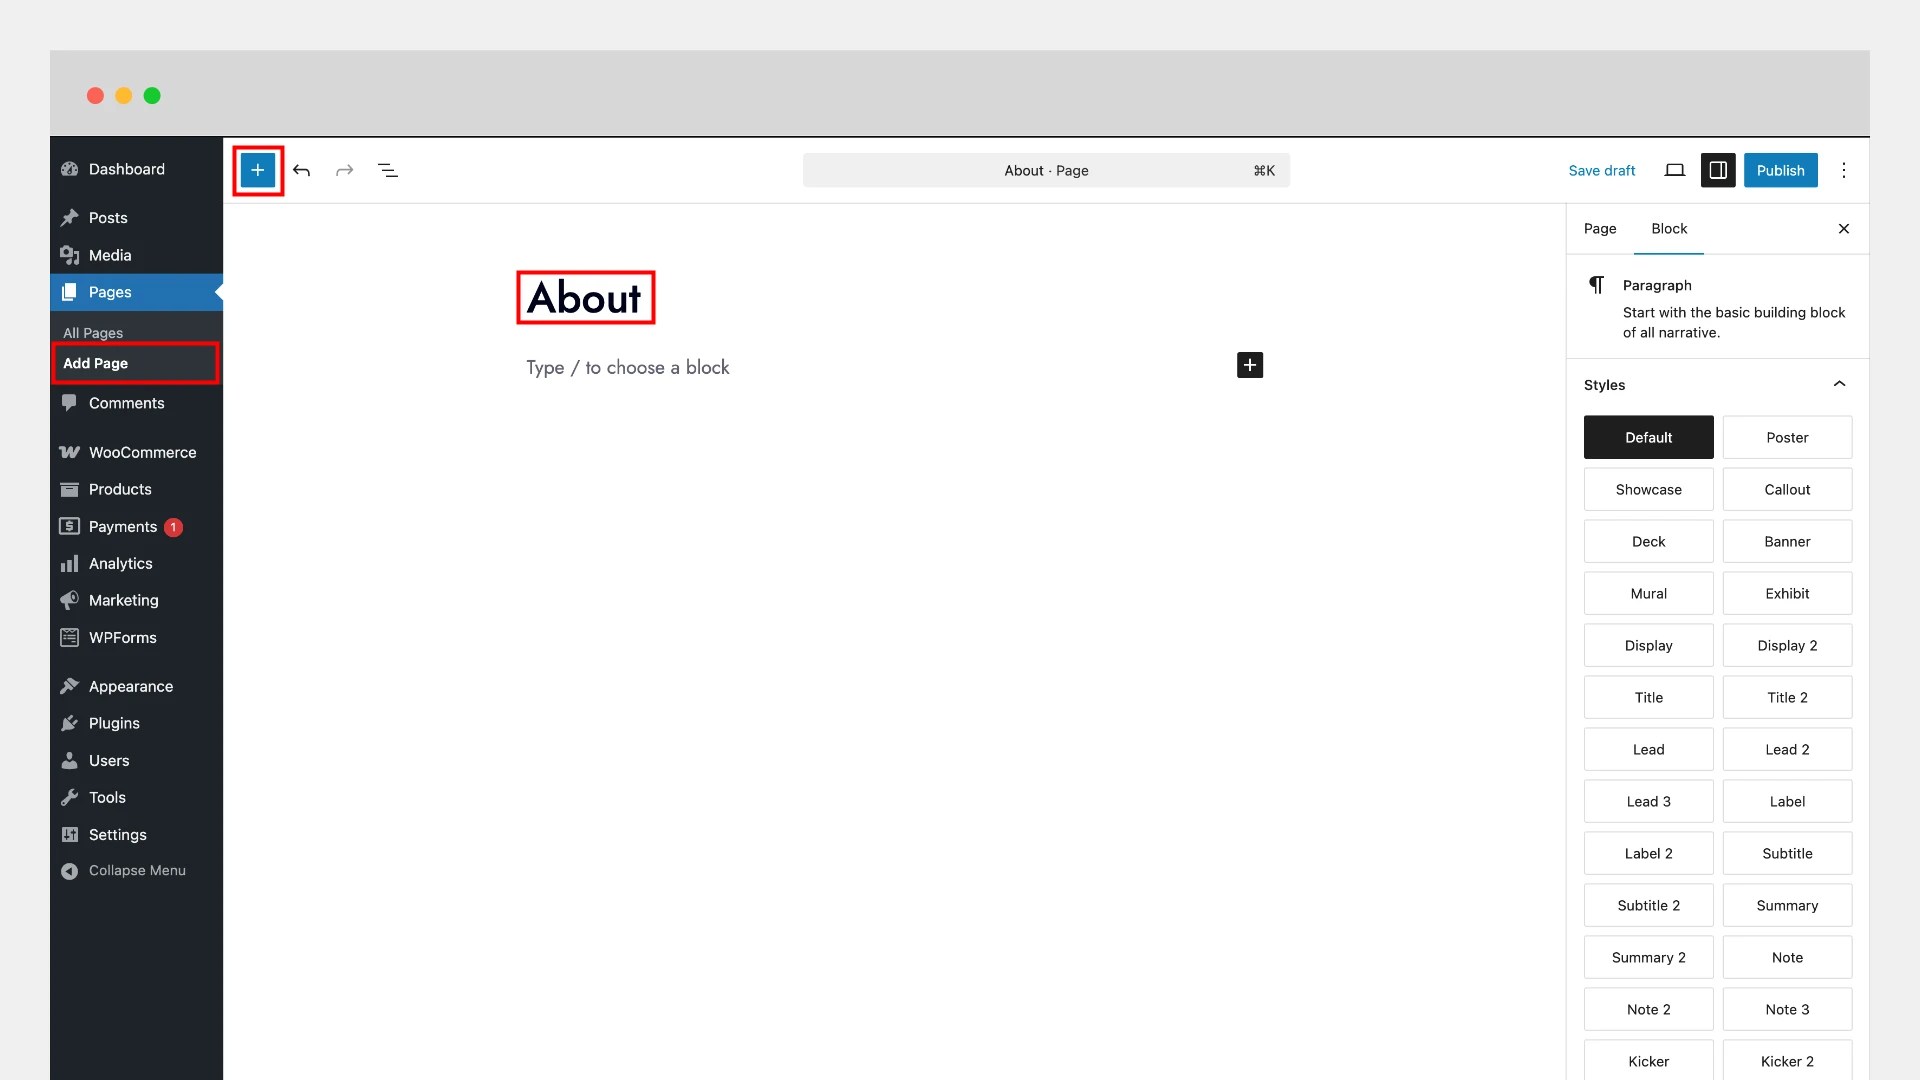
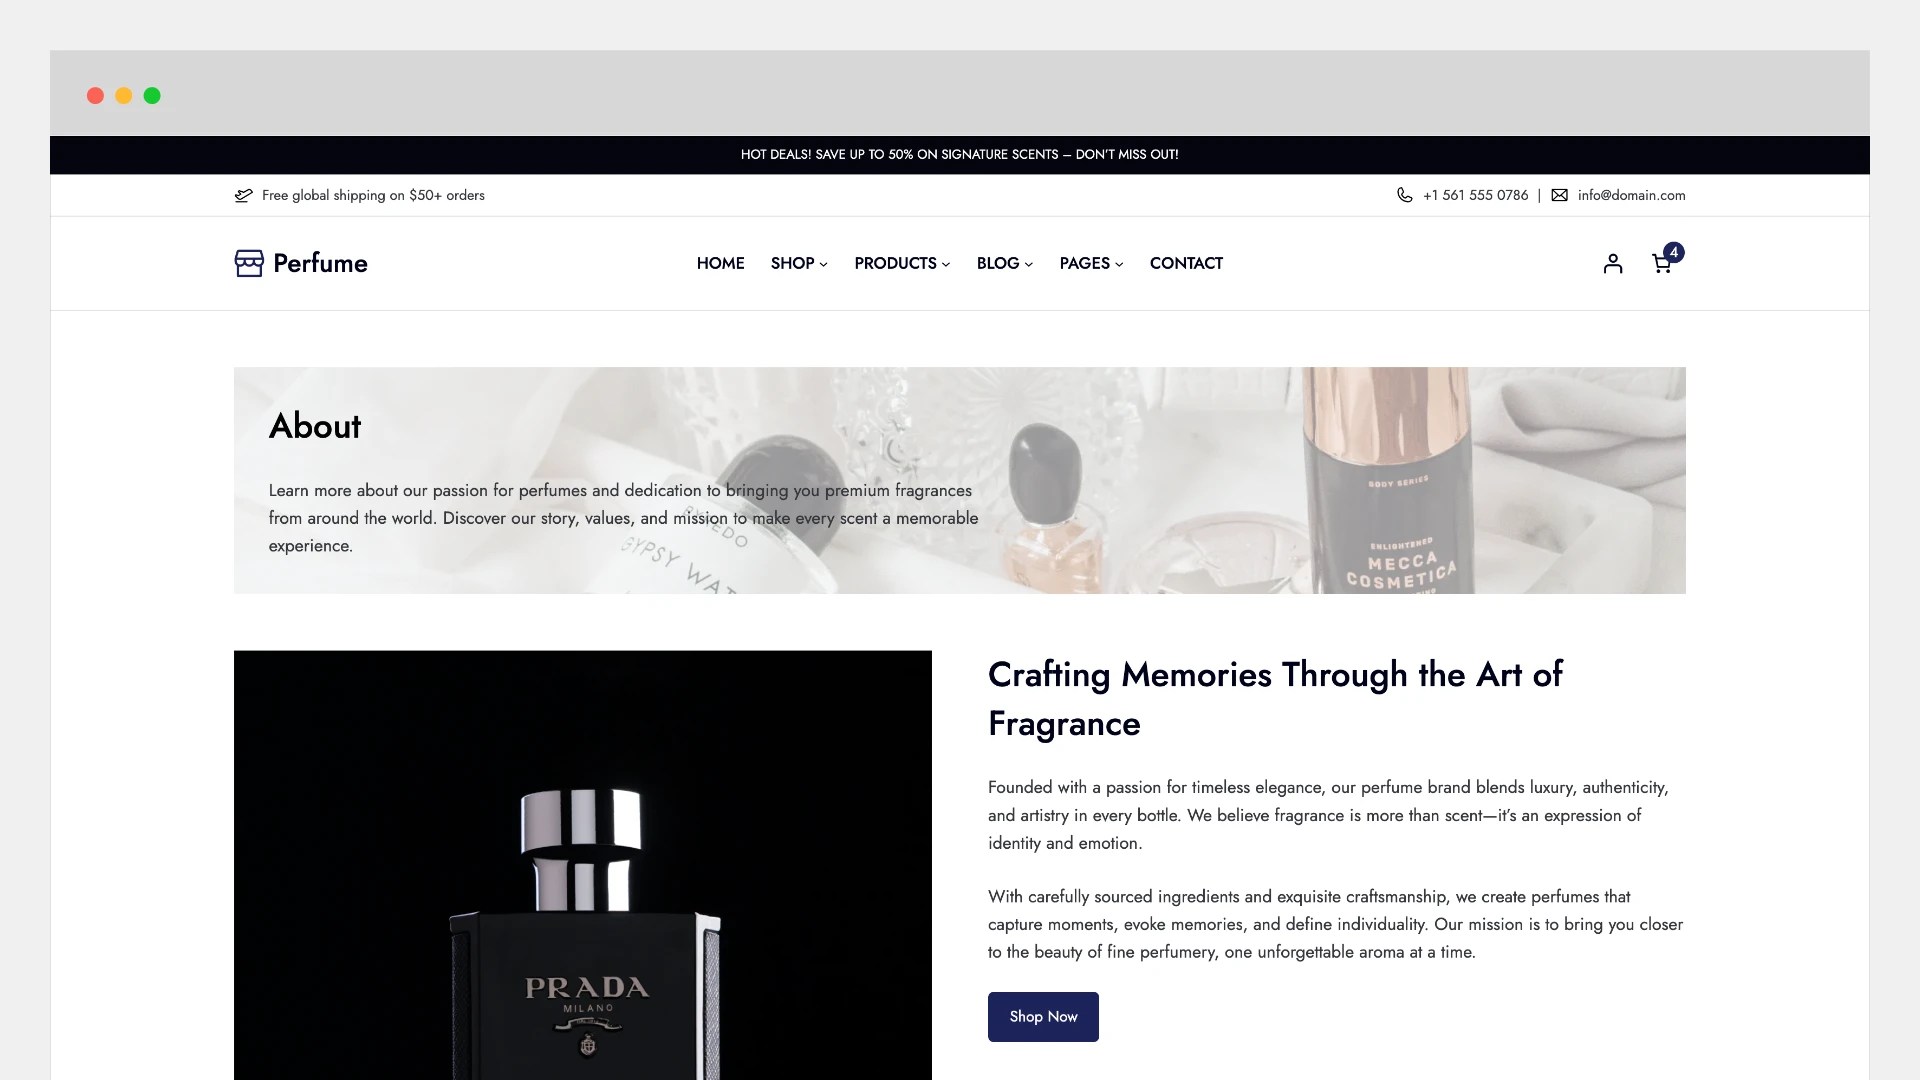
In this example, we will create and set up the About page. You can follow the same process to create the other pages.
Using Starter Patterns
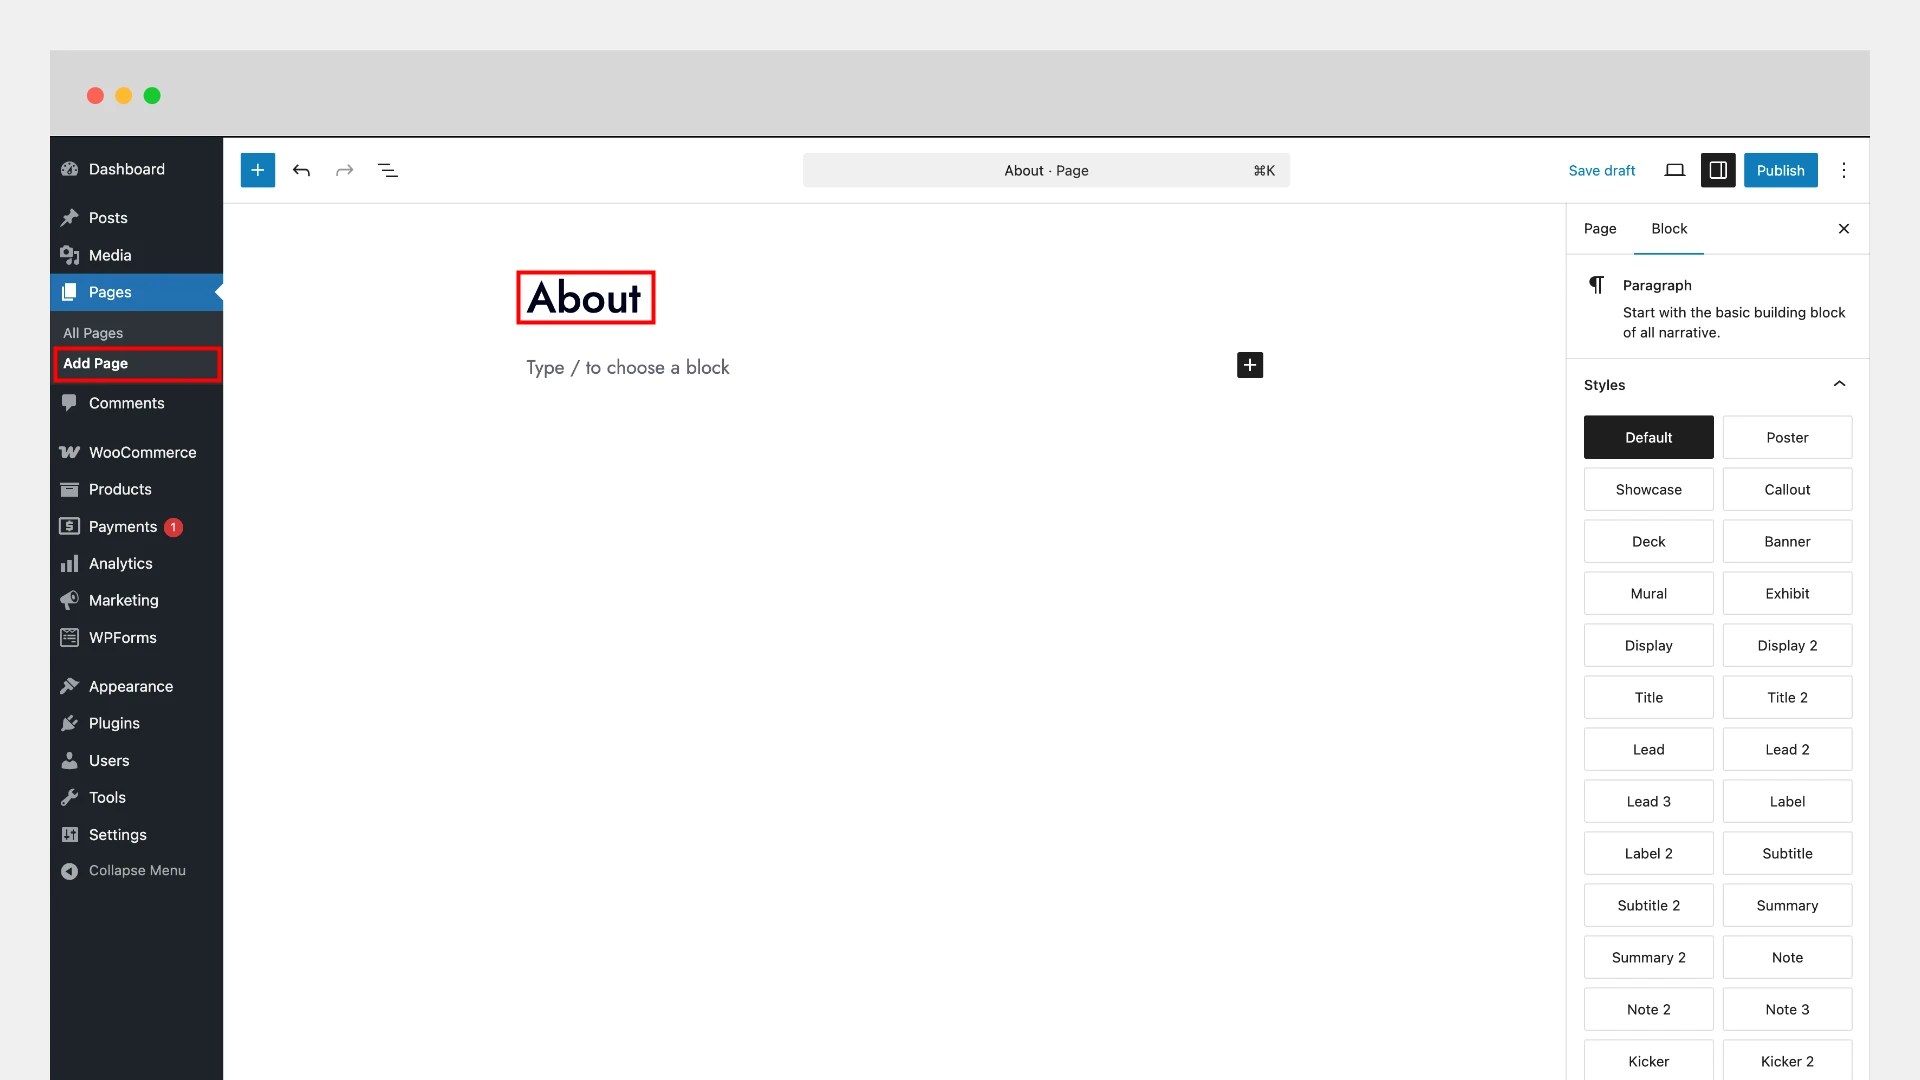
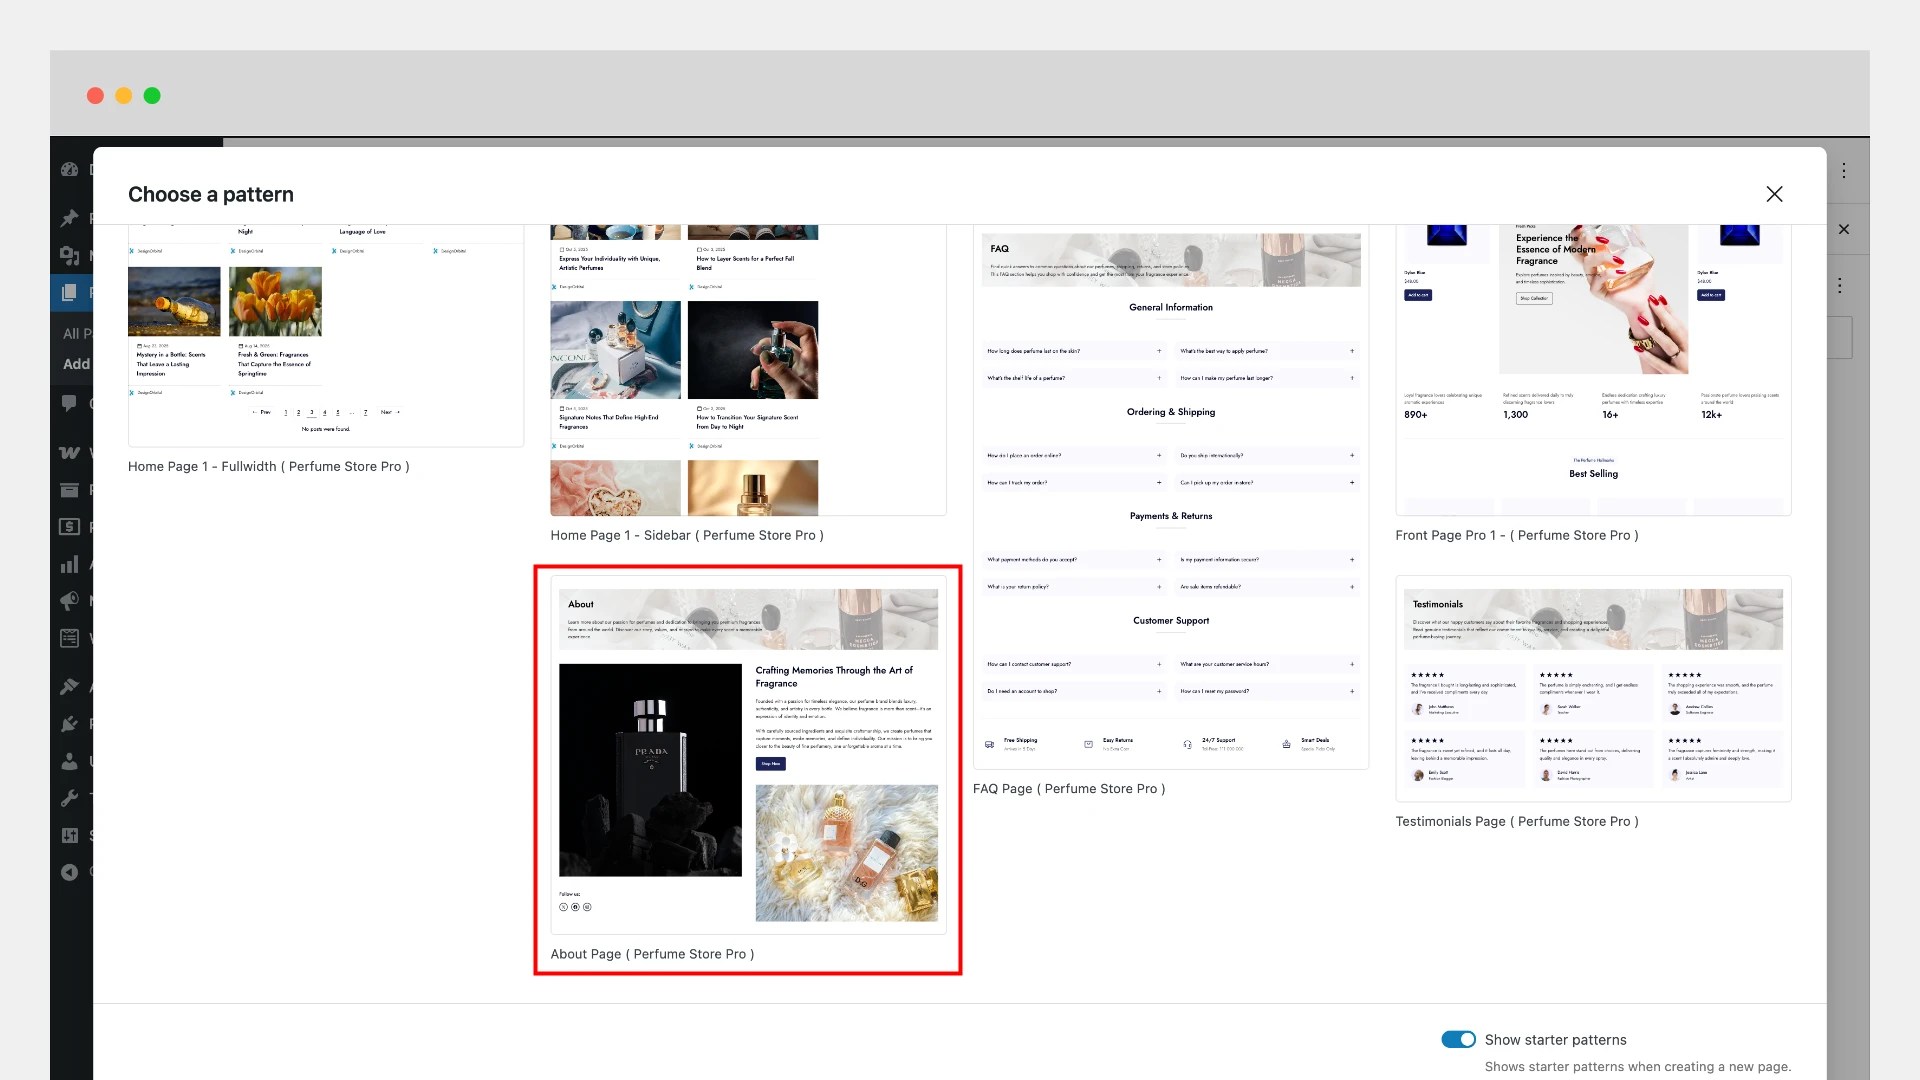
↑ Back to top- Go to Pages > Add New.
- If Show Starter Patterns is enabled, you will see a selection of built-in layouts.
- Select the About Page (Perfume Store Pro) pattern.
- The About Page pattern will load directly inside the editor.
- Enter a title, such as About, and proceed to customize the content as needed.
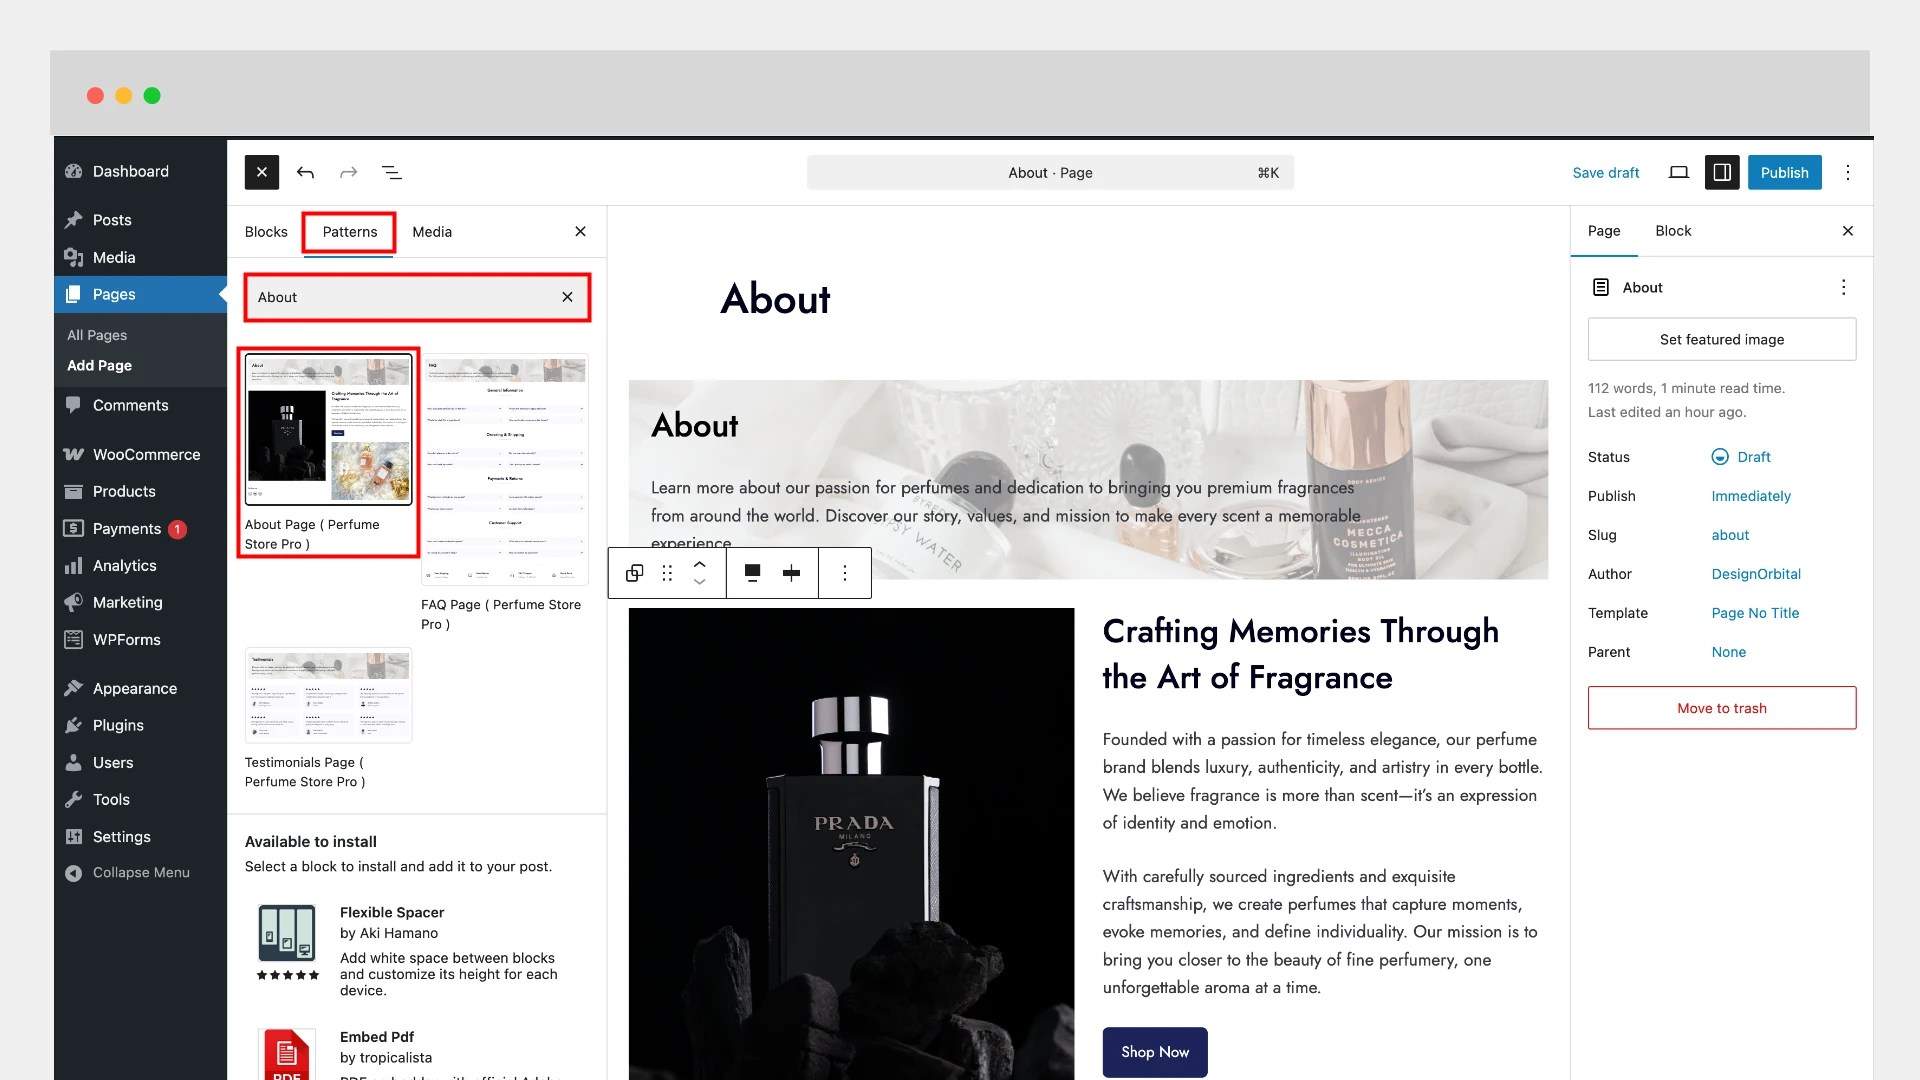
Using Block Inserter
↑ Back to top- Go to Pages > Add New and enter a title, such as About.
- Open the Block Inserter ( + icon ).
- Switch to the Patterns tab.
- Type About into the search field.
- Select the About Page (Perfume Store Pro) pattern.
- The layout will load into the editor, ready for your customization.
Hide Page Title
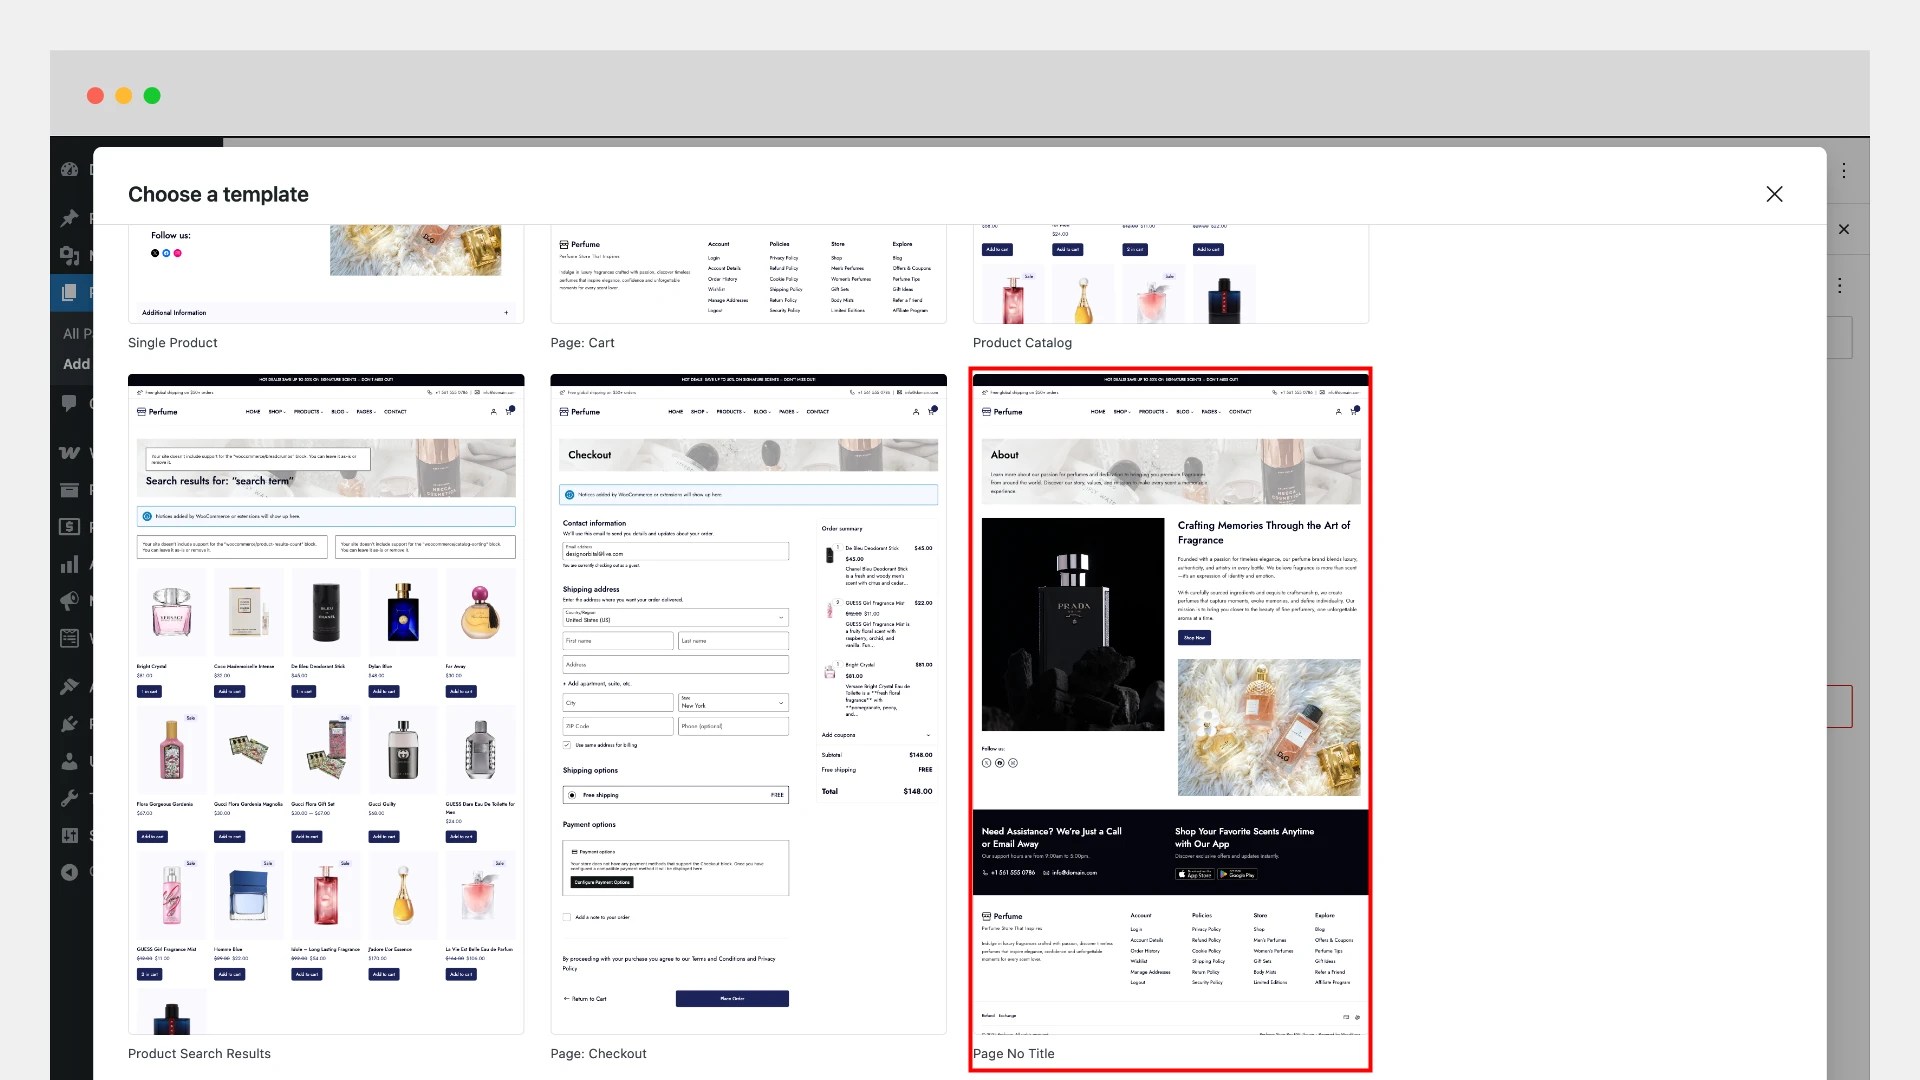
↑ Back to topBy default, the page title is visible on the frontend. If you prefer not to show the title, you can use the No Title page template:
- In the editor, click Template > Pages > Change Template.
- From the template list, choose Page – No Title.
- Apply and return to the editor.
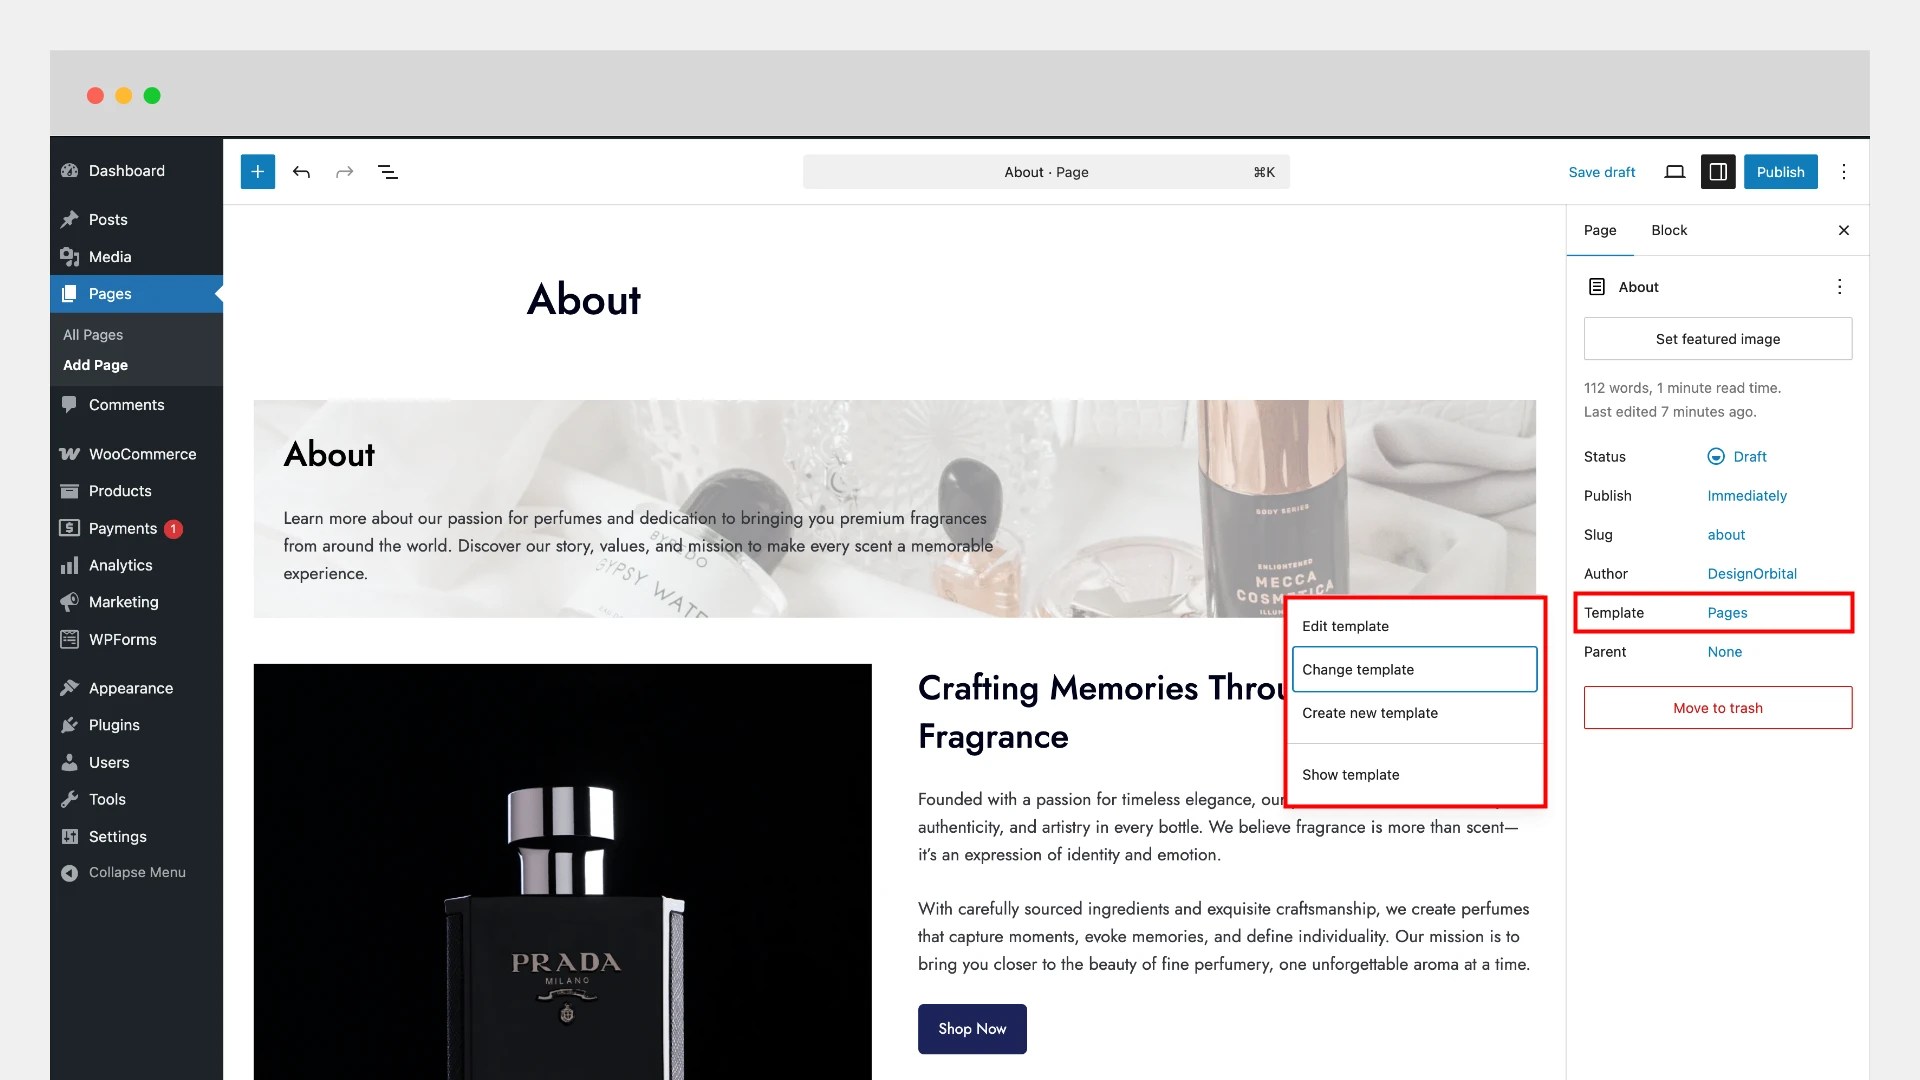
Publish your page once you’re satisfied.
You can repeat the same steps to create the remaining pages, such as Testimonials, FAQ, and Contact.
Add Products with WooCommerce
↑ Back to topAdding products in Perfume Store Pro works the same way as any standard WooCommerce store. The theme fully supports all major product types, including:
- Simple Products
- Grouped Products
- External/Affiliate Products
- Variable Products
You can easily add product details such as price, images, variations, stock status, and more.
For a more detailed guide on adding and managing WooCommerce products, please refer to the official WooCommerce documentation.
You can explore the key helpful links below:
Adding Different Product Types
Learn how to add a Simple Product
Learn how to add a Grouped Product
Learn how to add an External/Affiliate Product
Learn how to add a Variable Product
Learn how to add a Virtual and Downloadable Product
Here are some helpful links to better understand WooCommerce product editor features:
Product Editor Settings
Learn about all product editor settings
Learn how to put products on sale or apply discounts
Learn how to manage product stock and inventory
Continue adding products to your store, and they will automatically appear on the homepage and shop page. To view your shop, simply click Shop from the header navigation menu.
Additional Custom CSS
↑ Back to topYou can use the following built-in CSS utility classes to hide elements on specific screen sizes:
- hide-on-mobile – hides the element on mobile devices
- hide-on-tablet – hides the element on tablet devices
- hide-on-desktop – hides the element on desktop devices
How to Add Custom CSS Classes to a Block
↑ Back to topTo apply any of these classes to a block:
- Select the block you want to modify (e.g., Buttons block).
- Click the Settings icon in the top-right corner of the editor.
- Scroll down and open the Advanced section.
- Find the Additional CSS Class(es) field.
- Enter one of the class names, for example:
- hide-on-mobile to hide the block on mobile devices
- hide-on-tablet to hide the block on tablet devices
- hide-on-desktop to hide the block on desktop devices
Note: Do not add a dot (.) when entering class names. For example, type hide-on-mobile instead of .hide-on-mobile.
Site Editor
↑ Back to topIf you’re new to WordPress or working with a Block Theme for the first time, becoming familiar with features like Site Styles, Patterns, Templates, and Template Parts will make it much easier to customize and design your website exactly the way you want.
Customizing Website using Site Editor
Learn about the Site Editor
Intro to the Site Editor
Getting to Know the Site Editor
Block Editor
↑ Back to topCustomizing Posts, Pages using Block Editor
FAQs
↑ Back to top
Why are products not appearing in sections like Best Sellers?
If certain blocks or patterns—such as Best Sellers—appear empty, there are a few common reasons:
No products have been added yet.
Make sure you have created and published products in WooCommerce.The block is filtered to show only specific types of products.
Many product blocks display items based on conditions (for example, “best sellers,” “on sale,” “featured products,” or specific categories).
If no products meet the criteria, the block will appear empty or show only the section title.Solution:
Add products that match the required conditions, or adjust the block settings (such as changing filters, categories, or sorting options) to display available products.