From time to time, you may find it beneficial for testing or troubleshooting the WooCommerce Android app, to view it from an Android simulator. This guide will walk you through how to set that up.
Note: This document is meant to serve as a helpful guide for advanced troubleshooting; however, the procedures described are beyond the scope of our support policy and we cannot provide direct assistance with implementing them.
If you would like to seek assistance from a qualified WordPress/WooCommerce developer, we highly recommend Codeable or a Woo Agency Partner.
Setting up an Android simulator
↑ Back to top1. Download the Android Studio and install it on your computer.
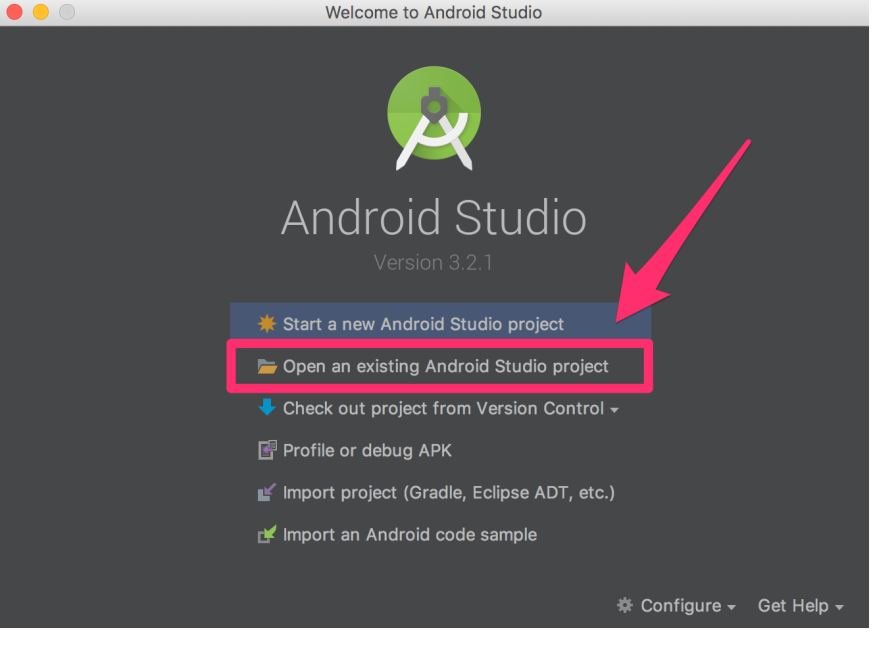
2. Once done, select Open an existing Android Studio project:
3. Navigate to GitHub and download the latest Android Release .zip file.
4. Unzip the file on your computer.
5. When asked to Open an existing Android Studio project, select that unzipped folder and click Ok.
6. The project will start the installation in the Android Studio but won’t be able to be finished as it requires so-called build to be done. You won’t need that to continue with this process, but you will want to see a message showing Build configuration file gradle.properties doesn't exist, follow README instructions.
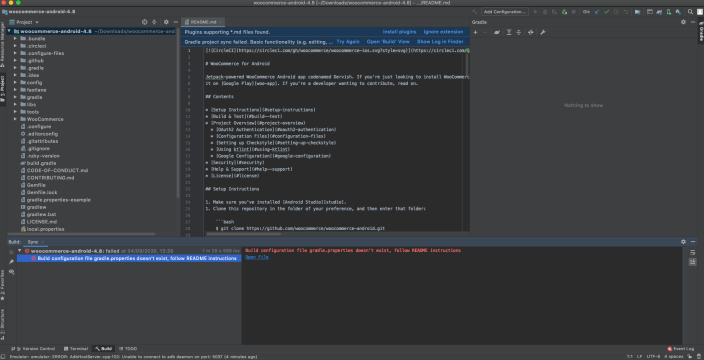
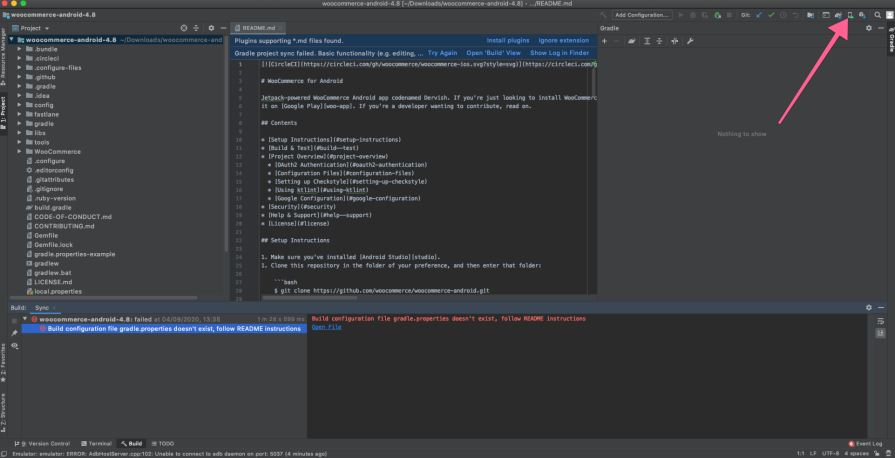
7. Set up the device to be used for the simulator. Click on the phone icon in the top right corner to open an AVD (Android Virtual Device) Manager:
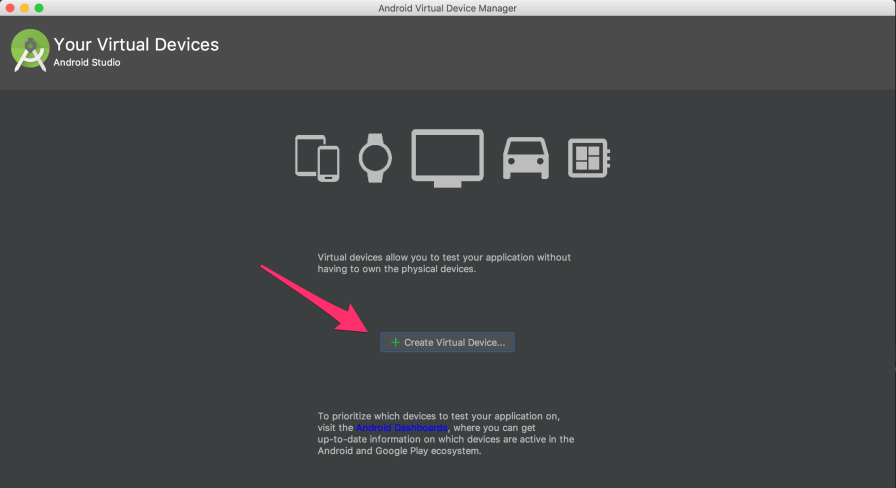
8. The AVD Manager will open a screen where you can Create Virtual Device:
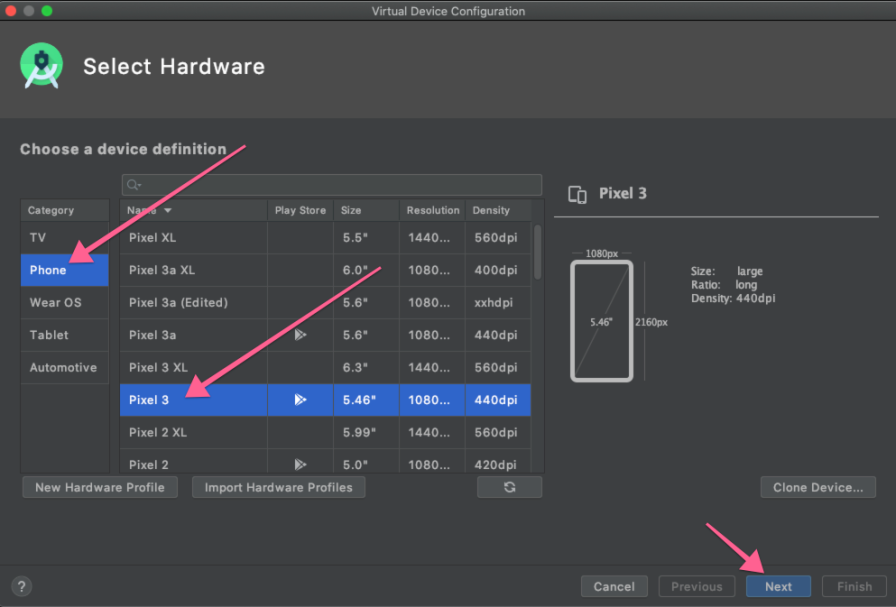
9. From the Select Hardware screen, select the virtual device you would like to set up:
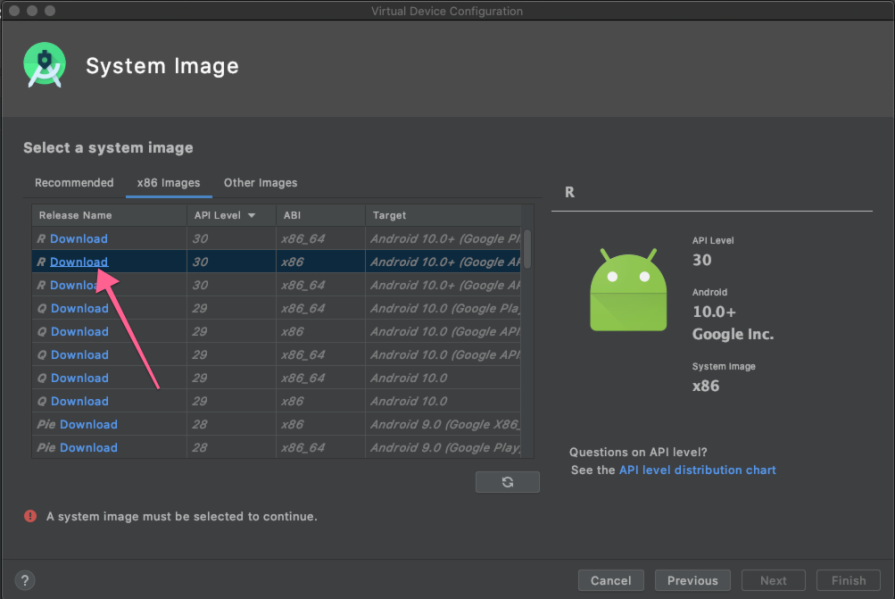
10. Select a System Image. You will need to download a system image of your choice. Downloading and installing this takes a few minutes after you click on Next.
The next step is to install the WooCommerce Android app onto your simulator.
Setting up the WooCommerce app
↑ Back to top1. Run the simulator by clicking the Play button:

2. To install the app on the simulator, navigate to GitHub and download the .apk file of the recent release.
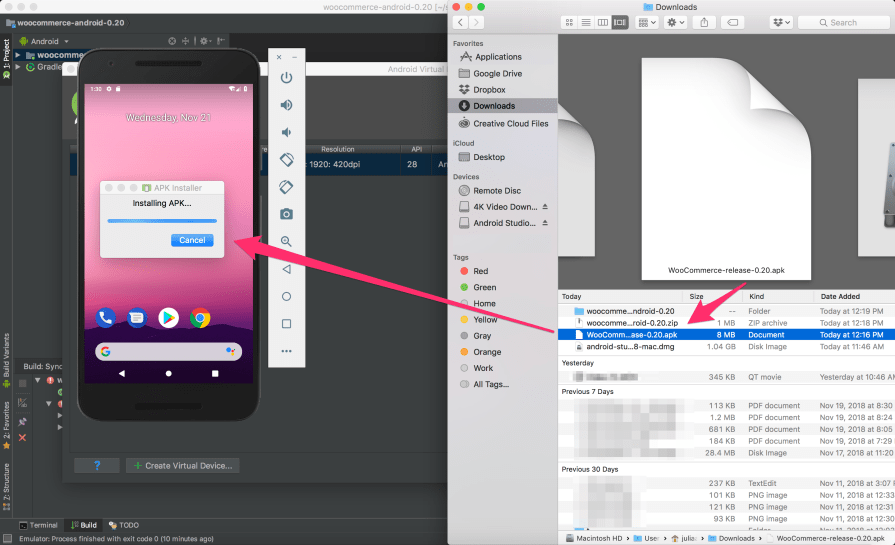
3. Drag and drop the .apk file from your computer to the running simulator:
4. After the APK installation is complete, you will see a WooCommerce icon on the simulator:
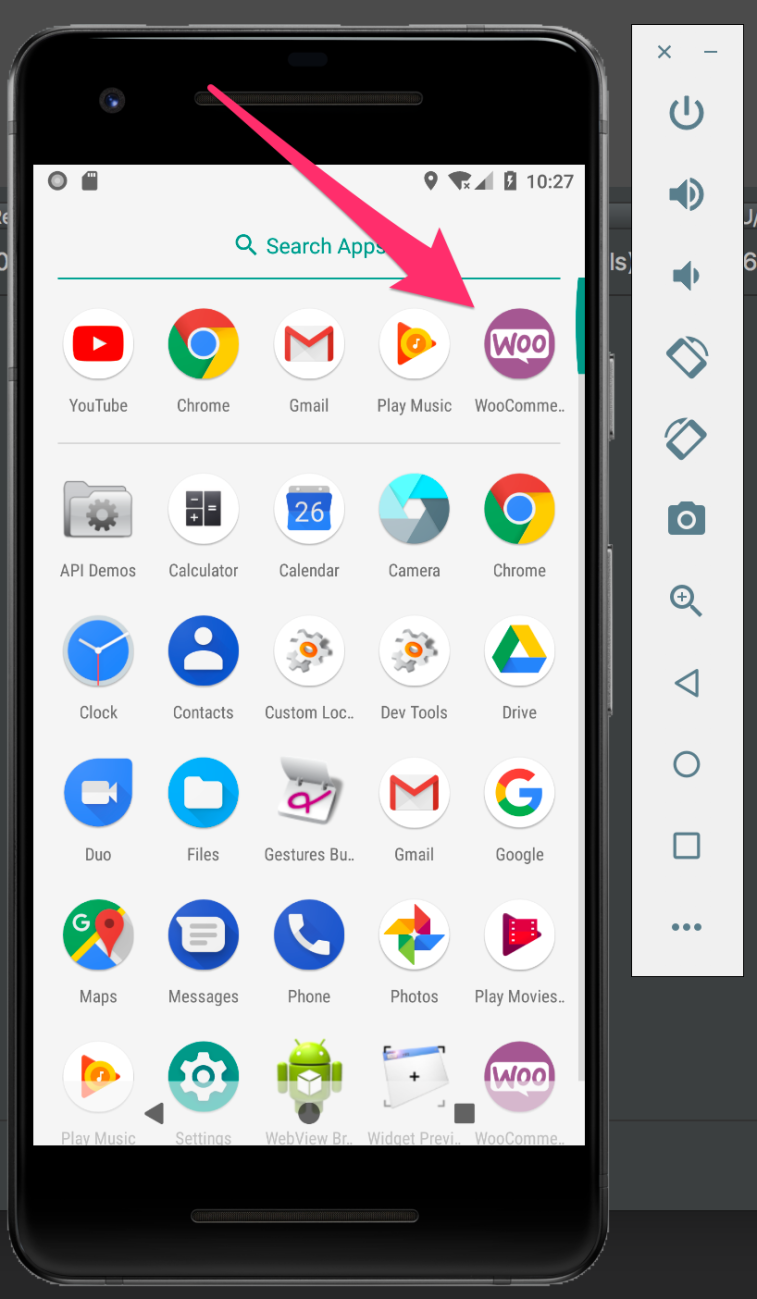
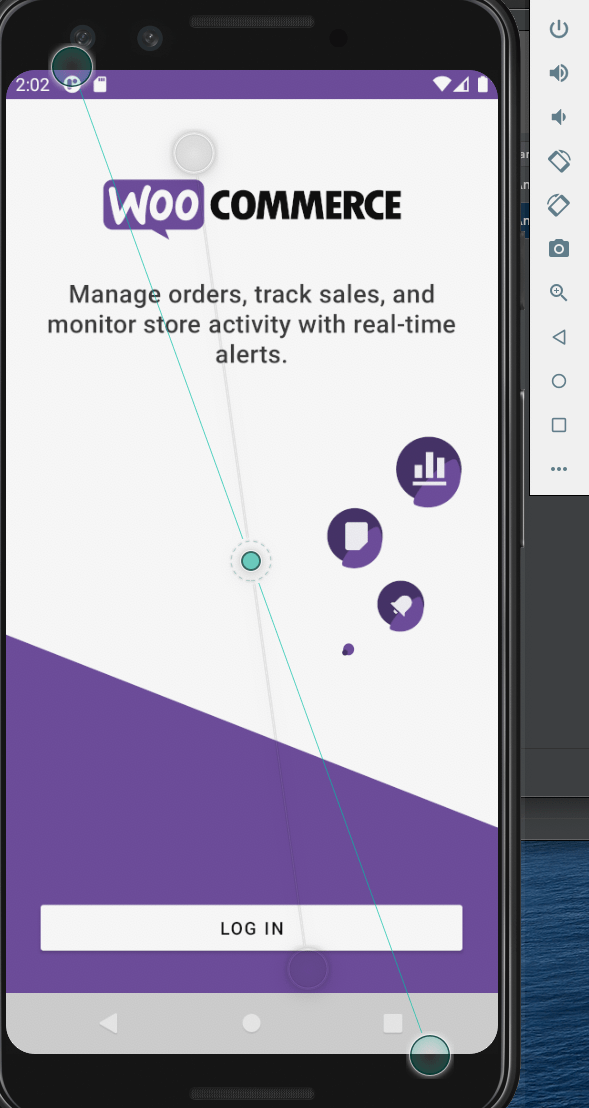
5. Click on the WooCommerce icon to start the app on the simulator:
Note: This document is meant to serve as a helpful guide for advanced troubleshooting; however, the procedures described are beyond the scope of our support policy and we cannot provide direct assistance with implementing them.
If you would like to seek assistance from a qualified WordPress/WooCommerce developer, we highly recommend Codeable or a Woo Agency Partner.
