We have tested the Currency Switcher for WooCommerce with many WordPress themes, plugins and third-party WooCommerce extensions. Please read the details below.
WooCommerce Products/extensions
↑ Back to top- Conditional Shipping and Payments for WooCommerce
- Smart Custom Product Addons and Fields for WooCommerce
- Role Based Pricing for WooCommerce
- B2B for WooCommerce
- Donation for WooCommerce
- All Products for WooCommerce Subscriptions
- WPML
- Wholesale For WooCommerce
- WooCommerce Deposits By WooCommerce
- WooCommerce Bookings By WooCommerce
- Wholesale Suite
- LiteSpeed Cache
- Wp Rocket
- Dynamic Pricing (By Addify)
Compatibility With Woo Conditional Shipping and Payments
↑ Back to topInstallation of Woo Conditional Shipping and Payments
↑ Back to top- Download and Install the Woo Conditional Shipping and Payments.
- Follow the Woo Conditional Shipping and Payments documentation to set up and configure the plugin.
Getting Started
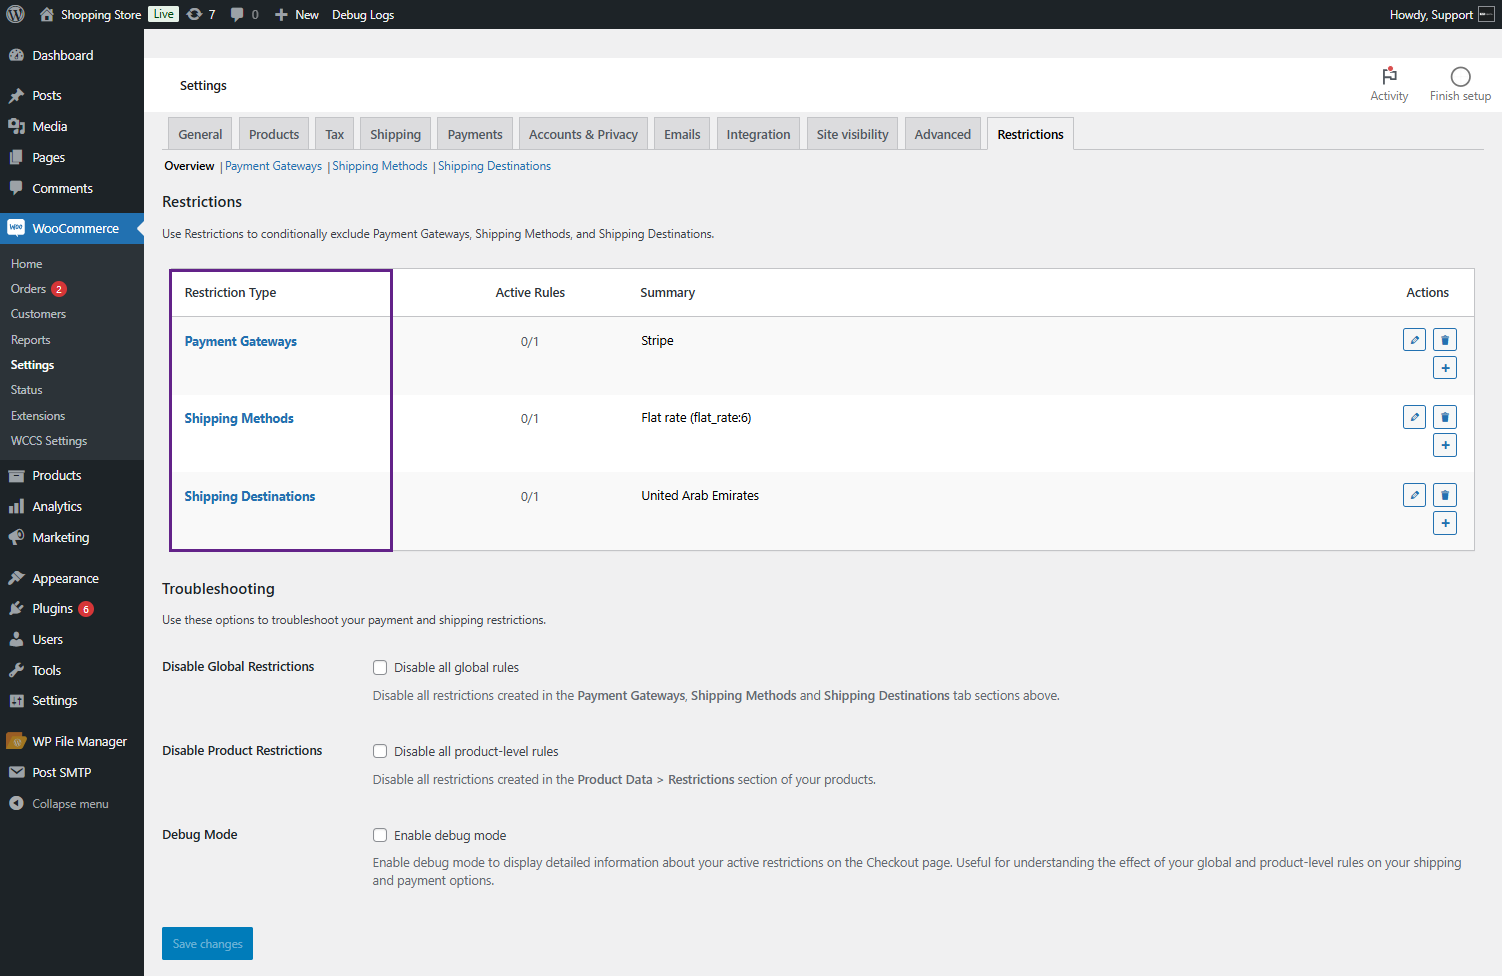
↑ Back to top- To set up restrictions, Go to the WordPress Admin Dashboard > WooCommerce > Settings > Restrictions.
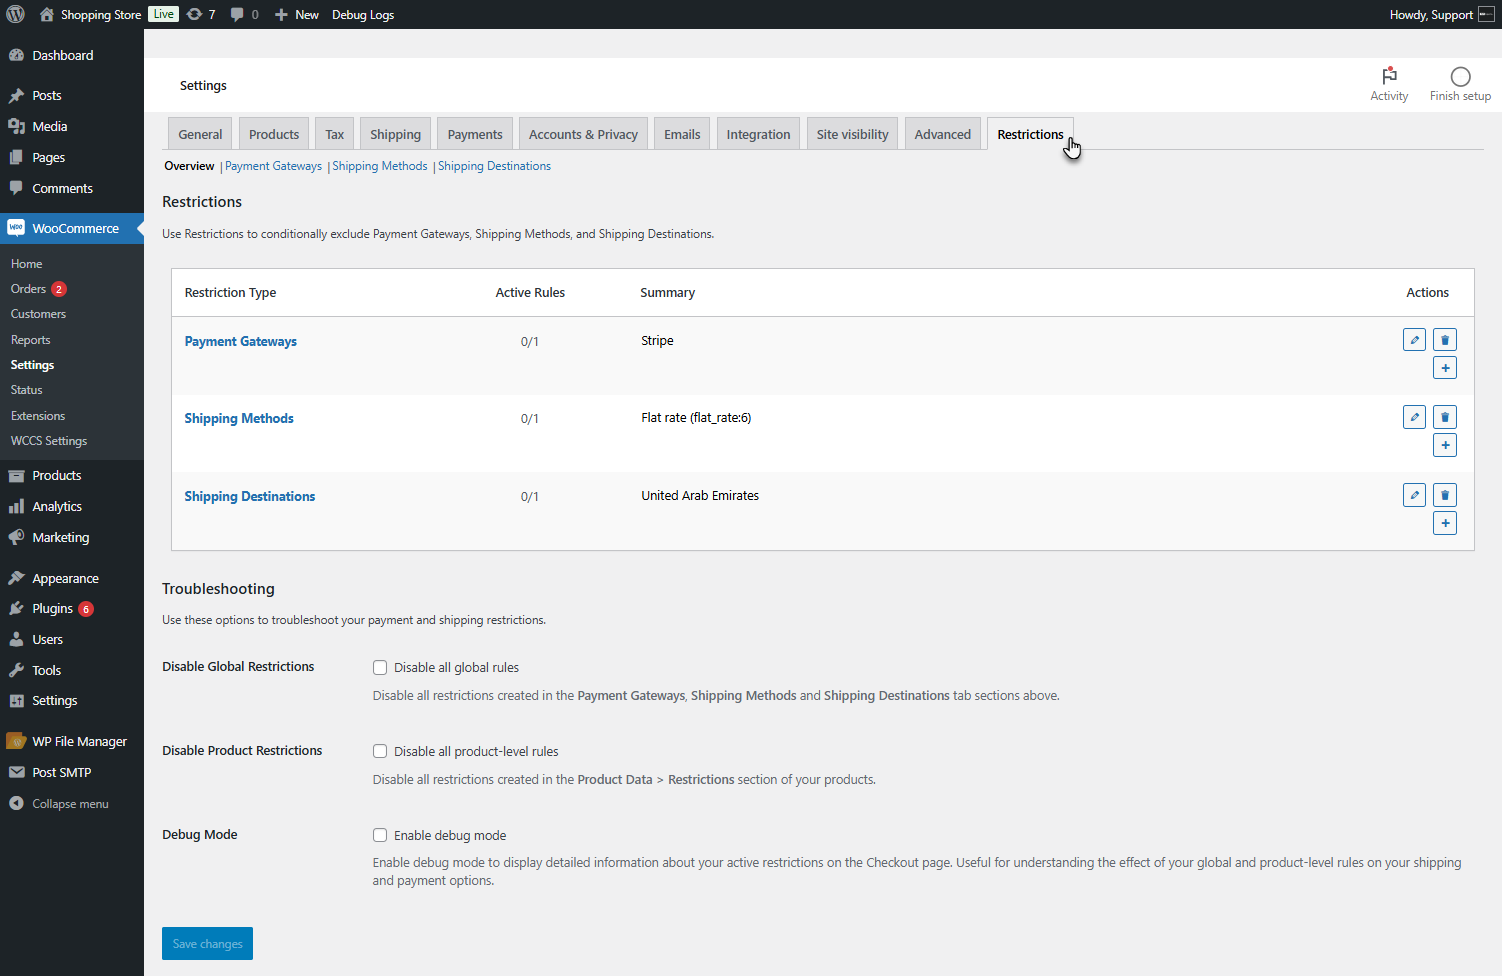
- There are three types of restrictions.
- Payment Gateway
- Shipping Methods
- Shipping Destinations
Payment Gateway Restriction
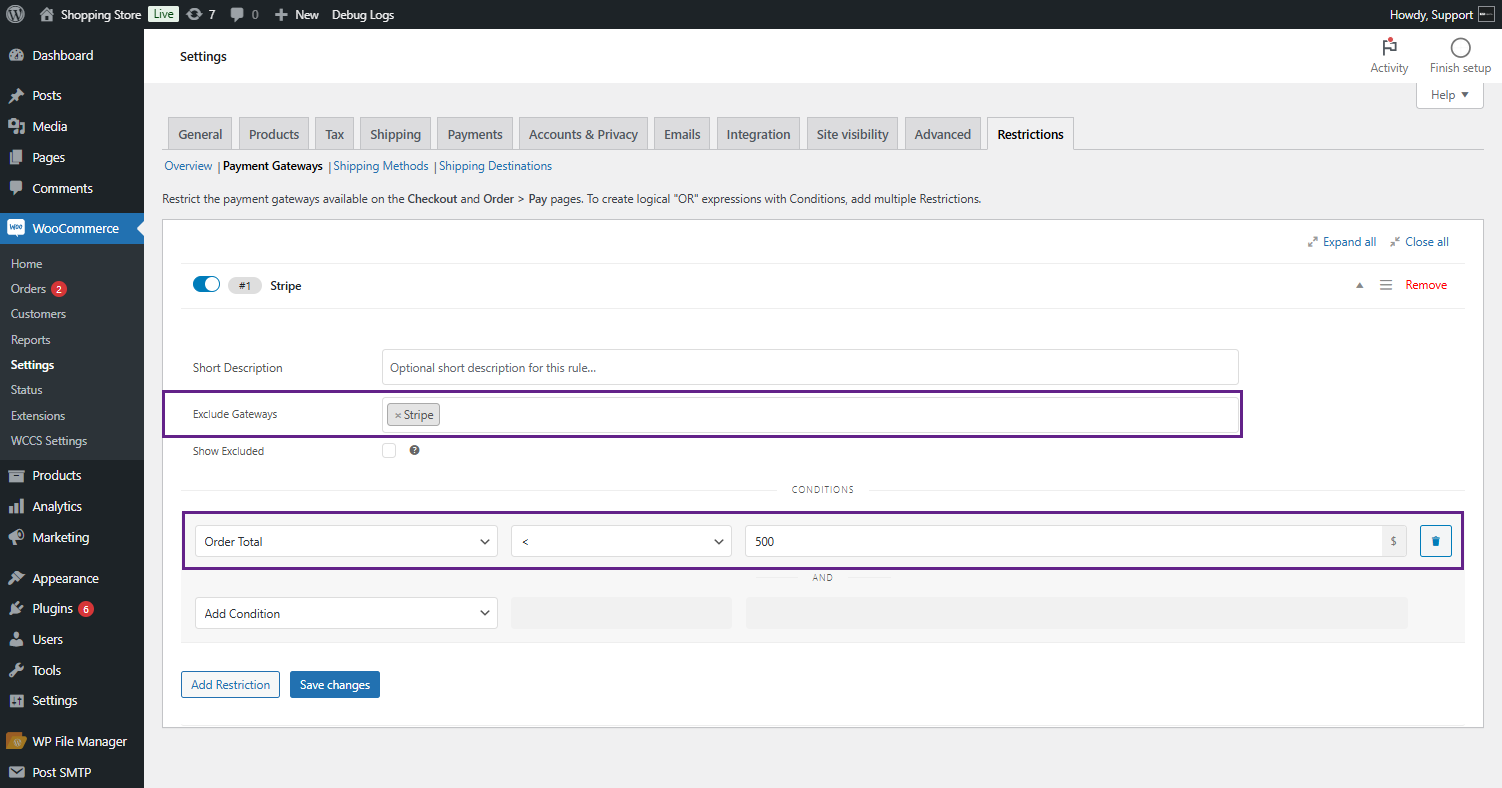
↑ Back to top- Navigate to WordPress Admin Dashboard > WooCommerce > Settings > Restrictions > Payment Gateways and add a restriction.
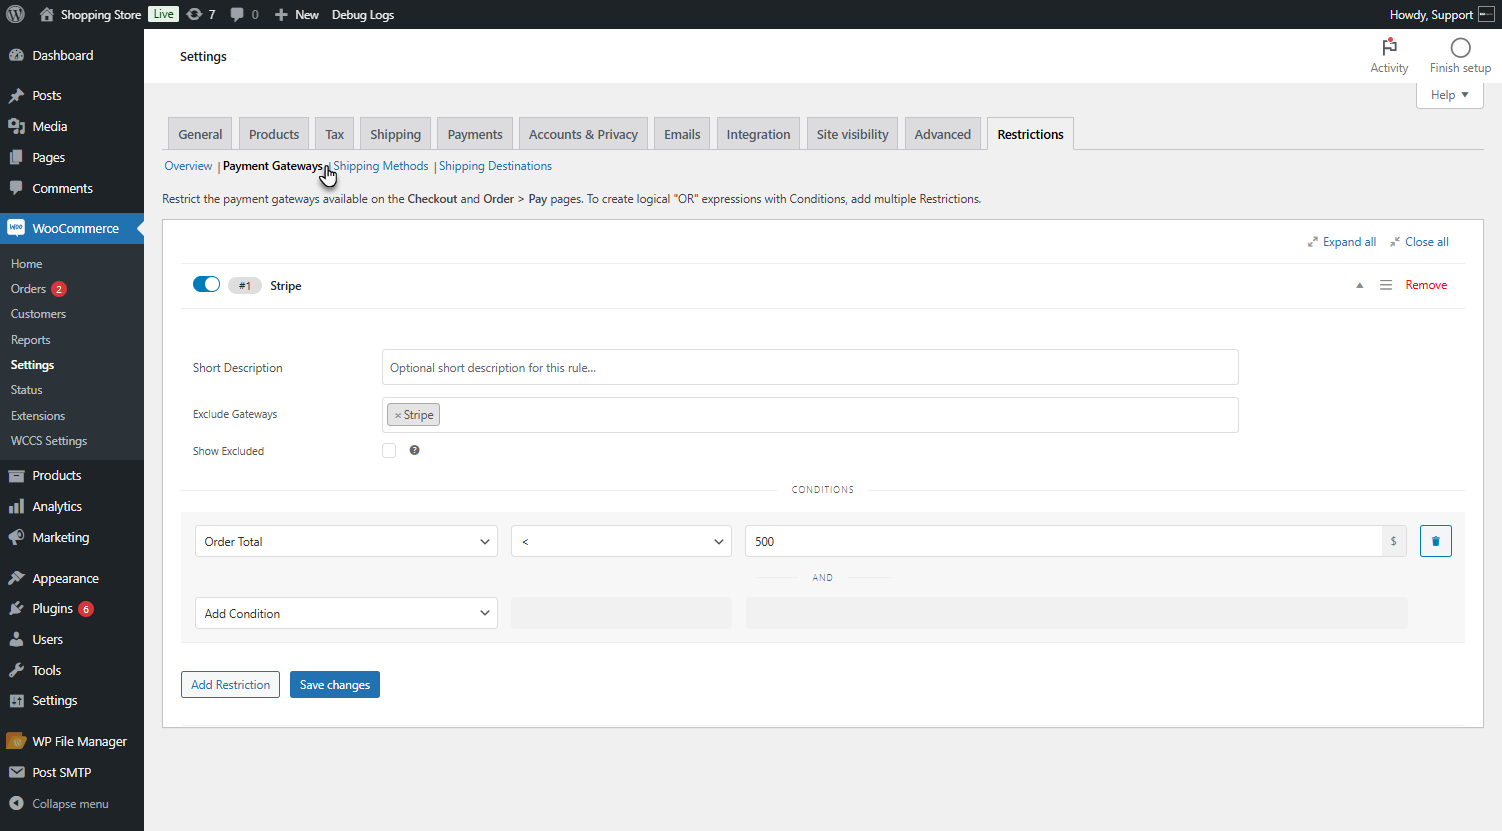
- In this case, the condition set requires the order total to exceed 500; if the total is below this amount, the Stripe payment gateway will be excluded.
Front End Impact
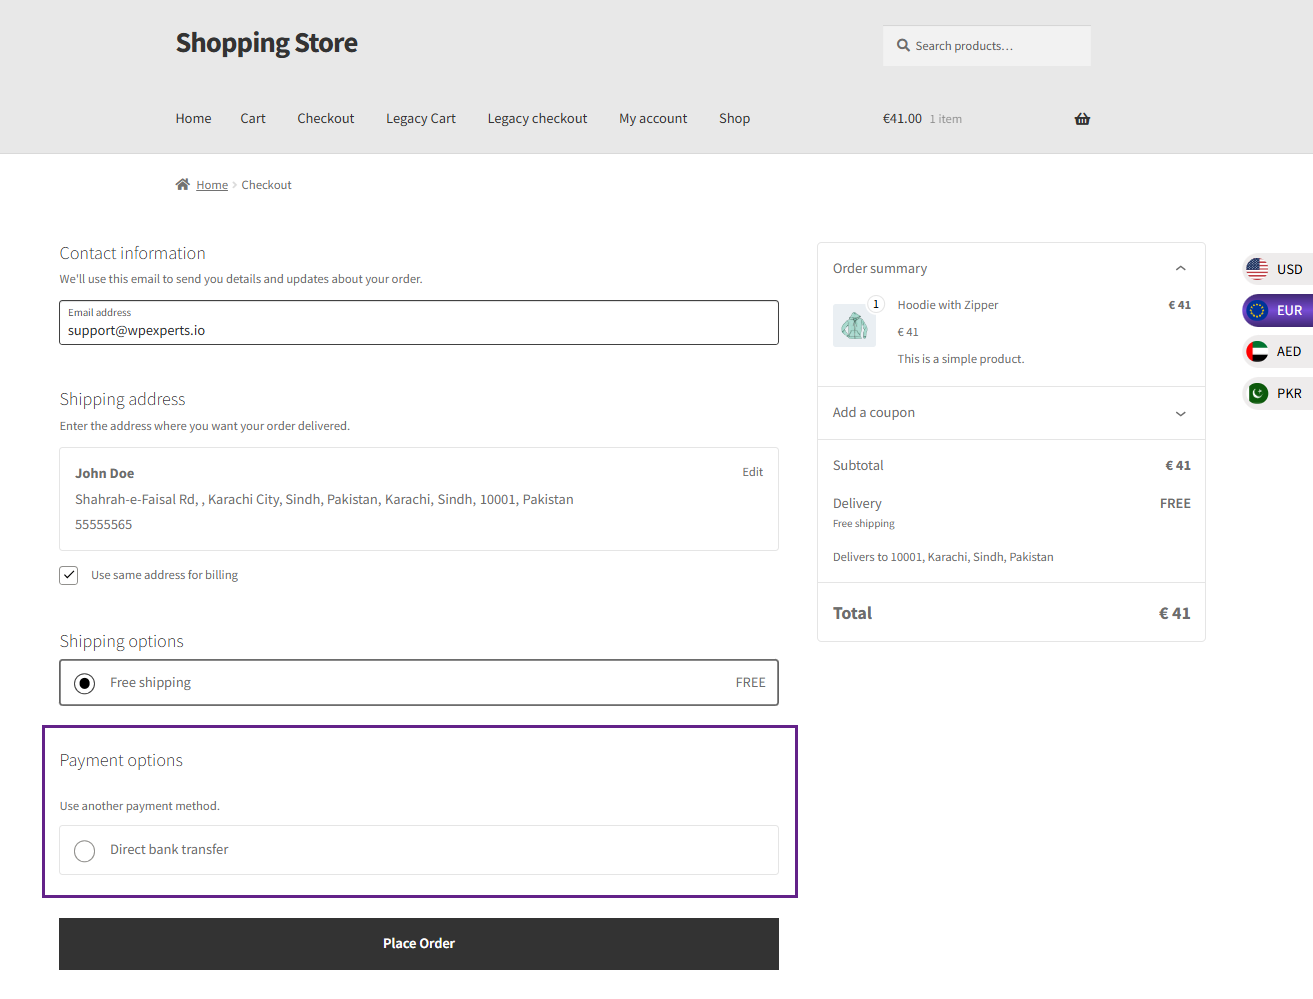
- The Stripe payment gateway will be excluded when the order value is less than 500.
Before Conversion

After Conversion
Shipping Methods Restriction
↑ Back to top- Navigate to WordPress Admin Dashboard > WooCommerce > Settings > Restrictions > Shipping Methods and add a restriction.
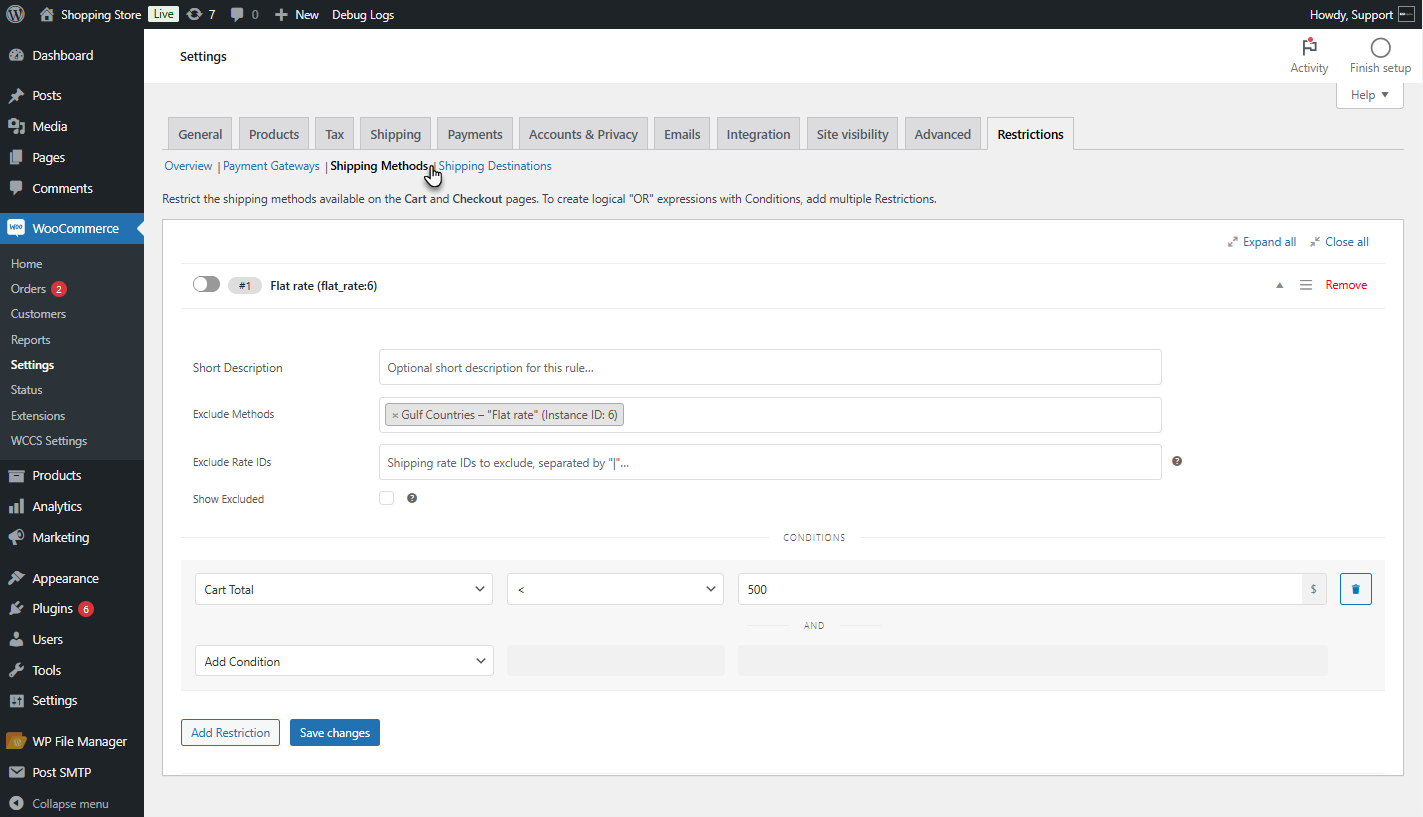
- If the cart total is less than 500 for Gulf countries, the Flat Rate shipping option will be excluded from the available shipping options.

Front End Impact
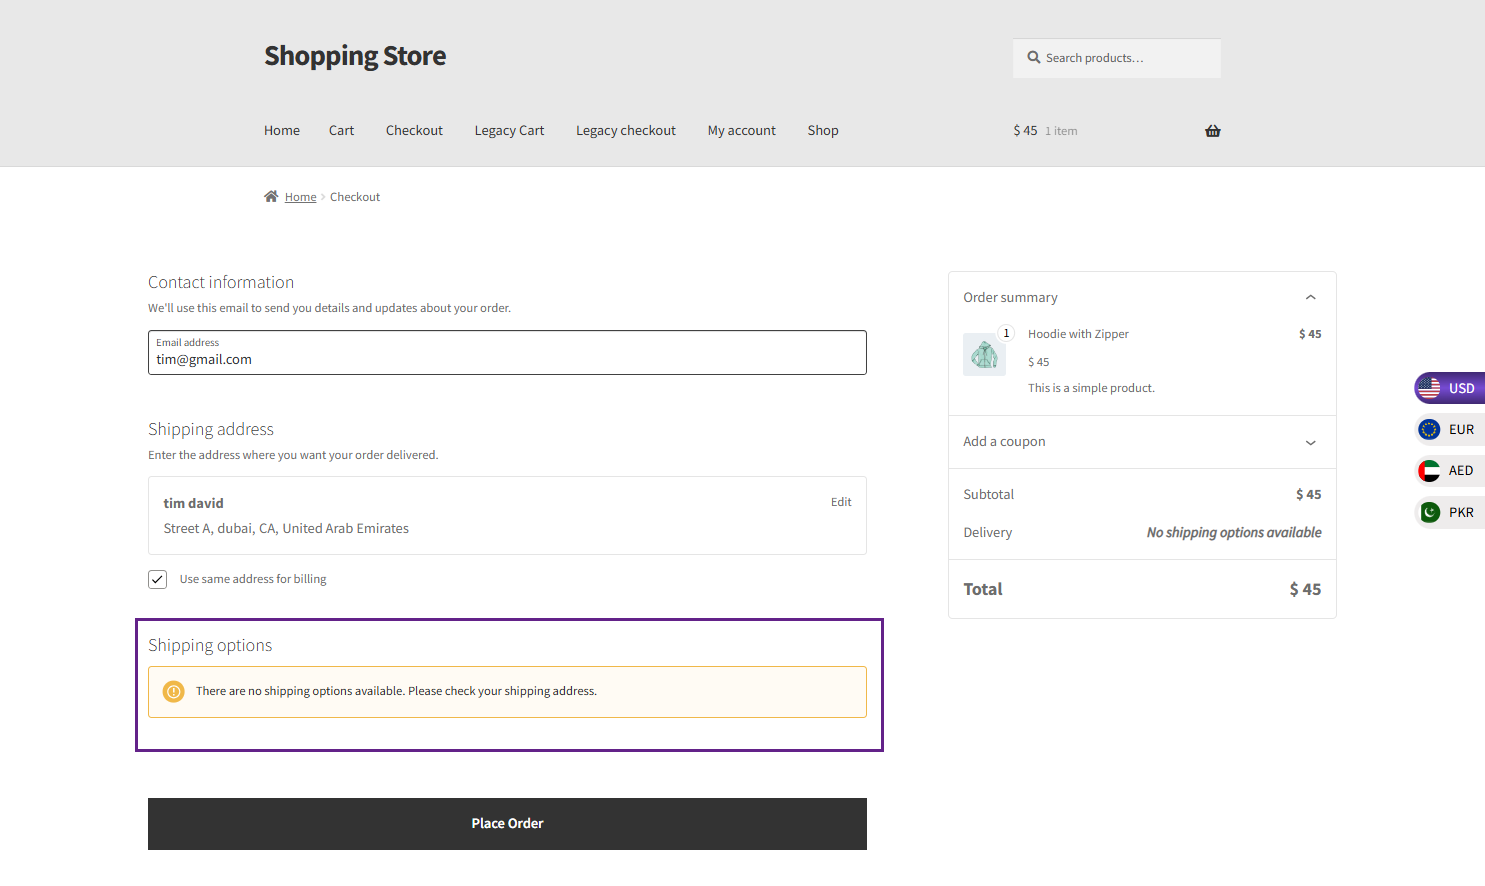
- For Gulf countries, if the order value is below 500, the Flat Rate shipping option will be disabled.
Before Conversion
After Conversion
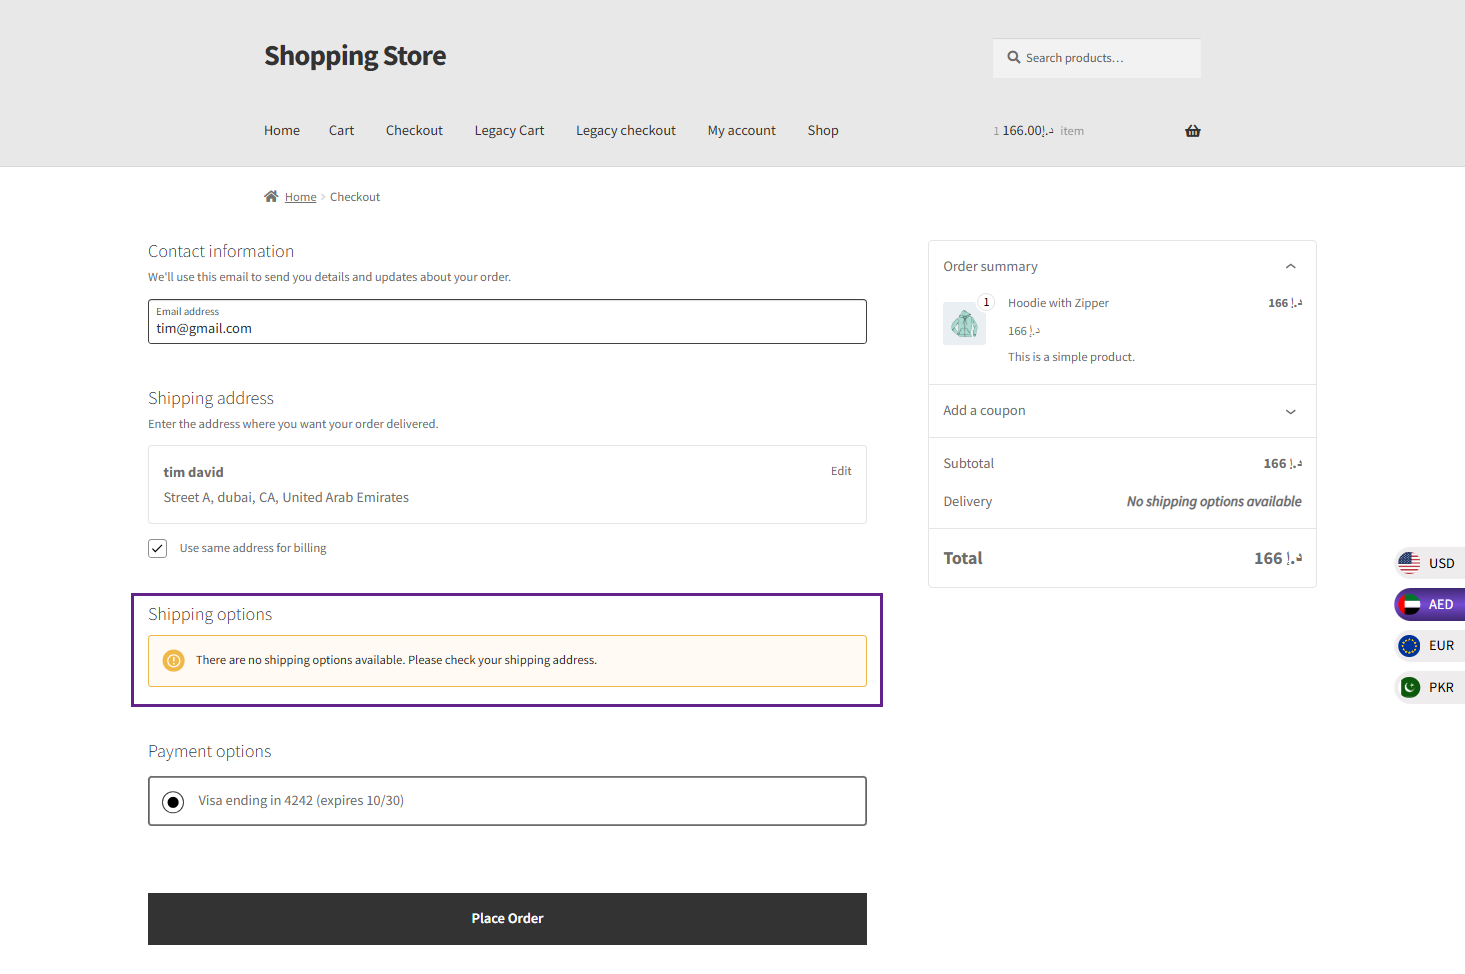
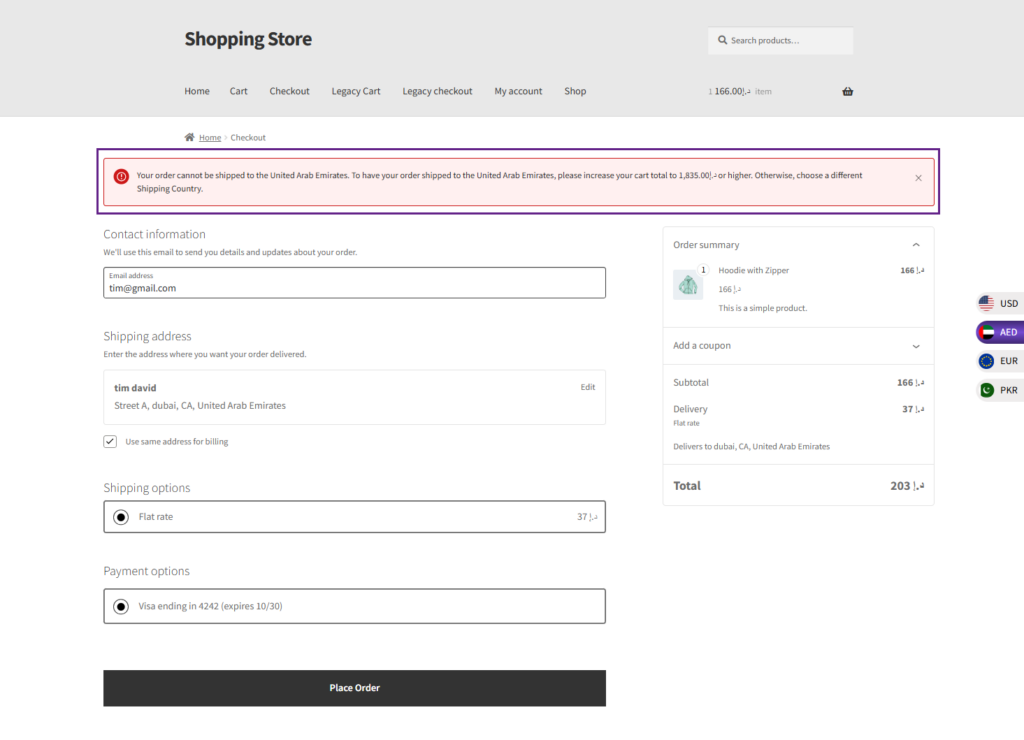
Shipping Destination Restriction
↑ Back to top- Navigate to WordPress Admin Dashboard > WooCommerce > Settings > Restrictions > Shipping Destination and add a restriction as needed.

- If the cart total is less than 500, the shipping destination will be excluded from the available options.
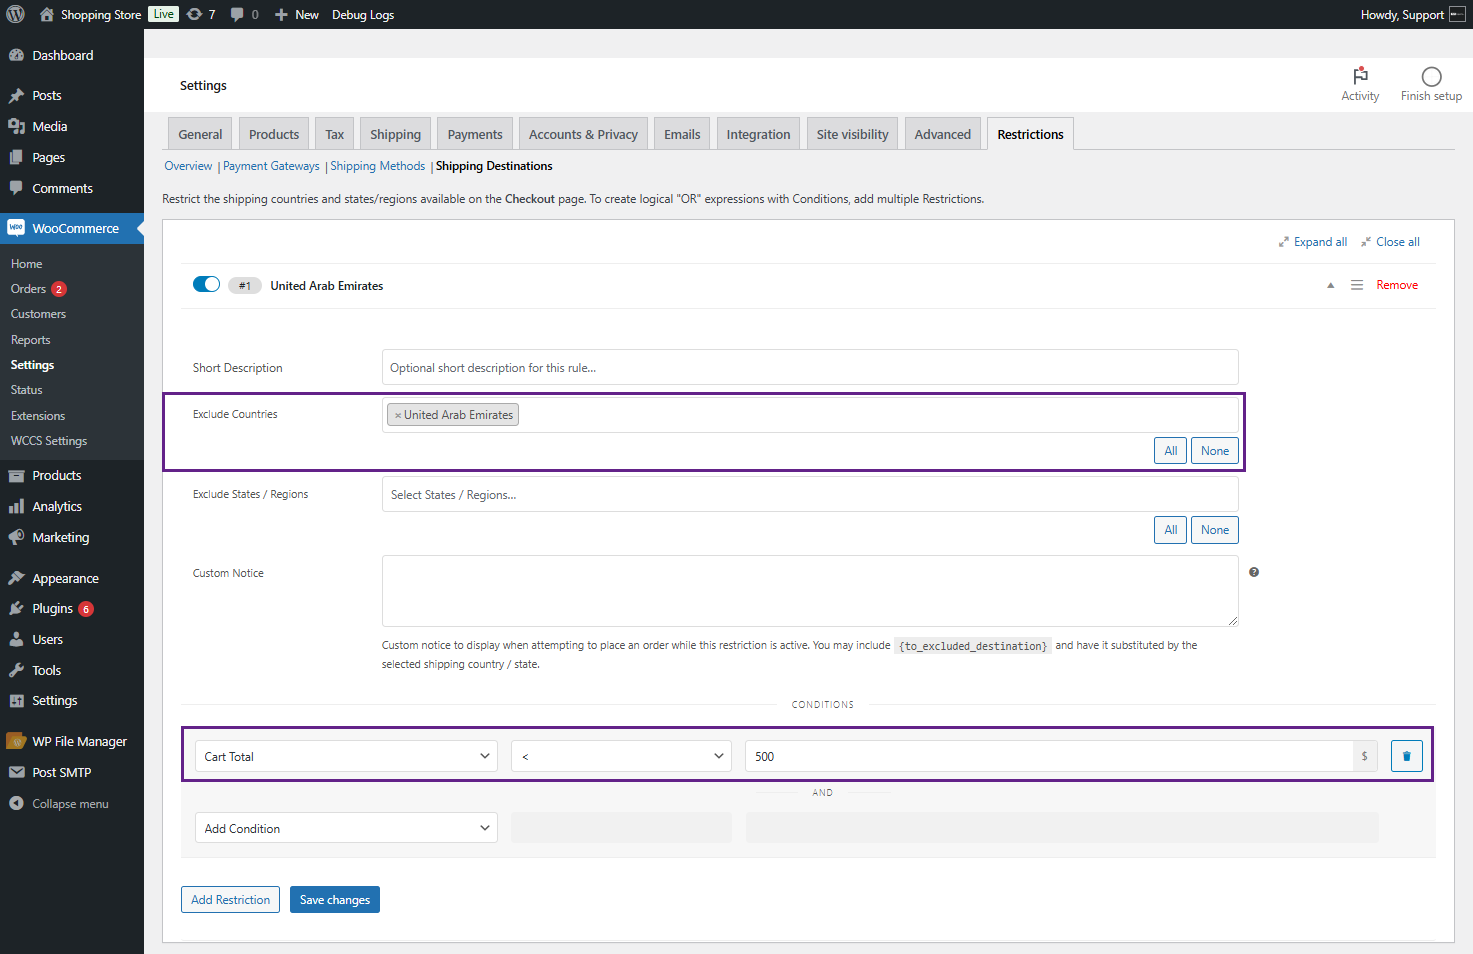
Front End Impact
- If the order value is below 500, shipping will not be available for the specified areas set by the admin in the backend.
Before Conversion
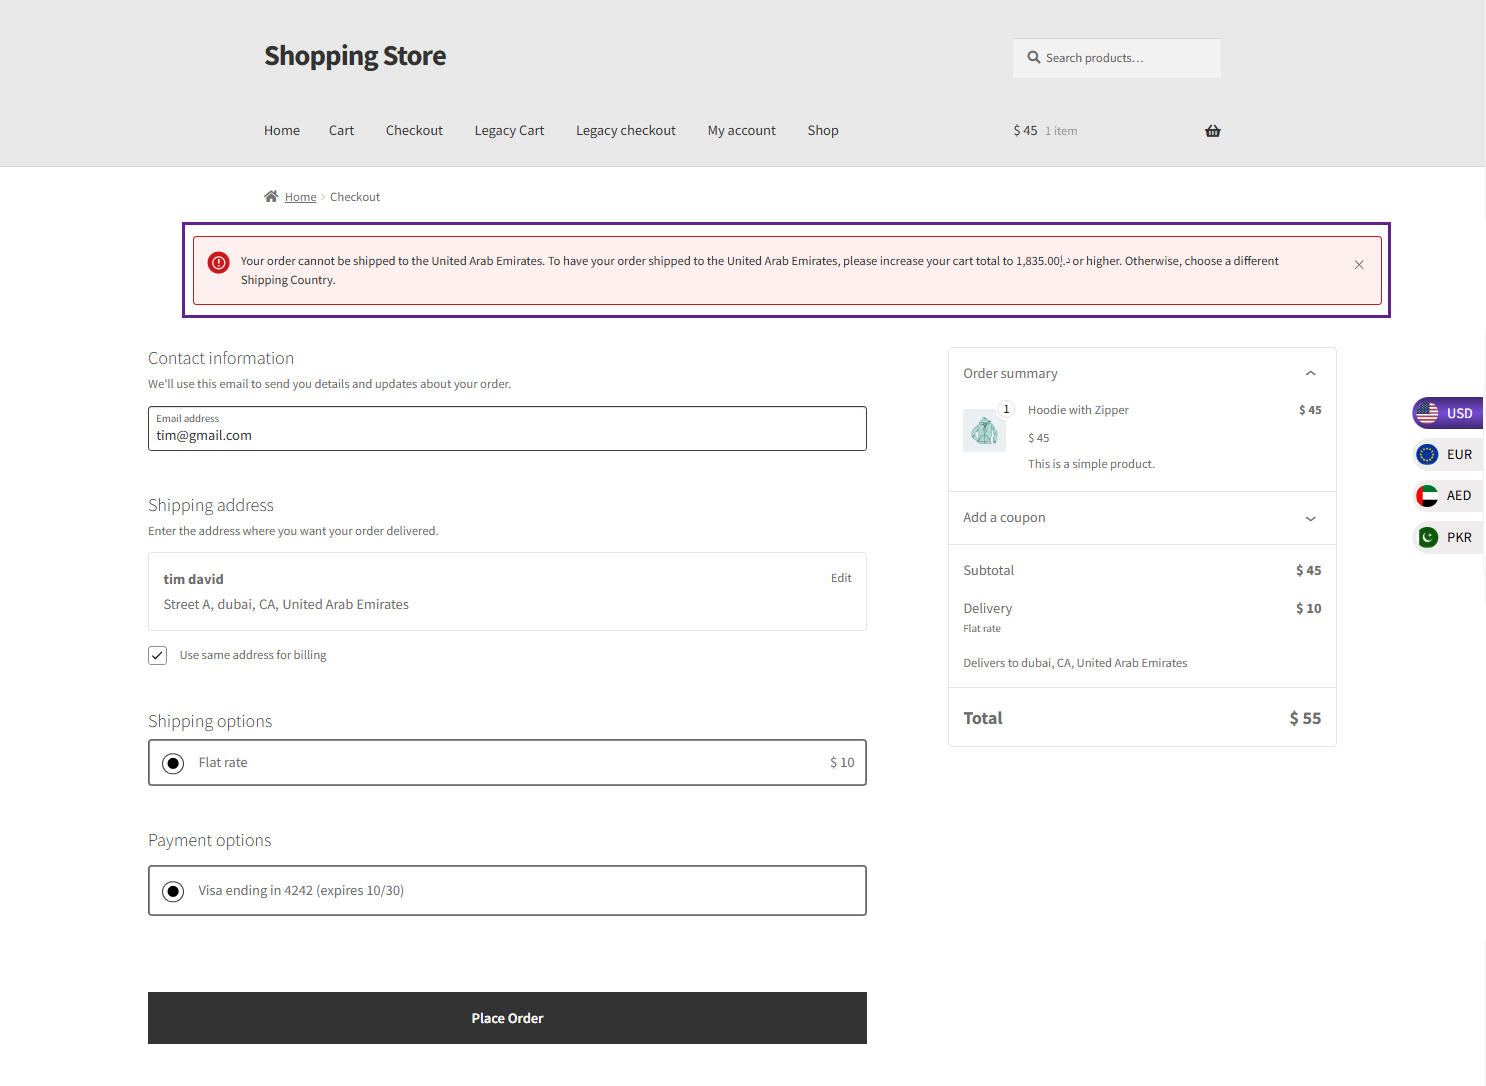
After Conversion
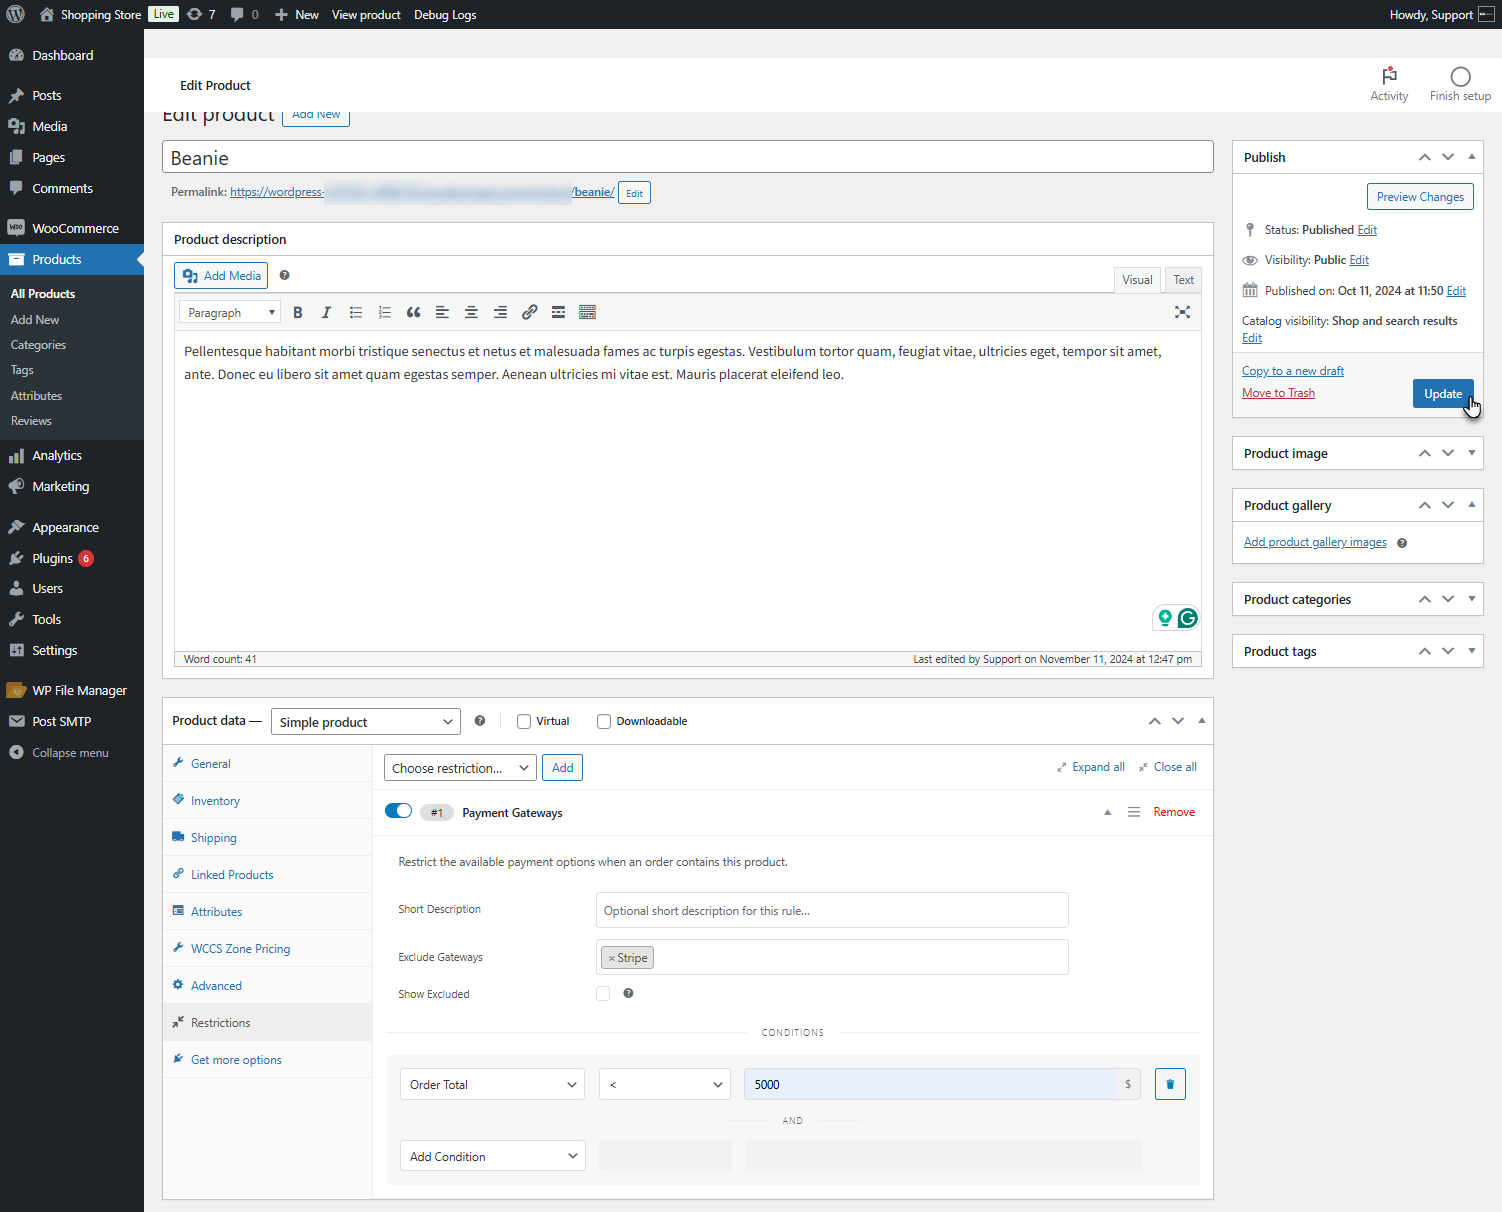
Product Restrictions (Product Data)
↑ Back to top- Navigate to WordPress Admin Dashboard > Products > All Products > Edit product.
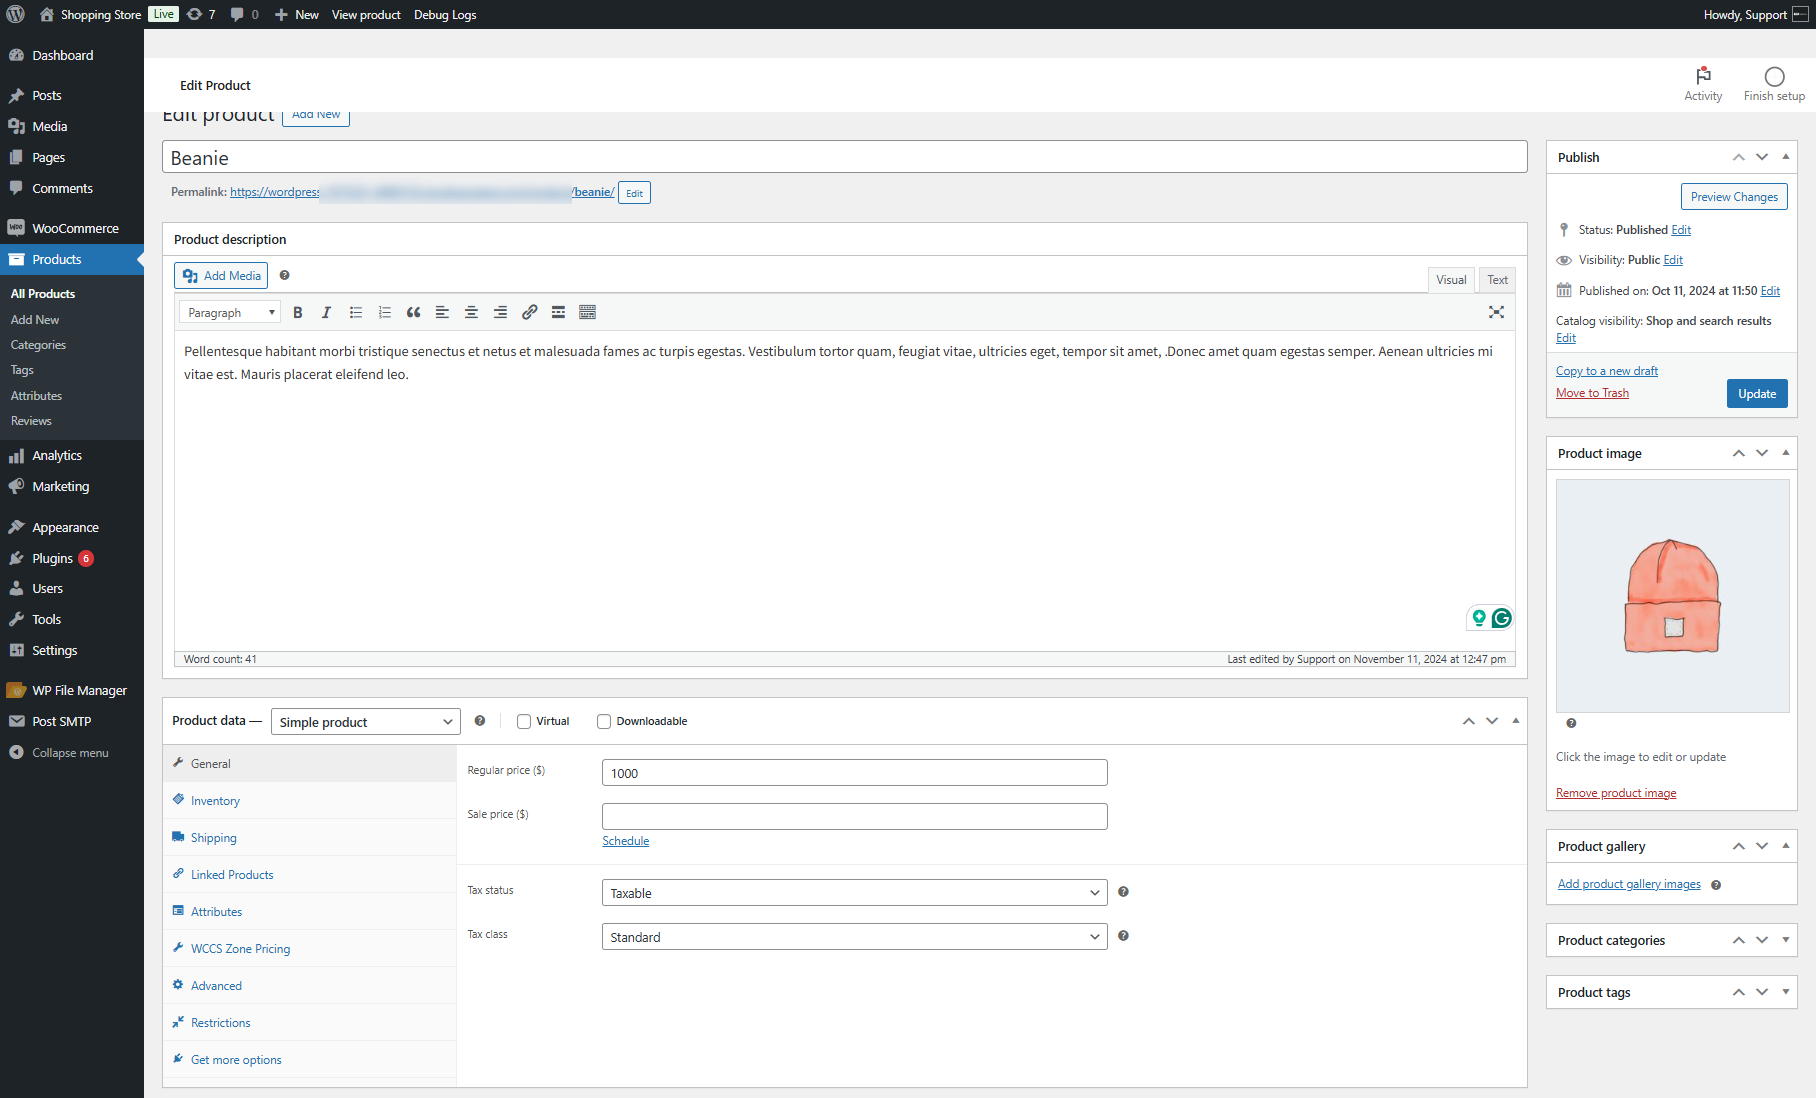
- Navigate to the Restrictions tab in the Product Data section.
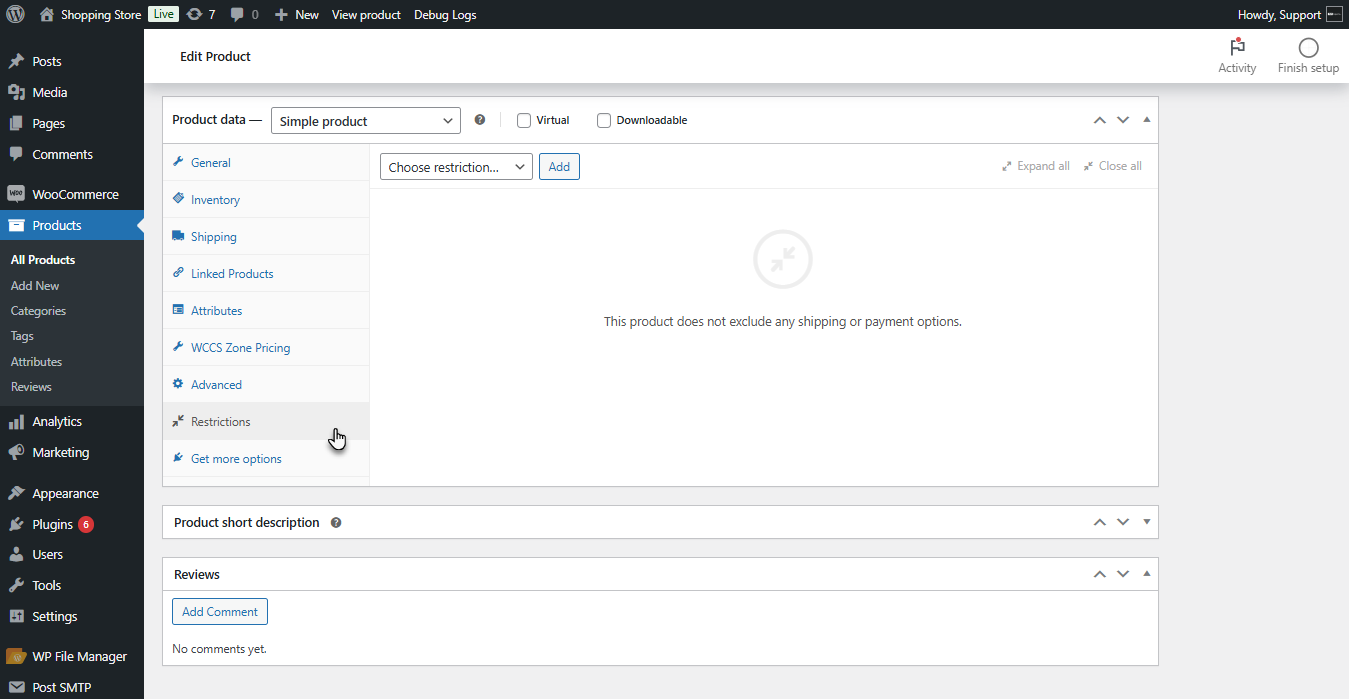
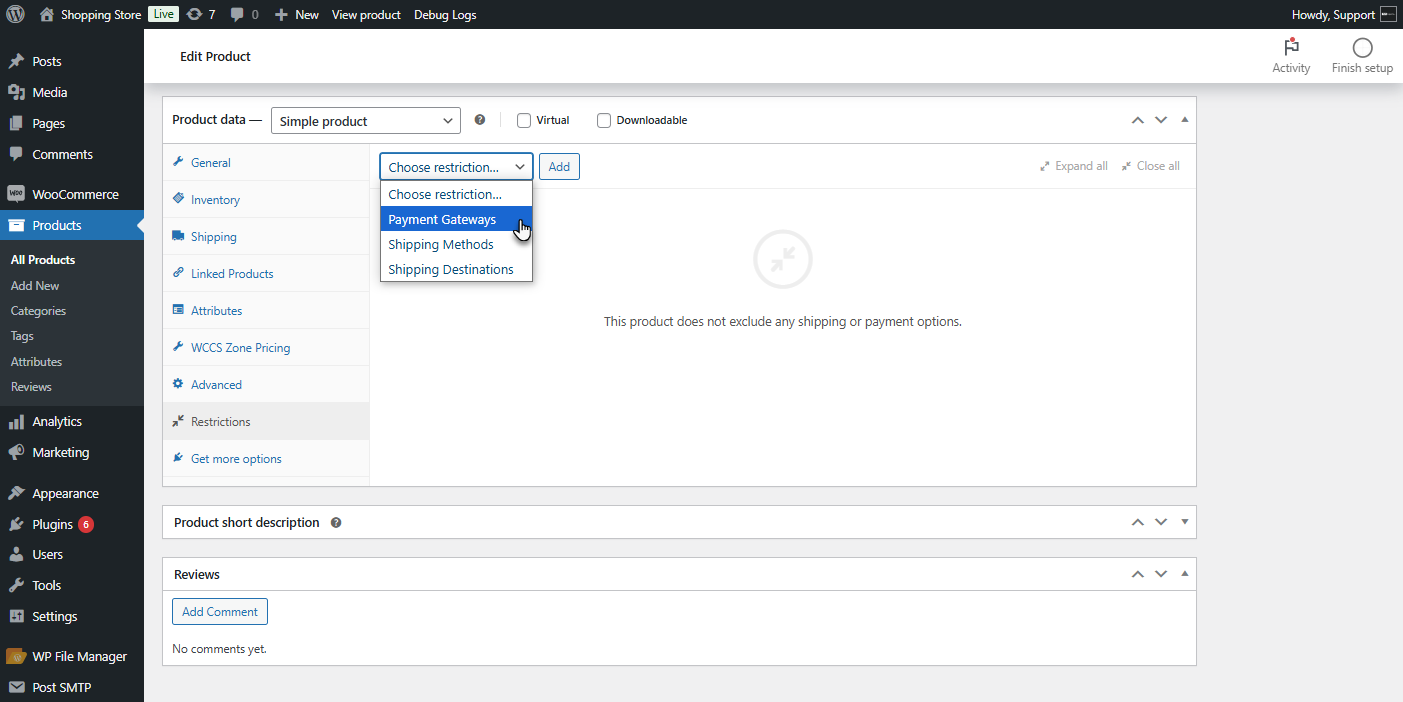
- Choose the Restriction from the Choose Restriction dropdown list and click the Add button.
- Set the Conditions for the Payment Gateways as needed.
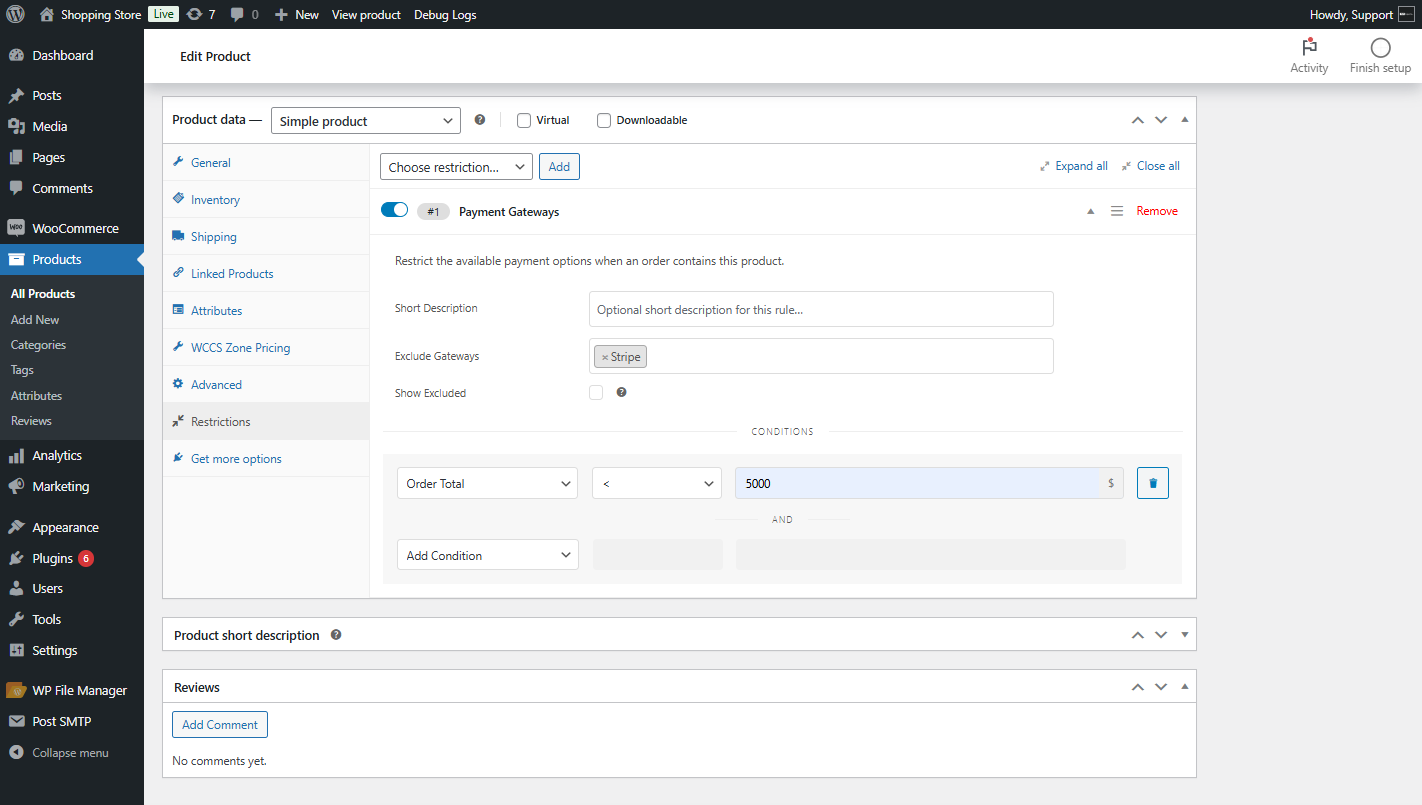
- Click on the Update button to save the changes.
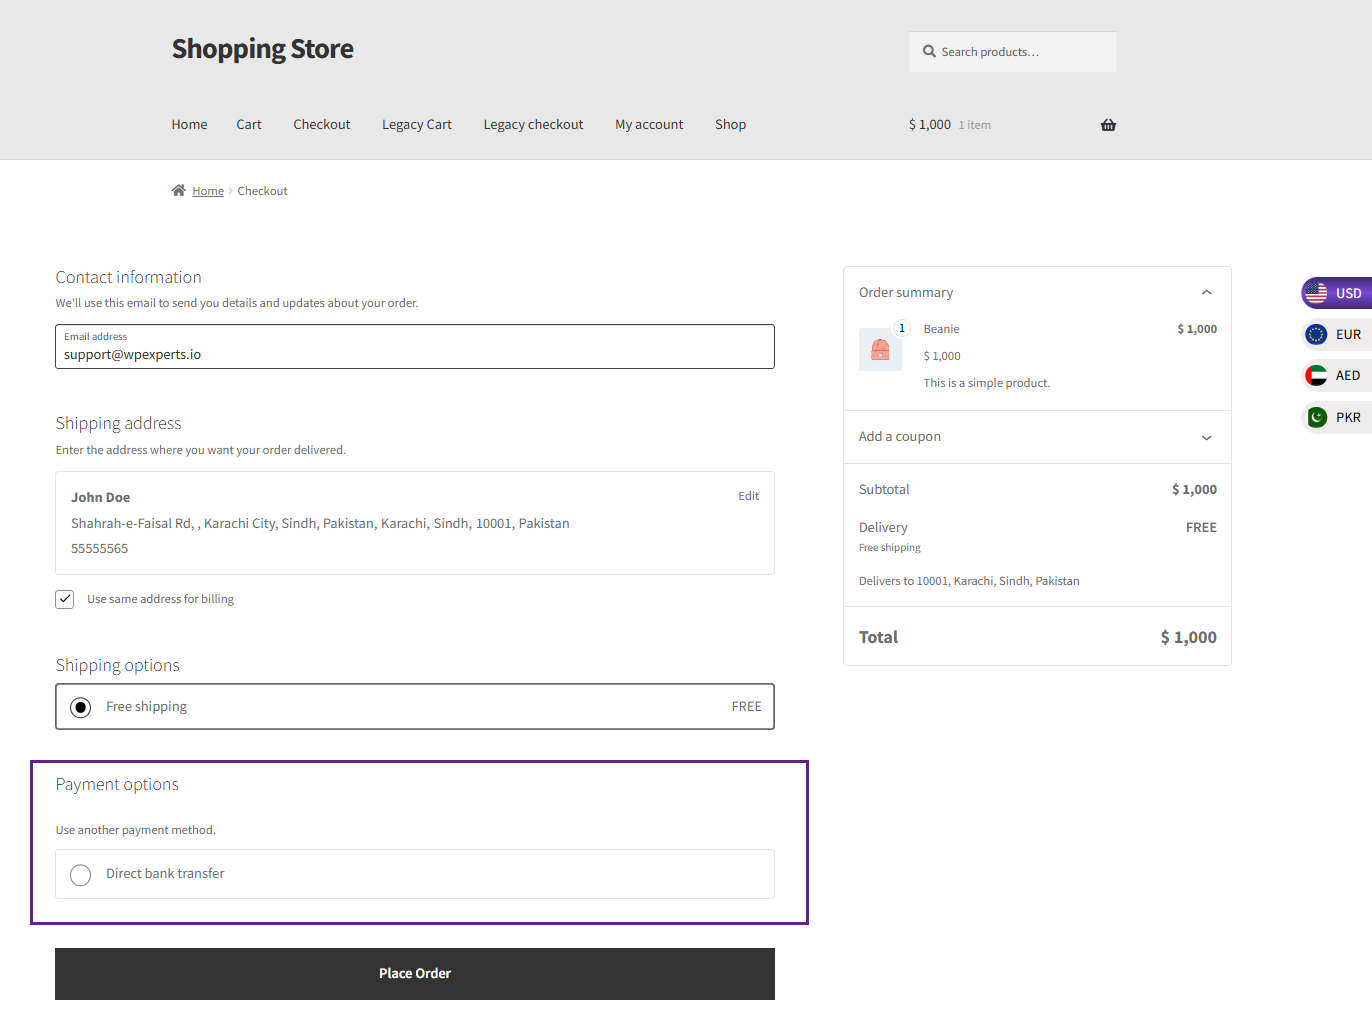
Front End Impact
↑ Back to top- When the order value is below 5,000, the Stripe payment gateway will be disabled.
Before Conversion
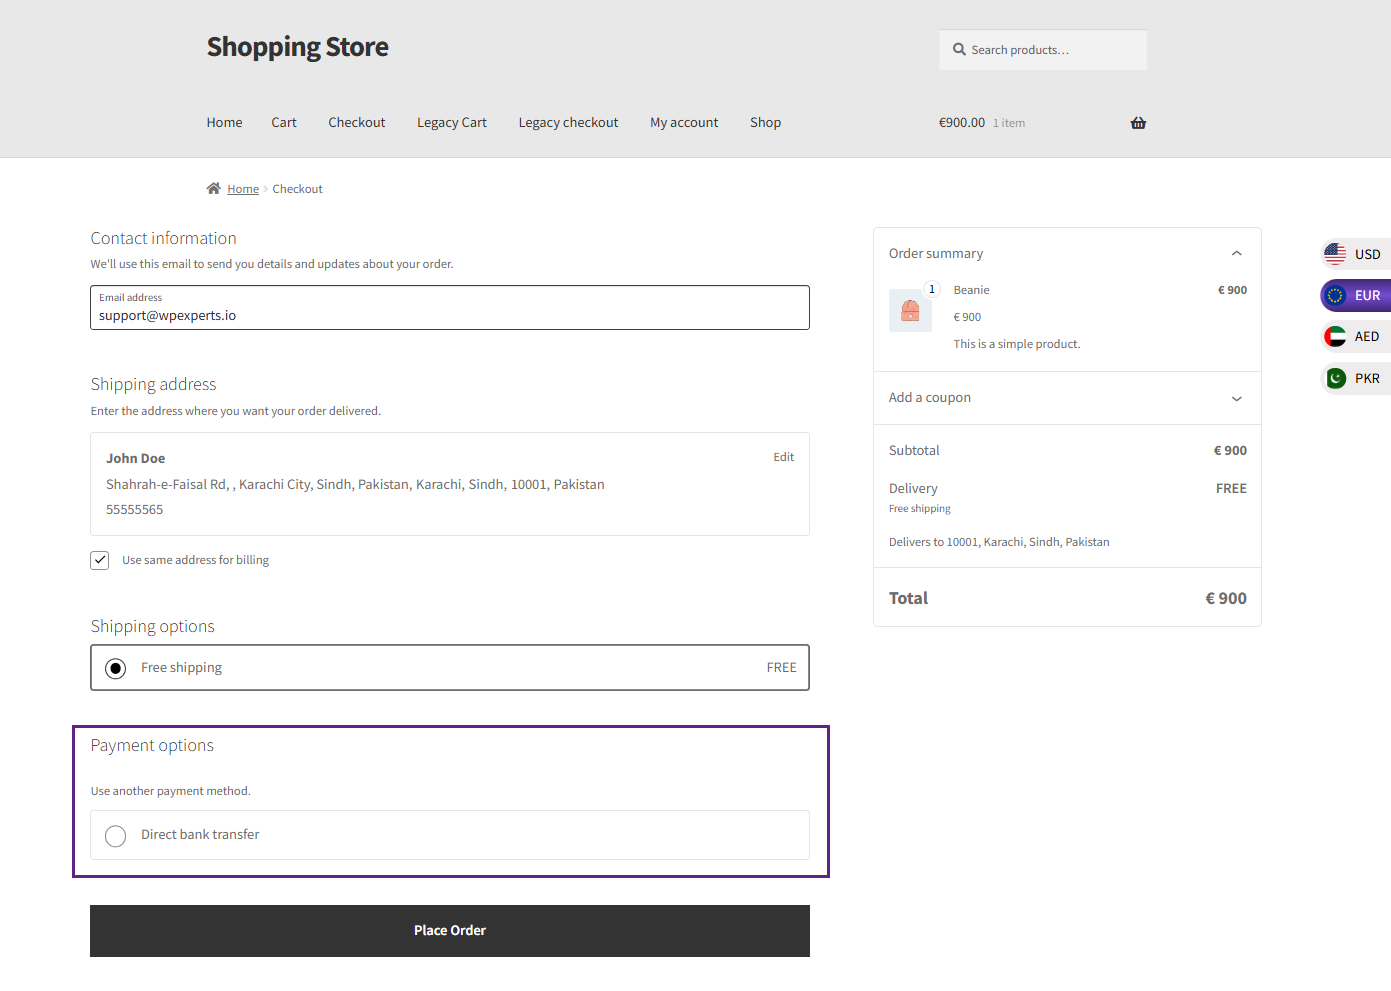
After Conversion
Compatibility With WooCommerce Measurement Price Calculator
↑ Back to top- Download and Install the WooCommerce Measurement Price Calculator
- Follow the WooCommerce Measurement Price Calculator documentation to set up and configure the plugin.
Getting Started
↑ Back to top- Go to the WordPress Admin Dashboard > Products > All Products > Edit Product.
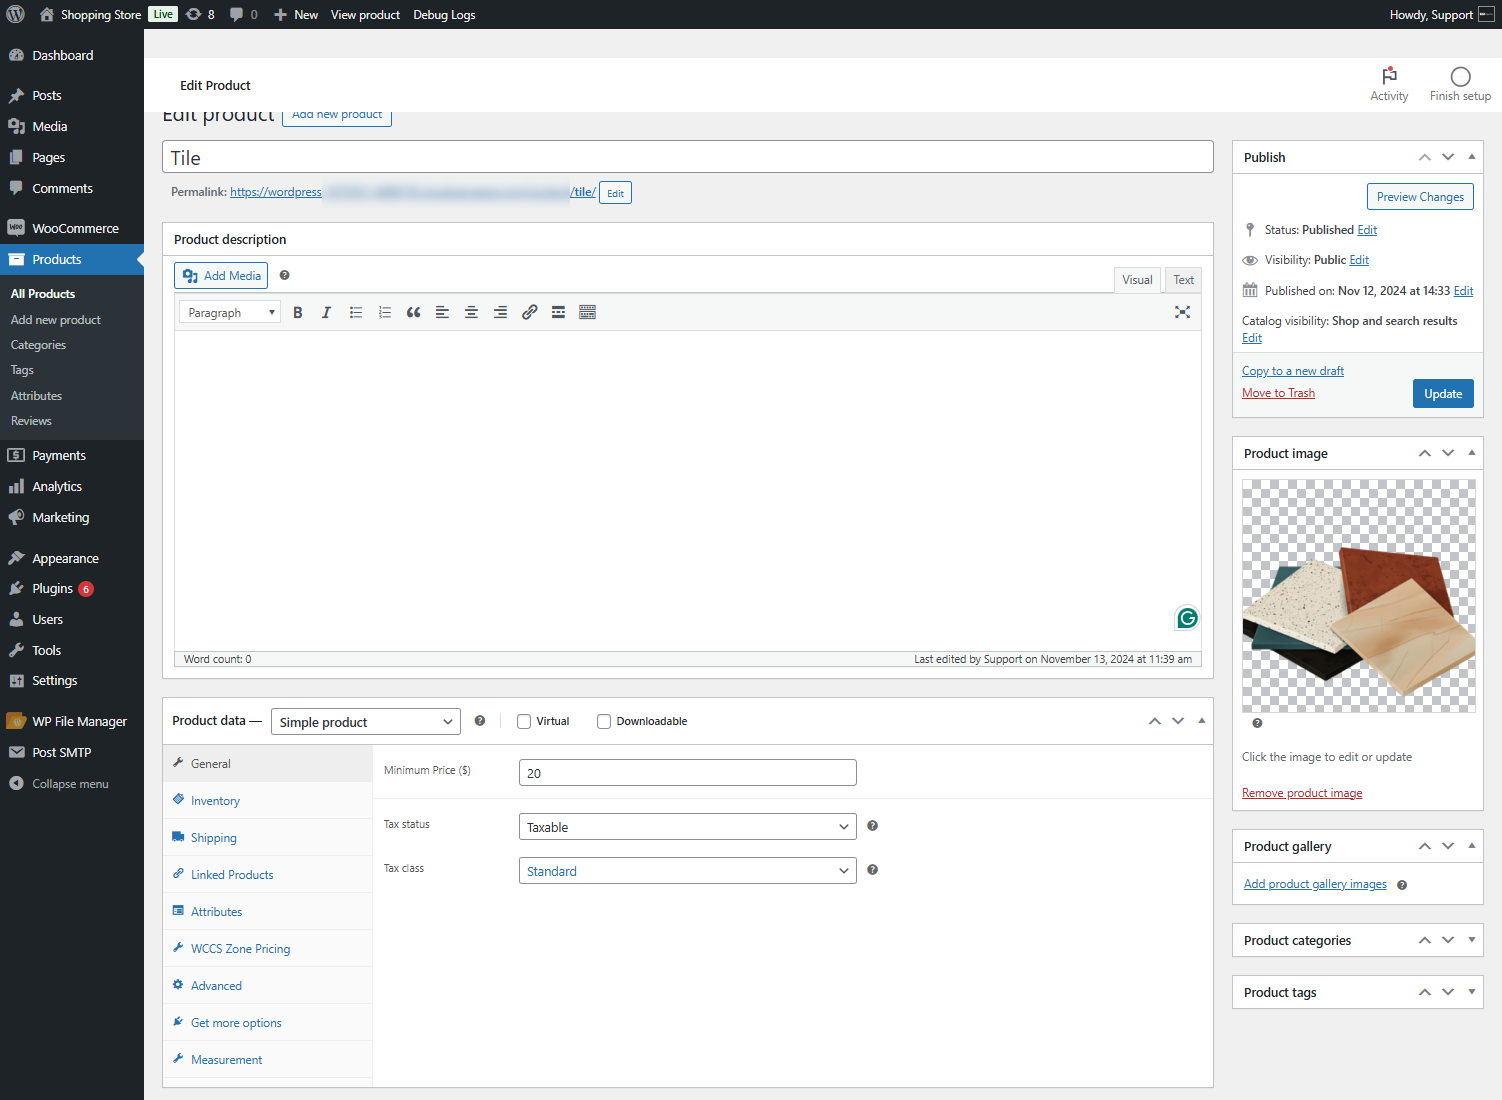
- Navigate to the Measurement tab in the Product Data section and Click on the Pricing Table.
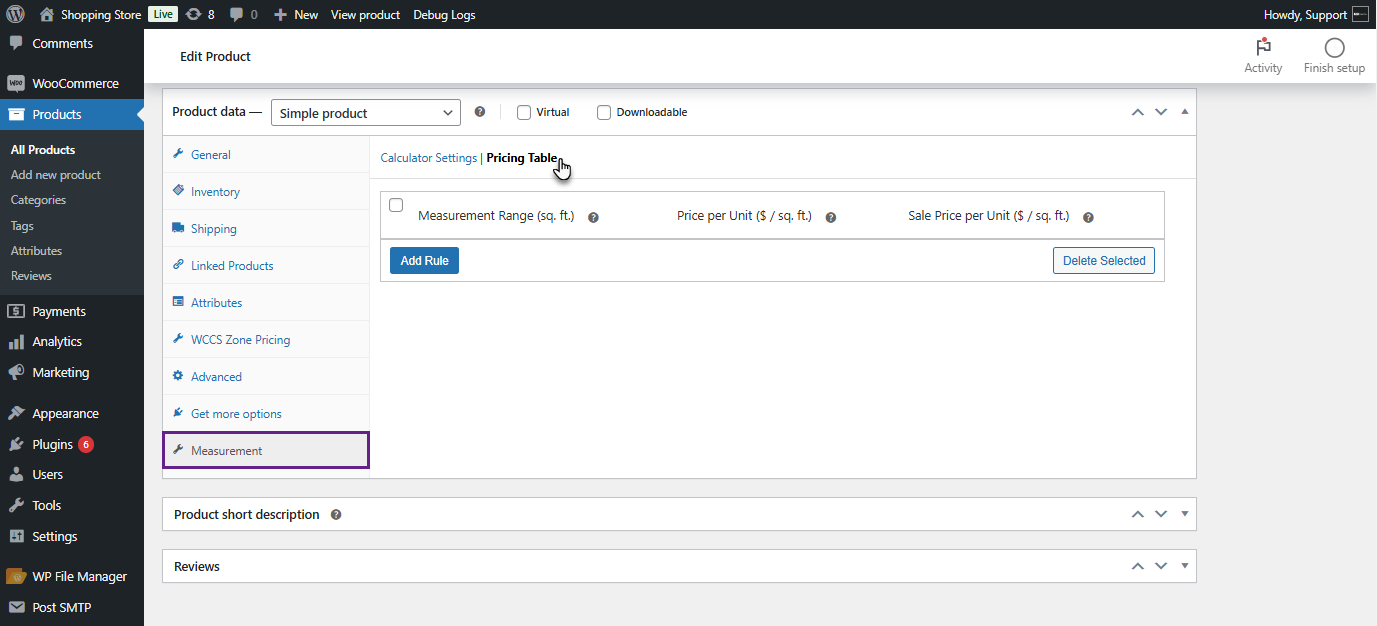
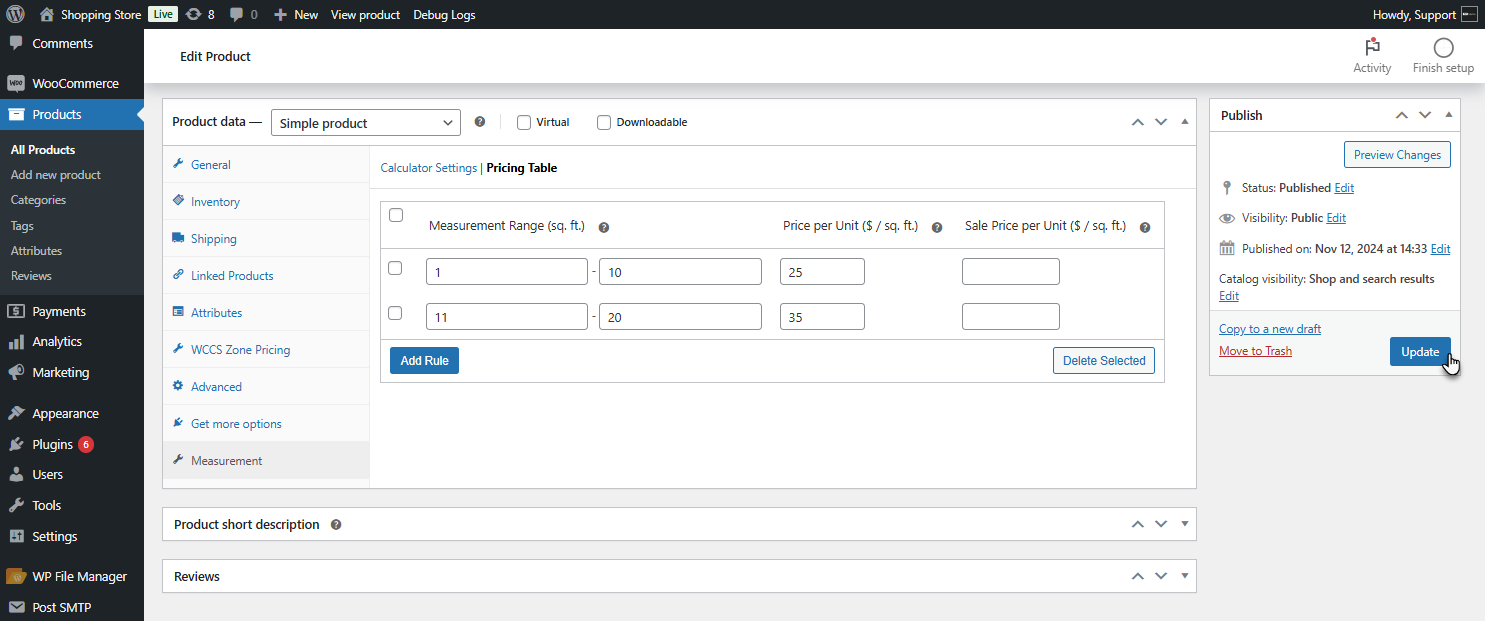
- Set the measurement ranges and prices as required.
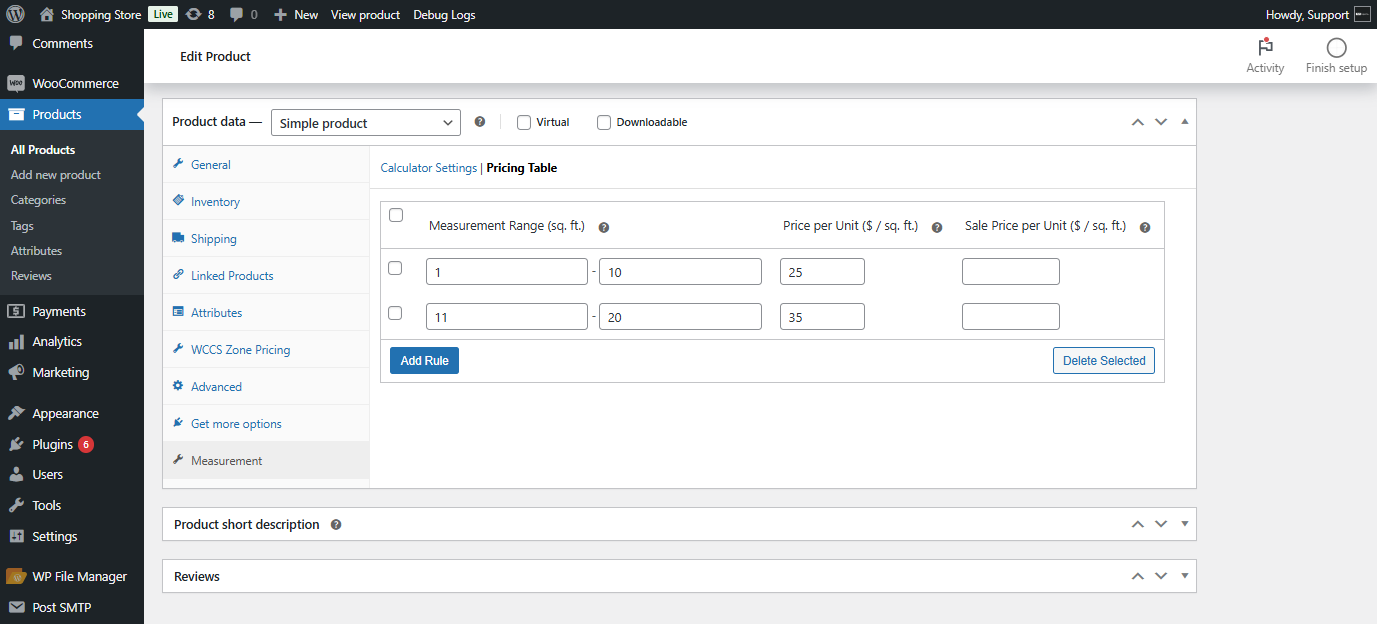
- Click on the Update button to save the changes.
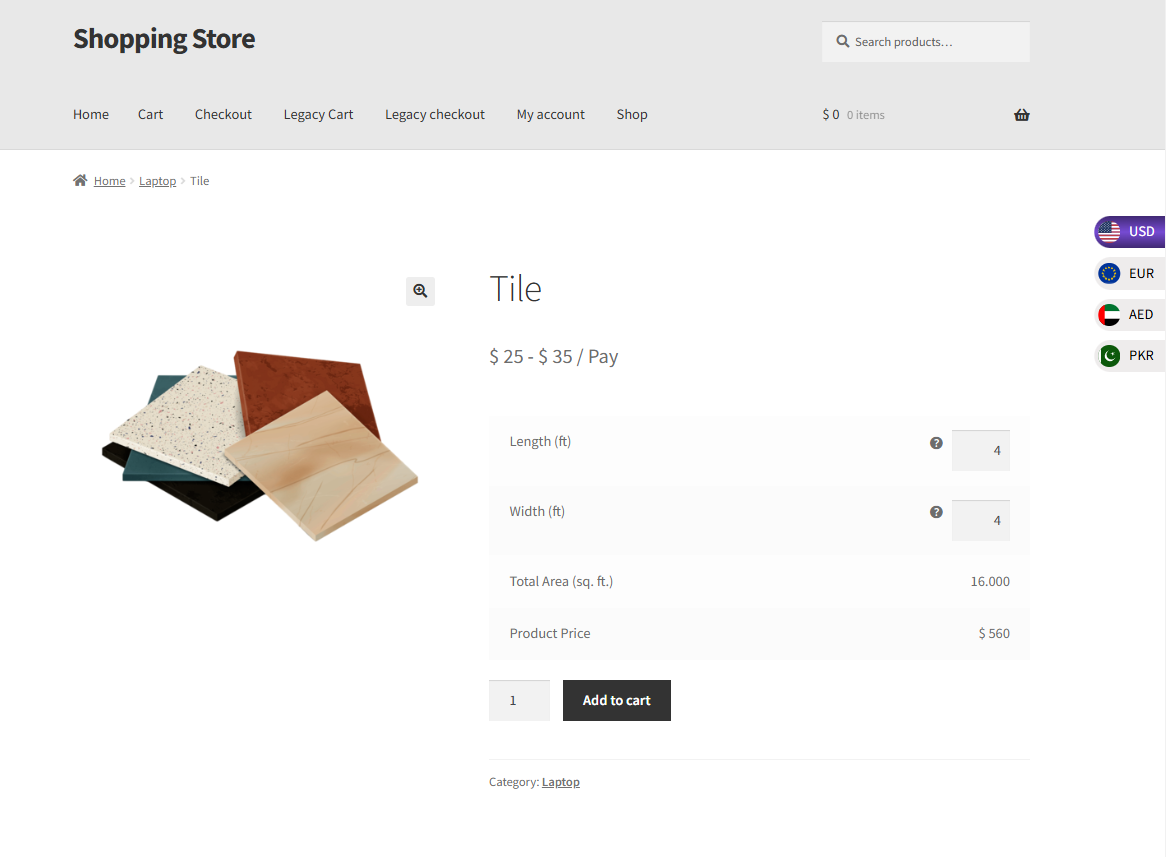
Front End Impact
- Login to your account.
- Go to the Single Product page. Fill out the parameters for the product.
Before Conversion
- The price on the Single Product page before conversion.
- The price on the Cart page before conversion.
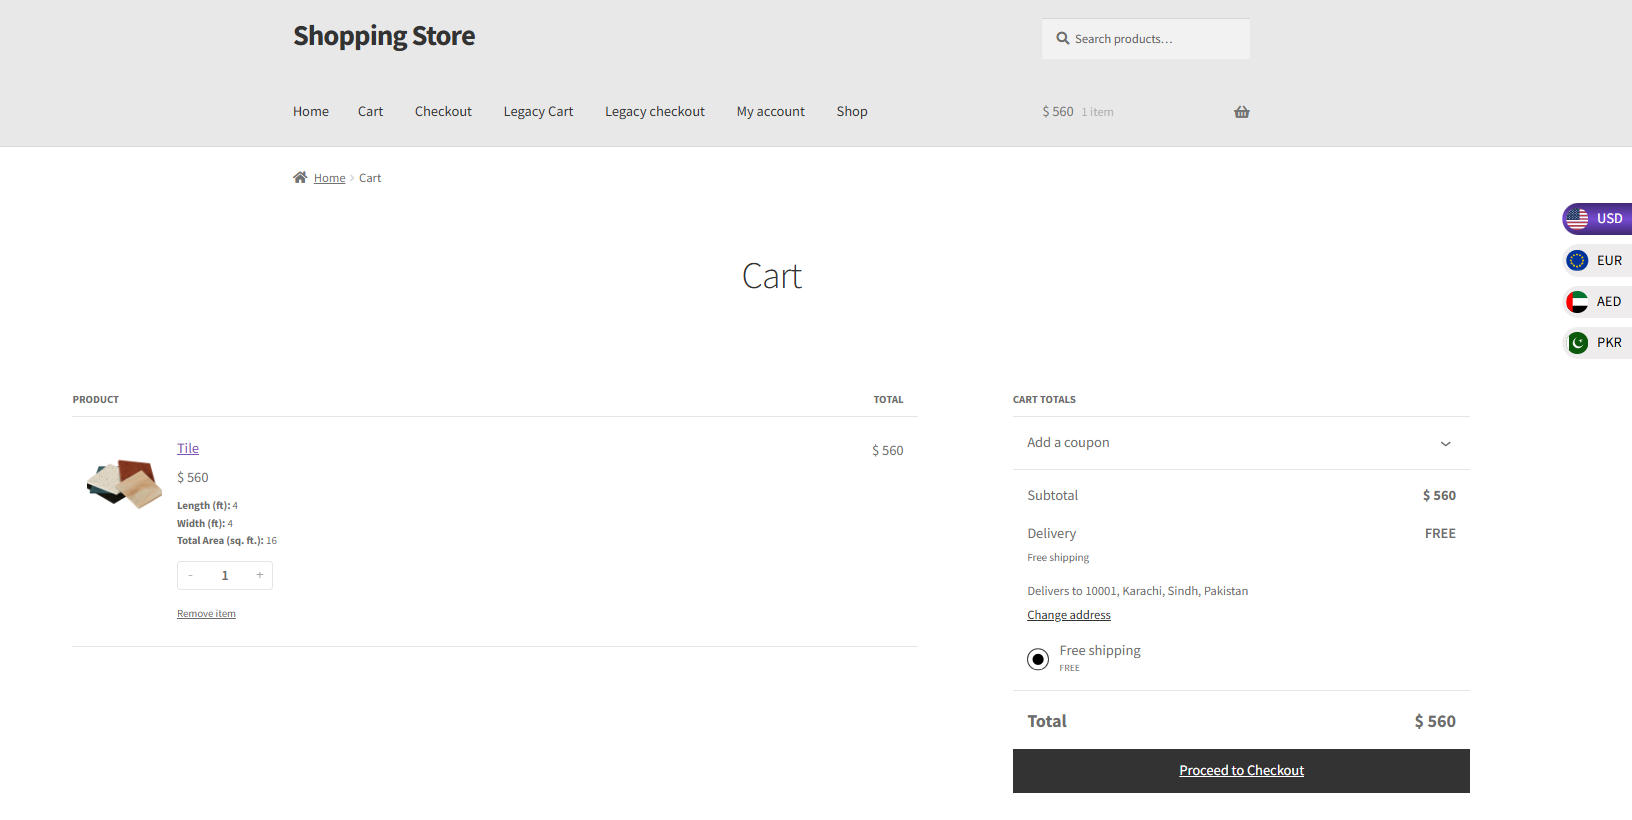
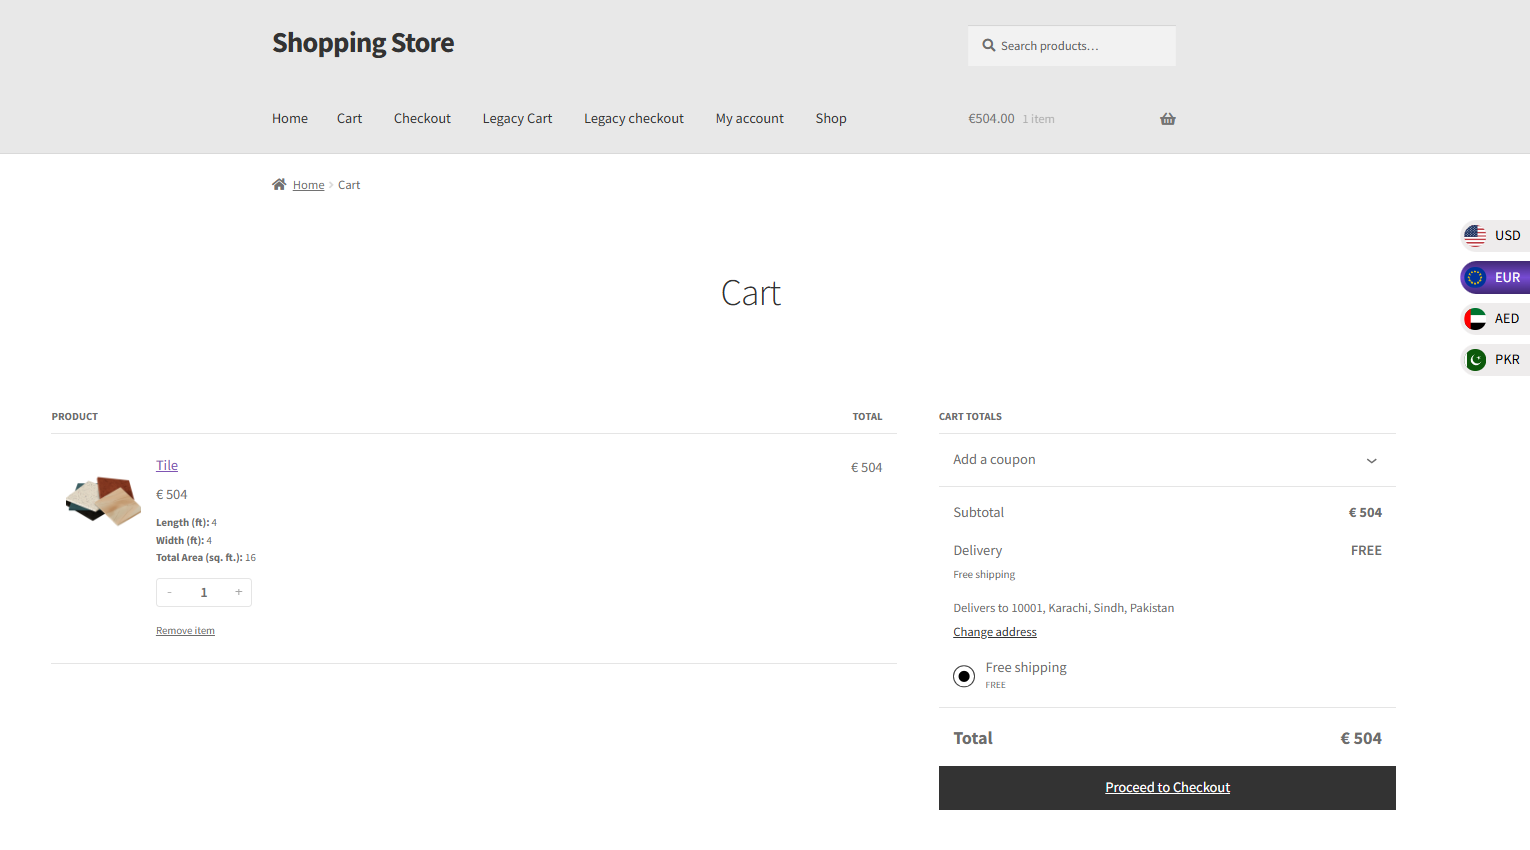
After Conversion
- The price on the Single Product page after conversion.

- The price on the Cart page after conversion.
Compatibility With Smart Custom Product Addons and Fields
↑ Back to top- Download and Install the Smart Custom Product Addons and Fields
- Follow the Smart Custom Product Addons and Fields documentation to set up and configure the plugin.
Getting Started
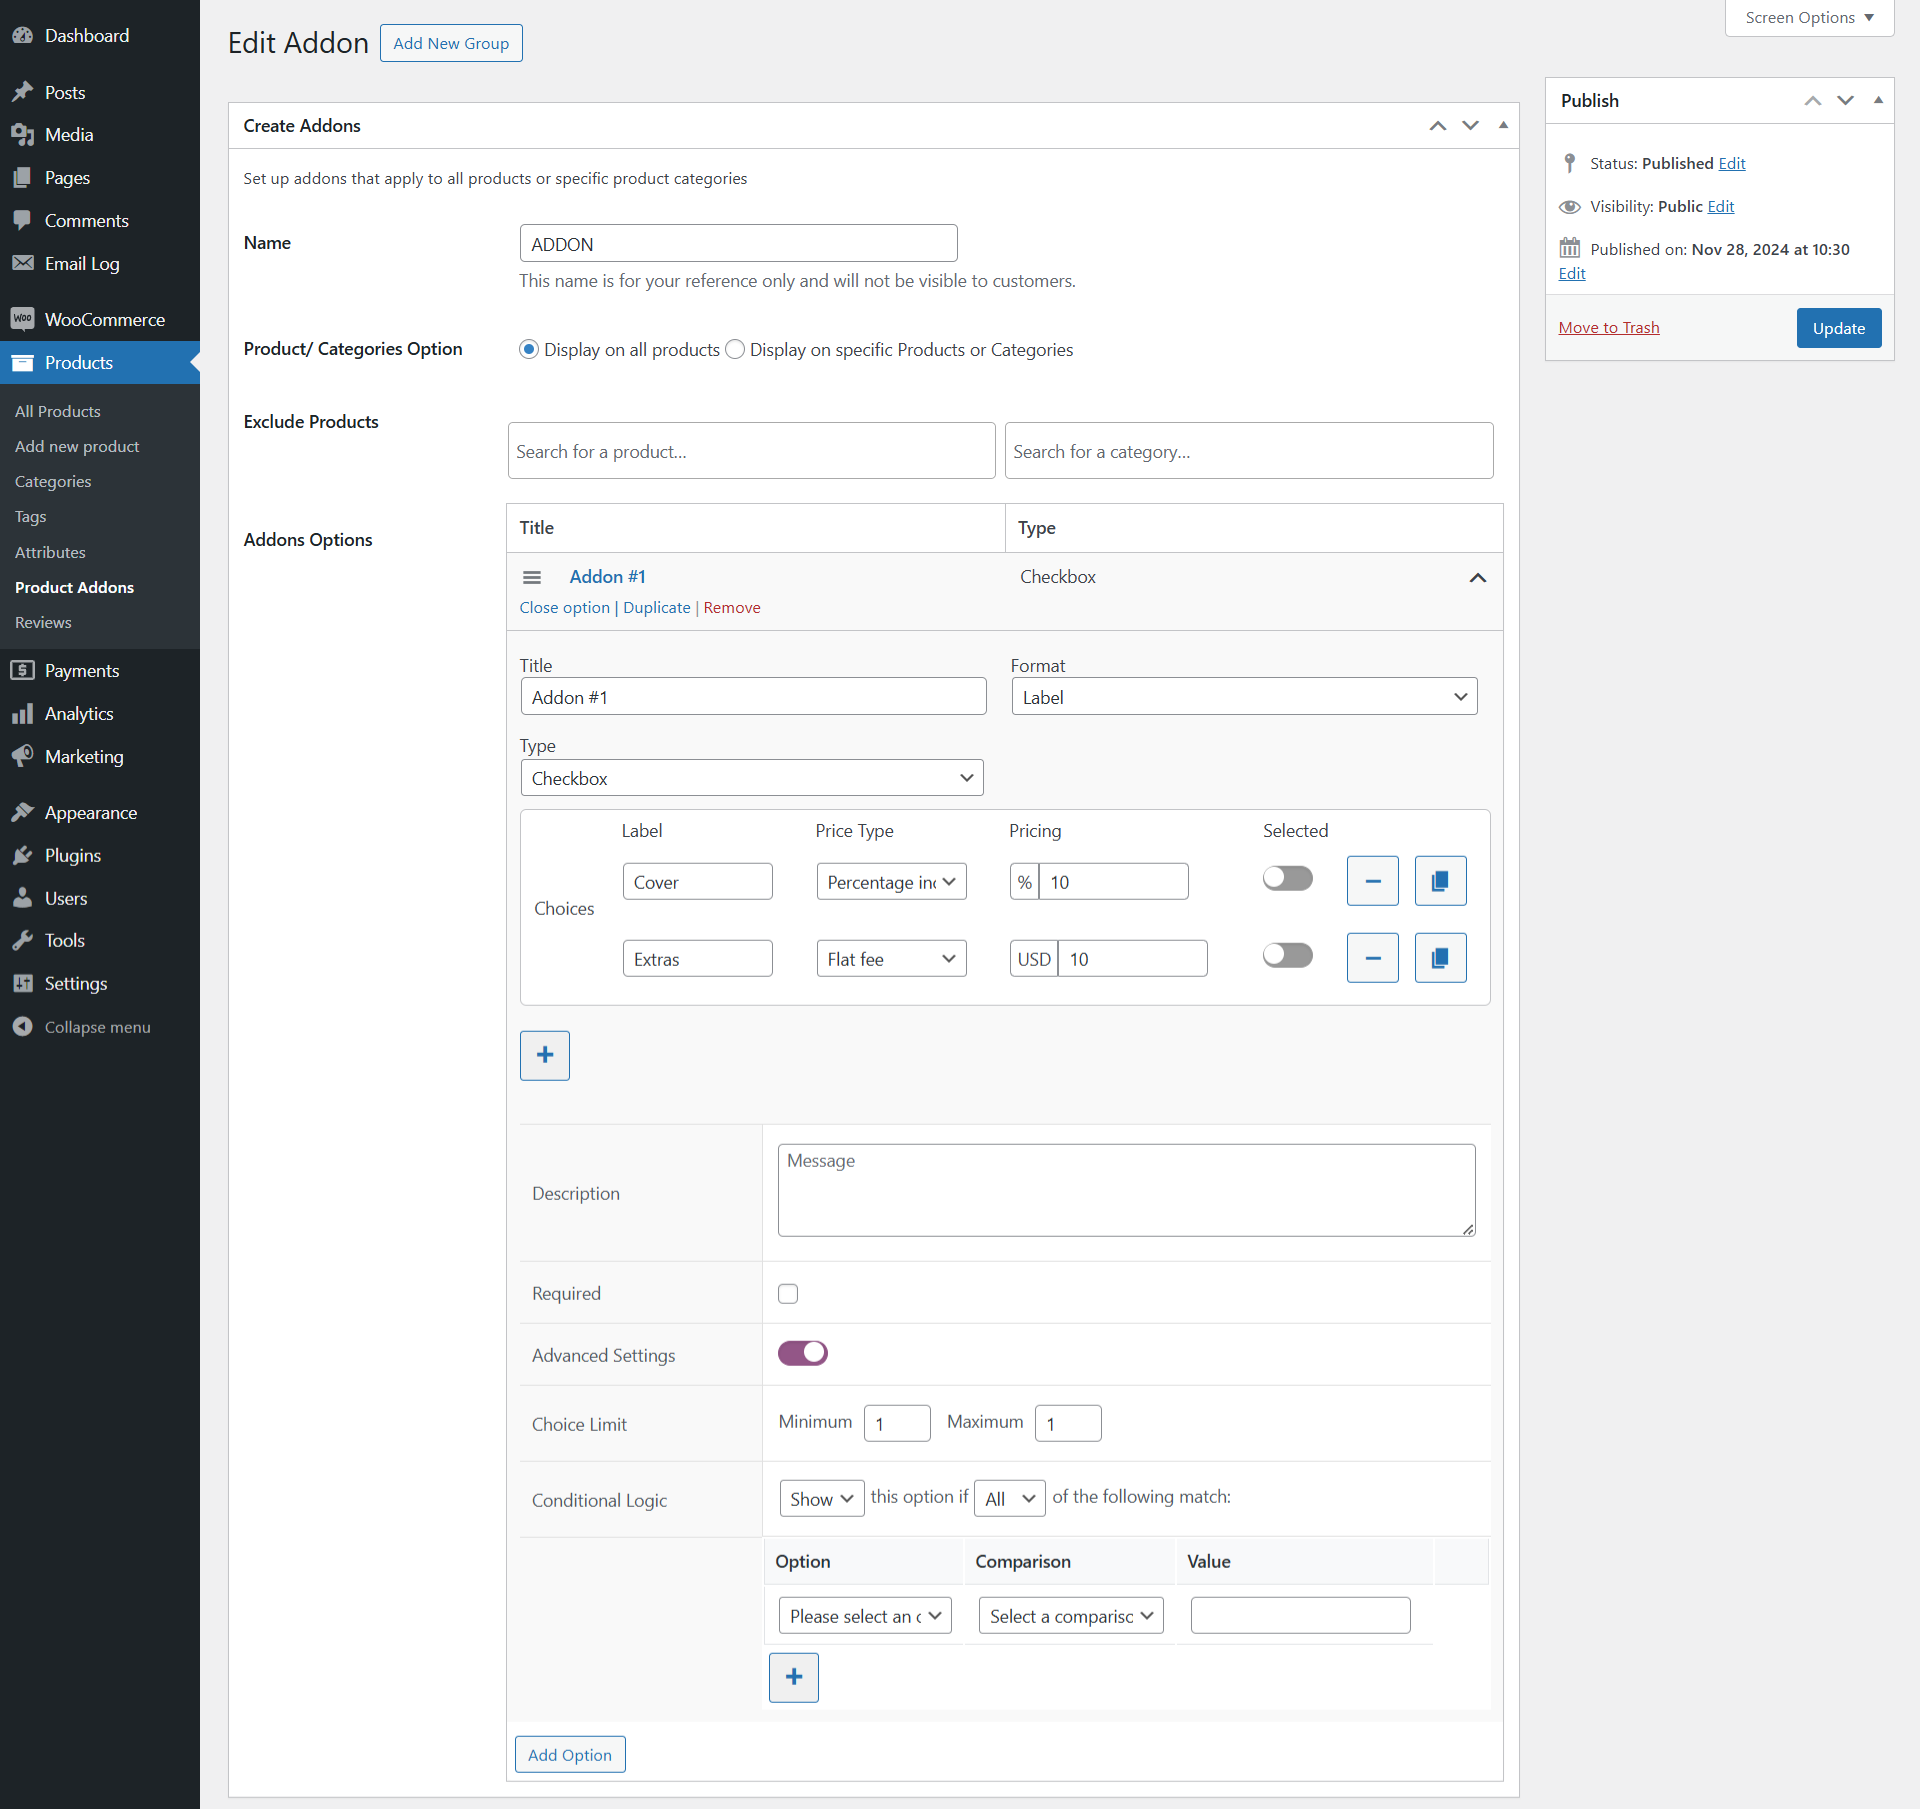
↑ Back to top- Go to the WordPress Admin Dashboard > Products > Product Addons > Edit Addon.
- Configure/Update the Addon as per requirement.
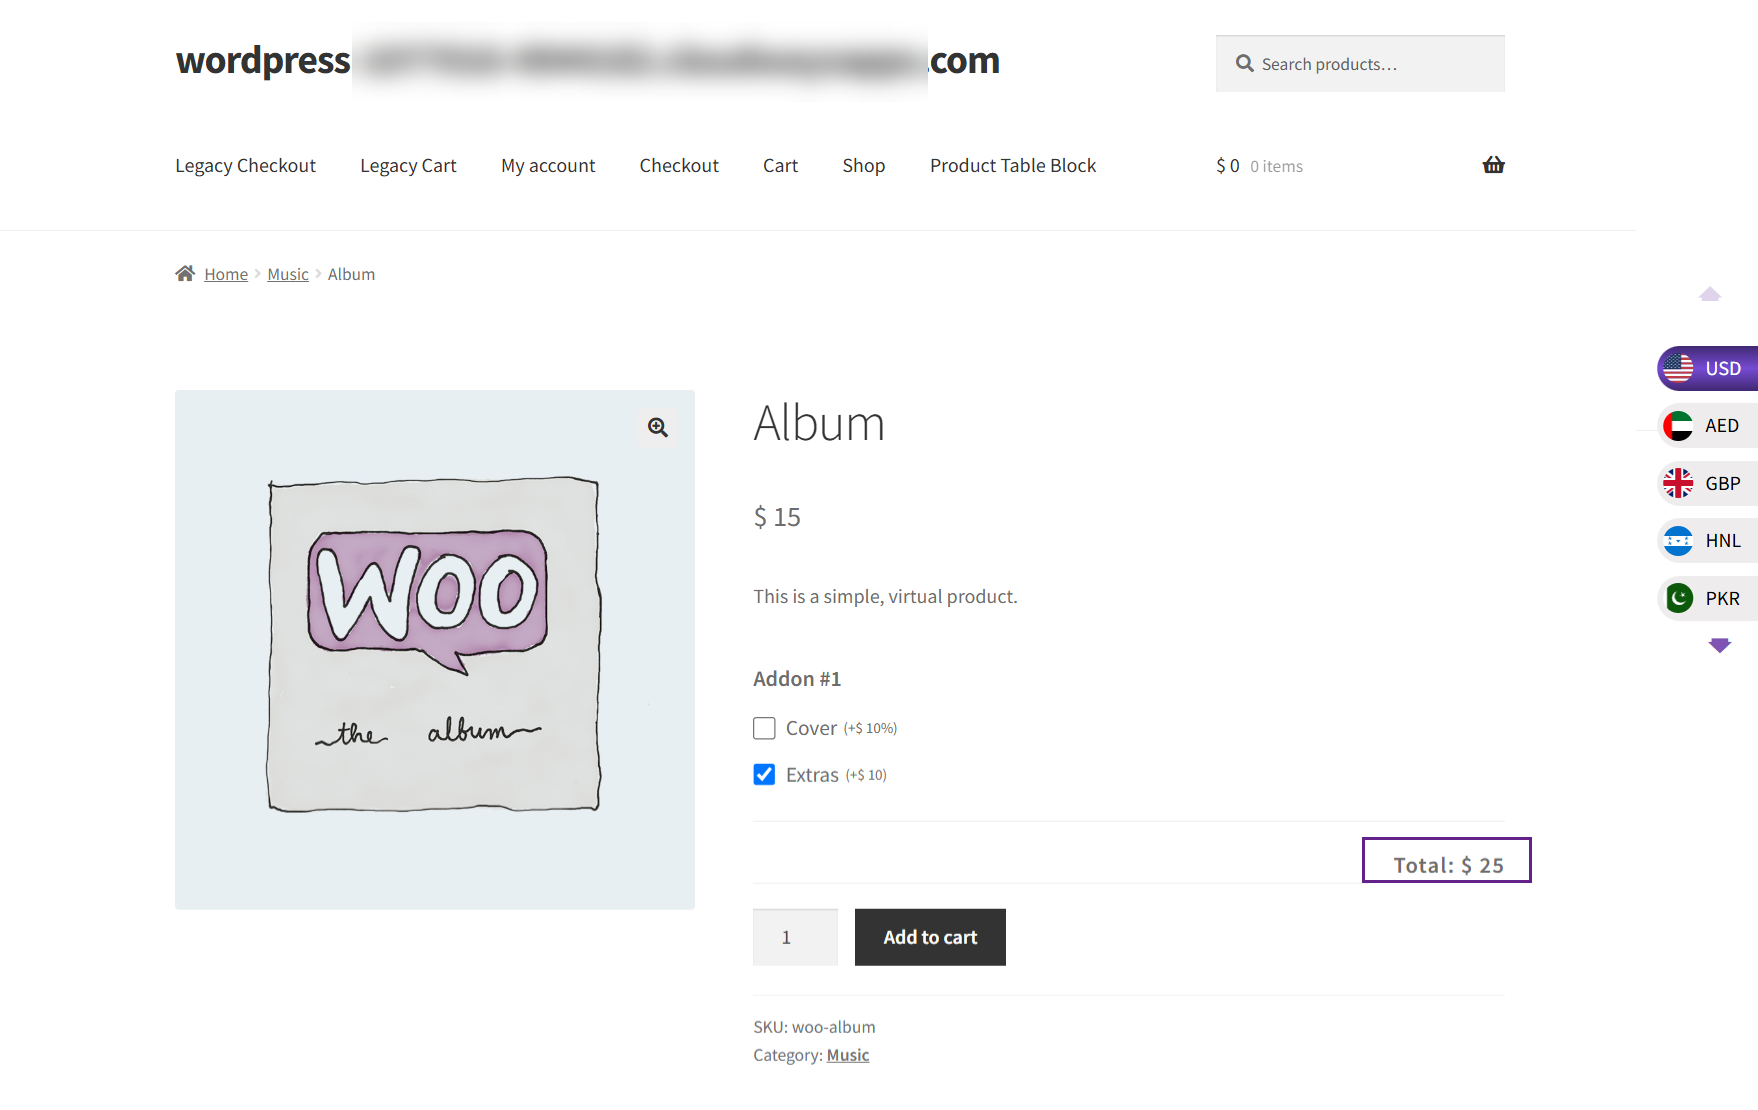
Front End Impact
- Login to your account.
- Go to the Single Product page.
Before Conversion
After Conversion

Compatibility With Dynamic And Role Based Pricing For WooCommerce
↑ Back to top- Download and Install the Dynamic And Role Based Pricing For WooCommerce
- Follow the Dynamic And Role-Based Pricing For WooCommerce documentation to set up and configure the plugin.
Getting Started
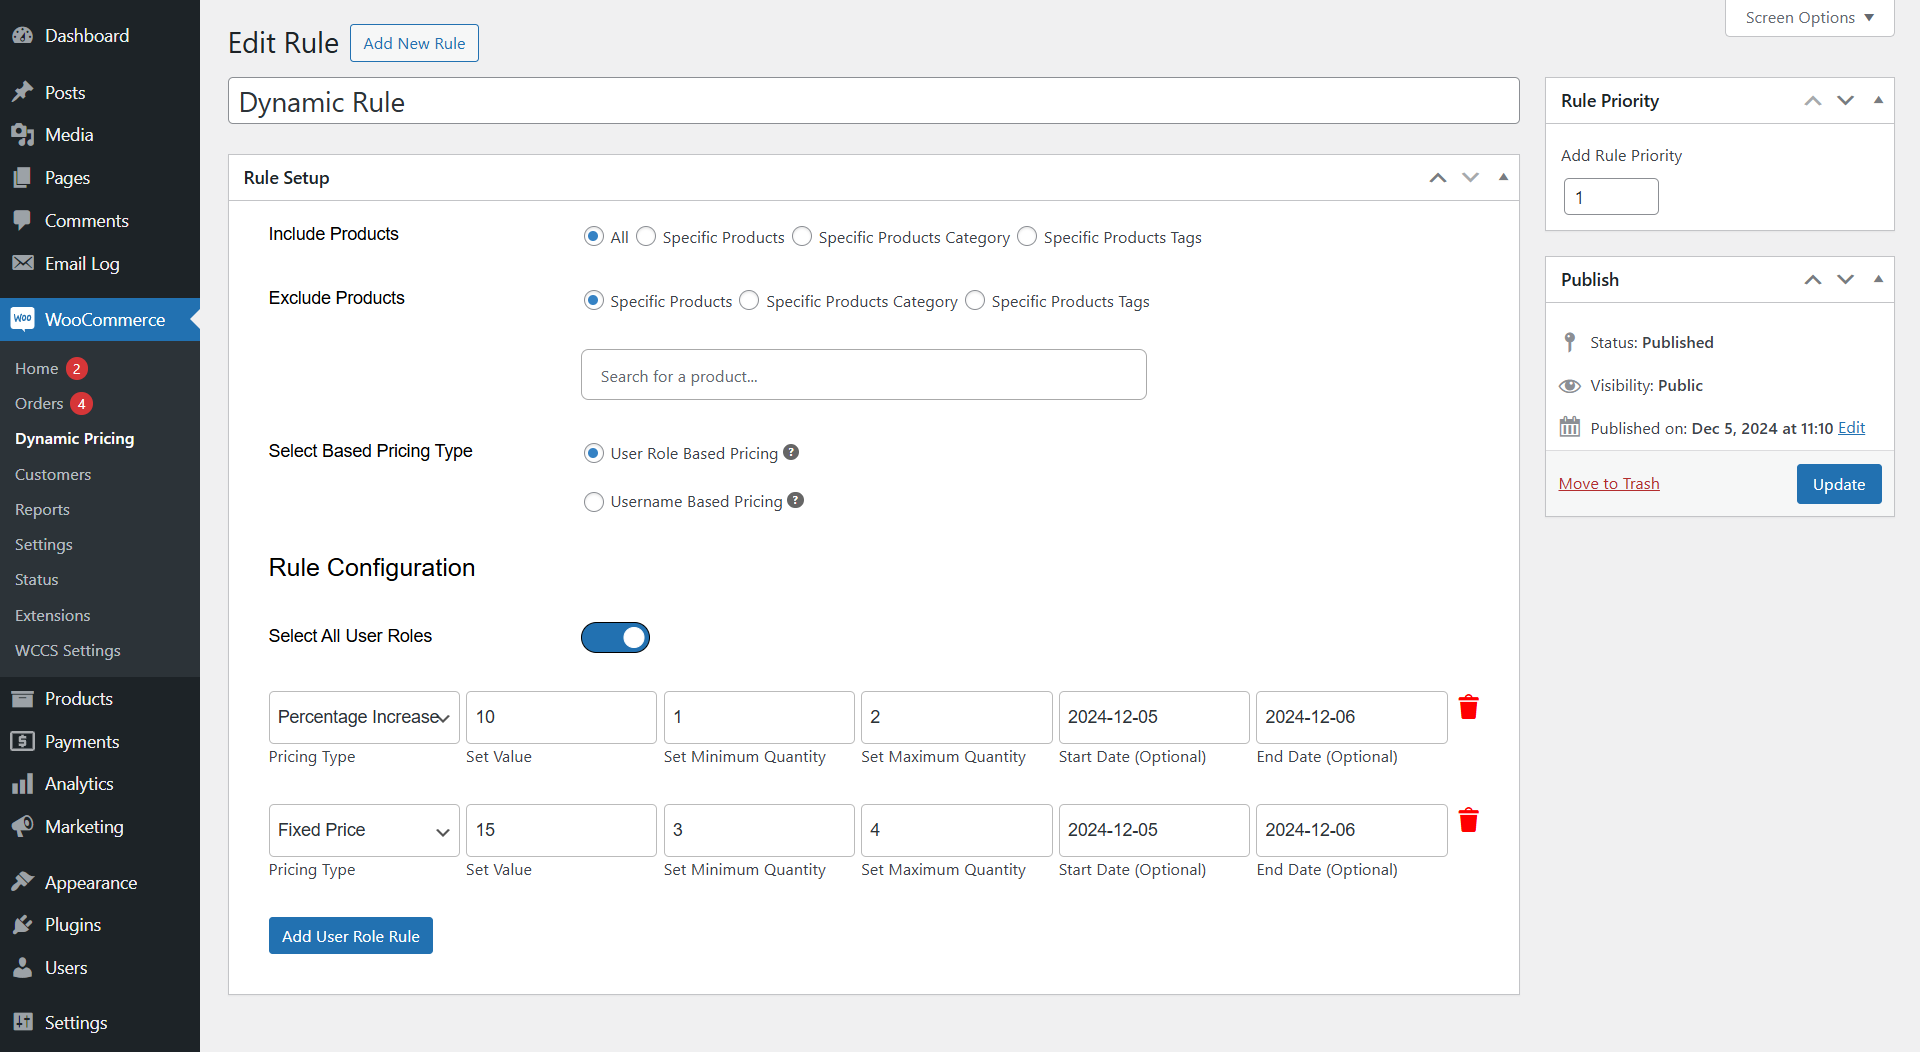
↑ Back to top- Go to the WordPress Admin Dashboard > WooCommerce > Dynamic Pricing > Edit Rule.
- Configure/Update the Rule as per requirement.
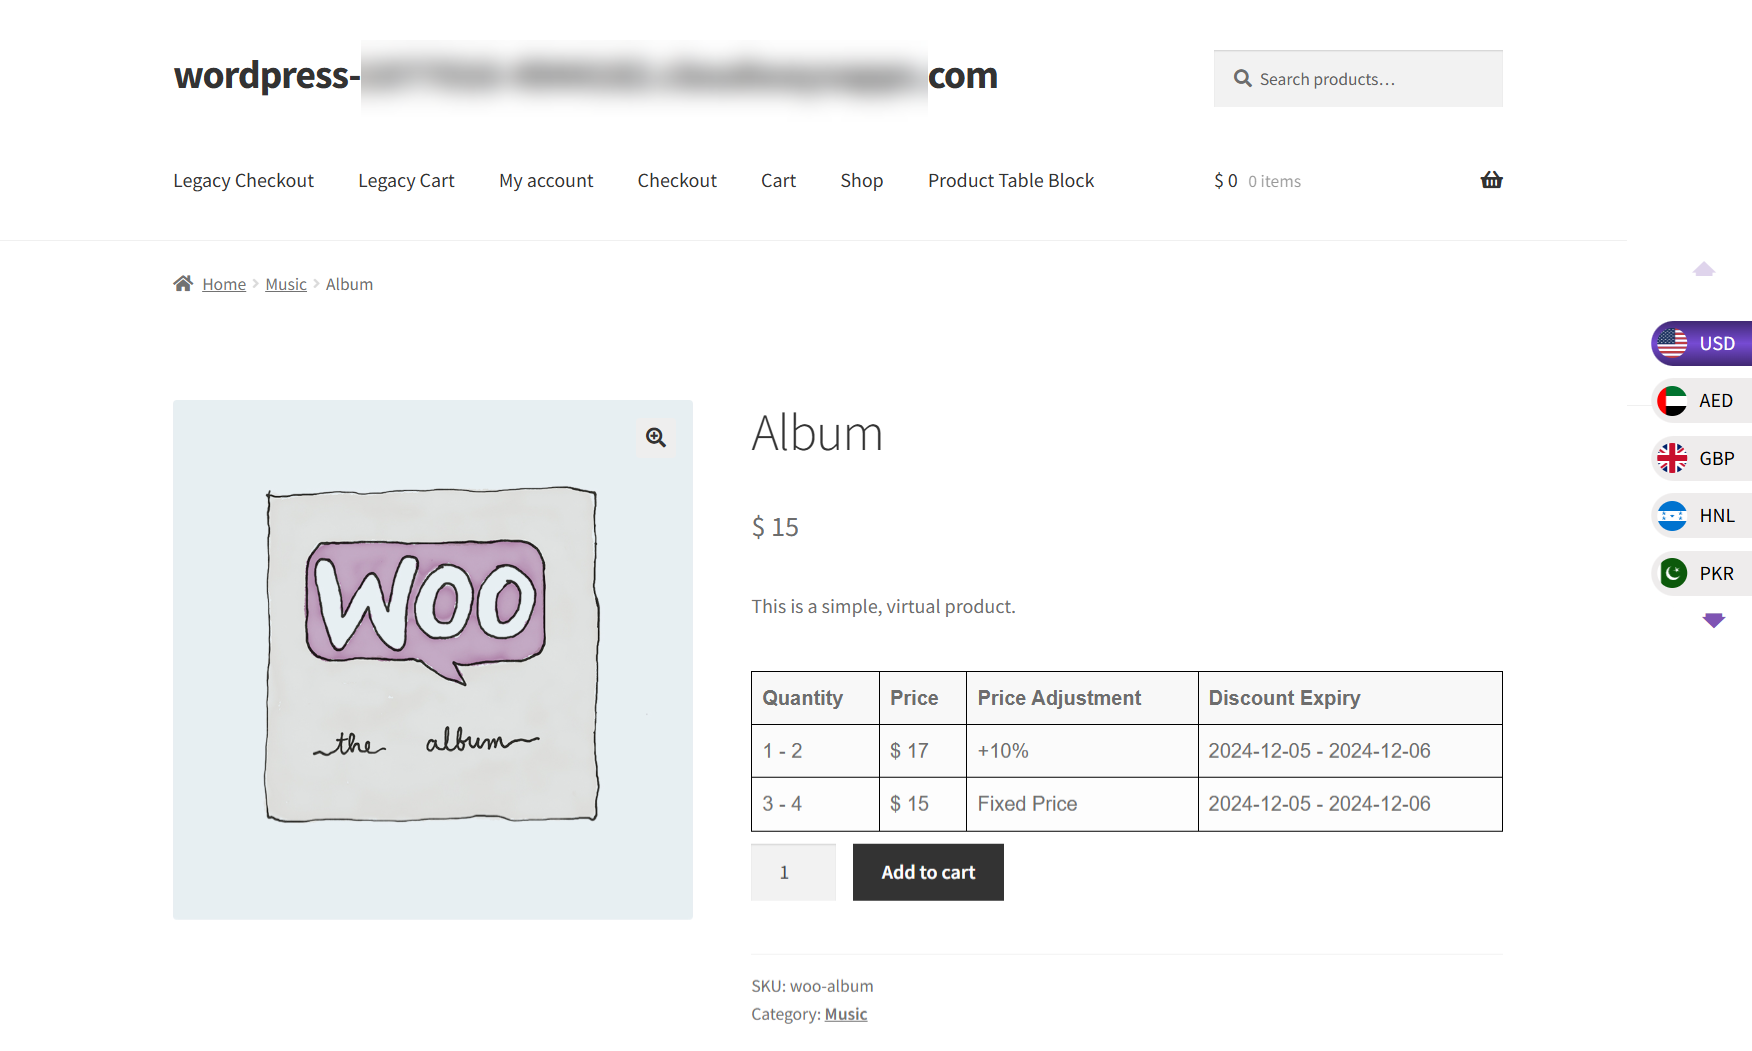
Front End Impact
- Login to your account.
- Go to the Single Product page.
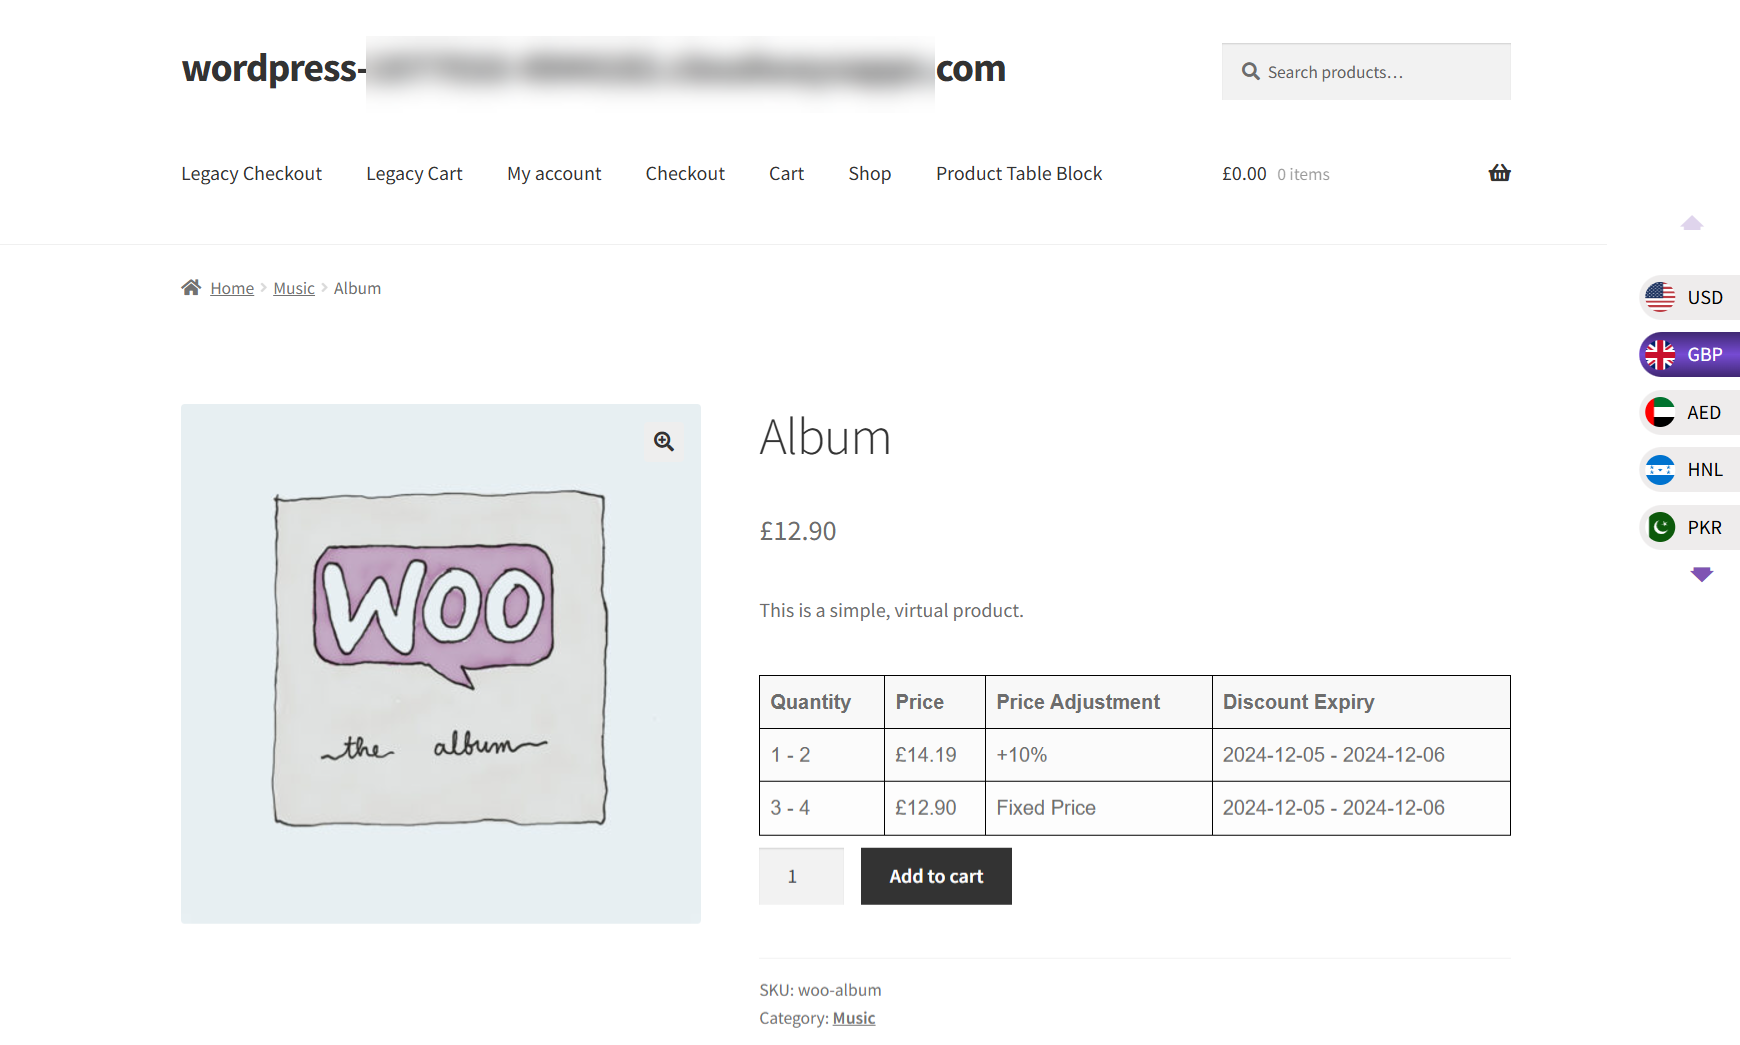
Before Conversion
After Conversion
Compatibility with B2B for WooCommerce Configuration
↑ Back to top- Download and Install the B2B for WooCommerce By Addify plugin.
- Follow the B2B plugin documentation to set up and configure the plugin.
- Setup Role Based Pricing.
Role Based Pricing
- Navigate to the WordPress Admin Dashboard > B2B > Role Based Pricing.
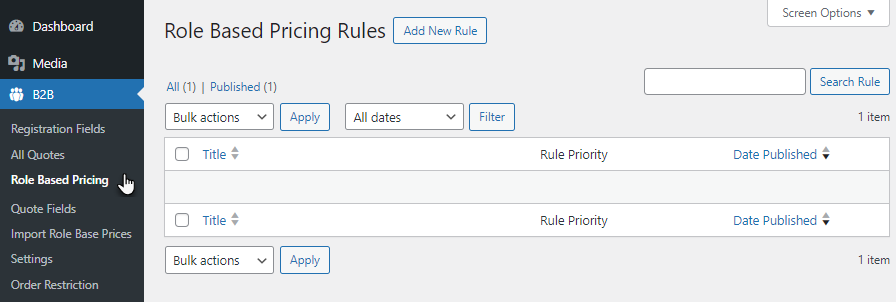
- Now, add a new rule by clicking the Add New Rule button.
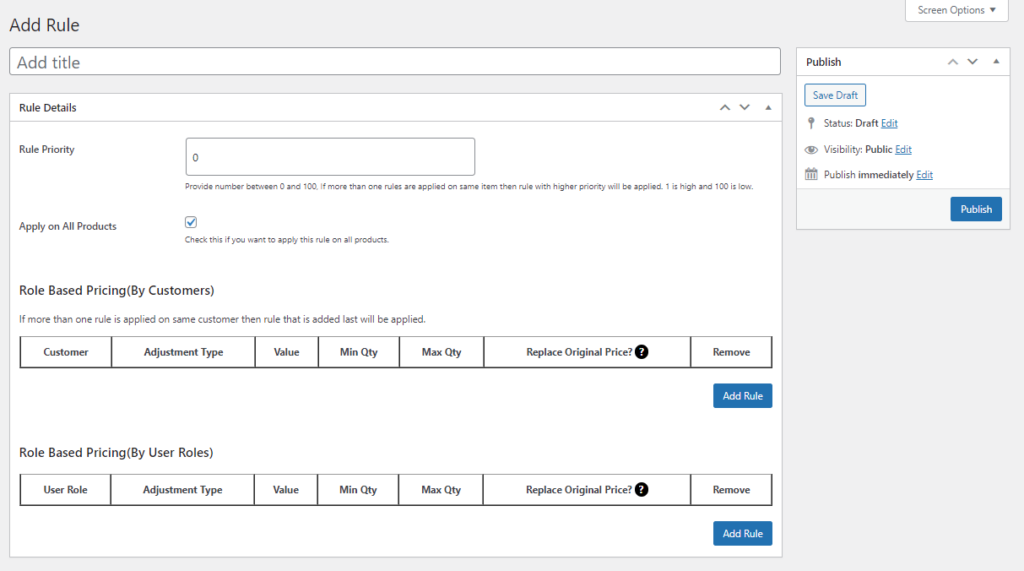
- Add Rule Title to your new rule.
- In case you have multiple rules, set Rule Priority from range 1 to 100, where 1 is high and 100 is low.
- We have selected Apply on All Products, where users can select specific products or categories by unchecking Apply on All Products.
- Now, navigate to the Role Based Pricing (By Customer) or Role Based Pricing (By User Roles). The user can add both Rules.
- Click on Add Rule.
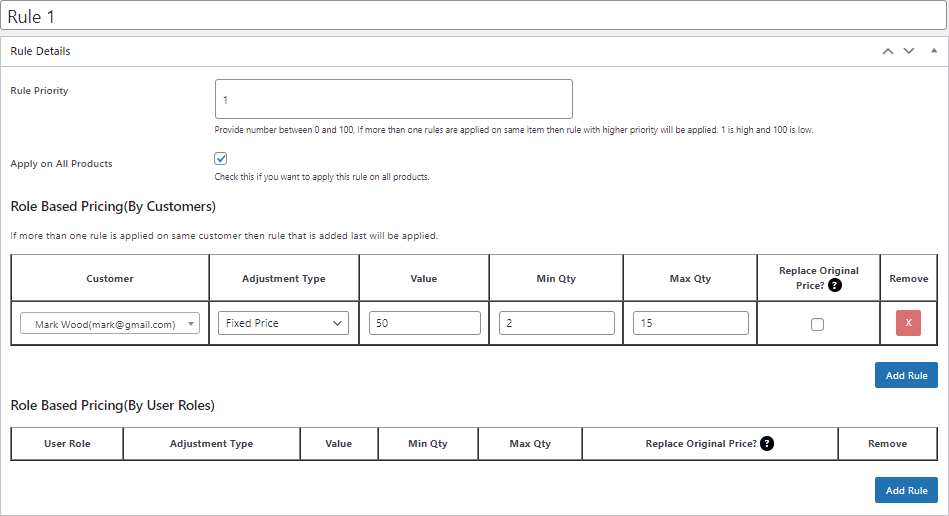
- A rule will be added. Select the Customer or User Role depending on the added rule.
- Select an Adjustment Type.
Fixed Price
- Set the Adjustment Type to Fixed Price.
- Set the Value for this adjustment type.
- Add Min Qty and Max Qty if needed.
- Publish the rule.
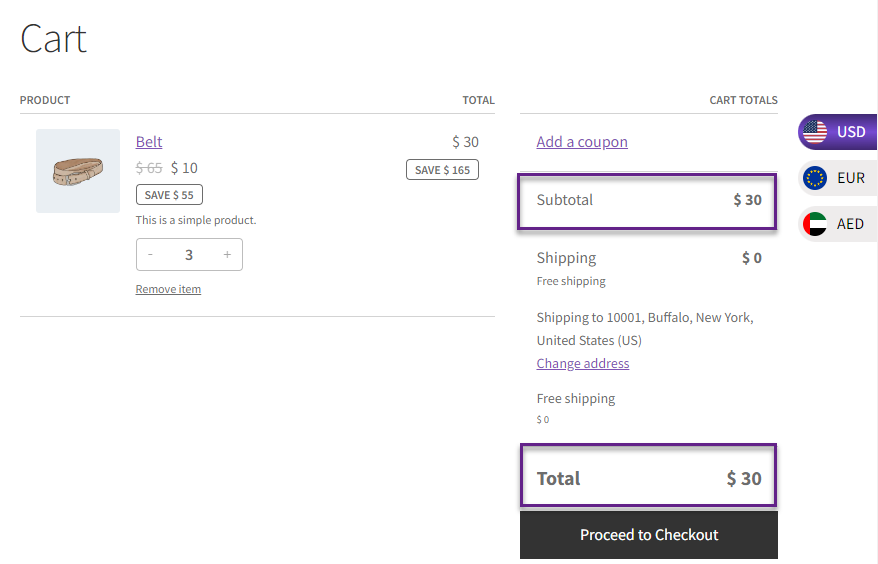
Front End Impact
- Log in with the specific Customer mentioned in the configuration.
- Go to the Shop page.
- Add the product to the cart.
- Meet the Role Based Pricing Condition.
Before Conversion
After Conversion
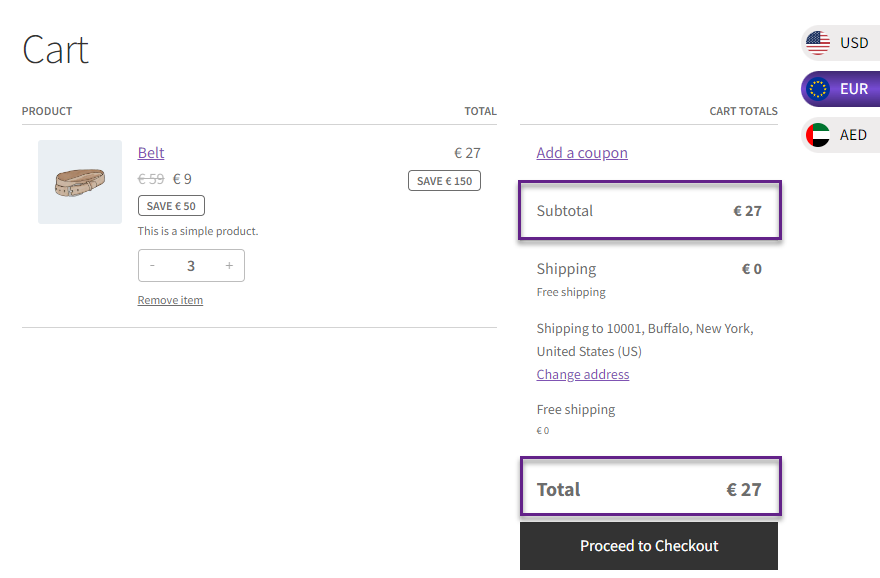
PLEASE NOTE: The equivalent of $30 is approximately €26.99, It will be rounded-off per your settings.
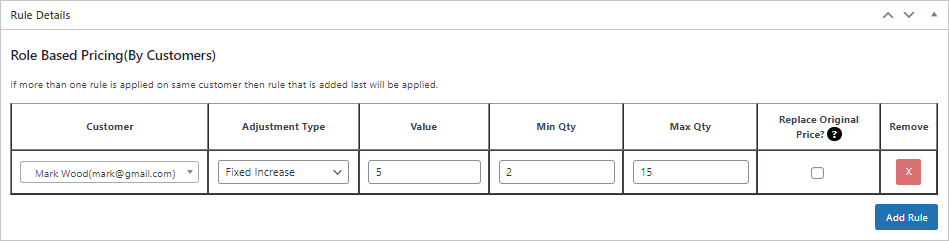
Fixed Increase
- Set the Adjustment type to Fixed Increase.
- Set the Value for this adjustment type.
- Add Min Qty and Max Qty if needed.
- Publish the rule.
Front End Impact
- Log in with the specific Customer mentioned in the configuration.
- Go to the Shop page.
- Add the product to the cart.
- Meet the Role Based Pricing Condition.
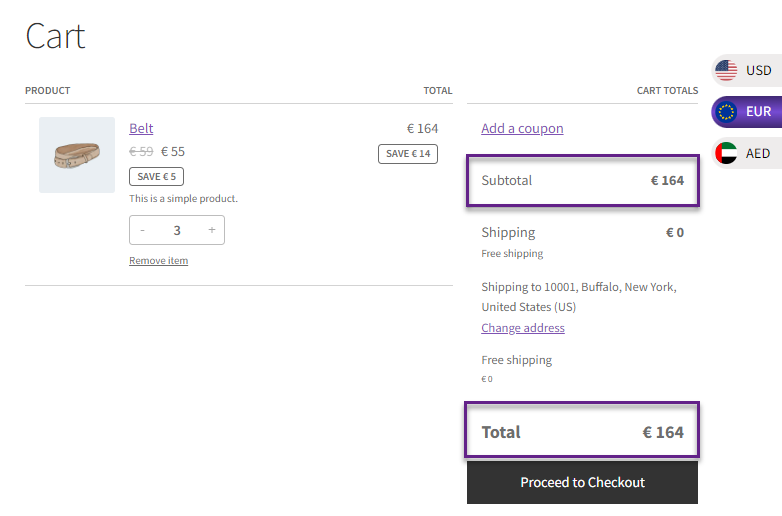
Before Conversion

After Conversion
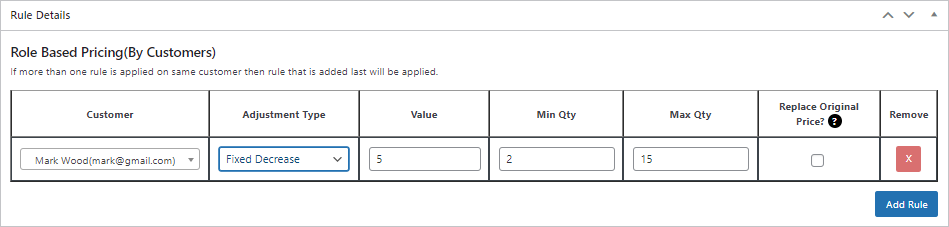
Fixed Decrease
- Set the Adjustment type to Fixed Decrease.
- Set the Value for this adjustment type.
- Add Min Qty and Max Qty if needed.
- Publish the rule.
Front End Impact
- Log in with the specific Customer mentioned in the configuration.
- Go to the Shop page.
- Add the product to the cart.
- Meet the Role Based Pricing Condition.
Before Conversion
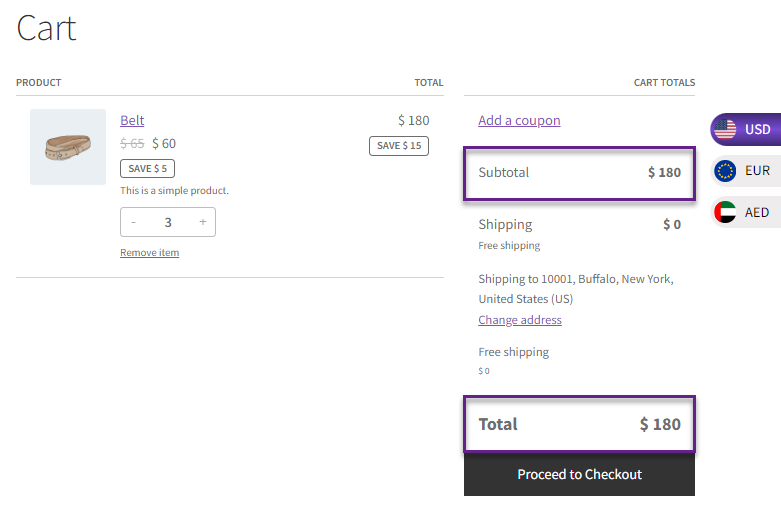
After Conversion
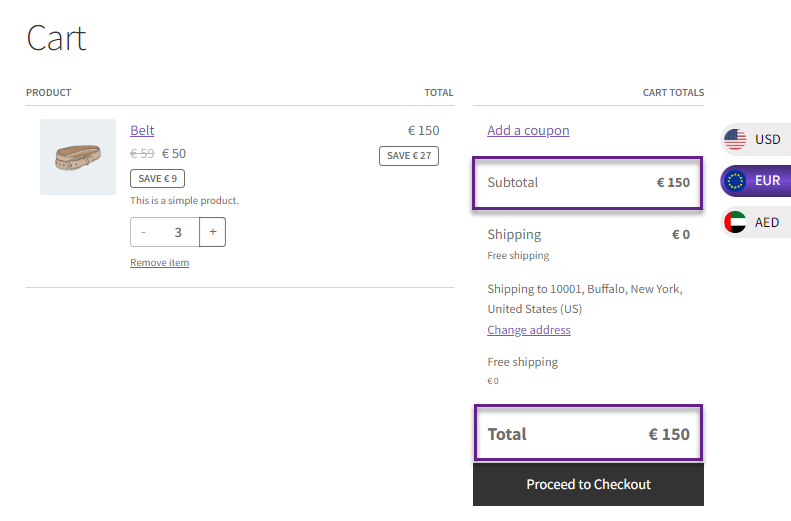
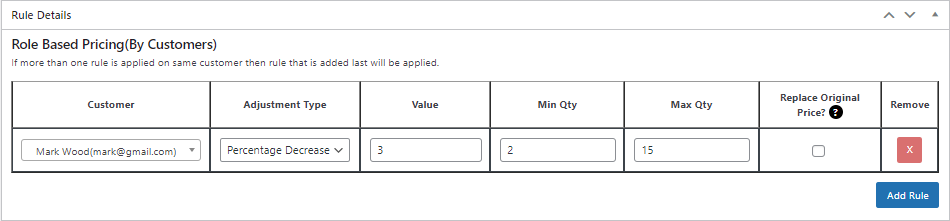
Percentage Decrease
- Set the Adjustment type to Percentage Decrease.
- Set the Value for this adjustment type.
- Add Min Qty and Max Qty if needed.
- Publish the rule.
Front End Impact
- Log in with the specific Customer mentioned in the configuration.
- Go to the Shop page.
- Add the product to the cart.
- Meet the Role Based Pricing Condition.
Before Conversion
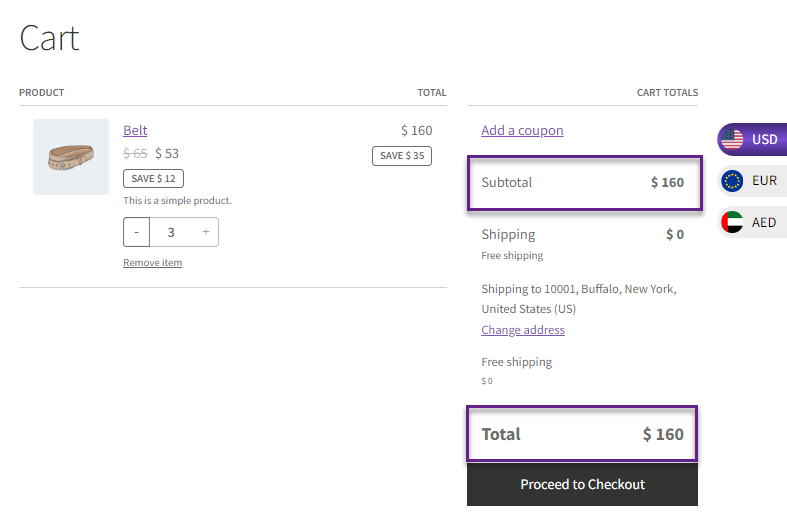
After Conversion

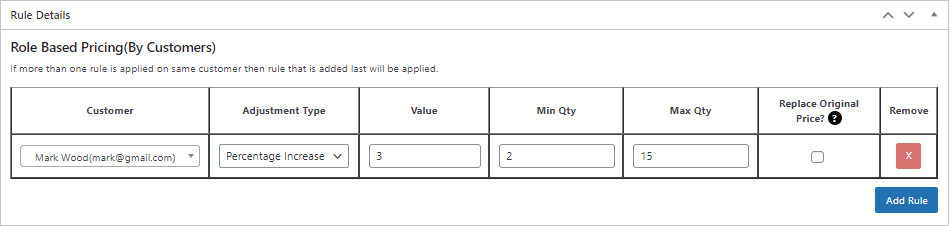
Percentage Increase
- Set the Adjustment type to Percentage Increase.
- Set the Value for this adjustment type.
- Add Min Qty and Max Qty if needed.
- Publish the rule.
Front End Impact
- Log in with the specific Customer mentioned in the configuration.
- Go to the Shop page.
- Add the product to the cart.
- Meet the Role Based Pricing Condition.
Before Conversion
After Conversion
Order Restriction
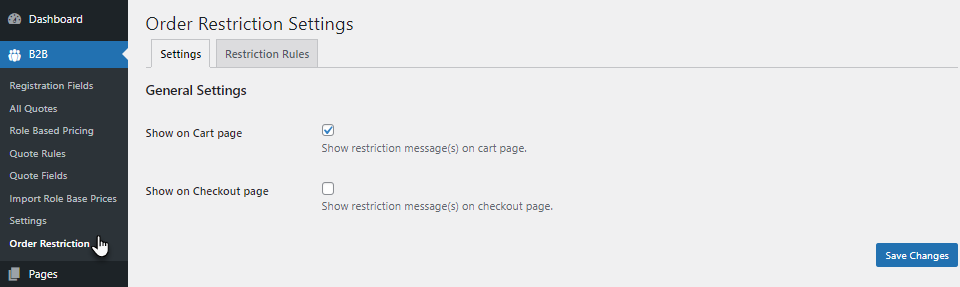
↑ Back to top- Navigate to the WordPress Admin Dashboard > B2B > Order Restrictions.
- Check mark the option whether you want to show this on the Cart and Checkout Page.
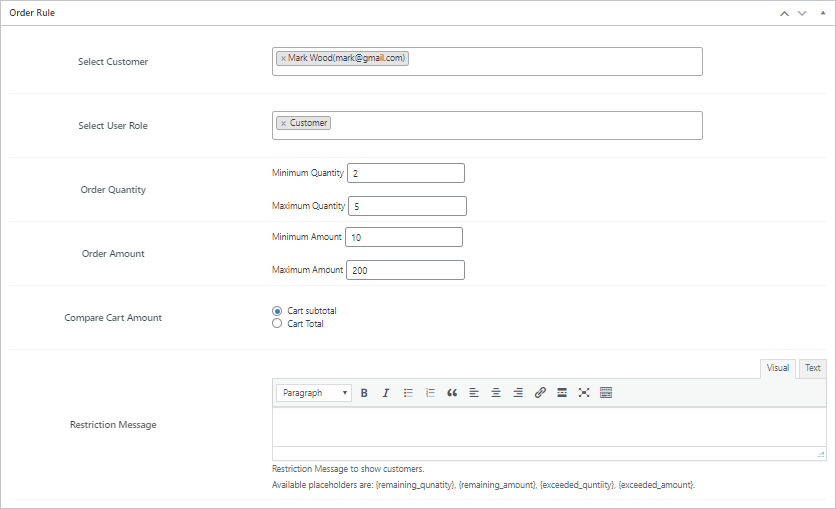
- Switch the tab to Restriction Rules.
- Add Order Restriction Rules as per your requirement.
- Select specific customers from Select Customer.
- Add specific user roles from Select User Role.
- Add order quantity restriction in Order Quantity.
- Add order amount restriction in Order Amount.
- Select which cart amount should be compared from Compare Cart Amount.
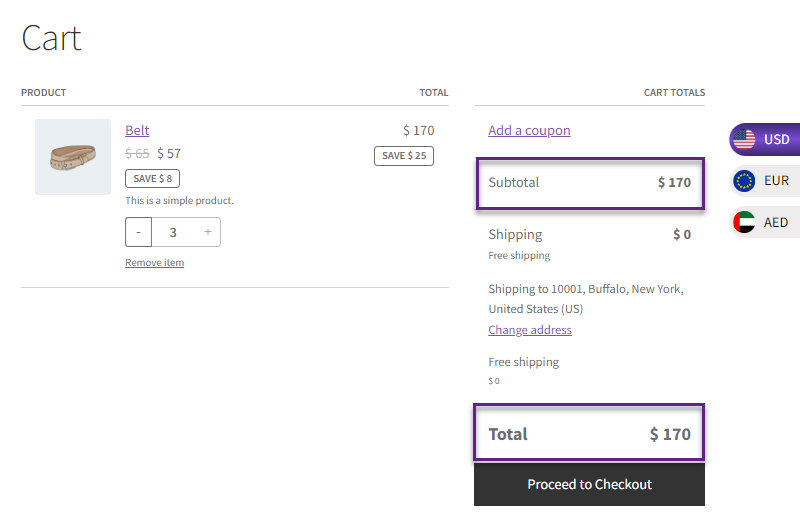
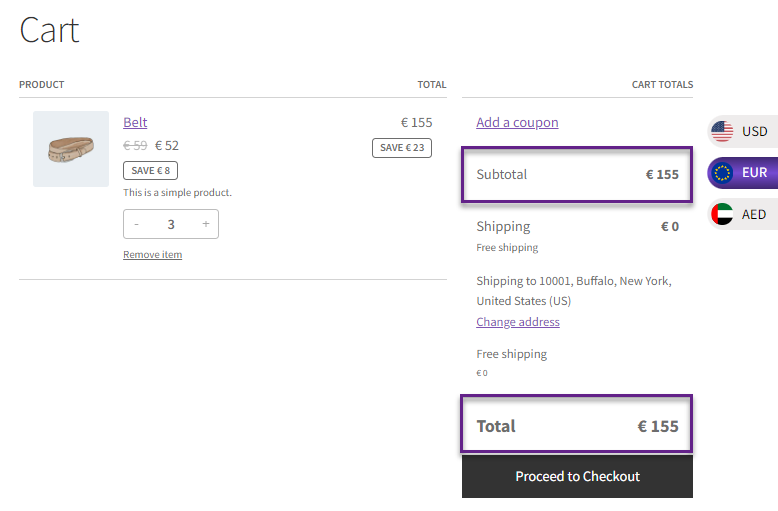
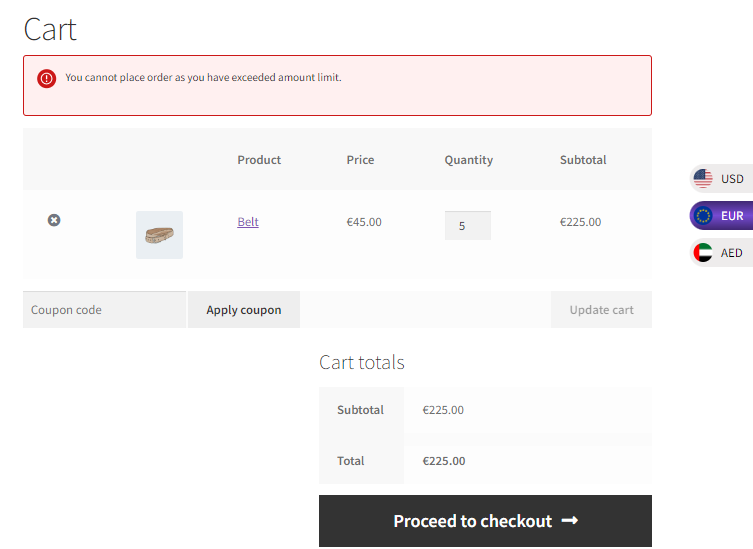
Front End Impact
- Log in with the specific Customer mentioned in the configuration.
- Go to the Shop page.
- Add the product to the cart.
- A message will appear on the screen if your Product Qty or Product Price mismatches the condition.
Before Conversion

Before Conversion
Compatibility with Donation Feature
↑ Back to top- Download and Install the Donation For WooCommerce
- Follow the Donation For WooCommerce documentation to set up and configure the plugin.
Getting Started
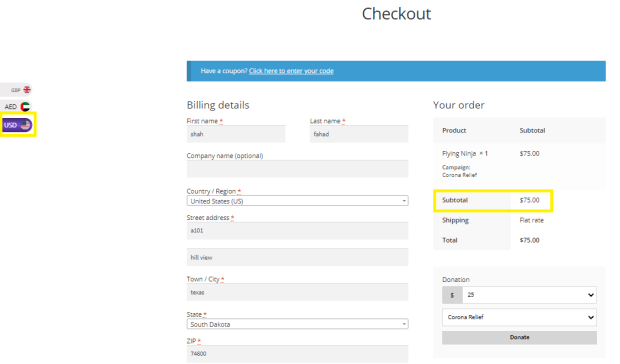
↑ Back to topUser went for a donation of 10 GBP with default currency
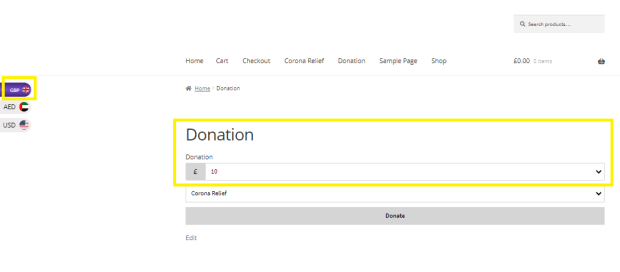
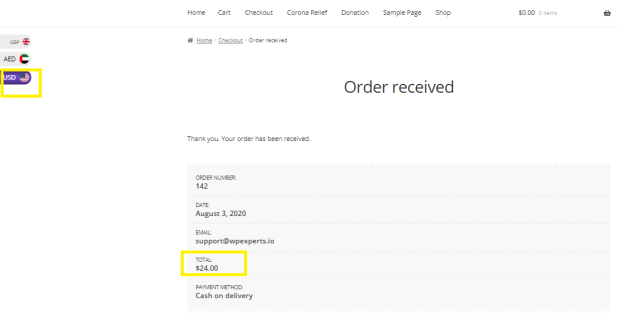
But at the time of checkout he switched the currency to USD
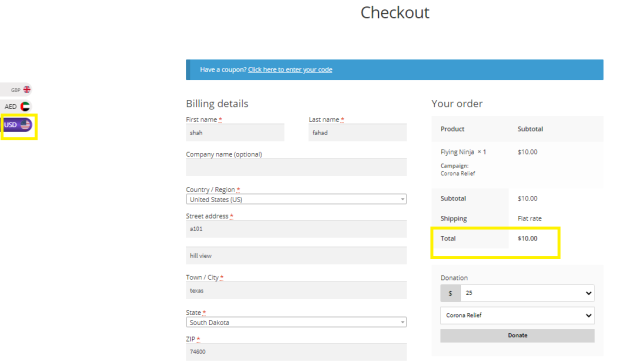
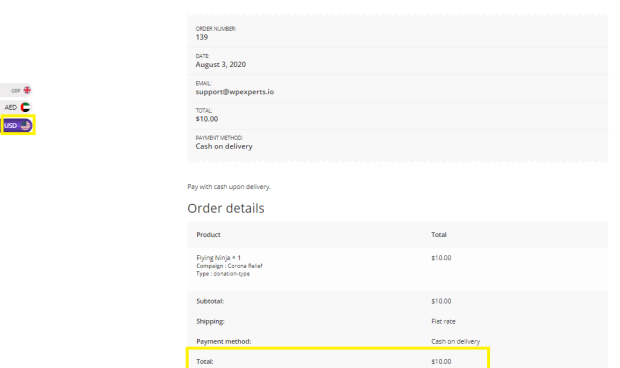
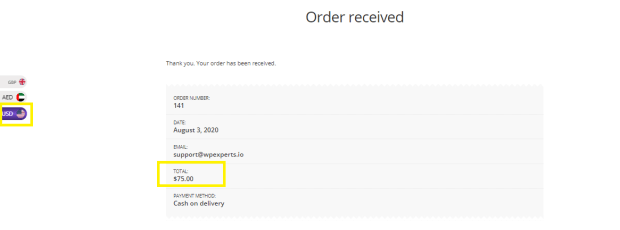
The donation was made in USD
Donation from Widget
↑ Back to topUser selected by default GBP currency in widget to donate:

But on checkout option he switched the currency to USD
Payment was made in USD as we can see in below image
Currency Switcher at Round off Donation
↑ Back to topCustomer went for a purchase with default GBP currency
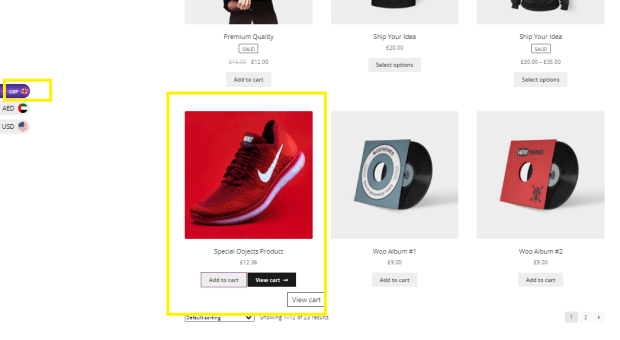
But at the time of checkout it gave an option to round off the value by giving donation

User changed the currency here:
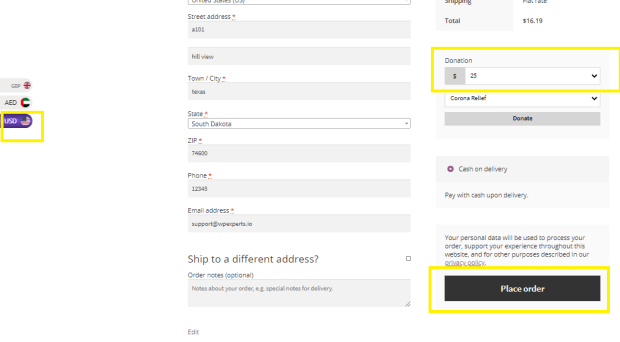
The final transaction has processed with USD
Compatible with All product Subscription plugin
↑ Back to top- Download and Install the All product Subscription
- Follow the All product Subscription documentation to set up and configure the plugin.
Getting Started
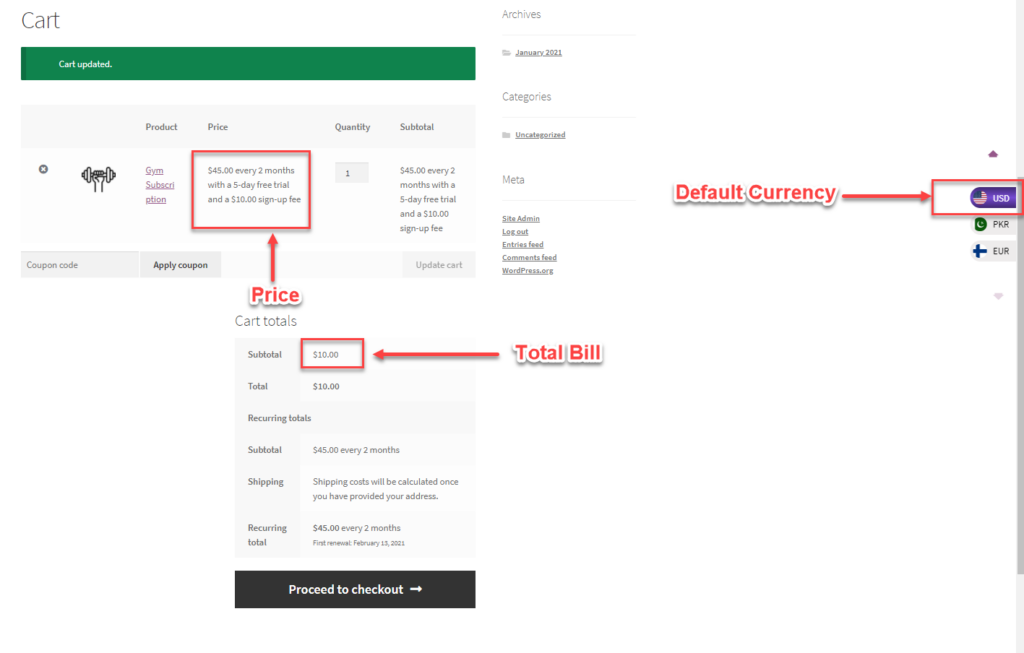
↑ Back to top- Create a subscription product

- Once published, go to SHOP

- Default Currency (USD Dollar)
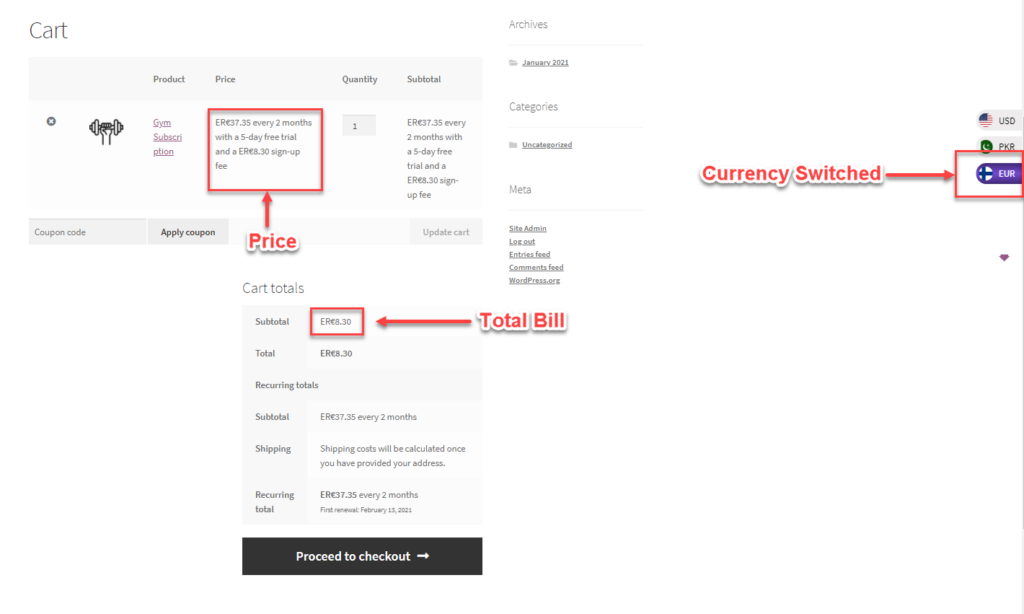
- Currency Switched (EURO)
Compatibility with WPML
↑ Back to top- Installation of WPML
- Download and Install the WPML
- Follow the WPML documentation to set up and configure the plugin.
Getting Started
↑ Back to topCurrency By Languages
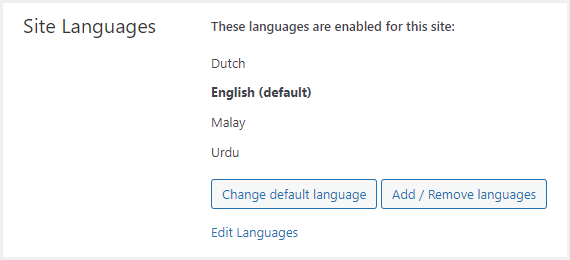
↑ Back to topNOTE: WPML Pro and WooCommerce Multilingual plugins are required to use this option. Go to Admin Dashboard → WPML → Languages and Add languages in the Site Languages section.
Back-end Configuration
- Go to the Admin Dashboard → WooCommerce → WCCS Settings.

- WC Currency Switcher Settings page would open.
- Checkmark the Currency by Language option to enable it.
- Once you’ll checkmark the Currency by Language option checkbox, the Languages option would appear right below it.
- Select the currency against each language.
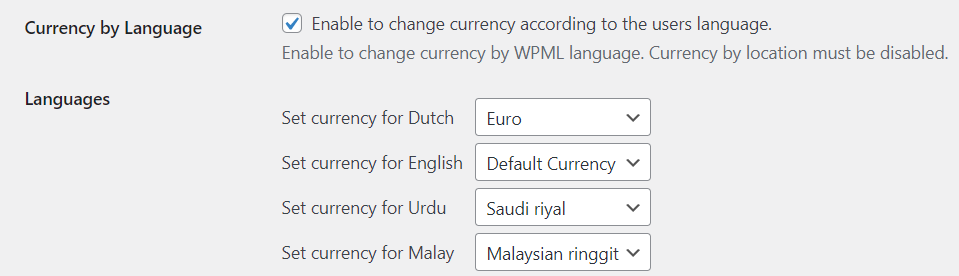
- Click on the Save Changes button.
Front-end Impact
- The user will go to the website and visit the shop.
- At the bottom of the page, we can see all the available languages.
- Click on any other language available.

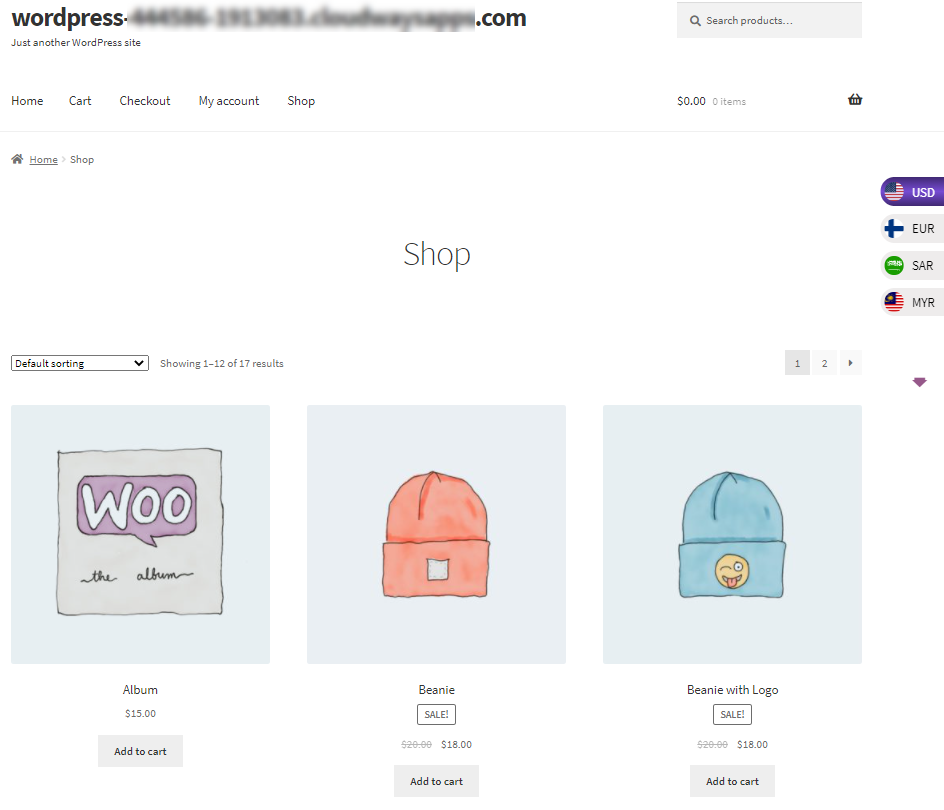
BEFORE
- The website when the language is English and it was configured against USD currency (default currency).
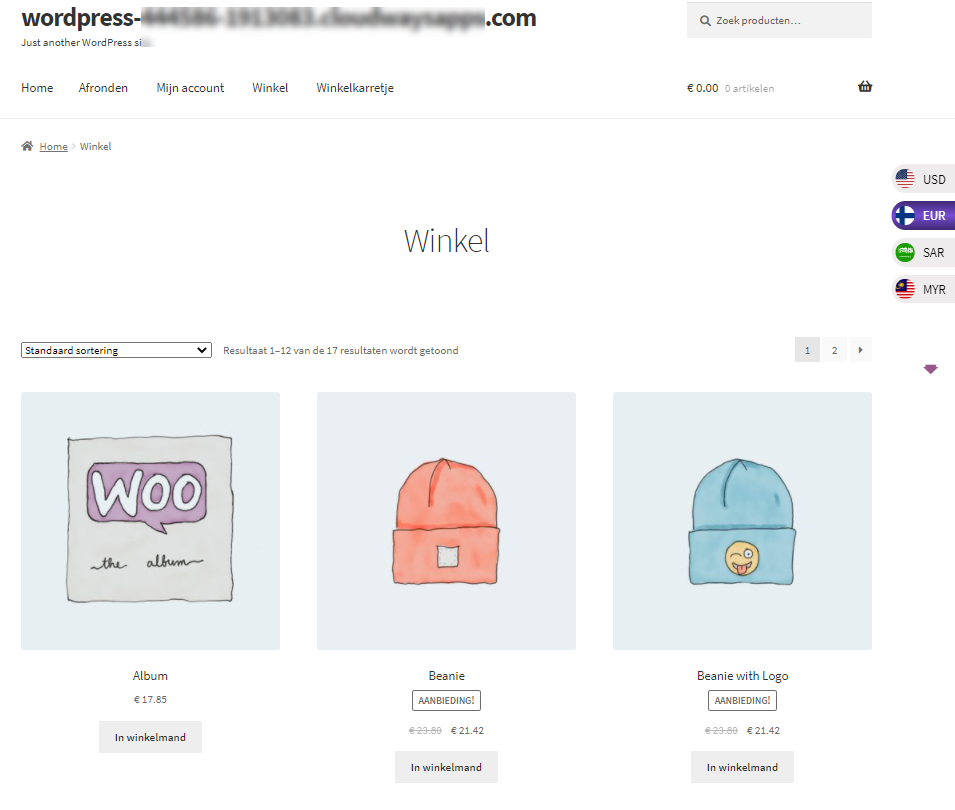
AFTER
- The website when the language is changed to Dutch and it was configured against Euro currency.
Compatibility with Wholesale For WooCommerce By WPExperts
↑ Back to top- Download the Wholesale for WooCommerce plugin by clicking here.
- Install the plugin and activate it.
- For further plugin settings and information, please visit the Wholesale for WooCommerce documentation.
- Custom Currency for Wholesale User Role
Back-End Configuration
- This will allow the admin to select a custom currency to each wholesaler user role so that when the wholesale user logs in to the shop page, the shop currency will be automatically converted to the user selected currency.
- Go to the Wholesale > User Roles.
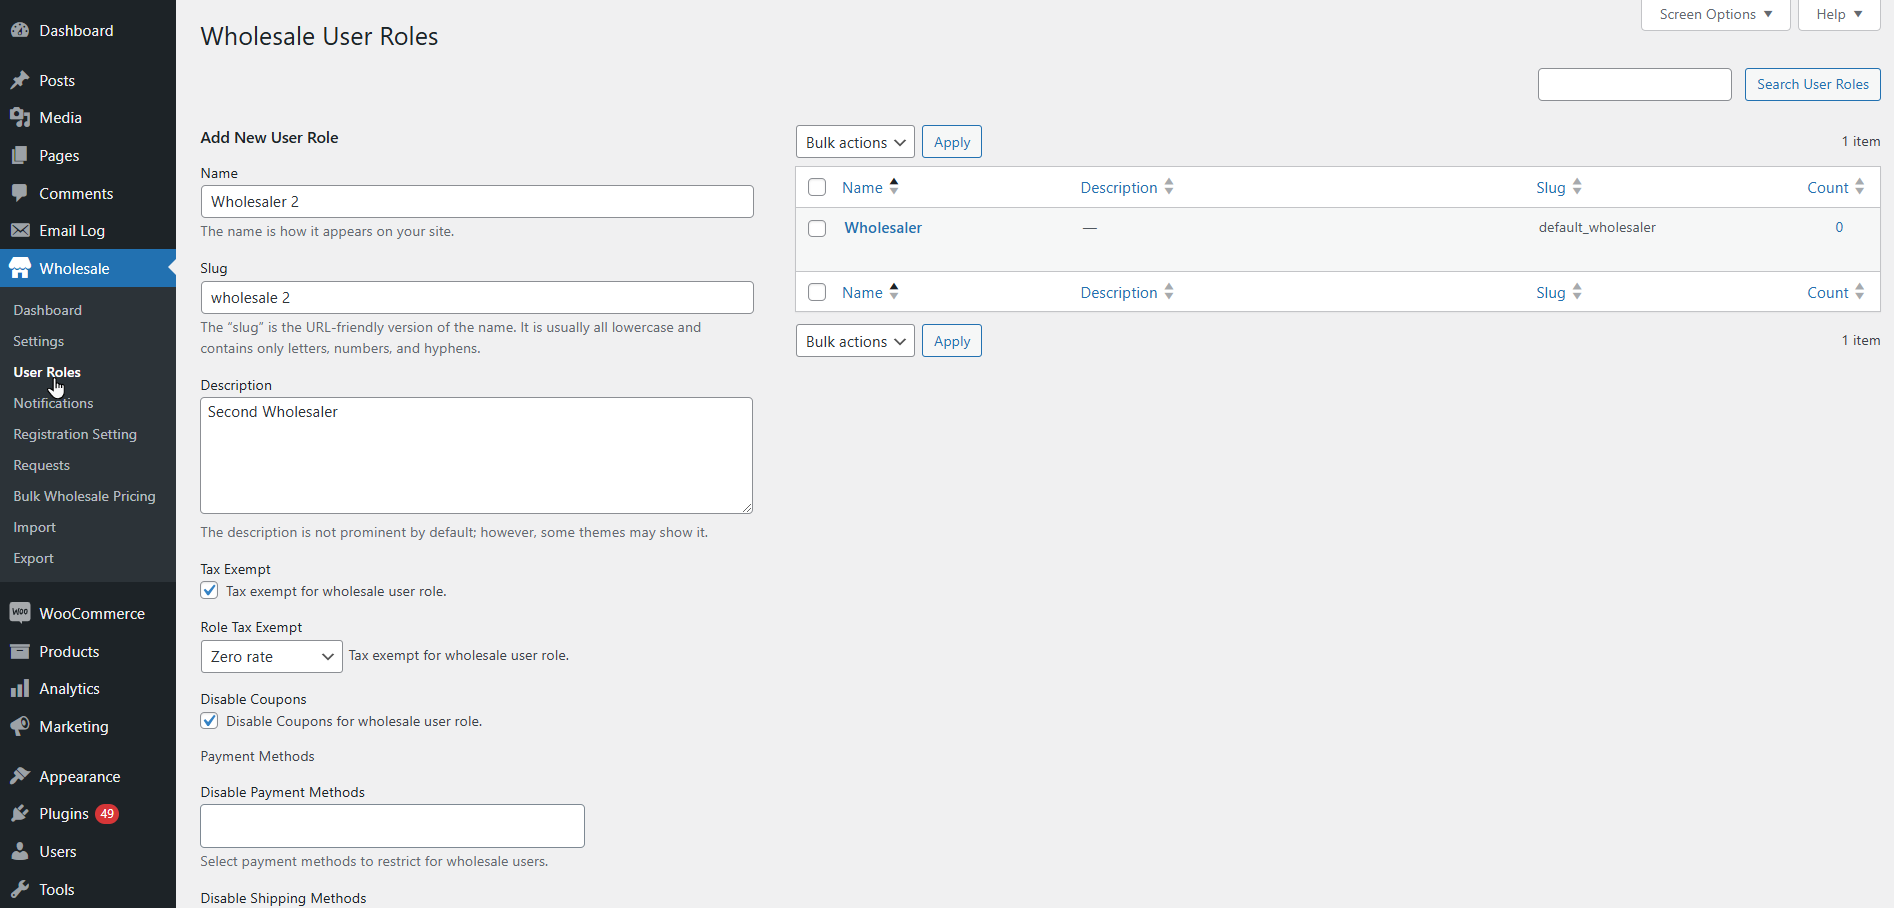
- Edit an existing or add a new wholesaler user role.
- Scroll down, there will be a User Role Currency checkbox.
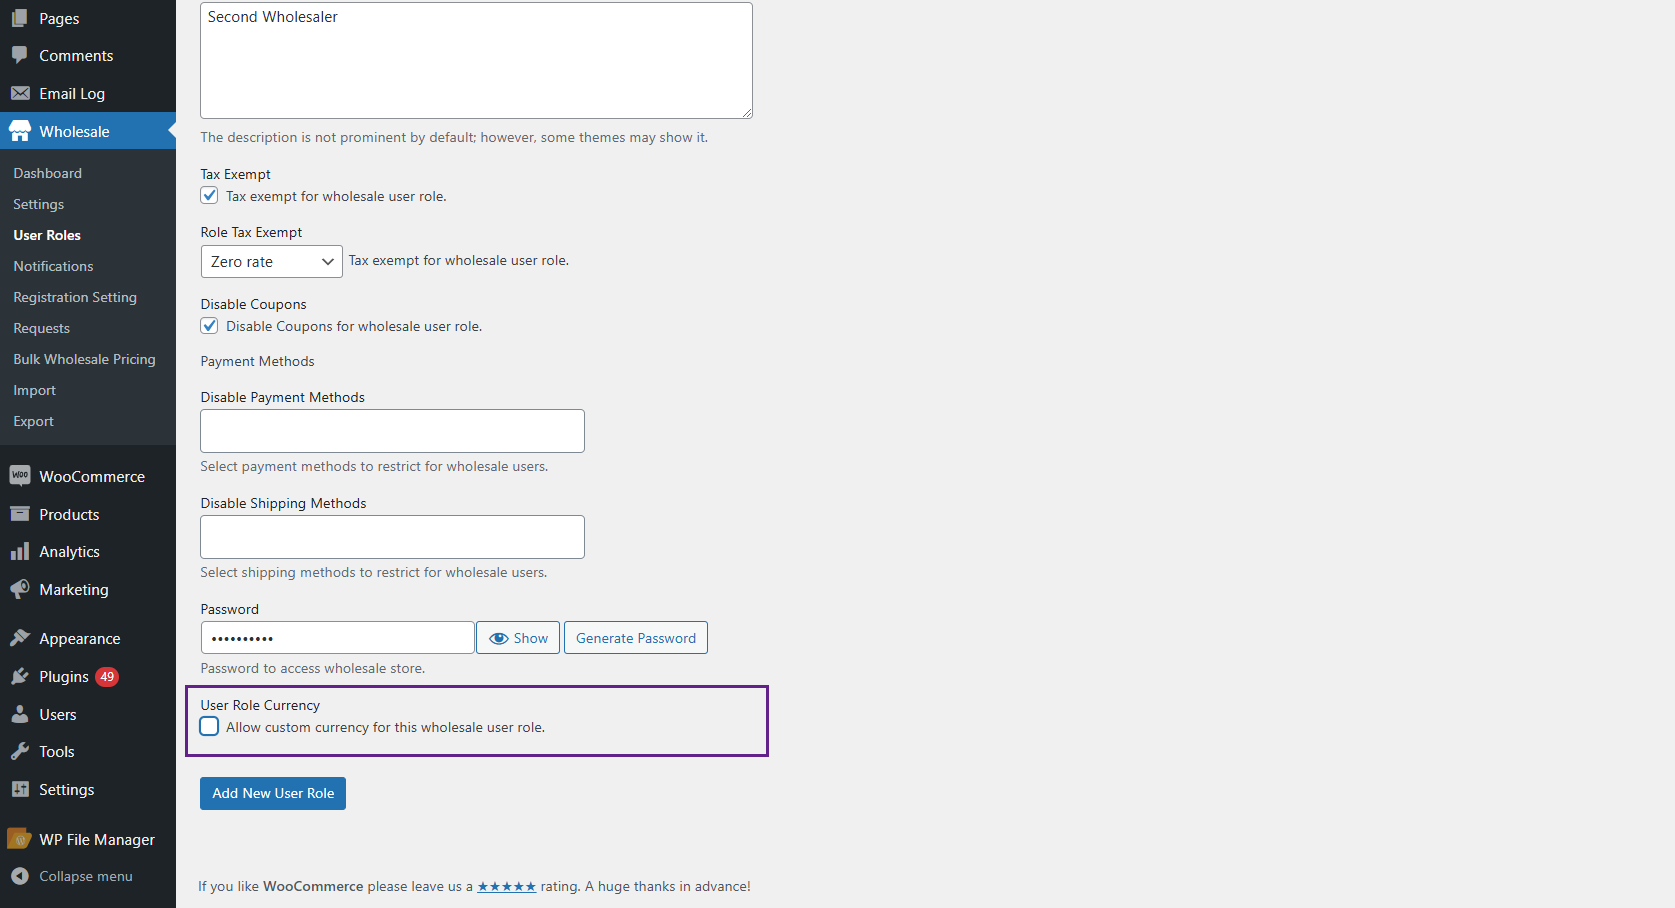
- Click on the User Role Currency checkbox.
- When the admin checks this box then the Select Currency drop down will be displayed. Select a currency from the Select Currency drop down box for this user role.
Front-End Impact
↑ Back to top- When a Wholesaler logs in to the Shop, the shop currency will be switched to the wholesale user role selected currency.
- Users can not change the currency and the currency selected by the admin will remain throughout the site.
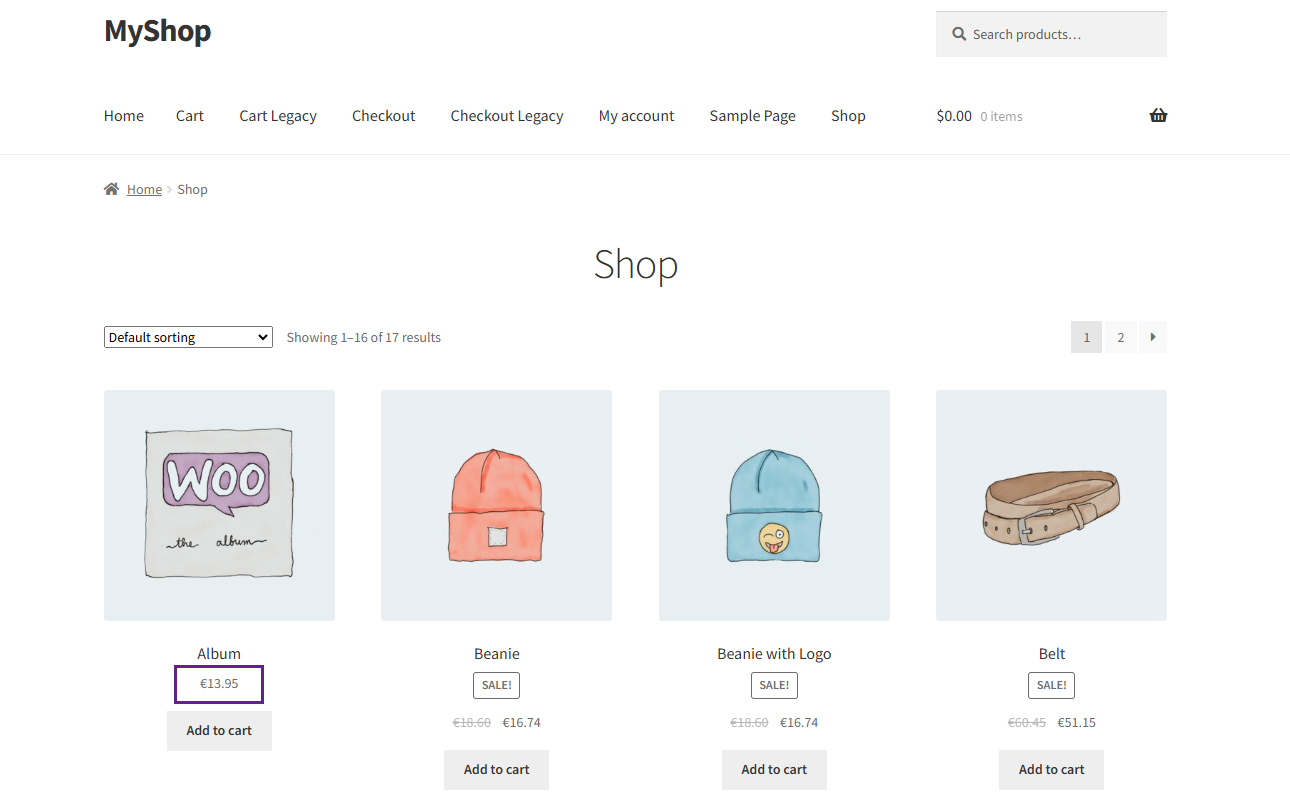
- Go to the Shop page.
- Wholesaler without custom currency.

- Wholesaler with custom currency.
Compatibility with WooCommerce Deposits By WooCommerce
↑ Back to top- Download the WooCommerce Deposits plugin by clicking here.
- Install the plugin and activate it.
- For further plugin settings and information, please visit the WooCommerce Deposits documentation.
Back-End Configuration
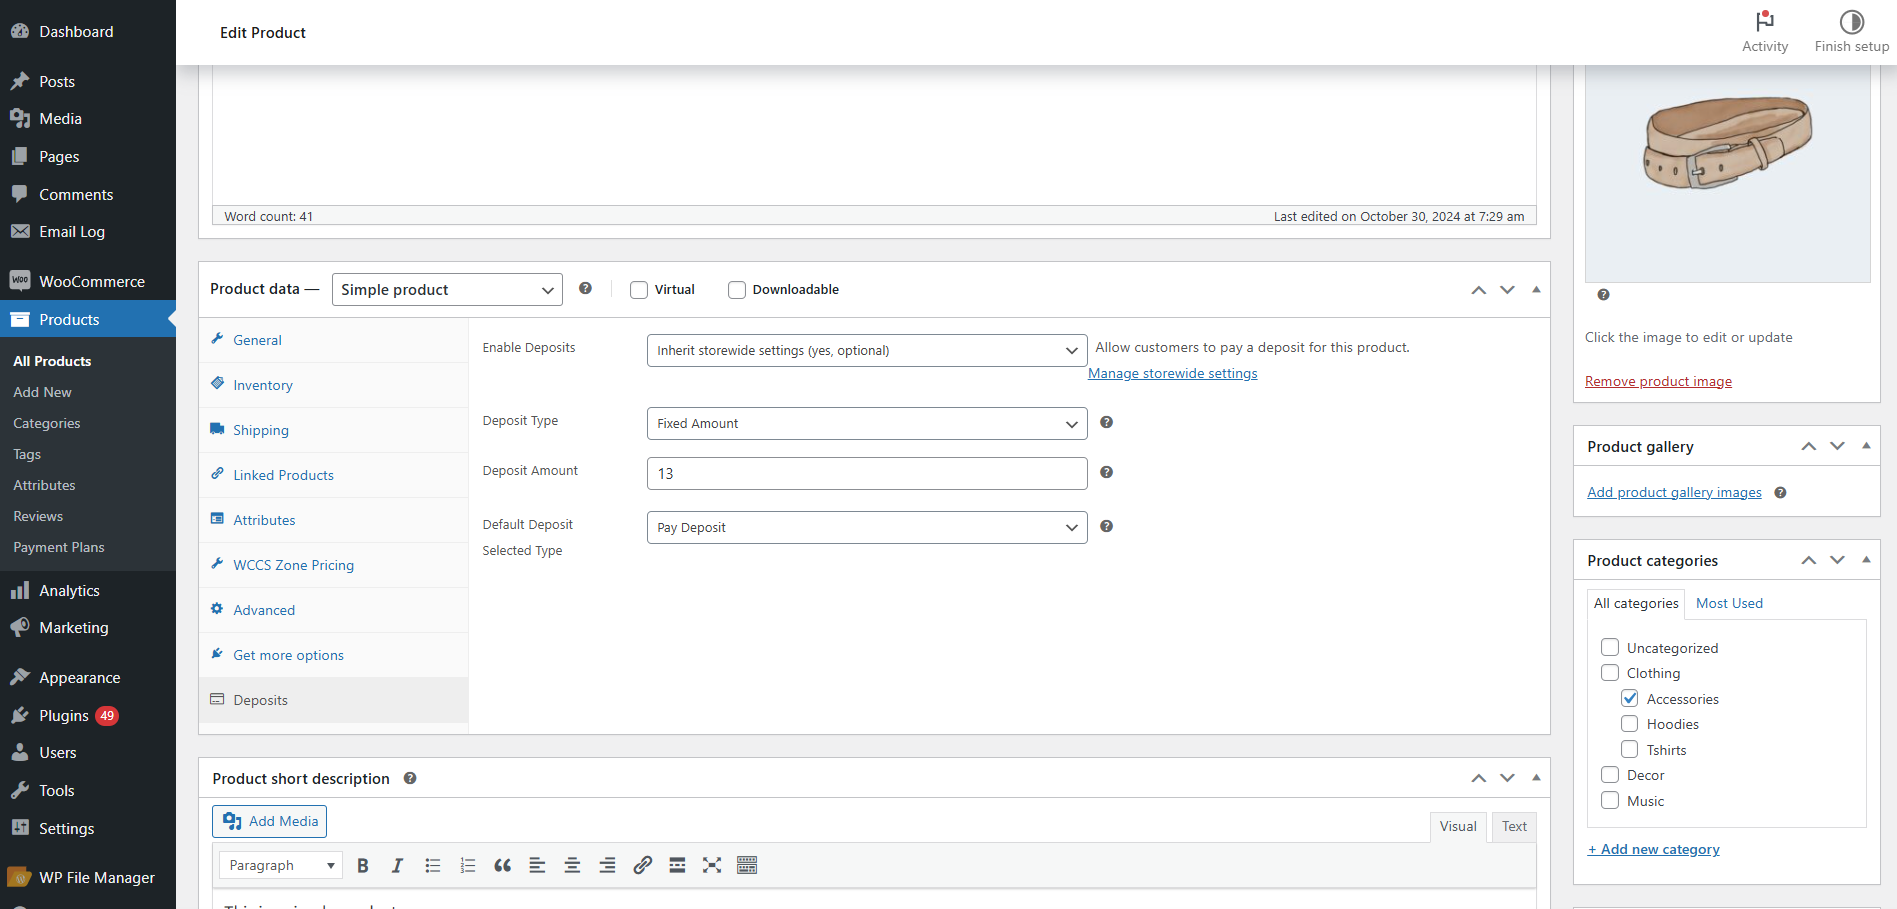
↑ Back to top- Go to the Products > Edit or Add a new product.
- In the Products, navigate to the Product data > Deposits.
- Add the Fixed Amount as Deposit Type.
- Add the Deposit Amount.
- For storewide deposit, go to WooCommerce > Settings > Products > Deposits.
- Set the Deposit type to Fixed Amount and set the Deposit Amount.
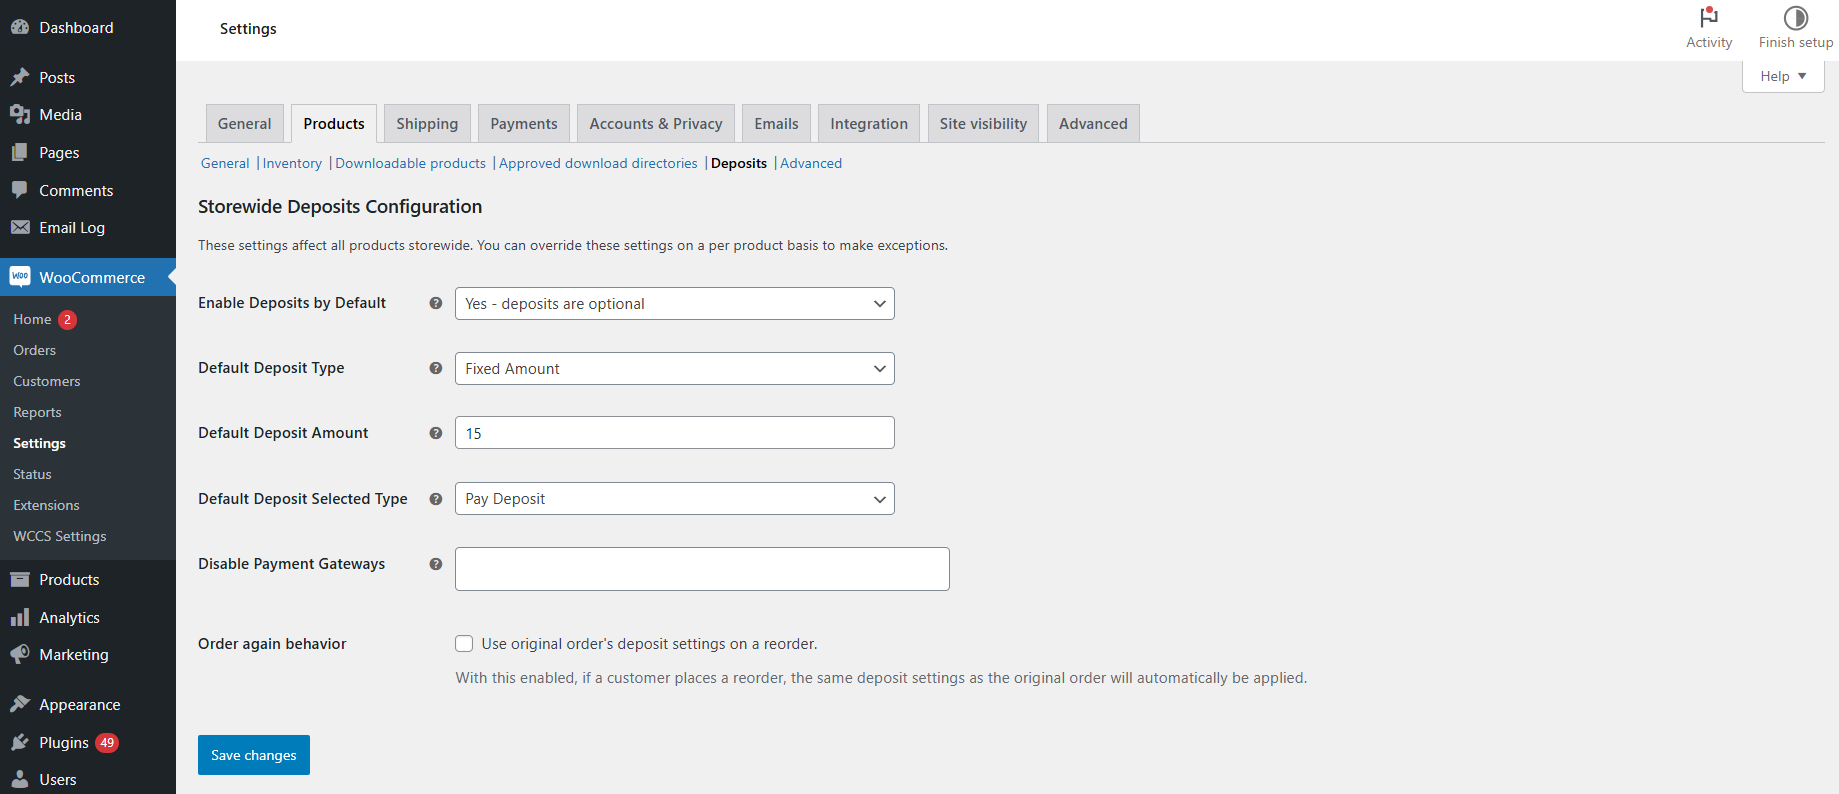
- For more details and set up guide, please visit the plugin documentation.
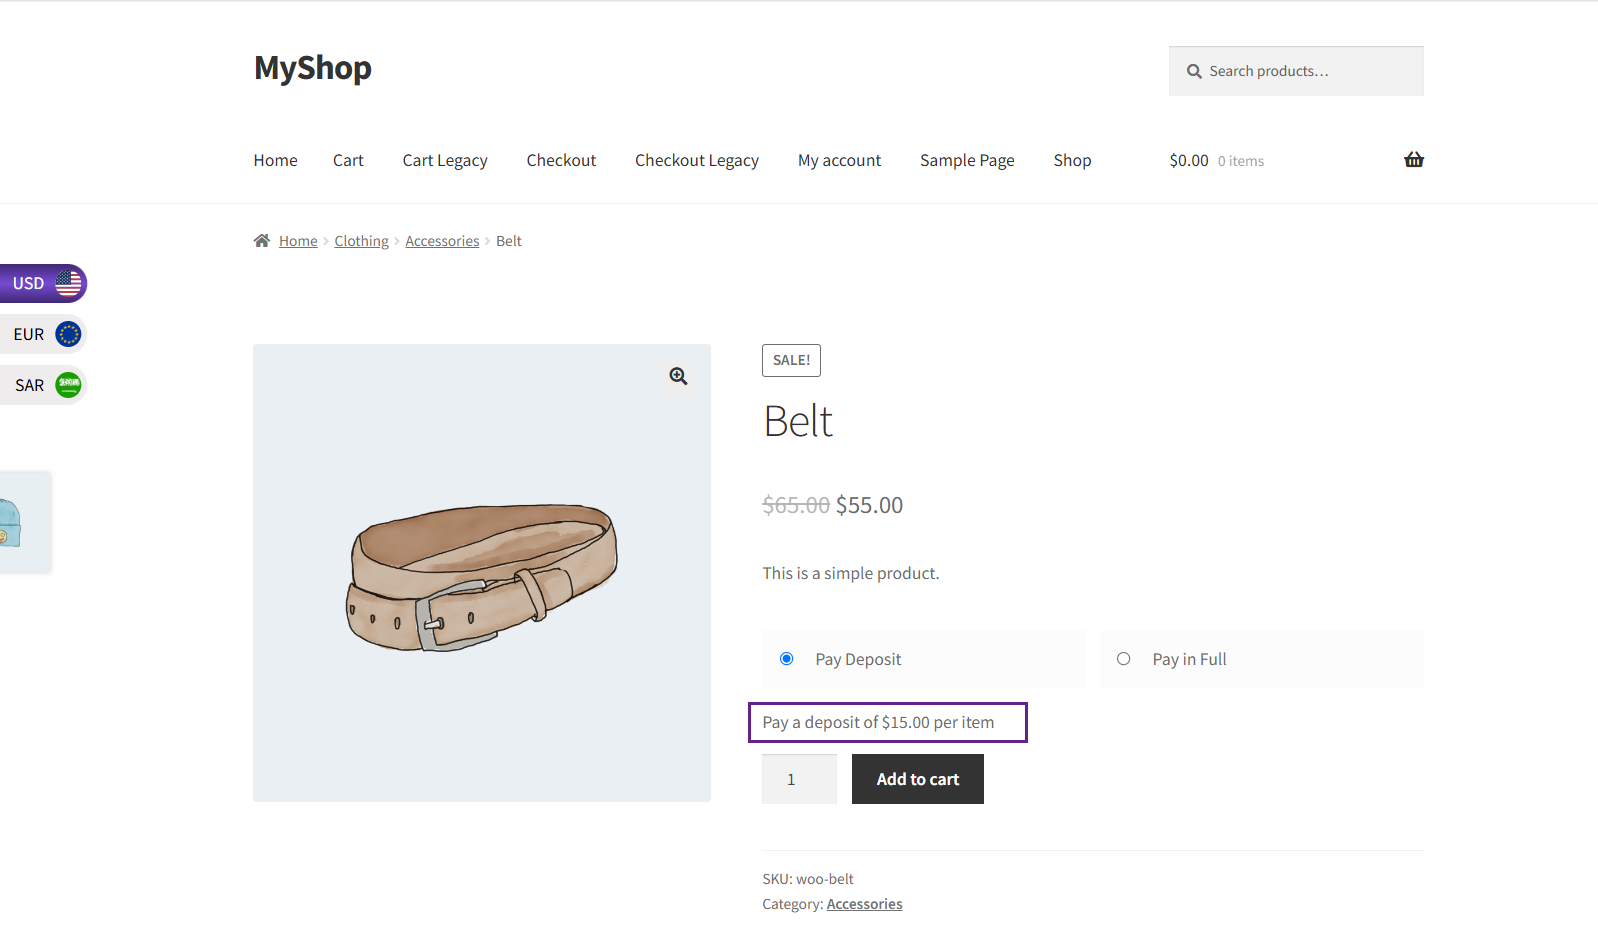
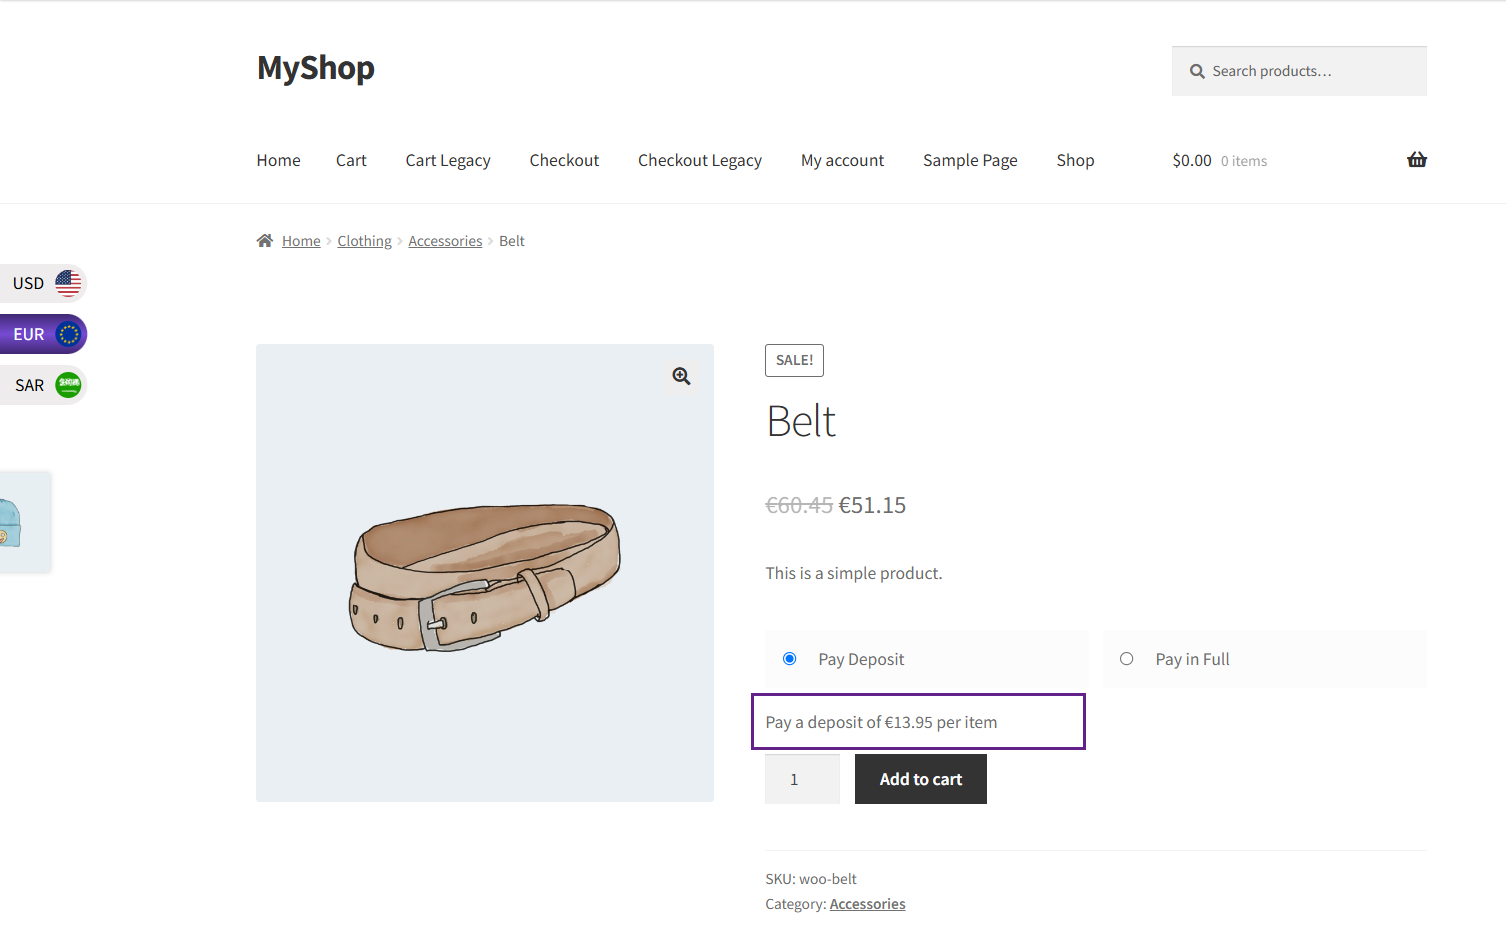
Front-End Impact
↑ Back to top- Go to the Shop page.
- Select a product.
- Deposit amount before switching the currency:
- Deposit amount after switching the currency:
Compatibility with WooCommerce Bookings By WooCommerce
↑ Back to top- Download the WooCommerce Bookings plugin by clicking here.
- Install the plugin and activate it.
- For further plugin settings and information, please visit the WooCommerce Bookings documentation.
Back-End Configuration
↑ Back to top- Go to the Products > Edit or Add a new product.
- In the Products, navigate to the Product data and select Bookable Product in Product Type.
- Check Has Persons or Has Resources checkbox.
- Or select a booking template.
- Set up resources and their prices.

- For more details and guides on how to use WooCommerce Bookings and how to set up booking products using templates, please visit the plugin documentation.
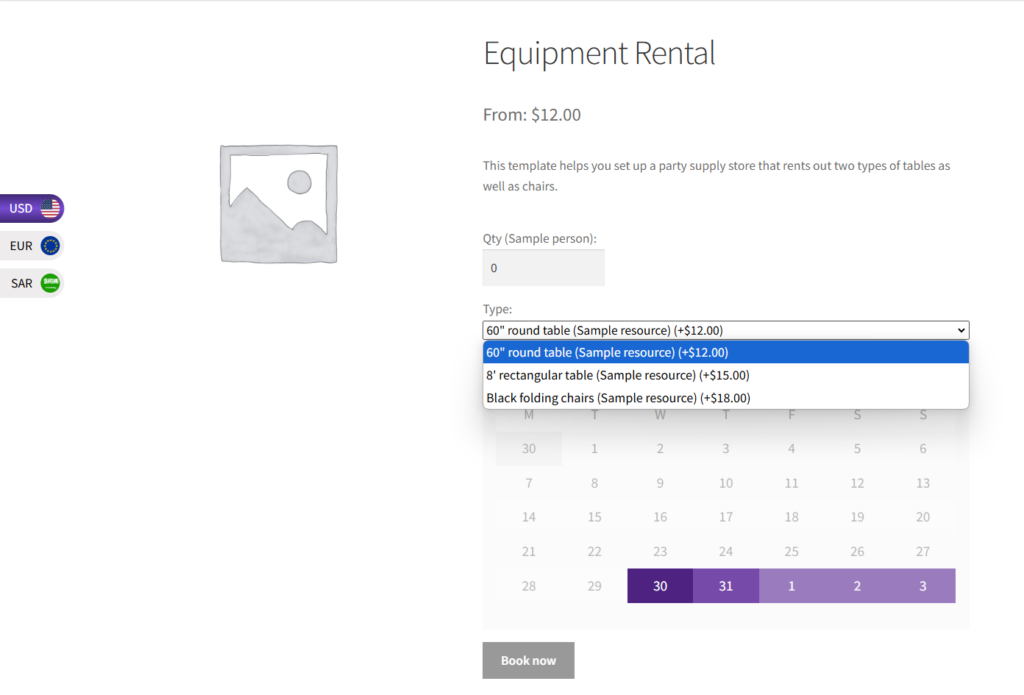
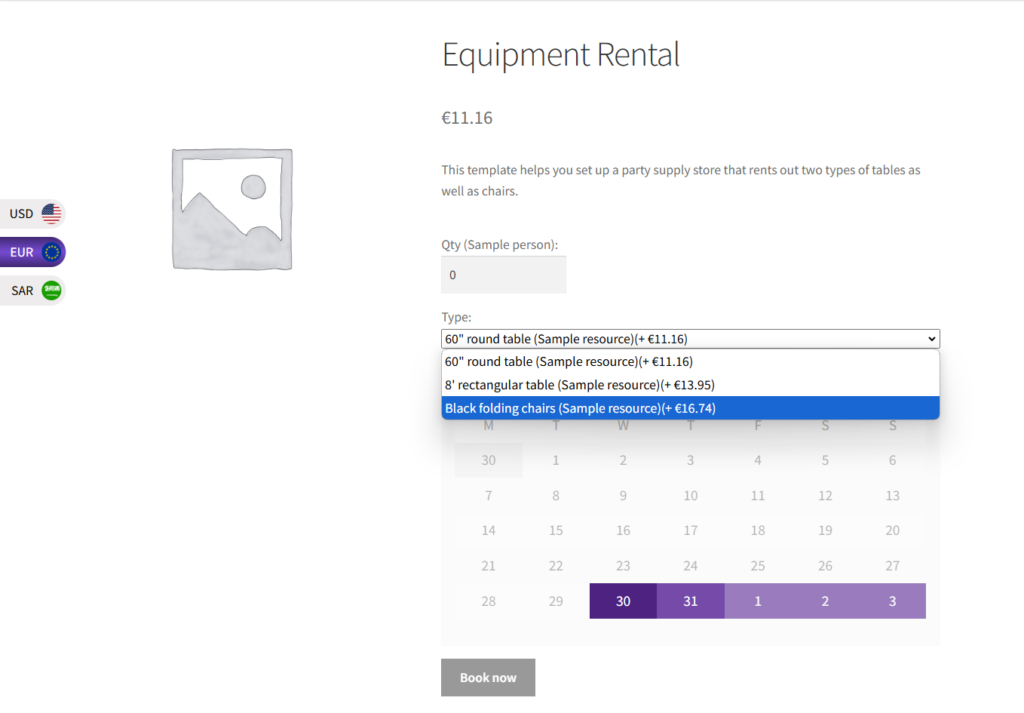
Front-End Impact
↑ Back to top- Navigate to the Shop page.
- Select a bookable product and go to the product page.
- Amount before switching the currency:
- Amount after switching the currency:
Compatibility with Wholesale Suite By Rymera Web Co
↑ Back to top- Download the Wholesale Suite – WooCommerce Wholesale Prices plugin by clicking here.
- Install the plugin and activate it.
- For further plugin settings and information, please visit the Wholesale Suite documentation.
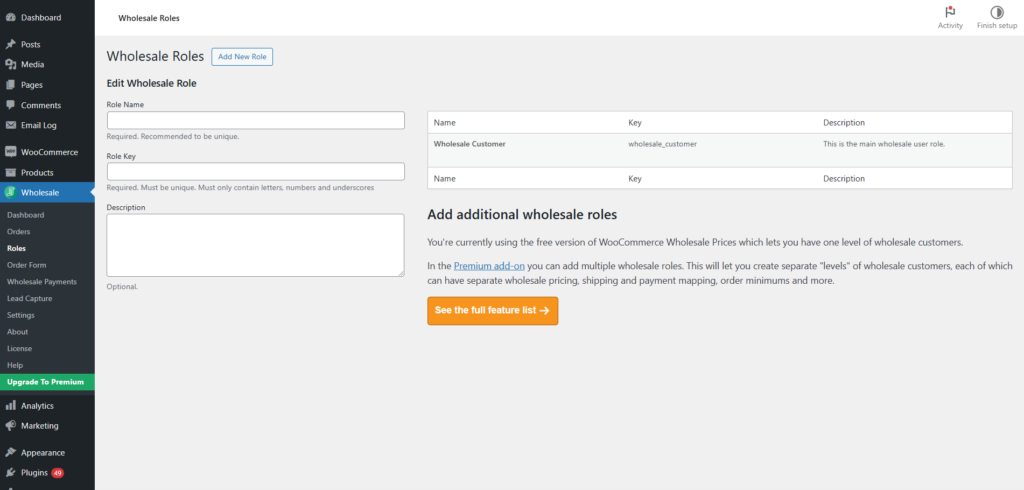
Back-End Configuration
↑ Back to top- Navigate to the Wholesale > Roles.
- Add a new wholesale user role.
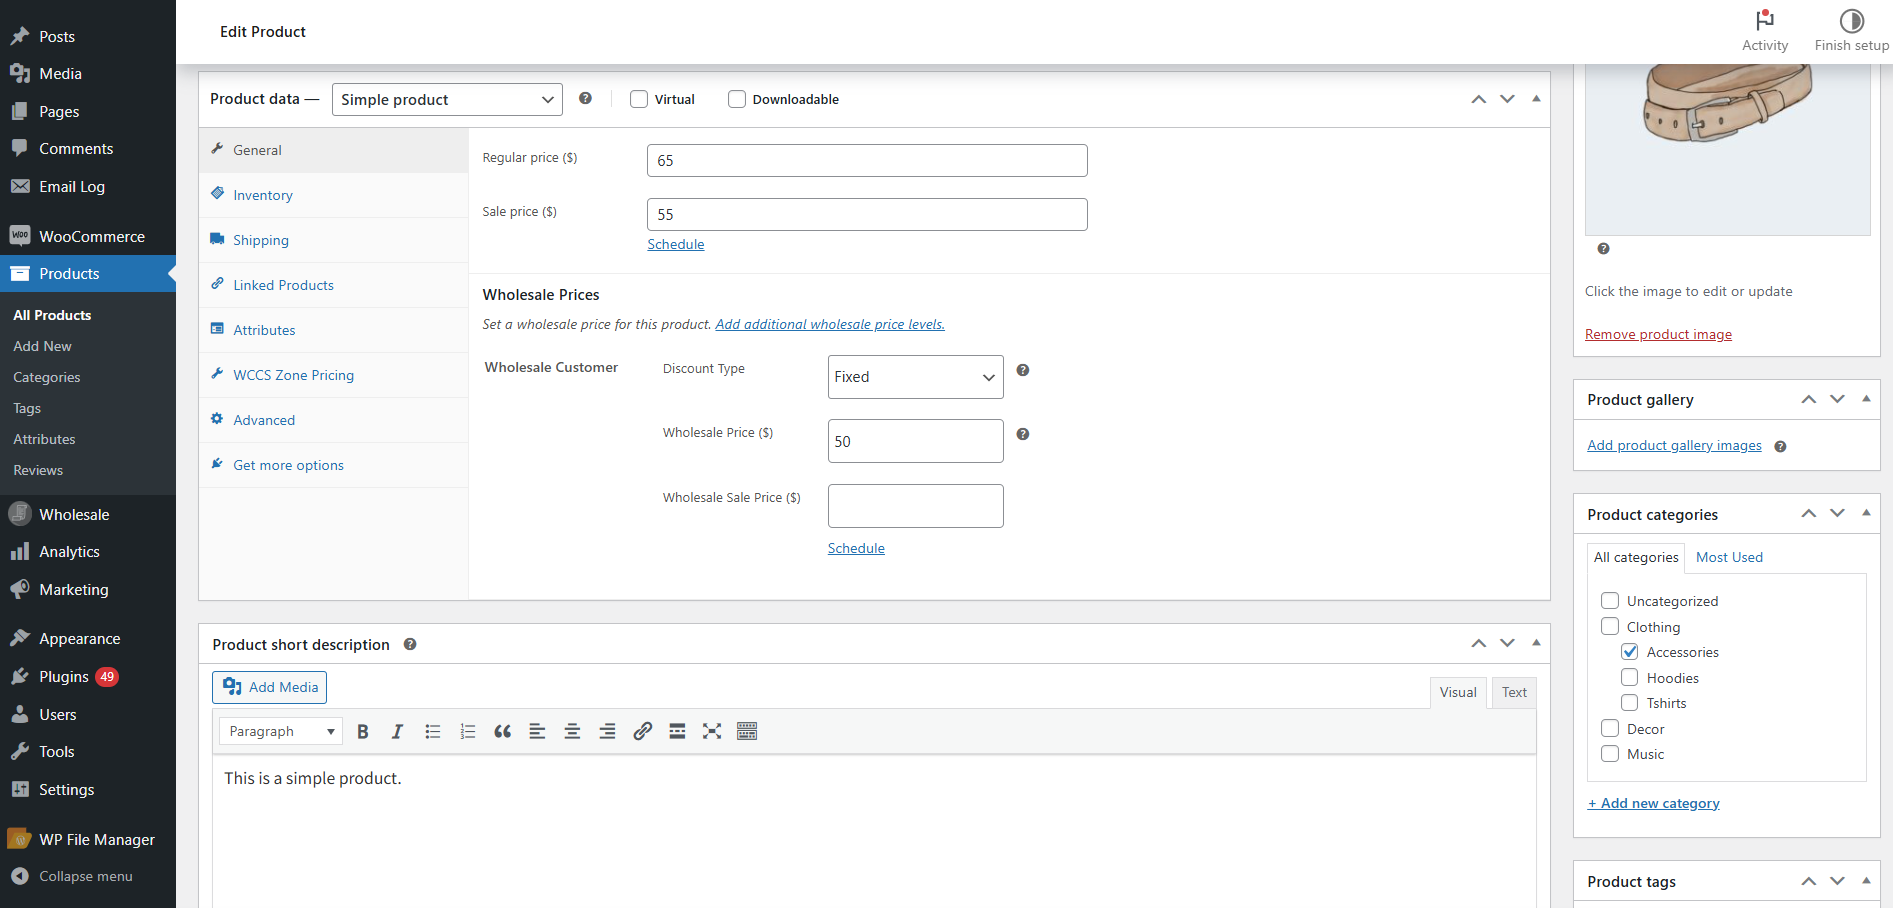
- Go to the Products > Edit or Add a new product.
- In the Product, navigate to the Product data > General.
- Go to the Wholesale Prices section.
- Add prices for the wholesale user role in this section.

- Select discount type as Fixed from the Discount Type drop down.
- Add the Wholesale Price.
- Add the Wholesale Sale Price if needed.
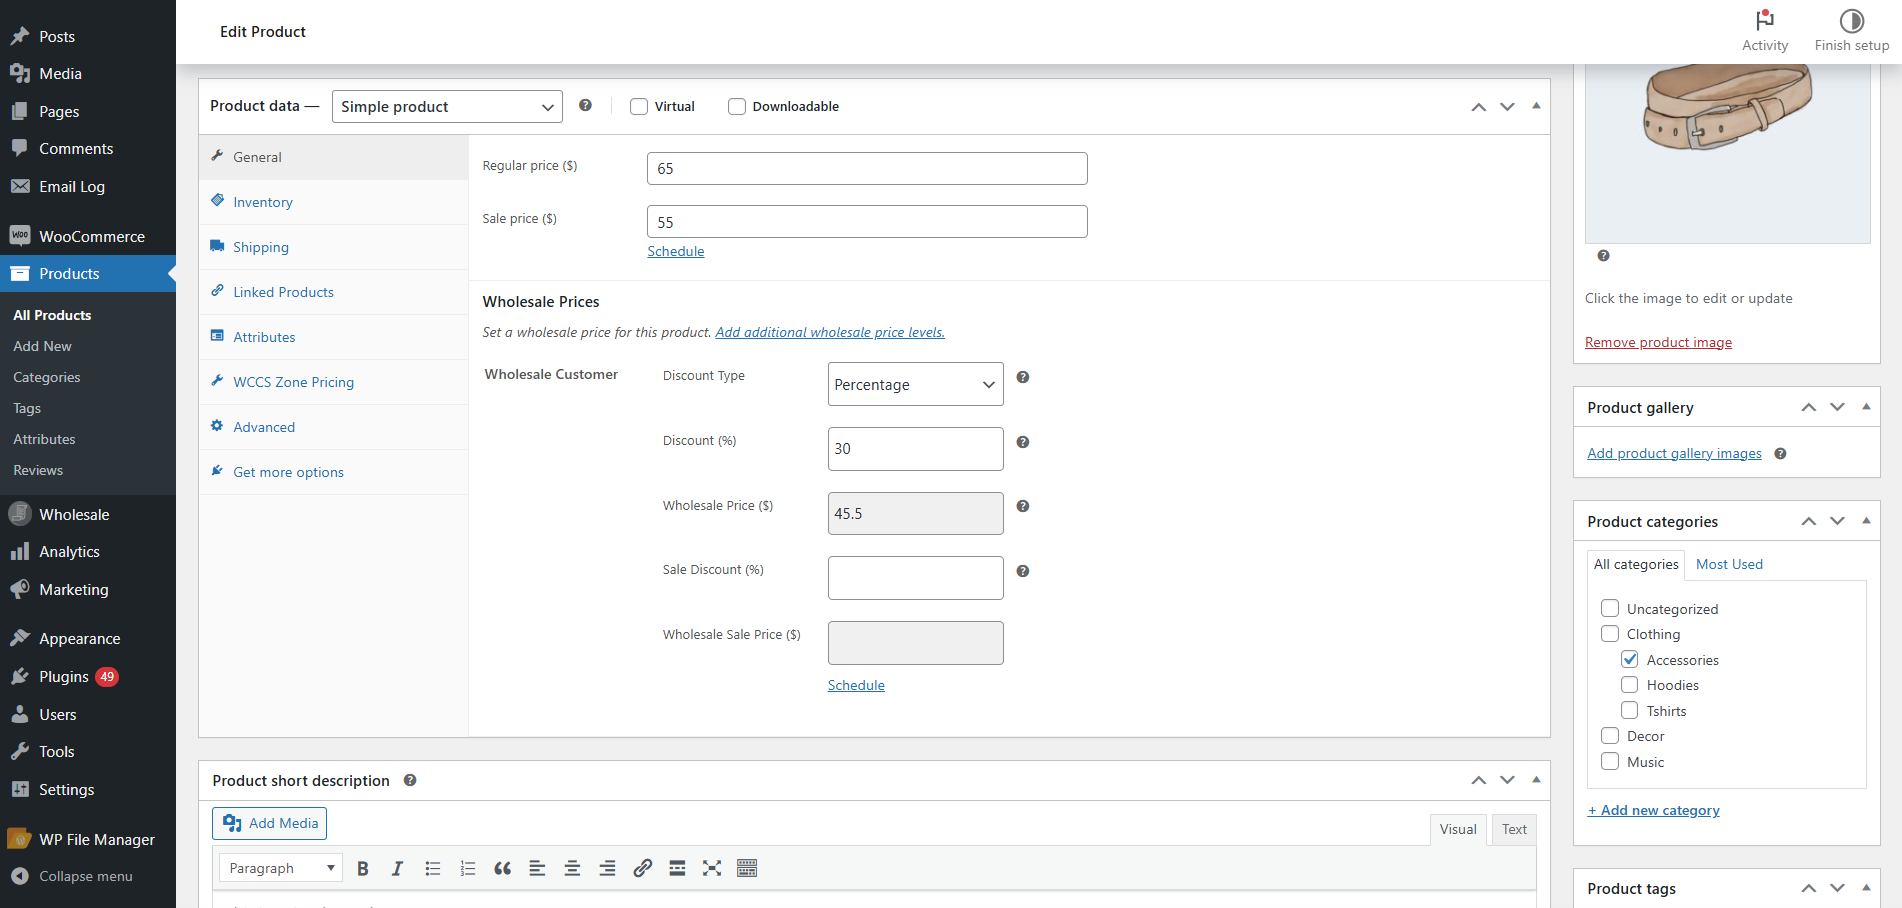
- Or select discount type as Percentage from the Discount Type drop down.
- Add the Discount %.
- Add the Sale Discount % if needed.
- For more details and guides on how to use Wholesale Suite and how to set up wholesale prices and user roles, please visit the plugin documentation.
Front-End Impact
↑ Back to top- Navigate to the Shop page.
- Wholesale price Fixed discount type before switching the currency:
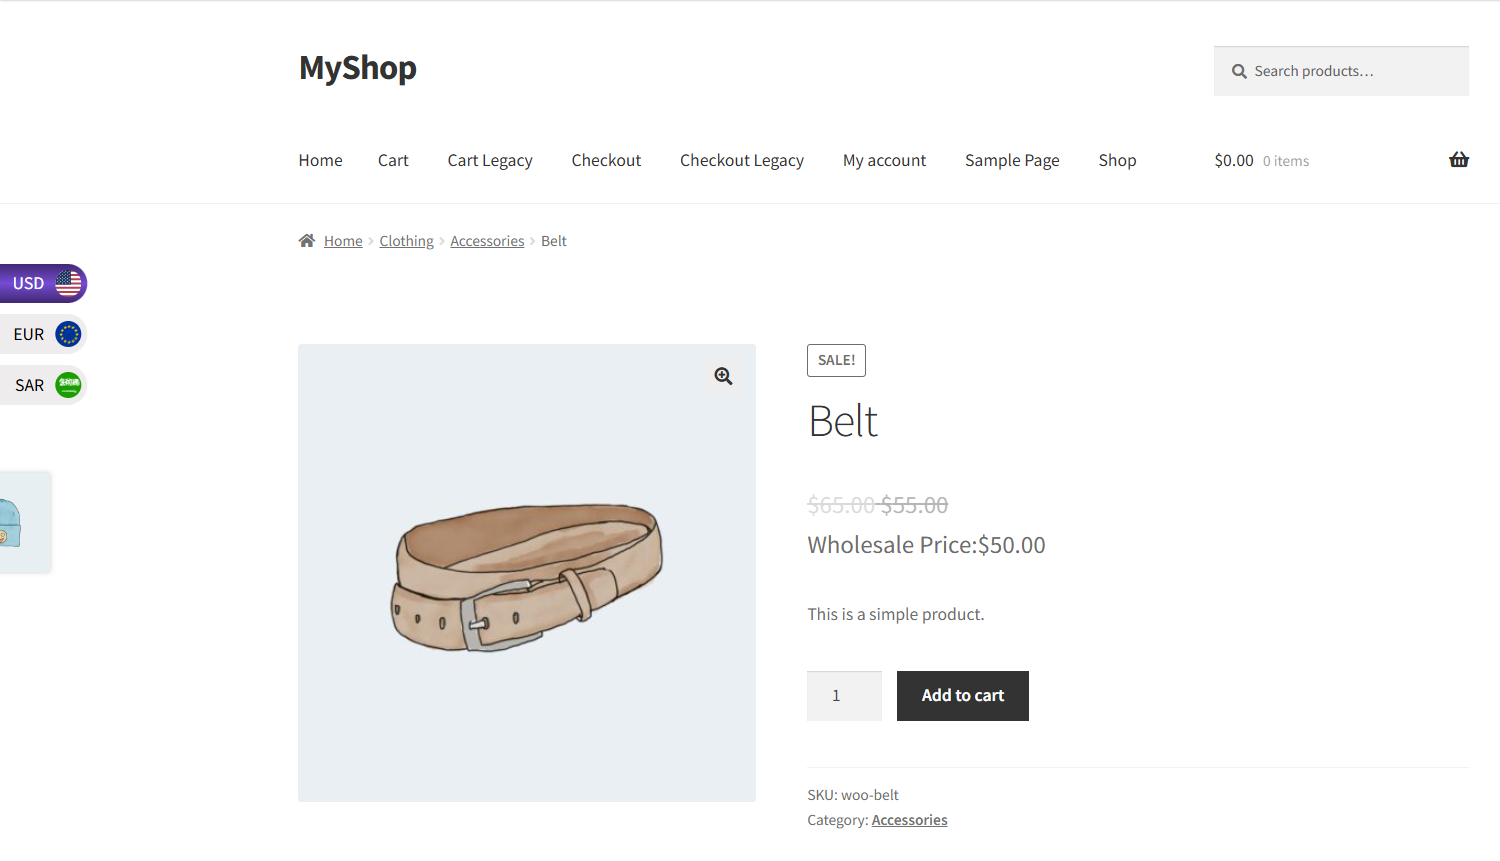
- Wholesale price fixed discount type after switching the currency:
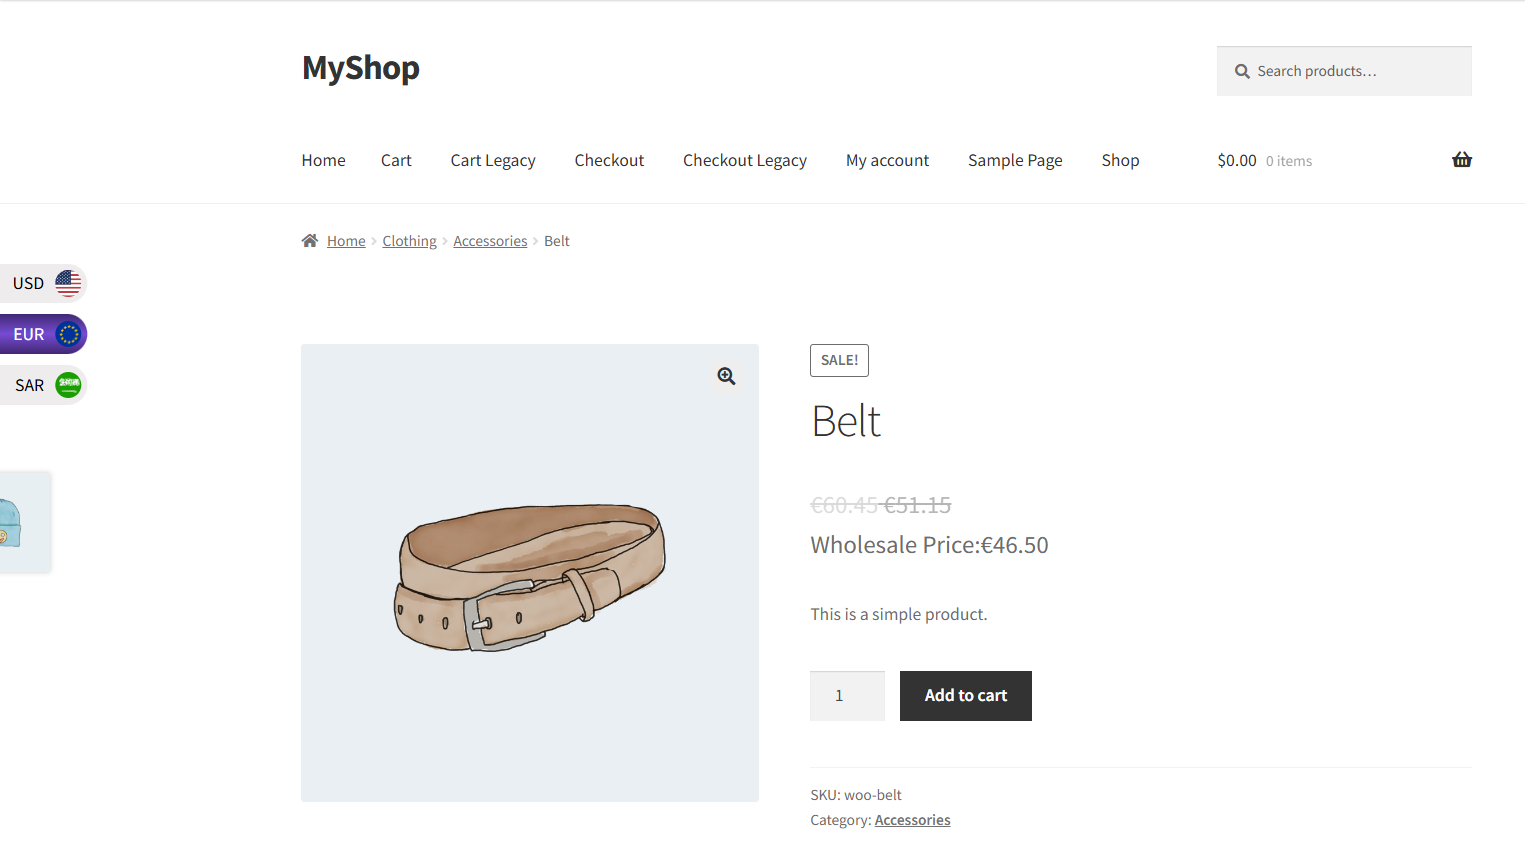
- Wholesale price Percentage discount type before switching the currency:
- Wholesale price Percentage discount type after switching the currency:

Compatibility With LiteSpeed Cache
↑ Back to top- Download the LiteSpeed Cache by clicking here.
- Install the plugin and Activate it.
- Go to the Admin Dashboard → WooCommerce → WCCS Settings.

- Navigate to Compatible With Cache Plugin.
- Click on the Enable radio button.

Note : Enable this option if you are using any cache plugin. Default is disable
Compatibility With Wp Rocket
↑ Back to top- Download the Wp Rocket by clicking here.
- Install the plugin and Activate it.
- Go to the Admin Dashboard → WooCommerce → WCCS Settings.

- Navigate to Compatible With Cache Plugin.
- Click on Enable Radio Button.

Note : Enable this option if you are using any cache plugin. Default is disable
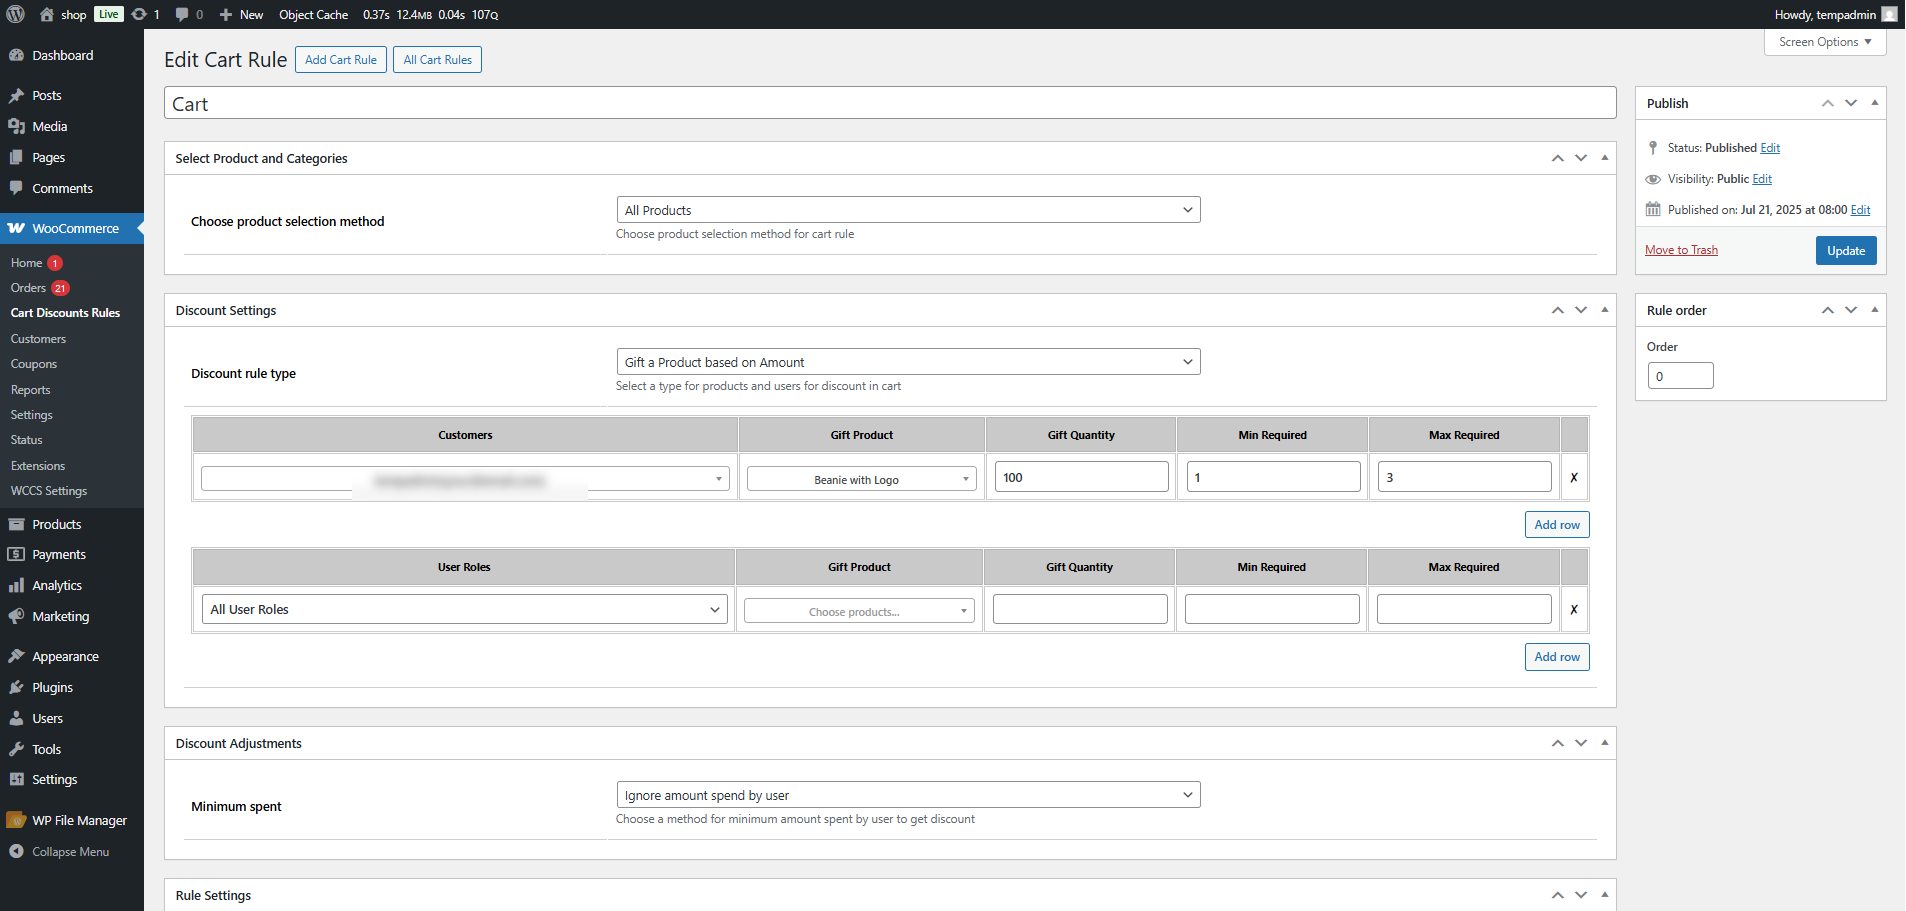
Compatibility with Dynamic Pricing (By Addify)
↑ Back to topThis feature ensures that the Currency Switcher works seamlessly with the Dynamic Pricing by Addify plugin. The Dynamic Pricing plugin applies Cart Discounts and Product Pricing Rules based on conditions such as:
- Quantity
- User roles
- Cart totals
- Specific customers
Back-end Configuration
↑ Back to top- Install and activate the Dynamic Pricing by Addify plugin
- For more details, visit the Dynamic Pricing by Addify plugin Documentation.
- Navigate to: WooCommerce > Cart Discount Rules.
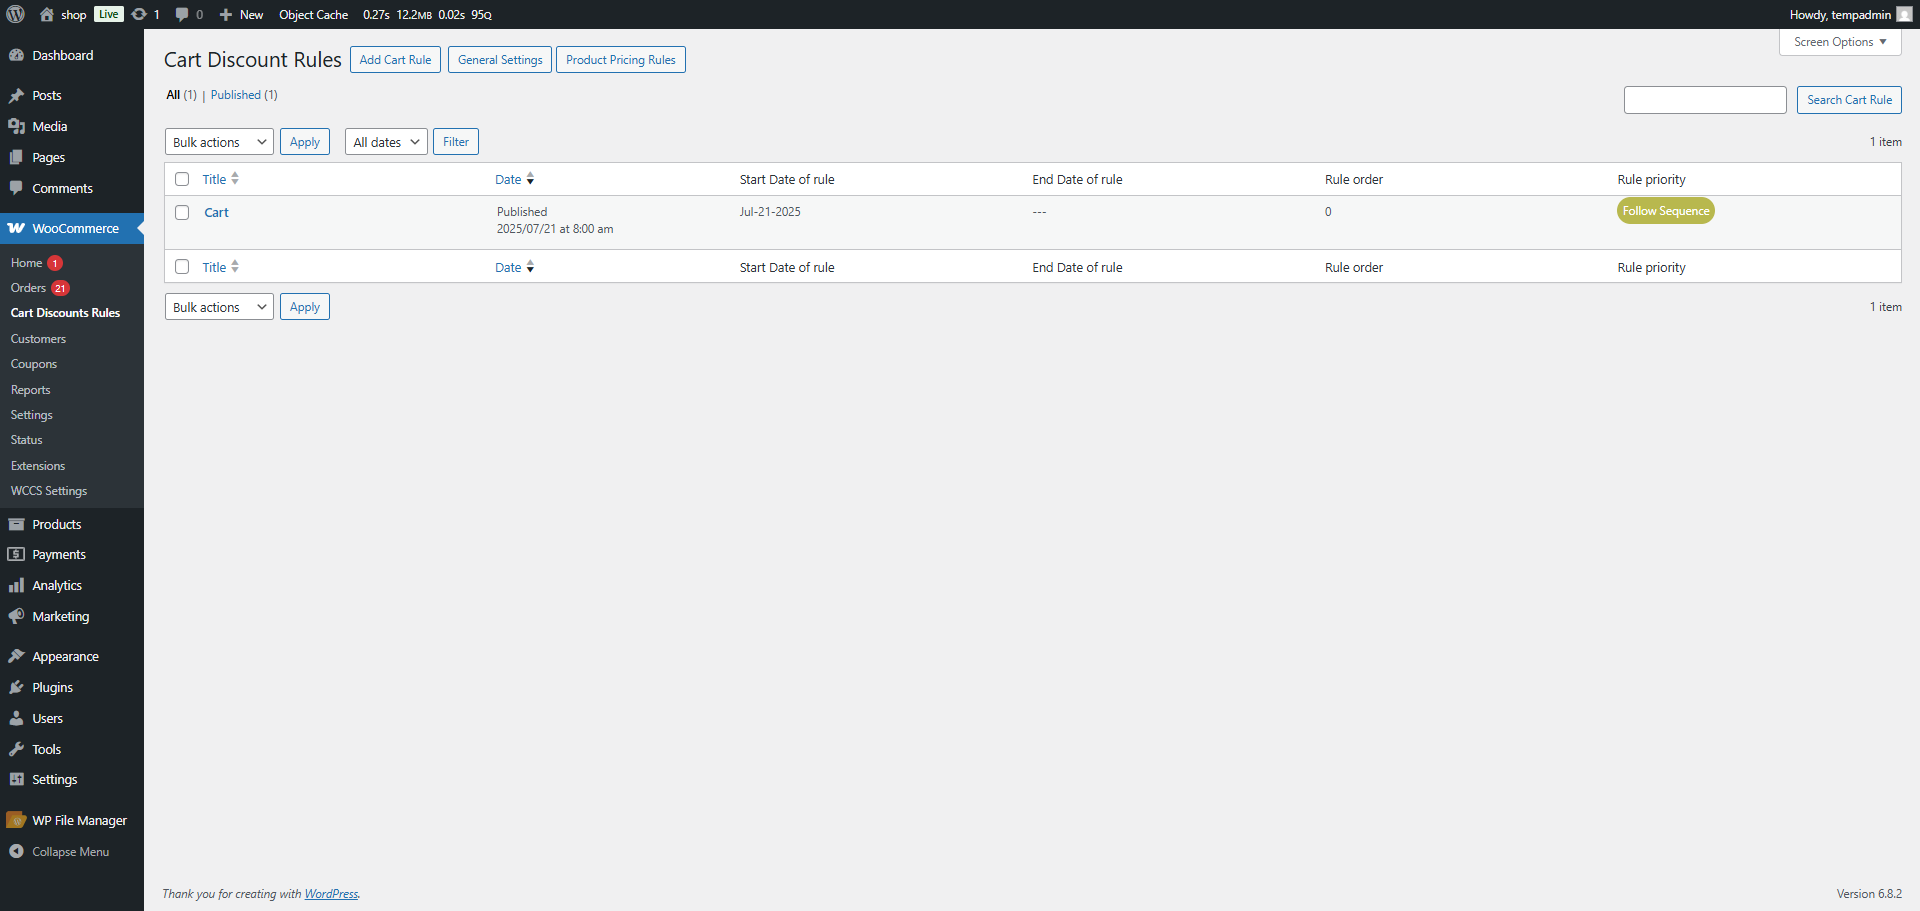
- Set up Cart Rules or Product Pricing Rules as per requirements.
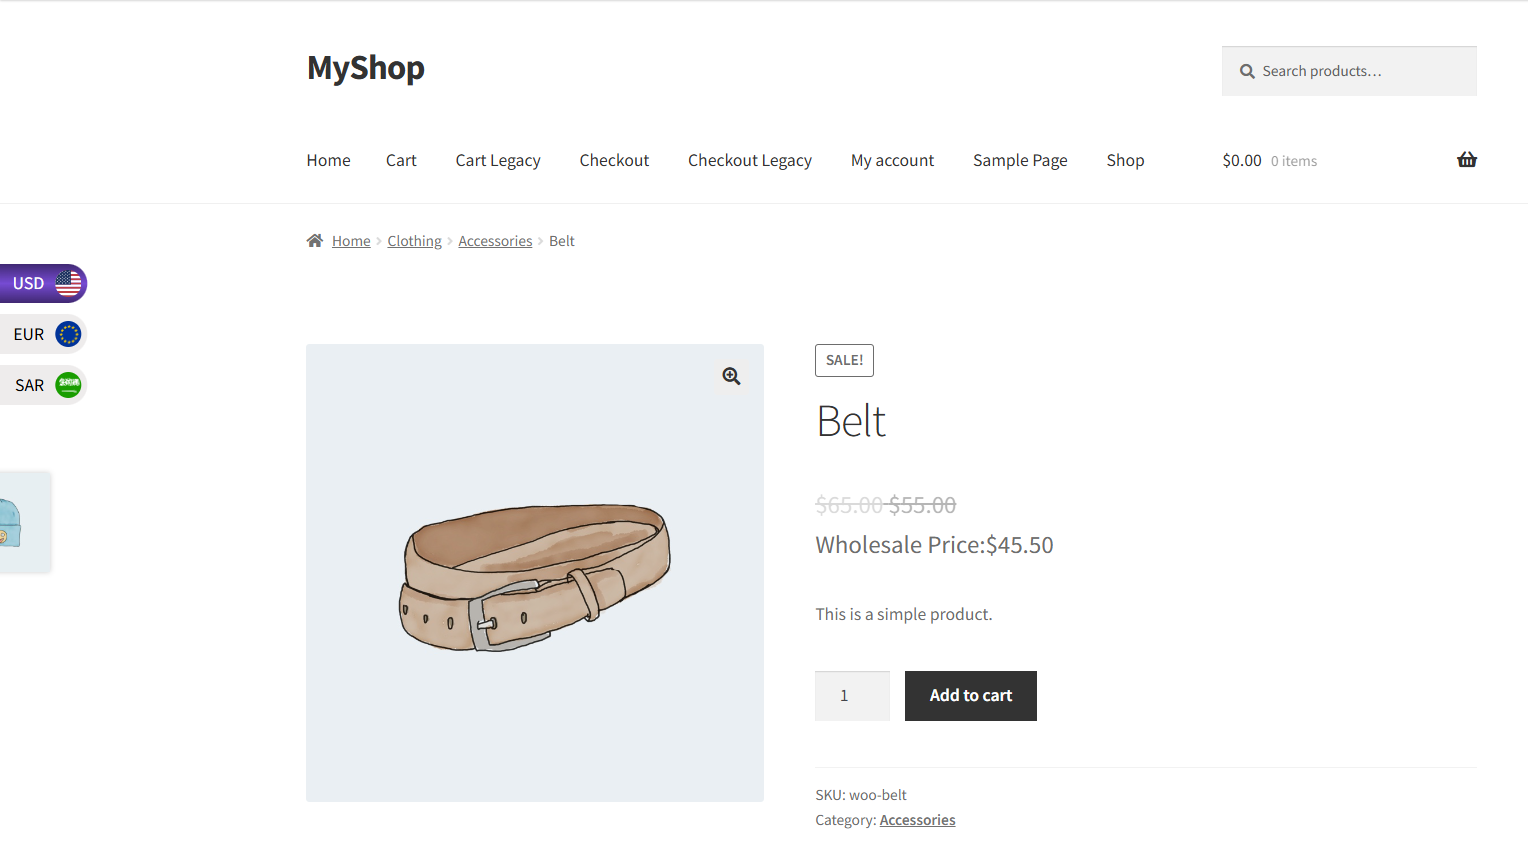
Front-End Impact
- Go to the Shop page.
- Navigate to a product that has Cart Rules.
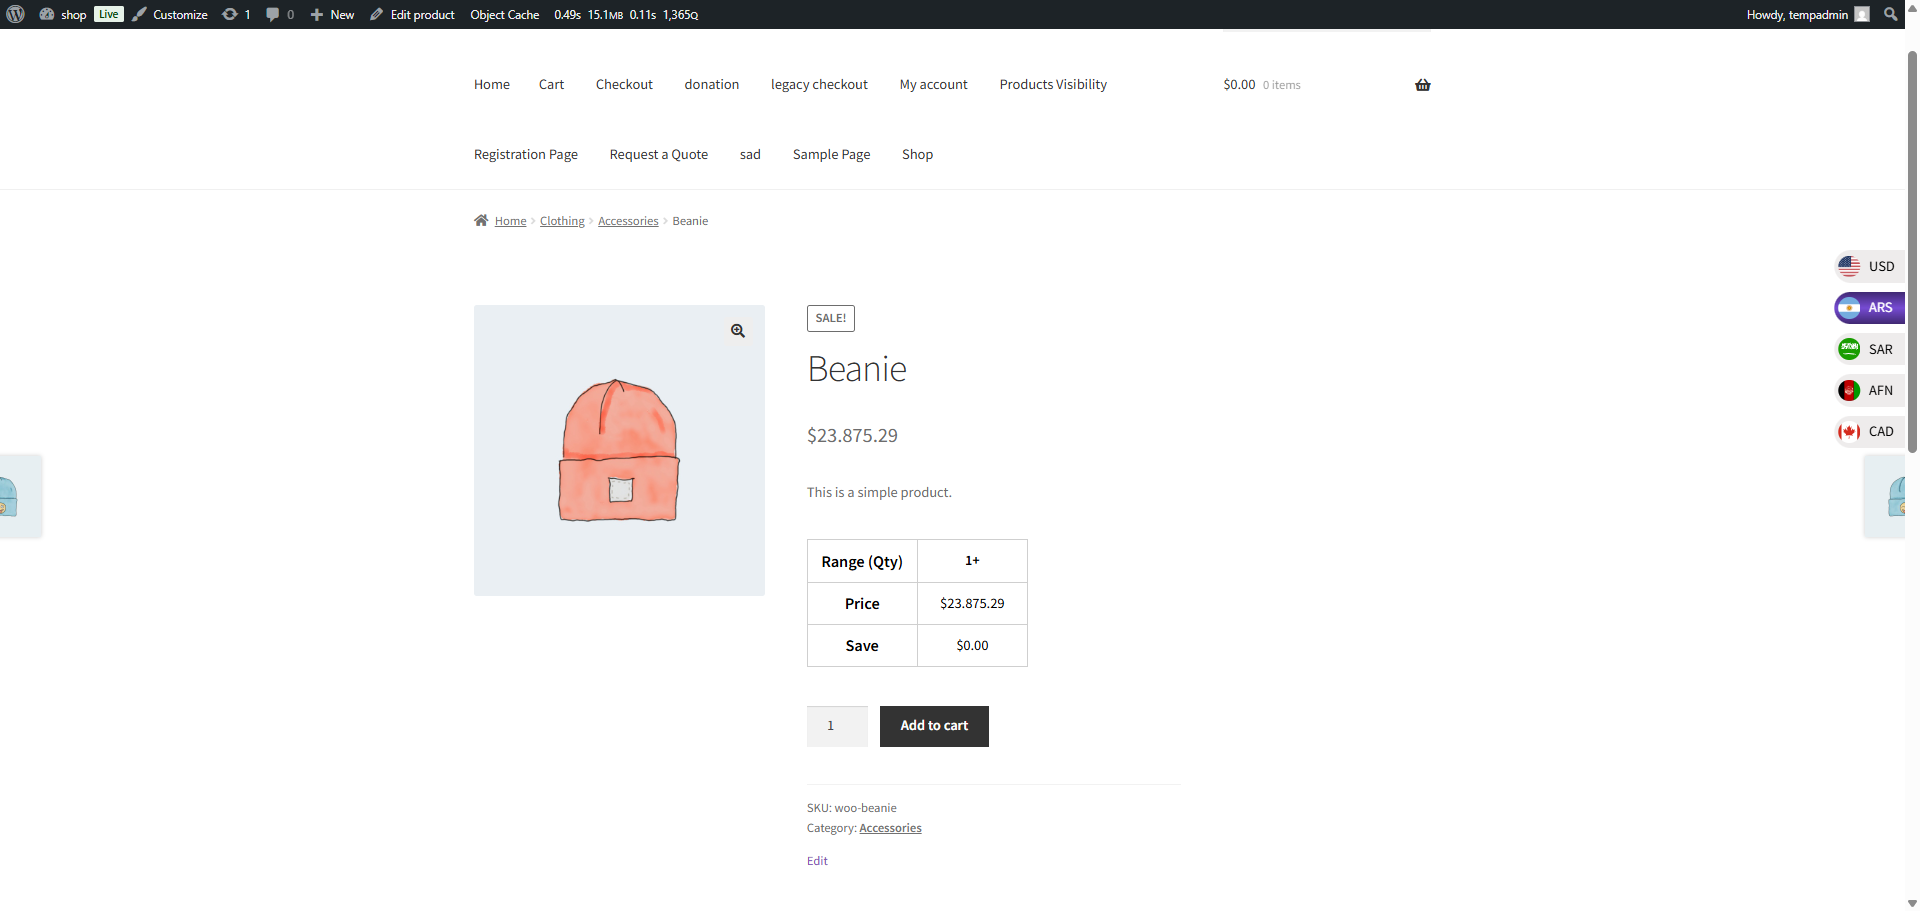
- When the customer switches currency using the Currency Switcher, the adjusted prices will update accordingly.