Requirements
↑ Back to topThe Jetpack plugin should be installed and connected to your site. New to Jetpack? Check out this support guide to get started with that.
Starting with Jetpack 12.3, Blaze needs to be activated under the Jetpack Feature modules page.
Or you need to install the Blaze for WooCommerce extension.
Blaze your content
Follow these steps to set up a Blaze campaign:
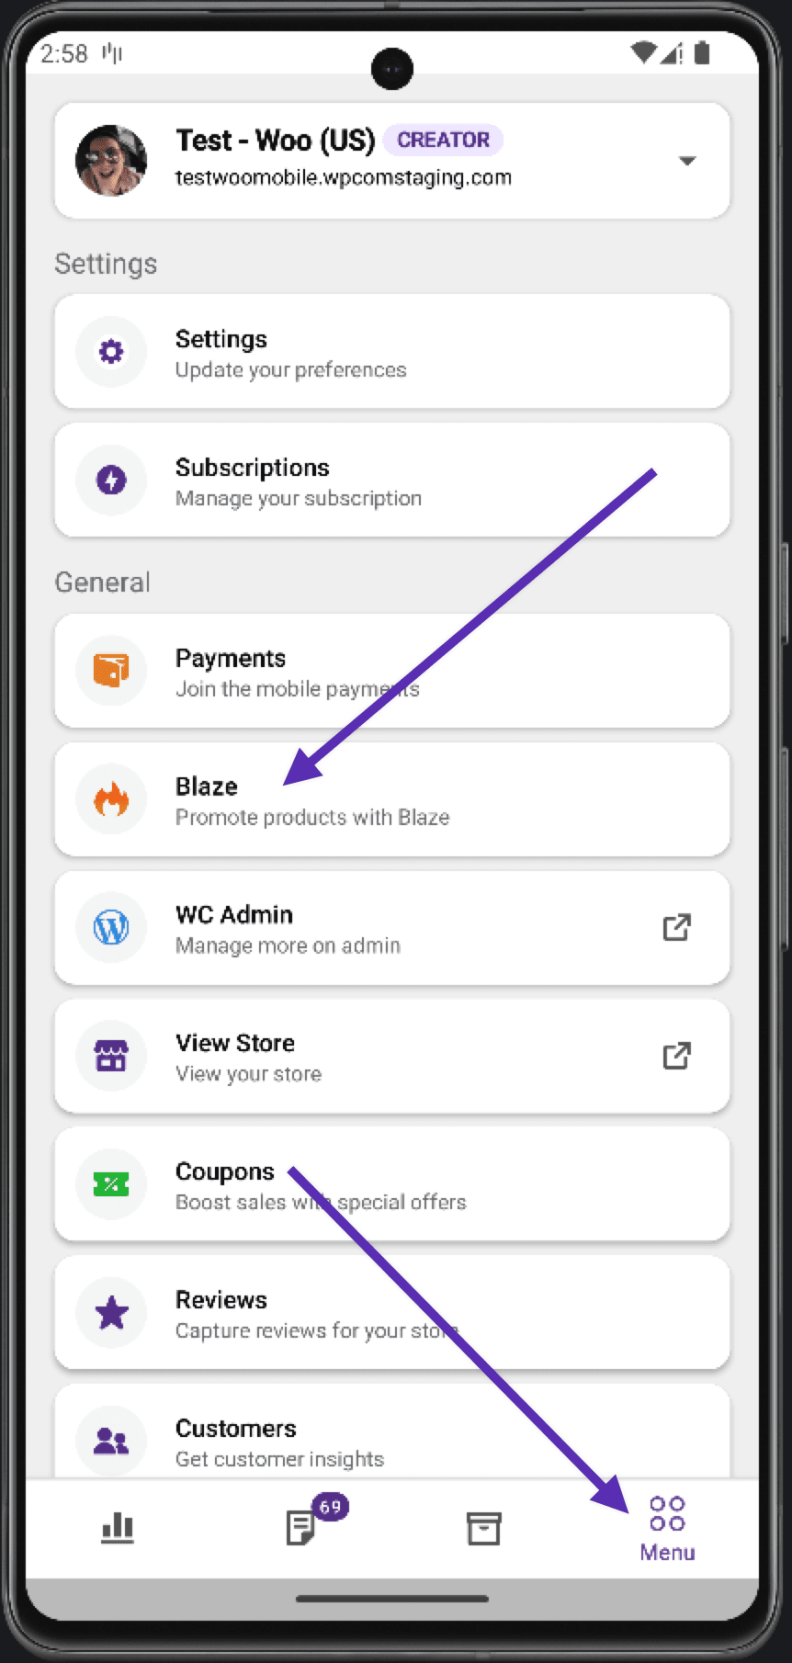
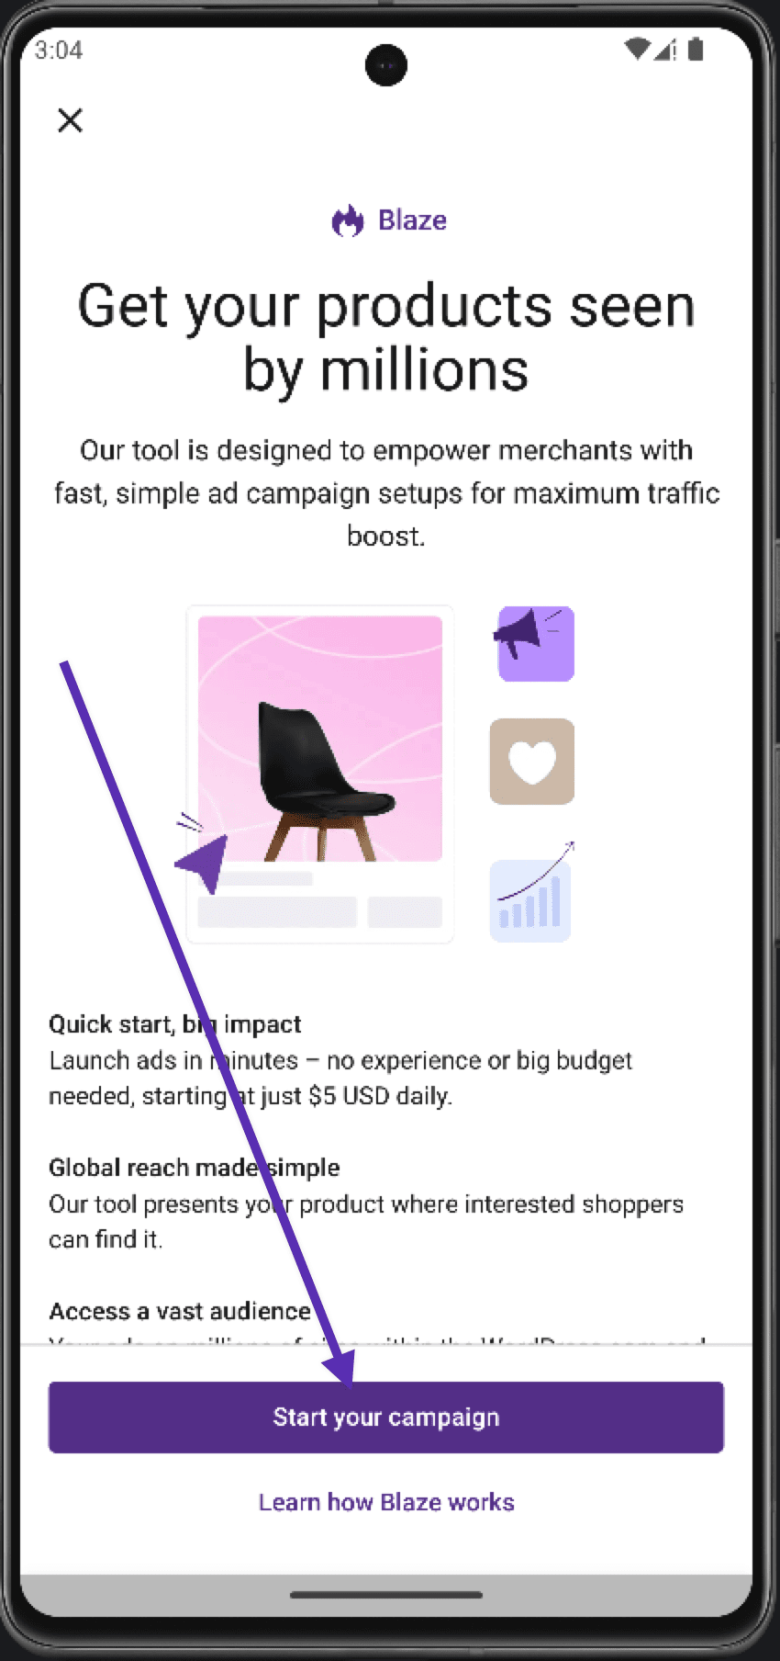
- Tap on the Menu tab, then click on Blaze. Click on the Start your campaign button.
2. Select the products you would like to promote and click on the Promote button

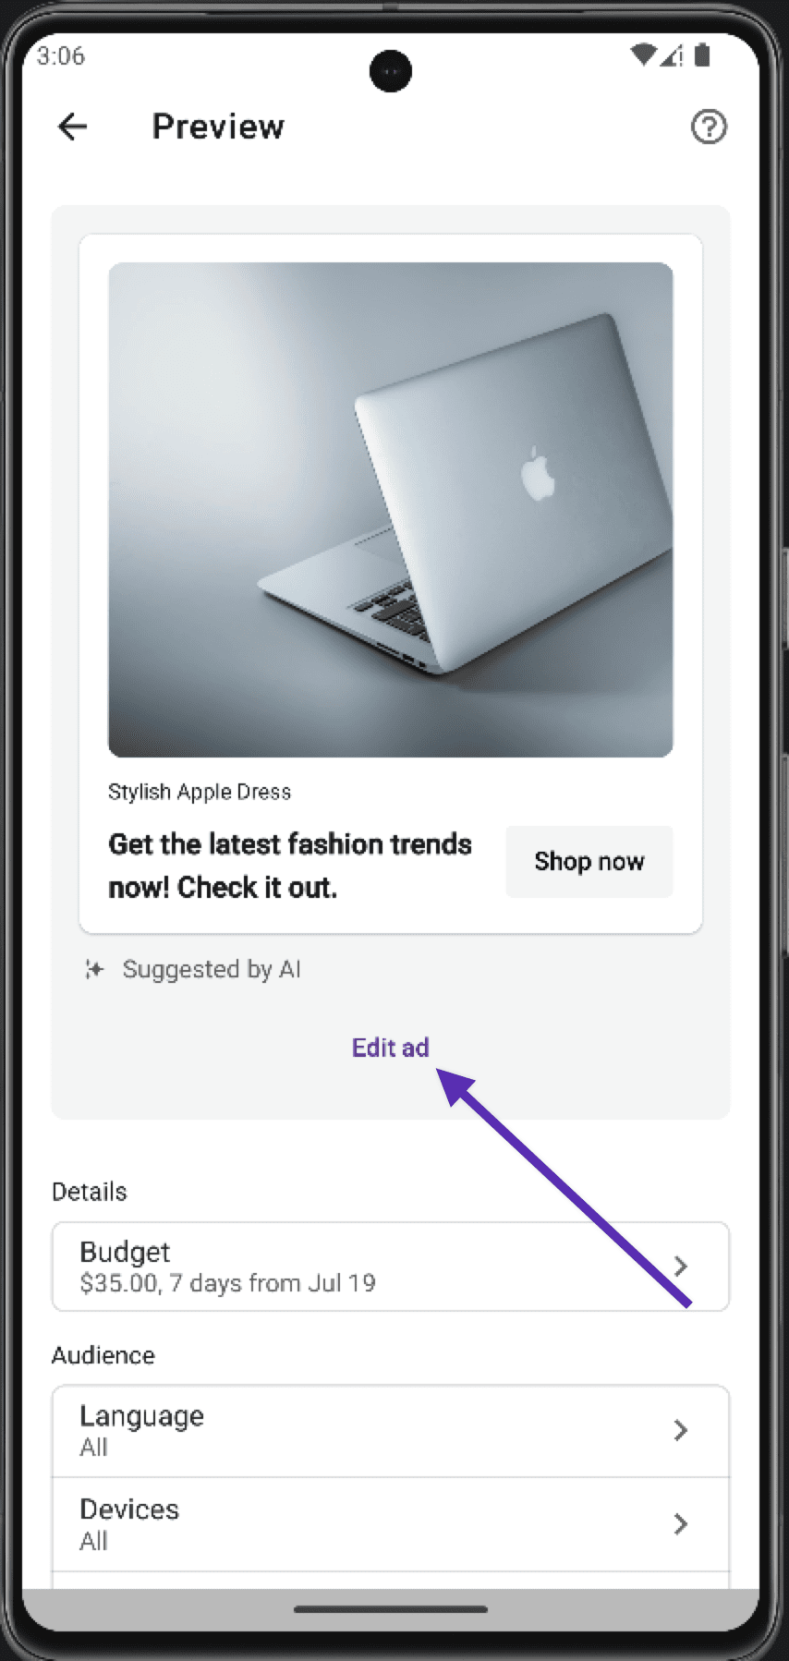
3. The next page will let you edit the ad if you need to. It determines how your Blaze campaign will look when promoted across the network. You can change the image, the product name and the description. Please note that images need to be at least 500 x 500 pixels for it to work.
- Change Image: Upload an image for your ad. This will be the post’s featured image by default, but you can upload a different one. You can also crop the image from here.
- Tagline: This appears just below your image and as non-bolded text. This can be the product name or something more catchy and will be truncated if it exceeds 32 characters. Use this to briefly describe what the ad is about.
- Description: A short text description of your product that appears underneath your image and title. You can write a maximum of 140 characters here. We recommend using this text to support the title and give viewers more context about what they will see when they click the ad and arrive at your content. You can also use it to capture their attention.

4. Next is the Details session. Clicking on the Budget tab you can control how much you would like to spend on your Blaze campaign.
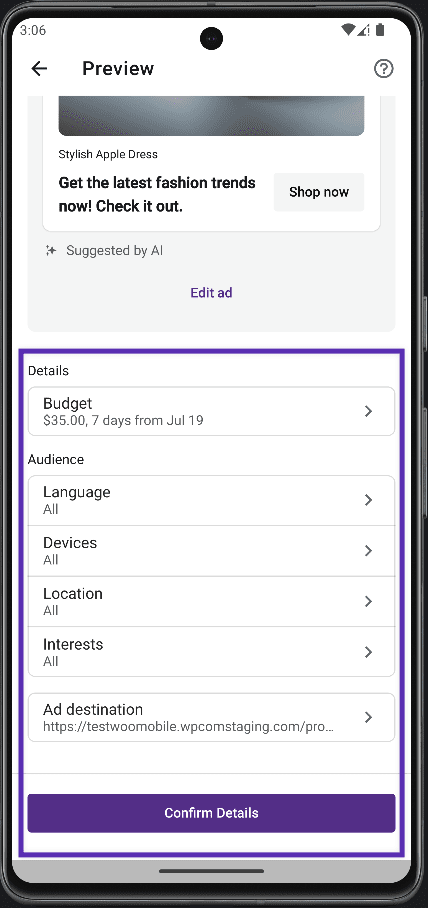

5. From the Audience session you can choose who will see your ad by adjusting the following:
- Language: Select the target language(s) spoken by your intended audience. You can select more than one target language here and can choose All languages to target all available languages.
- Devices: You can choose between mobile devices or computers ( both desktops and laptops)
- Interests: Choose the interests of your intended audience using the dropdown. Select All topics to show your post to all potential viewers regardless of their interests.
- Location: Select geographic areas where your post will be promoted. You can narrow down your audience or select Everywhere to show your post to all potential viewers regardless of their location.
As you adjust your settings on this screen, your ad preview will reflect your choices and provide you with an estimated reach for your campaign, which is the number of times your ad will be shown.
6. Click on the Confirm Details button
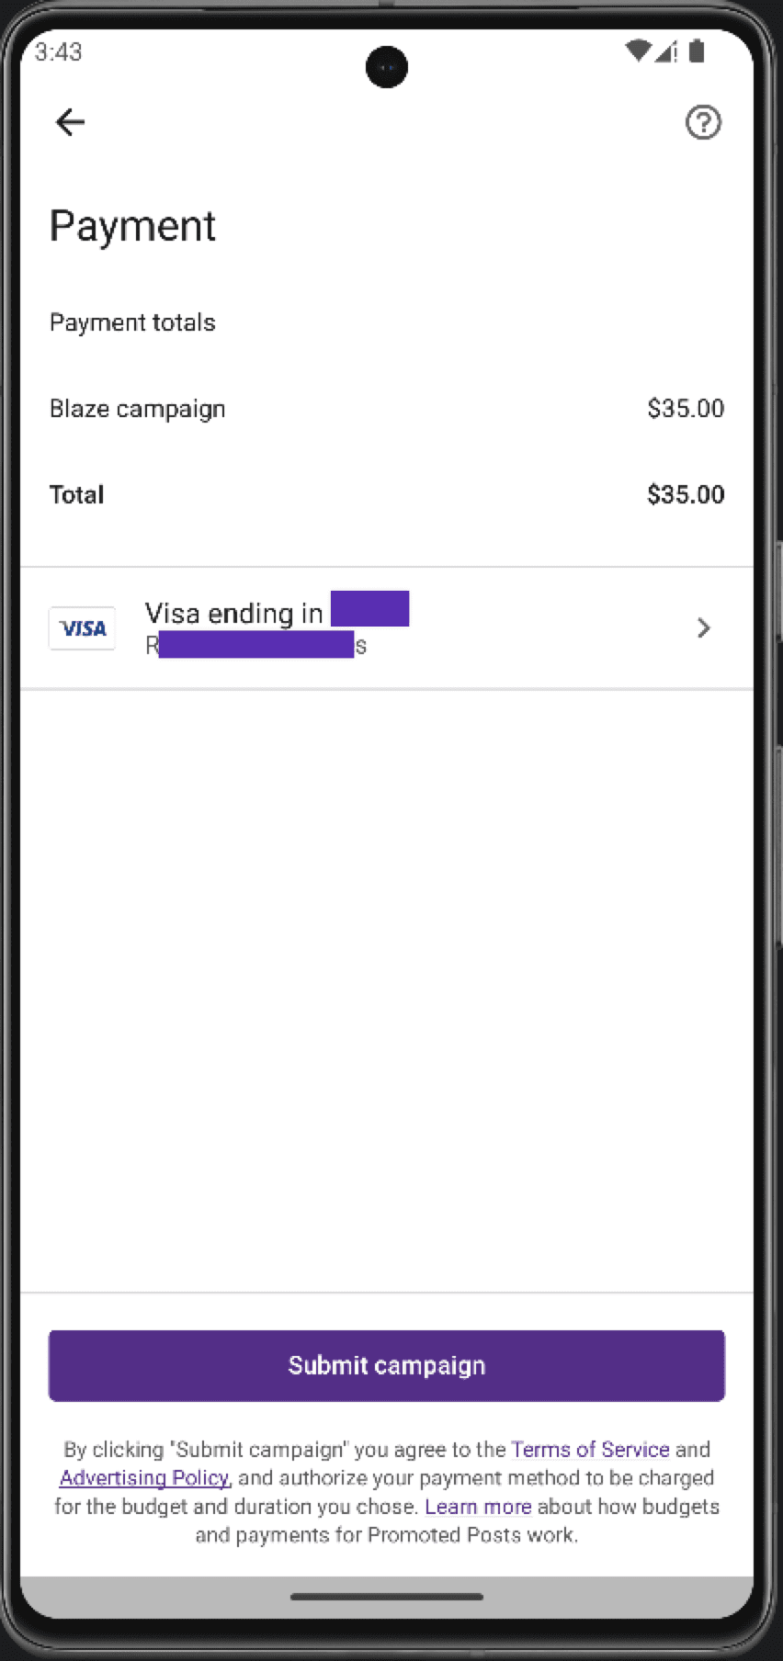
7. Review the Payment details and click on submit the campaign.
Cancelling a campaign
↑ Back to topIf you wish to stop a campaign, follow the steps below:
- Visit wordpress.com/advertising and click on the Campaigns tab.
- Click the downward arrow to the right of the campaign you’d like to stop.
- Click on the Cancel campaign link in the bottom right corner.
Once a campaign has been cancelled, it will stop running, with no option to restart it.
If you need to edit a campaign that’s already submitted, you can cancel that campaign and create a new one with the necessary updates, then submit that for approval.
Still experiencing issues?
↑ Back to topIf you’re using the Jetpack plugin to connect the app to your site, make sure that the Jetpack connection is active and working correctly. You can verify some known issues or try reconnecting your site.
If you’re still having difficulty, please fill out our contact form to reach our support team from within the app by going to Menu > Settings > Help & Support > Contact Support.