The WooCommerce Customizer includes a couple different display settings for the Product Page and Product images. On this page you’ll learn how to:
- Configure the Sticky Add-to-Cart and Product Pagination features for single product pages.
- Configure product thumbnail sizes and cropping.
Product Page
↑ Back to topThe WooCommerce Customizer lets you choose how to display product pages. Navigate to Appearance > Customize > WooCommerce > Product Page, and you’ll find two display options for the product page:
Sticky Add-To-Cart
↑ Back to topThis is a small bar at the top of your browser window that includes relevant product information like the thumbnail, product title, price and the ever important Add to cart button. It comes into view once the standard Add to cart button has gone out of view in your browser window.
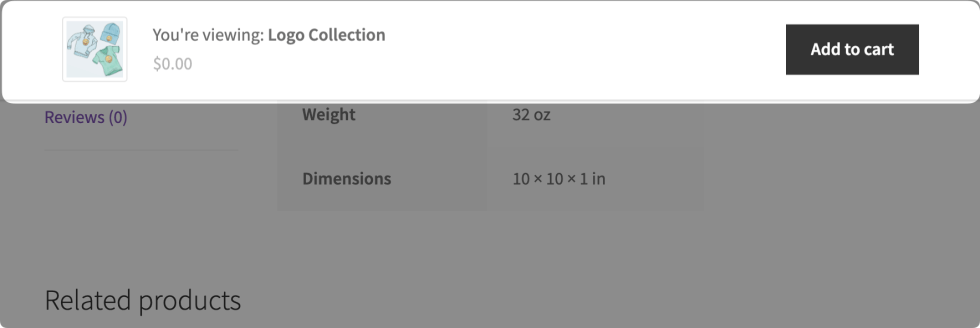
Sticky Add-to-Cart: A banner appears at the top of the product page when scrolling, allowing you to add the item to your cart without needing to scroll back.
Product Pagination
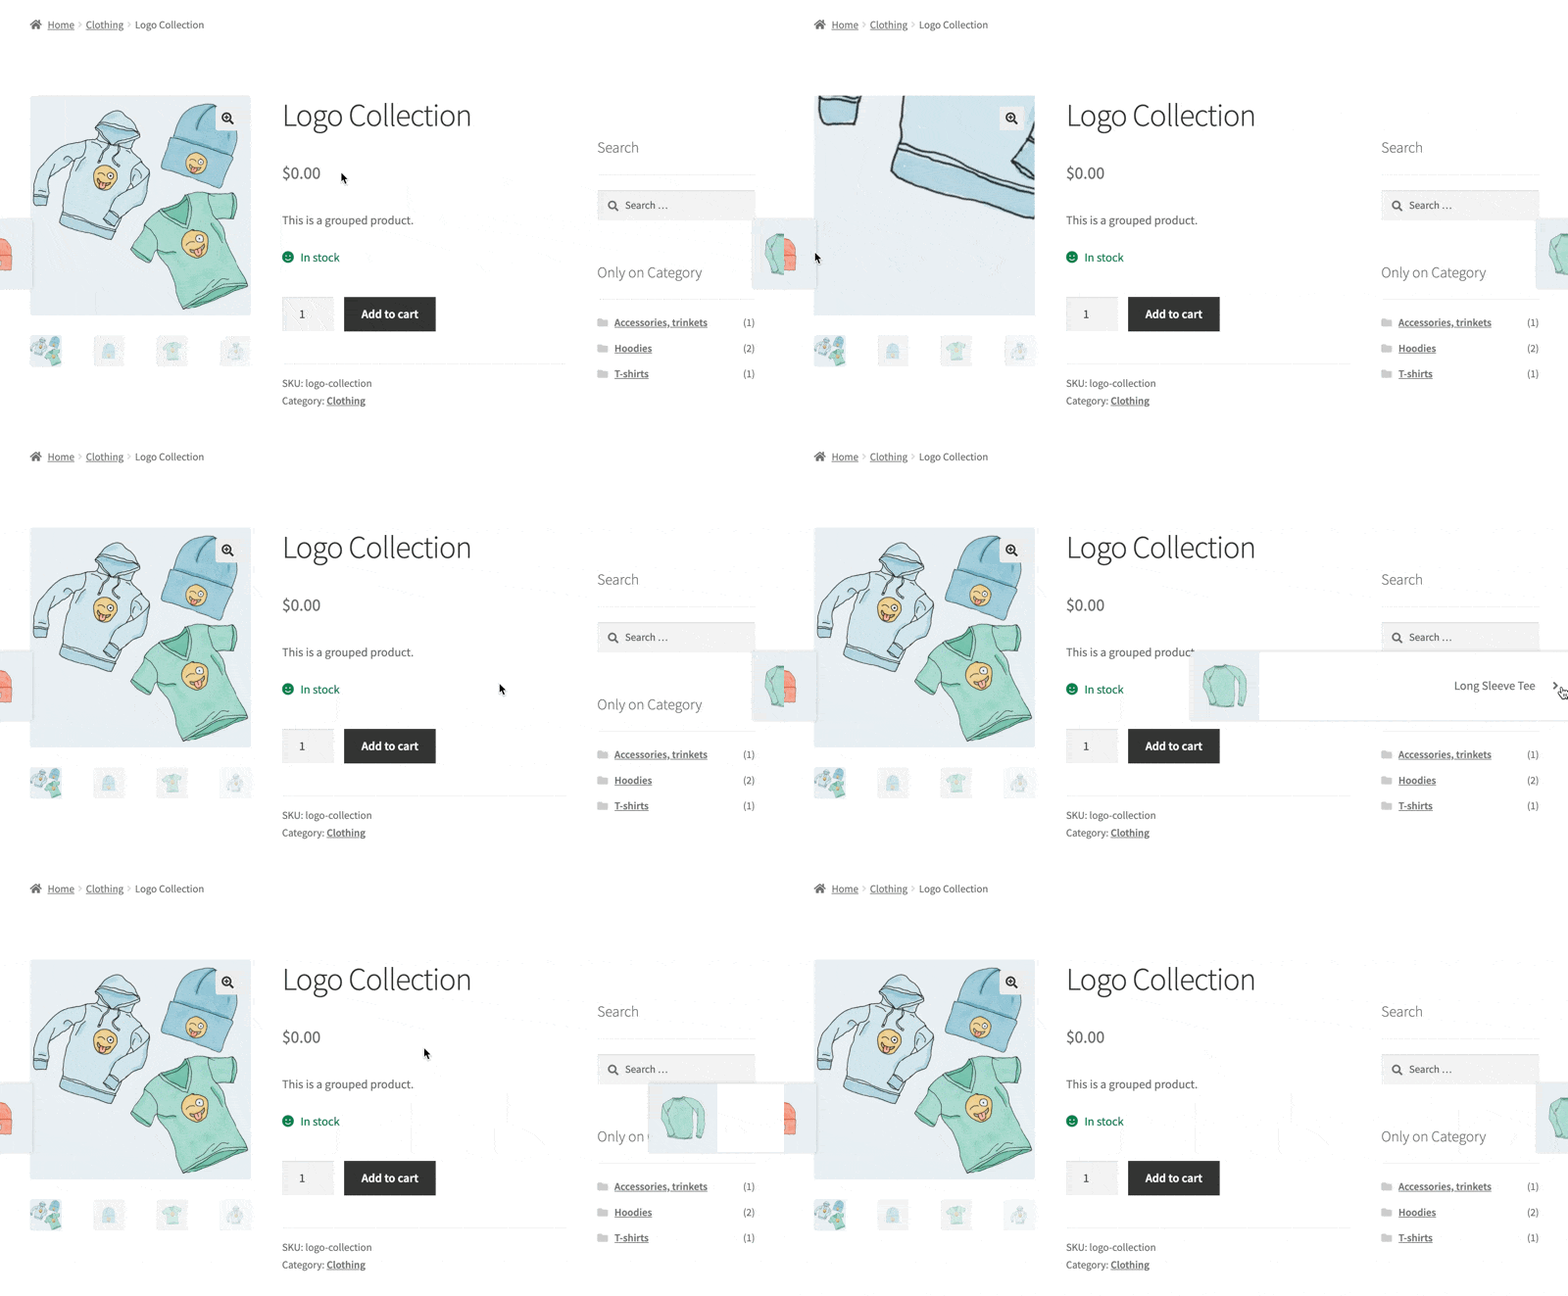
↑ Back to topThis option displays the next and previous product links on product pages by displaying a thumbnail image. Hovering on the thumbnail reveals the product name/title.
Product Images
↑ Back to topThe next menu item in the customizer is Product Images. Here, you set the size and cropping of Catalog and Thumbnail images.
Product Image Types
↑ Back to topFirst, let’s go over the different types of images that appear on a WooCommerce store:
- Catalog Images are medium-sized images on the Shop page, Category pages, and for Related products, Up-sells, and Cross-sells. The WooCommerce Customizer settings described below set the size and cropping for these images.
- Thumbnail Images are the smallest images used in the Cart, Widgets, and (optional) Gallery images underneath the Single Product Image on individual product details pages. The WooCommerce Customizer settings described below set the size and cropping for these images.
- Single Product Image is the largest image and refers to the main/featured image. Product Image settings in WooCommerce Customizer do not apply to these. To add, edit, or delete the Single Product Image or Product Image Gallery, see Adding Product Images and Galleries.
Resize and Crop Thumbnail Images
↑ Back to topUsing the WooCommerce Customizer, you can resize and crop thumbnail images. Follow the instructions below to choose thumbnail cropping options:
- Go to: Appearance > Customize > WooCommerce > Product Images.
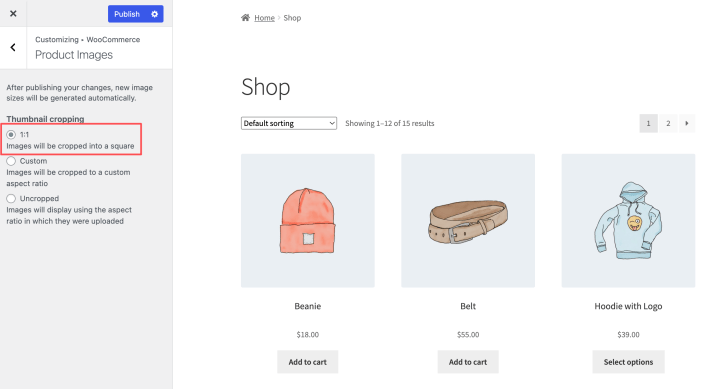
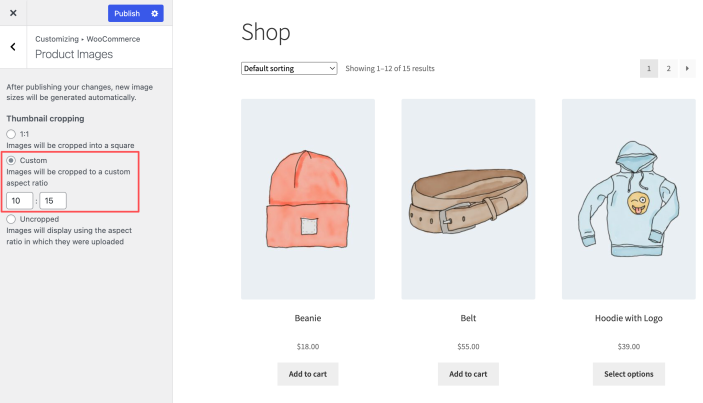
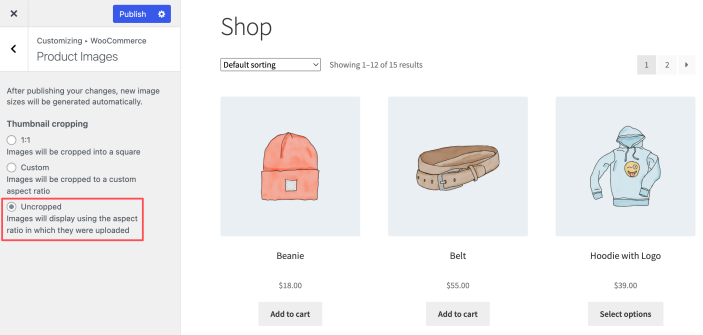
- Select one of the following cropping options:
- 1:1 — Square Images. All images appear as 1:1 squares.
- Custom — Enter a ratio for image cropping. In this example, the set ratio is 1:2. Notice that one image is not large enough to fit the selected ratio.
- Uncropped — Images appear as is, which can result in images appearing non uniformly.
- Test on different devices.
- At the bottom of the Customizer you’ll see 3 icons for Desktop, Tablet, and Mobile. Use those to preview your changes across device sizes.
- Select Publish to save and make your changes live.
Note:
If you need to regenerate thumbnails on your site, say when troubleshooting image changes or if you move to use a new theme. You can use the Regenerate Shop Thumbnails option at WooCommerce > Status > Tools:

Questions and support
↑ Back to topDo you still have questions and need assistance?
This documentation is about the free, core WooCommerce plugin, for which support is provided in our community forums on WordPress.org. By searching this forum, you’ll often find that your question has been asked and answered before.
If you haven’t created a WordPress.org account to use the forums, here’s how.
- If you’re looking to extend the core functionality shown here, we recommend reviewing available extensions in the WooCommerce Marketplace.
- Need ongoing advanced support or a customization built for WooCommerce? Hire a Woo Agency Partner.
- Are you a developer building your own WooCommerce integration or extension? Check our Developer Resources.
If you weren’t able to find the information you need, please use the feedback thumbs below to let us know.


