This scenario will walk you through using WooCommerce, WooCommerce Bookings, WooCommerce Subscriptions, Min/Max Quantities, and Smart Coupons to create a robust bookings offering with subscription-based payments.
Scenario
↑ Back to topYou run an appointment-based business and you’re interested in providing a subscription option for your customers. This set up would enable you to accept recurring payments for your appointments.
For example, if you’re a coach who sees your client 4 times per month and would like your client to pay on a monthly basis.
Extensions Used
↑ Back to topIn this use case, customers will subscribe for a monthly set of coupons that can be used to book their appointments.
Setup and Configuration
↑ Back to topCreating a Bookable Product
↑ Back to topFirst, we must create a booking product that will be used for these booking appointments. Follow these steps to create a bookable product:
- From your WordPress Admin Dashboard, navigate to Bookings > Add Product.
- Scroll down the page and under the Get started from scratch heading, click the Start from scratch button.
- This brings us to the booking product creation. Start by giving the product a name: “1 Hour Session with Coach”.
- Scroll down to the Product Data section and on the General tab, set the Booking duration field to Fixed Blocks of 1 Hour(s).
- Select the Availability tab and select these options.
- Ensure that the All dates are… field is set to not-available by default.
- Click the Add Range button and add Monday, Wednesday, and Friday.
- Set the time to be from 9:00 AM to 5:00 PM for each range.
- Set the Bookable field to Yes for each range.
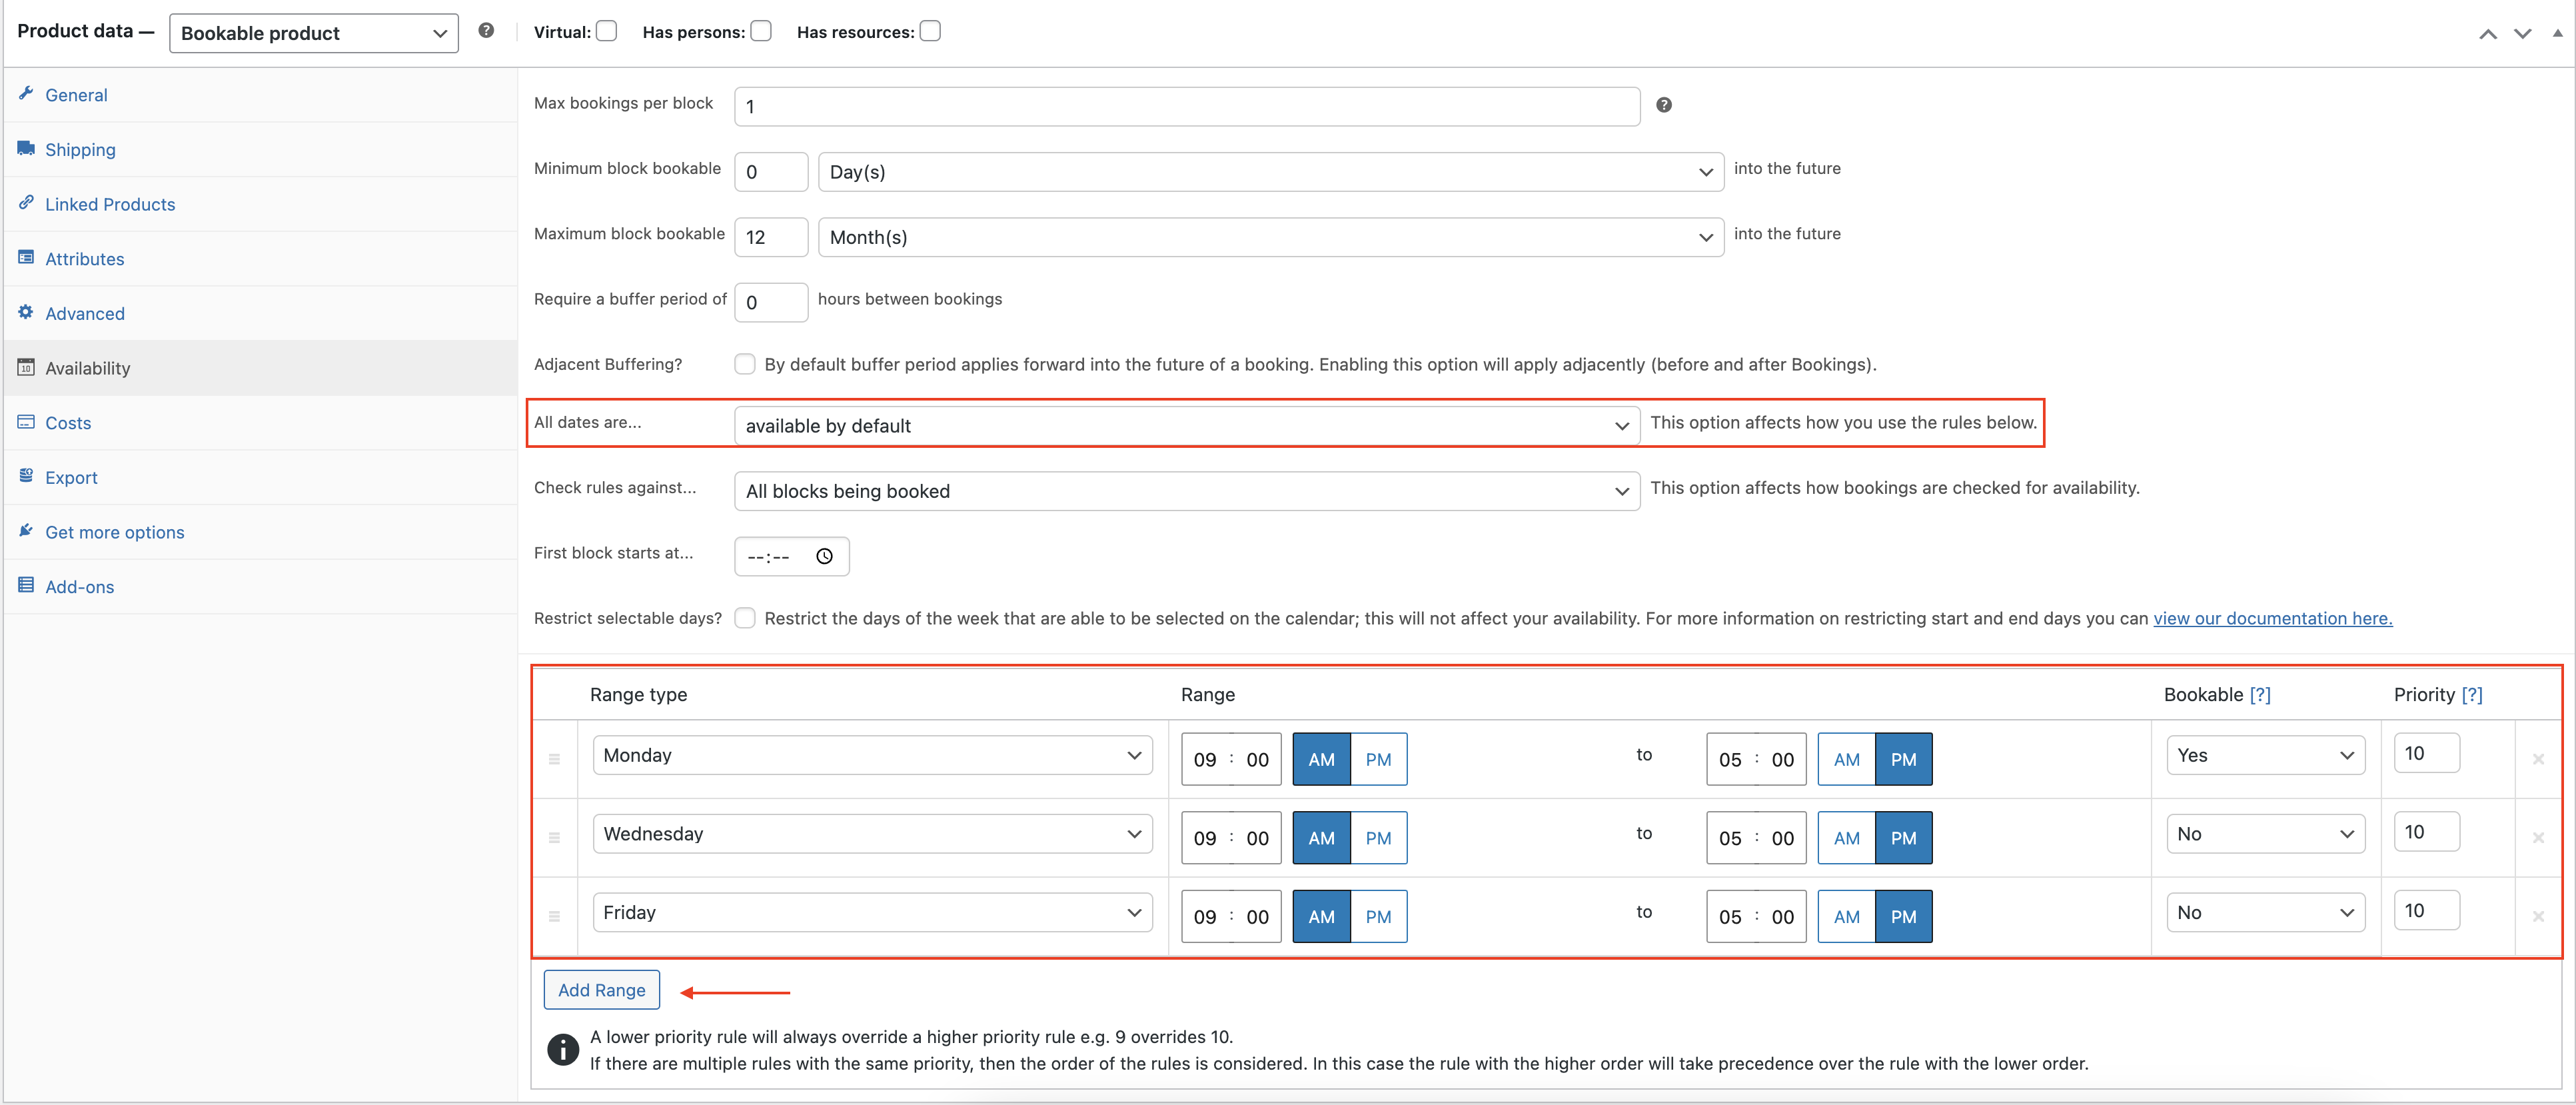
- Select the Costs tab and set the Base cost field to 100.
- Save the product by clicking on the Publish button.
Create Your Coupon With Smart Coupons
↑ Back to topThe next step is to create a coupon. For the purposes of this use case, we’ll be using the Smart Coupons extension. Please follow these instructions to create the coupon:
- From your WordPress Admin Dashboard, navigate to the Marketing > Coupons page.
- Then click on the Add Coupon button to create a new coupon. Configure your coupon as below:
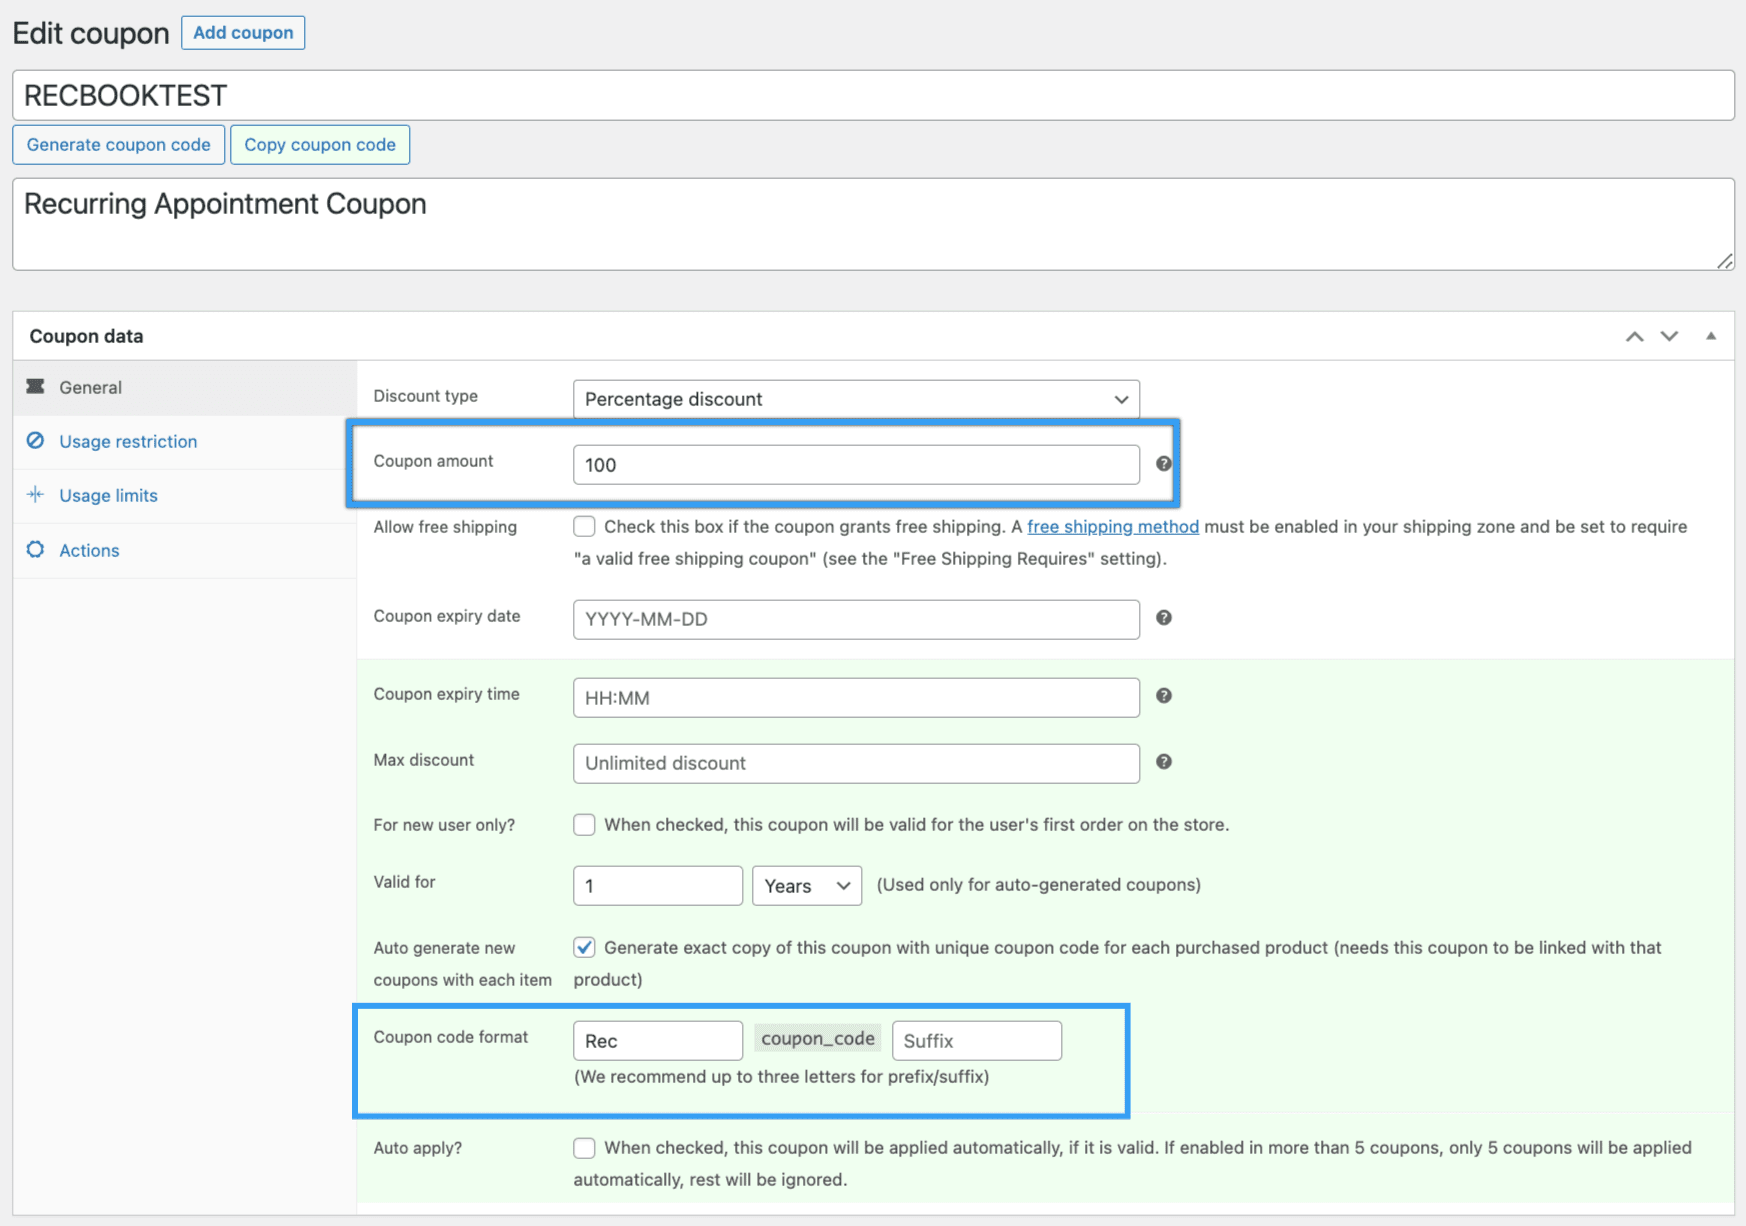
- General Settings
- Give the coupon a name of your choice.
- Set the coupon to be a percentage discount and set the amount to 100%.
- Optionally add a prefix or suffix — this can help make the coupon descriptive for the customer.
- General Settings
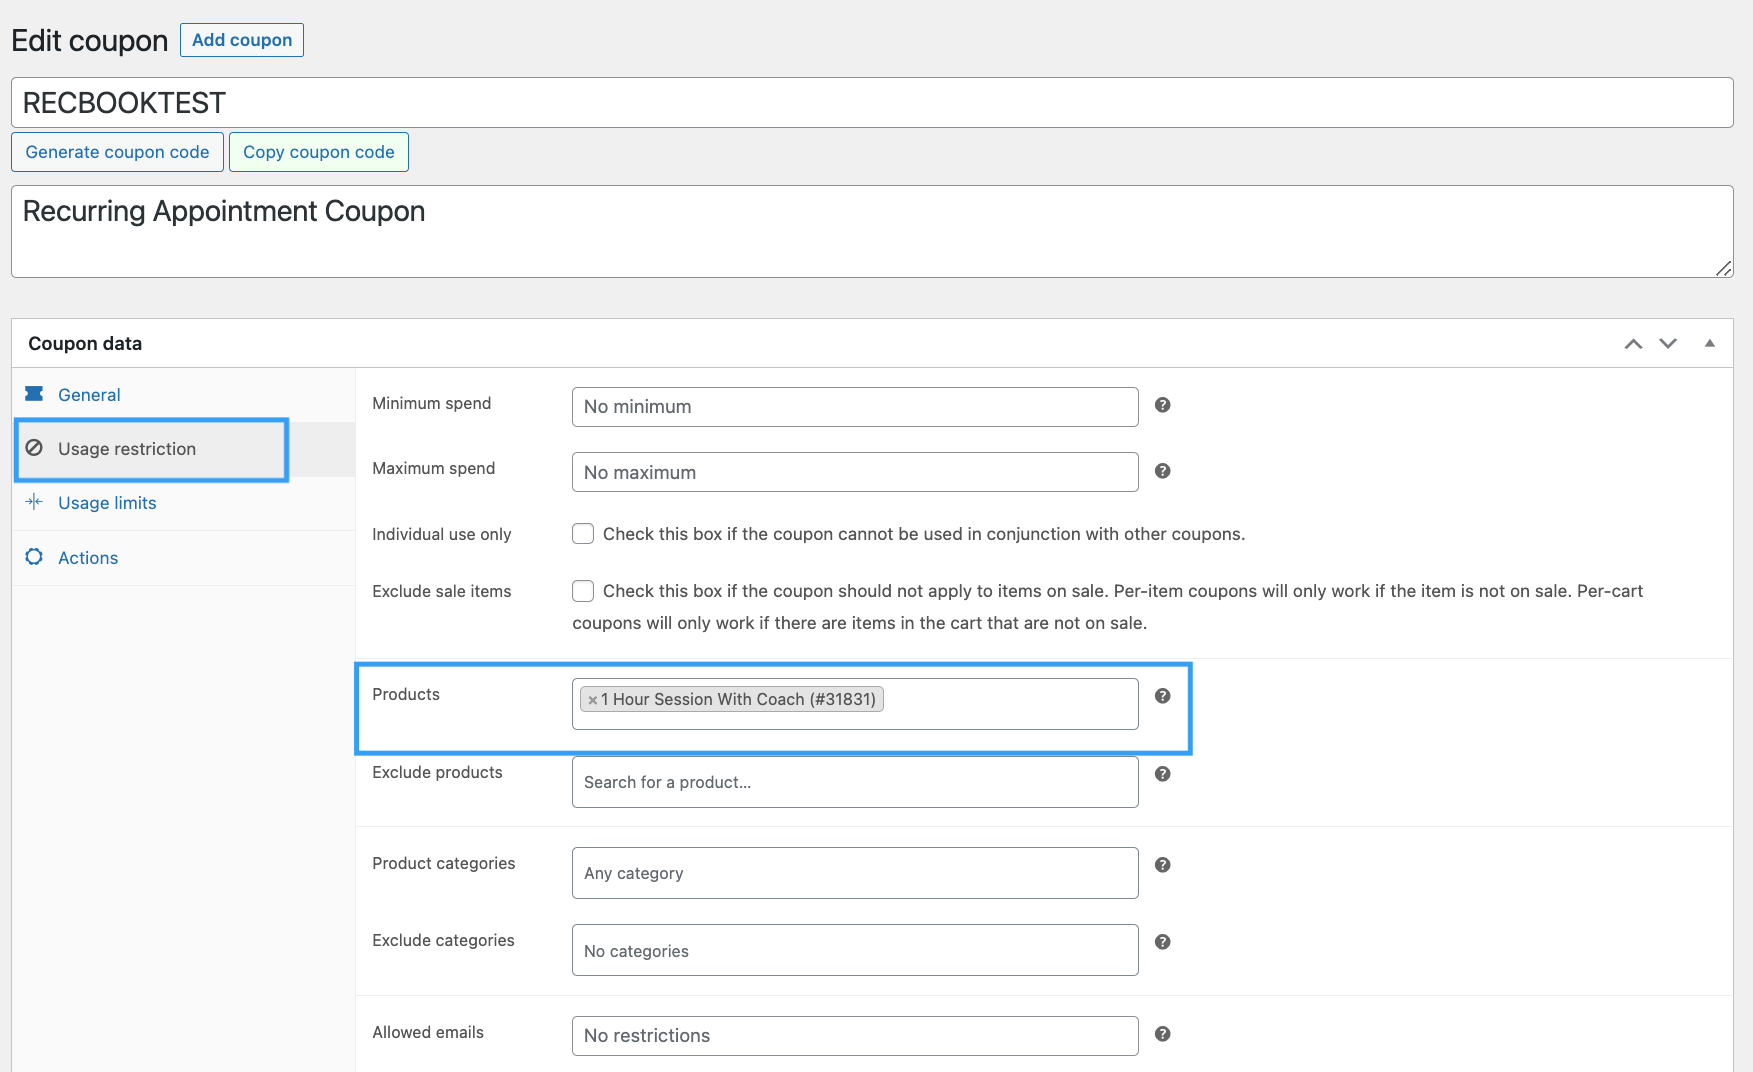
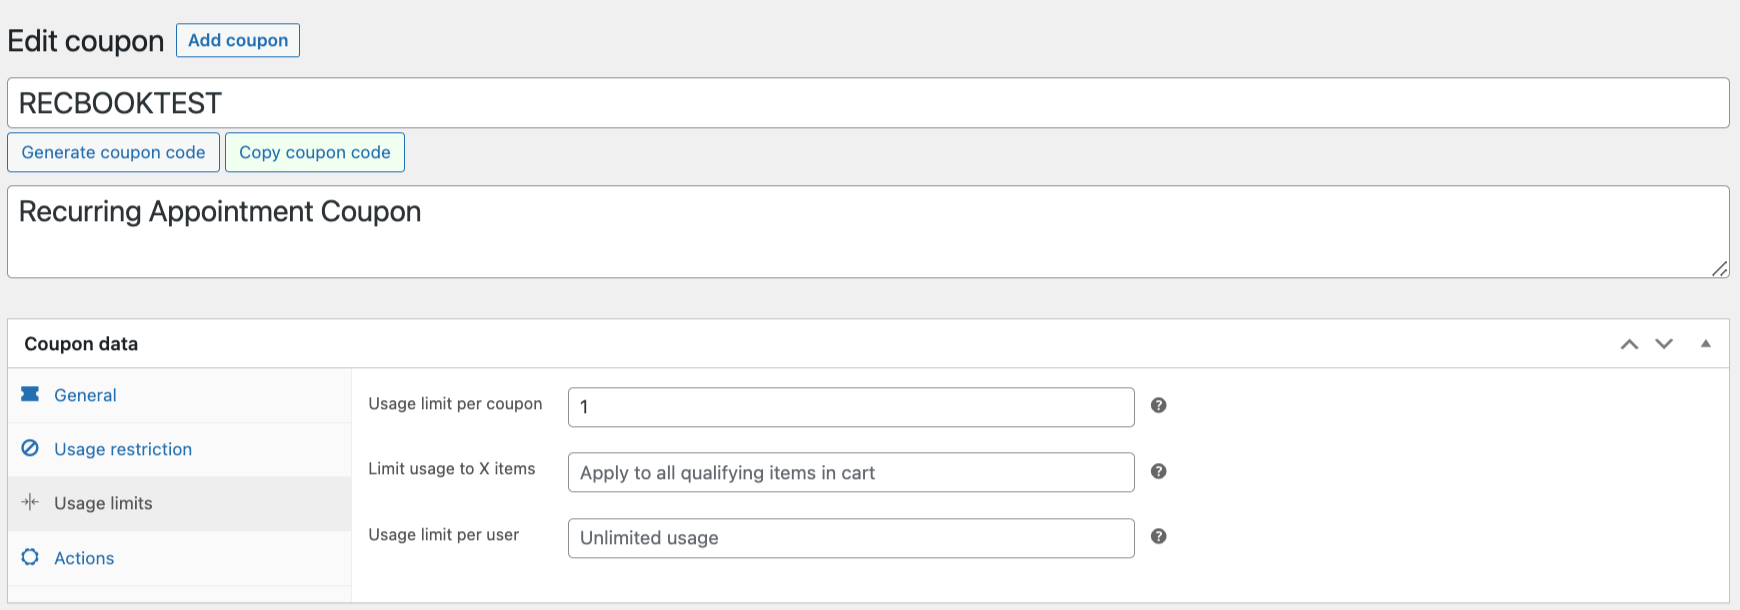
- Usage restriction
- In the Products section, include only the Bookable Product we previously created and no other products.
- Usage limits
- Set the usage limit for the coupon to 1 so that each coupon can only be used once:
Create The Coupon Subscription Product
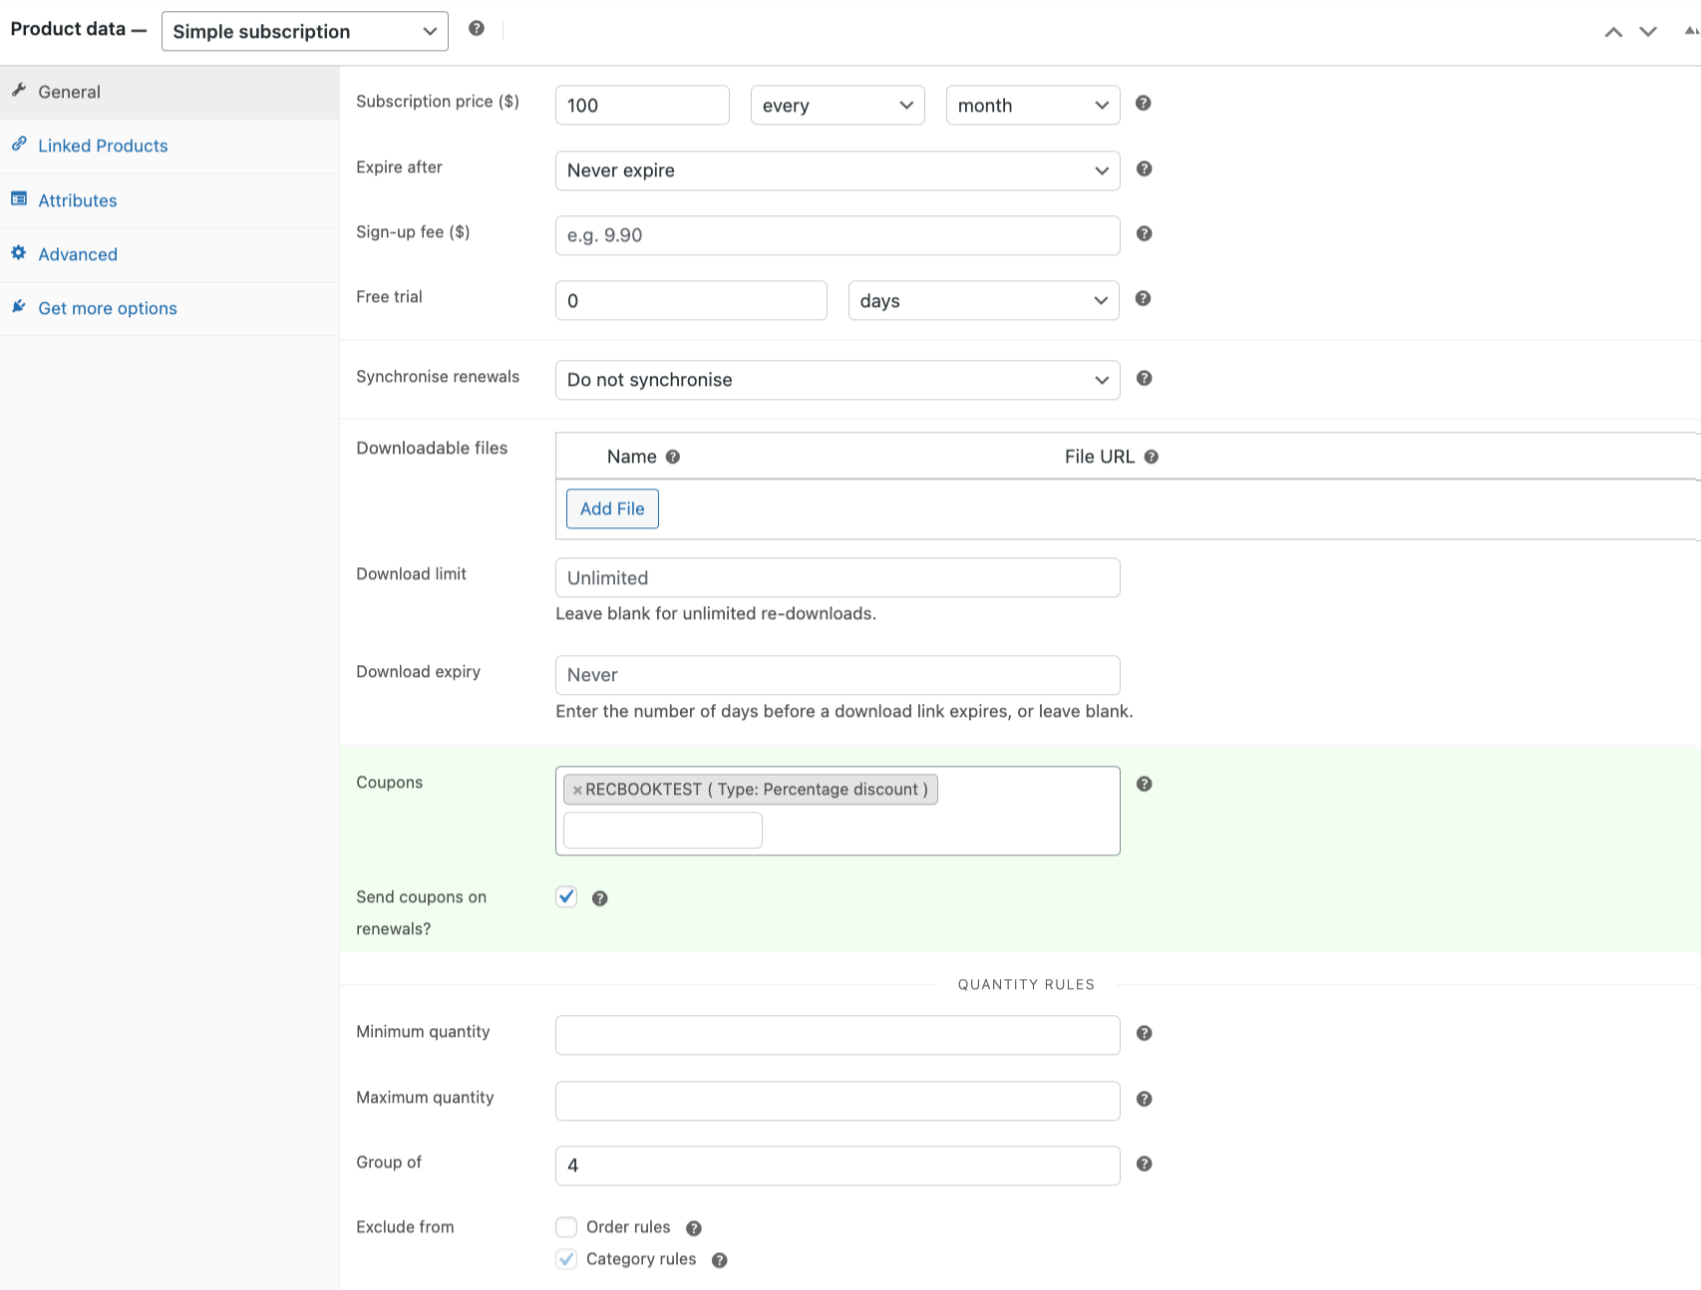
↑ Back to topCreate a subscription product from Products > Add New and set it up similar to the one below. In this product, each individual booking is $100, and the customer will be purchasing in groups of 4 – so they will be getting 4 coupons per month for bookings.
In particular, please note:
- This should be a simple subscription product. If there are no products to ship (in this example there aren’t) then it can be set to be virtual and downloadable
- The subscription price should be the price for each individual appointment. In this example, the customer would be purchasing a group of 4 per month and will pay $400/month.
- Add the coupon you just created, and ensure “Send coupons on renewals” is ticked.
- Set “Group of” to the number of appointments you would like someone to purchase per month. In this example, the customer is purchasing a bundle of 4 per month.
- If you did want to set up a variable subscription, please note that the “group of” setting applies to all variations of a variable product so this cannot be changed per variation.
Customer Experience
↑ Back to topPurchasing Coupons
↑ Back to topThe customer will start by purchasing their subscription for coupons.

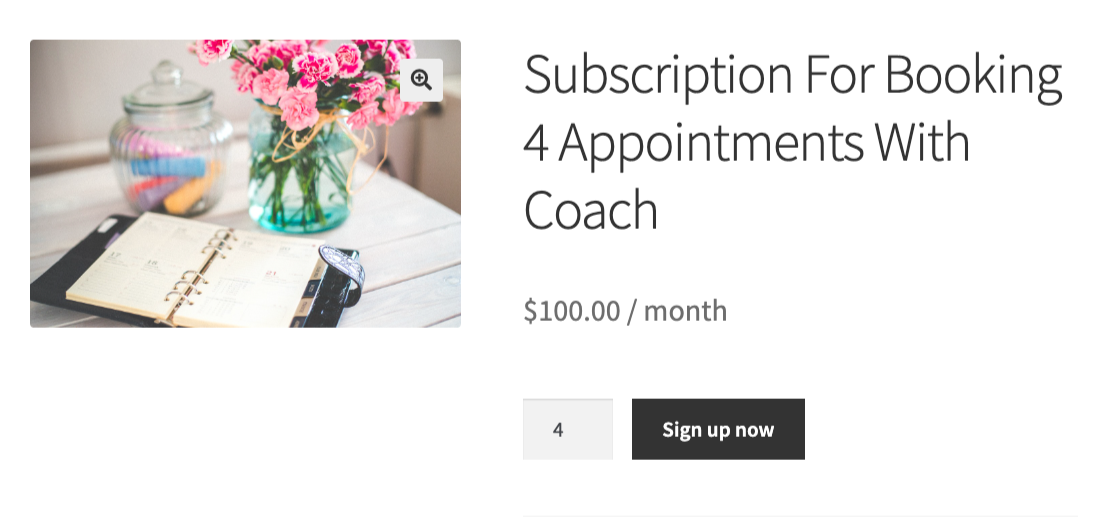
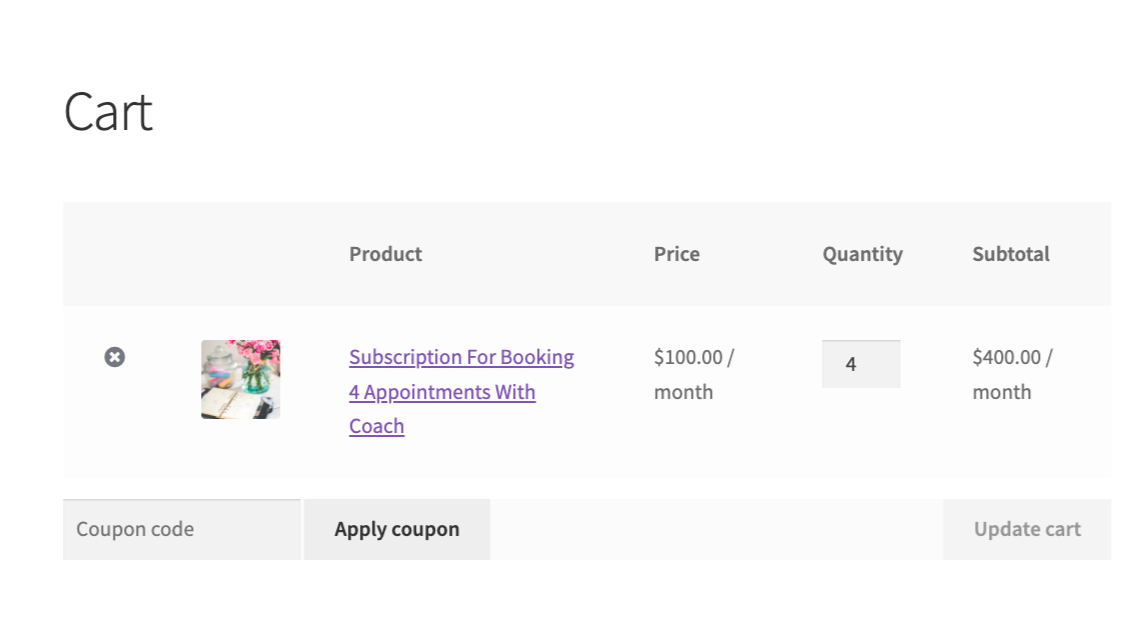
The product page will show the price per individual appointment, but they will only be able to add to the cart in groups of 4 – so 4, 8, 12, etc.
Cart
↑ Back to topIn the customer’s cart, this will show a quantity of 4, which is what they will checkout with:
Completing Purchase And Receiving Coupons
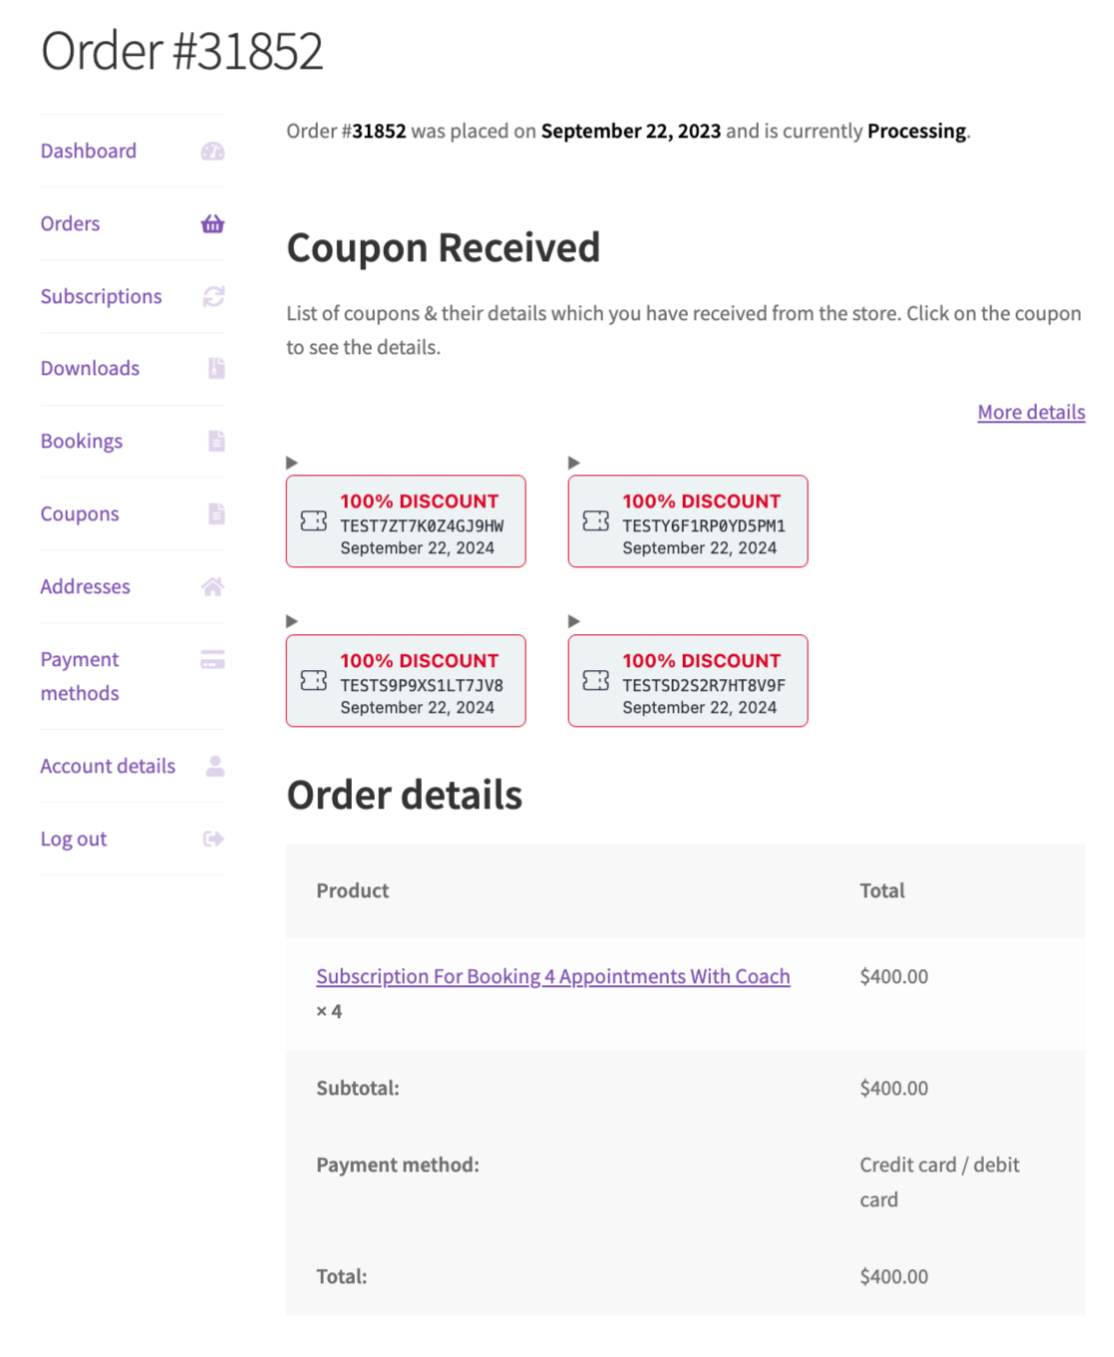
↑ Back to topOnce the customer has checked out and completed their subscription purchase, coupons will be available under My account > Orders, and select View on the order they just placed:
Making Bookings With Coupons
↑ Back to topBy this stage, the customer is set up with their 100% off coupons that they can use to make their bookings.
They can proceed to the bookable product you created at the beginning of this setup, select an appointment, add it to their cart and apply one of the coupons they just created:
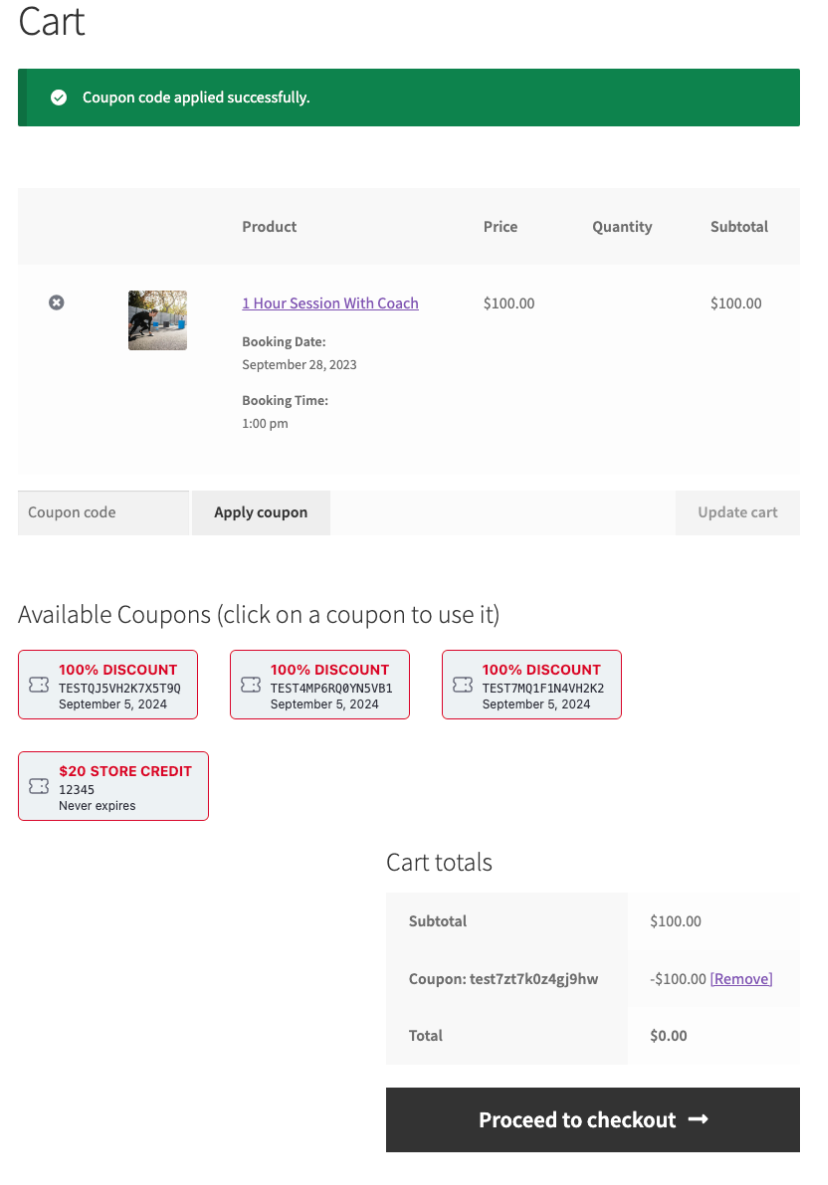
This will allow them to checkout for their booked appointment and pay $0 (as they have already paid for this through their subscription).
Cancellation And Refunds
↑ Back to topIf the booking or appointment needs to be cancelled, the booking order can be refunded from WooCommerce > Orders, and the coupon code will be returned to the customer.
Subscription Renewal
↑ Back to topWhen the customer’s subscription is renewed, this will generate a new order with new coupons. They will be able to access these from WooCommerce > Orders and click on View on the subscription renewal order.
Questions and Feedback
↑ Back to topDo you have a question before you buy? Please fill out this pre-sales form.
Already purchased and need some assistance? Get in touch with a Happiness Engineer via the Help Desk. Please ensure you are logged into the WooCommerce.com account you made your purchase from.