If you sell physical goods, your shipping strategy is one of the most important aspects of your success. Customers shopping online expect to pay as little as possible, but receive products quickly and in perfect condition.
How can you meet these expectations without losing money and set your business up for growth?
Start by establishing a shipping strategy that fits your products and customer needs. In this article, we cover everything from configuring shipping methods to using WooCommerce extensions to bolster your shipping options. You’ll learn the essential steps to create an effective shipping setup for your store.
1. Back up and update your store
↑ Back to topBefore making any major changes to your WooCommerce store, back it up — especially if your store is already live. A backup acts as a safety net, protecting your valuable data, including product details, order information, customer accounts, and other site content.
If something goes wrong while configuring new shipping options or shipping costs, a backup ensures you can quickly restore your website to a previous working state without losing critical information or revenue.
Even better, if you’re experimenting with different shipping methods or making significant changes to your store, use a staging site. Then, test updates and changes in a controlled environment without impacting your live store or disrupting the shopping experience for your customers.
For backups, Jetpack VaultPress Backup is a strong choice designed for WordPress and WooCommerce sites. It offers real-time cloud backups, logging every single change — from new customer orders to website edits — as they happen.

It also supports straightforward restoration directly from your store’s dashboard.
Once you’ve secured a reliable backup, it’s time to update your WordPress site. Keeping WordPress core, the WooCommerce plugin (and any extensions) itself, and your theme updated is important for several reasons, including:
- Compatibility. Updates often include bug fixes and adjustments to ensure your site remains compatible with the latest WordPress and WooCommerce versions. This reduces the risk of conflicts when installing new plugins or making changes.
- Security. Outdated software leaves your store vulnerable to hacking attempts and other security threats. Updates frequently patch known vulnerabilities to keep your site secure.
- Performance. Many updates include performance improvements that enhance store speed and reliability.
To avoid downtime, make updates during off-peak hours and test everything thoroughly afterward, ideally using your staging site. This ensures your live site remains functional and bug-free while you work.
2. Configure WooCommerce settings
↑ Back to topWith your site backed up and updated, configure WooCommerce settings to properly set up your shipping strategy.
If you offer free shipping, local pickup, or flat rate shipping, everything you need is built into WooCommerce — no other plugins or extensions needed.
These options provide flexibility for many store types, from ecommerce retailers to local businesses.
Setting up shipping methods and zones
To get started, go to WooCommerce → Settings → Shipping in your dashboard. Here, you’ll find options for Shipping Zones. Use these to define geographical areas you ship to. Each zone can be as broad as a country for international shipping or as specific as a zip code. This makes it much simpler to create custom shipping options based on where your shoppers are located.
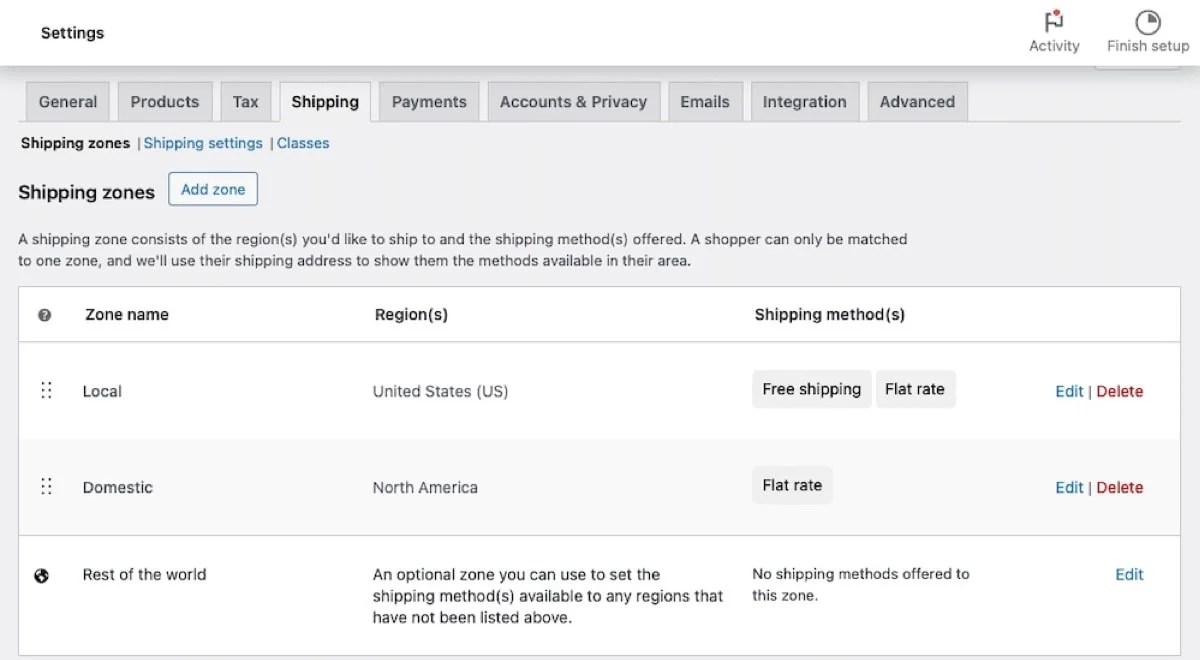
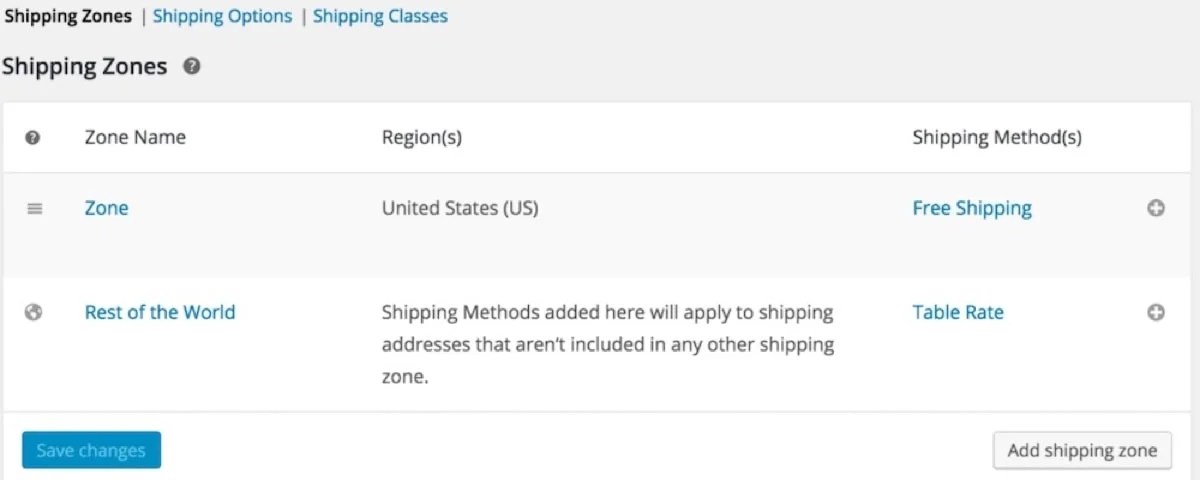
To create a new shipping zone, go to WooCommerce → Settings → Shipping then click Shipping zones → Add zone.
In the above example, zones have been configured for local deliveries and domestic shipping. For the Local zone, Free shipping and Flat rate shipping have been set as the shipping methods.

To configure this yourself, after clicking Add zone, give the zone a name, select zone regions, then click Add shipping method and choose from Flat Rate, Free Shipping, or Local Pickup.
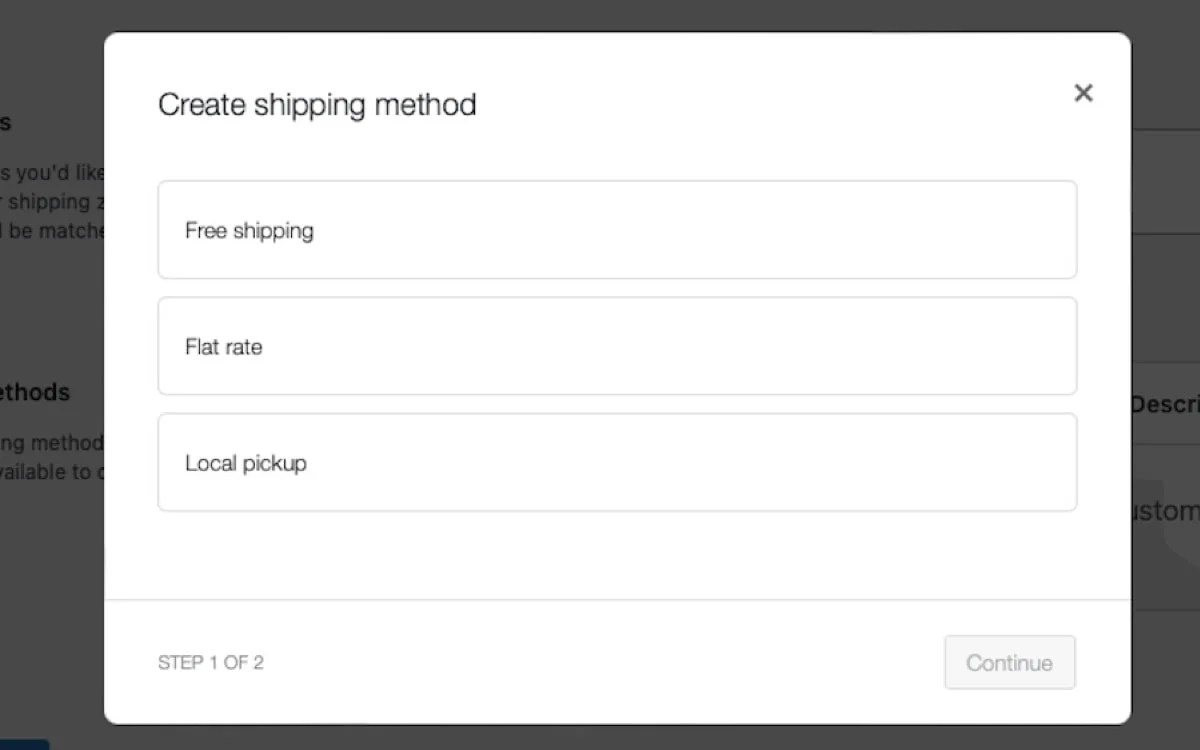
Then, customize shipping prices and options to suit your business model.
As an example, you might opt to charge a flat $10 shipping fee for orders in the continental U.S., offer free shipping for orders over $50, special express shipping for yet another use case, and allow for local pickup at no charge.
Using shipping classes for product-specific rates
If your store sells a mix of products with varying sizes or weights, consider setting up shipping classes. Use classes to group similar items and assign specific rates to each class.
A craft supplies store might charge flat rate shipping for individual items but offer free shipping for larger bundles or kits.
Or, a restaurant might charge shipping costs for packaged foods, but provide free local pickup for meal kits.
To set this up, go to the Shipping Classes tab in WooCommerce settings.
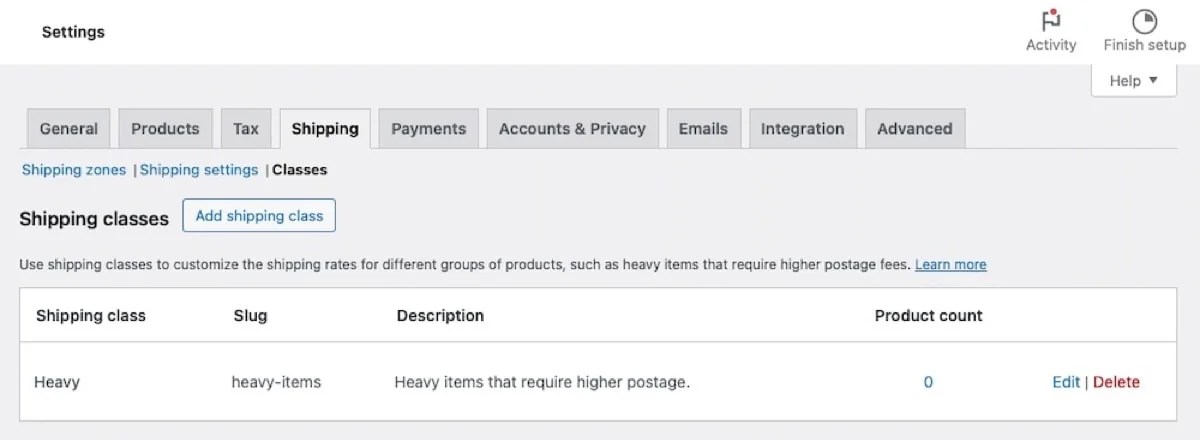
Create classes like “Small Items” or “Heavy.” Then, assign each class to the appropriate products in your store catalog.
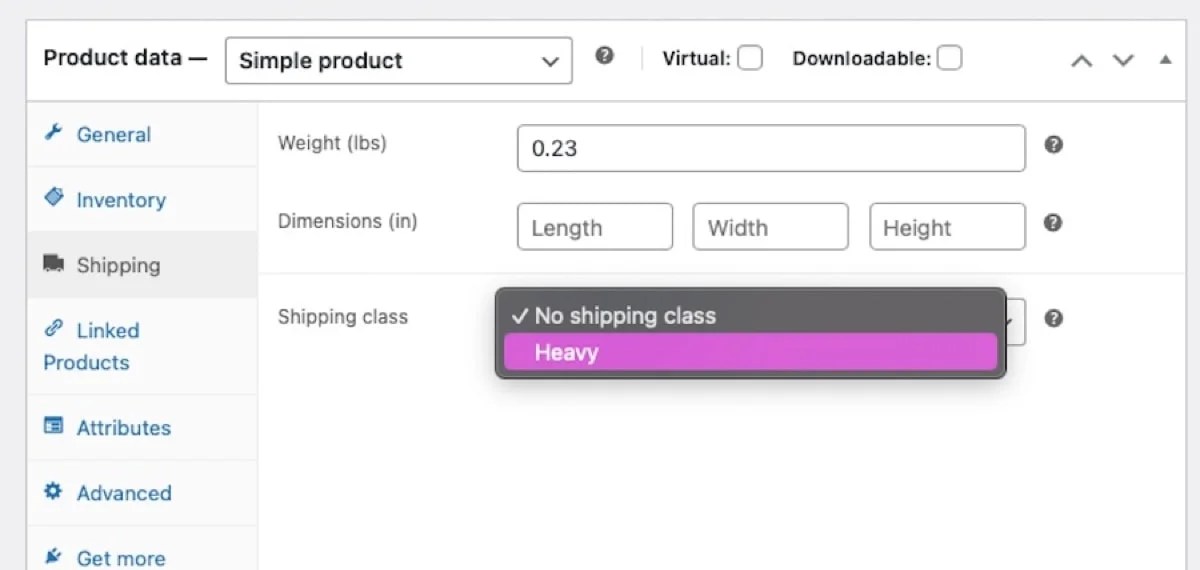
When you’re done, go back to Shipping zones and define shipping costs for each class you’ve created. In this example, the Domestic shipping zone has Flat rate shipping set as the method. Click Edit next to the method to access more settings.
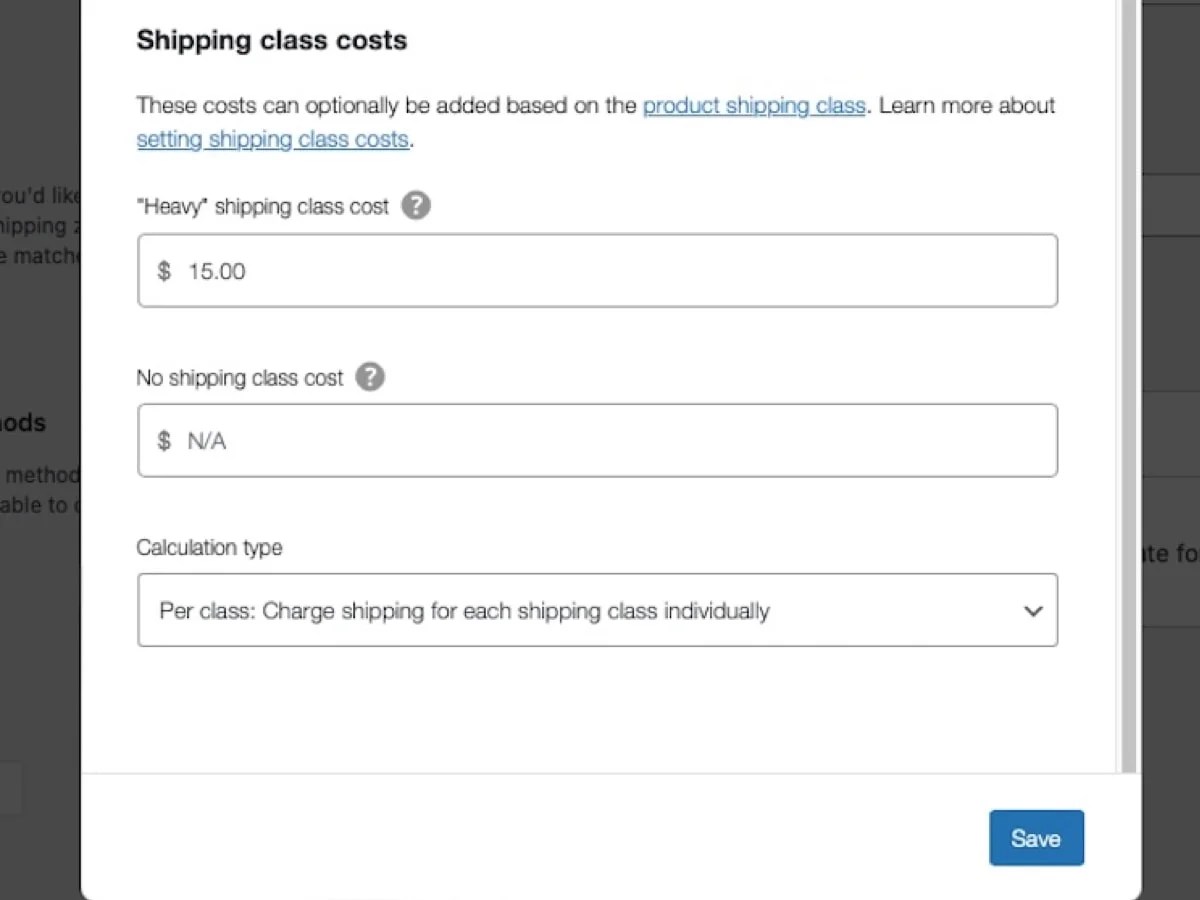
Scroll down to Shipping class costs and adjust the price of the shipping classes you created.
Here, the “Heavy” shipping class cost is set to $15.
Setting up tax-inclusive rates and conditional shipping rules
To streamline the checkout process, set tax-inclusive shipping rates. This makes your pricing more clear to shoppers and eliminates the surprise of added taxes at checkout.
If your shipping rate is $10 and includes a 10% tax, WooCommerce will automatically calculate that $9.09 goes toward the shipping fee and $0.91 toward tax.
To enable this, ensure your tax settings are configured under WooCommerce → Settings → Tax and select the option to display prices inclusive of tax.
Conditional shipping rules further enhance your store’s flexibility. These rules allow you to:
- Offer free shipping when customers spend over a certain amount.
- Apply discounts for customers in specific locations.
- Adjust shipping costs based on product quantities or cart weight.
Supporting eco-friendly shipping options
Many consumers value sustainability, so meet them where they’re at by offering eco-friendly shipping. WooCommerce supports integrations with third-party services that provide carbon-neutral or carbon-offset shipping options.
Some shipping carriers offer green shipping programs, or you could include an optional fee at checkout to fund carbon offset projects. Highlight these options on your product pages or checkout process to attract environmentally-conscious shoppers.
Displaying clear shipping policies
Transparent shipping policies build customer trust and reduce cart abandonment. Mostly, shoppers like to know what they’re getting into before putting in the effort to add an item to the shopping cart.
Some ways to be upfront about your shipping policies include:
- Outline your shipping costs, delivery times, and any additional fees on the homepage or product pages.
- Specify return policies related to shipping.
- Create a dedicated page about shipping and returns and link to it in your site’s footer or main menu.
As an example, if you expect potential delays for international shipping, inform customers of this upfront. This level of transparency ensures customers know what to expect and reduces frustration.
On the Robert August shop, which sells high-quality footwear, the product pages indicate how long shipping takes. Since these items are made to order, delivery takes between four to eight weeks.
3. Install and activate shipping extensions
↑ Back to topWooCommerce extensions centered around advanced shipping features simplifies the process of adding things like table rates and live rates to your store. These tools enable features like real-time shipping rates, shipping label printing, tracking number generation, and warehouse syncing to simplify order fulfillment and make for an all-around more pleasant experience for shoppers and a simpler-to-implement shipping strategy.
Select a shipping extension
To get started, select an extension that fits your needs. A few popular (and reliable) options include:
WooCommerce Shipping
One of the most popular options is the WooCommerce Shipping extension. It’s free and calculates live USPS, UPS, and DHL shipping rates within WooCommerce. It also includes simplified label printing options along with discounts for store owners that can significantly reduce shipping costs and boost profit margins.
ShipStation
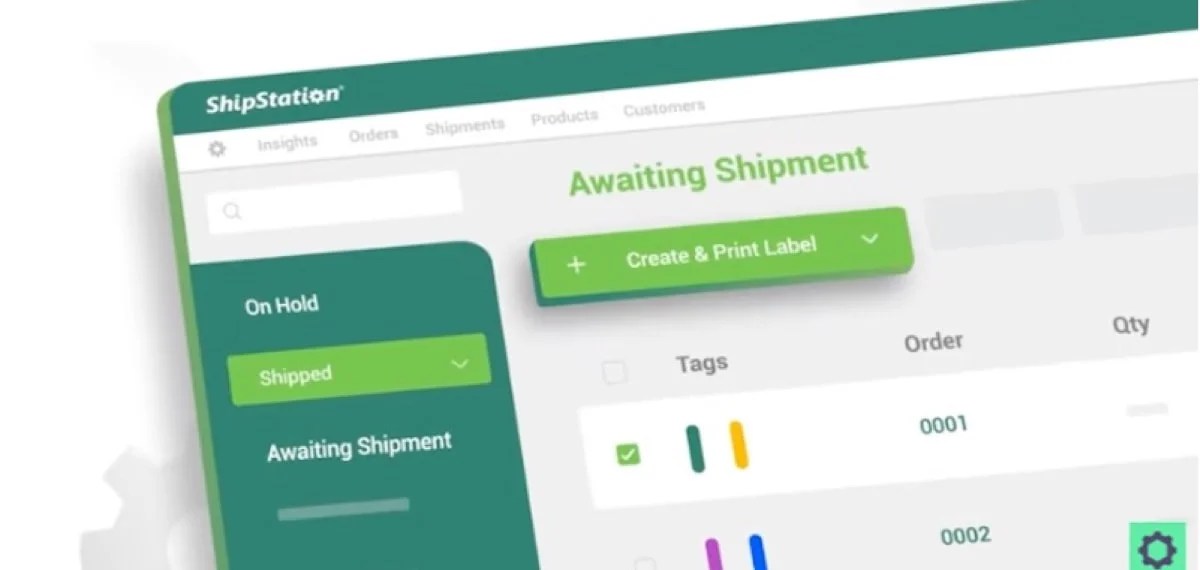
The ShipStation for WooCommerce extension integrates with major shipping carriers like USPS, FedEx, DHL, and UPS to simplify order management and shipping. It also allows you to print shipping labels in bulk, track shipments, and automate delivery notifications.
This extension is free to install, but does require a monthly ShipStation plan to use.
Conditional Shipping and Payments
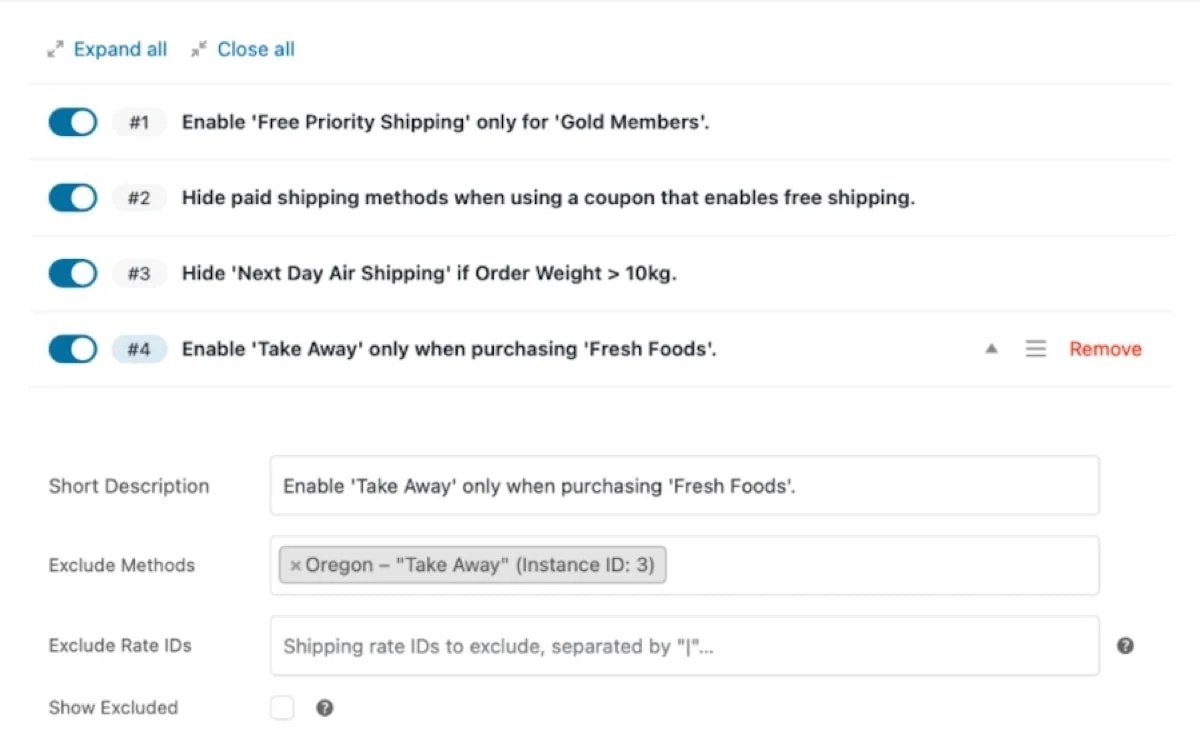
The Conditional Shipping and Payments extension adds the ability to create flexible rules to control shipping methods, payment gateways, and destinations based on specific conditions like cart contents, customer location, or order value. Use this to build the checkout experience you need, while offering customers only the options that pertain to their order.
Table Rate Shipping for WooCommerce
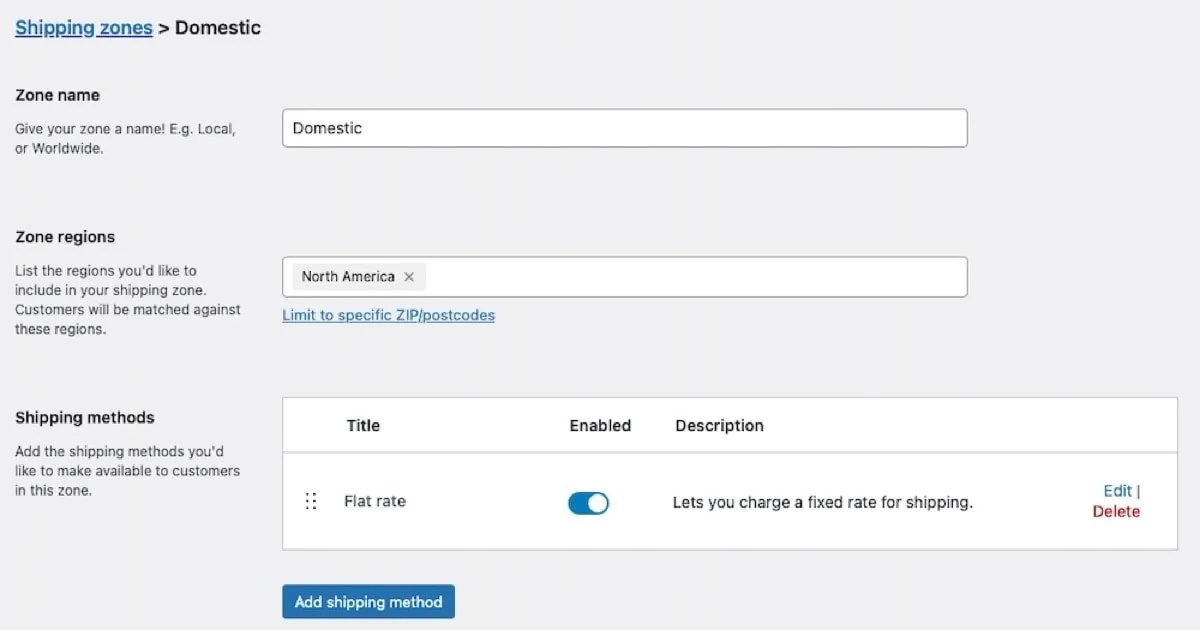
Ideal for creating highly-customized shipping rules based on weight, item count, or destination, the Table Rate Shipping extension works well for stores with complex shipping needs. Shops offering free shipping above certain order values or charging flat rate shipping costs for specific zones are especially poised to benefit.
Once you’ve selected the extension that best suits your store, download or purchase the extension from the WooCommerce Marketplace.
After activation, many extensions include setup wizards to guide you through configuration, connecting your store to shipping carriers, and defining custom rules.
4. Adjust shipping settings to meet your needs
↑ Back to topEach shipping extension comes with its own unique settings and configurations, so the exact setup process will depend on the extensions you’ve chosen. To find specific instructions for your extension, visit its page in the WooCommerce Marketplace and click the Documentation button in the right-hand column.
Here are a few examples of how you might adjust shipping settings for specific needs:
Perishable goods
If you sell items like fresh food or flowers, you prioritize speed and temperature control. Use settings to:
- Offer overnight shipping with carriers like FedEx or UPS.
- Add a “cooling surcharge” for insulated packaging.
- Configure live rate calculations to provide customers with accurate costs based on their location and chosen speed.
Oversized or heavy items
For large products like furniture or gym equipment, adjust settings to:
- Create shipping classes for bulky goods and set unique rates for those items.
- Define rules based on weight or dimensions.
- Offer shipping insurance and freight shipping or local delivery for oversized items.
Setting up shipping rules for marketplaces or multi-channel sales
If you sell products on multiple platforms, like Amazon or eBay in addition to your own site, it’s important to sync shipping rules across all channels for consistency. A shipping extension like ShipStation assists in these scenarios and integrates with WooCommerce and popular marketplaces.
Setup in these scenarios involves syncing orders and shipping labels by pulling in orders from Amazon, eBay, Etsy, and WooCommerce so you can manage everything from one dashboard. This allows you to set up and print shipping labels for all platforms in bulk and automatically apply rules like free shipping or free shipping insurance for orders over a certain value.
In some cases, setting up marketplace-specific rules helps, too. For Amazon, setting up Fulfilled by Merchant (FBM) rates based on Amazon’s delivery guidelines is a priority. Or, for eBay, you may want to customize rates based on package weight and buyer location.
5. Test your shipping setup
↑ Back to topBefore rolling out your new shipping configuration to customers, test it thoroughly to ensure a smooth experience. Even small errors lead to abandoned carts, frustrated customers, or lost sales.
To prevent this, use the following checklist to catch potential issues:
- Test a product from each shipping class. Ensure that rates are calculated correctly on the Cart and Checkout pages for every shipping class and zone you’ve set up. This is particularly important when verifying international shipping costs.
- Test product combinations and cart sizes. Verify that discounts or free shipping rules are applied appropriately, especially for orders that qualify for promotions like free shipping above a specific amount.
- Complete the entire checkout process. If you’ve integrated an extension, confirm that shipping information is synced correctly, and labels are generated without errors.
- Verify tracking information. If tracking numbers are part of your setup, ensure they’re correctly attached to customer emails and displayed on account pages.
- Check live rates. Confirm that real-time shipping rates displayed to customers match your carrier’s rates. Any discrepancies could erode trust or result in financial loss.
- Review policies for visibility. Are your shipping policies, return policies, and any free shipping or discount offers easy for customers to find?
- Confirm discounts are visible. If free shipping or reduced rates are available based on cart size, make sure this information is clear on product pages or the cart summary.
To simplify testing and minimize errors, use tools and plugins designed for this purpose, such as a staging site or WooCommerce-compatible testing plugins. WooCommerce itself doesn’t have a “Sandbox Mode,” but using a staging environment through your hosting provider or with a plugin like WP Staging will suffice.

Once you’ve tested your shipping setup internally, consider involving a small group of trusted customers to provide feedback. Offer them a discount or free product in exchange for their help testing the process.
Real customers may reveal issues like:
- Whether rates and fees make sense.
- If checkout steps are clear and intuitive.
- How well tracking information is communicated.
Real-world testing ensures you’re prepared for edge cases that automated tests might miss, like customers using non-standard addresses or unexpected product combinations.
If everything works as expected and all potential issues are resolved, you’re ready to launch! Testing takes time, but it’s a must to ensure a pleasant experience for your customers and to prevent costly errors down the road.
6. Optimize your shipping strategy over time
↑ Back to topAn effective shipping strategy isn’t a one-and-done process. It requires ongoing evaluation and refinement. As your store grows and customer expectations evolve, optimizing your approach helps you stay competitive, reduce costs, and improve the overall shopping experience.
Review shipping data
Regularly reviewing your store’s shipping data means identifying areas for improvement as they appear. Key metrics to track include:
- Delivery times. Are your orders arriving within the promised window? Delays frustrate customers and damage trust.
- Abandoned carts. Use analytics tools to determine whether high shipping costs or lack of options contribute to cart abandonment. WooCommerce extensions like Cart Reports assist with tracking this behavior.
- Shipping cost-to-revenue ratio. Assess whether your shipping fees are too high, cutting into conversions, or too low, eating into your profit margins.
Use customer feedback
Your customers’ feedback can be used to refine your shipping processes. Collect feedback through:
- Post-purchase surveys. Ask customers to rate their shipping experience, including delivery speed, packaging quality, and ease of tracking.
- Customer reviews. Monitor product reviews and support tickets for recurring mentions of shipping-related issues or suggestions.
- Direct outreach. Engage with frequent shoppers or loyalty program members to gather information about their preferences and pain points.
Use this feedback to identify common frustrations and prioritize changes that will have the biggest impact on customer satisfaction.
Keep policies and options up to date
As you optimize your strategy, ensure that your shipping policies, FAQs, and site content reflect any changes. Transparency about delivery times, shipping prices, and options remains critical for moving forward.
Start shipping your products
↑ Back to topWooCommerce gives you everything you need to manage shipping affordably, efficiently, and accurately — ensuring happy customers and a well-run store. With the right setup and tools in place, providing a satisfying delivery experience for every order is within reach.
Remember: shipping isn’t a “set it and forget it” task. As your business grows, customer expectations evolve, and market trends change, so revisit your shipping process periodically. Regular reviews let you refine your approach, adapt to new opportunities, and address inefficiencies to stay competitive.
Want to get started? Begin by installing WooCommerce and configuring your preferred shipping methods. Then, build the most effective shipping strategy for your business. Good luck!
About


