Adding users to your online store can improve the efficiency and scalability of your business. Users with defined roles can facilitate smoother day-to-day management, whether you’re growing your team, delegating responsibilities, or maintaining continuous operations.
With more users, merchants can delegate tasks such as inventory updates, customer service, and order processing. This collaborative approach can improve operations and free up time for merchants to focus on growing their business.
The Woo Mobile App supports two user roles: Shop manager and Administrator. How these users access the mobile app depends on whether your store is connected to Jetpack. Learn about each role’s capabilities.
Stores connected to Jetpack
↑ Back to topIf your site is connected to Jetpack and you want other users to access its features — such as push notifications for orders, Blaze campaigns, and visitor and conversion stats — they will need to connect their accounts to Jetpack. Learn how to connect additional users to Jetpack.
Stores not using Jetpack
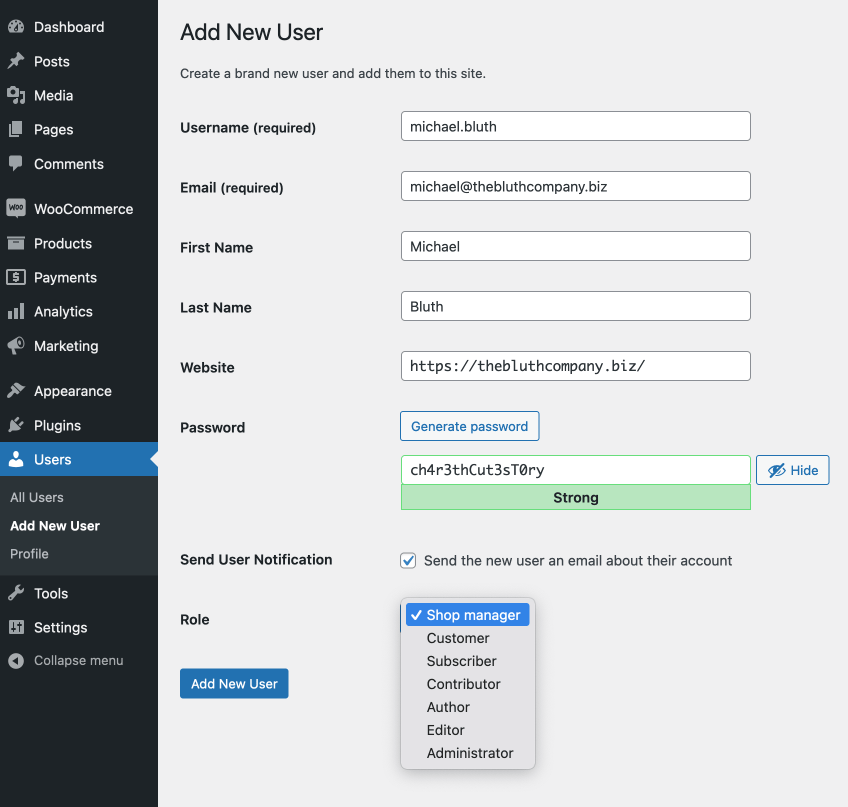
↑ Back to topTo add a new user, follow these steps:
- Log in to your store’s WP Admin dashboard.
- In the left-hand menu, hover over Users and click Add New.
- Fill in the new user’s details:
- Enter a username.
- Provide the user’s email address.
- Add their first and last names. These fields are optional, but recommended.
- Enter the user’s website URL (optional).
- Create a password; WordPress can generate one for you if you prefer.
- Check the box to send the user a notification email that includes their account login information.
- Assign the role:
- From the Role dropdown menu, choose Administrator or Shop manager.
- After filling in all the details, click the Add New User button to save your changes.
Still experiencing issues?
↑ Back to topIf you’re using the Jetpack plugin to connect the mobile app to your site, ensure that the Jetpack connection is active and functioning correctly. Review common issues or reconnect your site.
If you’re still having difficulty, contact support from within the app by going to Menu > Settings > Help & Support > Contact Support.