The latest versions of the mobile apps (versions 8.9.0 and above) give you the ability to create orders.
Note: To obtain the best experience, we recommend you update your store to the latest version of WooCommerce.
The mobile apps currently support:
- Creating a new order
- Adding products & variations
- Removing a product
- Setting a custom shipping method
- Deleting the custom shipping method
- Setting a custom amount
- Deleting the custom amount
- Setting customer details (Billing & Shipping addresses)
- Setting customer-provided notes
- Completing the new order creation
- Editing the order
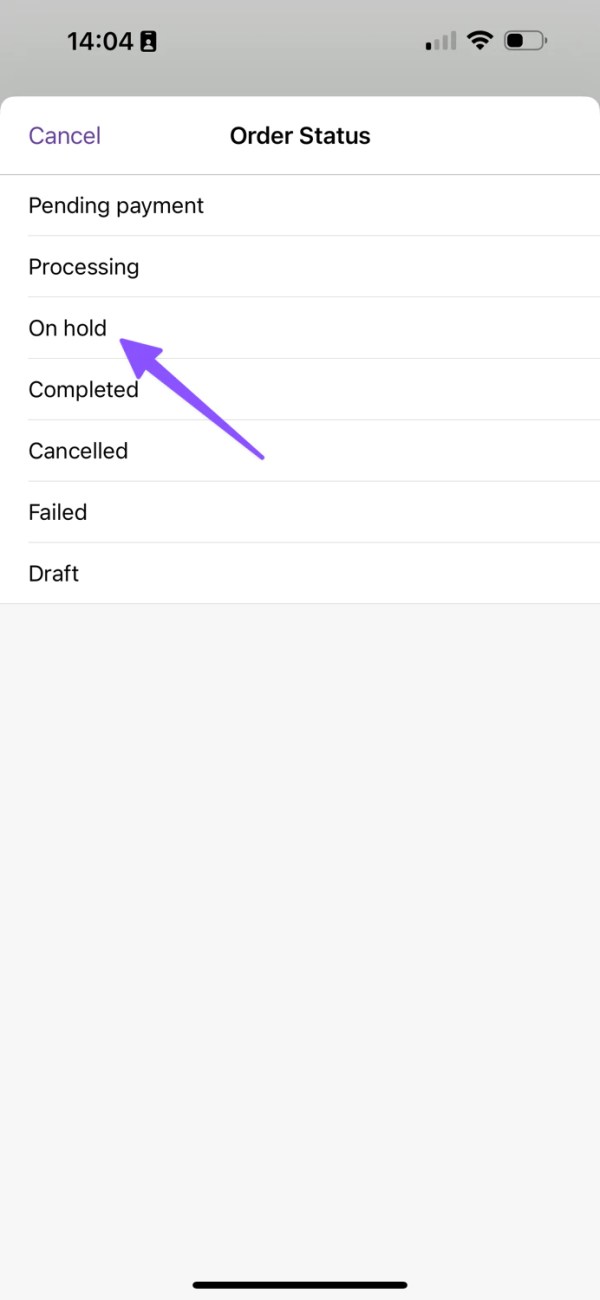
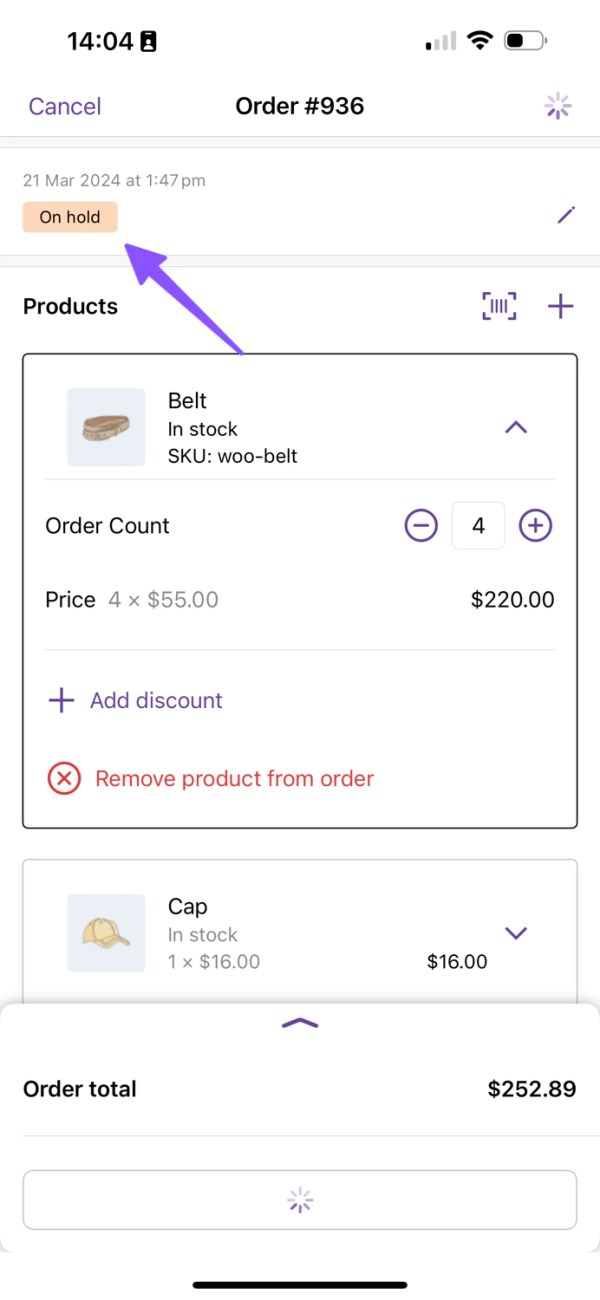
- Setting the order status (edit only)
Creating a new order
↑ Back to topFollow these steps to create an order:
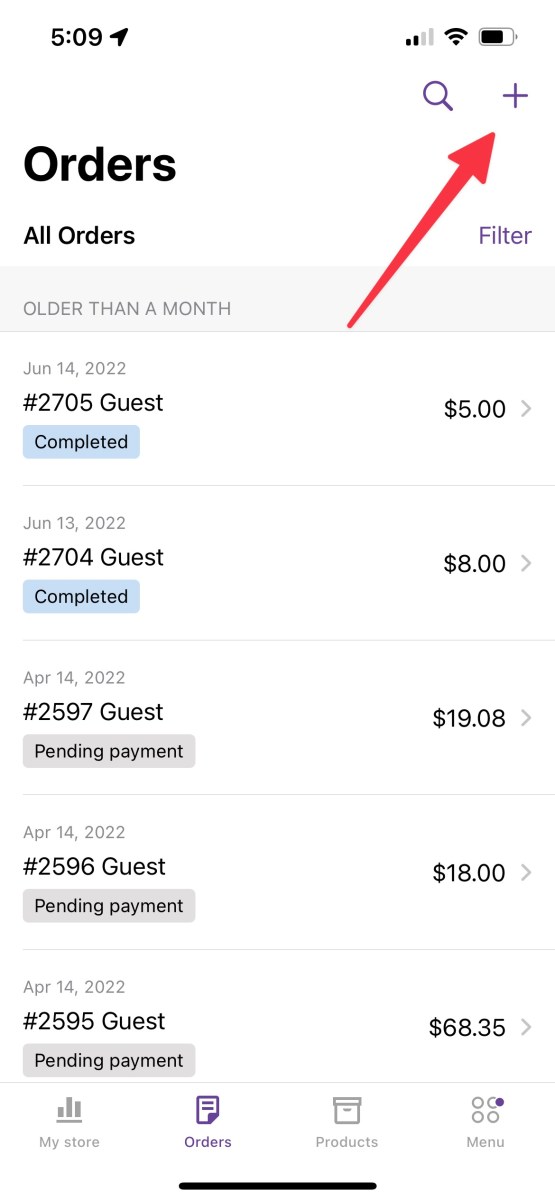
- Tap on the + icon at the top right on the Orders tab.
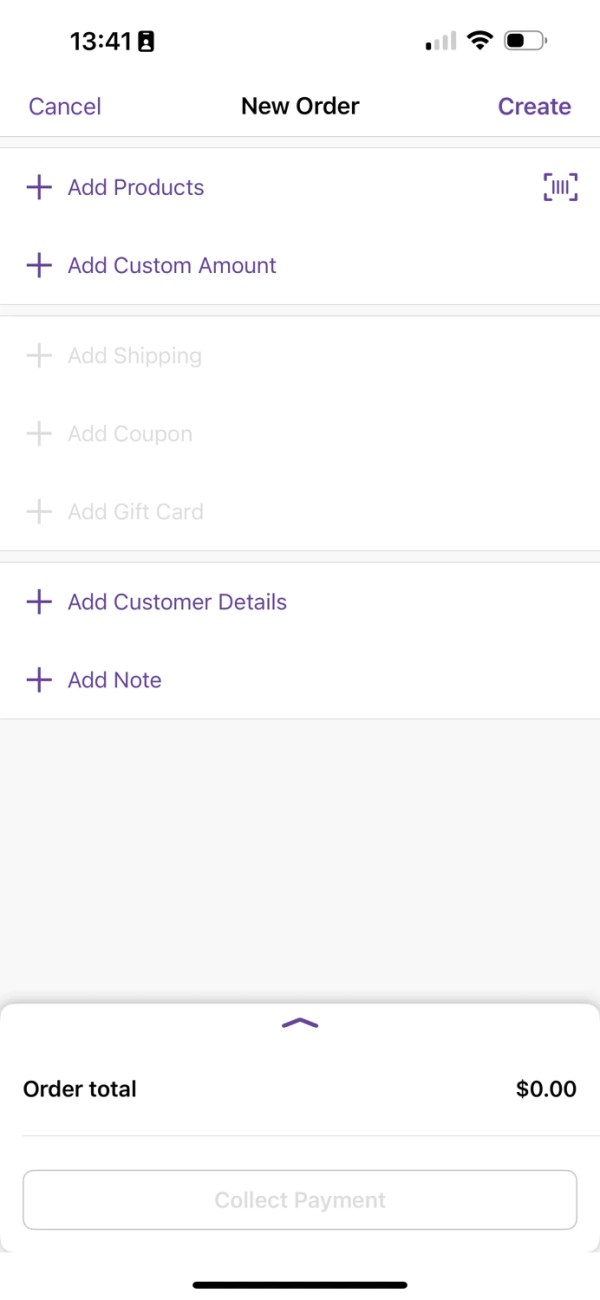
- The New Order screen will appear.
Adding Products & Product Variations
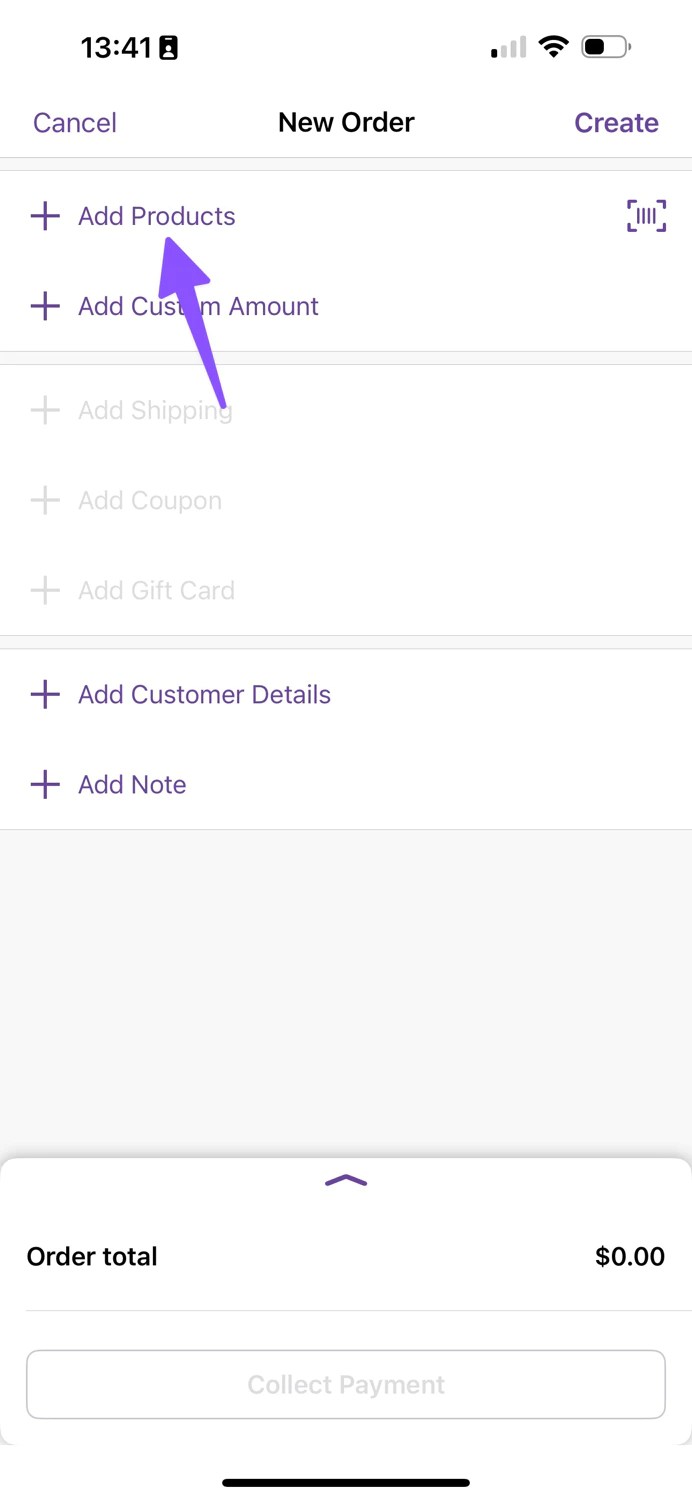
↑ Back to top- Tap on the + Add Products button in the Products Section.
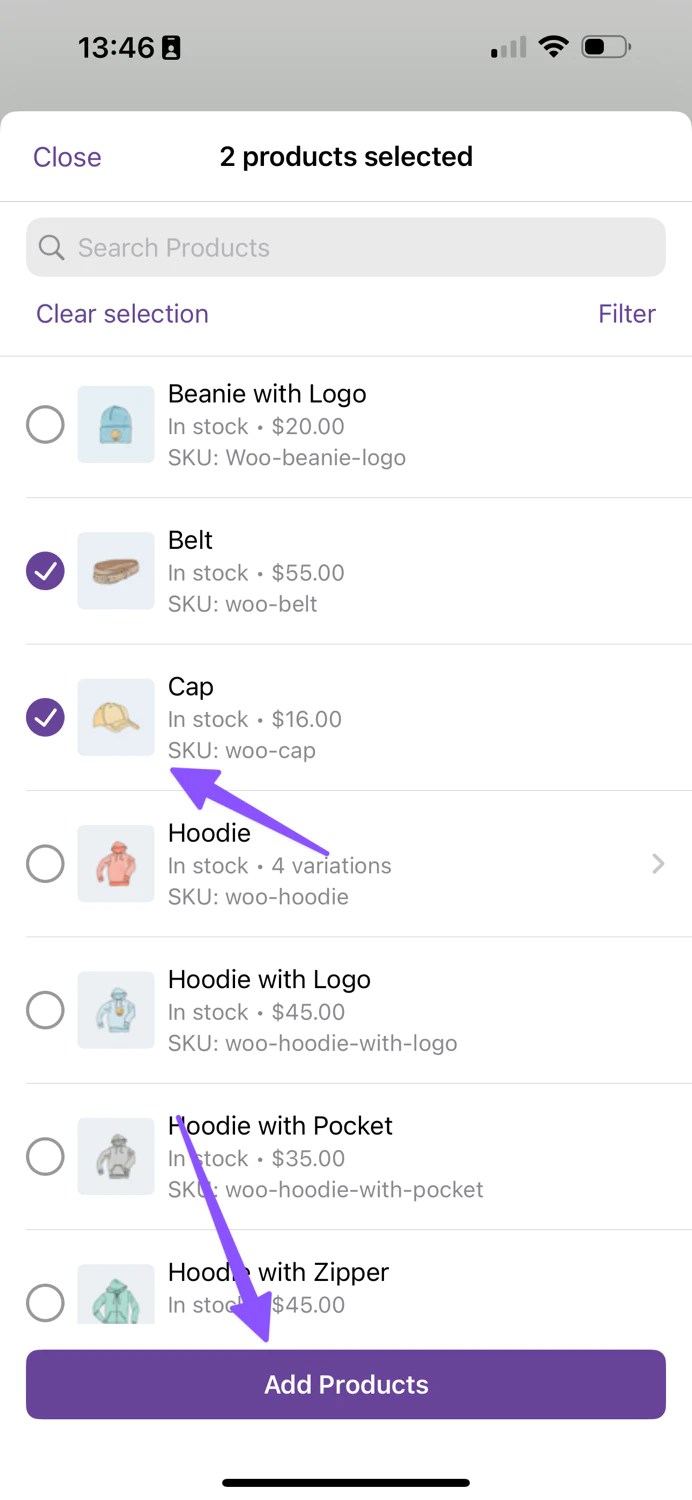
- Search for & select the products you wish to add.
- Tap Add Products
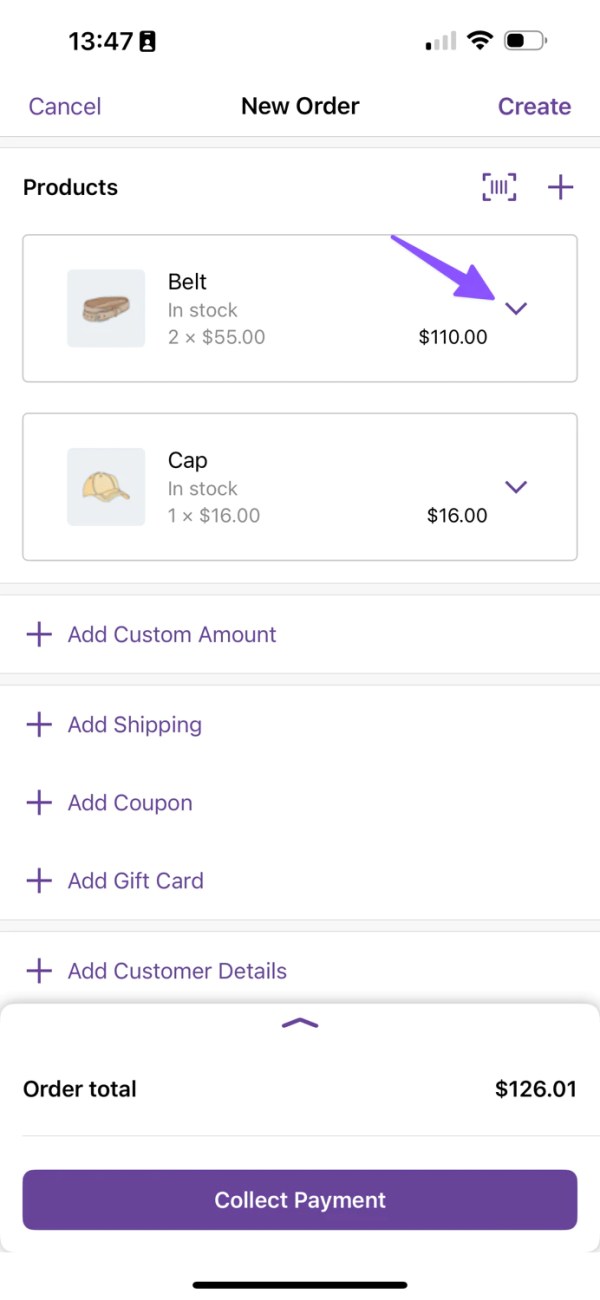
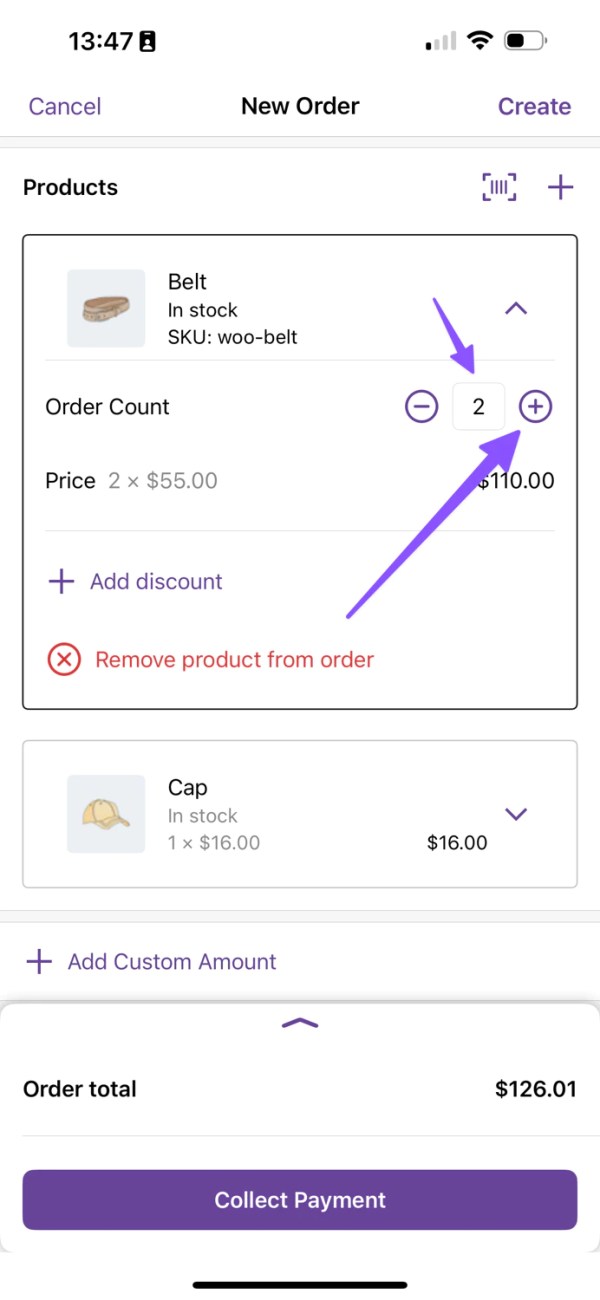
- Expand the product card to adjust the quantity using the quantity stepper or text box as needed.
Adding Products by Scanning Barcode
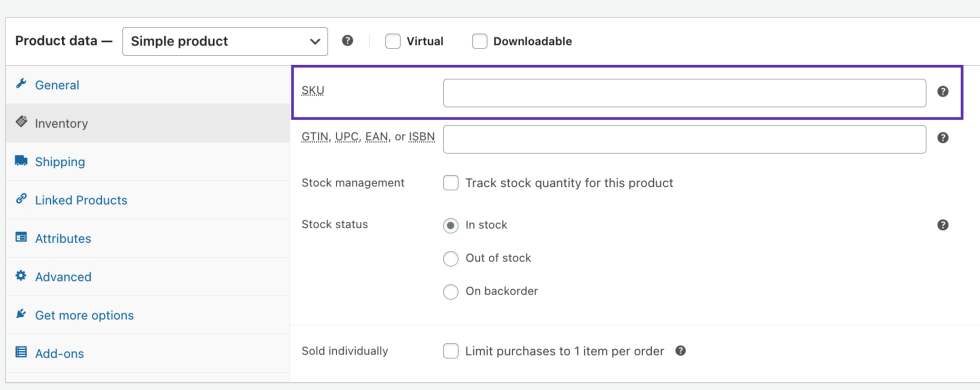
↑ Back to topBarcode scanning is available on Android with application version 13.8 and later and on iOS with version 14.1 or later. This feature allows you to quickly scan product barcodes with your device’s camera to add them to an order. Note that the feature only supports barcode numbers matching your store’s product SKUs.
Note: The Mobile App barcode scanner currently only works with codes added to the SKU field in the inventory tab. The new GTIN, UPC, EAN or ISBN field in WooCommerce core is not yet integrated with the Mobile App.
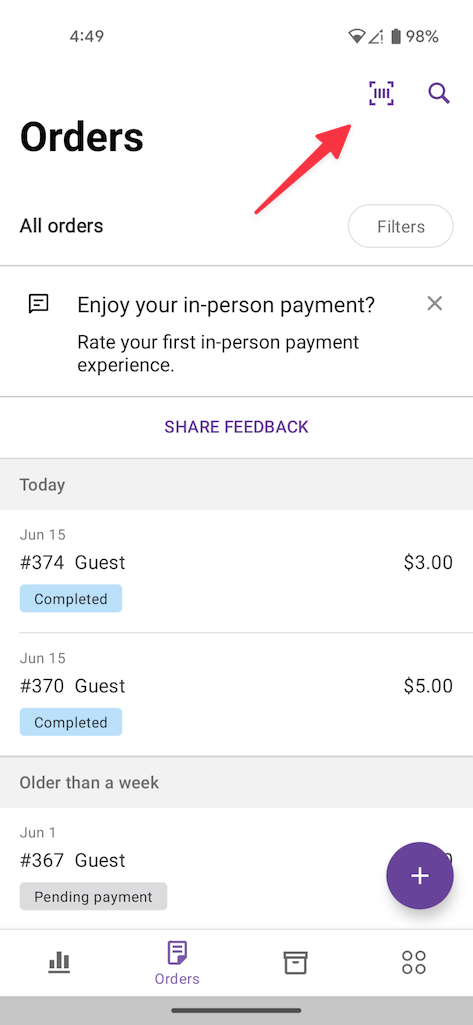
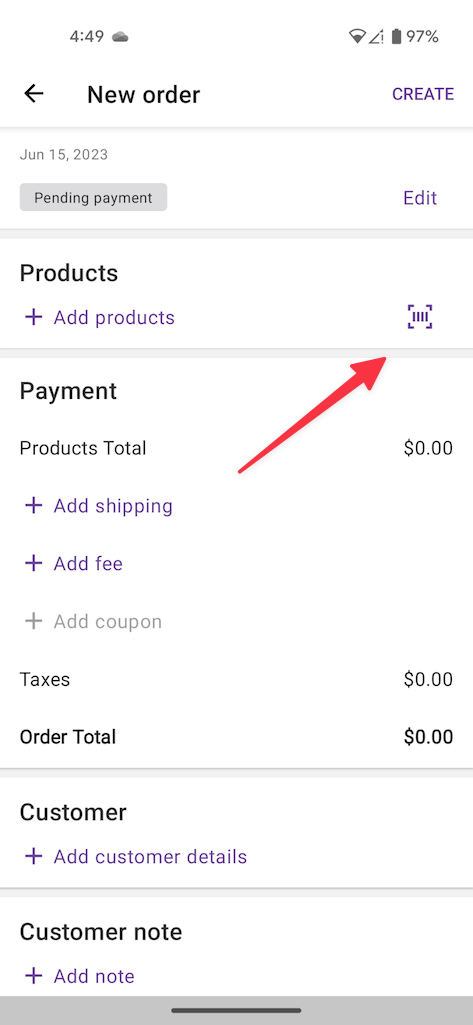
To get started, tap the barcode icon at the top of the Orders tab and scan the barcode of a product to add it to a new order.
Alternatively, from the New Order screen, you can tap on the barcode icon next to + Add Product to scan an item and add it to the order.
Removing a product
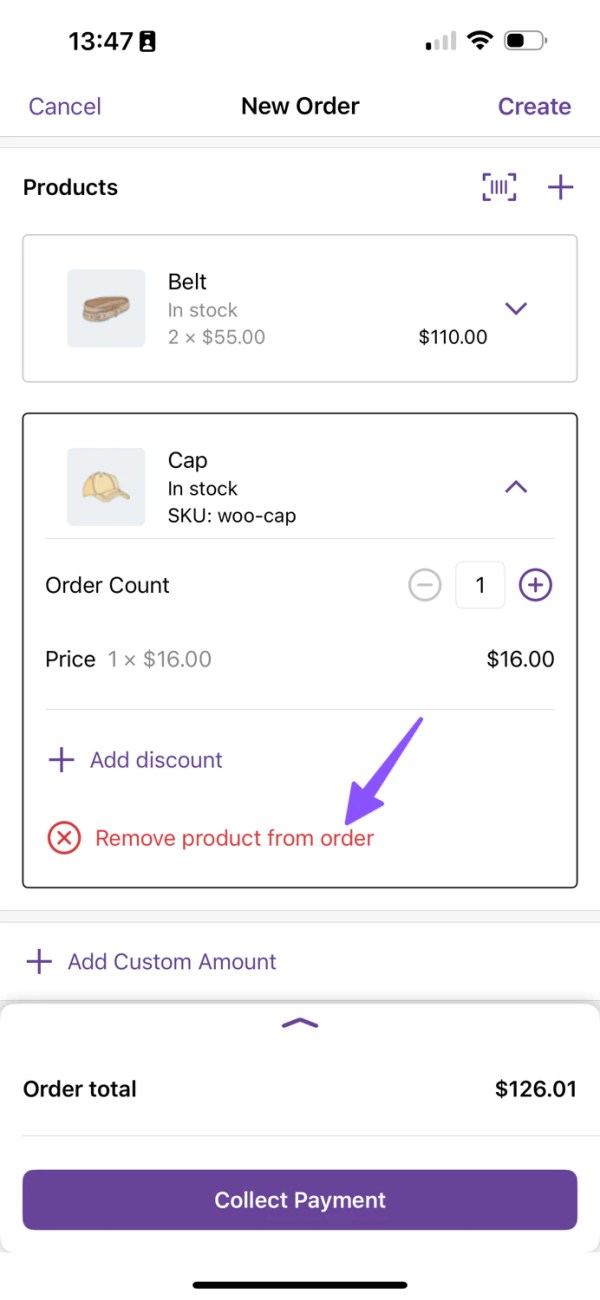
↑ Back to top- Tap on the product you wish to remove to expand the card.
- Tap on the Remove Product from Order button.
Setting a custom shipping method
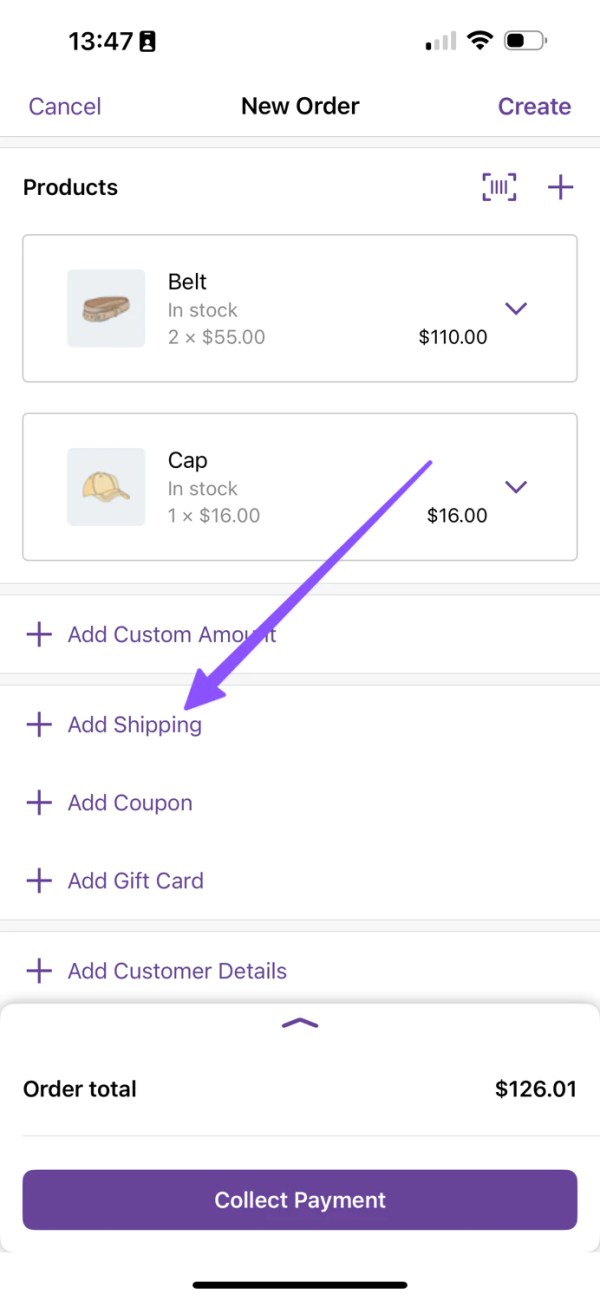
↑ Back to top- On the Payments section, tap the + Add Shipping button.
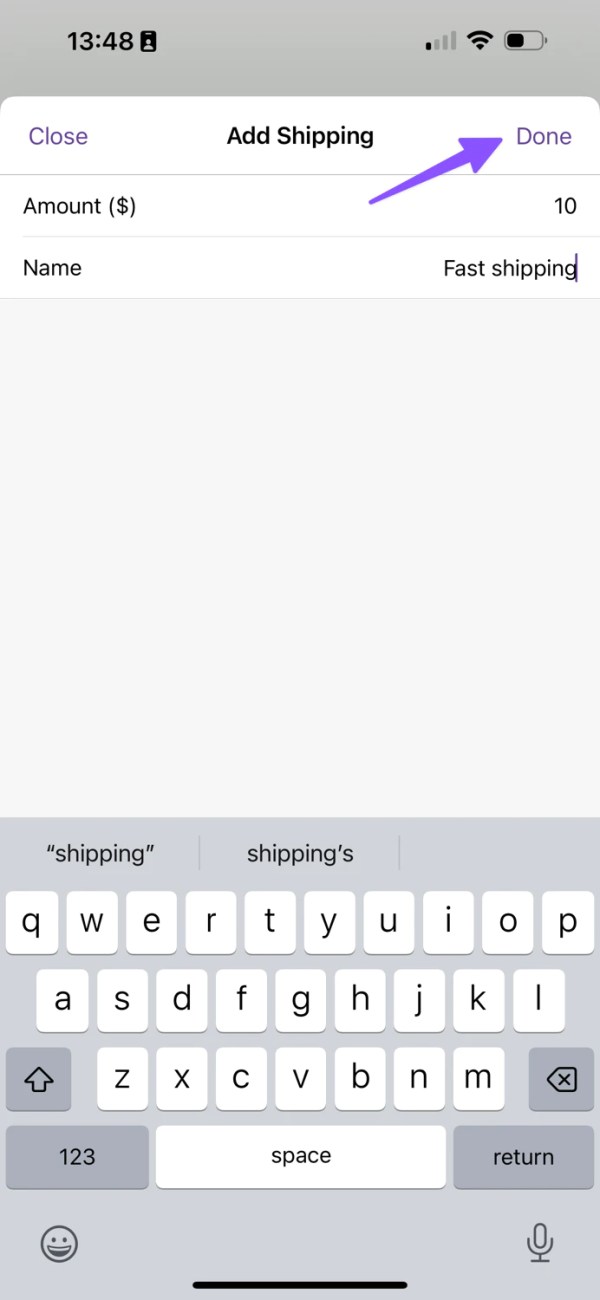
- On the presented form, enter the value you wish to charge and optionally a name for it.
- Tap on the Done button to save the change.
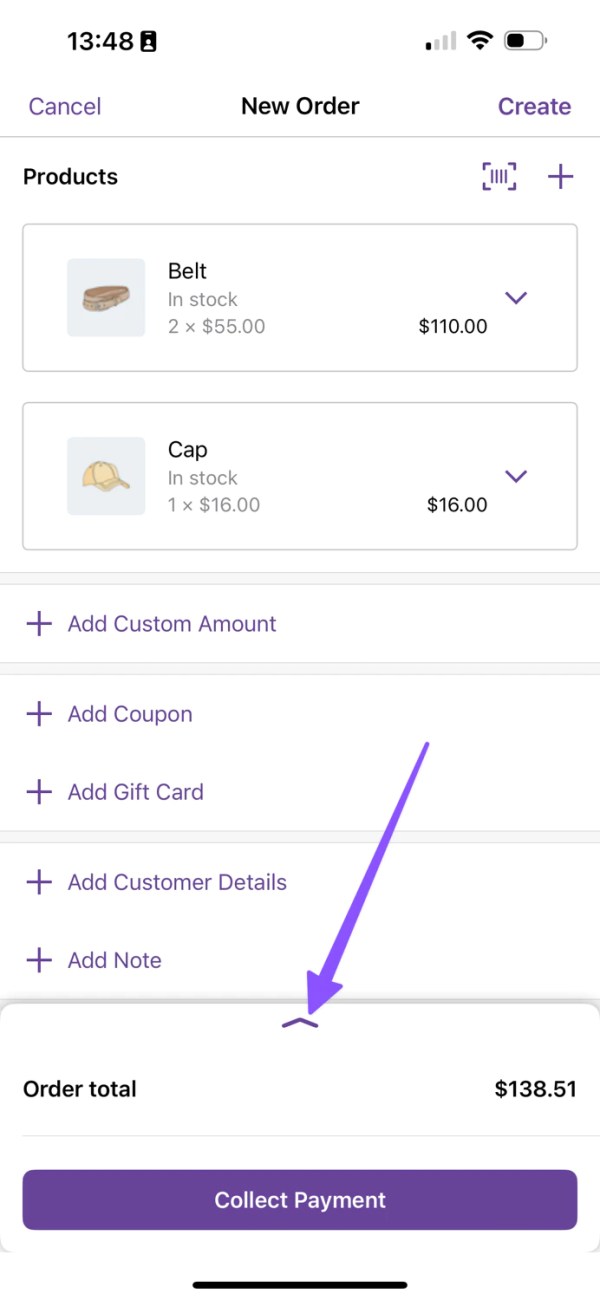
- Tap the expansion chevron to see the totals details, including shipping
Deleting the custom shipping method
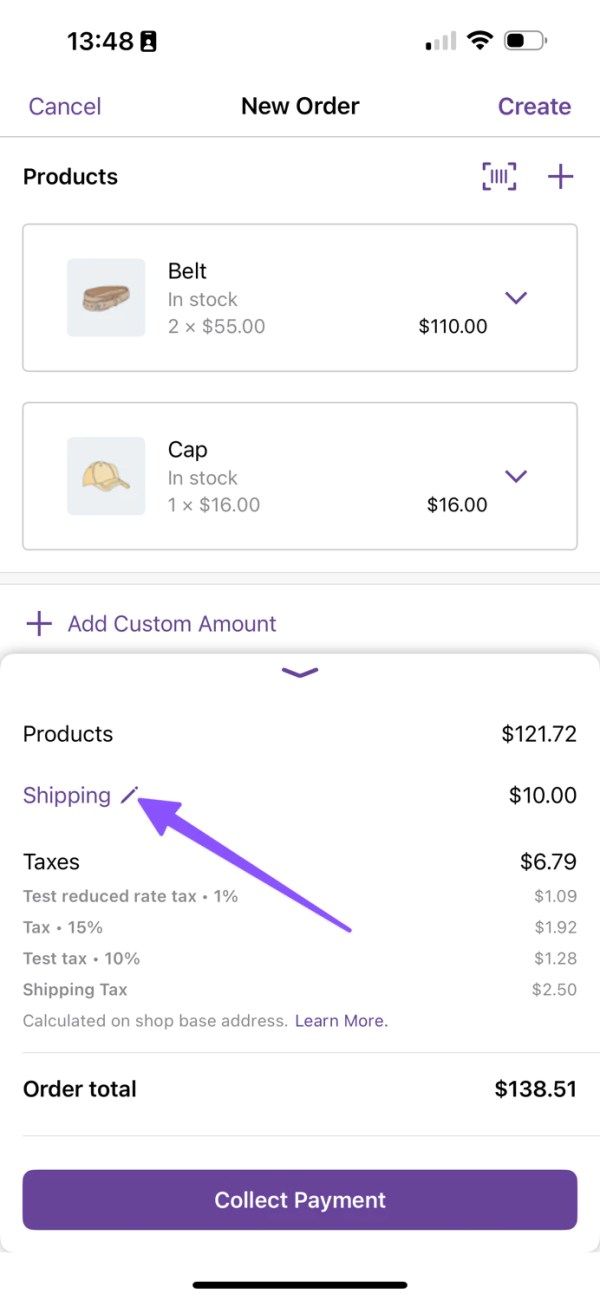
↑ Back to top- With the totals panel expanded, tap on the Shipping pencil button.
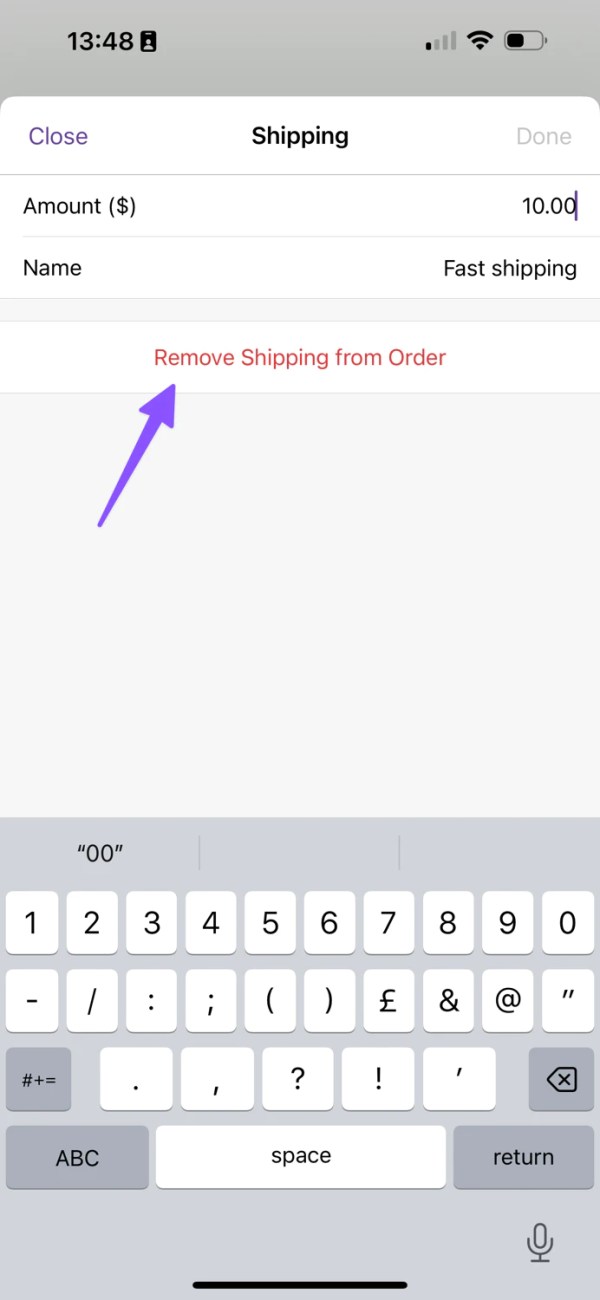
- Tap on the Remove Shipping from Order button.
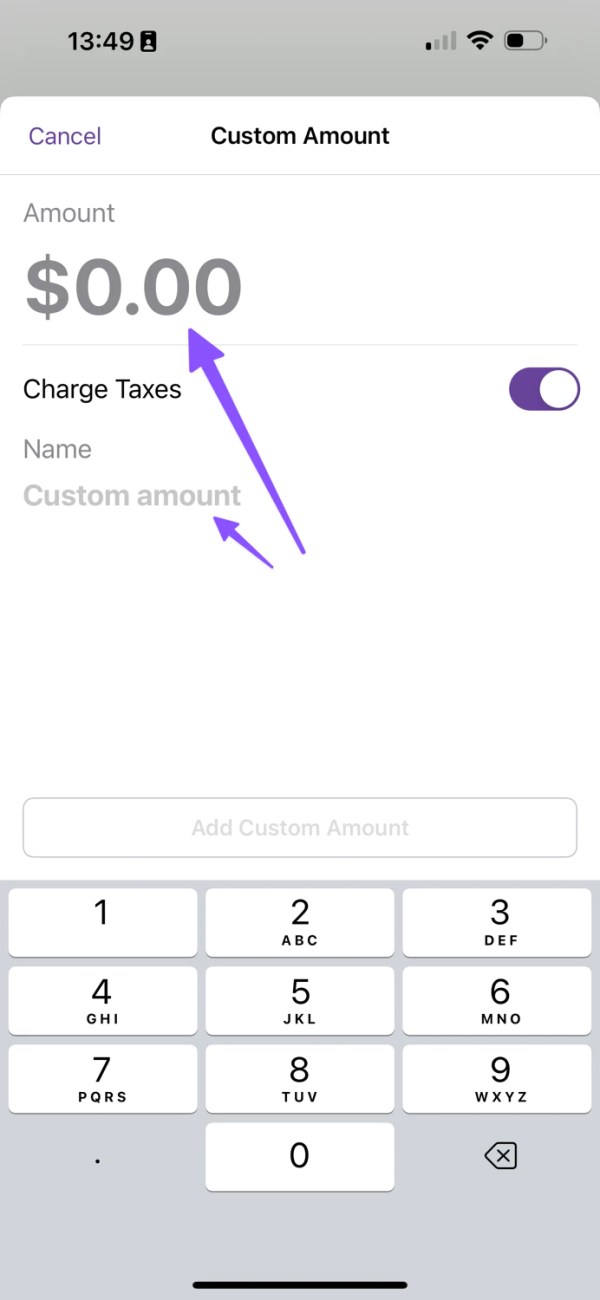
Setting a custom amount
↑ Back to top- Under the Payments section, tap the + Add Custom Amount button.
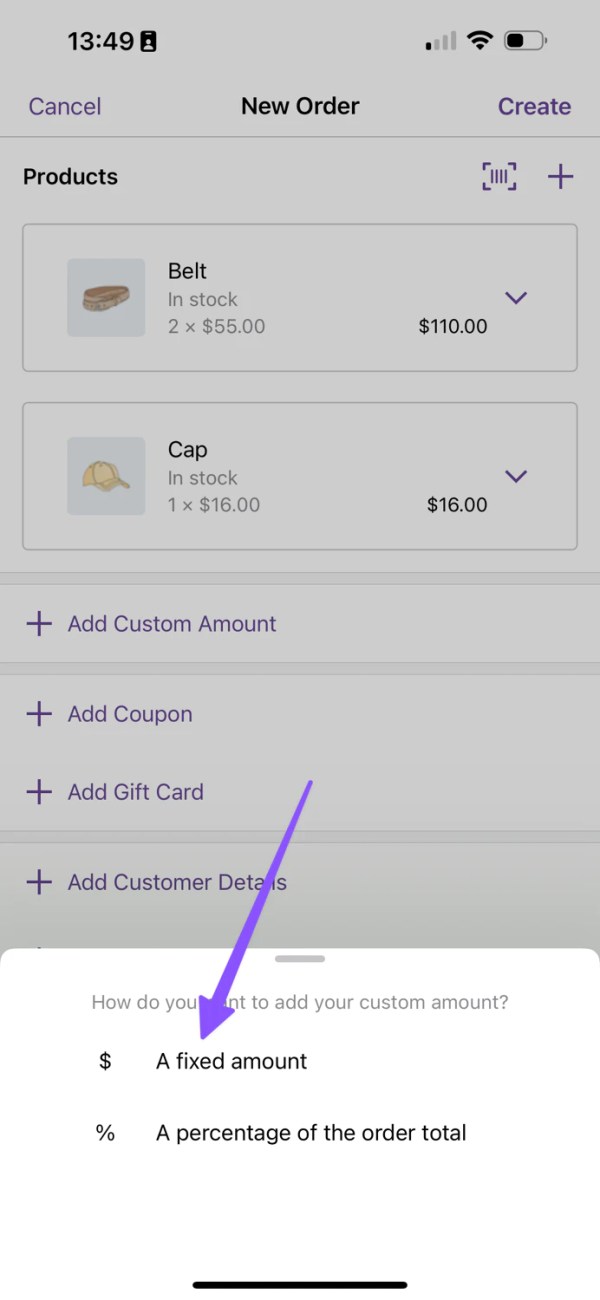
- Select the type of custom amount, percentage of the order, or specific amount.
- On the presented form, enter the value you wish for the fee.
- Optionally add a name
- Tap on the Add Custom Amount button to save the change.
Note: You can enter a negative value as an alternative to give a discount.

Deleting the custom amount
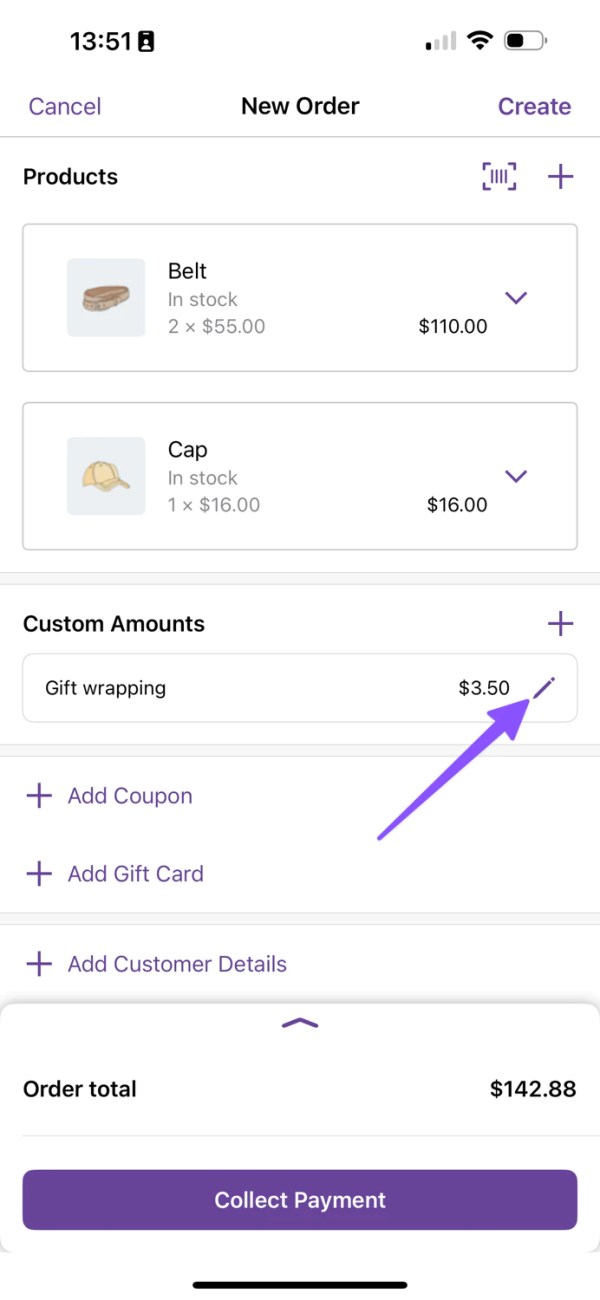
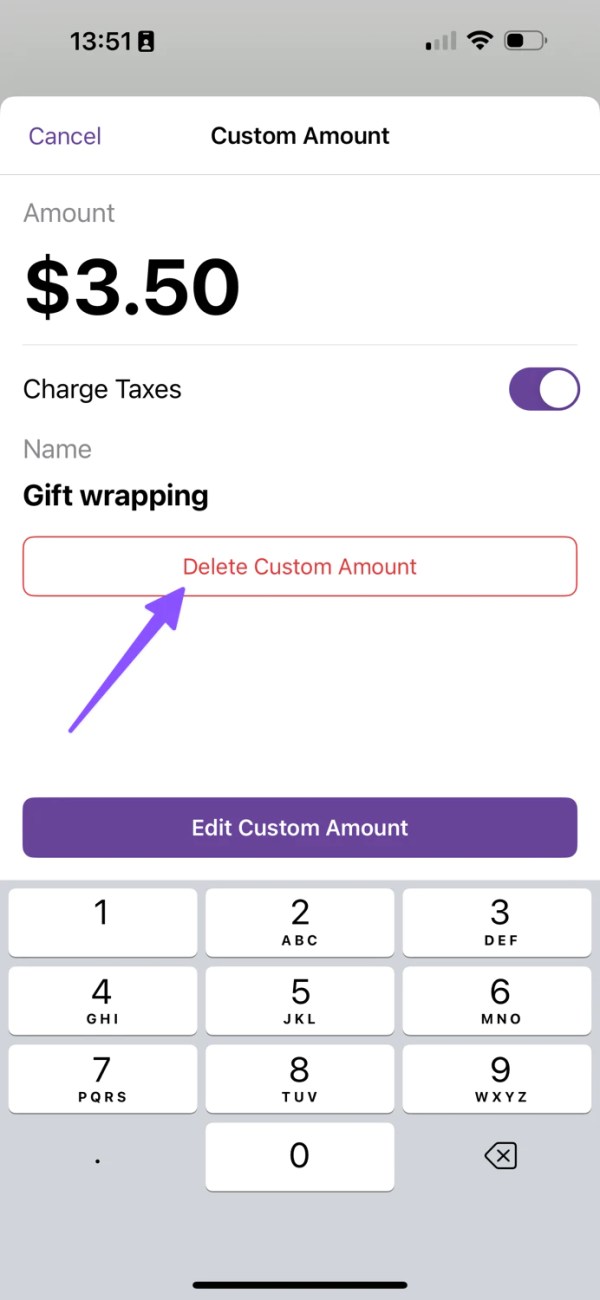
↑ Back to top- On the Custom Amounts section, tap on the Pencil button next to the amount you want to remove.
- Tap on the Delete Custom Amount button.
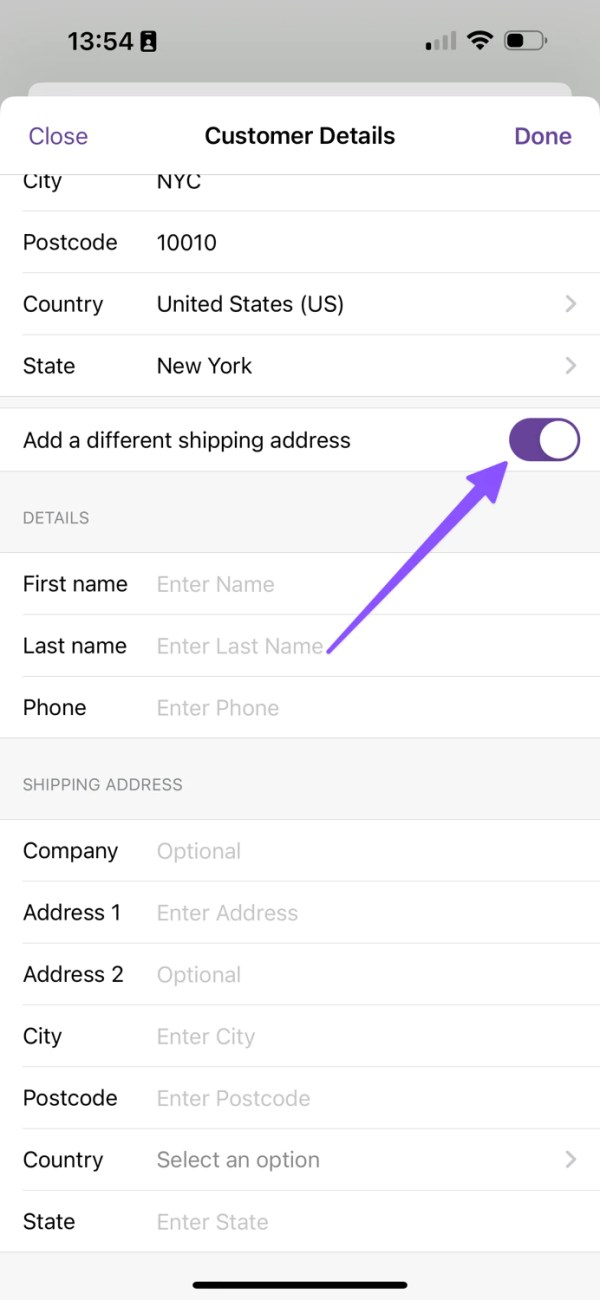
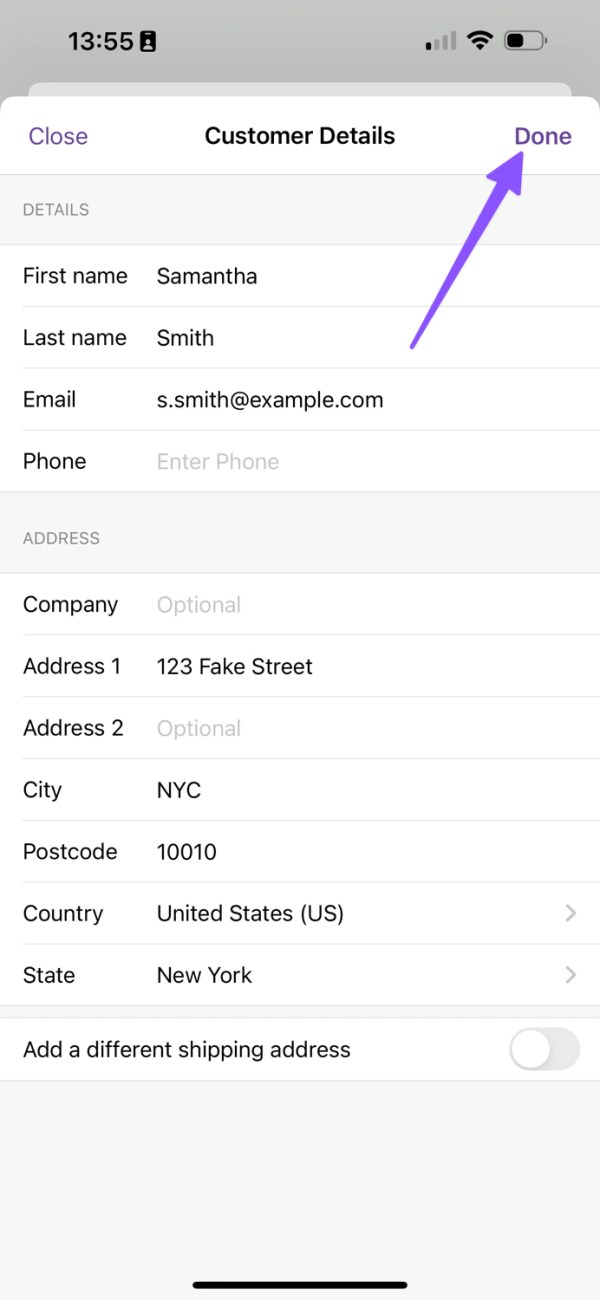
Setting customer details
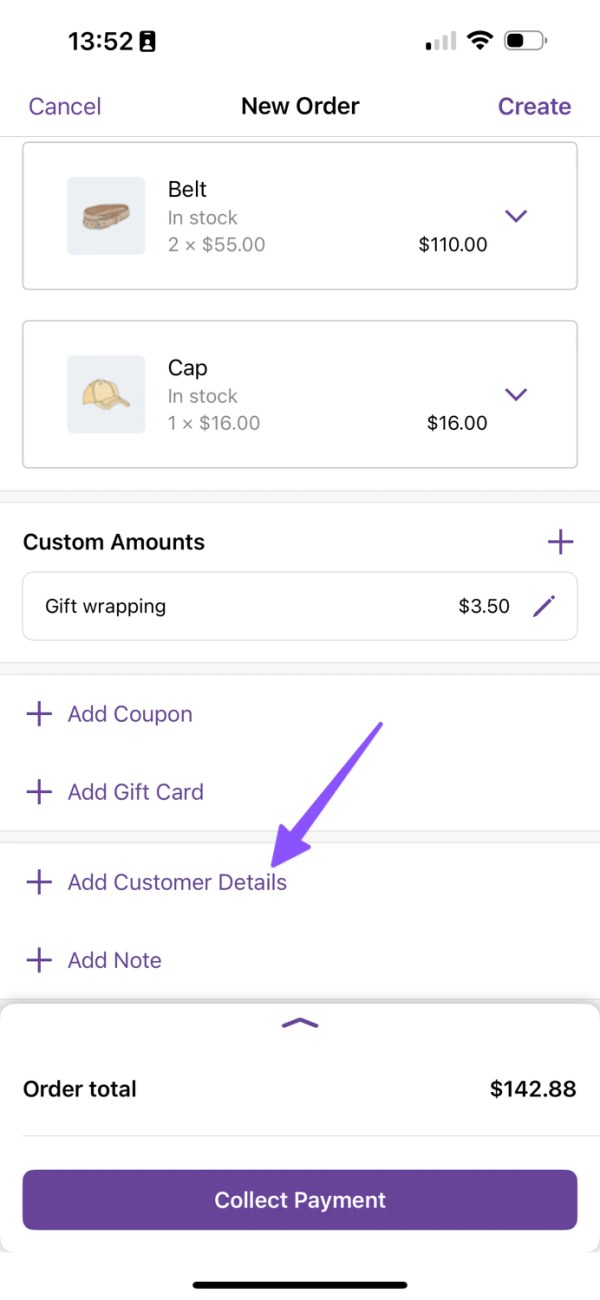
↑ Back to top- Tap the + Add Customer Details button.
- On the presented form, enter all the values you need from your customer. All of them are optional but at least one is required.
- If you wish to add a different shipping address, you can enable a separate form by toggling the switch at the bottom.
- Tap on the Done button to save the changes.
Setting customer-provided notes
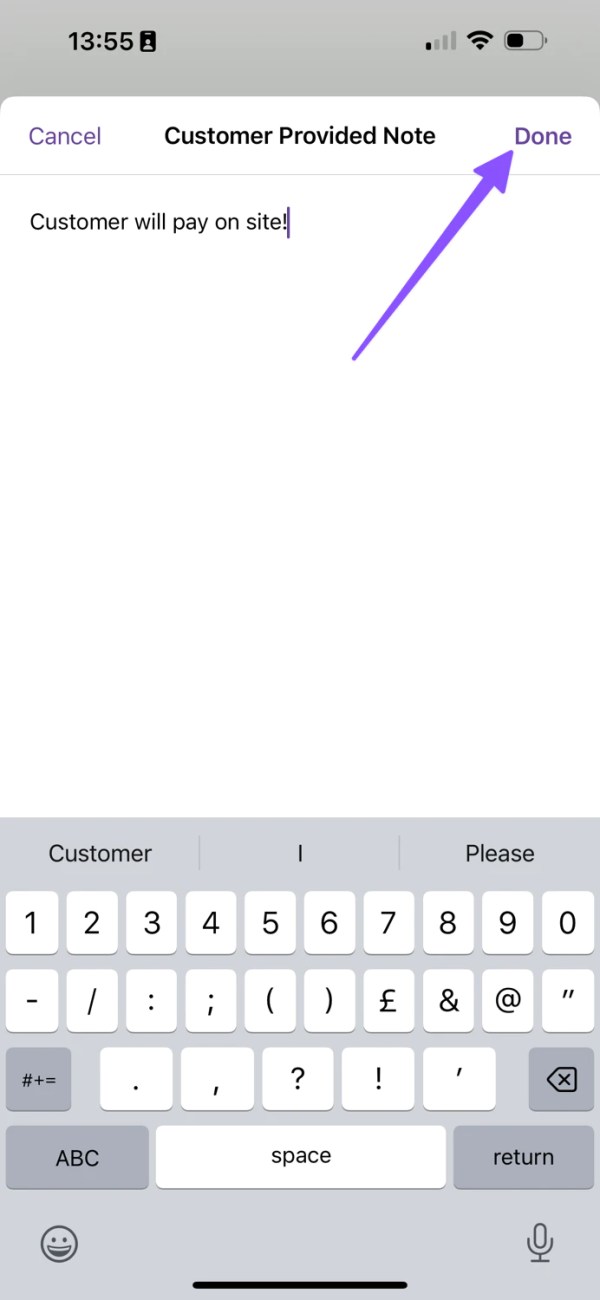
↑ Back to top- On the Customer Note section, tap the + Add Note button.
- On the presented form, enter the text you want to submit as the customer note.
- Tap on the Done button to commit the change.

Completing the new order creation
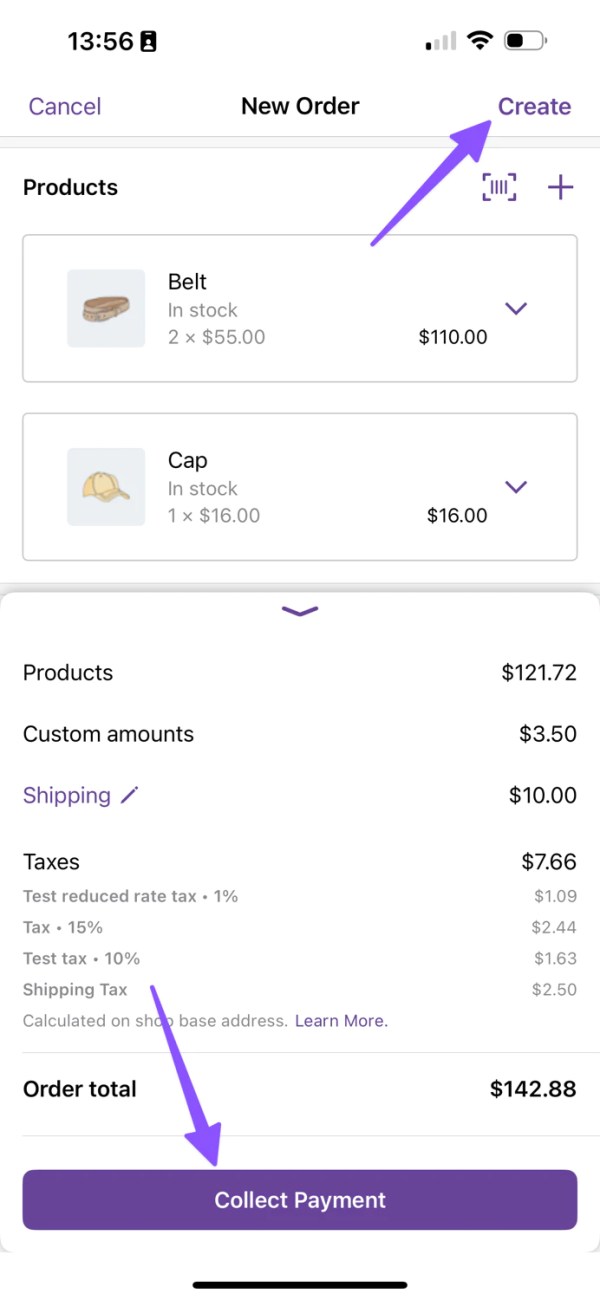
↑ Back to top- When your order is complete, you can tap Collect Payment button to immediately take an In-Person Payment for the order, or use the Create button located at the top right to create the order without taking payment.
- If you take payment, you’ll get a choice of payment methods, such as cash, scan to pay, or card payments, depending on the payment methods set up for your site and your location.
- After the order is created, you will be redirected to the order details screen where you can take the necessary actions to fulfill the order.
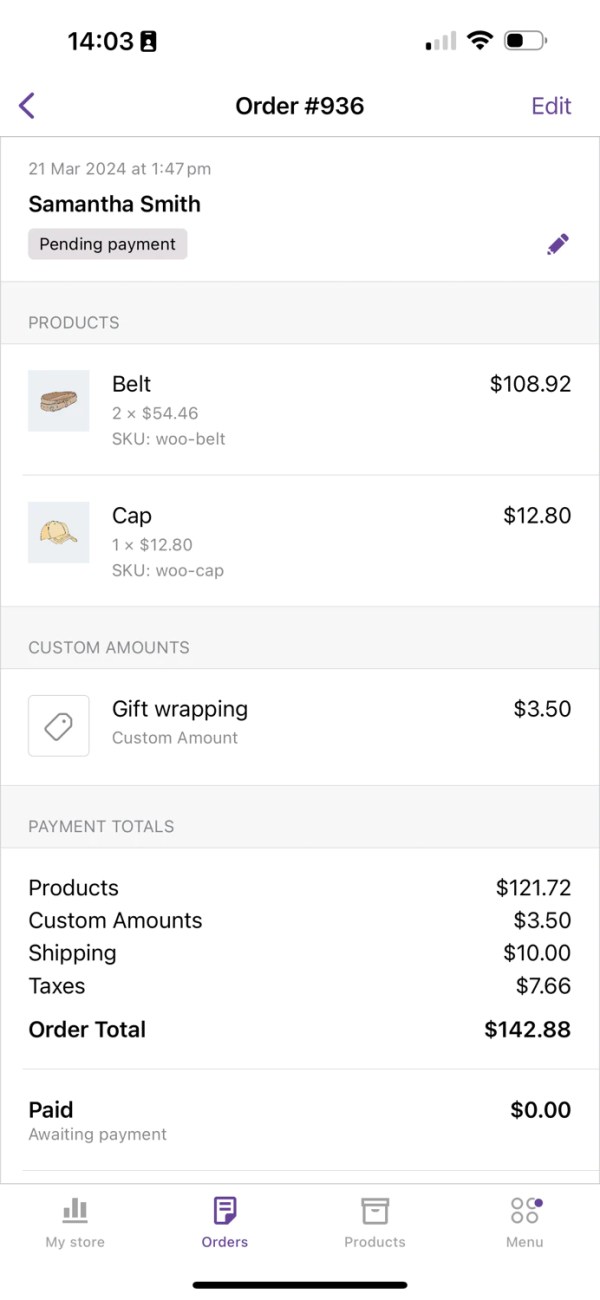
- There is also an edit
Editing the order
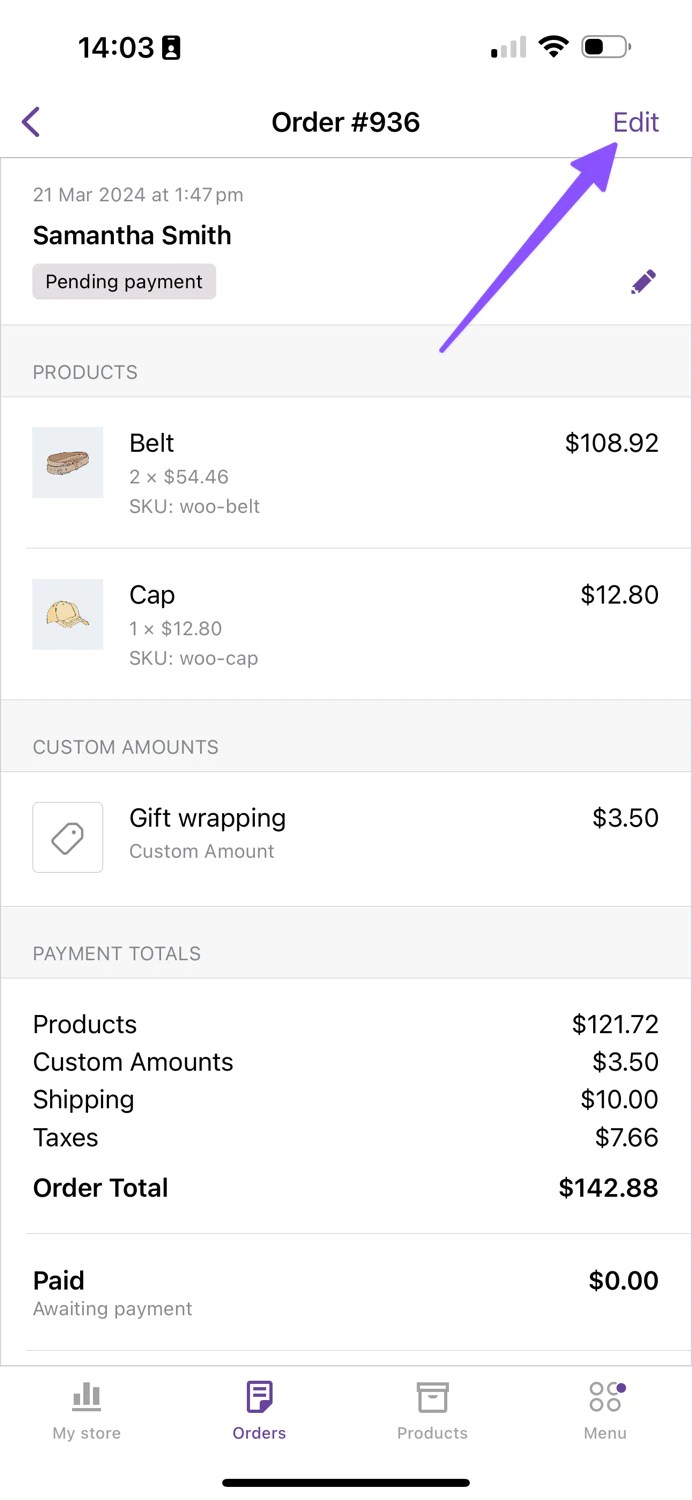
↑ Back to topThe latest mobile app versions (from 9.7.0) allow you to edit orders.
- From an order detail, tap the Edit button, located at the top right of the navigation bar.
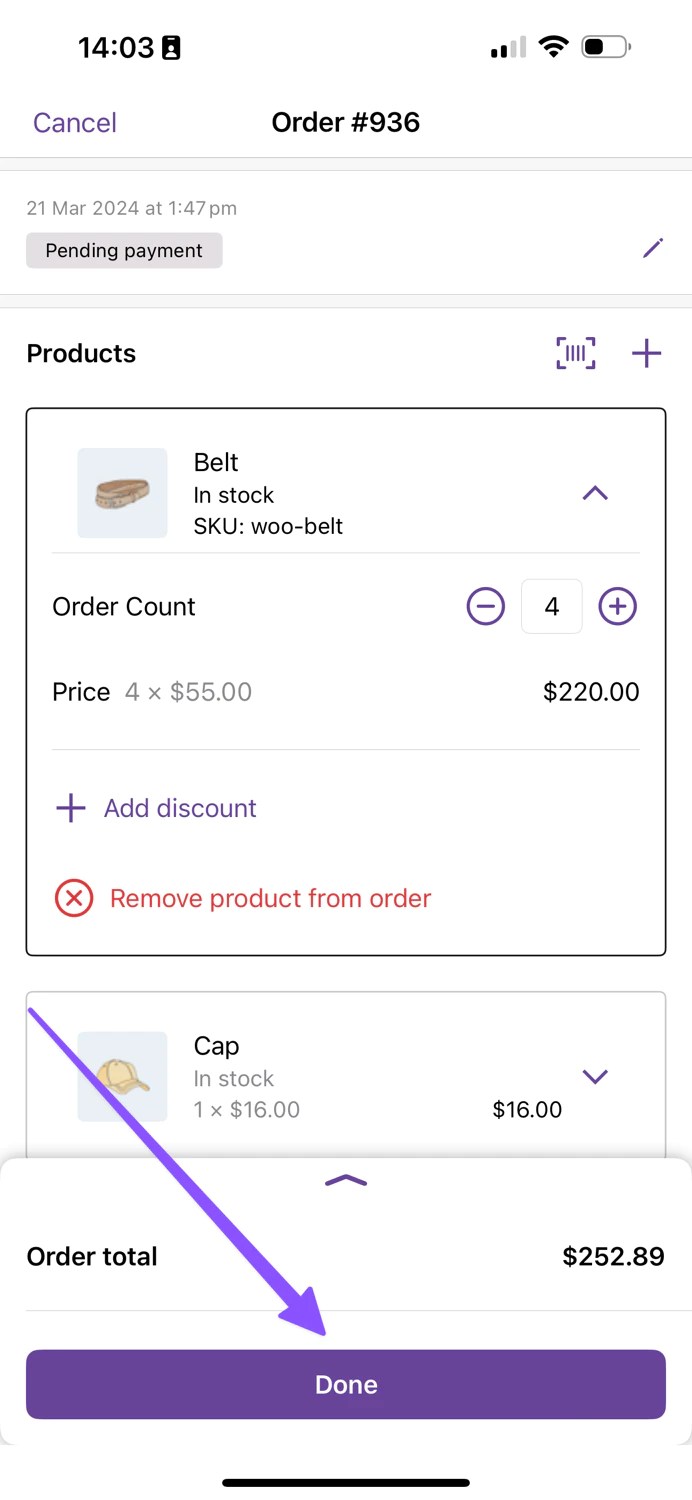
- Edit any necessary field. Changes will be saved immediately to the order.
- Tap the Done to dismiss the edit form.
Setting the order status (edit only)
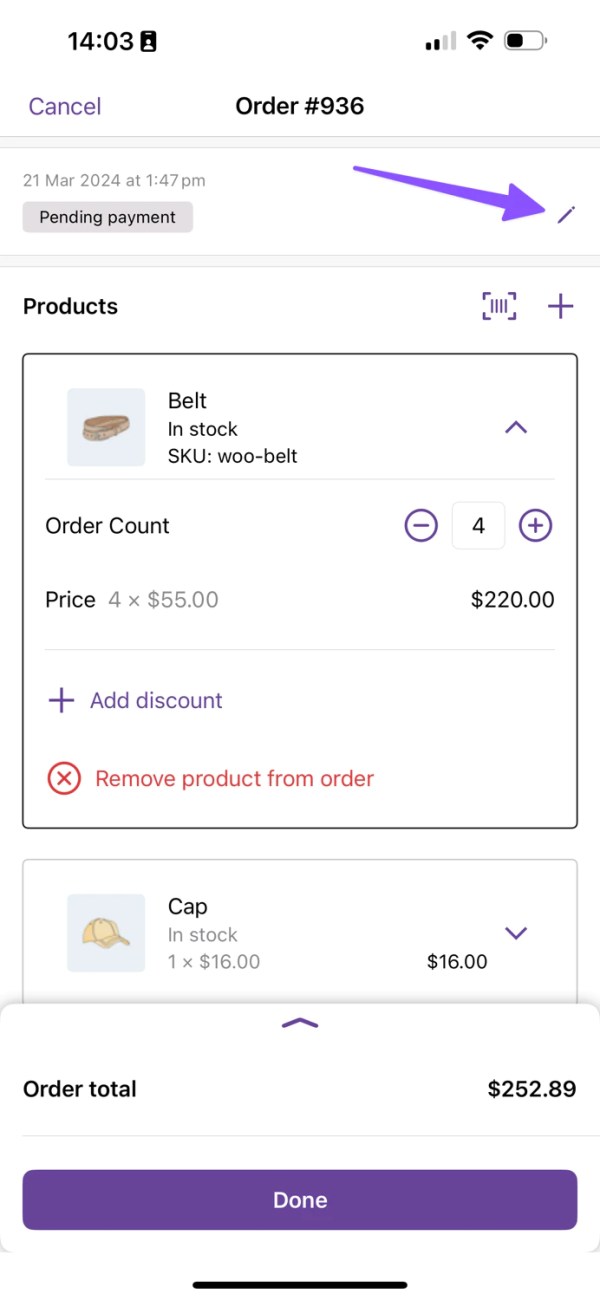
↑ Back to top- Tap the Edit button in the first section of the edit order screen to update the order status.
- A screen with all available statuses will be presented for you to select.
- When you select one, the order status will be updated immediately.
Order creation on a tablet
↑ Back to topOn tablets, we show the relevant screens side by side, where space permits. This can help you create and edit orders more quickly – the screens all work the same way, you can just see more at once. Here’s a taster of how it looks:
Still experiencing issues?
↑ Back to topIf you’re using the Jetpack plugin to connect the app to your site, make sure that the Jetpack connection is active and working correctly. You can verify some known issues or try reconnecting your site.
If you’re still having difficulty, please fill out our contact form to reach our support team from within the app by going to Menu > Settings > Help & Support > Contact Support.
