The Advanced settings area in WooCommerce is where you configure store pages such as the cart and checkout, create access tokens to integrate external applications with the REST API, add custom webhooks, and enable new or experimental features. You can find these settings at WooCommerce > Settings > Advanced.
The Advanced settings area contains the following sections, accessible via the submenu tabs:
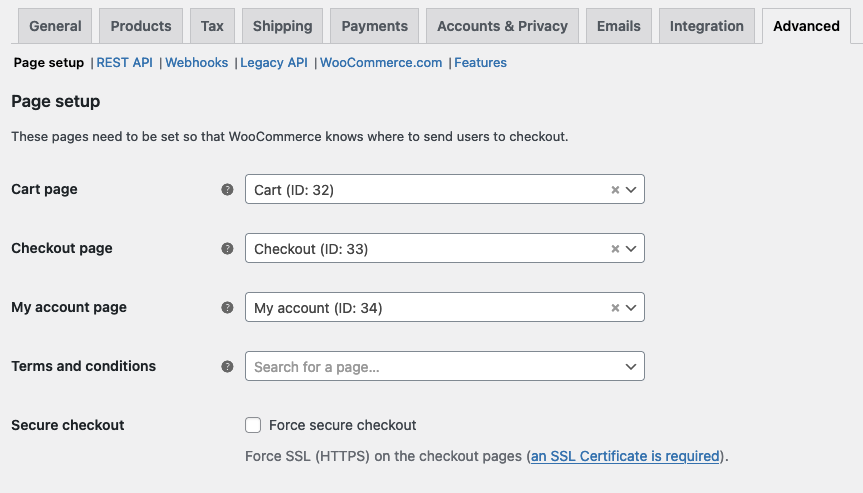
Page setup
↑ Back to topWooCommerce uses specific pages for core store functions. You assign these pages so WooCommerce knows where to direct customers for each action. The following page assignments are available:
- Cart page — Displays the items in your customer’s cart.
- Checkout page — Where your customer enters payment information and submits orders.
- My account page — Where registered customers view their orders and update their account details.
- Terms and conditions — Displays your store’s terms and conditions.
On sites that are not served via HTTPS, the page setup area also shows the Force Secure Checkout setting. See our SSL and HTTPS documentation for more details about that setting.
You do not need to use the exact pages WooCommerce created during installation, but you must have a page assigned for the Cart and Checkout. Otherwise, your customers cannot buy and pay for your products. WooCommerce normally creates and assigns these pages during the setup process. See WooCommerce Pages for more details.
Terms and conditions
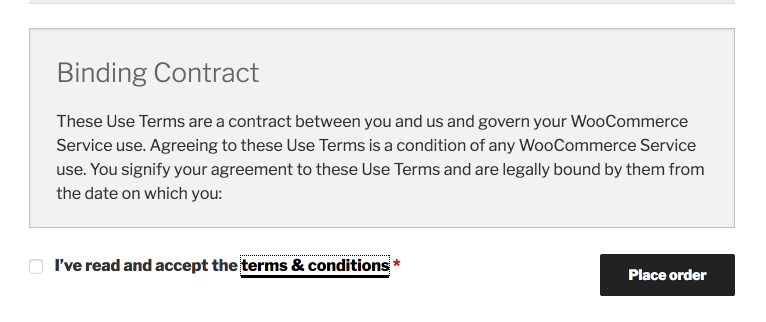
↑ Back to topTo use a Terms and Conditions page, create a new page at Pages > Add New, then select it from the dropdown in the Page setup settings.
When you use the [woocommerce_checkout] shortcode, the terms and conditions appear inline during checkout. They expand when the customer clicks the “Terms & Conditions” link. The customer can then scroll through the content and tick the checkbox to accept.
On the block version of the checkout, shoppers see a message that reads: “By proceeding with your purchase you agree to our Terms and Conditions and Privacy Policy,” with links to the respective pages if they have been set. You can edit this message in the block editor.
Checkout endpoints
↑ Back to topEndpoints are extra parts appended to a page URL that WooCommerce uses to display different content. The checkout endpoints handle specific actions during checkout and order payment. They should be unique and generally do not need to be modified unless you have a specific reason.
The checkout endpoints are:
- Pay — Handles the payment page for pending orders, where customers submit their payment details.
- Order received — Displays the order confirmation page after a successful purchase.
- Add payment method — Allows customers to add a new saved payment method to their account.
- Delete payment method — Processes the removal of a saved payment method from a customer’s account.
- Set default payment method — Allows customers to designate a saved payment method as the default for future orders.
Learn more about WooCommerce endpoints in the developer documentation.
My account endpoints
↑ Back to topThese endpoints handle specific actions on the My Account pages. They should be unique and generally do not need to be modified unless you have a specific reason.
The My Account endpoints are:
- Orders — Displays the customer’s order history.
- View order — Shows the details of a specific order.
- Downloads — Lists the customer’s available digital product downloads.
- Edit account — Allows the customer to update their name, email, and password.
- Addresses — Lets the customer manage their billing and shipping addresses.
- Payment methods — Displays saved payment methods and allows the customer to manage them.
- Lost password — Handles the password reset process for customers.
- Logout — Ends the customer’s session and logs them out of their account.
Learn more about WooCommerce endpoints in the developer documentation.
REST API
↑ Back to topThe REST API settings allow you to create API keys that connect external applications to your store. You can find them at WooCommerce > Settings > Advanced > REST API. For step-by-step instructions, see Generate API keys.
The REST API is primarily intended for developers. However, some third-party services may ask you to create API keys so they can connect to your store. Because the REST API enables access to store data from outside WordPress, create and use keys with caution. Learn more at WooCommerce REST API.
Webhooks
↑ Back to topA webhook is an event notification sent to a URL of your choice. You can use webhooks to integrate your store with third-party services that support them. For example, you can configure a webhook to notify an external fulfillment service whenever a new order is placed.
To create a webhook, go to WooCommerce > Settings > Advanced > Webhooks and click Create a new webhook. You configure the webhook by setting a name, status (active or paused), topic (the event that triggers it, such as “Order created”), delivery URL (the external endpoint that receives the notification), and an optional secret key for authentication.
Learn more in the developer documentation at Working with webhooks in WooCommerce.
Legacy API
↑ Back to topThe Legacy REST API is no longer maintained and has been removed as a built-in feature starting with WooCommerce 9.0. If you need to continue using the Legacy REST API, see the Legacy REST API removal announcement and migration details on the developer blog for information on the dedicated extension.
WooCommerce.com
↑ Back to topThe WooCommerce.com section contains two settings that control how your store communicates with WooCommerce.com. You can find them at WooCommerce > Settings > Advanced > WooCommerce.com.
- Allow usage of WooCommerce to be tracked — When enabled, WooCommerce sends anonymous usage data (such as which settings and extensions you use) to help the WooCommerce development team improve the product. No personal or customer data is shared. This setting is off by default.
- Show Suggestions — When enabled, WooCommerce displays contextual suggestions for official extensions from the WooCommerce Marketplace in relevant areas of your dashboard. For example, you may see a payment extension recommendation on the Payments settings page. Disable this toggle if you prefer not to see these suggestions.
Features
↑ Back to topThe Features tab lets you enable stable and experimental WooCommerce features. You can find it at WooCommerce > Settings > Advanced > Features.
The following stable features are available:
- Order Data Storage — Choose which order data storage method to use. See the documentation about High-Performance Order Storage for more details.
- Analytics — Enable or disable WooCommerce Analytics.
- Order Attribution — Enable or disable Order Attribution Tracking.
Experimental features
↑ Back to topNote: Features listed here are experimental or incomplete. Enable them at your own risk.
The following experimental features may be available:
- New Product Editor (Beta) — Enable or disable the new product editor (Beta).
Questions and support
↑ Back to topDo you still have questions and need assistance?
This documentation is about the free, core WooCommerce plugin, for which support is provided in our community forums on WordPress.org. By searching this forum, you’ll often find that your question has been asked and answered before.
If you haven’t created a WordPress.org account to use the forums, here’s how.
- If you’re looking to extend the core functionality shown here, we recommend reviewing available extensions in the WooCommerce Marketplace.
- Need ongoing advanced support or a customization built for WooCommerce? Hire a Woo Agency Partner.
- Are you a developer building your own WooCommerce integration or extension? Check our Developer Resources.
If you weren’t able to find the information you need, please use the feedback thumbs below to let us know.